

To create a bootable flash drive, you can use Microsoft's branded software, the most installed operating system or other programs. All the methods described below suggest that you already have a downloaded ISO image of the operating system, which you will record on the USB flash drive. So, if you have not downloaded the OS, do it. Also, you must have a suitable removable medium. Its volume should be sufficient to fit the image downloaded by you. At the same time, some files can still be stored on the drive, it is optional to delete them. All the same in the recording process, all the information will be irrevocably erased.
Video instruction
Method 1: Ultraiso
On our site there is a detailed overview of this program, so we will not paint how to use it. There is also a link in which you can download it. To create a bootable USB flash drive using ultra ISO, do the following:
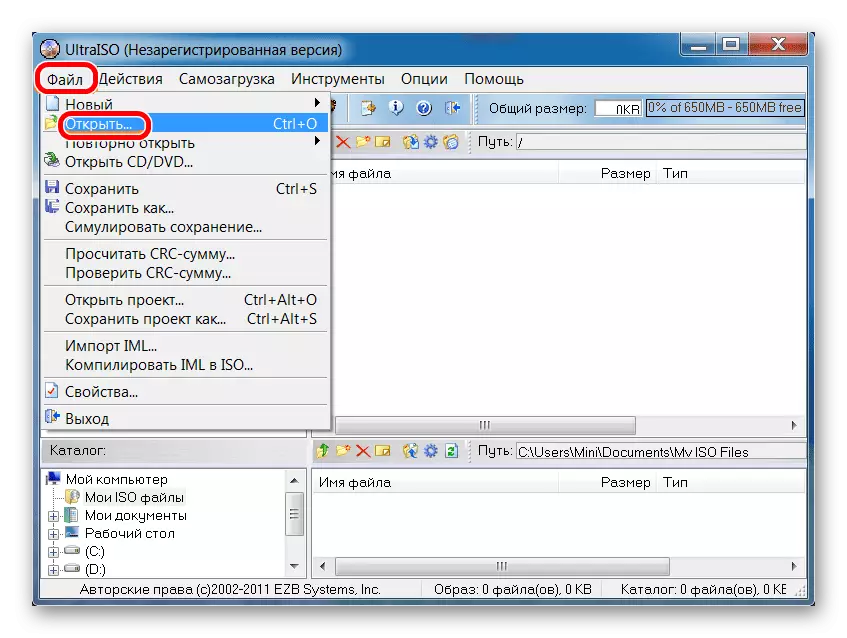
- Open the program. Click on the "File" point in the upper right corner of its windows. In the drop-down list, select "Open ...". The following file selection window will continue. Choose your image there. After that, it will appear in the Ultraiso window (left from above).
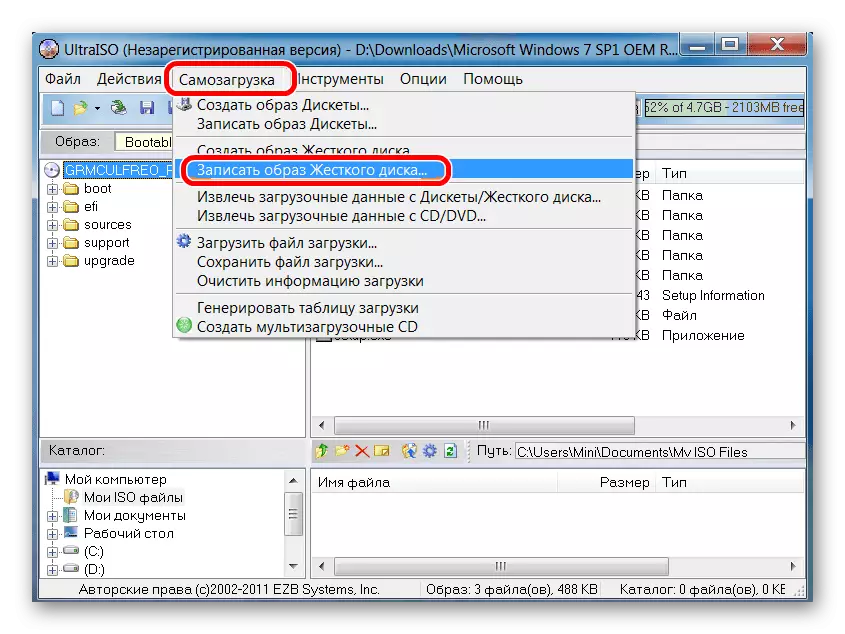
- Now click on the "Self-loading" item from above and in the drop-down menu select "Write a hard disk image ...". This action will result in the record menu of the selected image to remove the removable media.
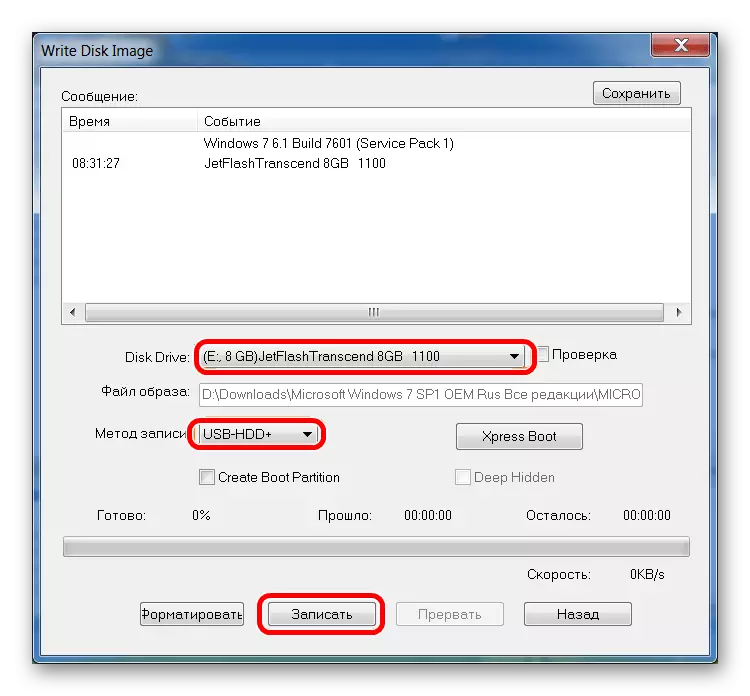
- Near the inscription "Disk Drive:" Select your flash drive. It will also be useful to choose the recording method. It is done near the inscription with the corresponding name. It is best to choose not the fastest, and not the slowest from available there. The fact is that the most high-speed method of recording can lead to loss of some data. And in the case of the images of operating systems, absolutely all information is important. At the end, click on the "Record" button at the bottom of the open window.
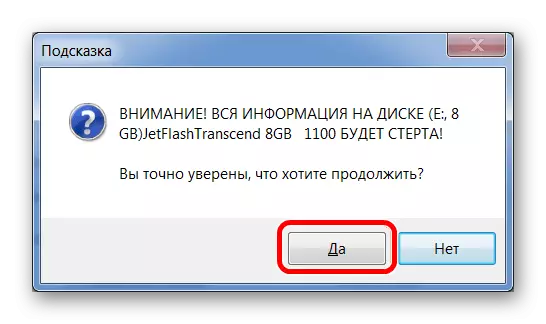
- A warning will be displayed that all information from the selected media will be deleted. Click "Yes" to continue.
- After that, it will only be waited until the image recording is completed. It is convenient that this process can be observed with the help of progress. When everything is over, you can safely use the created loading flash drive.
If some problems arise in the recording, errors appear, most likely the problem in the damaged image. But if you downloaded the program from the official site, there should be no difficulties.
Method 2: RUFUS
Another very convenient prog that allows you to very quickly create a bootable media. To use it, follow these actions:
- Download the program and install it on your computer. Insert the flash drive to which the image will be recorded in the future, and run Rufus.
- In the "Device" field, select your drive, which will be bootable in the future. In the "Formatting Parameters" block, check the box near the "Create boot disk" item. Next to it, you must select the type of operating system, which will be recorded on the USB carrier. And the right is the right button with the disk icon and disk. Click on it. The same standard image selection window appears. Specify it.
- Next, simply click the Start button at the bottom of the program window. Create creation. To see how it is moving, click on the "Magazine" button.
- Wait until the recording process is completed and use the created loading flash drive.
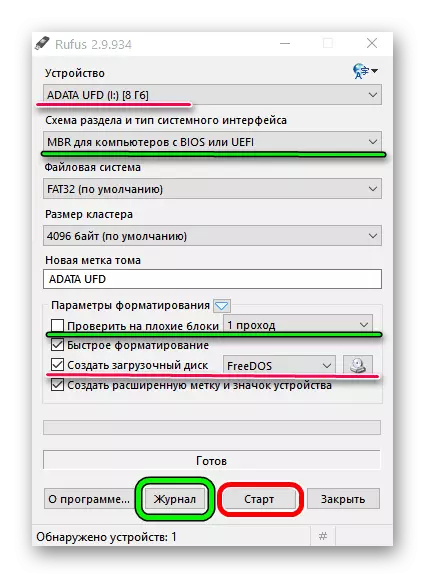
It is worth saying that in Rufus there are other settings and recording parameters, but they can be left as they are originally. If you wish, you can put a tick on the "Check on bad blocks" item and specify the number of passes. Due to this, after recording, the installation flash drive will be checked for damaged parts. If such will be detected, the system will automatically fix them.
If you understand what MBR and GPT are, you can also specify this feature of the future image under the inscription "section of the section and the type of system interface". But all this is completely optional.
Method 3: Windows USB / DVD Download Tool
After the release of Windows 7, Microsoft developers decided to create a special tool that allows you to make a loading flash drive with the image of this operating system. Thus was created a program called Windows USB / DVD Download Tool. Over time, management decided that this utility could well provide recording and other OS. To date, this utility allows you to record Windows 7, Vista and XP. Therefore, those who want to make a carrier with Linux or another system, except Windows, this means will not suit.
To use them, follow these actions:
- Download the program and run it.
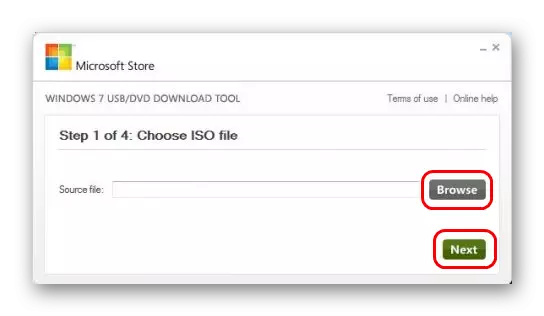
- Click on the "Browse" button to select the previously downloaded operating system image. A newly familiar selection window will open, where it will be easy to specify where the desired file is located. When you finish, click on "Next" in the lower right corner of the open window.
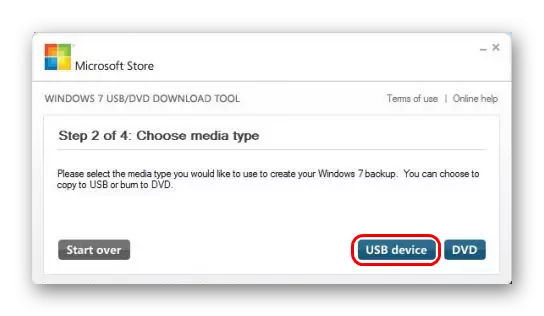
- Next click on the "USB Device" button to record OS on removable media. The "DVD" button, respectively, is responsible for discs.
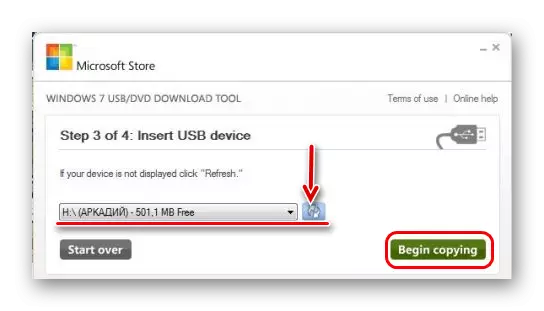
- In the next window, select your drive. If the program does not display it, press the Update button (as an icon with arrows forming the ring). When a flash drive is already specified, click on the "Begin Copying" button.
- After that, burning will begin, that is, entry on the selected medium. Wait for the end of this process and you can use the created USB drive to install the new operating system.
Method 4: Windows Installation Media Creation Tool
Also, Microsoft specialists have created a special tool that allows you to install on a computer or create a bootable flash drive from Windows 7, 8 and 10. Windows Installation Media Creation Tool is most convenient for those who decided to write the image of one of these systems. To take advantage of the program, do the following:
- Download the tool for the desired operating system:
- Windows 7 (in this case, you have to enter the product key - your own or the OS that you have already bought;
- Windows 8.1 (here you do not need to enter anything, on the download page there is a single button);
- Windows 10 (the same as in 8.1 - do not need to enter anything).
Run it.
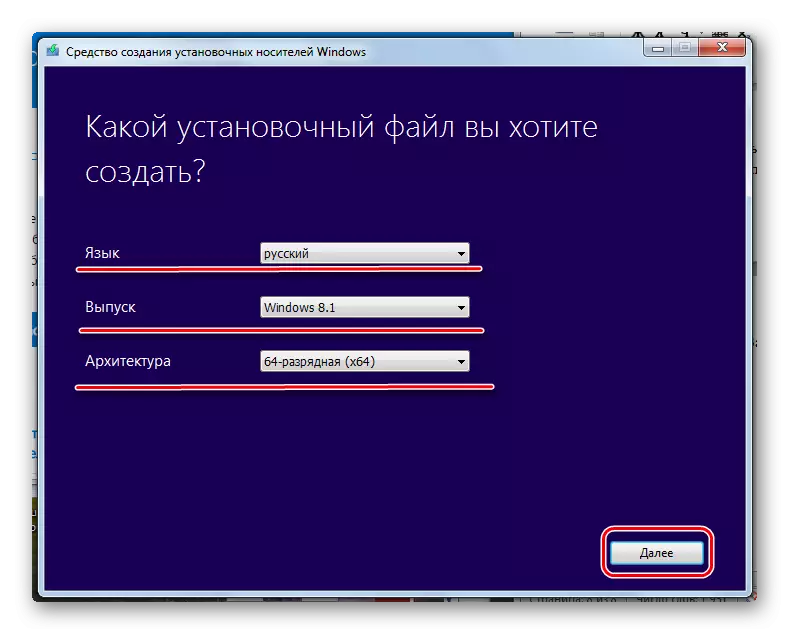
- Suppose we decided to create a bootable medium with version 8.1. In this case, it is necessary to specify the language, release and architecture. As for the latter, choose the one that is already installed on your computer. Click the "Next" button in the lower right corner of the open window.
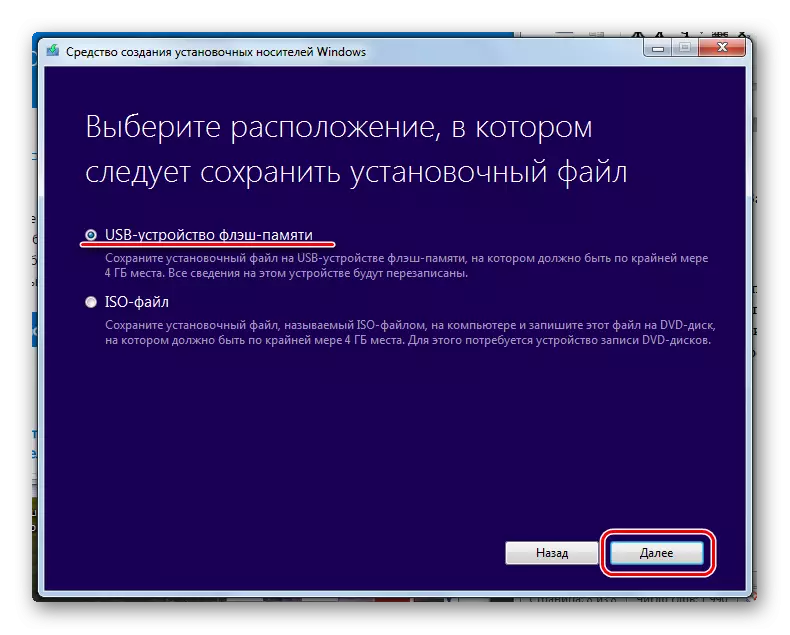
- Next, check the mark on the "USB Flash Memory" item. If you wish, you can also choose the option "ISO file". Interestingly, in some cases the program can refuse to immediately write the image to the drive. Therefore, you have to first create an ISO, and only then transfer it to the USB flash drive.
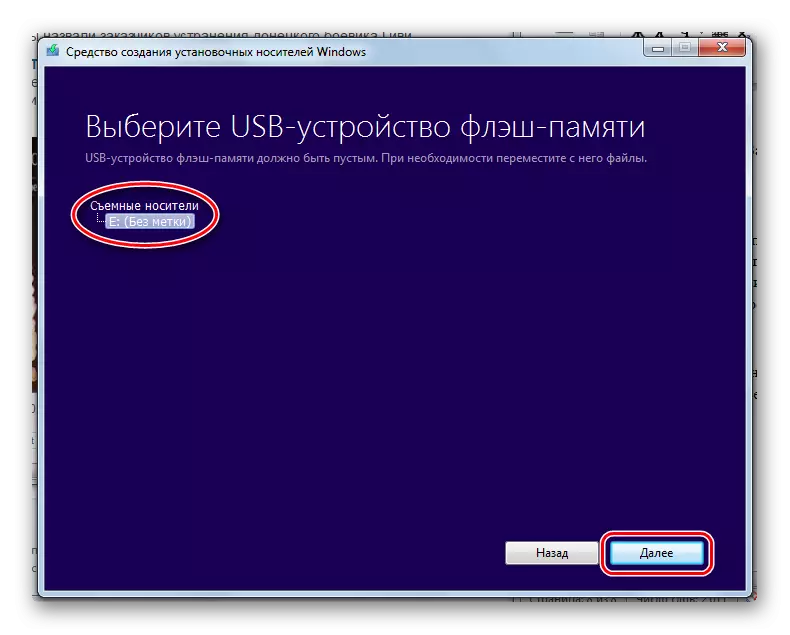
- In the next window, choose a carrier. If you inserted only one drive into a USB port, you don't need to choose, just click "Next".
- After that, a warning will appear that all data from the flash drive used will be erased. Click "OK" in this window to start the creation process.
- Actually, the entry will start. You can only wait until it end.
Lesson: How to create a bootable USB flash drive 8
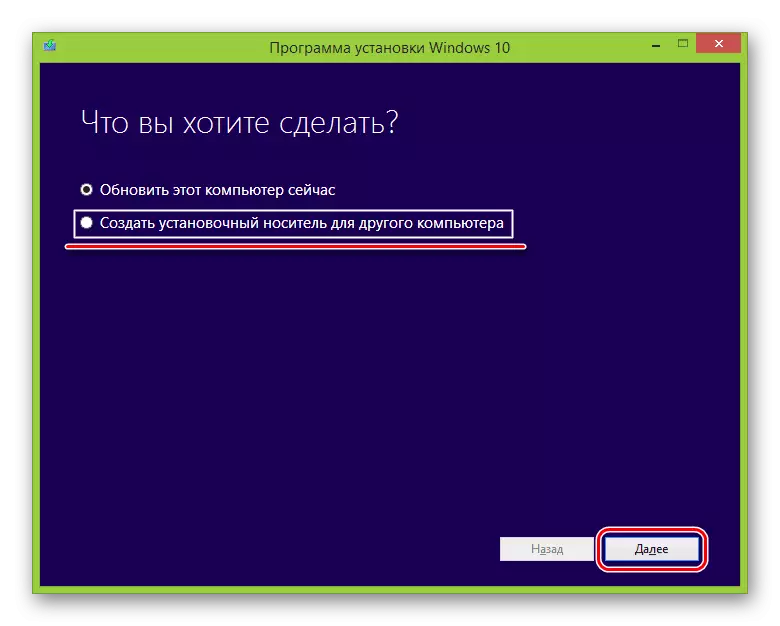
In the same means, but for Windows 10 this process will look somewhat different. First, check the inscription "Create an installation media for another computer". Click "Next".
And then everything is fine in the same way as in Windows Installation Media Creation Tool for version 8.1. As for the seventh version, there does not differ from that shown above for 8.1.
Method 5: UnetBootin
This tool is intended for those who need to create a Linux loading flash drive from under Windows. To use them, do this:
- Download the program and run it. Installation in this case is not required.
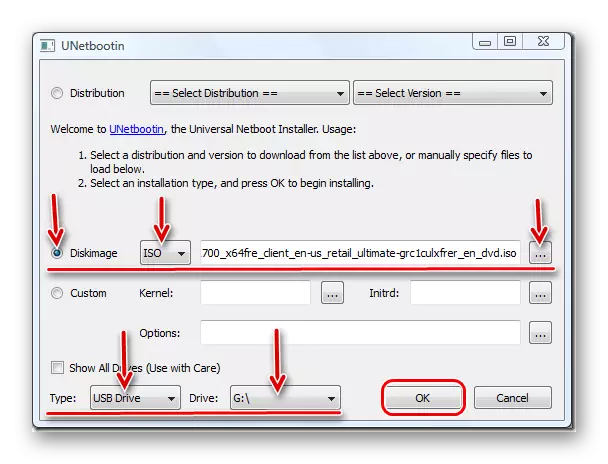
- Next, specify your medium to which the image will be recorded. To do this, near the lettering "Type:" Select the "USB Drive" option, and choose the letter inserted flash drive near the "Drive:". You can find it in the "My Computer" window (or "this computer", just "computer" depending on the version of the OS).
- Put the mark near the inscription "diskimage" and select "ISO" to the right of it. Then click on the button in the form of three points, which is on the right side, after the empty field, from the above inscriptions. The desired image selection window opens.
- When all the parameters are specified, click on the "OK" button in the lower right corner of the open window. The creation process begins. It will only wait until it is over.
Method 6: Universal USB Installer
Universal USB Installer allows you to record Windows, Linux and other OS drives. But it is best to apply this tool for Ubuntu and other similar operating systems. To take advantage of this program, do the following:
- Download it and run.
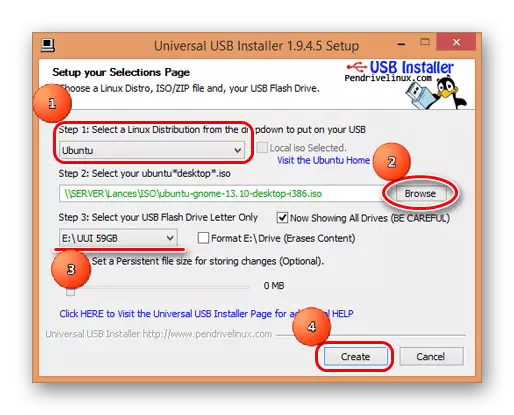
- Under the inscription "STEP 1: SELECT A LINUX DISTRIBUTION ..." Select the type of system that you will install.
- Click the "Browse" button under the inscription "STEP 2: SELECT YOUR ...". A selection window will open, where you will have to specify where the image is located for recording.
- Select the letter of your carrier under the inscription "STEP 3: SELECT Your USB Flash ...".
- Check the inscription "We Will Format ...". This will mean that the USB flash drive before recording onto it will be completely formatted.
- Click the "Create" button to start.
- Wait until the recording is completed. Usually it takes quite a bit of time.
See also: How to remove protection from writing from a flash drive
Method 7: Windows Command String
Among other things, it is possible to make a bootable media using a standard command line, and specifically with its diskpart snap. This method involves the following actions:
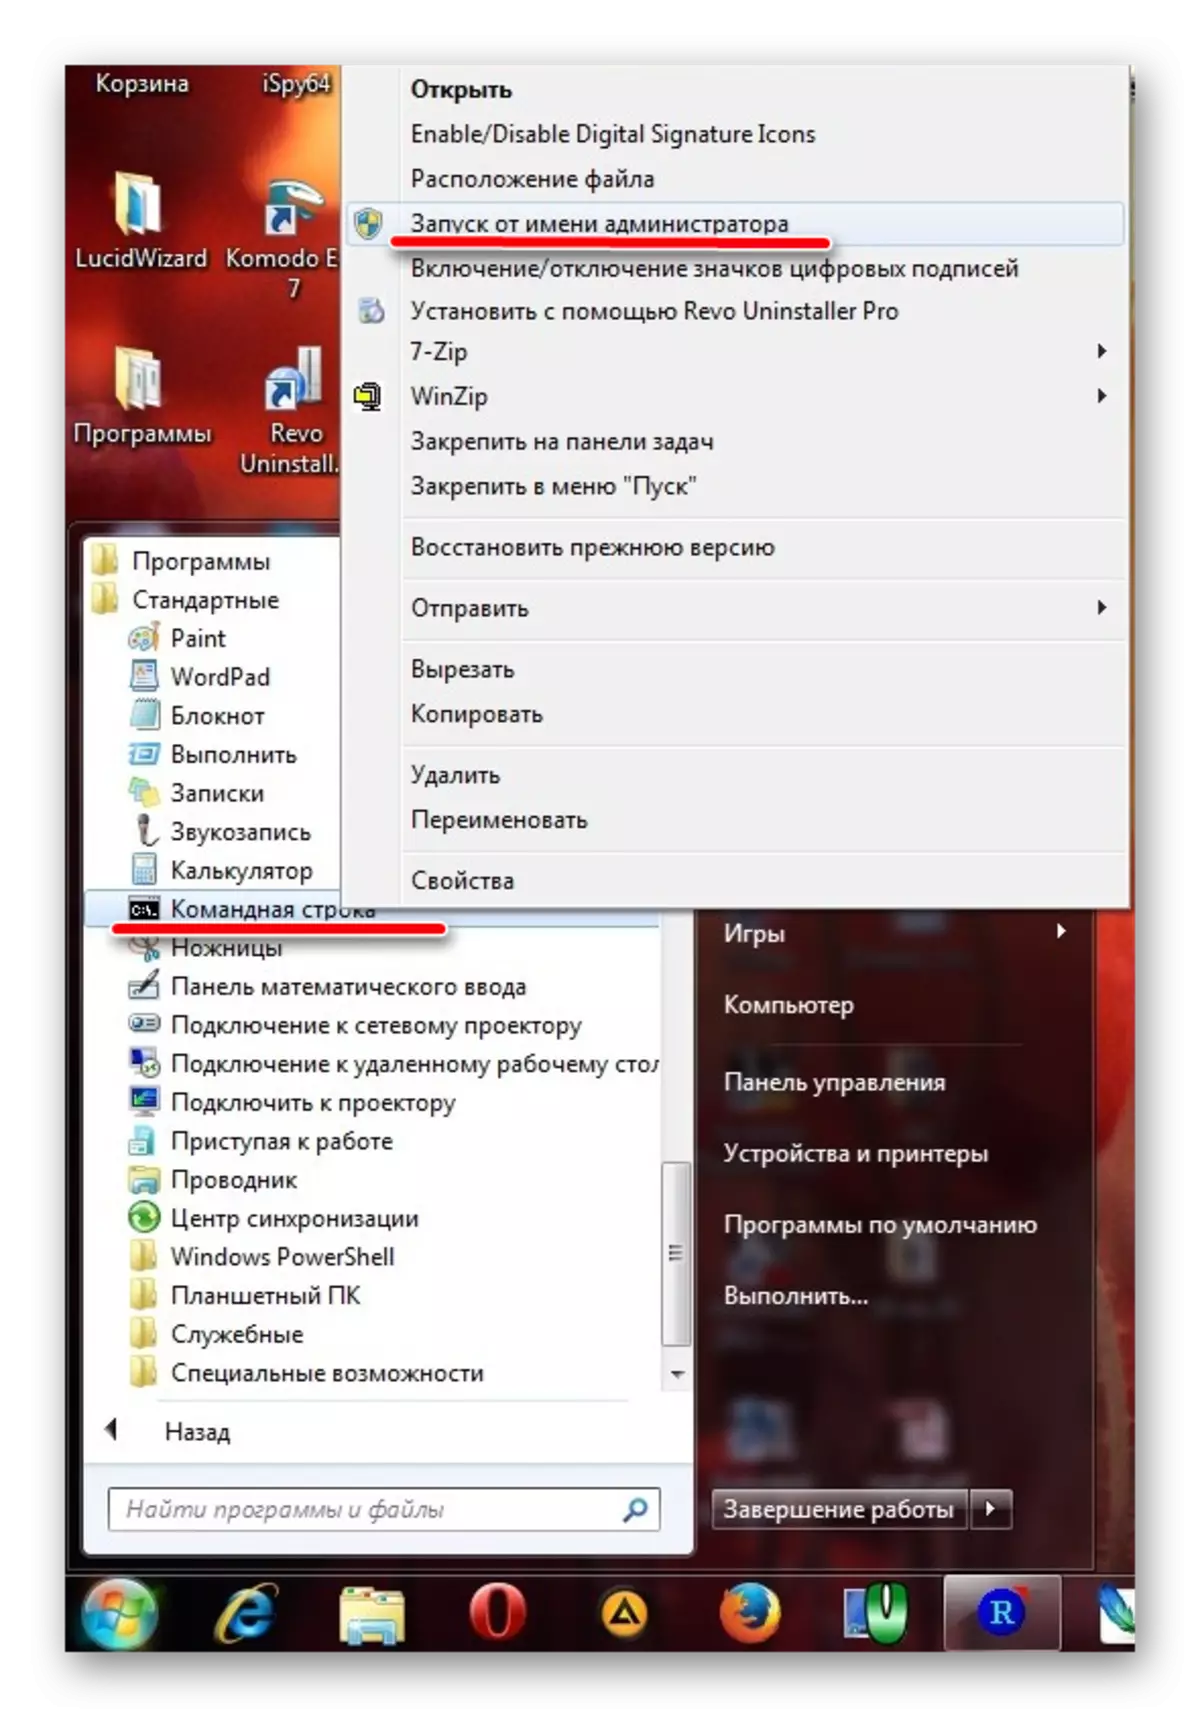
- Open the command prompt on the administrator. To do this, open the "Start" menu, open "All Programs", then "Standard". At the "Command Line" item, right-click. In the drop-down menu, select the "Run from the administrator" item. This is relevant for Windows 7. In versions 8.1 and 10, use the search. Then, on the found program, you can also touch the right mouse button and select the above item.
- Then in the window that opens, enter the DiskPart command, thereby running the needed tool. Each command is entered by pressing the "ENTER" button on the keyboard.
- Further write List DISK, as a result of which the list of available media will be displayed. In the list, select the one that will need to record the image of the operating system. You can find it in size. Remember its number.
- Enter SELECT DISK [Drive Number]. In our example, this is a Disk 6, so enter SELECT DISK 6.
- After that, write Clean to completely erase the selected USB flash drive.
- Now specify the Create Partition Primary command, which will create a new section on it.
- Format your drive to the Format FS = FAT32 Quick command (Quick means quick formatting).
- Make the section active using Active. This means that it will be available for download on the computer.
- Send a unique name section (this happens in automatic mode) by the ASSIGN command.
- Now see what name was assigned - List Volume. In our example, the carrier was called M. This also can be found in the size of the volume.
- Exit from here using the EXIT command.
- Actually, the loading flash drive is created, but now it needs to reset the image of the operating system. To do this, open the downloaded ISO file using, for example, Daemon Tools. How to do this, read in the lesson on mounting images in this program.
- Then open the mounted disk in the "My Computer" so to see the files that are inside it. These files need to be simply copied to the USB flash drive.

Lesson: How to mount the image in Daemon Tools
Ready! The loading media is created and you can install the operating system from it.
As you can see, there are quite a lot of ways to fulfill the above task. All of the above methods are suitable for most versions of Windows, although in each of them the process of creating a boot drive will have its own characteristics.
If some of them you can not use, just choose another. Although, all the specified utilities use quite easily. If you still have any problems, write about them in the comments below. We will definitely come to your aid!