

In this instruction, we briefly consider the capabilities of the HDDScan - free utility to diagnose the hard disk, what exactly and how to check it with it and what conclusions about the state of the disk are made. I think the information will be useful for novice users.
HDD check capabilities
The program supports:
- Hard drives IDE, SATA, SCSI
- External USB Hard Drives
- Valid USB flash drives
- Check and S.M.R.R.T. For solid-state SSD drives.
All functions in the program are implemented understandable and simply and if with the Victoria HDD unprepared user can get confused, it will not happen here.
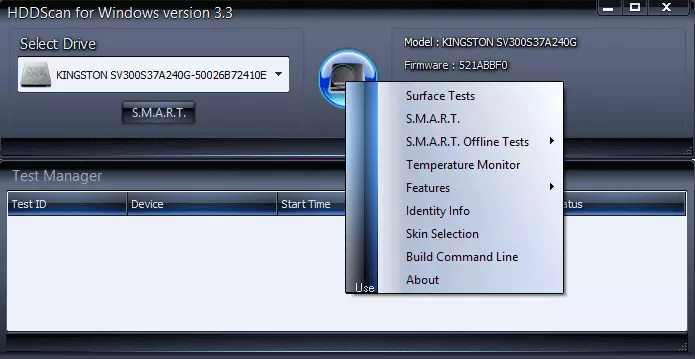
After starting the program, you will see a simple interface: a list for selecting a disk, which will be tested, a button with a hard disk image, by clicking on which access to all available features of the program, and at the bottom - a list of running and completed tests.
View information s.m.a.r.t.
Immediately under the selected disk there is a button with an inscription S.M.R.R.T., which opens the report of the results of self-diagnosis of your hard disk or SSD. The report everything is clearly explained in English. In general terms - green marks is good.
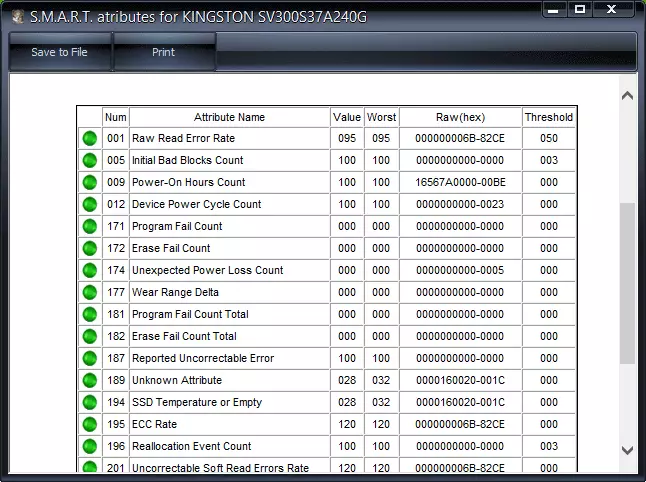
I note that for some SSDs with the SandForce controller, one red item Soft ECC Correction Rate will always be displayed - this is normal and due to the fact that the program incorrectly interprets one of the values of self-diagnostics for this controller.
What is s.m.a.r.t. http://ru.wikipedia.org/wiki/s.m.a.r.t.
Verification of the hard disk surface
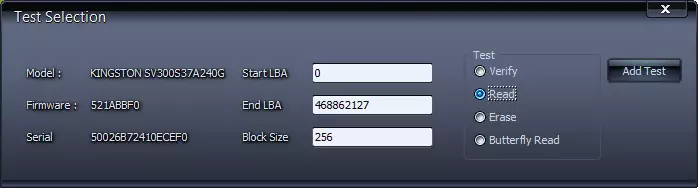
To start checking the HDD surface, open the menu and select "Surface Test". You can choose one of the four test options:
- Verify - reading in the internal buffer of the hard disk without transmission over the SATA, IDE interface or other. The time of operation is measured.
- Read - read, transmission, data check and measurement time measurement.
- Erase - the program writes alternately block data blocks by measuring operation time (data in the specified blocks will be lost).
- Butterfly Read is similar to the read test, with the exception of the order of reading blocks: reading begins simultaneously from the beginning and end of the range, the block 0 and the last is tested, then 1 and the penultimate.
To normal verification of the hard disk on errors, use the Read version (selected by default) and click the Add Test button. The test will be launched and added to the "Test Manager" window. By double click on the test, you can view detailed information about it in the form of a graph or the cards of the scanned blocks.
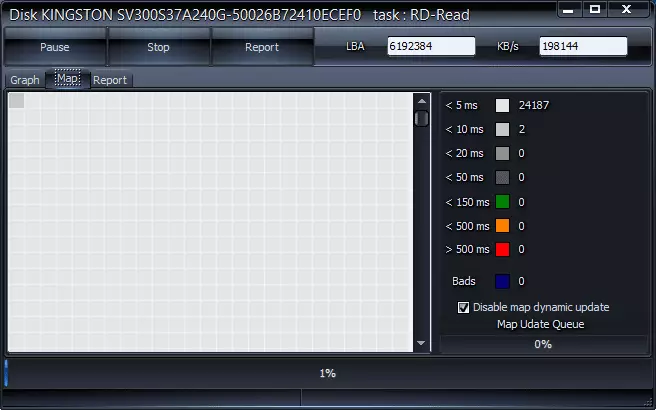
If briefly, any blocks, for access to which more than 20 ms is required - it is bad. And if you see a significant number of such blocks, it can talk about hard disk problems (to solve which is not better not remapping, but to save the desired data and replace HDD).
Detailed information about the hard disk
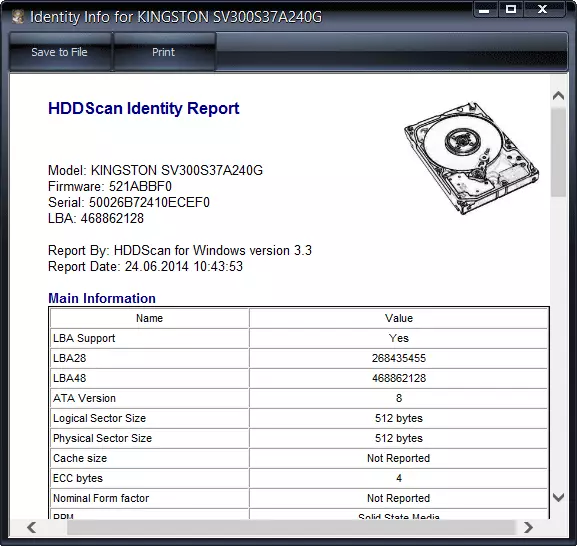
If you select Identity Info in the program menu, you will receive complete information about the selected drive: Disc Volume Supported Work Modes, Cache Size, Disc Type, and other data.
You can download HDDScan from the official site of the program http://hddscan.com/ (the program does not require installation).
Summing up, I can say that for a regular user, the HDDScan program may be a simple tool in order to check the hard disk on errors and make certain conclusions about its condition, without referring to complex diagnostic tools.