

The operational memory of the computer is designed for temporary storage of data that must be processed by the central processor. RAM modules are small cards with chips and a set of contacts and are installed in the appropriate slots on the motherboard. About how to do this, we will talk in today's article.
Installing RAM modules
With an independent installation or replacement of RAM, you need to sharpen your attention on several nuances. This type or standard of planks, multichannel mode of operation, and directly when installing - varieties of locks and the location of the keys. Next, we will analyze all working moments in more detail and show in practice the process itself.Standards
Before installing the planks, you must make sure that they comply with the standard of available connectors. If the DDR4 connectors are planned on the "motherboard", then the modules must be the same type. To find out what memory the motherboard is supported, you can visit the manufacturer's site or reading the complete instruction.
Read more: How to choose RAM
Multichannel mode
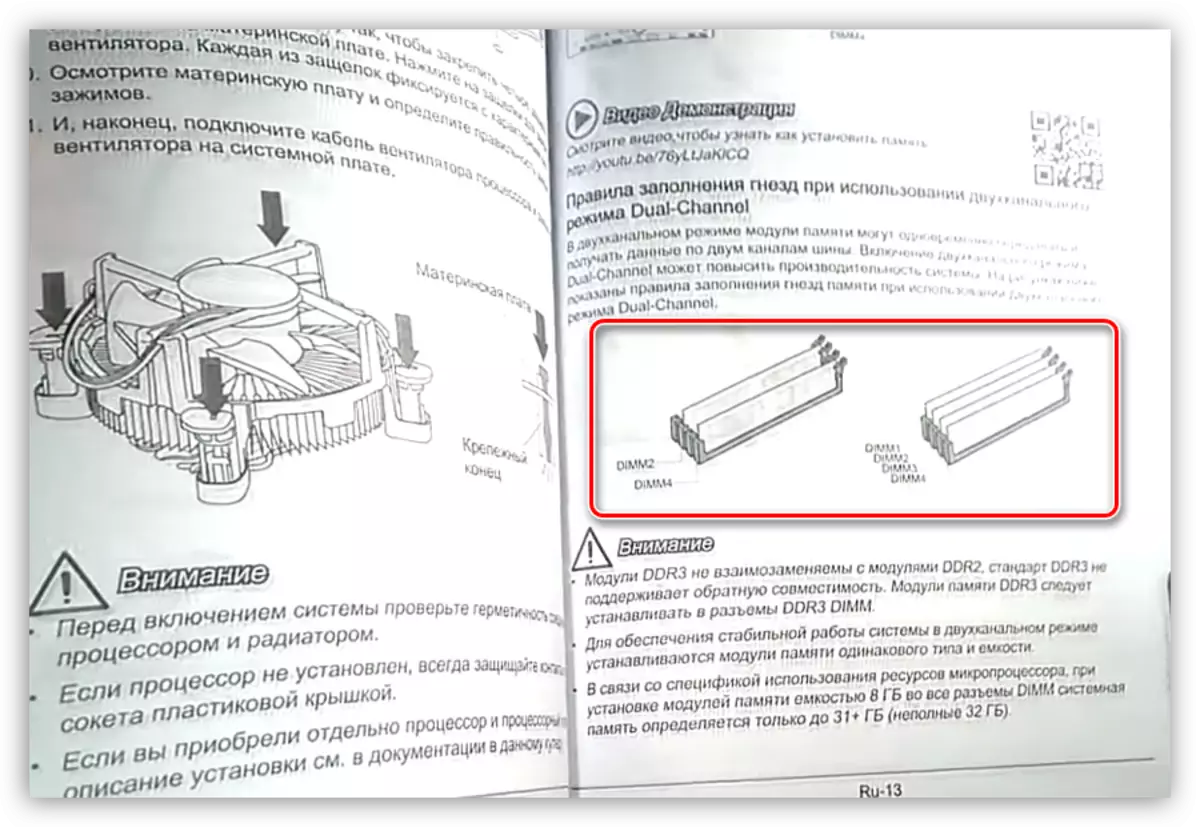
Under the multichannel mode, we understand the increase in memory bandwidth due to the parallel operation of several modules. In consumer computers, two channels are most often included, there are four-channel controllers on server platforms or motherboards "for enthusiasts", and newer processors and chips can already work with six channels. As it is easy to guess, bandwidth increases in proportion to the number of channels.
In most cases, we use conventional desktop platforms that can work in two-channel mode. In order to enable it, it is necessary to establish an even number of modules with the same frequency and volume. True, in some cases, diverse barns are launched in a "two-channel", but it happens rarely.
If there are only two connectors on the motherboard under the "RAM", then it is not necessary to invent anything here and find out. Just install two strips by filling out all available slots. If there are more places, for example, four, the modules should be installed according to a specific scheme. Usually, the channels are marked with multi-colored connectors, which helps the user make the right choice.
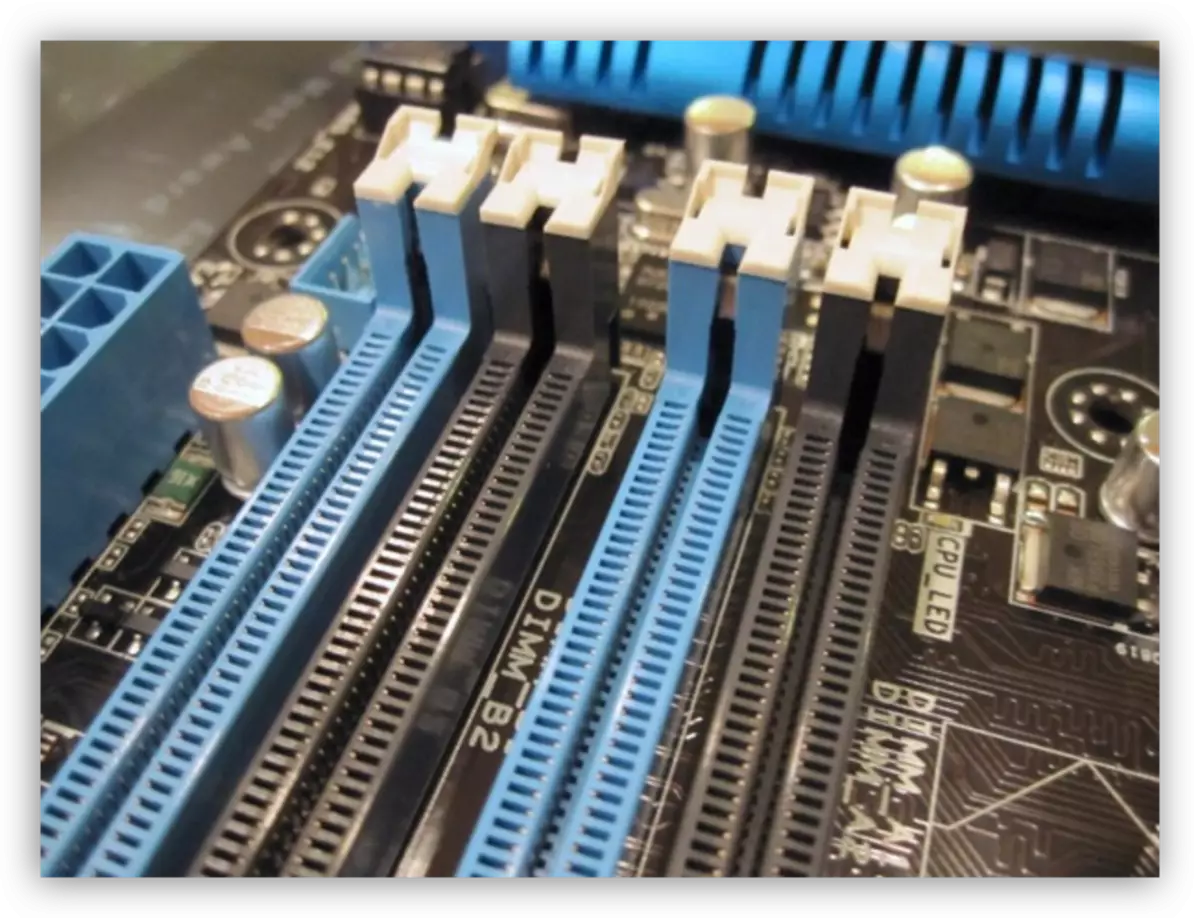
For example, you have two planks, and the "motherboard" four slots - two black and two blue. In order to use a two-channel mode, you must install them in the slots of the same color.
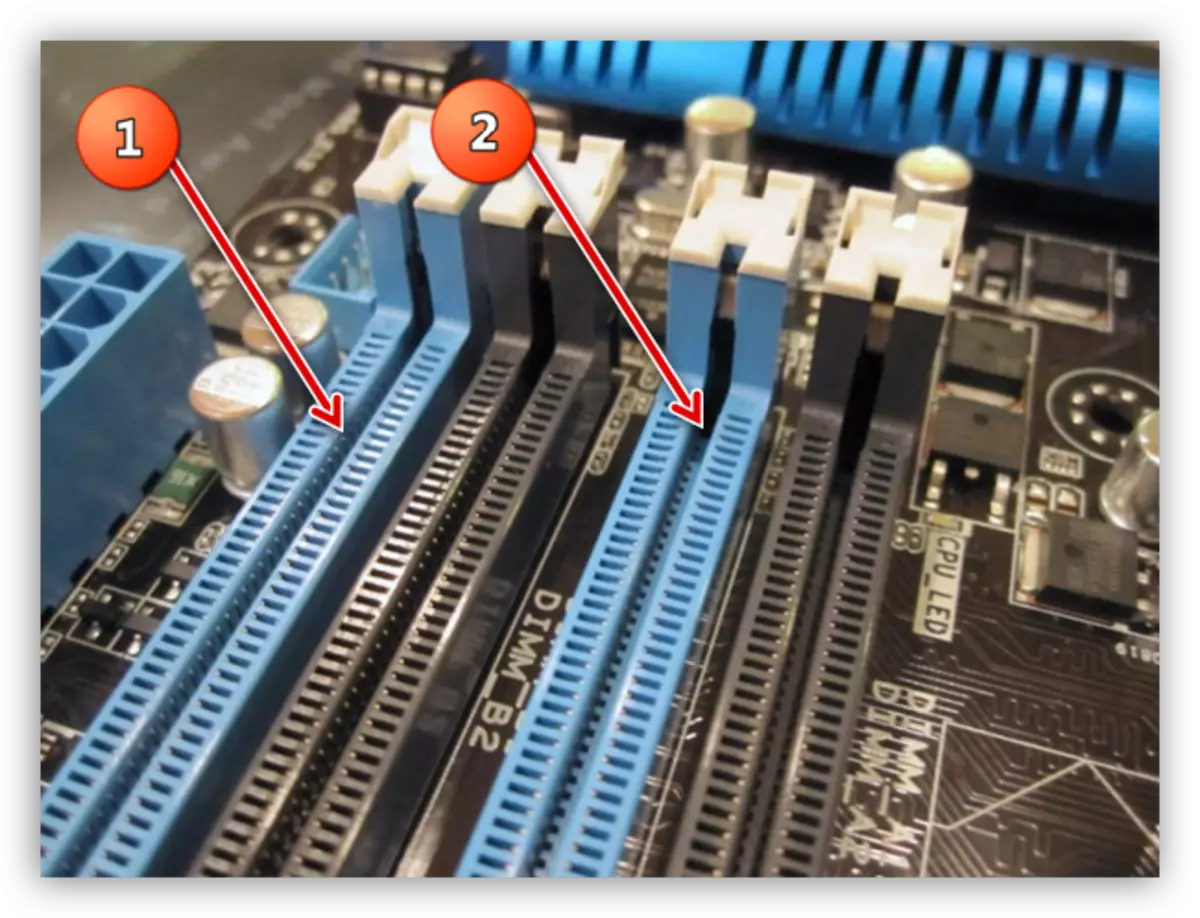
Some manufacturers do not share the color slots. In this case, you will have to refer to the user manual. Usually it says that the connectors must be alternate, that is, to insert modules in the first and third or in the second and fourth.
Armed with the information shown above, and the necessary number of planks, you can start setting.
Mounting modules
- To begin with, it is necessary to get inside the system unit. To do this, remove the side lid. If the hull is spacious enough, then the motherboard can not be removed. Otherwise, it will have to dismantle and put on the table for the convenience of work.
Read more: Substitution of motherboard
- Pay attention to the type of locks on the connectors. They are two species. The first has latches on both sides, and the second is only one, and they can almost look almost the same. Be careful and do not try to open the lock, if it does not give in - you may have a second type.

- To extract old slats, it is enough to open locks and remove the module from the connector.
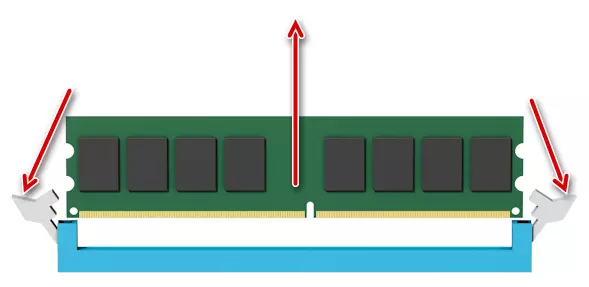
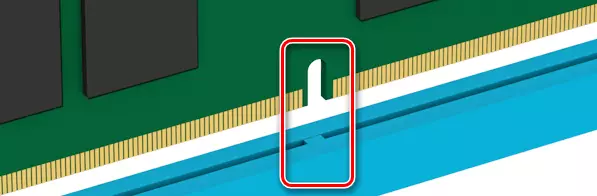
- Next, we look at the keys - this is such a slot on the bottom of the plank. It must be combined with the key (protrusion) in the slot. Everything is simple here, since it is impossible to make a mistake. The module simply does not enter the connector if you turned it not to that side. True, with proper "skill" you can damage both the bar, and the connector, so do not too dilute.
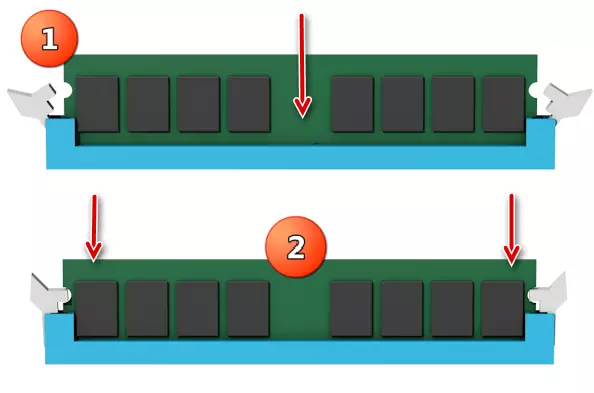
- Now we insert the memory into the slot and gently press the top from the top of both sides. Castles should close with a characteristic click. If the bar is tight, then, in order to avoid damage, you can first press one side (before clicking), and then onto the second.
After installing the memory, the computer can be collected, enable and use.
Installation in laptop
Before replacing memory in a laptop it is necessary to disassemble. How to do this, read the article available on the link below.
Read more: How to disassemble a laptop
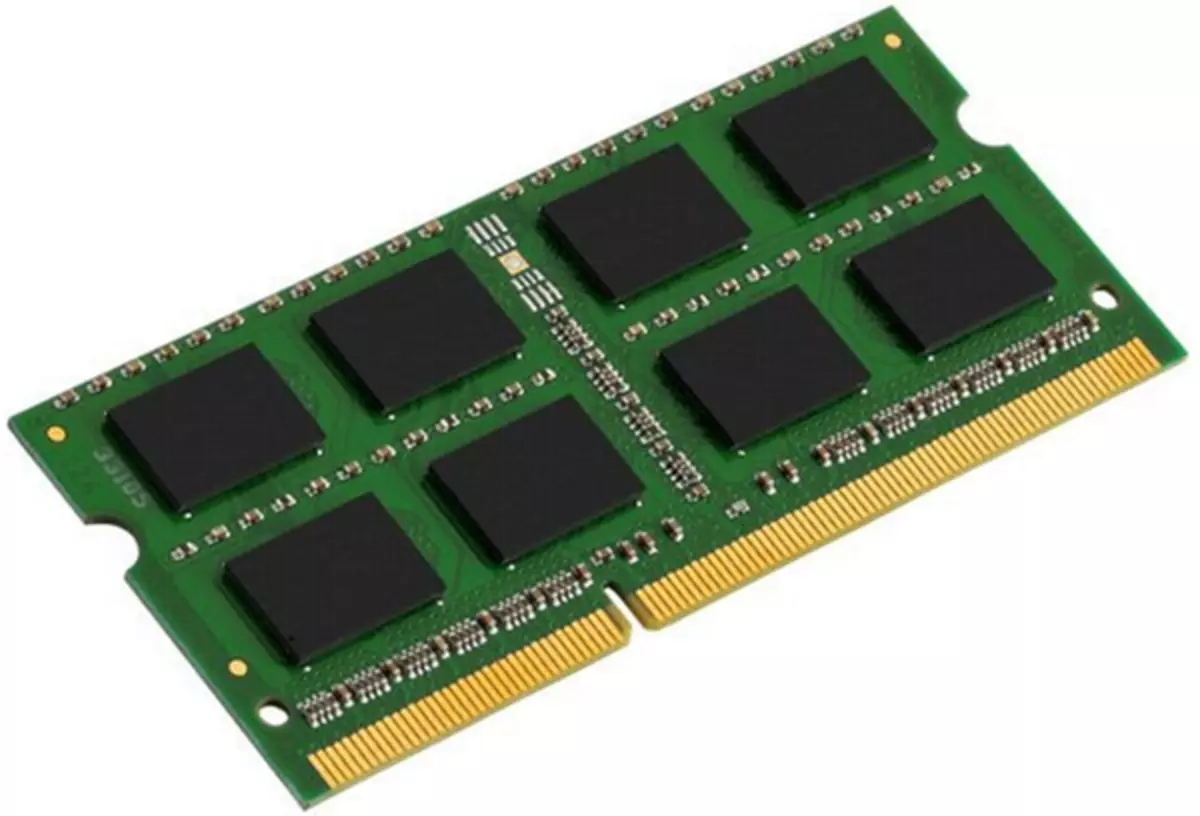
The laptops use Sodimm type slats, which differ from desktop dimensions. On the possibility of using a two-channel mode can be read in the instructions or on the manufacturer's website.
- Gently insert the memory into the connector, as well as in the case of a computer, paying attention to the keys.
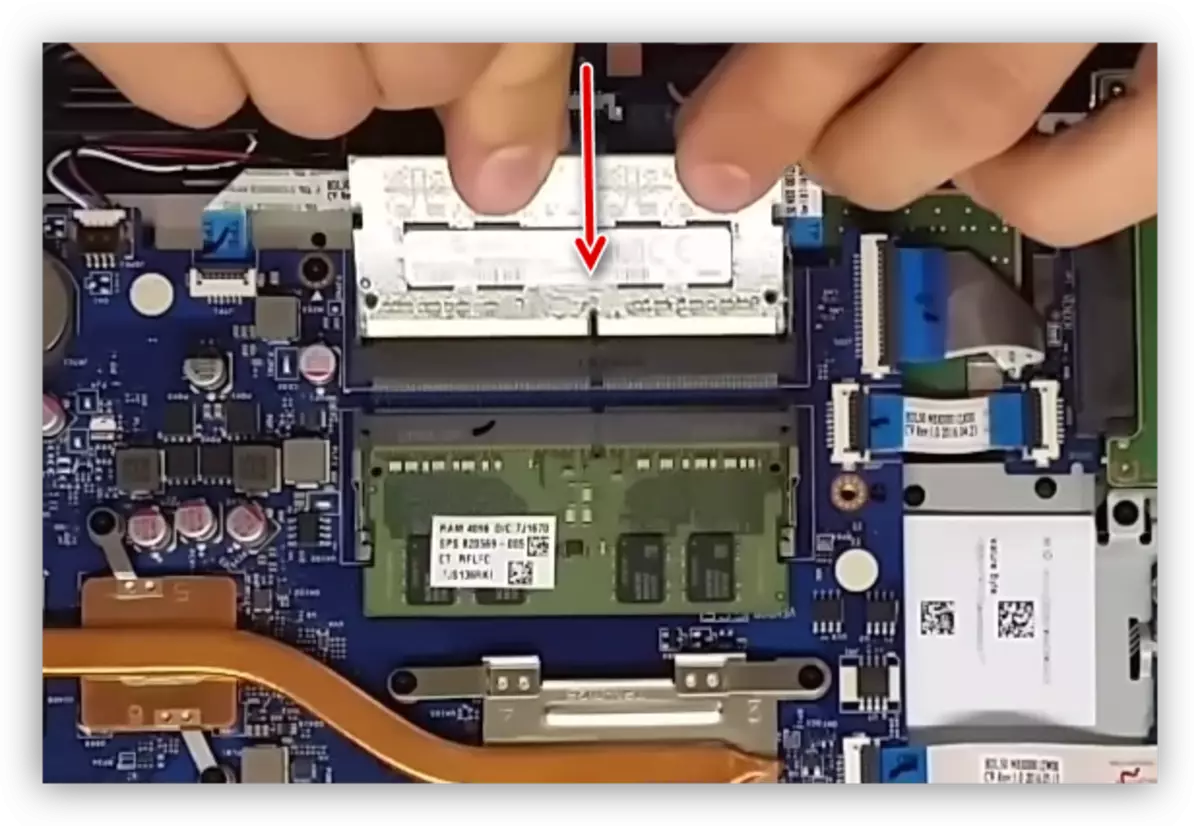
- Next, click on the upper part, aligning the module horizontally, that is, add it to the base. A successful installation will tell us a click.
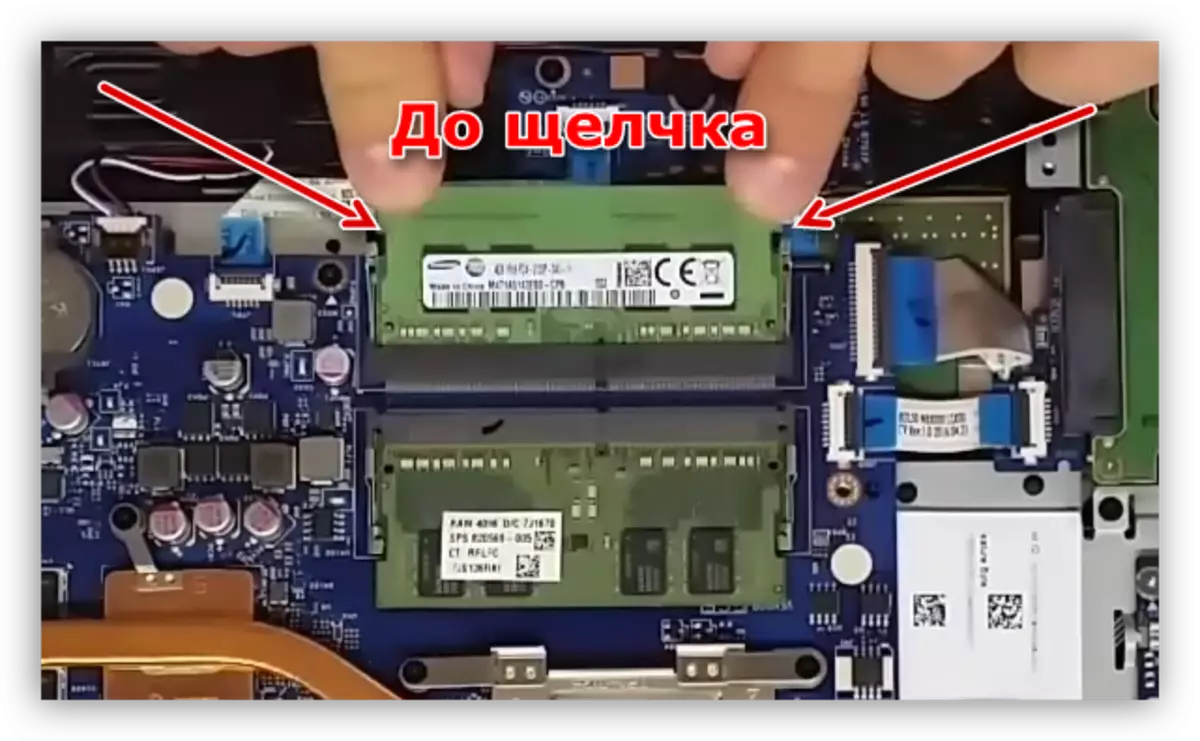
- Ready, you can collect a laptop.
Examination
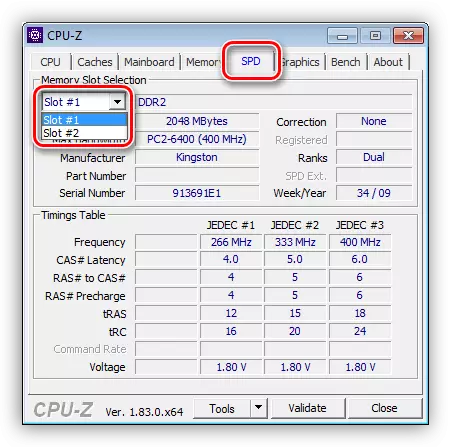
In order to make sure that we did everything correctly, you can use special, software such as CPU-Z. The program needs to be launched and go to the "Memory" tab or in the English version, "Memory". Here we will see, in what mode the planks work (dual - two-channel), the total amount of the installed RAM and its frequency.

On the SPD tab, you can get information about each module separately.
Conclusion
As you can see, nothing difficult in installing RAM into the computer is not. It is just important to pay attention to the type of modules, keys and what slots need to be included.