

Tor Browser is one of the most popular browsers, which provides the replacement of the IP address with a unique method - computers are performed as computers of real users with active sessions. It is the principle of operation of this web browser that attracts many users interested in anonymous web pages or a substitution of their location. In addition, the Thor opens resources with registration on the pseudo domain of the top level .ONion, because such sites are not indexed by the familiar search engines. As part of this material, we would like to tell about all the features of the configuration of the mentioned browser for comfortable and safe surfing.
Configure Tor Browser for comfortable and safe use
Next, we will talk about configuring Tor Browser through the menu with parameters and special configuration files. To do this, you will only need to download and install this web browser. All the screenshots below are made on the Russian version, so we recommend downloading the assembly with this language pack, so as not to be confused in the menu items.Entrance and weekend nodes
Nods call all computers connected to one TOR network. As you know, each active browser user can become one of the nodes of the chain, the final or intermediate, since it consists of three stars. However, this technology is managed and accessible to configuration through a configuration file. There, the user allows or limits the entrance and weekend nodes. The entrance nodes call the participants from which the chain will begin, the weekends - the users who will become the final links. All setting is in choosing countries, and it happens as follows:
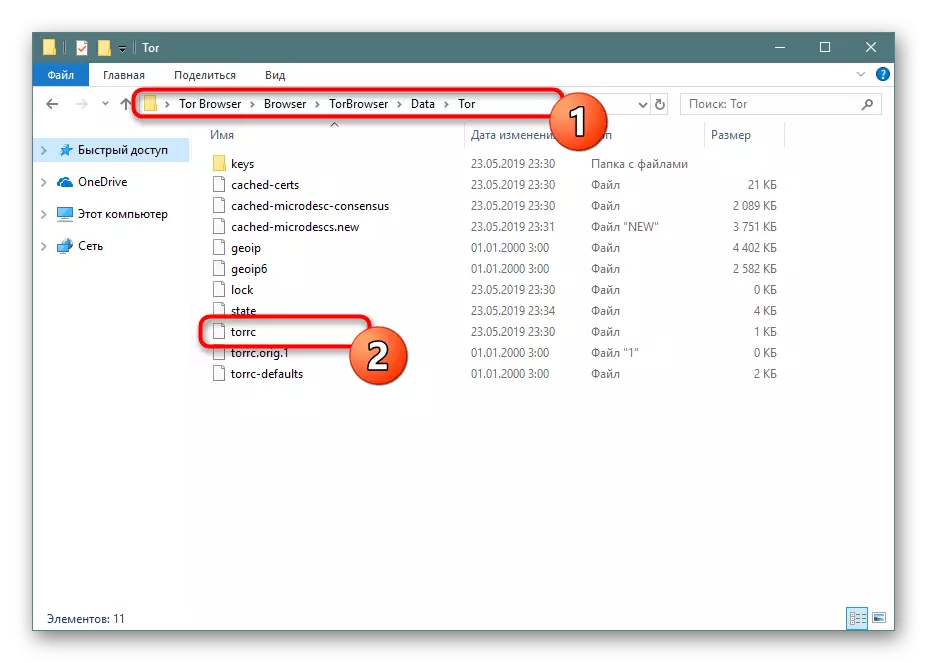
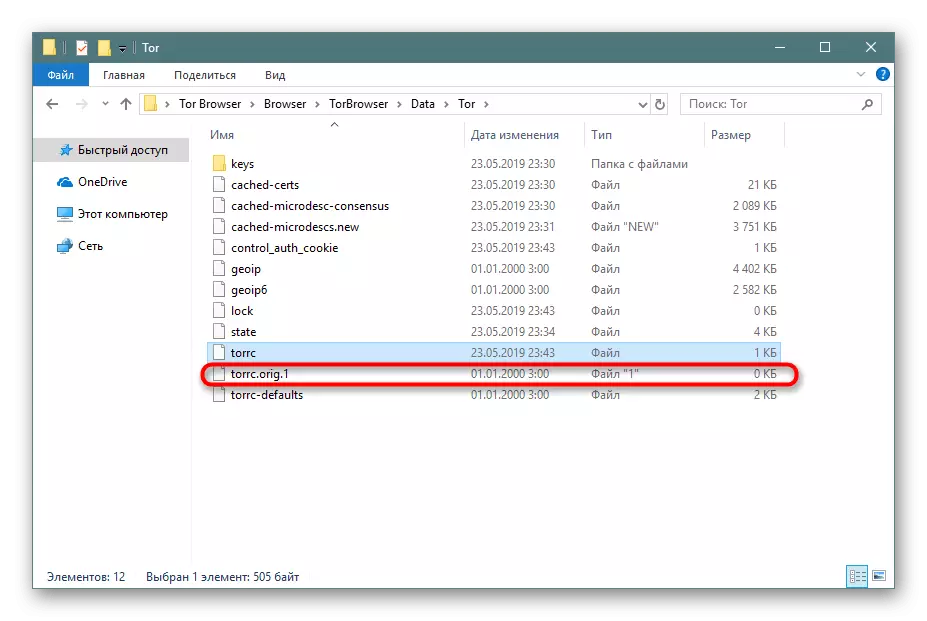
- Open the folder with the web browser and go along the path "Browser"> Torbrowser> Data> Tor. In the directory, find the file "Torrc" and double-click on it with LKM.
- Start using a standard notepad or any convenient text editor.
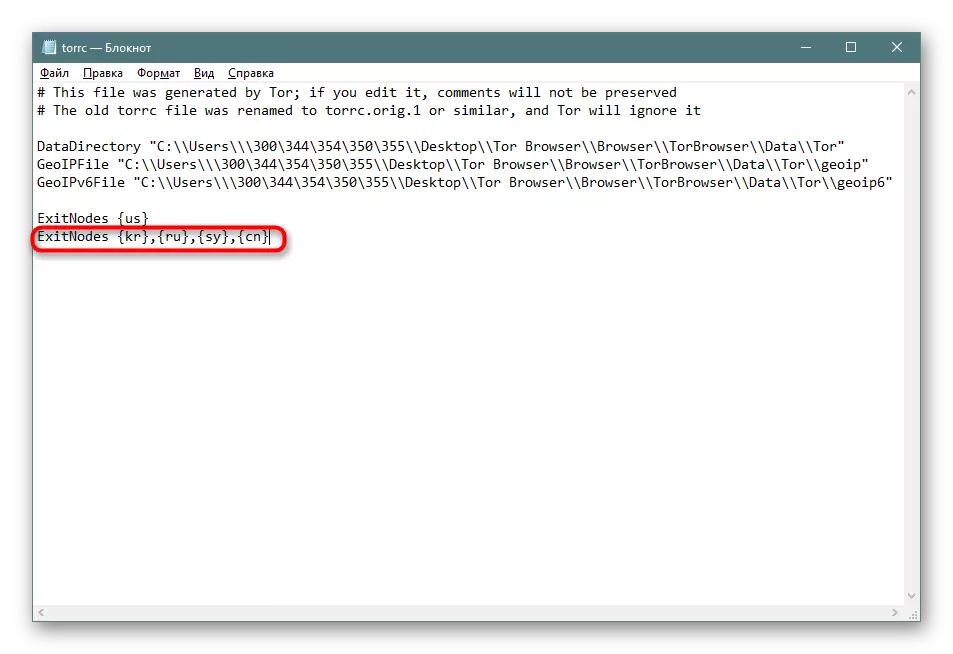
- At the bottom, add the string exitnodes {US} - it is responsible for the fact that the IP address of the specified country will be the end link.
- You can set codes of countries through commas, indicating all available locations. Then the string will find something like this: exitnodes {kr}, {ru}, {sy}, {cn}.
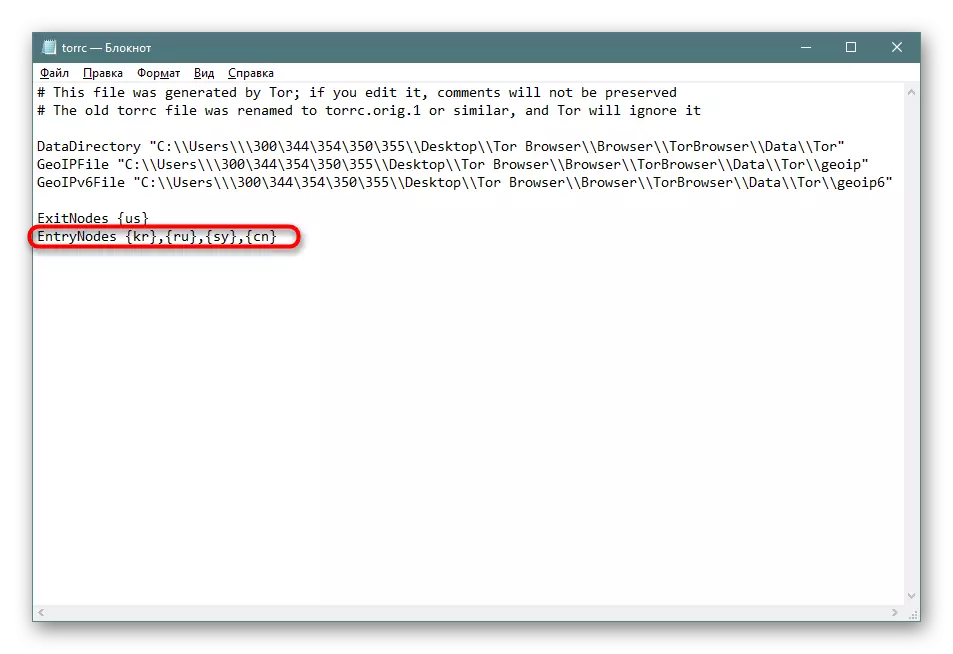
- There are countries as input points in about the same principle where the team changes to entrynodes, and state codes fit in the same way.
- In addition, the restrictions on the use of certain countries are given and the route is also set:
EXCLUDENODES {Code_strana}, {Code_Stran}
STRICTNODES 1.
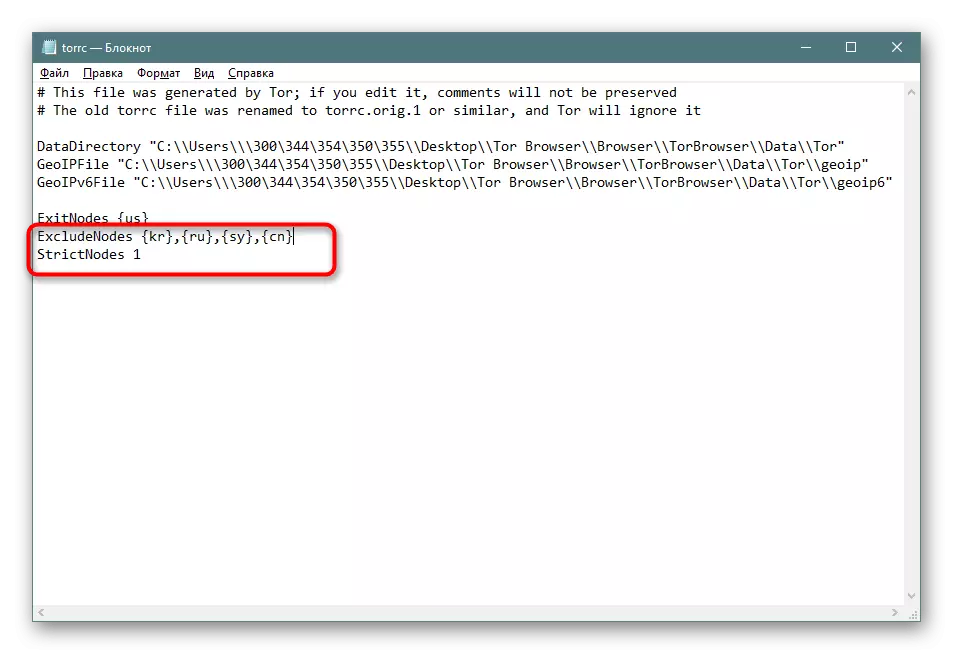
EXCLUDEEXITNODES is used as limiting endpoints, where the next line is also necessary to enter StrictNodes 1, because the "StrictNodes" parameter obliges Tor to consider custom configurations to limit compounds.
- Upon completion, save the settings and close the configuration file. The folder will create its original copy that can be renamed at any time, thereby restoring the initial content.
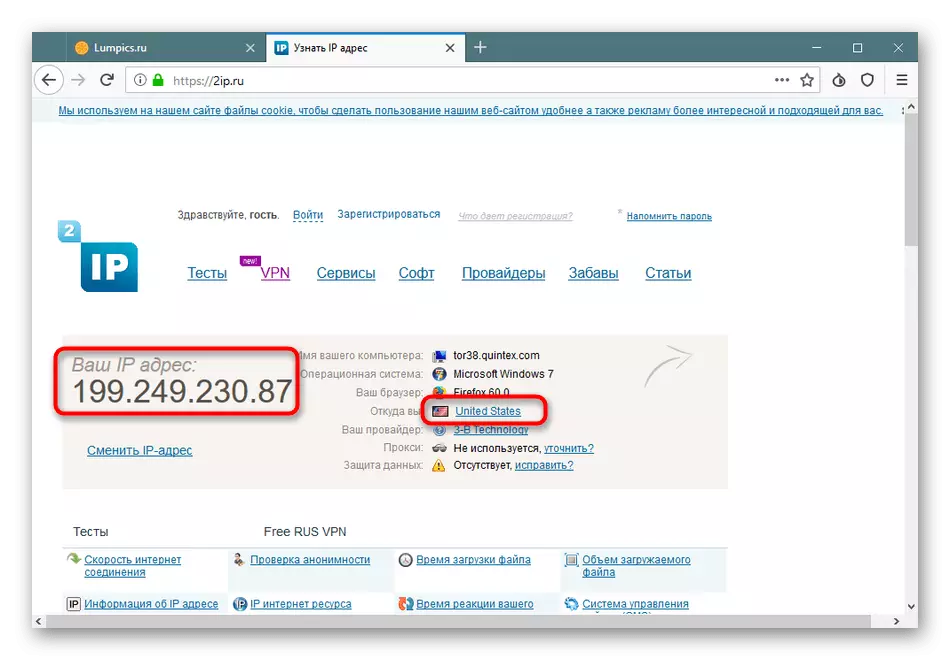
- Make sure the editing has passed successfully. To do this, simply start TOR and go to the IP check site. There you will find all the necessary information.


Sometimes it is required to specify quite non-standard countries for input points or exit. In this case, there is no idea of their codes, which causes various difficulties or errors when entering. Avoiding them will help appeal to the table, in which all codes in the correct ISO 3166-1 format are written. It is located on the famous Wikipedia website, and you can go to it by clicking on the link below.
List of country codes in ISO 3166-1 format
Connection at startup
During the first and subsequent startups of the browser on the screen, the network setup screen appears. It usually disappears after the first successful configuration, and when errors appear with the connection becomes active again. In it, the user is proposed to properly configure the connection, specifying the available ports, proxy or bridges. With a proxy server, everything is quite simple - you need to click on "I use a proxy for connecting to the Internet" and fill out the form that appears in accordance with the available data.

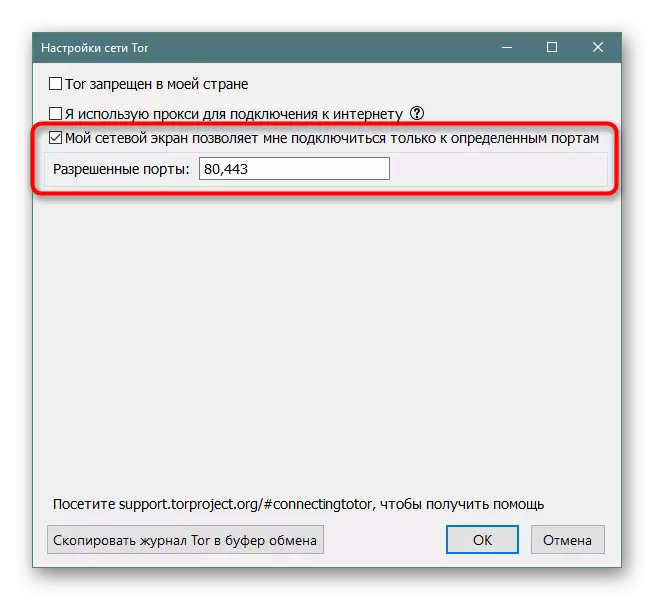
With ports, too, everything is extremely clear - the settings of the firewall are sometimes blocked by the use of certain ports, which causes the need to specify permissible. Set of port numbers is carried out through the comma.
Problems occur most often from those users who have Tor blocked by the provider. Then any attempt to connect to the network is interrupted. It is solved only by installing the bridge. Such a function added developers and organized its correct operation, which allows one of several options.
Selecting a built-in bridge
The developers have built several types of bridges that organize a secure connection. They are written in different technologies in different programming languages, which makes them more resistant to protective mechanisms of Internet service providers. You only need to mark the "Select Built-in Bridge" marker and specify one of the available options. Next, by checking the performance, the optimal bridge is selected.

As for the difference in all those present by Bridges, you can familiarize yourself with them in the official documentation of the web browser developers. There is information on each technology, their detailed descriptions and links to full sweeps published on GitHub.
Official documentation on the variety of bridges used in Tor Browser
Bridge request directly
If no of the current built-in bridges does not work, you should try to request a bridge from the official site. In reliability, it will be more effective, but its receipt depends on the possibility of connecting to the resource itself.
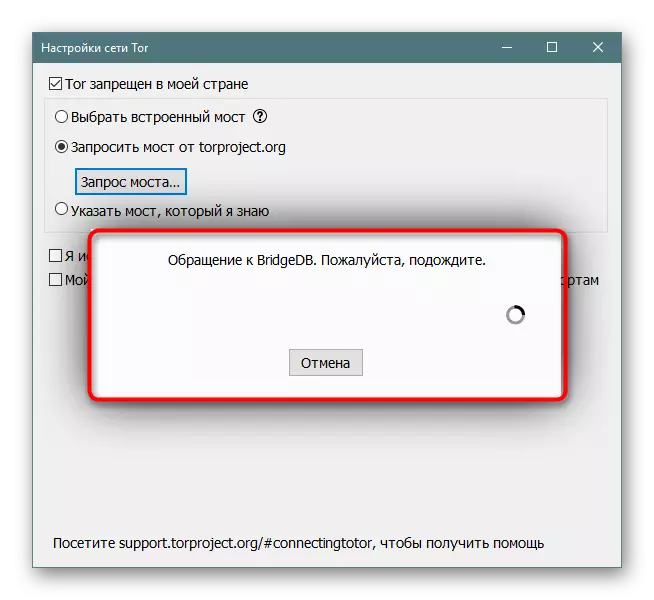
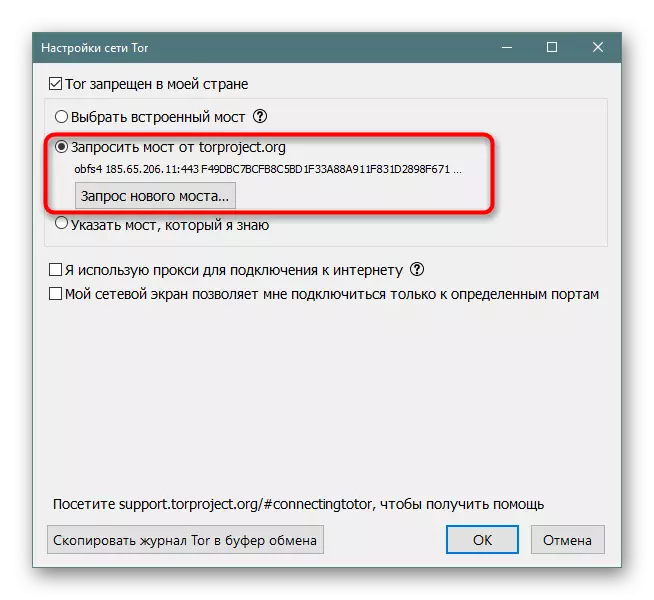
- Mark the "Request Bridge from Torproject.org" by the marker and click on the appropriate button for the bridge request.
- Expect conversion completion. In the case when it lasts for several minutes, interrupt it and go to the next method of obtaining a bridge.
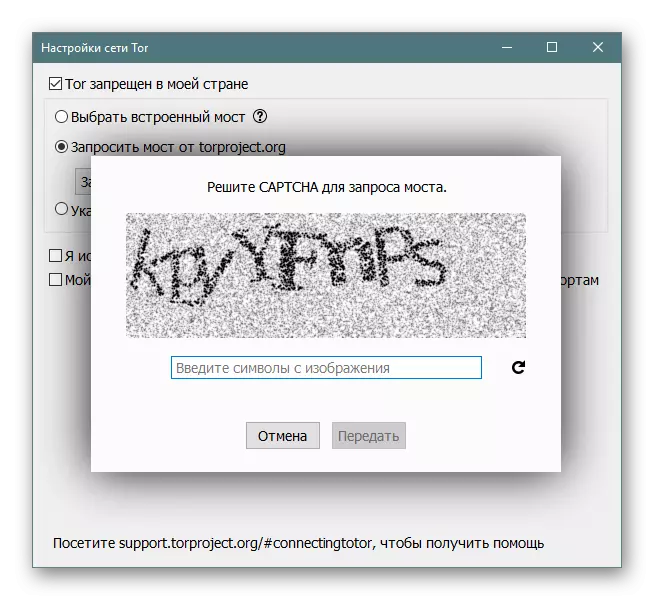
- If you successfully communicate with the server, a notification will appear asking for capping.
- The bridge will then be provided, and on this connection procedure is completed. If necessary, you can always ask for a new address.

Manual getting bridge
In some situations, no of the above options will be effective, since providers use advanced protection technology. Then you have to go to the official website with bridges through any working browser and get it manually, but this is done like this:
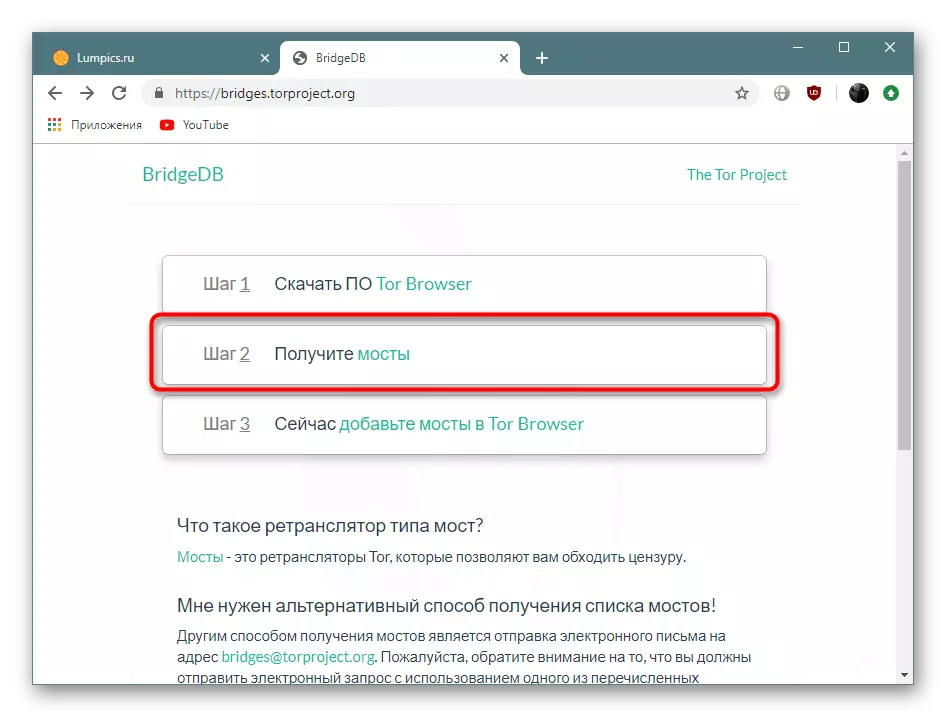
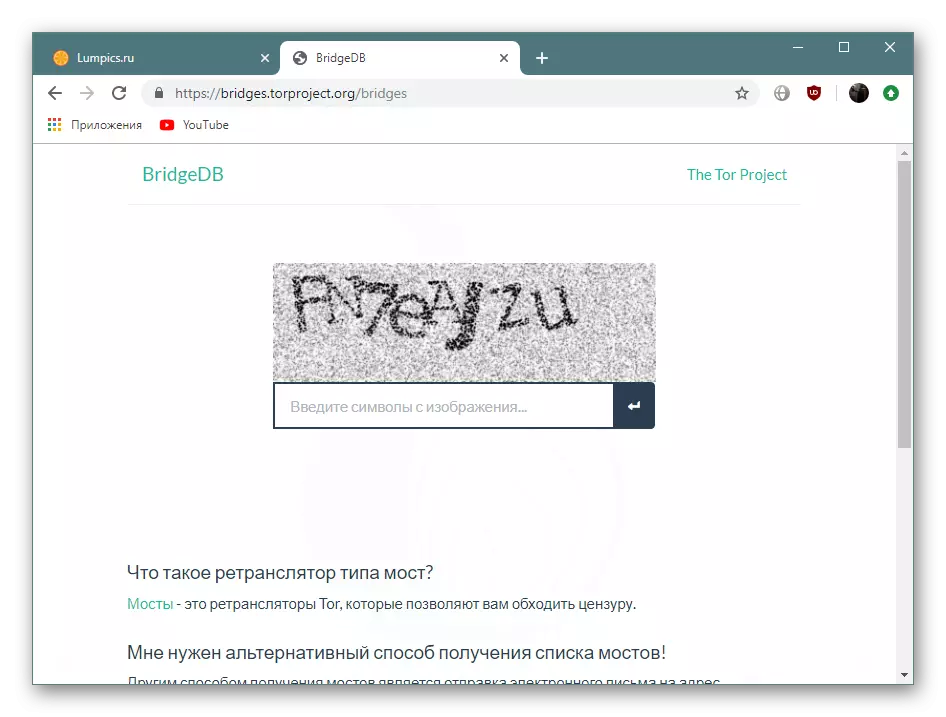
Getting bridges on the official website BridgeDB
- Go to the above link and click on "Step 2 Get Bridges".
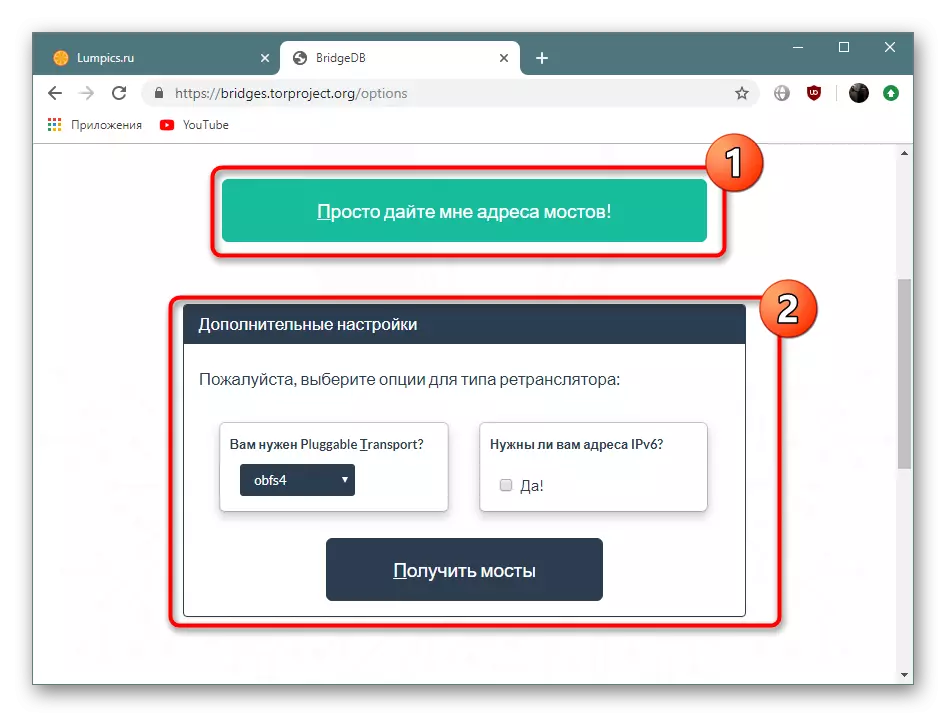
- A normal receipt mode is available or through the definition of additional parameters. Here choose the option at your discretion.
- Next is injected.
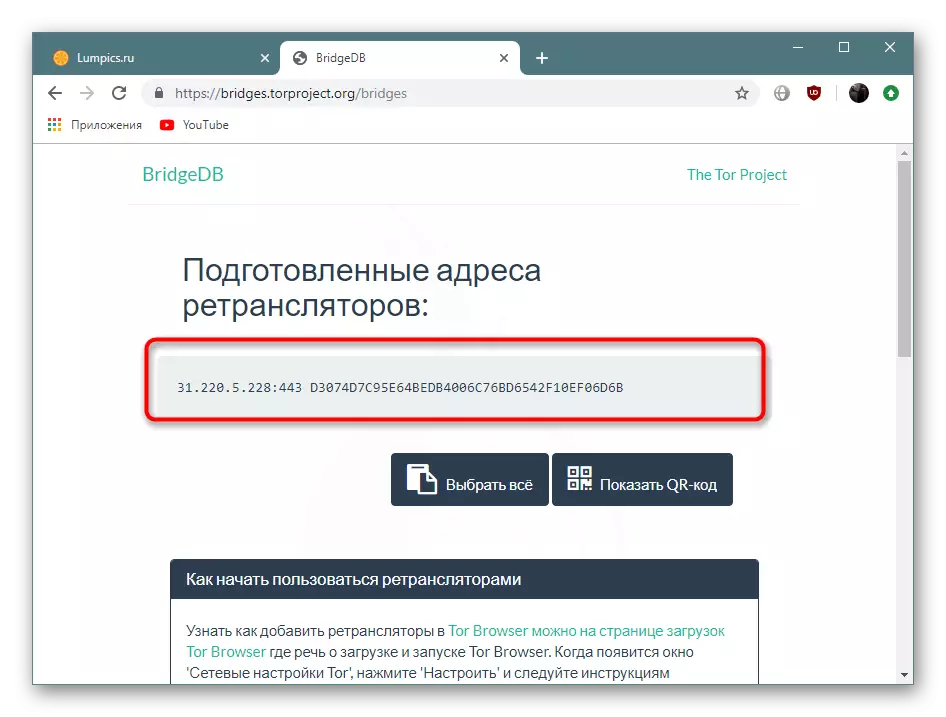
- A selected address will appear on the screen, it must be copied to the clipboard.
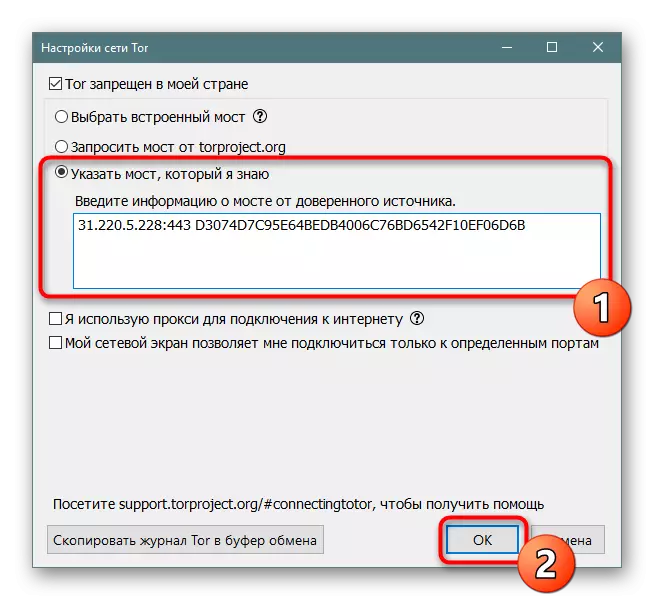
- In the Tora itself, you should mark the marker "Specify the bridge that I know" and enter the address received. After that click on "OK".
Now you have an idea of how to configure the connection to the first and further launches of the browser under consideration. Let's move on to the following configuration items.
Safety regulations
When working with a torus, it is important to make this process safe, because often users love to go to suspicious resources or even download various files. There are several parameters to which you need to pay attention to:
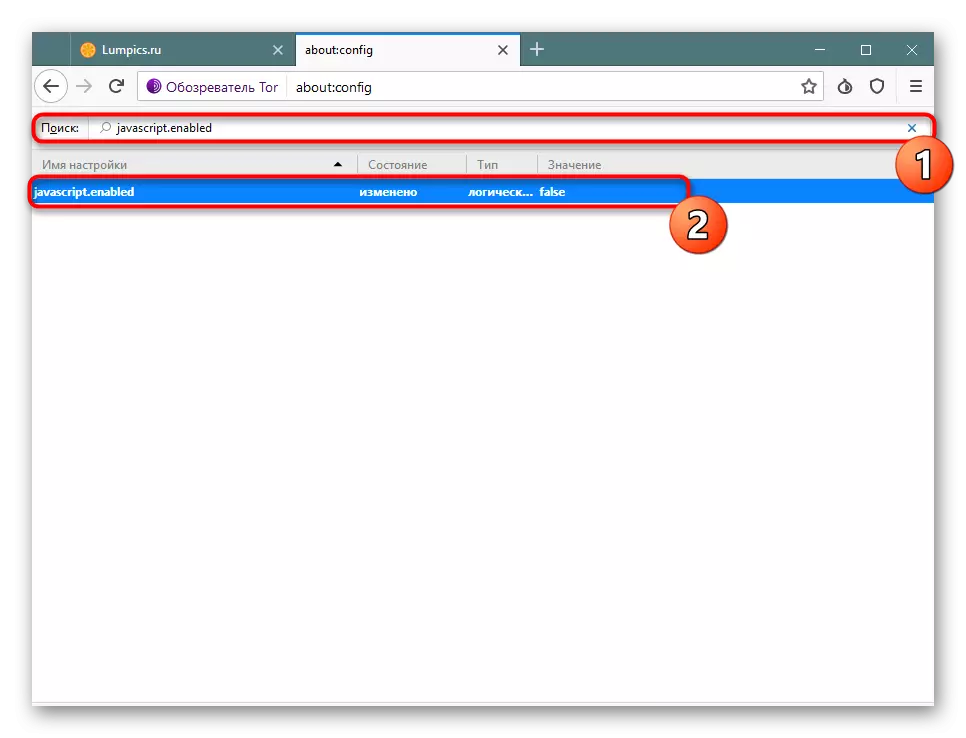
- In the address bar, enter About: Config and press Enter. When displaying a notification, click on "I take the risk!".
- You will display a list of all available parameters. Through search, find JavaScript.Enabled and double-click the LKM on the displayed line so that the value has changed to "false". Such an action will disable the use of JavaScript absolutely on all sites.
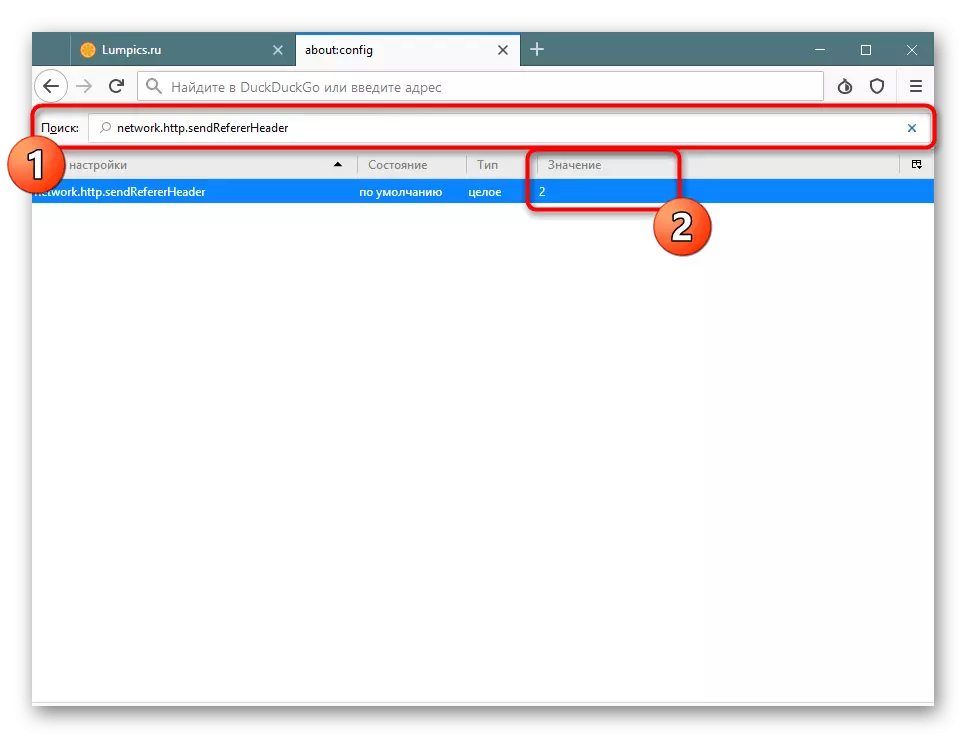
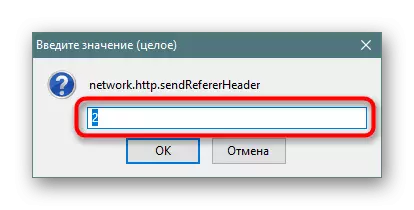
- Next, it will be necessary to disable HTTP Referer to avoid saving the first source address when traveling on the links on various pages. To do this, find the Network.http.sendrefererheader parameter twice click on the value.
- Install it in the 0 state and save the settings.

All actions with configuration parameters are completed, now you need to finish the started by using the settings embedded in the browser, because almost all the default values do not provide reliable protection.
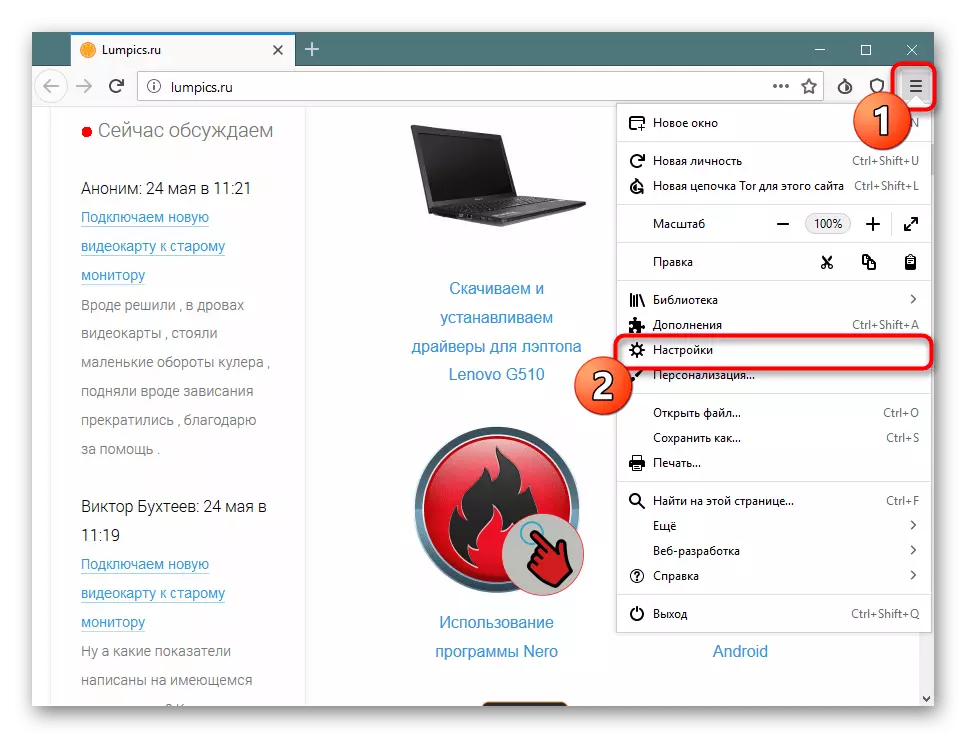
- Open the menu by clicking on the three horizontal strips on the right above, and go to the "Settings" section.
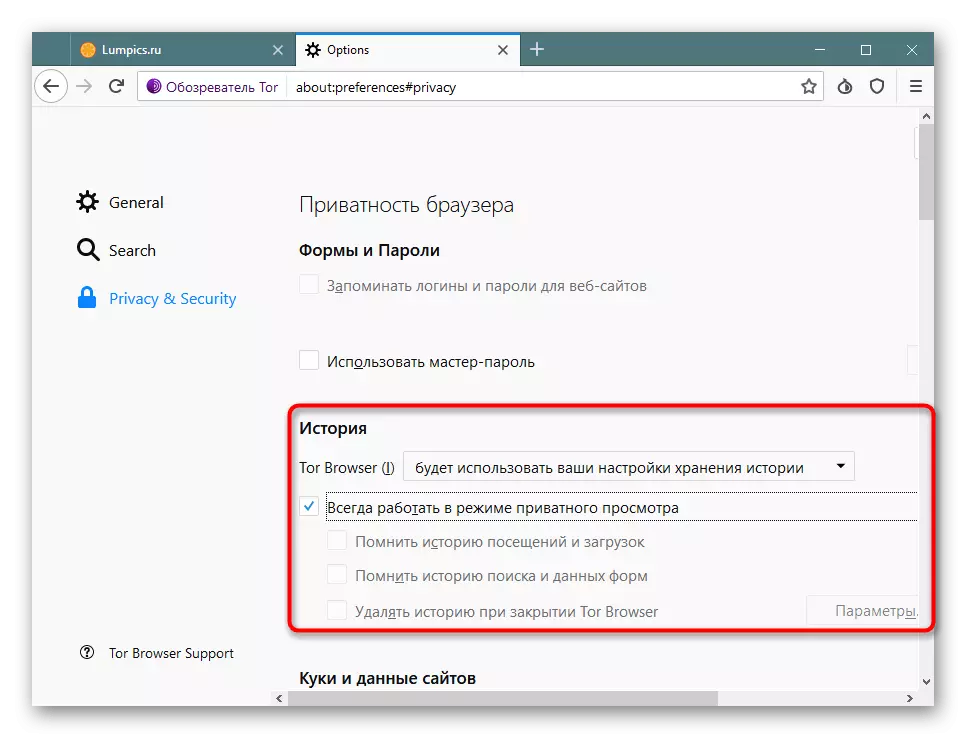
- Here move to the Privacy & Security category.
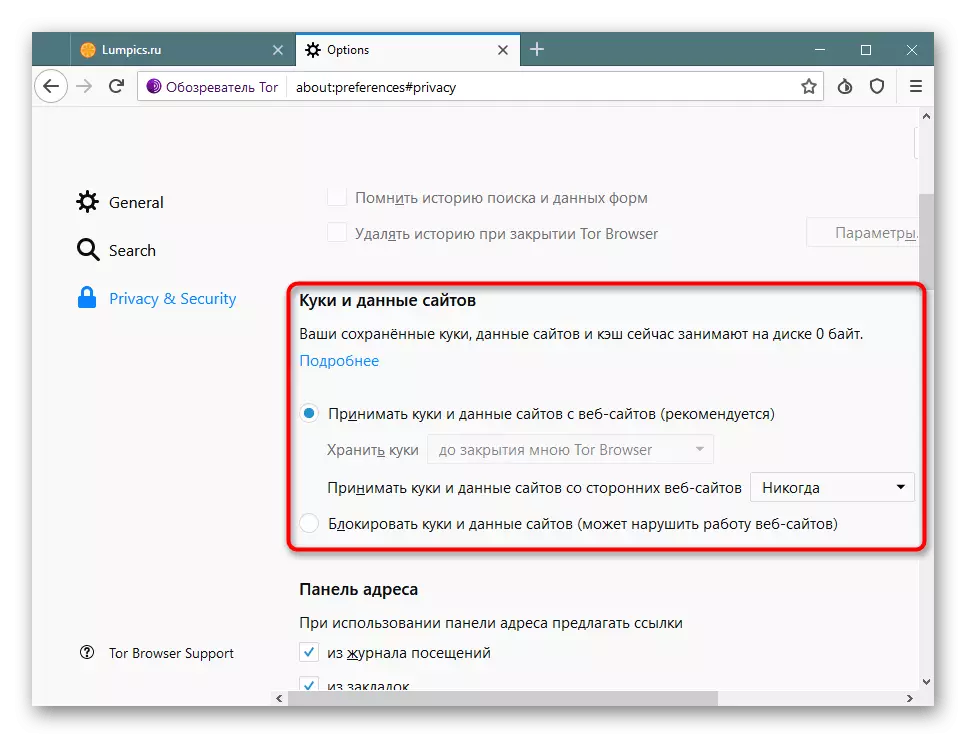
- First of all, make sure that the history of the views will never be saved.
- Cookies set up at your discretion. For complete safety, they can be turned off, but sometimes it suffers to display the contents of the pages.
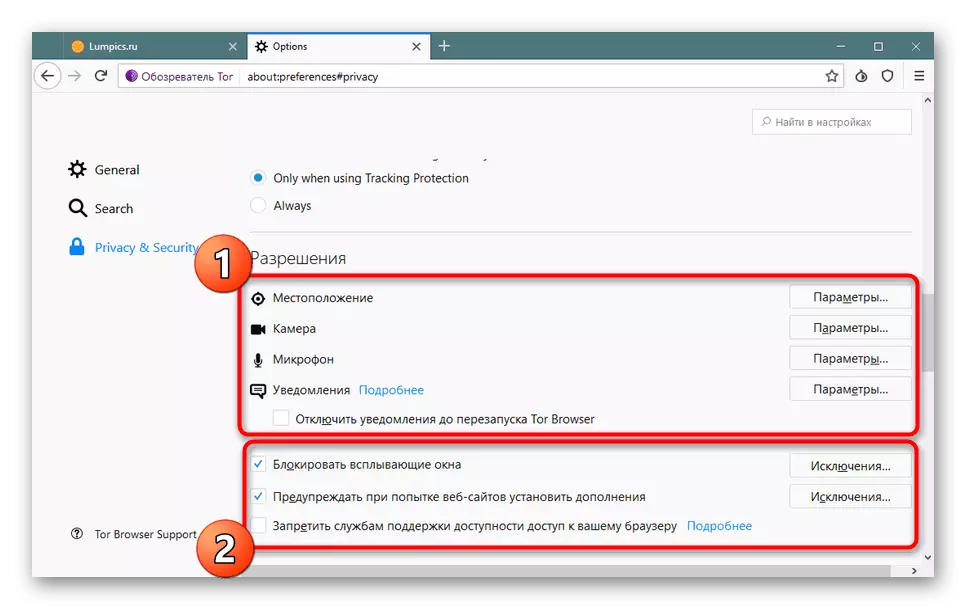
- Turn on tracking protection by setting a marker to the desired item. Below is the parameter responsible for sending notifications to sites that you refuse to use online trackers, it can also be set at your discretion.
- Separate attention to permissions by turning off the microphone activation, camera and location detection. Be sure to make sure that the installed tick is near "block pop-up windows".
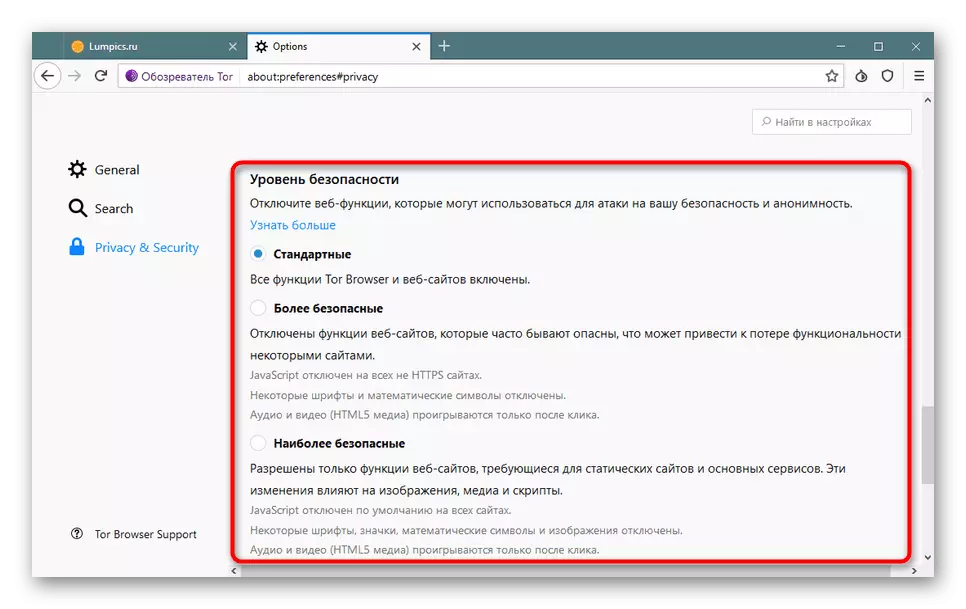
- Below is one of the unique functions of Tor Browser - "security level". It has three modes of operation, each of them limits the launch of certain tools, which makes it possible to increase protection. Check out the description of all modes and select Optimal for yourself.
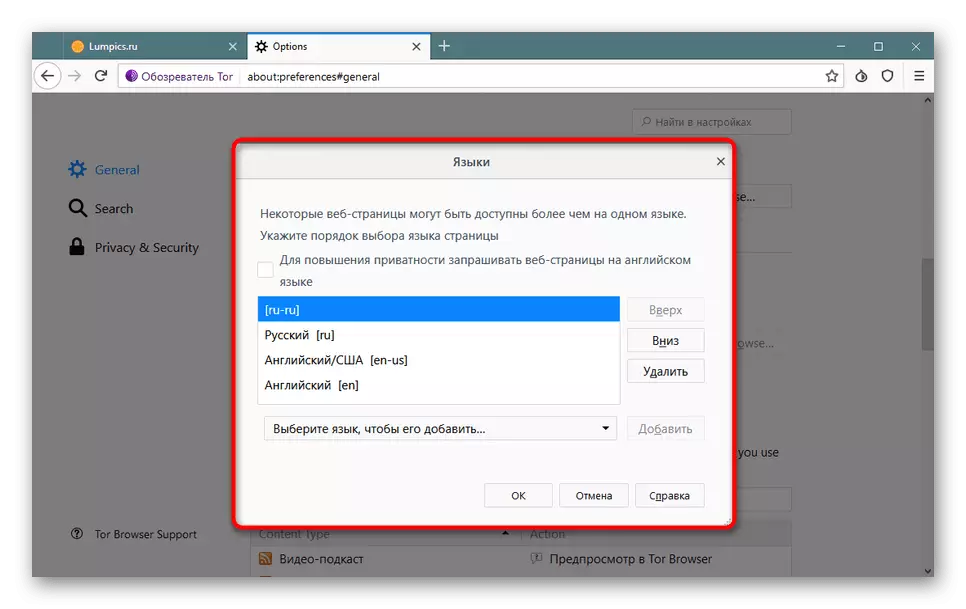
- In addition, the developers recommend changing the preferred page display language to increase anonymity. This is done in the section "GENERAL". Near the "Language" item will need to click on "Choose".
- Select a language from the list or add a new one.


We paid special attention to scripts, such as JavaScript and HTTP Referer, as they have certain vulnerabilities used by intruders to distribute threats or hacking computers. The remaining items are standard and basic rules of secure Internet surfing.
Supplements
The developers have built two useful additions to TOR, which increase protection when switching to suspicious or unverified sites. One of them limits the launch of the scripts, and the second automatically redirects to the secure HTTPS protocol, if it is considered possible. Let's analyze them in more detail.
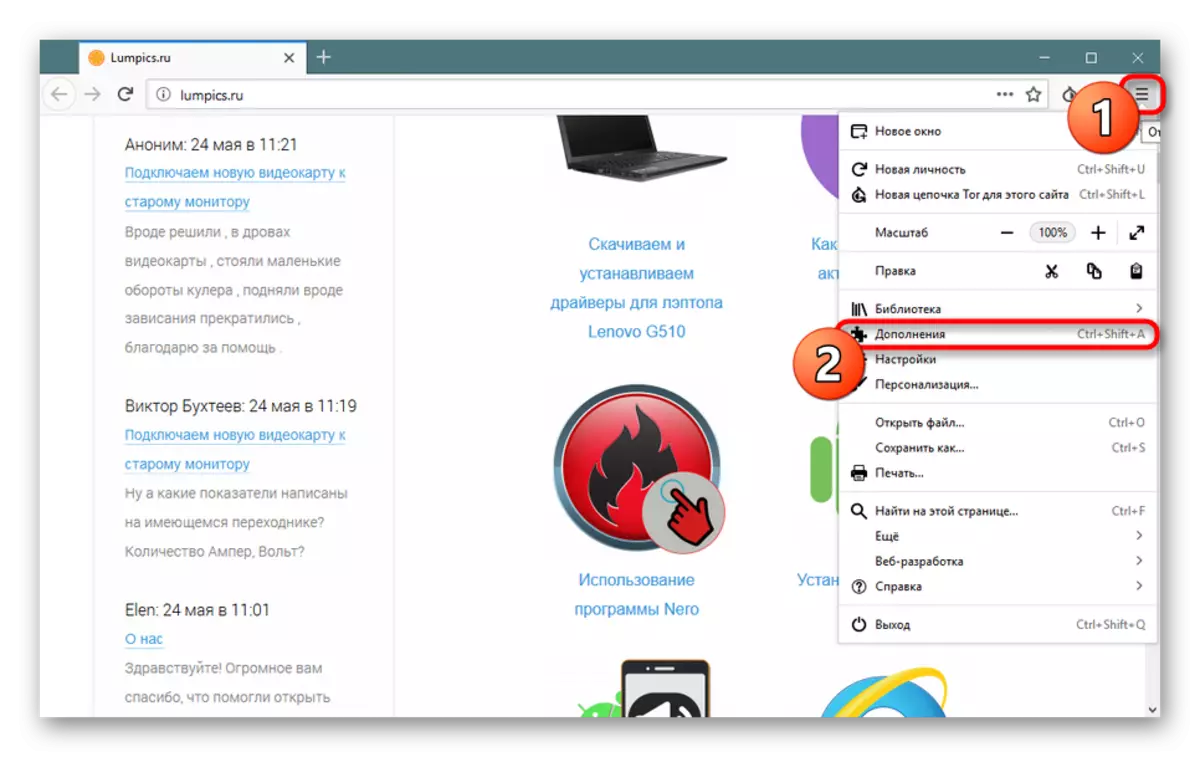
- Open the web browser menu and go to "add-ons".
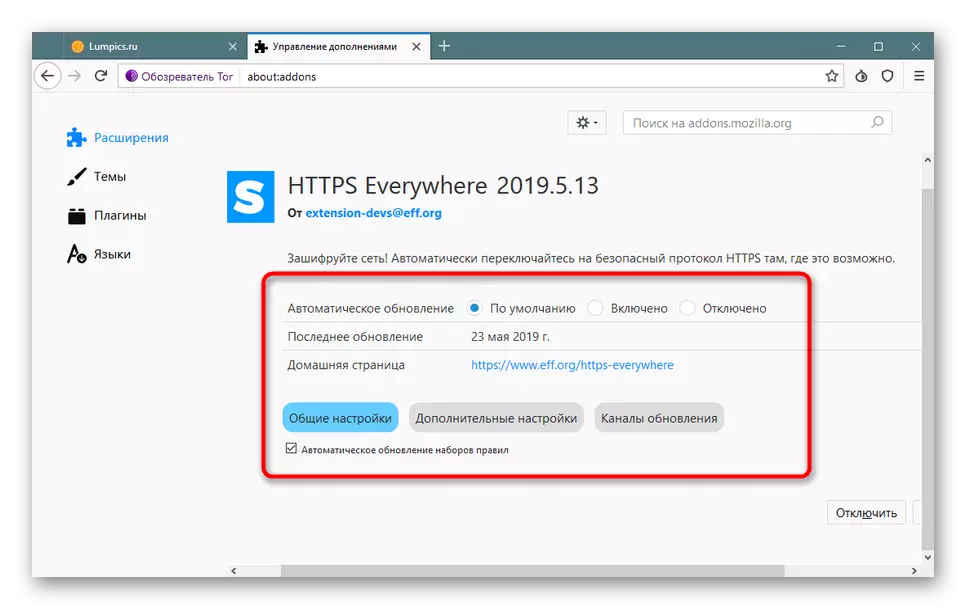
- Make sure that each of them is active and click on "HTTPS EVERYWHERE".
- This extension settings have little, you can only install the update mode of versions and make sure that the check mark is a check mark near the important "Automatic Updating Rule Sets" item.
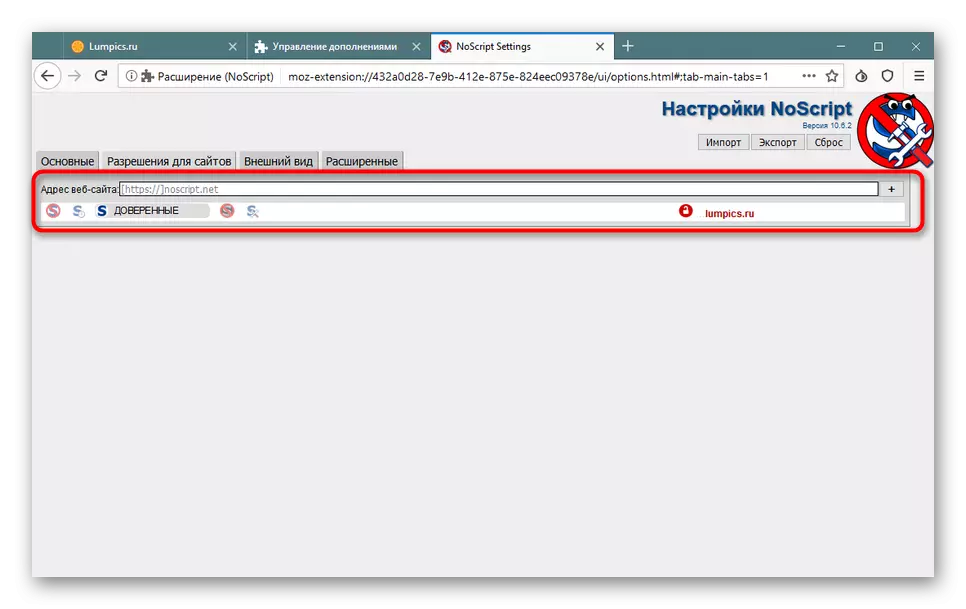
- Let us turn to a more interesting tool - "Noscript".
- In a new configuration window, you see three "Default" tabs, "trusted" and "untrusted". Tick all the scripts that you want to disable or enable on the pages of different types. Once again we clarify that the disabling of these tools increases safety, eliminating vulnerabilities for transmitting viruses.
- You can enter the address of a specific site to add it to one of the types of pages or configure individual rules.
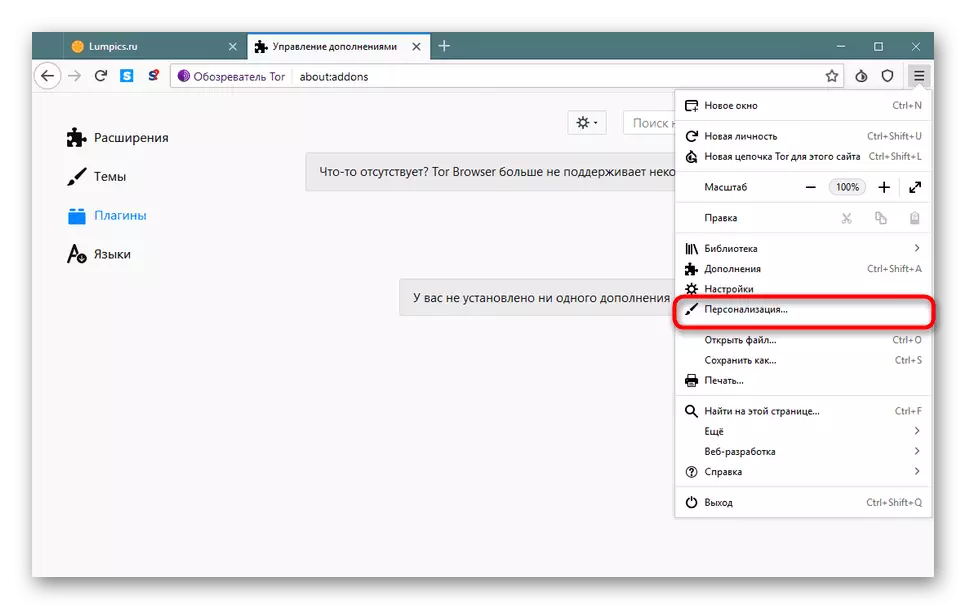
- Next, we recommend moving to the "Personalization" section.
- Here are the icons of the mentioned scripts. Move them to the top panel to speed up the management of them if necessary.


In addition, we note that the installation of additional extensions and plug-ins is not recommended, since they reduce the overall level of security and can be used by intruders as vulnerabilities for transmitting malicious code or files.
Search engine setup
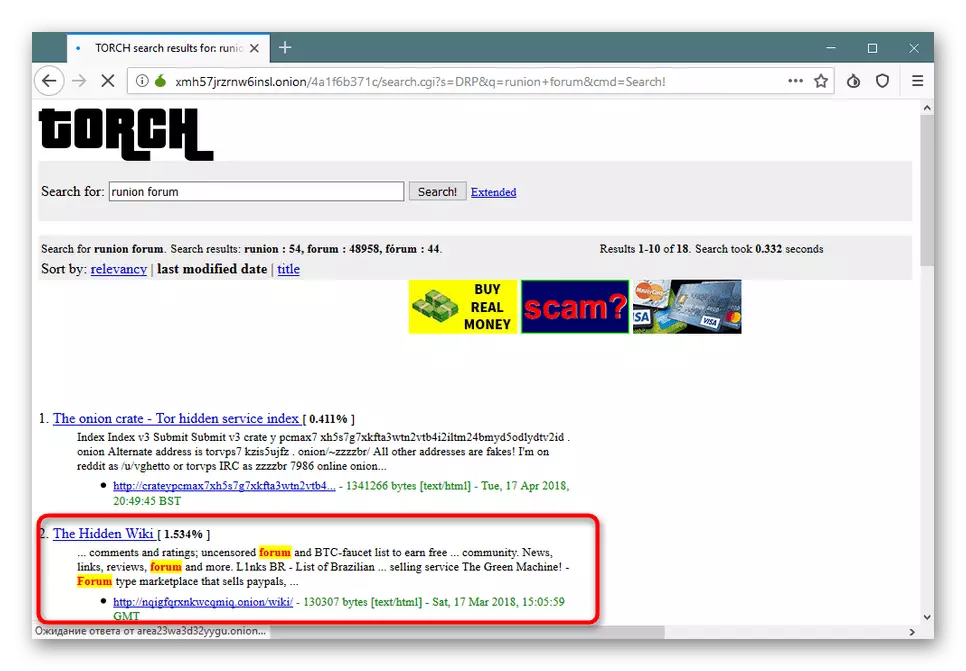
As mentioned earlier, Tor Browser allows you to move to sites registered on the .ONion domain. If you use Google search engine or, for example, Yandex, then such resources will not be found. There are specially created search engines that allow you to find solely on the mentioned domain. If you are interested in this process, it is recommended to save the found search engine so as not to enter it every time.
- Through the menu, go to "Settings".
- Here in the "General" section, find the Home Page field and insert the search engine found.
- When you start the browser, you will get to the desired page so that you can immediately go to the search.
- The number and quality of the displayed results depends only on the search service used, because all of them have different algorithms.
- To always be able to get to the site page, click the asterisk icon and add it to the bookmarks panel.


From time to time, any resources can change, so it is better to have several alternatives in stock. They are added to the bookmarks panel in the same way and stored even after restarting the browser.
Working with sites
When all the pre-editing is completed, each user wants to climb on various sites in search of the necessary information. It must be borne in mind that each page is applicable to their settings that allow you to change the connection circuit or set personal permissions.
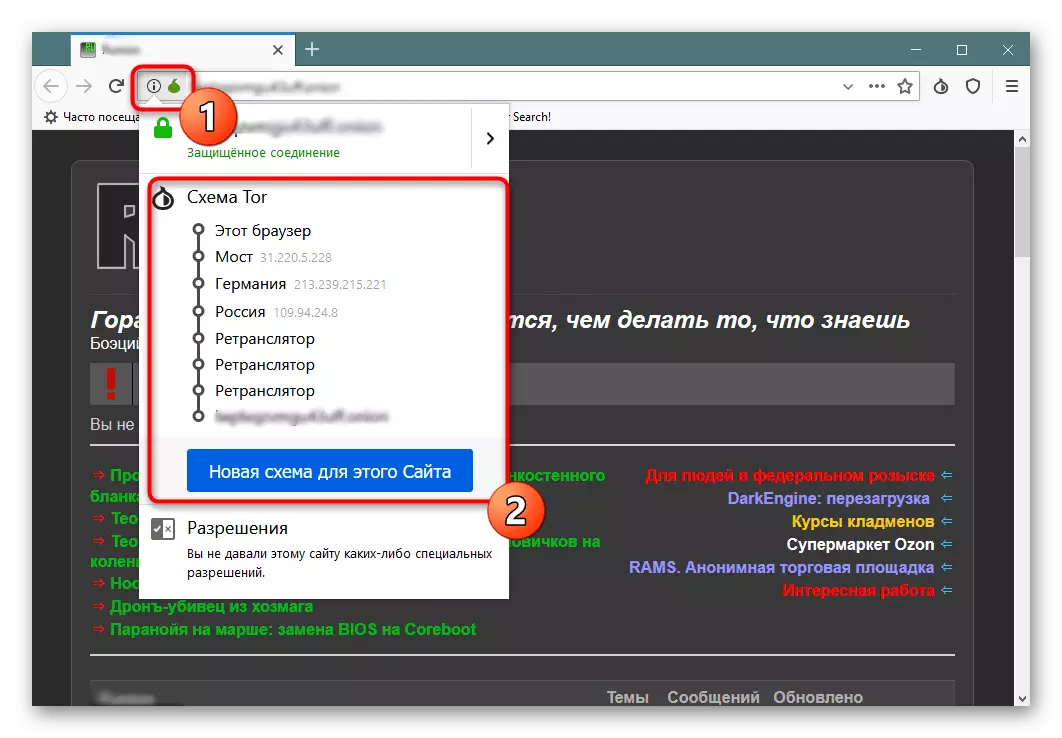
- After transition to the page, click on the green blossom icon. Here you will immediately see the chain chain. If she does not suit you or works with failures, click on the "New Scheme for this Site".
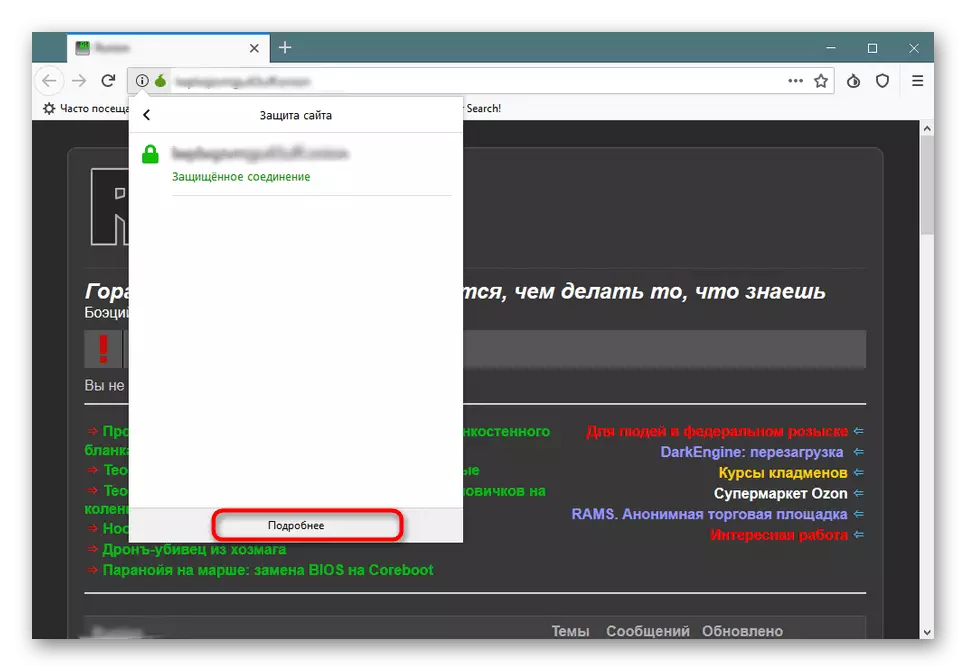
- In the "Site Protection" section, there is a button to go to an additional configuration.
- The first tab indicates the authenticity of the resource, information on privacy and technical details.
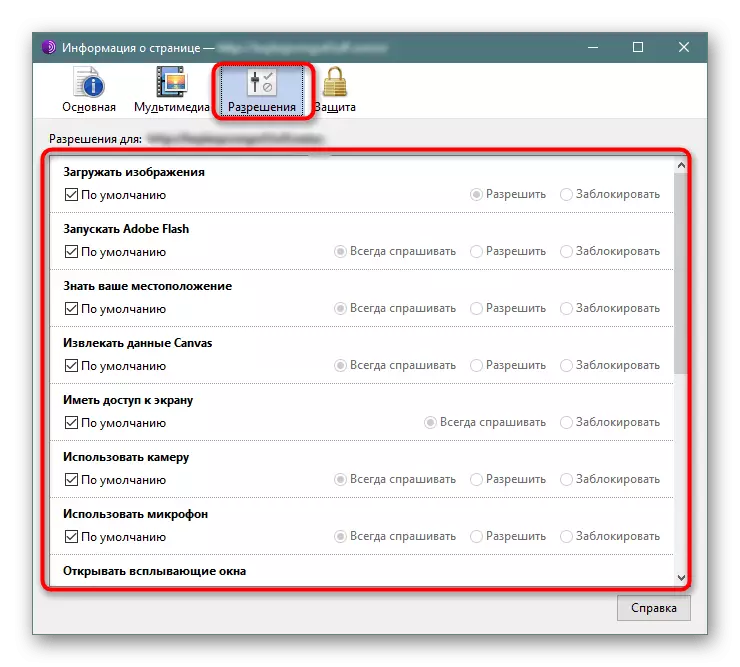
- "Permissions" is responsible for installing the privileges of the resource, such as inclusion or disable Flash Player, loading images, receiving access to the screen or launch pop-up windows. All this is configured individually for the requests of the user.
- In the Multimedia tab you will find a list of all images and video recordings. This will help track visible and invisible content displayed on the page, and learn direct links to this data.


Now you are familiar with all the main aspects of the configuration of the browser toruster. As you can see, there are many important parameters responsible for the convenience and safety of surfing. It is important to choose the right setting to create perfect conditions individually for yourself.