
Now the viruses have gained quite widespread and infect your computer can almost every user, without even suspecting it. There are several types of similar threats that hide files on removable media, and the usual change in attributes does not always help. For example, sometimes labels appear instead of the directories and when trying to start such a shortcut, there is even greater infection, and the source objects are not so easy to find. Today we would like to step by step to write the procedure for solving this problem, taking into account all the nuances.
We solve the problem with hiding the virus of files on the flash drive
Hiding the files on the flash drive is one of the most innocuous problems faced by victims of viruses. However, in most cases, such threats continue to continue to spread through PCs in search of information, such as payment data. Therefore, they are required to detect and delete them as soon as possible. At the same time, it is important to save the files that we will try to make further.Step 1: Using Anti-Virus
First of all, it is always recommended to use special anti-virus software that will not only find a virus on a computer or a USB drive, but also remove it. Such an action is necessary in order to make files can be made again visible and get rid of further difficulties when working with them. It is recommended to use several tools, because sometimes new viruses are still missing in the database. In another article, on the following link, you will find five different ways to implement the task.
Read more: Check and fully clean the flash drive from viruses
Step 2: Deleting residual entries in the registry
Not always, after complete removal of the virus with PC, absolutely all files associated with it are erased by the software method. Some applications and utilities skillfully disguised as a friendly software and run each time the operating system starts. Usually such entries remain in the registry, so they need to be removed, and this can be done like this:
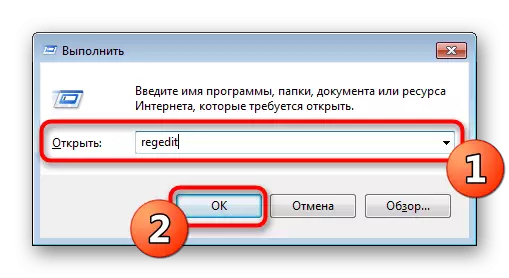
- Call the "Run" function by holding the Win + R keys combination. Then enter the REGEDIT expression there, press the ENTER key or the "OK" button.
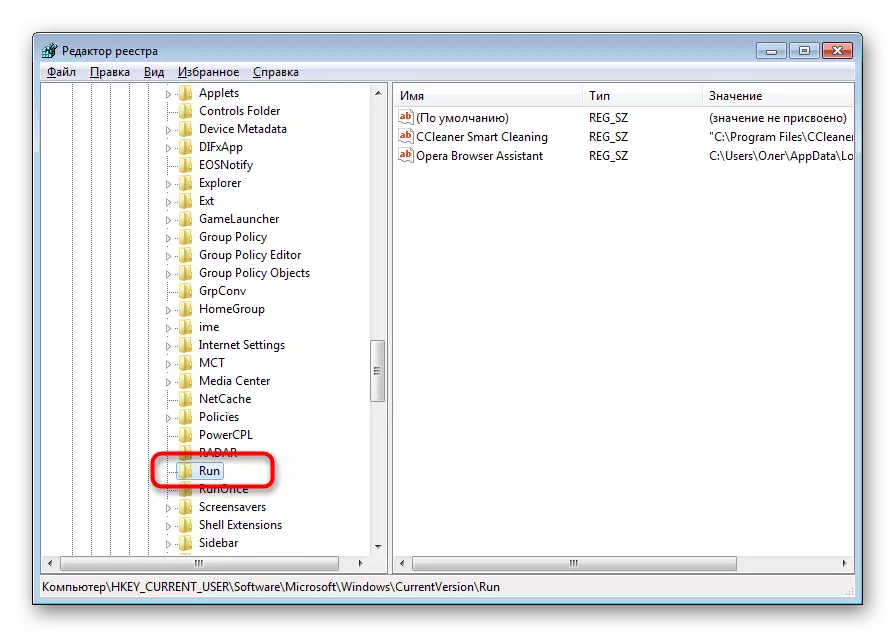
- In the Registry Editor, follow the path of HKEY_CURRENT_USER \ SOFTWARE \ Microsoft \ Windows \ Currentversion \, where you find the directory called "RUN".
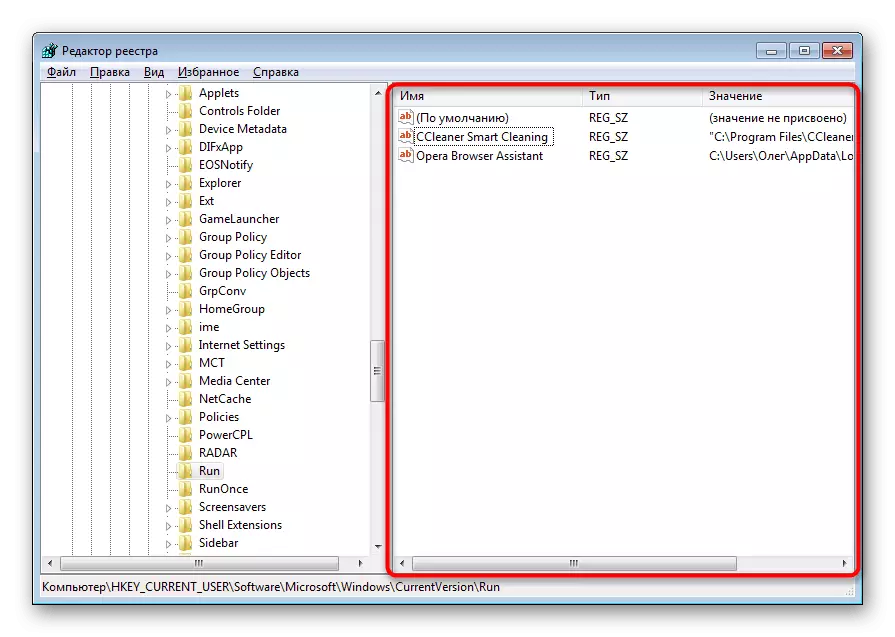
- It contains the keys of programs that run automatically. Find suspicious or unfamiliar records there, click on them PCM and select "Delete".
- After that, it is recommended to restart the computer so that the changes take effect.
Usually, such records generated by malicious software have a random name consisting of a set of characters, so it is not difficult to find it. In addition, each user knows that it is installed on his PC - it will also help to find an excess record.
Step 3: Disable suspicious services
Some threats leave behind small scripts, called services. Usually, antivirus detects them and successfully removes, but the most sophisticated viruses can remain on PC unnoticed. Because of this, the user is recommended to independently view the list of current services and find a suspicious utility there. It is most likely to delete it, but after the disconnection, it will stop damage to the device.
- Open the "Run" utility (Win + R). Enter MSCONFIG there and click on "OK".
- Move into the "Services" tab.
- Browse the list of all services, highlight those associated with malicious data, and disconnect them. After that, apply the changes and restart the PC.


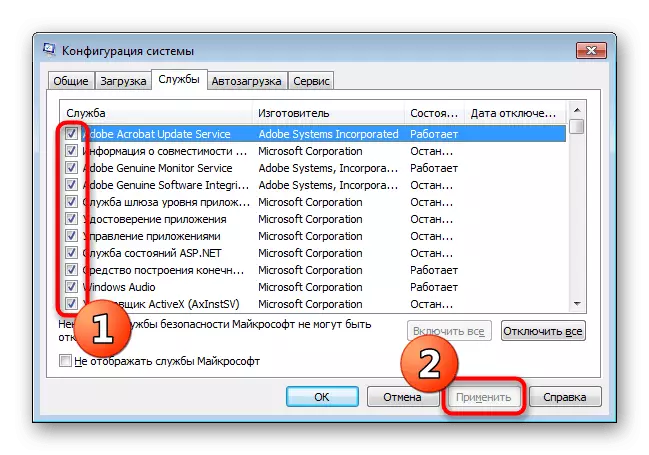
If you are not sure about any of the services, you can always find information about it on the Internet to make sure of it involvement in viruses or security.
Step 4: Change file attributes
If the objects on removable media were amazed by the virus, now they are either removed, or have a assigned attribute that makes them hidden, systemic and inaccessible to change. Therefore, the user will have to manually delete all these attributes to get the files left on the flash drive.
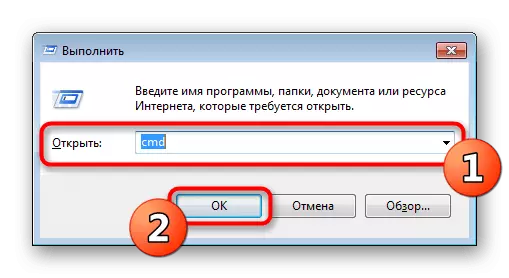
- Open the "Start" and run the "command line" on behalf of the administrator. You can do it and through "execute" by entering CMD there.
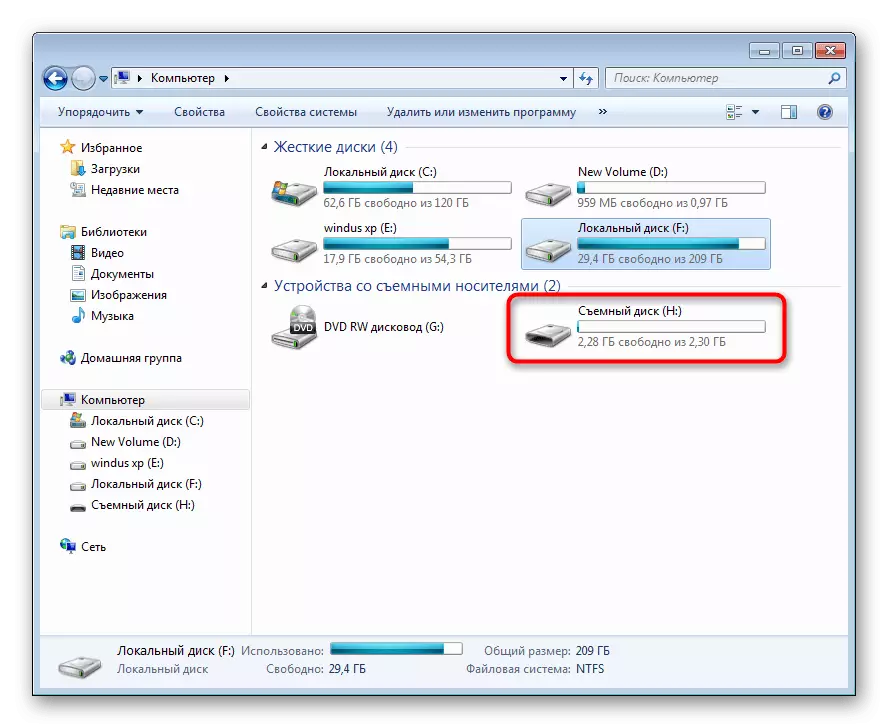
- In the "This Computer" section, find out the letter that is assigned to the USB drive. It will come in handy for further actions.
- In the console, enter ATTRIB H: *. * / D / S -H -R -S, where H is the name of the flash drive. Confirm the execution of the command by pressing ENTER.
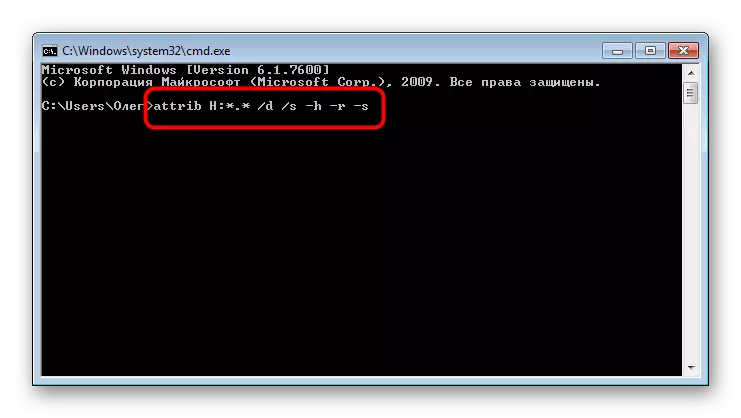
After that, it remains only to wait for the operation, this is evidenced by the input row that appears. It is now important to describe the action of each argument so that you do not have any questions on the use of the considered command:
- H - the letter of the drive, always exhibited individually, in accordance with the connected device;
- *. * - indicates the format of all files. By analogy, you can install, for example, * .txt *;
- / d - responsible for processing all files and directories;
- / s - processes all files with the specified resolution; It turns out that / d and / s, installed together, allow you to apply attributes to all objects immediately.
- + or - - add or cancel attributes;
- h - attribute to hide files;
- R is only reading;
- S is an attribute to assign the status "system".
Now you know everything about the main arguments of the ATTRIB command, which will allow you to change the attributes of files and folders directly through the console, saving your time and strength.
Step 5: Restore Remote Data
There are such cases when, after removing the attributes, the user does not access some files that stored on a flash drive until the virus is valid. The emergence of this situation means that this information was removed by antivirus or the threat. It turns out that without further, do not do here - you will have to apply a means to restore remote files. At the same time, each such tool works in its algorithm, because of which all elements are not always restored. A detailed manual for three ways to return files is looking for in our material by clicking on the reference below.Read more: Instructions for restoring remote files on a flash drive
Full cleaning flash drive
The above steps applied all together, most often bring a positive result, which allows you to get at least part of the information stored on the flash drive. However, sometimes the virus is so powerful that the consequences are irreversible. In this case, only complete cleaning of the drive will help. The standard DiskPart command will best with this, the action of which is detailed in the article below.
Read more: Command Line as a tool for formatting a flash drive
In today's article, you learned about the method of combating viruses that hide files on a flash drive. As you can see, there is a chance to return infected information, but it is worth understanding that a part may be lost forever.