
Initially, the entire space on a USB flash drive is represented as a single partition, and when formatting or working in the disk management menu, there is no possibility to create an additional volume. However, some users have such a need to ensure that it is required to place the files of certain formats in different sections. Then the third-party software or standard tool of Windows 10 will come to the rescue, which has become available with the output of the Creators Update update.
Create partitions on the flash drive
Before starting the operation, we recommend creating copies of all files that are on the drive, since further formatting and further distribution to the sections will be performed. If suddenly something goes wrong, you will have to restore the flash drive, erasing all the information from it. After preparing a backup, proceed to familiarize yourself with the following methods.Immediately, we want to note that in Windows 7 there may be problems with displaying partitions created in this way, however, in BIOS and other programs they will be visible. Therefore, with the premises of the boot partition in place, no difficulties will arise.
Method 1: Aomei Partition Assistant Standard Edition
Aomei Partition Assistant is one of the most popular third-party solutions to work with hard disk sections and connected to a computer storage. Its functionality includes many useful tools and opportunities, but today we will only touch on the interaction with Tom. All the necessary tools are available in the free version of Standard Edition.
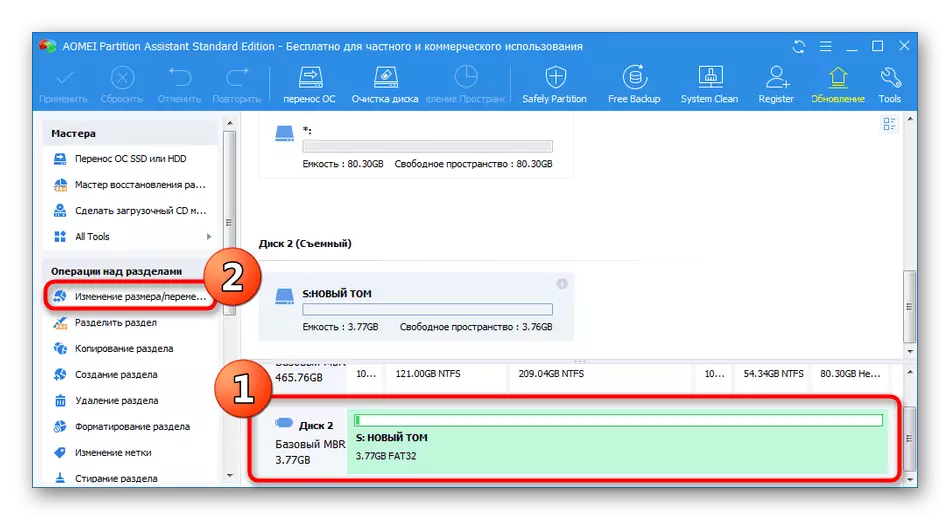
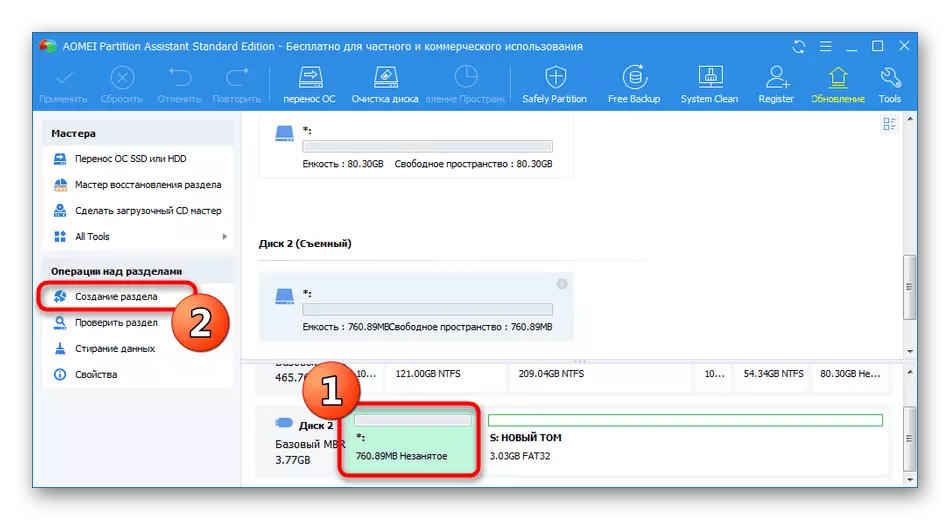
- Download and install the mentioned program on the PC. Mark the Flashplay section and select the "Size" operation.
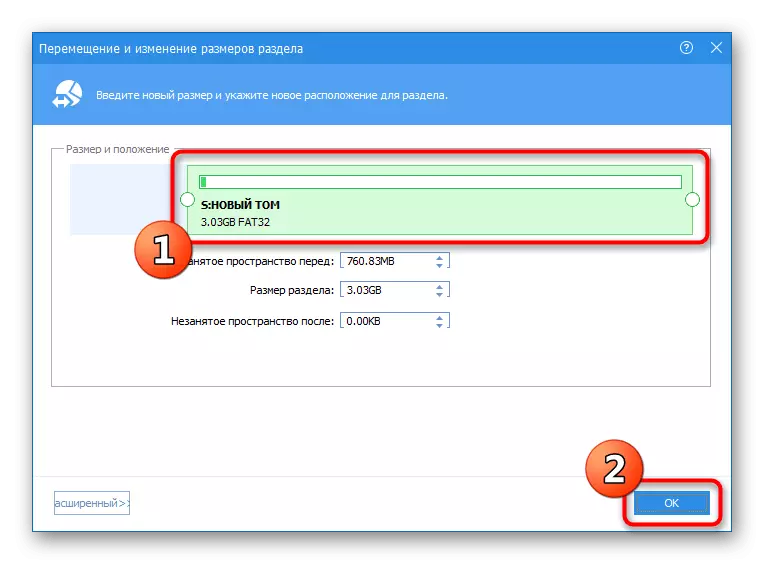
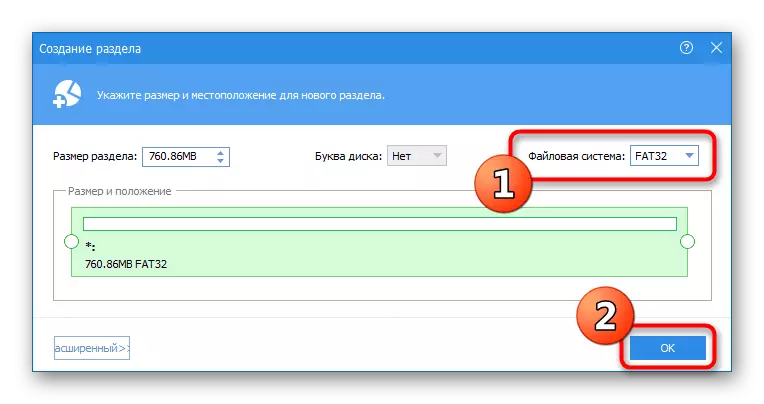
- Highlight a free space for a new volume, and then click on "OK".
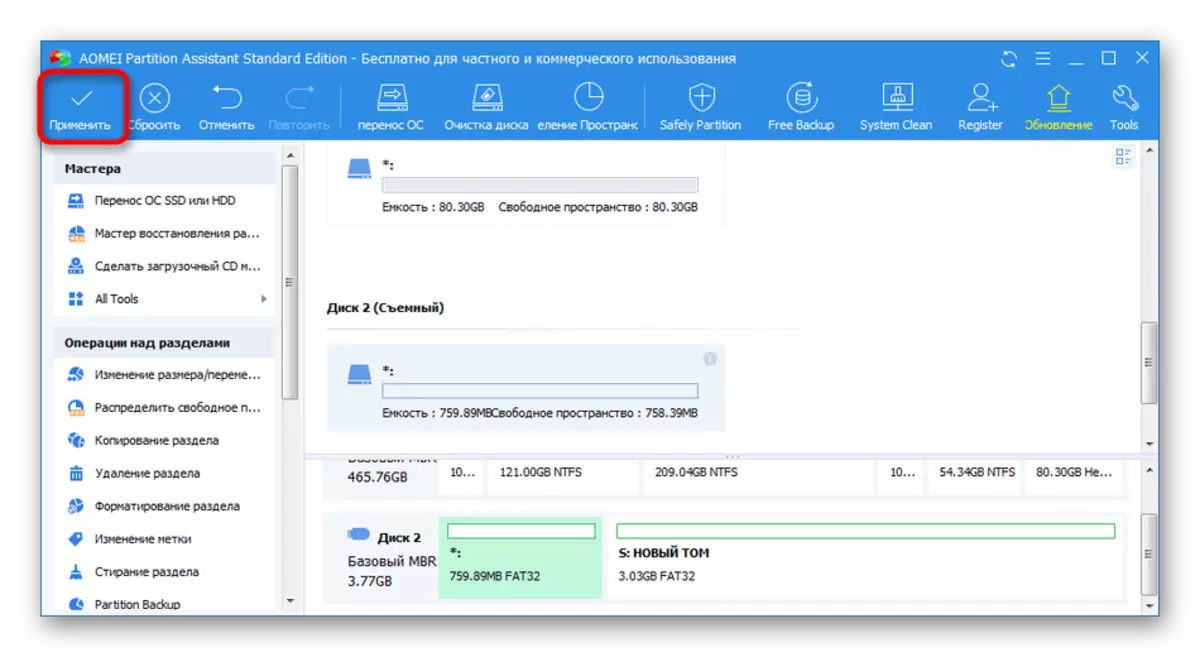
- You will need to apply the parameters by pressing the corresponding button.
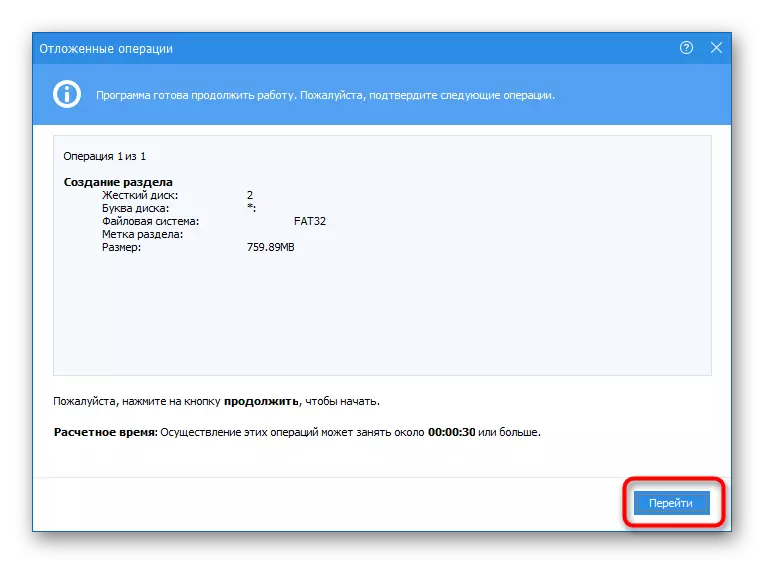
- Check out the information about the deferred operation, and then apply it.
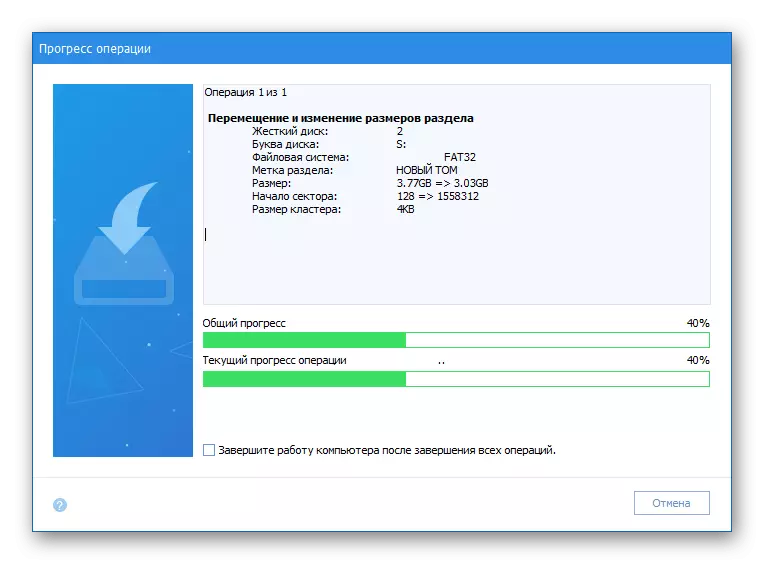
- Expect the process completion.
- After that, highlight the free area and proceed to creating a new partition.
- Be sure to select a file system that corresponds to the FS of the previously created volume.
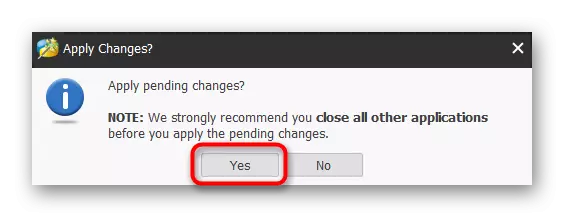
- Apply Changes.
- Run the deferred operation.
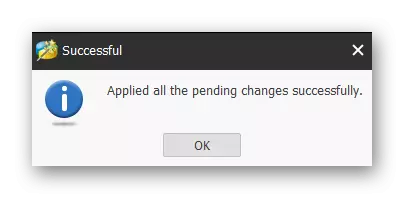
- Wait until the new volume is created.


Method 2: Minitool Partition Wizard
If the previous method is not suitable for any reason, we advise you to familiarize yourself with other similar security that is called Minitool Partition Wizard. This solution will allow you to quickly break the USB drive on the required number of partitions, but it will be necessary to erase all data.
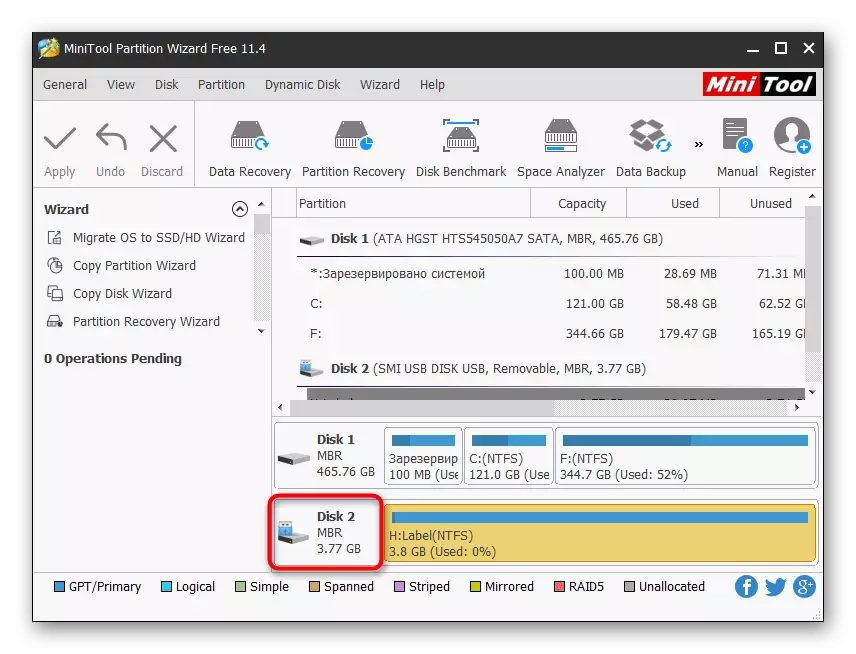
- Download and run Minitool Partition Wizard. After that, right-click on the name of the flash drive.
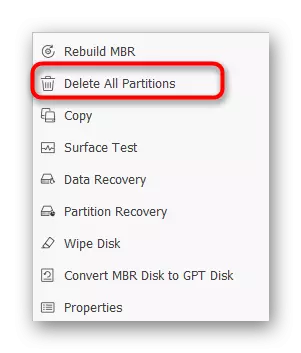
- Select the option "Delete All Partitions".
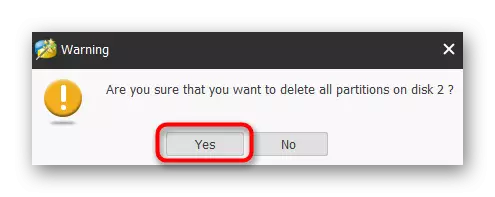
- Confirm the performance.
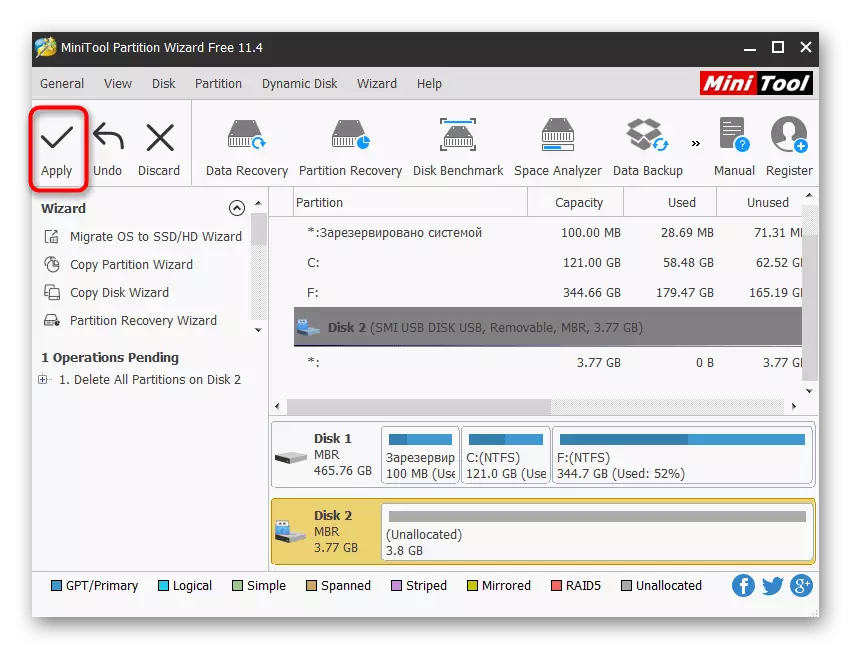
- Then you need to apply this operation by clicking on "Apply".
- Confirm the implementation of the removal procedure for all sections.
- Upon completion, you will be notified of the successful removal of volumes.
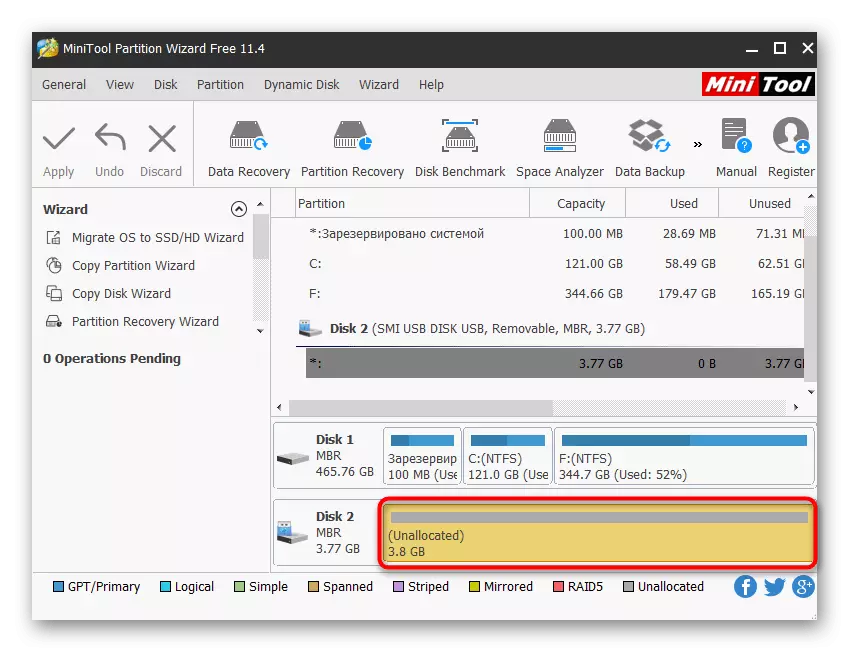
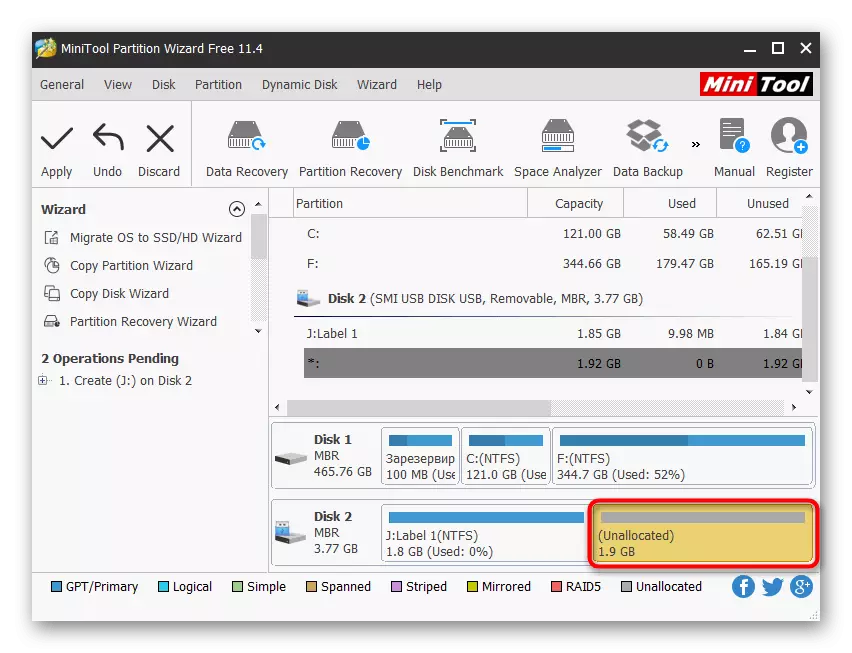
- Now free space on the drive will not be distributed. Click on the PCM.
- Lay in the context menu option "Create".
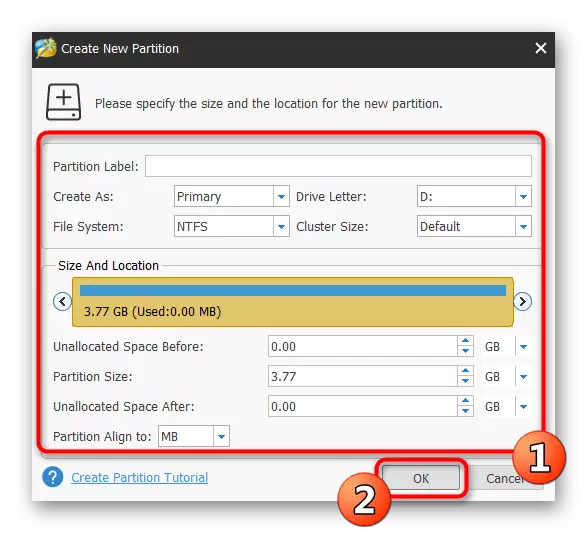
- Set the volume parameters - select its volume, name, set the file system and the disk letter.
- Do the same with the remaining free space.
- When creating a second partition, a notification will appear that it will not be seen in Windows. Continue the creation by clicking on "YES".
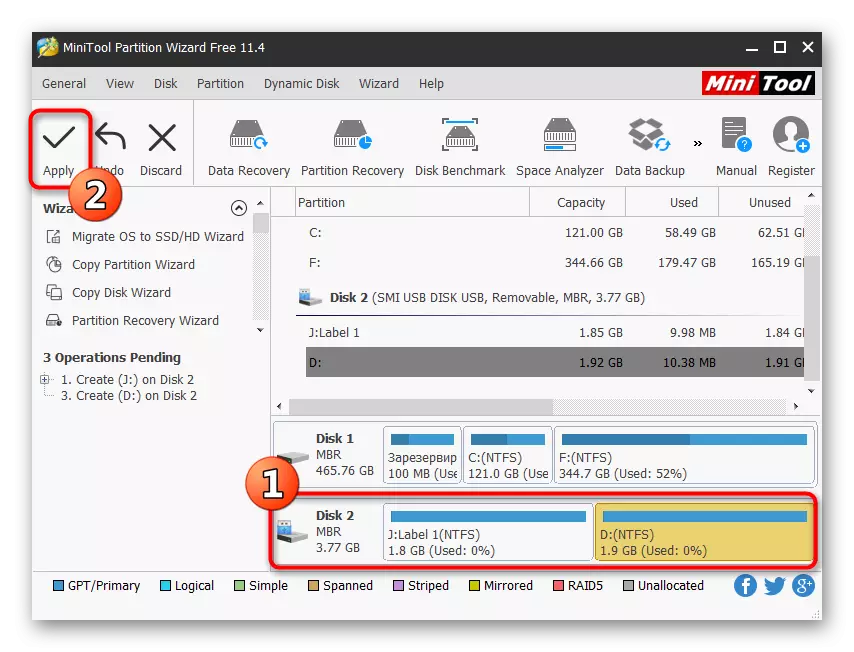
- Make sure that all partitions are ready, and then click on "Apply".
- Wait for the application to apply.


Now you can freely use flash drive sections for your purposes.
Method 3: Easeus Partition Master
Easeus Partition Master practically does not differ from the methods discussed above, however, there are additional tools here, which can be useful to the user during the implementation of other acts with drives. Although the program is also paid (the free version only demonstrates the functioning of functions), we still decided to tell the creation of several sections of the flash drive.
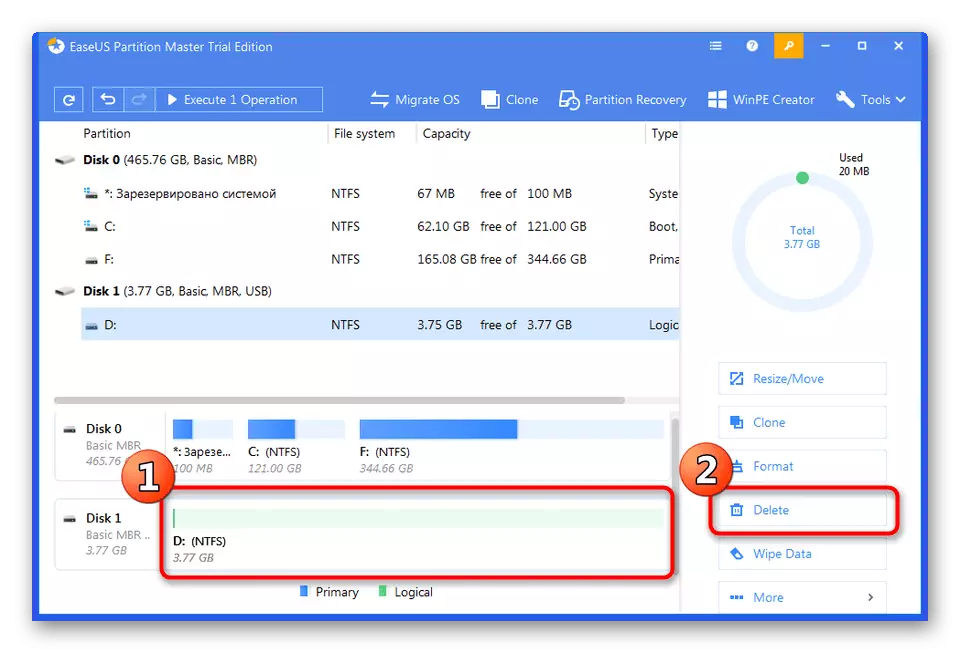
- Select the current main storage section and click on DELETE.
- Confirm your actions.
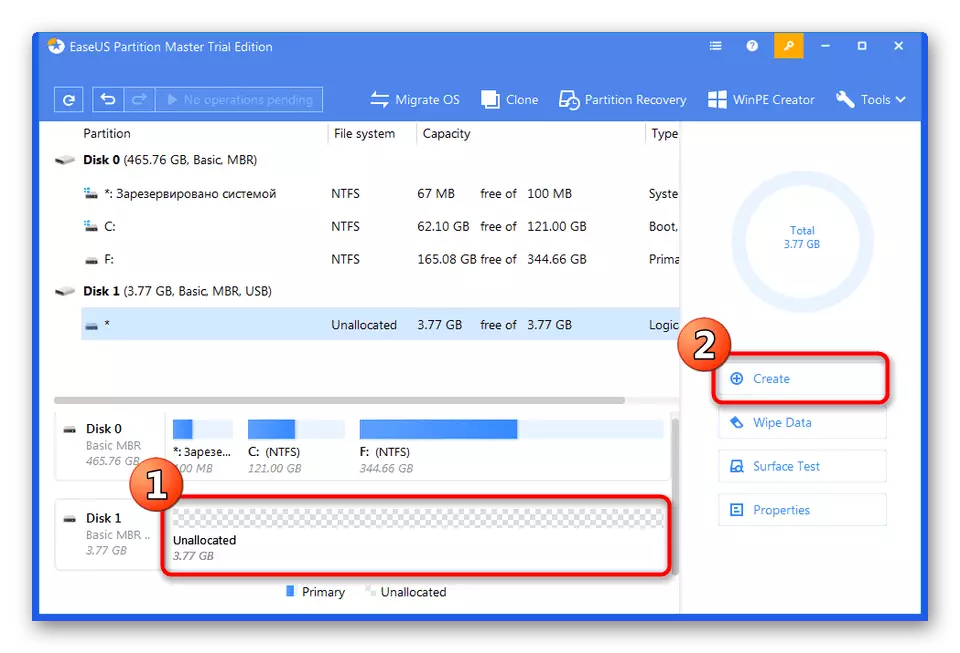
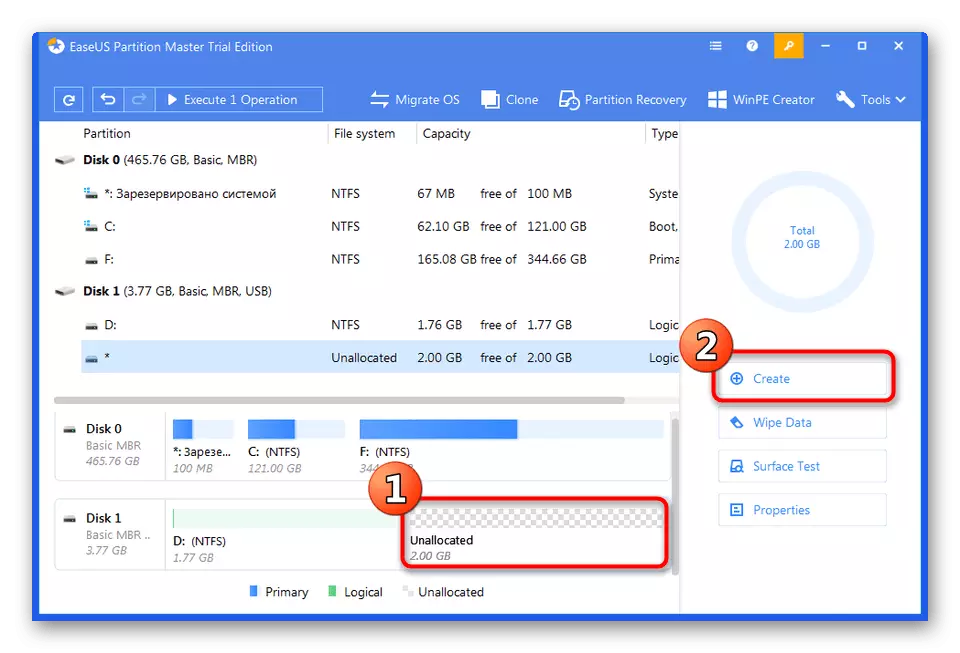
- Specify the free area and select "Create".
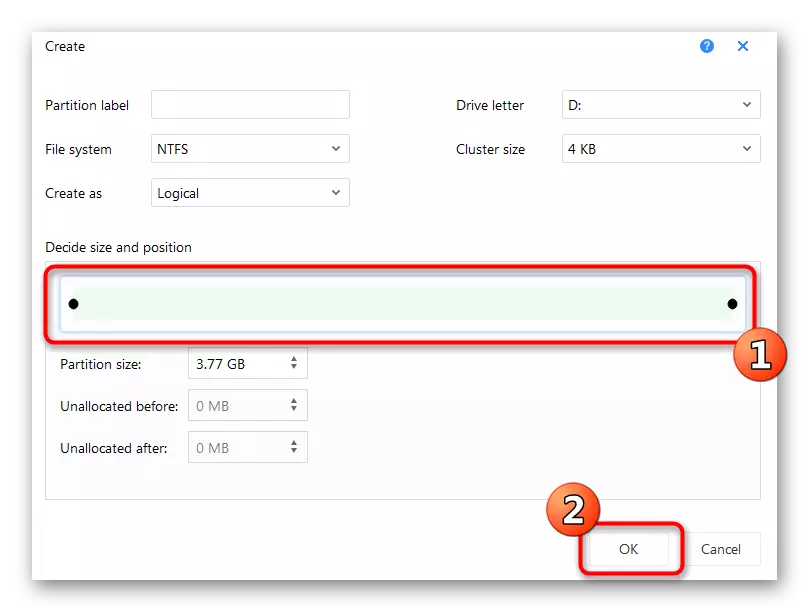
- Set the file system, the name of the section, its letter and size, adjusting the slider. Then click on "OK".
- Do the same with the remaining space.
- Run the application of the changes by clicking on Execute 2 Operations.


On the Internet, there are still many similar programs that allow working with sections of flash drives and hard drives. You can familiarize yourself with the most popular of them by turning to the article on the following link if the options presented above for any reason are not suitable for you.
We have acquainted you with methods for distributing flash drives to sections. As you can see, everything is not so easy with this case, because initially such a drive was not designed for crushing space. However, with due skills and with the help of special means, this task is quite fulfilled.