
Watercolor is a special technique of painting, in which paints (watercolor) are applied on wet paper, which creates the effect of blurring of smears and ease of composition. This effect can be achieved not only with the help of a real letter, but also in our beloved Photoshop. This lesson will be dedicated to how to make a watercolor drawing from the photo. At the same time, nothing will have to draw, only filters and correction layers will be used.
Watercolor effect in Photoshop
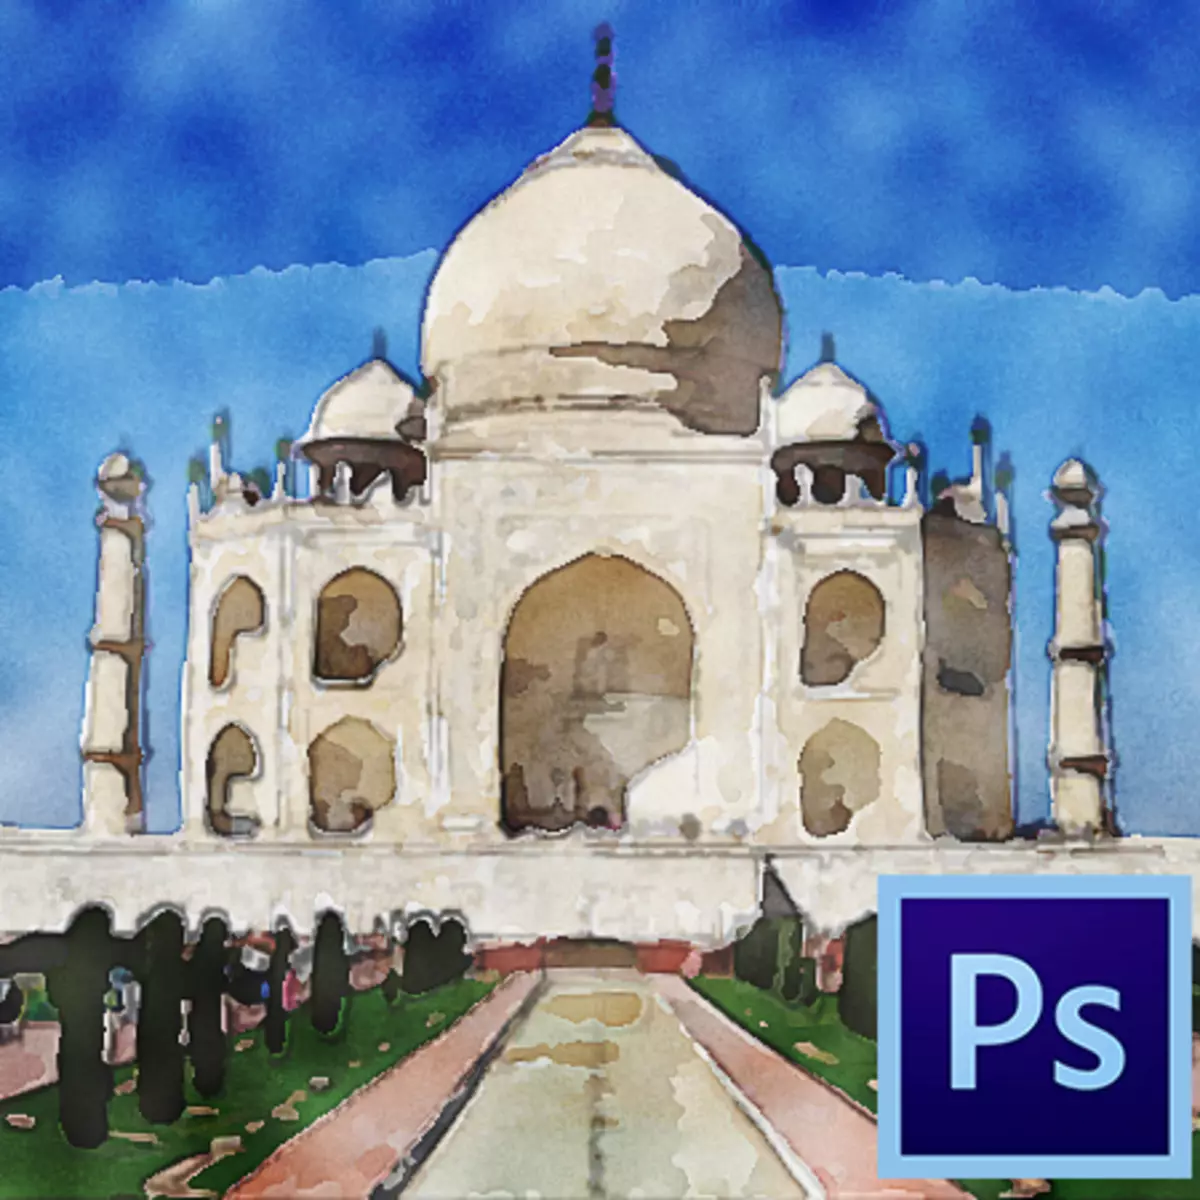
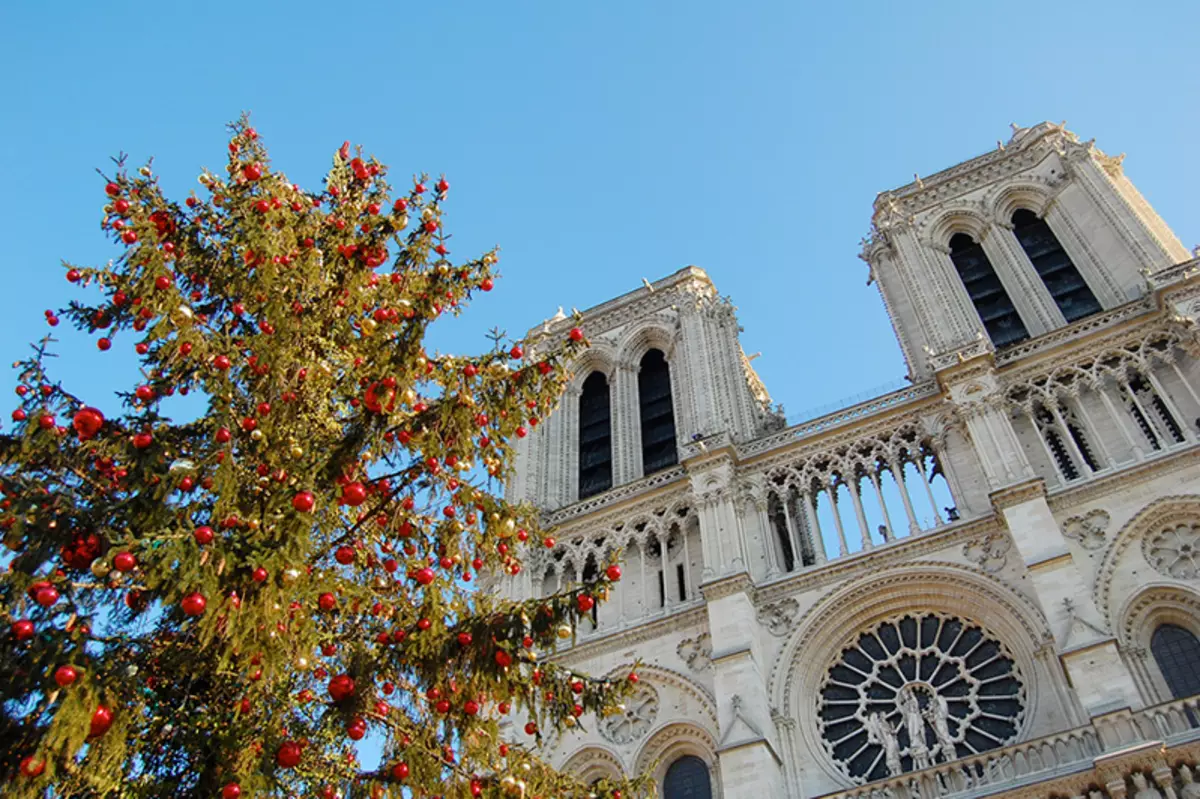
When creating a watercolor drawing, we will use only filters and correction layers, without handmade. Let's start the conversion. For a start, let's see what we want to achieve as a result. Here is the original image:
But what we get at the end of the lesson:

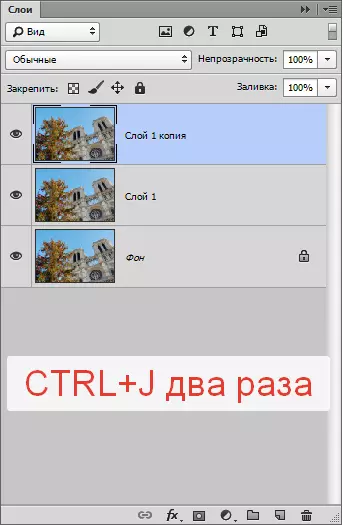
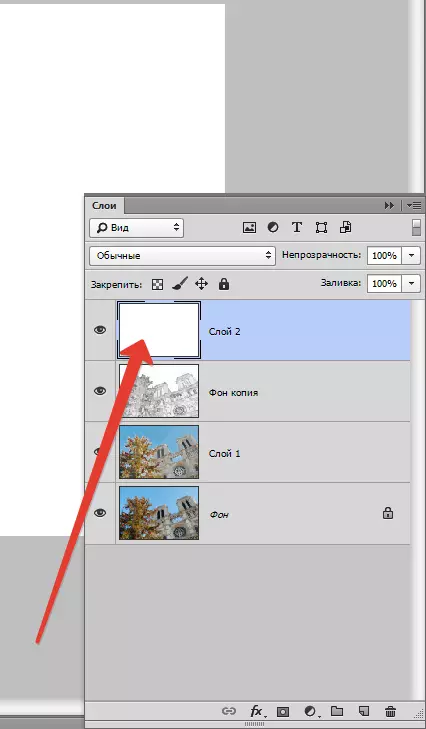
- We open our picture in the editor and create two copies of the source background layer twice by pressing Ctrl + J..
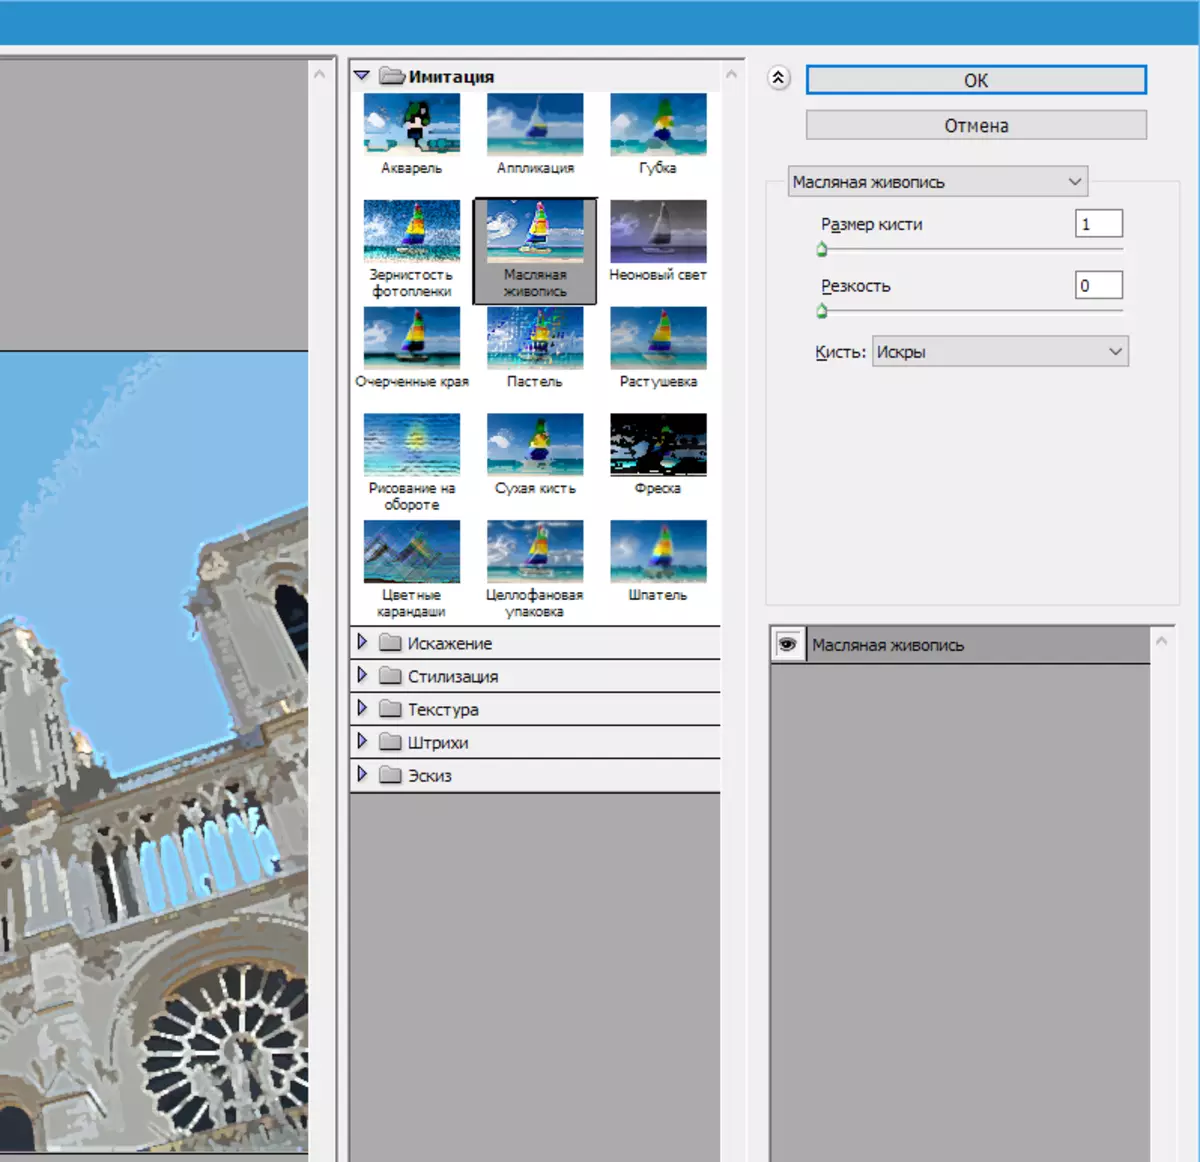
- Now let's create the basis for further work by applying the filter called "Application" . It is in the menu "Filter - imitation".

- Customize the filter, as shown in the screenshot, and click OK.

Please note that some details may be lost, so the value "Number of levels" Pick depending on the size of the image. Preferably maximum, but can be reduced to 6..
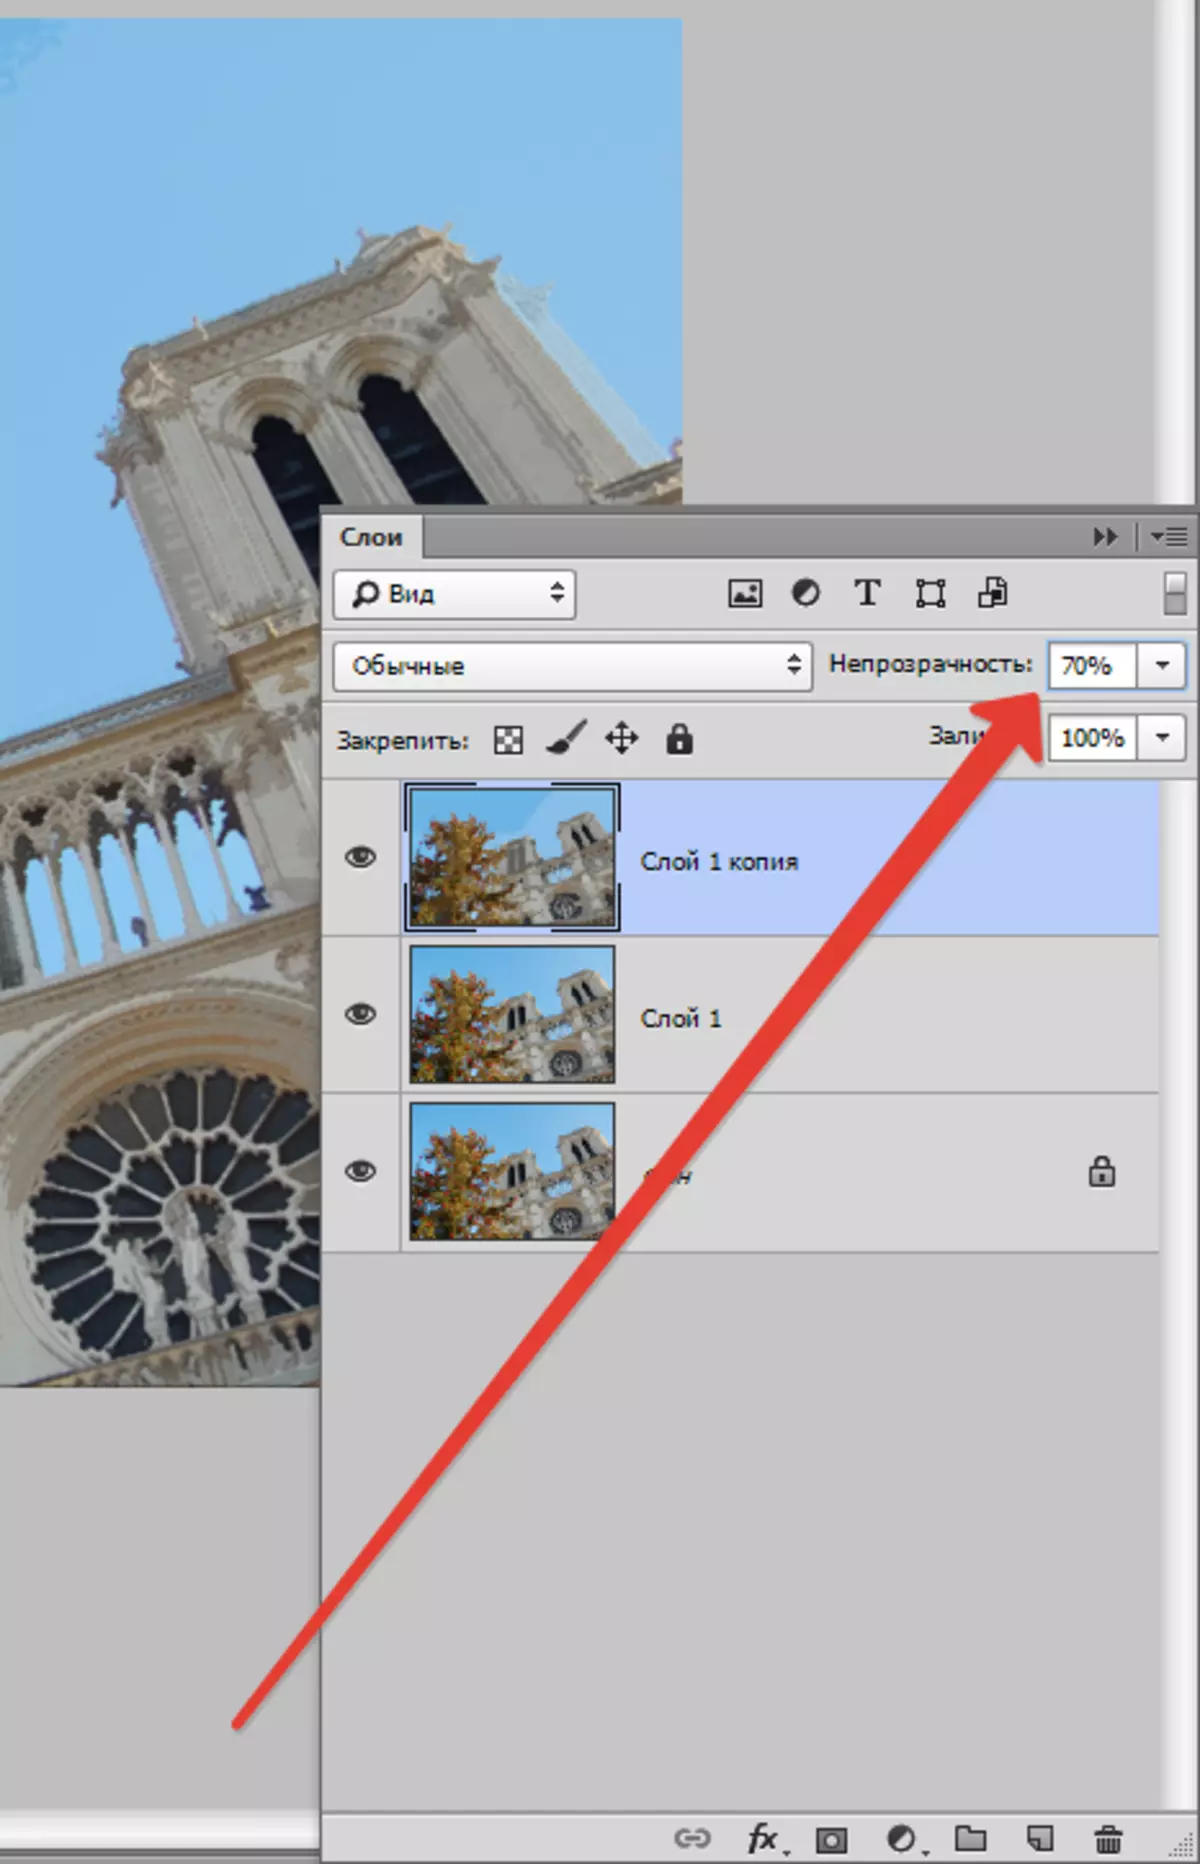
- Next, we reduce the opacity for this layer to 70% . If you work with a portrait, the value may be less. In this case, 70 is suitable.
- Then we perform the combination of this layer with the previous one by pressing the keys Ctrl + E. and apply to the resulting layer filter "Oil painting" . We are looking for there, where and "Applique".

- We look again on the screenshot and configure the filter. Upon completion of Zhmem. OK.
- After previous actions, some colors on the image may be distorted or lost at all. Restore the palette will help us with the following procedure. Go to the background (the lowest, source) layer and create a copy of it ( Ctrl + J. ), and then drag it to the top of the palette of the layers, after which we change the imposition mode on "Color".

- We again perform the fusion of the upper layer with the previous one ( Ctrl + E. ). In the palette of layers, we now have only two layers. Apply to the top filter "Sponge" . It is all in the same menu block "Filter - imitation".

"The size of the brush" and the "contrast" exhibit in 0, and we prescribe "mitigation" 4.

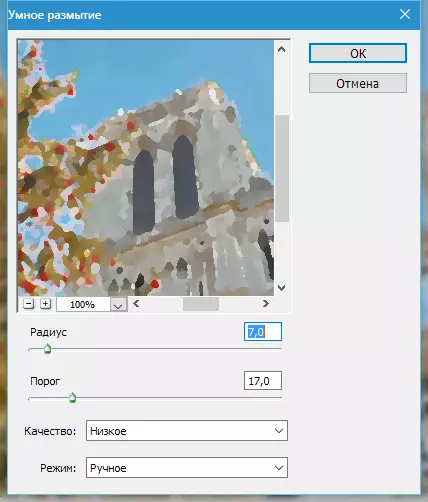
- We'll warm the sharp boundaries, applying the filter "Smart Blur".

Filter settings - in the screenshot.
- Then, oddly enough, it is necessary to add sharpness to our drawing. This is necessary in order to restore parts blurred by the previous filter. Go to the menu "Filter - increasing sharpness - smart sharpness".
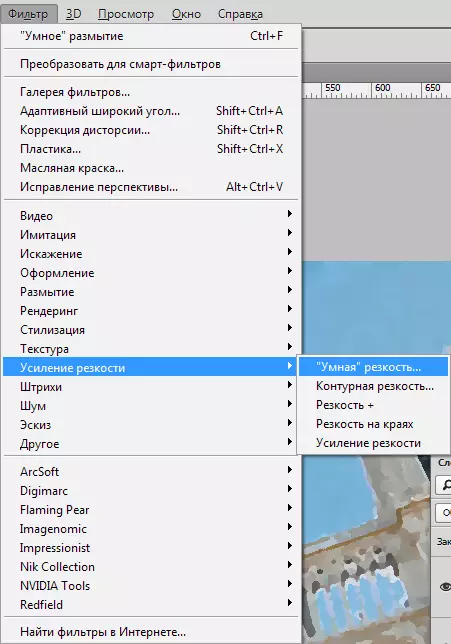
For the settings, we turn to the screenshot again.

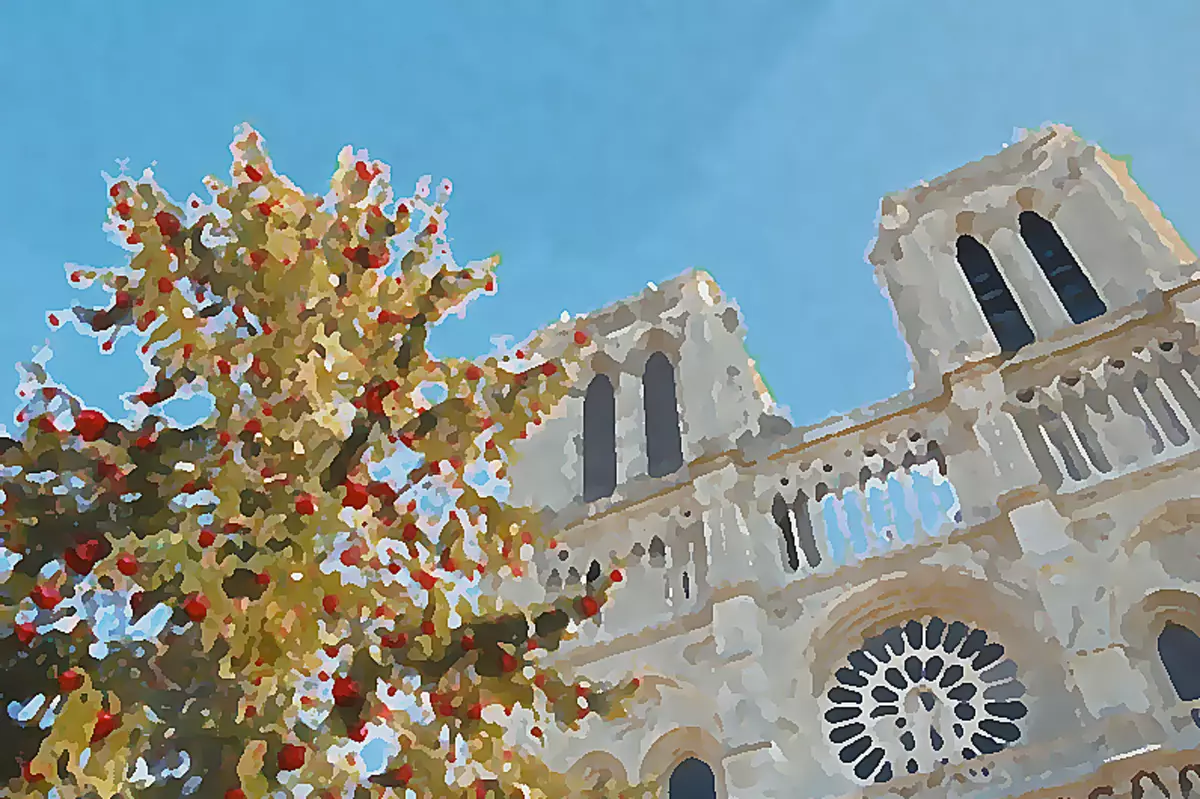
Long time we did not look at the intermediate result.
- We continue to work with this layer (upper). Further actions will be aimed at giving the maximum realism of our watercolor. To begin with, add some noise. We are looking for an appropriate filter.

- Meaning "The effect" I exhibit on 2% and click OK.

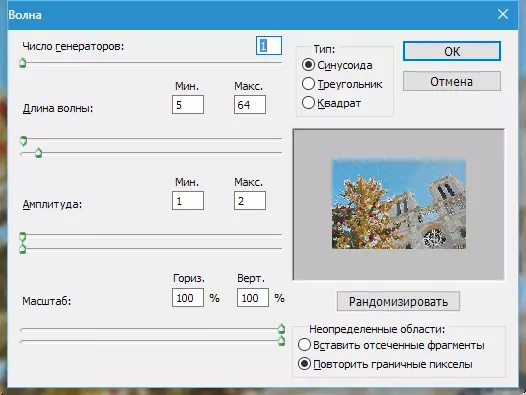
- Since we imitate manual work, add more distortion. The following filter will help to achieve this. "Wave" . You can find it in the menu "Filter" In chapter "Distortion".

Carefully look at the screenshot and configure the filter in accordance with these data.
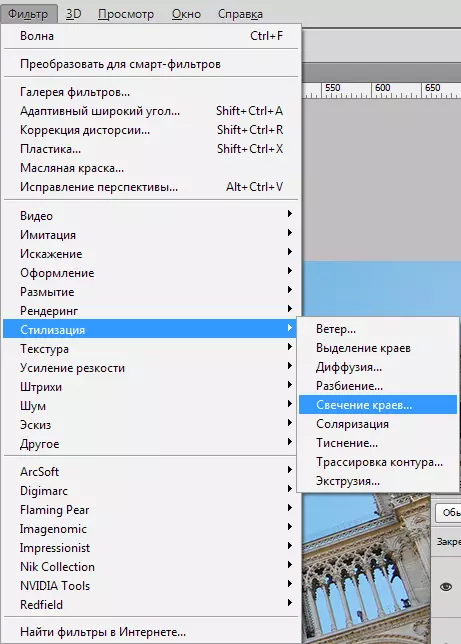
- Go to the next stage. Although watercolor also implies ease and blur, but the main contours of the image should still be present. We need to outline the contours of objects. To do this, create a copy of the background layer again and move it to the very top of the palette.

- Apply to this layer filter "Glow of edges".
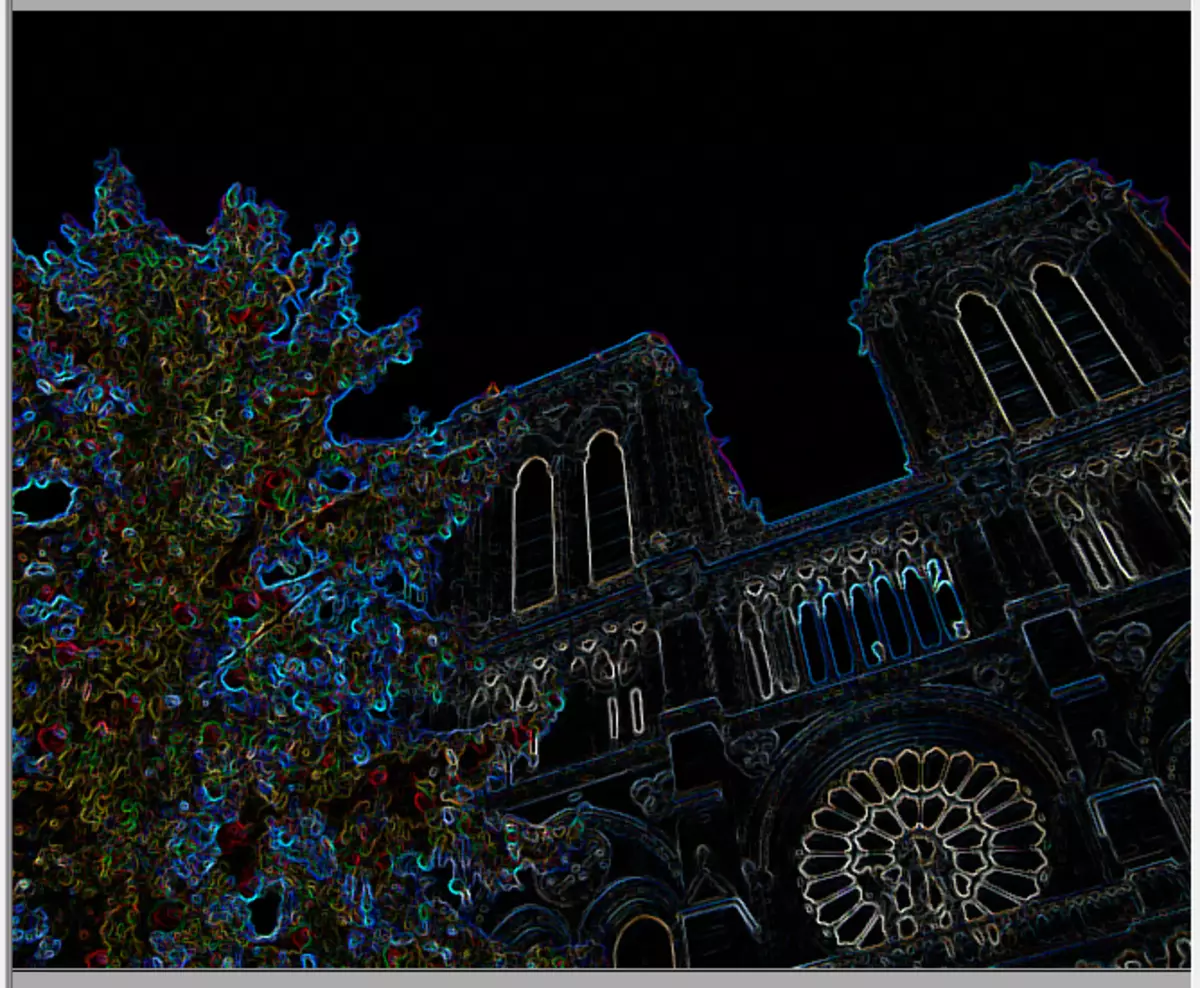
The filter settings can be taken again from the screenshot, but pay attention to the result.

Lines should not be too thick.
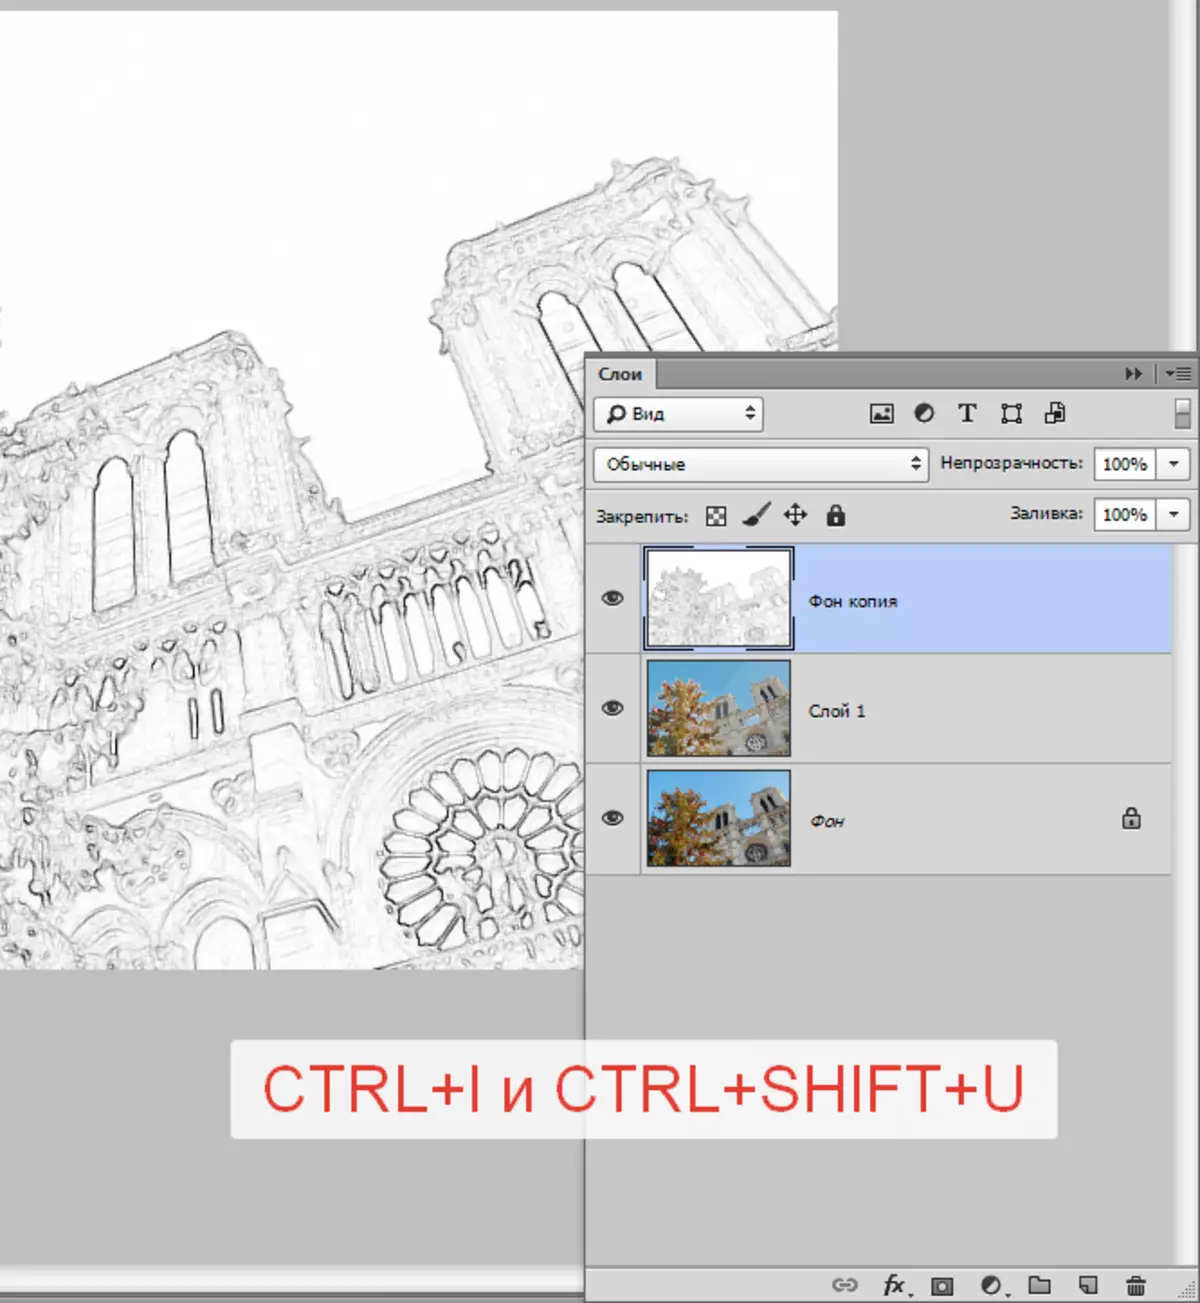
- Next, it is necessary to invert colors on the layer ( Ctrl + I. ) and discolor it ( Ctrl + SHIFT + U).
- Add contrast to this image. Clamp Ctrl + L. And in the window that opens, move the slider, as shown on the screen.

- Then apply the filter again "Application" With the same settings (see above), change the overlay mode for a layer with a circuit on "Multiplication" and reduce opacity to 75%.

Take a look at the intermediate result again:

- The final barcode is the creation of realistic wet spots in the figure. Create a new layer by clicking on a leaf icon with a curved angle.

- This layer must be poured with white. To do this, press the key D. On the keyboard, throwing out colors in the default state (main black, background - white).

- Then press the key combination Ctrl + Del. And get the desired.
- Apply to this layer filter "Noise" But this time the slider moves to the extreme right position. The value of the effect will succeed 400%.

- Then apply "Sponge" . Settings are the same, but the size of the brush is exhibiting on 2..

- Now we will wash the layer. Go to the menu "Filter - Blur - Blur in Gauss".

Blur radius exhibit on nine pixels. In this case, we are also guided by the result. Radius can be different.

- Add contrast. Call levels ( Ctrl + L. ) And we move the slider to the center. Values in the screenshot.

- Next, create a copy of the resulting layer ( Ctrl + J. ) and change the scale with a combination of keys Ctrl + - (minus).

- Apply to the top layer "Free Transformation" Combination of keys Ctrl + T. , clamp Shift. and increase the image in 3-4 times.
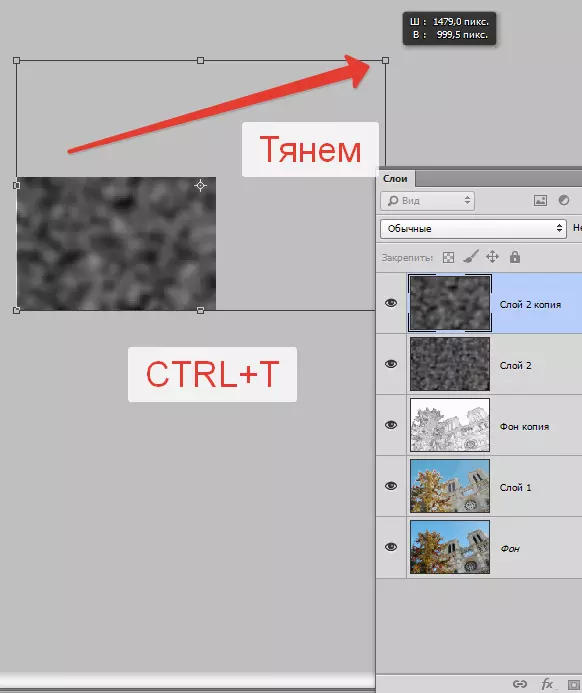
Then move the resulting image to about the center of the canvas and click ENTER . To bring pictures to the original scale, click Ctrl ++. (a plus).
- Now change the overlay mode for each layer with stains on "Overlapping" . Attention: for each layer.

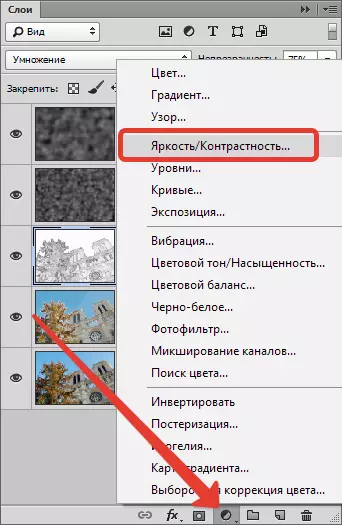
- As you can see, our drawing turned out to be too dark. Now we will fix it. Go on a layer with a circuit.

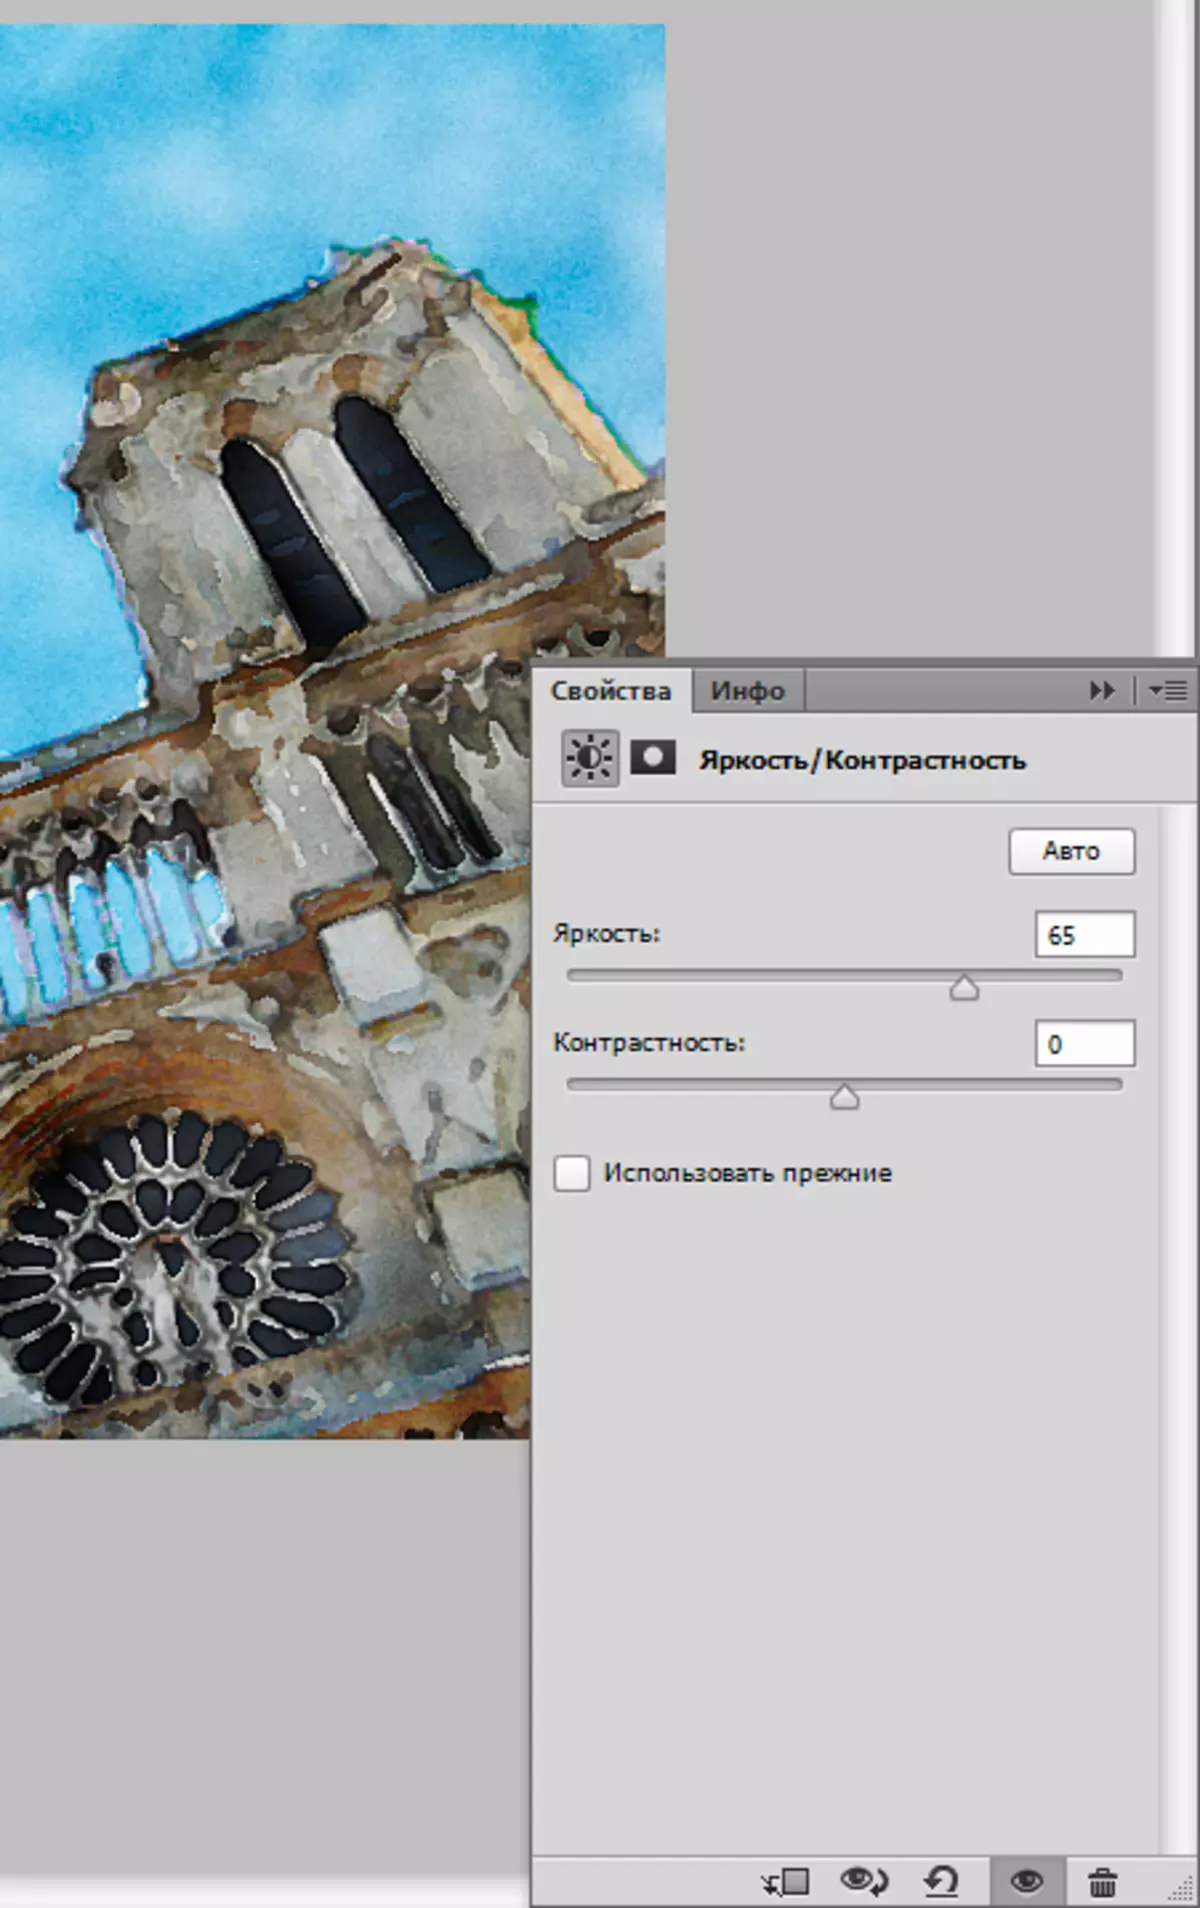
We use a corrective layer "Brightness / Contrast".
Weching the slider Brightness right to date 65..
- Next, apply another corrective layer - "Color tone / saturation".

Reduce Saturation and raise Brightness until the desired result is achieved. Our settings in the screenshot.

Ready!
Let's take once again to our masterpiece.

This lesson for creating a watercolor drawing from the photo is completed.