
Photoshop program presents users three types of "Lasso" for a comfortable image editing process. We will consider one of these tools within our article.
Tool "Lasso" in Photoshop
The LASSO (Lasso) tool will be exposed to our close attention. It can be found by simply clicking on the corresponding part of the panel. He looks like a Lasso Cowboy, hence this name appeared.
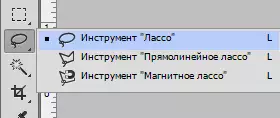
To quickly go to the toolkit LASSO (Lasso) just click on the key L. on keyboard. There are two other types of Lasso. These include Polygonal Lasso (Rectangular Lasso) and Magnetic Lasso (Magnetic Lasso) , both of these types are stubborn inside the usual LASSO (Lasso) On the panel. All these three types are similar. You need to click on the button L. Also these actions are dependent on the settings Preferences , because the user has the opportunity to move between these types of Lasso in two versions: just clicking and holding L. once either using SHIFT + L. . We will talk about these tools in other lessons.
Arbitrary selection
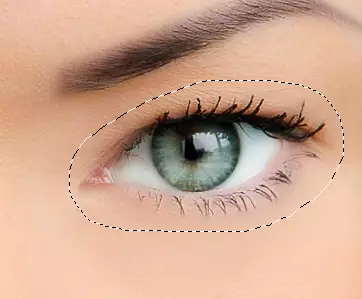
From the whole rich functionality of the Photoshop program "Lasso" refers to the most understandable and easy to use, as the user only falls at the request to select one or another part of the surface (it is very similar to the present drawing and obstruction of the object pencil). When the tool is activated, the arrow on your mouse turns into a cowboy lasso, after which you click on the point on the screen and start the process of the circuit of the pattern or object by easy to hold the mouse button. To complete the process of selection of an object, you need to get back to that part of the screen, where the movement began. If you don't finish this, the program will finish the whole process instead of you, simply by creating a line from the point where the user released the mouse button.
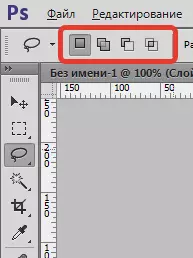
It is necessary to know that the Lasso mode on the functionality of the Photoshop program refers to the most accurate toolor, especially with the development of the software itself. This is explained by the fact that the program "Add to" ("Add") and "SUBTRACT FROM" ("Remove") functions were added, which significantly facilitate the entire work process. We recommend that you work with a tool according to the next simple algorithm: we are allocated near the desired object, which must be allocated, passing by all the inaccuracies of the process, then move to the opposite direction, passing the wrong parts using the Add and delete functions, so we come to the desired result .
- Before us is a picture of a handshake. We start the process of selection of hands.

Click on the top of the hand on the left side to go highlight, although in fact anyway, with which part of the object you will start your work using the Lasso function. After they pressed to the point, not the release of the mouse buttons begin to lead the line around the object that we need. You can see some errors and inaccuracies, but we will not pay their attention to them, just go further.

If you want to scroll photos in the window in the process of creating a selection, hold the space button on your device, which will move you to the "Hand" program toolkit. There you can scroll through the object in the necessary plane, then let go of the space and return to our allocation. If you want to know if all the pixels got into the selection area along the edges of the image, simply hold the button F. On the device - you will replace you with a full screen with a line from the menu. Do not think about the selection of the gray part, since the photoshop program is engaged only by the photo itself, and not this part of gray.
- We continue to circle an object. We do it until you return to the initial item of your route. Now you can release the mouse clamping button. According to the results of work, we observe a line that is animated, it is also called "Running Ants".

Since on the fact of the Lasso tool is the mode of allocation of an object in manual order, the user only counts on its attentiveness and the operation of the mouse, so if you do a little wrong, do not worry ahead of time. You can simply come back and correct all erroneous parts of the selection. We are now going to this process.
Adding areas to source
In order to consider our selection in detail, we increase the scale of the image in the workspace. To make the size more, clamp the buttons on the keyboard Ctrl + gap To go to the ZOOM toolkit ("Lup"), we click on our photo several times to approach the object approaching (in order to turn the size of the picture, you need to hold and not let go Alt + gap ). After an increase in the size of the picture, clamp the spacebar button to go to the Hand toolk (hand). It allows you to move the canvas inside the workspace.
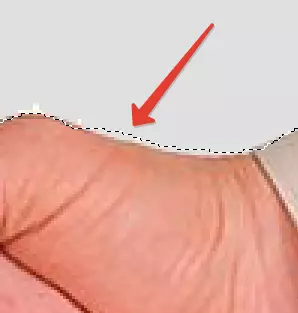
We see a plot where a piece of man's hand disappeared.

Absolutely no need to start all over again. All problems are solved easily, we will simply add this part to the already dedicated object. Please note that the Lasso tool has been turned on. Next, we activate the allocation, pre-holding Shift. , after which we will see a small plus icon, which is on the right side of the arrow of the cursor. Thus, the "Add to Selection" feature is activated.
Clicking first button Shift. I click on a part of the image within the selected area, then go beyond the edge of the selected and pass near the edges that plan to attach. As soon as the process of adding new parts ended, we come back to the initial selection. Finish the release at the point, from where we started at the very beginning, then let go of the mouse button. The missed part of the hand has been successfully added to the selection area.

You do not need to hold the button in constant mode. Shift. In the process of adding new regions in our selection. This is explained by the fact that the "Add to selection" function ("add to highlight") will be turned on until the LKM is clamped. The mode is valid until you stop keeping the mouse button.
Removal of areas from the initial selection
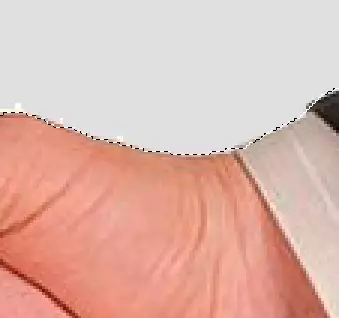
We continue to study our allocation. Now we see that we highlighted the extra parts of the object, namely parts of the picture near the fingers.
To correct errors in the form of unnecessary parts of the selected image, simply clamp the button Alt. on keyboard. Such manipulation will turn on the function SUBTRACT FROM SELECTION (remove from highlight) , After that, the minus icon appears in the bottom of the cursor arrow.
Clamp Alt. , Press the area of the selected object to select the original point, then move inside the selected part, we make a stroke of what it is necessary to get rid of. In our version, we will supply the edges of the fingers. As soon as the process is completed, we return back to the edge of the selected object. Go again at the starting point of the selection process, simply cease to keep the button on the mouse to finish the work. Now we cleaned all our mistakes and flaws.
As in the case of adding plots, there is no need to constantly keep the button Alt. squeezed. We calmly release it immediately after the start of the object isolate. In this case, the "SUBTRACT FROM SELECTION" function ("Delete from the selection") will be enabled, and will turn off only after we release the mouse button.
After the selection lines, remove all inaccuracies and errors by removing or, on the contrary, adding new sections, the entire process of editing using the Lasso tool approached its logical conclusion. Now we have fully formed allocations to the handshake.
Removing the selection
As soon as we finished working with the allocation yourself created when using Lasso, you can safely remove it. We move to the "SELECT" menu and press "Deselect" ("Cancel Selection"). Similarly, you can use Ctrl + D..
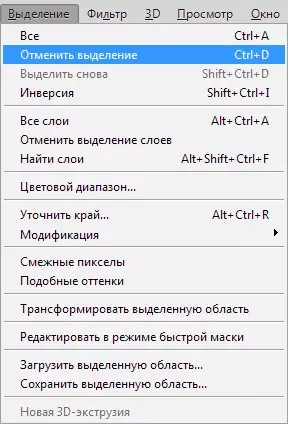
Read more: How to remove the selection in Photoshop
As you probably noticed, the "Lasso" tool is very easy to understand the user. Although it is not yet compared with more advanced modes, it can still be significantly helping in your work!