
Almost every web developer with a Ubuntu distribution system interacts with the PHPMYAdmin tool to implement MySQL servers databases through the web interface. Additionally, this component is part of LAMP, on the installation of which we have already spoken on our website within the framework of another material. Today's article will be aimed at inexperienced users who are just starting their acquaintance with web development and wants to install PHPMYAdmin to their computer. Next, we will present a step-by-step instruction that will make it possible to deal with all aspects of the fulfillment of the task.
Install PHPMYAdmin in Ubuntu
Immediately warn you that all subsequent actions will be performed through the "Terminal", so be prepared for the fact that you will have to enter a lot of a variety of teams. We also show how the PHPMYADMIN primary configuration is performed upon completion of the installation. Take as an example, the most popular APACHE web server and MYSQL DBMS. If you now need each of these components, it is better to use the link below, where the LAMP setting is described, and we go directly to the interaction with the component you need today.Almost always such a simple installation passes without any problems. However, if you have any system problems associated with the package manager, information appears on the screen that the installation failed. This situation should be quickly solved by using the search for corrections of a specific problem through the official documentation of Ubuntu or user forums.
Step 2: Install PHPMYAdmin
This stage is the most basic, since now we will develop the direct installation of the phpMyAdmin component. There are different methods that allow this to do this, and the easiest way will be used by the official repository that we offer to implement in the next instruction.
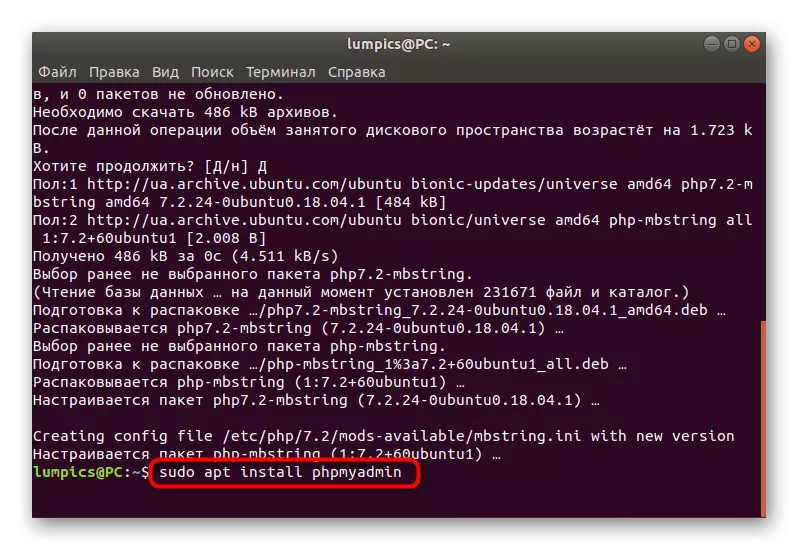
- To install, you will need to enter the Sudo Apt Install PHPMYAdmin command and activate it.
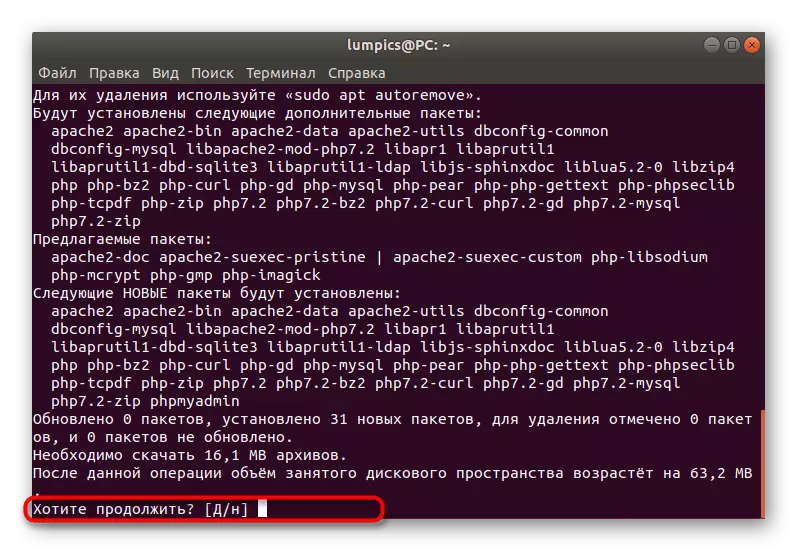
- There will be notified of the need for downloading archives. In the message "Want to continue?" Choose D. option
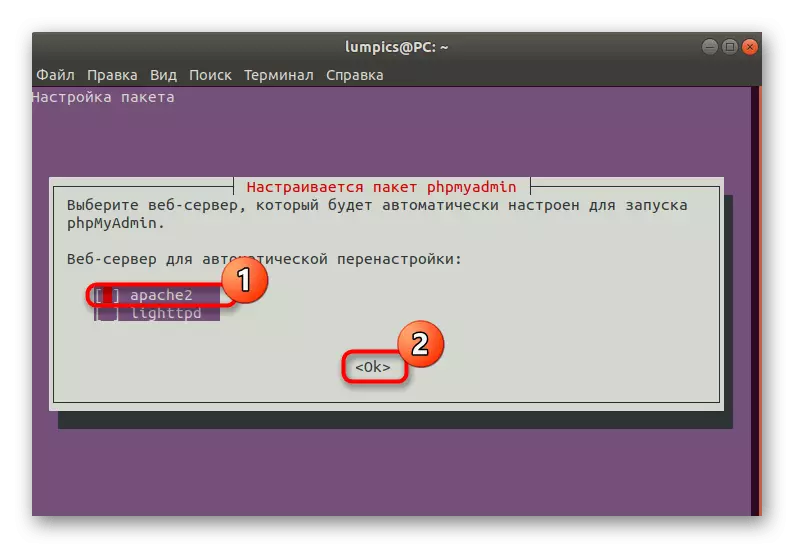
- Wait for the Console window "Setting the Package". Here, first of all, a web server is specified for automatic configuration. Select your own, then click on TAB to move quickly to the "OK" button.
- Wait a few minutes so that the packages are completely unpacked. During this operation, do not close the console and do not follow other actions on the PC.
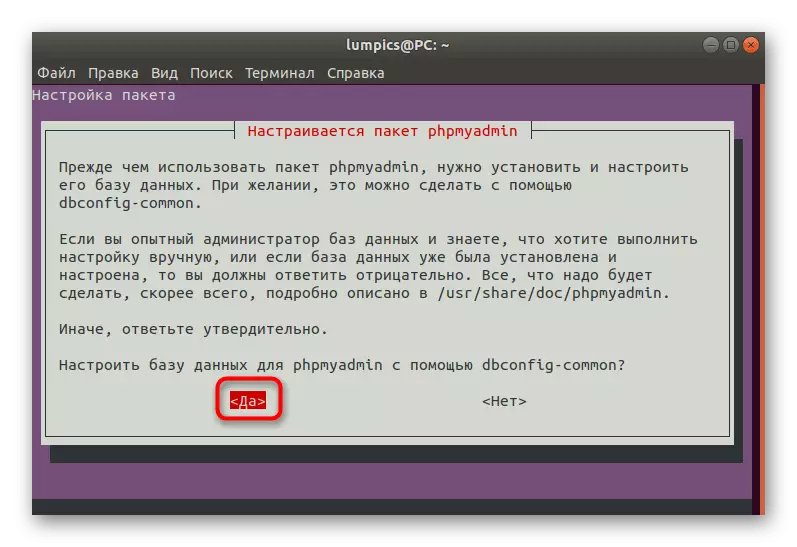
- The "Pack Setup" appears again. Now the database is edited here. Check out the information presented in the window and select the appropriate option.
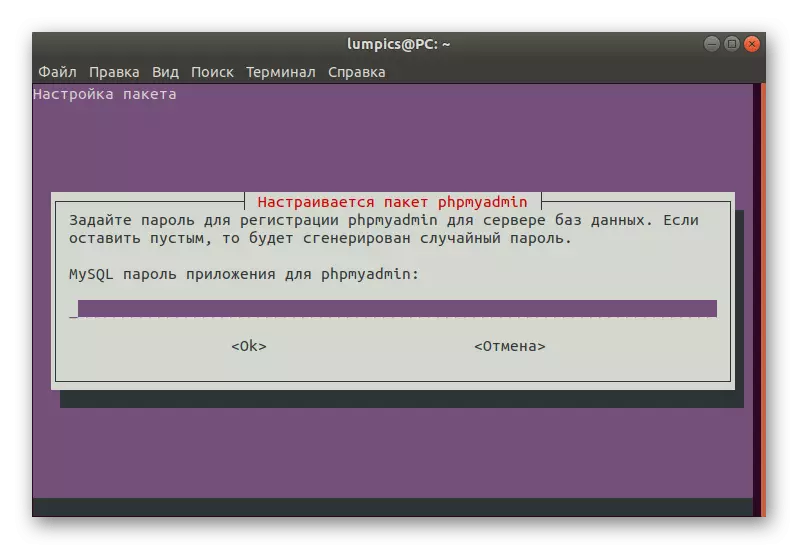
- Create a new password for the database.
- Confirm it, re-entered into the form that appears.
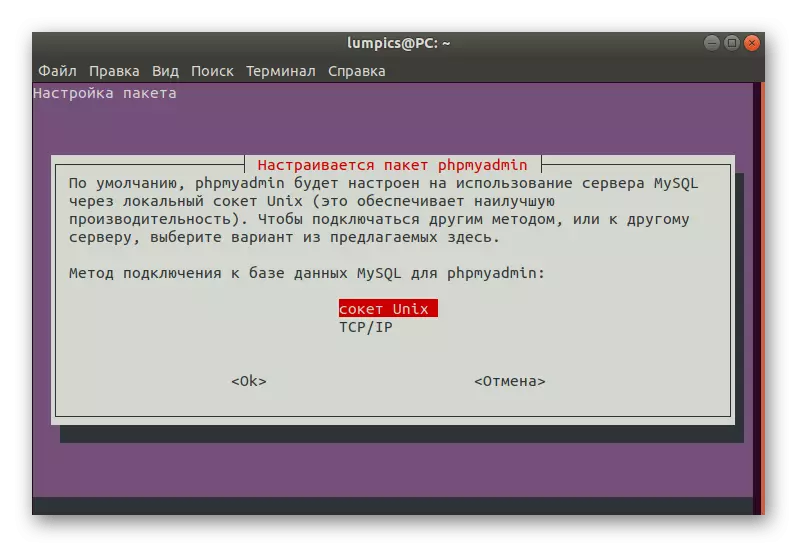
- Specify a convenient method for connecting to the database.
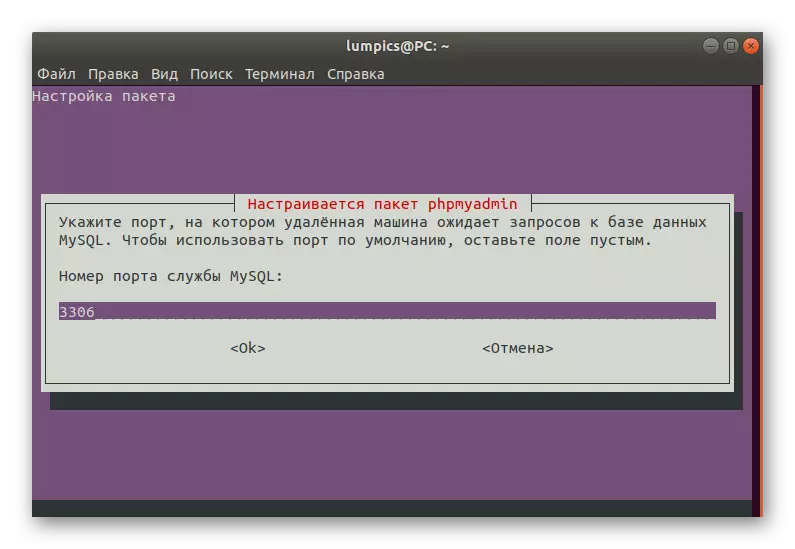
- The service port number will be set automatically. If you have a need to change it, just erase the numbers and specify the required port.
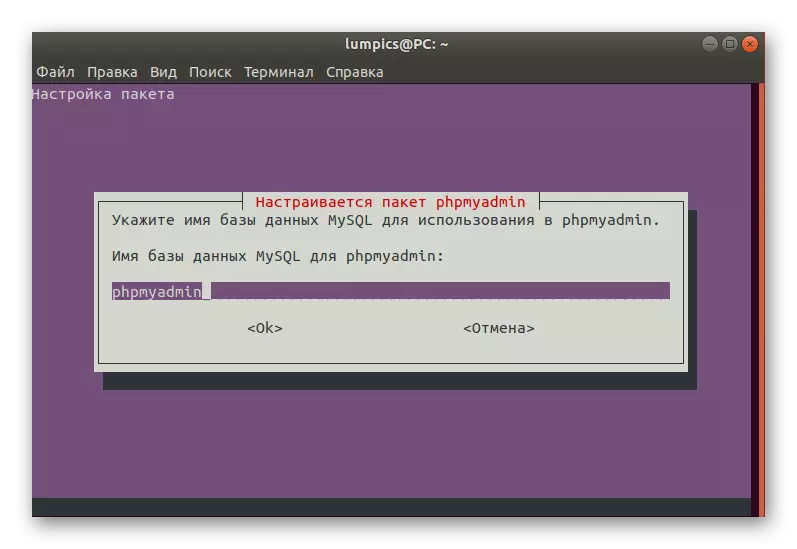
- Set the name of the standard database.
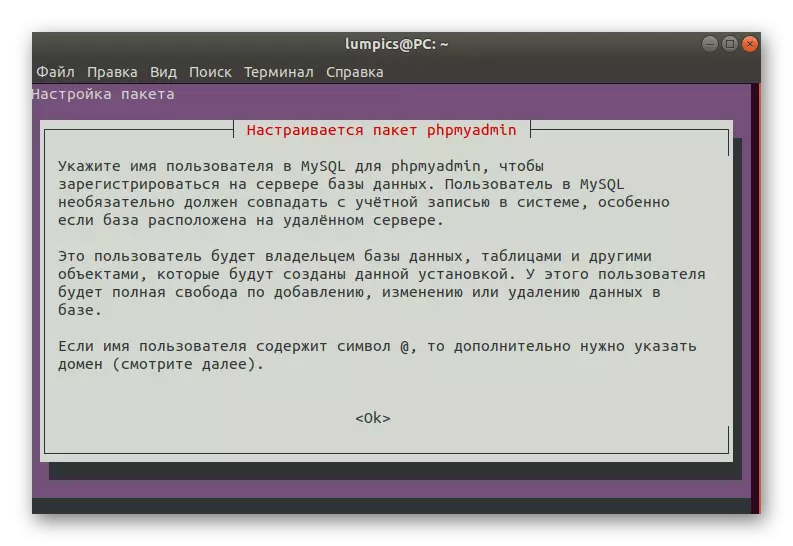
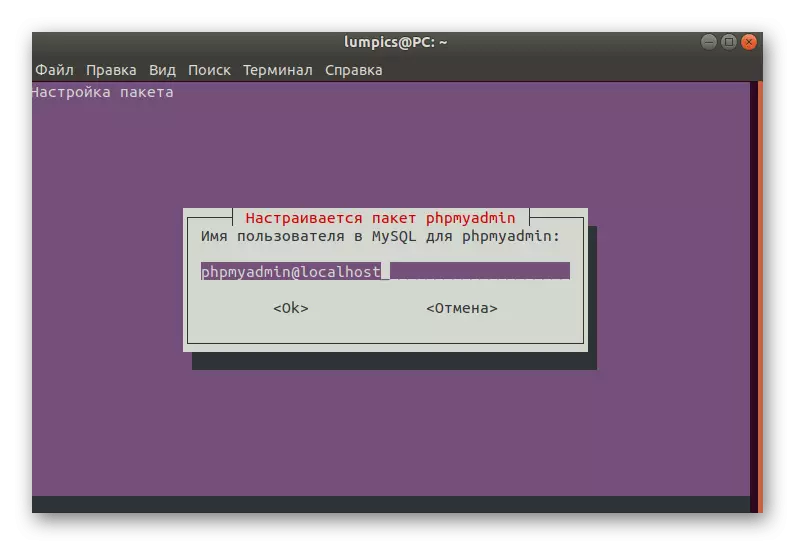
- Check out the information on the creation of the username.
- Now you have to ask him yourself, pushing out from the read instructions and your needs.
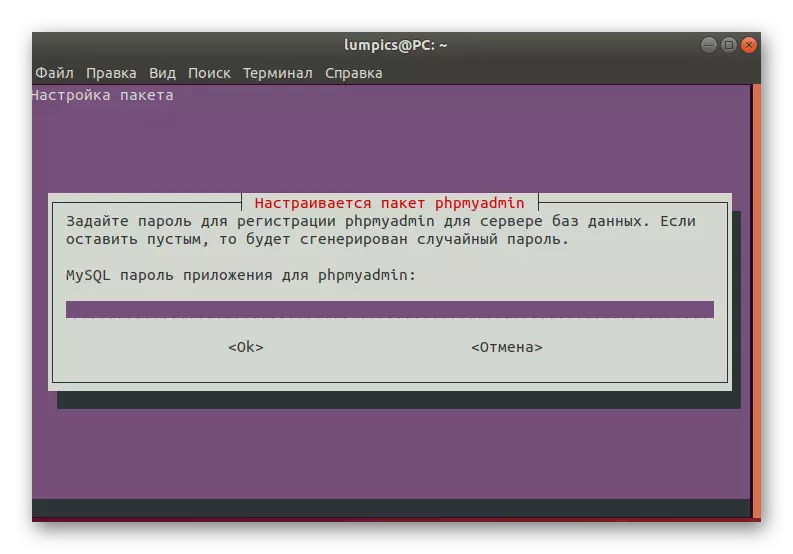
- Enter another password that will serve to access MySQL to phpMyAdmin.


After the screen displays information about the successful installation of phpMyAdmin in the system. If any problems arose during configuration or unpacking, you will also be notified about them. Options will additionally offer both action options, for example, ignoring the problem, re-attempt to solve it or skip.
Step 3: Creating a new user
During the previous stage, the installation tool offered to create a new user for phpmyAdmin, but some users missed this moment or need to add several more accounts. Let's start our section of the main settings with an instructions for creating a profile.
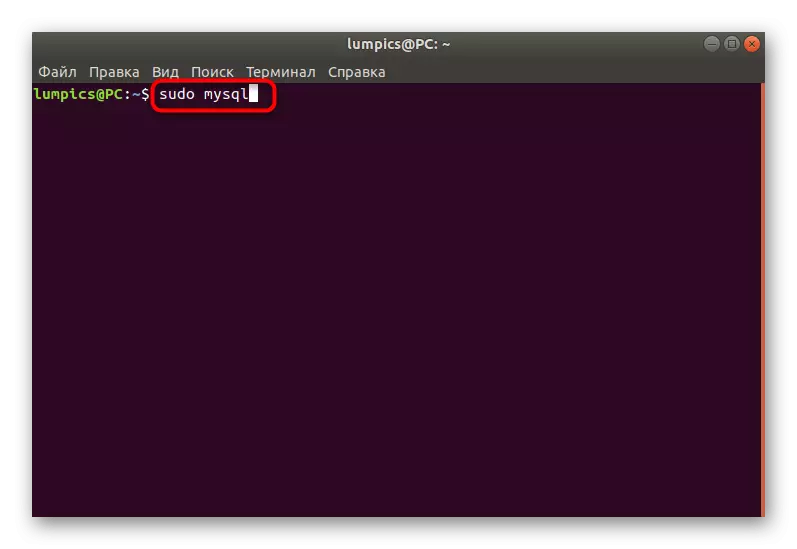
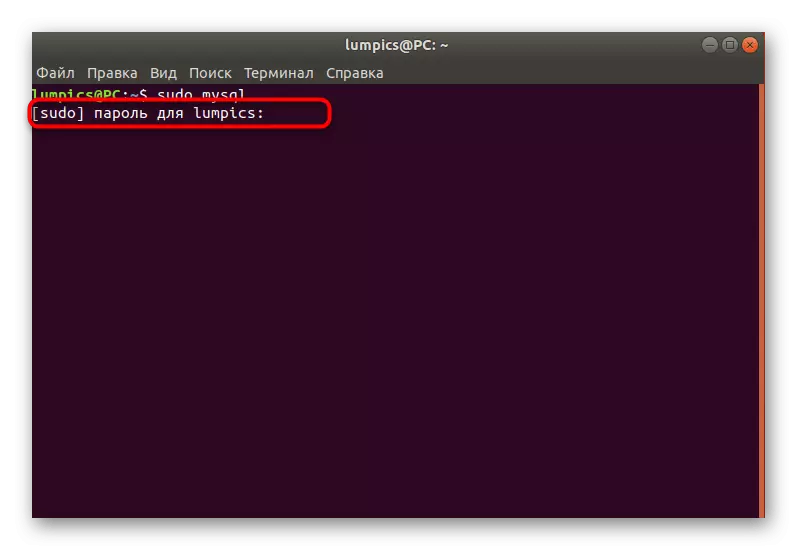
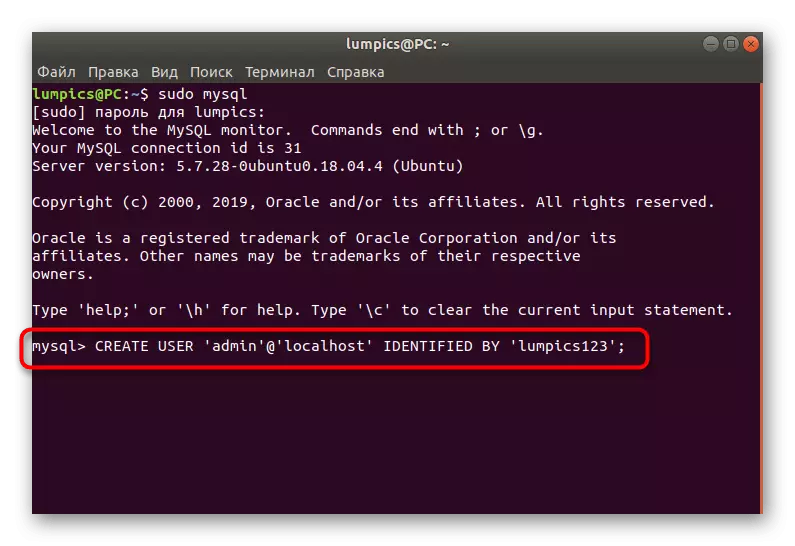
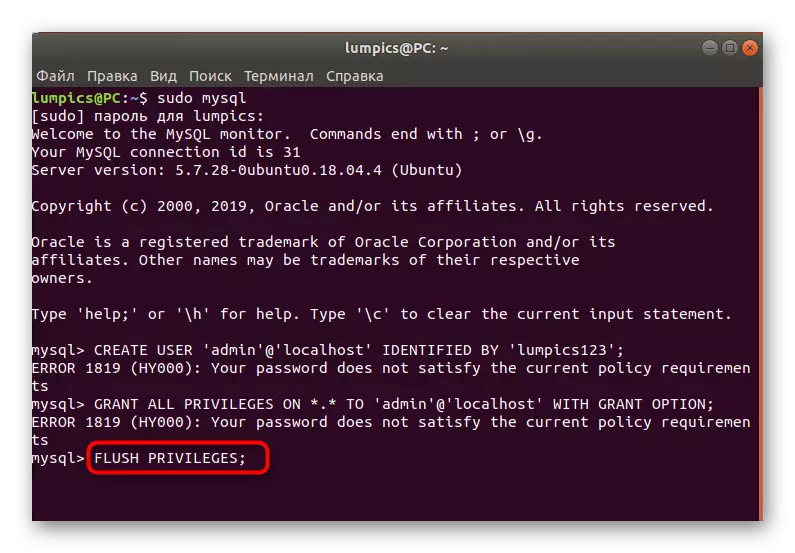
- Open a new session in the Terminal and type Sudo MySQL to start the database.
- Be sure to enter a superuser password.
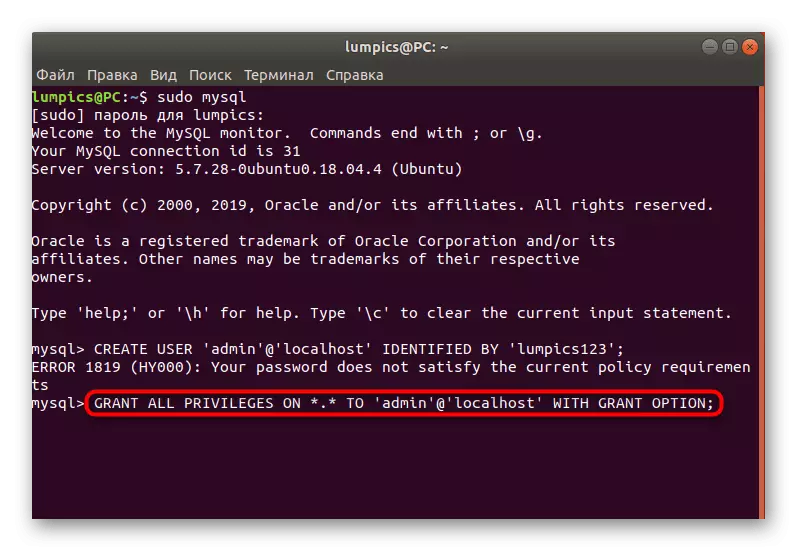
- As the first command, enter the Create User 'Admin' @ 'Localhost' identified by 'password';, where Admin '@' Localhost is the name of the account, and Password is the password installed.
- Set the basic privileges through the Grant All Privileges on *. * To 'admin' @ 'Localhost' with GRANT Option;, be sure to change the name of the user on the previously specified.
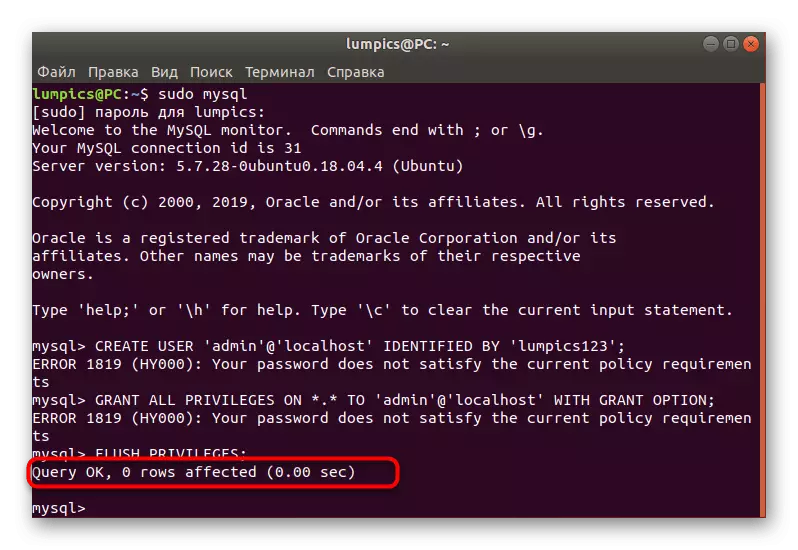
- Last queue, enter and activate Flush Privileges;.
- You will be notified of the successful completion of the operation.
Almost in the same way, you can create an unlimited number of users who will connect to PHPMYAdmin by entering the name of the account and password from it. Take into account only the installation of privileges for each profile. More information is written in the official documentation.
Step 4: Security
Creating basic security rules for phpmyAdmin is not always the necessary action, but if the server is directly related to an open network, then you should ask at least the basic policies that will help with surface attacks. Let's quickly understand exactly how to configure the server protection.
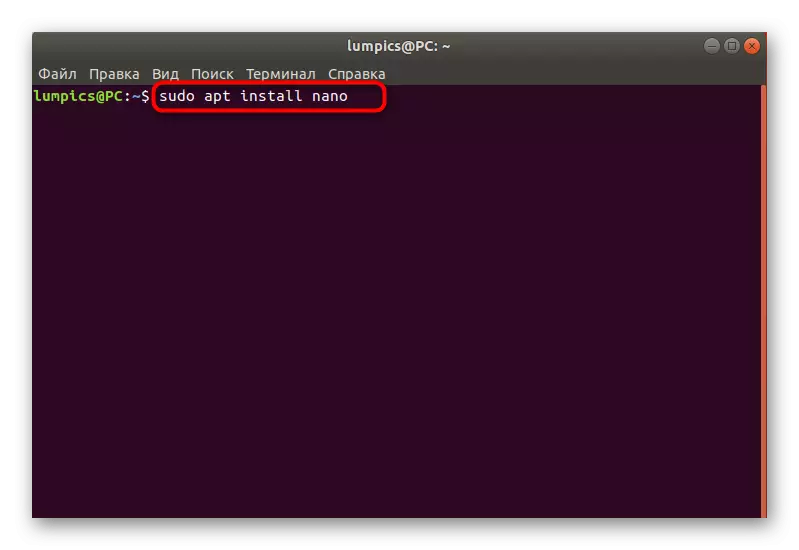
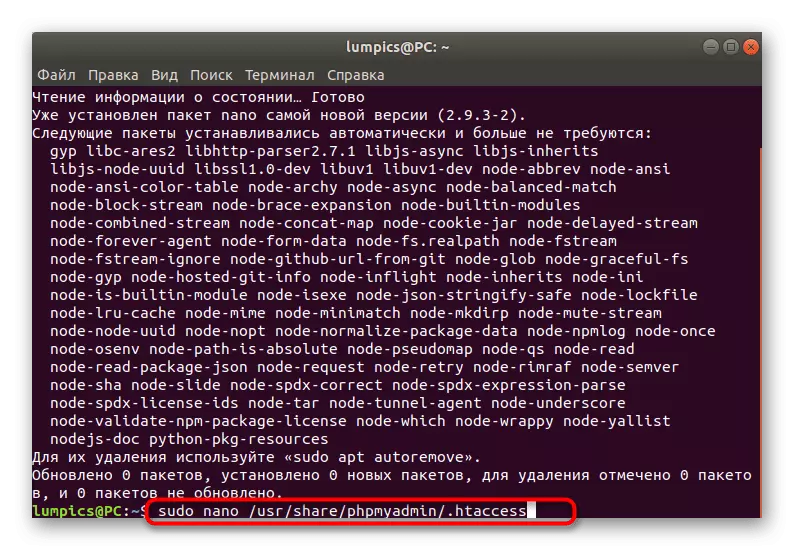
- All further actions will be made by changing configuration files. To do this, you need to use a text editor. Standard solutions can be incomprehensible to novice users, so let's start with the addition of a more convenient solution. Type Sudo Apt Install Nano and click on ENTER.
- After successful installation, start the first configuration file through Sudo Nano /usr/Share/PhpmyAdmin/.htaccess.
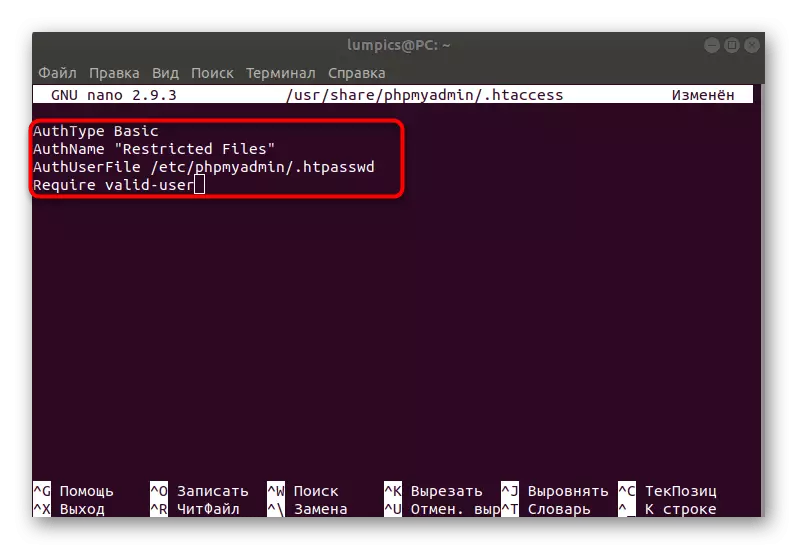
- Here in any empty line insert the following four rules.
AUTHTYPE BASIC.
Authname "Restricted Files"
Authuserfile /etc/phpmyadmin/htpasswd.
Require Valid-User
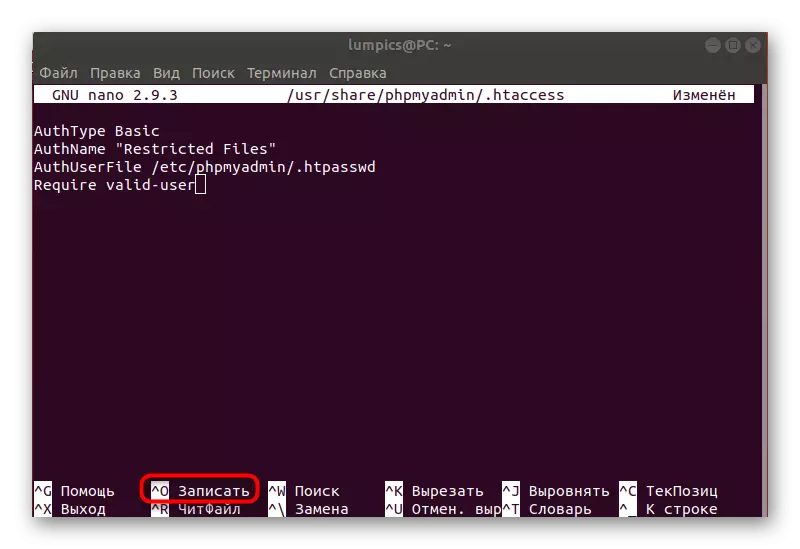
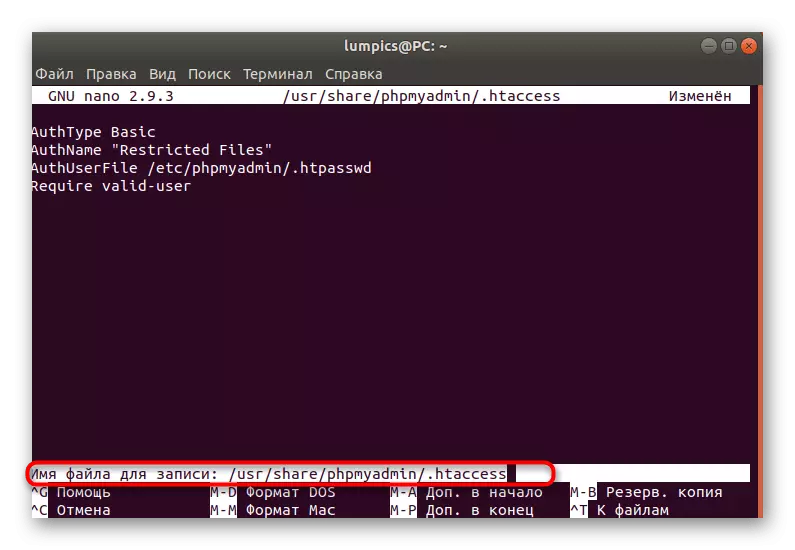
- Use the Ctrl + O combination to save the settings.
- When prompted, do not change the name of the object, but simply click on ENTER.
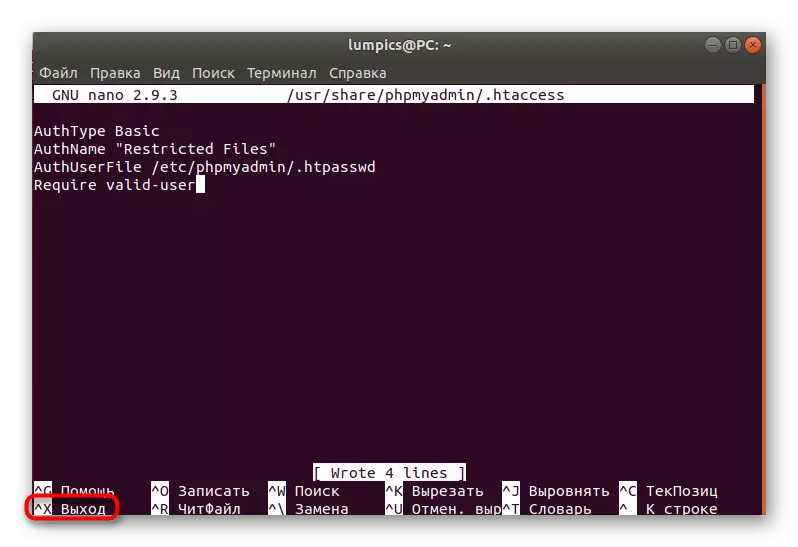
- When all settings are saved, press Ctrl + x to close the current file.
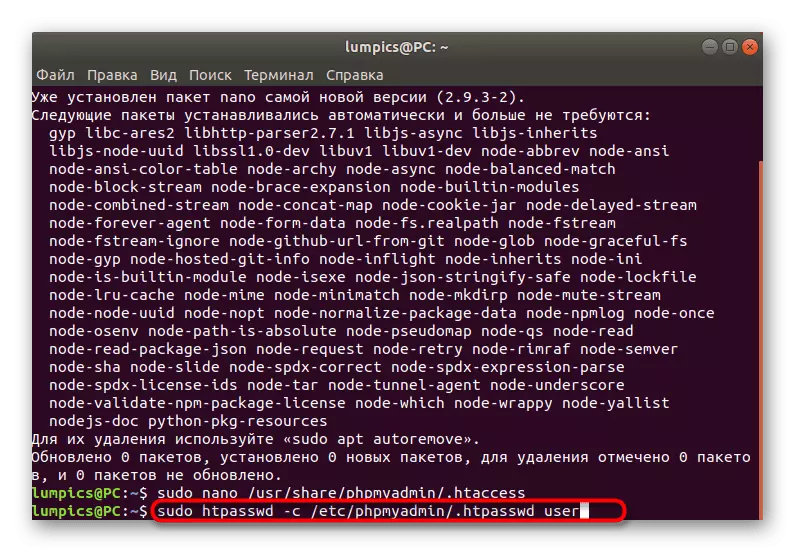
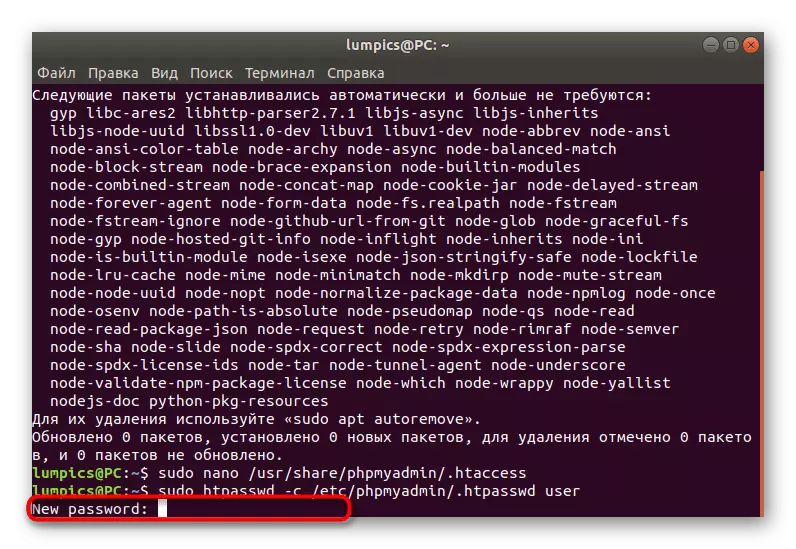
- Next, set the new password for the main account, if this has not been done earlier. Activate the sudo hpasswd -c /etc/phpmyadmin/.htpasswd user command.
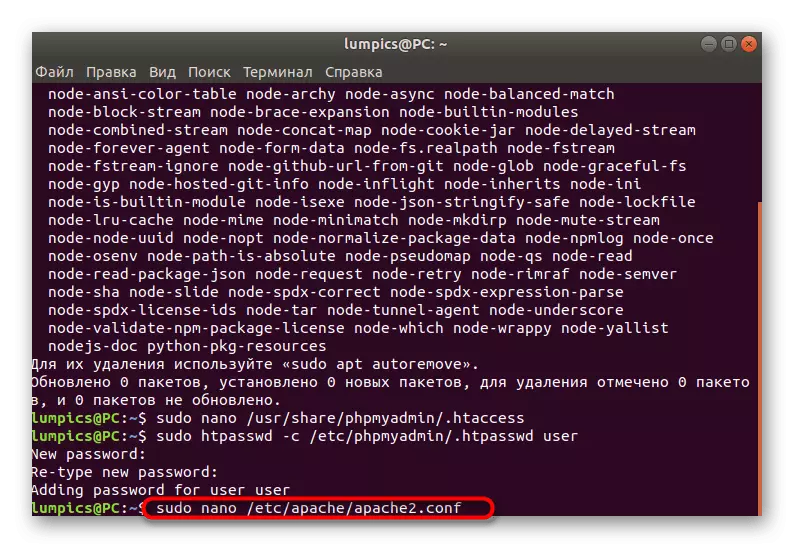
- In the appeared string, enter an access key acceptable for you and after activation, repeat it.
- It remains only to configure the web server under all the changes made earlier. To do this, open the appropriate file through Sudo Nano /etc/apache/apache2.conf.
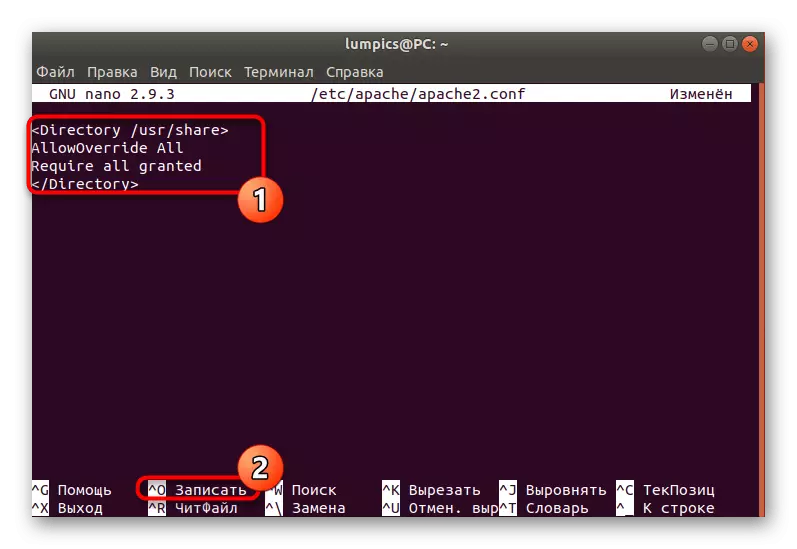
- Insert the lines below and save the changes.
AllowOverride All.
Require All Granted
All other security settings are carried out on the basis of your needs, taking into account the syntax and general rules that are described in the PHPMYAdmin documentation.
As part of today's material, we told not only about the principle of Installation PHPMYAdmin, but about the main configuration points. Now you know what actions should be done to successfully implement the goal.