
Almost all smartphones of one of the most famous manufacturer of Xiaomi instantly gain popularity among users at the expense of their balanced technical characteristics and excellent functions of MIUI. Even the first models released several years ago are still practically ideal for solving the problems of the average difficulty. Let's talk about the program part of the REDMI 2 model from Xiaomi and consider ways to update, reinstall, restore Android OS on these devices, as well as the possibility of replacing the branded software shell on solving third-party developers.
It should be noted that Siaomy Redmi 2 firmware is much simpler than the latest models of the manufacturer due to the absence of an obstacle in the form of a blocked loader. In addition, the methodology for conducting operations is repeatedly worked out in practice. Along with a large variety of ways to install Android applicable to the model, all this expands the range of possibilities and facilitates the process for an unprepared user. And yet, before carrying out interference in the system on the device, it is necessary to take into account:
No one except the user is responsible for the result of the manipulations carried out on the instructions! This material is a recommendatory, but non-acting character!
Preparation
Proper preparation for any work is a deposit of success by 70%. This also applies to interaction with android-devices software, and model Xiaomy Redmi 2 here is no exception. After performing some simple steps before reinstalling the OS on the device, you can find almost complete confidence in the positive result of manipulation and the absence of errors in the process.

Drivers and operating modes
For serious operations with Redmi 2, you will need a personal computer running Windows to which the smartphone is connected via a USB cable. Of course, the interface of two devices interacting with each other must be ensured, which is implemented after installing the drivers.
If there is no desire or the ability to install mythlash, you can install the REDMI 2 manually drivers. The archive with the necessary files is always available for download by reference:
Download drivers for firmware Xiaomi Redmi 2
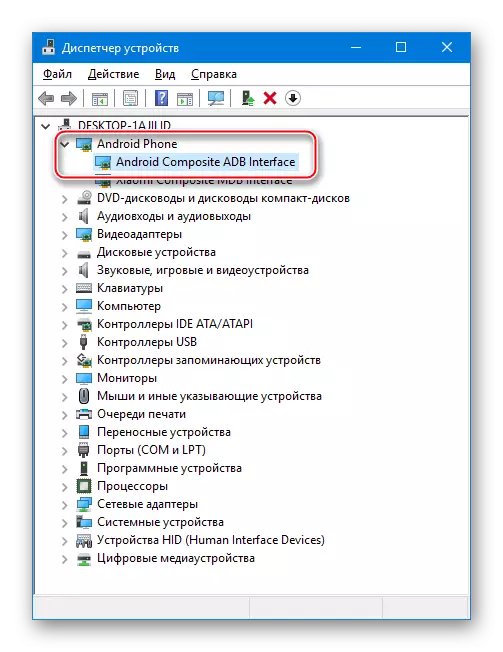
After installing the drivers, it is extremely desirable to check the correctness of their work, connecting the smartphone in various states to the computer. At the same time we'll figure it out how to switch the device into specialized modes. Open the "Device Manager", run the device one of the methods and observe the defined devices:
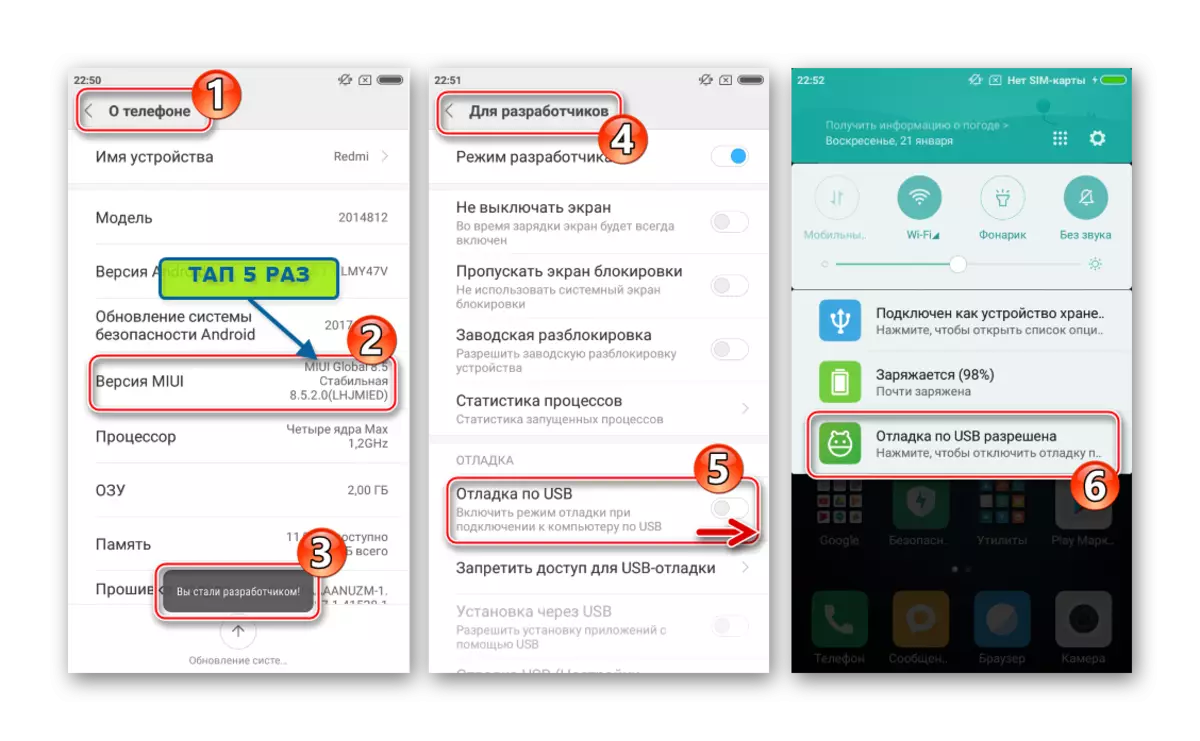
- USB Debugging. - Famous most users who had to intervene in the program part of Android-devices, the debugging mode on YUSB is used for many purposes. The activation of the option is described in the article below.
Read more: How to enable USB debugging mode on android
When Redmed 2 is connected with the "Device Manager" tab, the following is displayed:
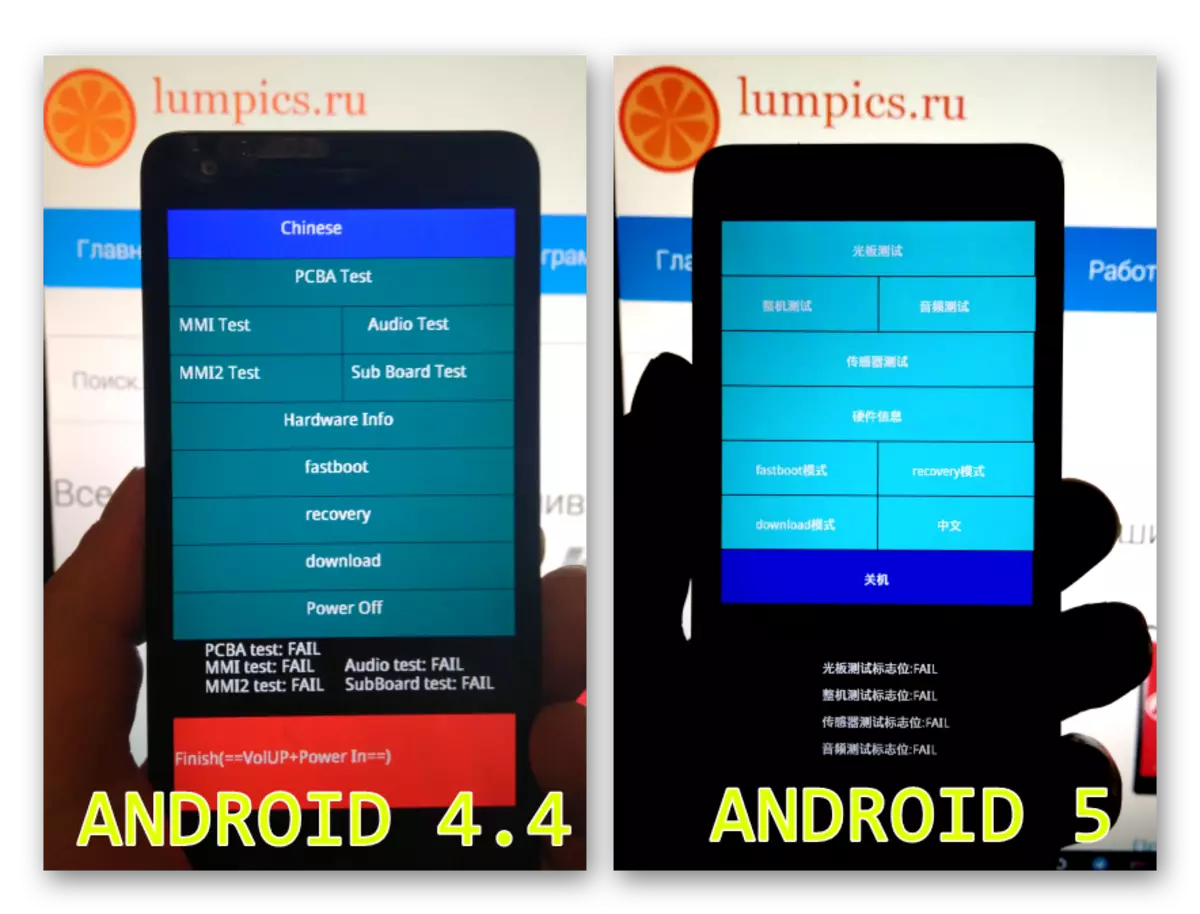
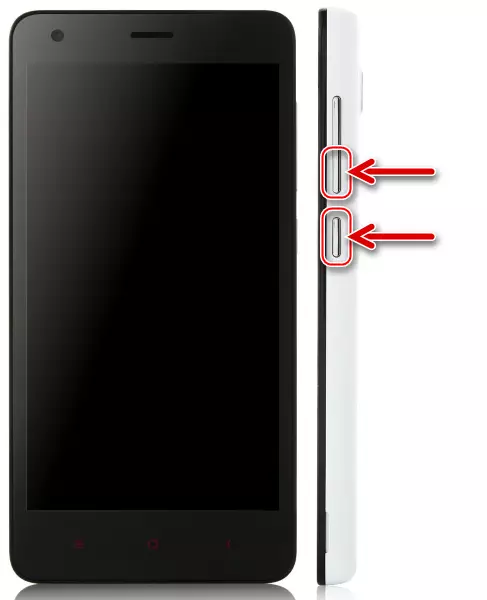
- Preloader. - The service mode of the phone startup, which allows you to check the operation of hardware components, as well as switch Redmi 2 to other specials. To call "Preloader" on the disabled device, press "Volume +" and then "Power".
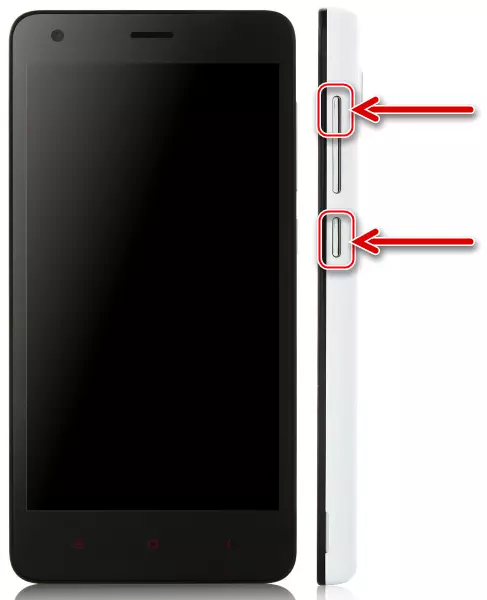
Hold both buttons until the screen appears, the view of which is different depending on the version of Android installed in the smartphone. The functionality of the medium is always the same:
- Recovery. - Recovery environment that all android devices are supplied. Used for a variety of actions, including to update / reinstall the operating system.
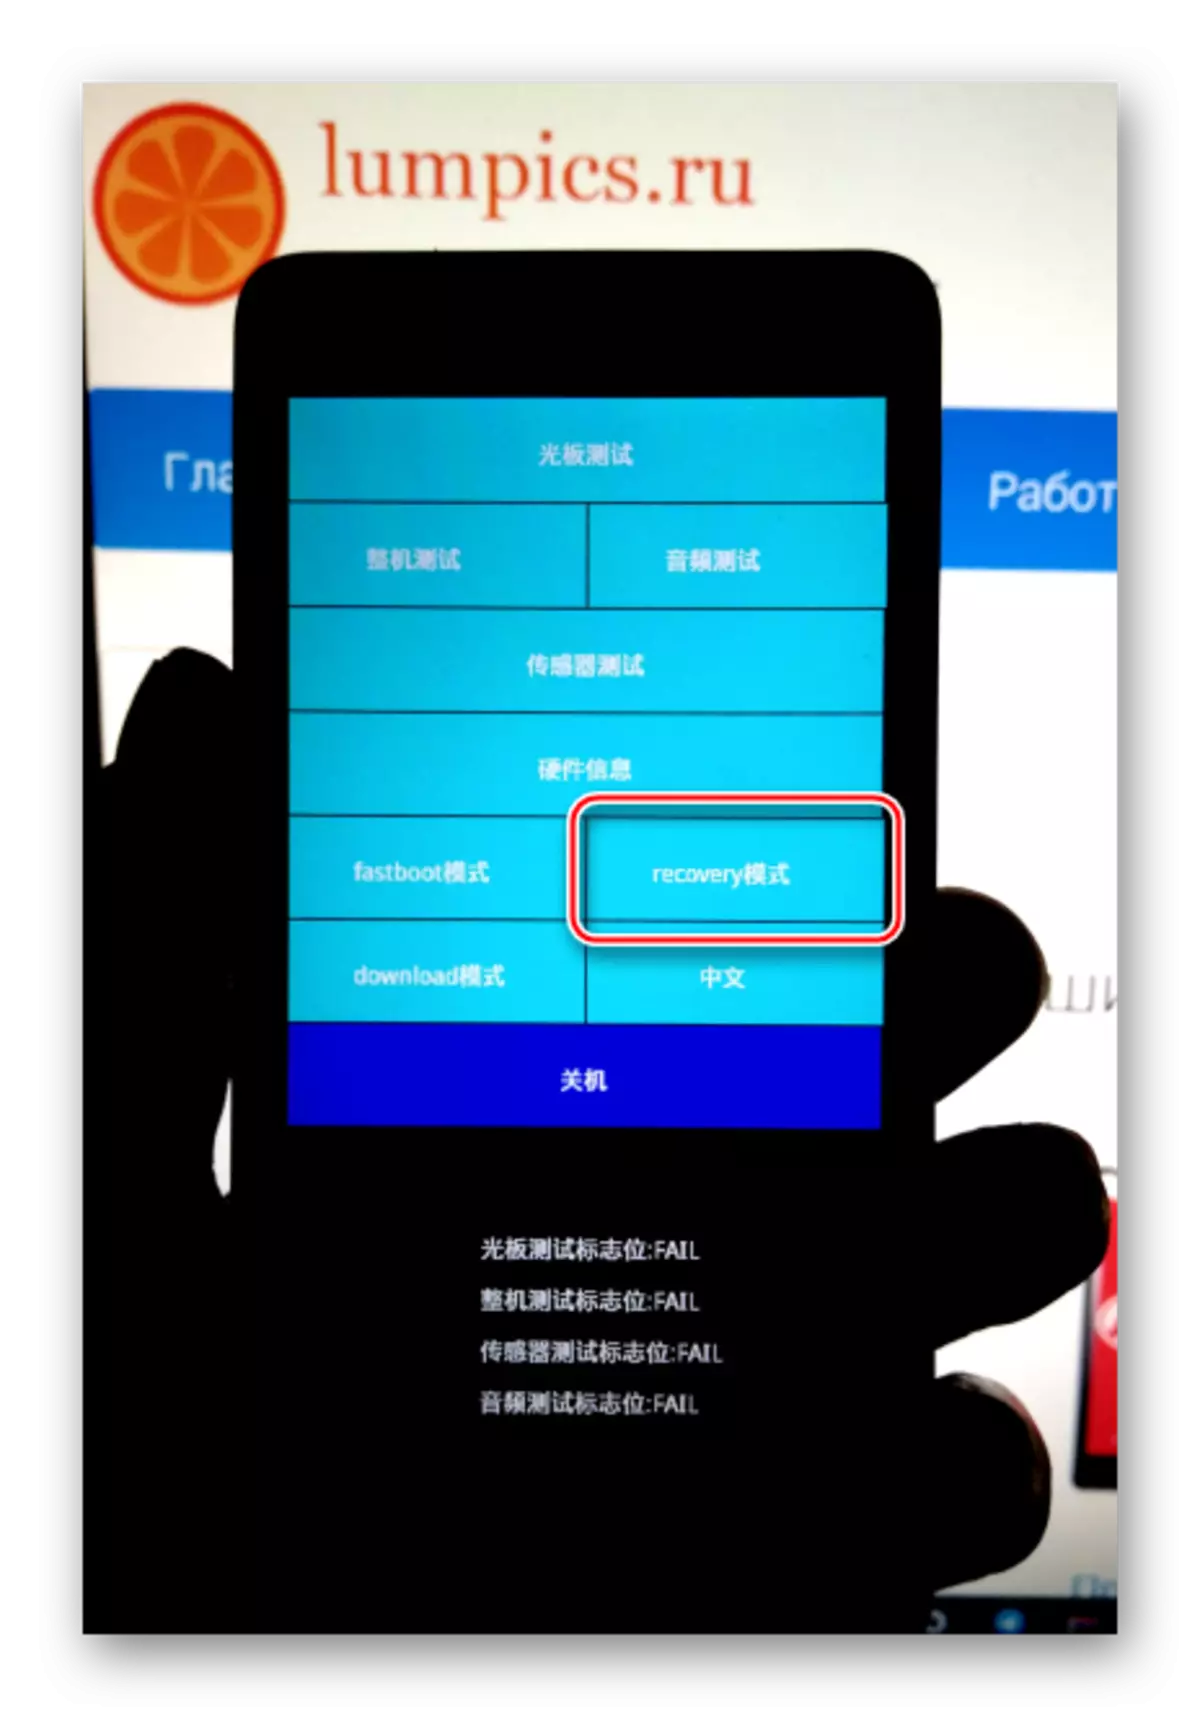
You can get into any recovery (and the factory and modified) from the above-described "Preloader" mode by selecting the appropriate item on the screen, or by pressing all three hardware keys on the phone off.

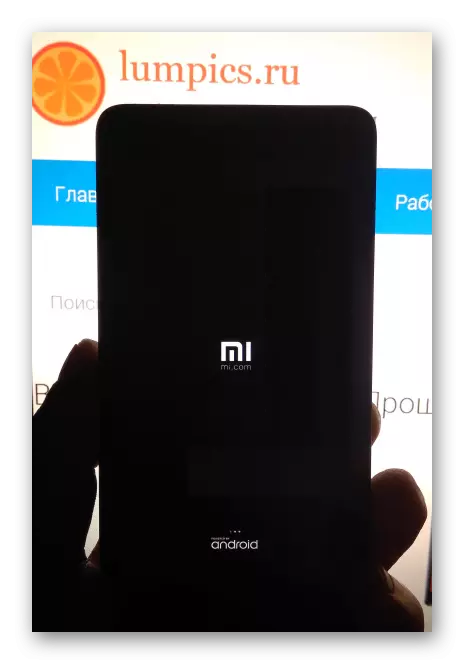
You need to release the buttons at the time the "MI" logo appears on the screen. As a result, we see the following picture:
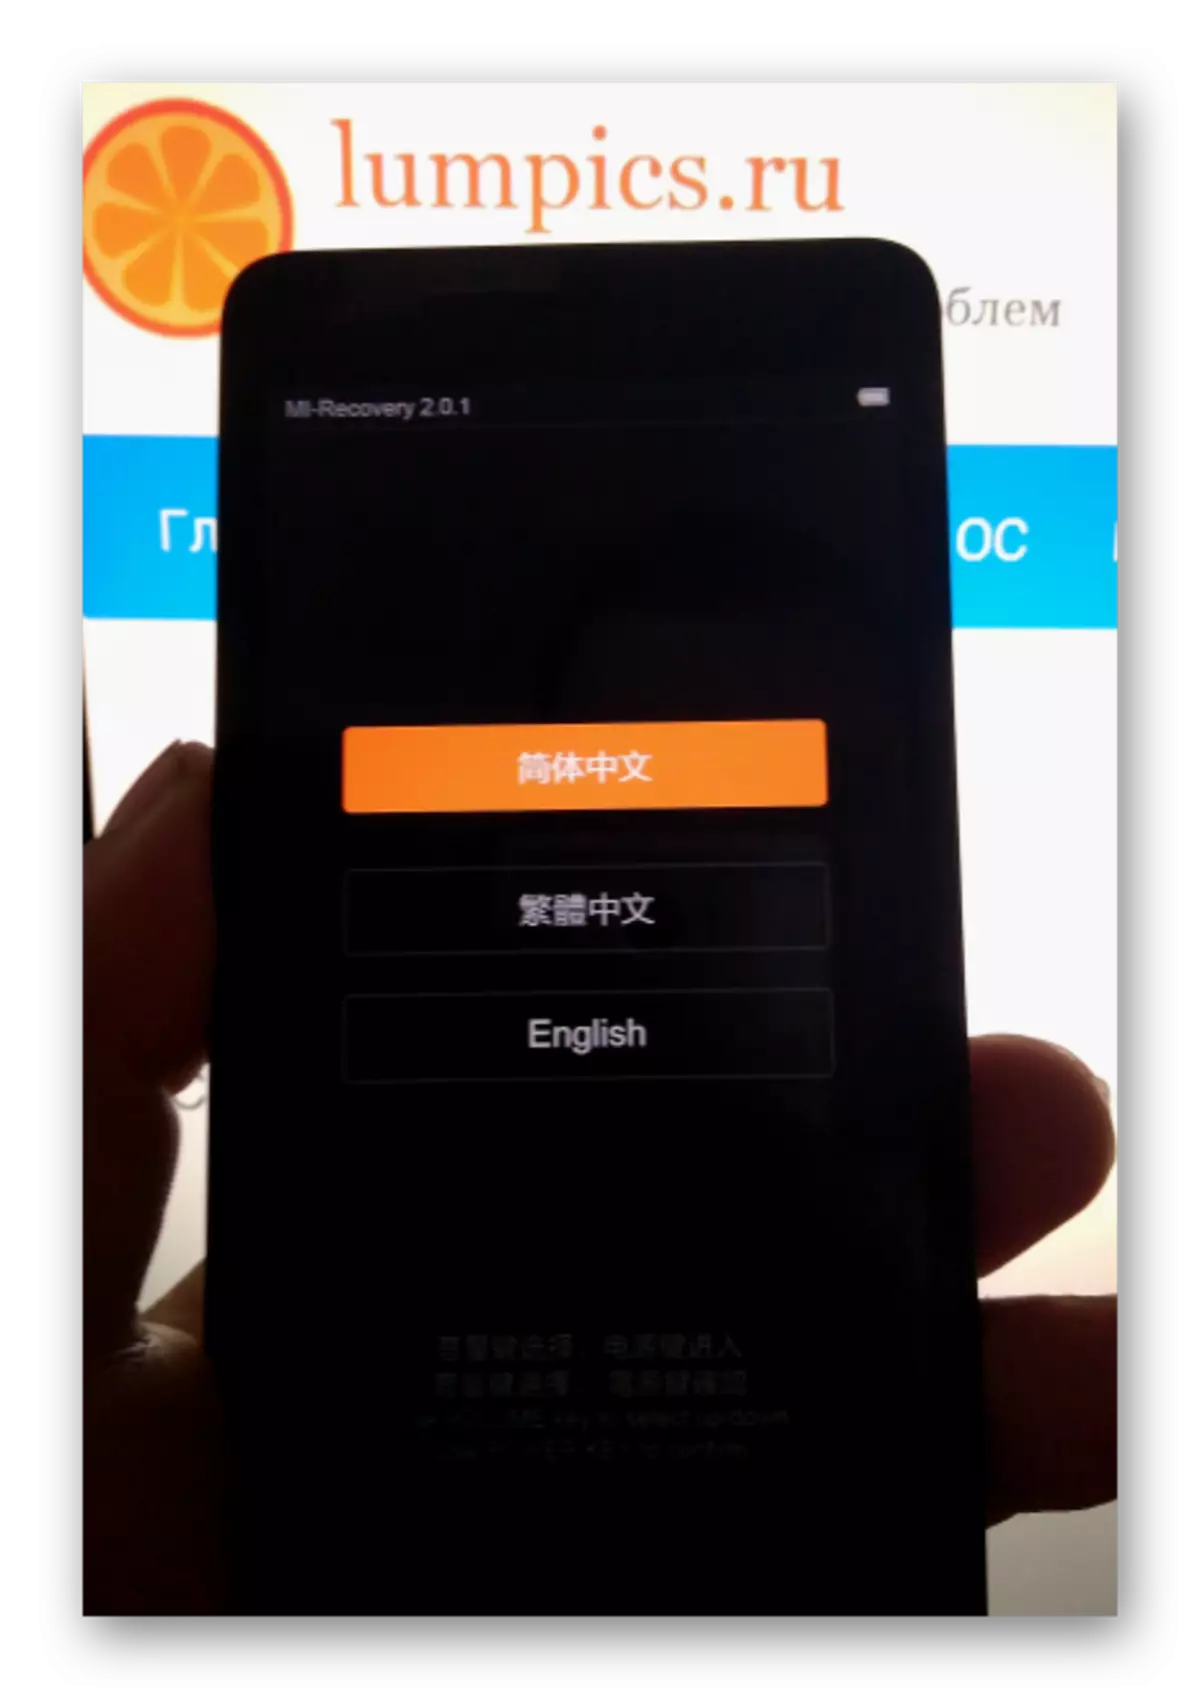
Sensory control in the native recovery environment does not work, use the "Vol + -" hardware keys to move through the menu items. Pressing "POWER" is used to confirm the action.
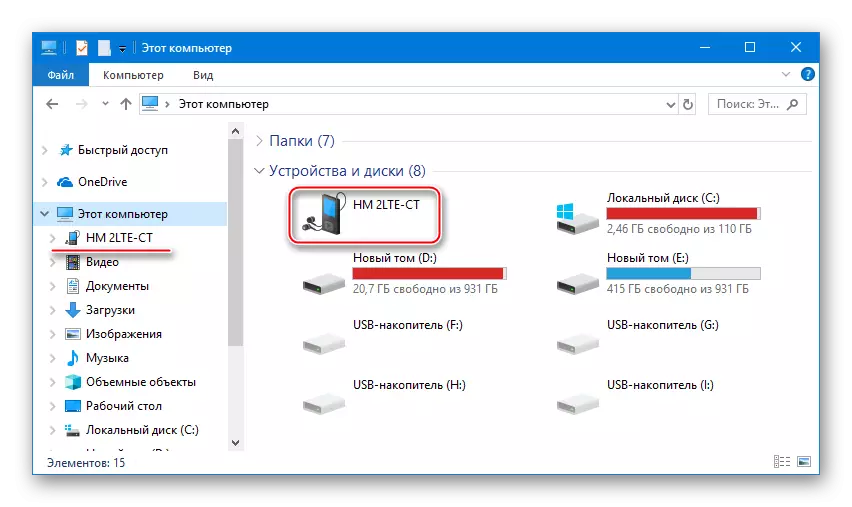
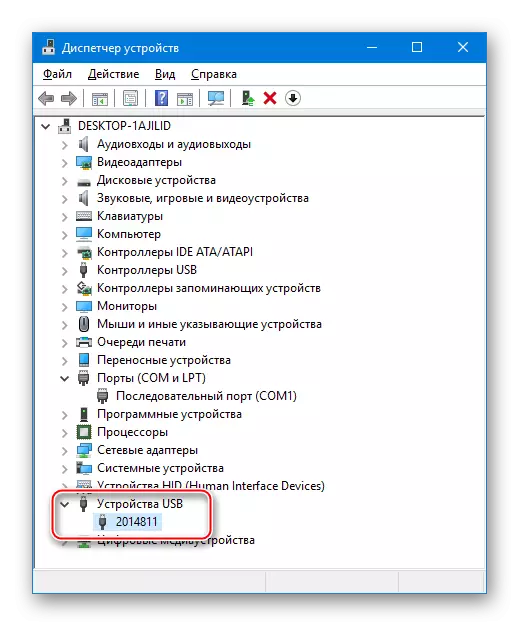
In the "Dispatcher" of Redmi 2, if in the recovery mode is defined as a USB device whose name corresponds to the identifier of the hardware version of the smartphone (may differ depending on the specific instance of the device, it is described in more detail in the article):
- FastBoot. - The most important mode with which you can produce almost any actions with the sections of the Android apparatus.
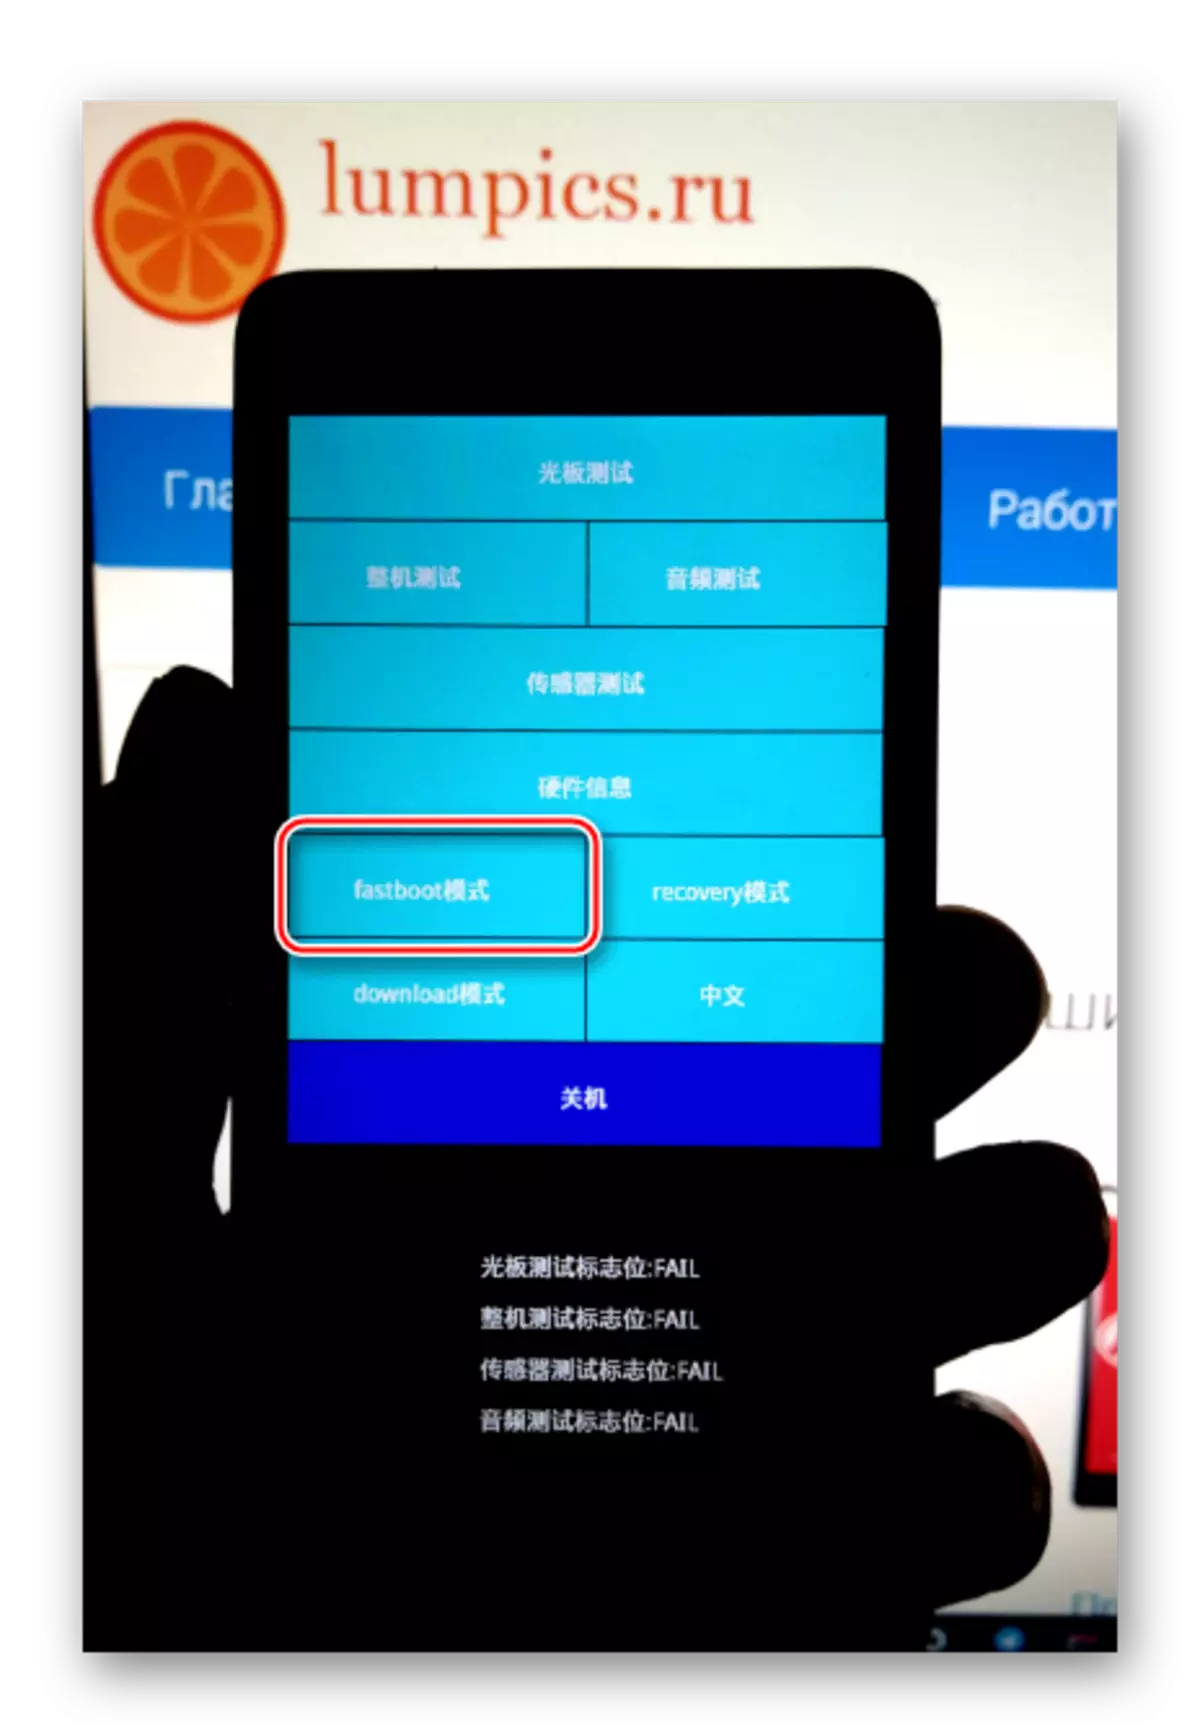
In "FastBoot" you can switch from the "Preloader" by clicking on the option of the same name, or using the "Volume-" and "power" key combination,
Which should be pressed on the smartphone turned off and hold until the image of a pretty hare occupied by the repair of the robot, on the screen.
When you connect the device translated into the "FastBoot" mode, "Device Manager" detects the Android Bootloader Interface device.
- QDLoader. . In some cases, in particular, when the "chipper" of the smartphone, Redmi 2 can be determined in Windows as the COM port "Qualcomm HS-USB QDLoader 9008". This state, suggests that the smartphone is in mode, which is service and is intended for the initial, immediately after the assembly, equipment of the device. Among other things, QDLoader can be used when recovering after serious failures and / or collapse android, as well as professionals for conducting specialized procedures.
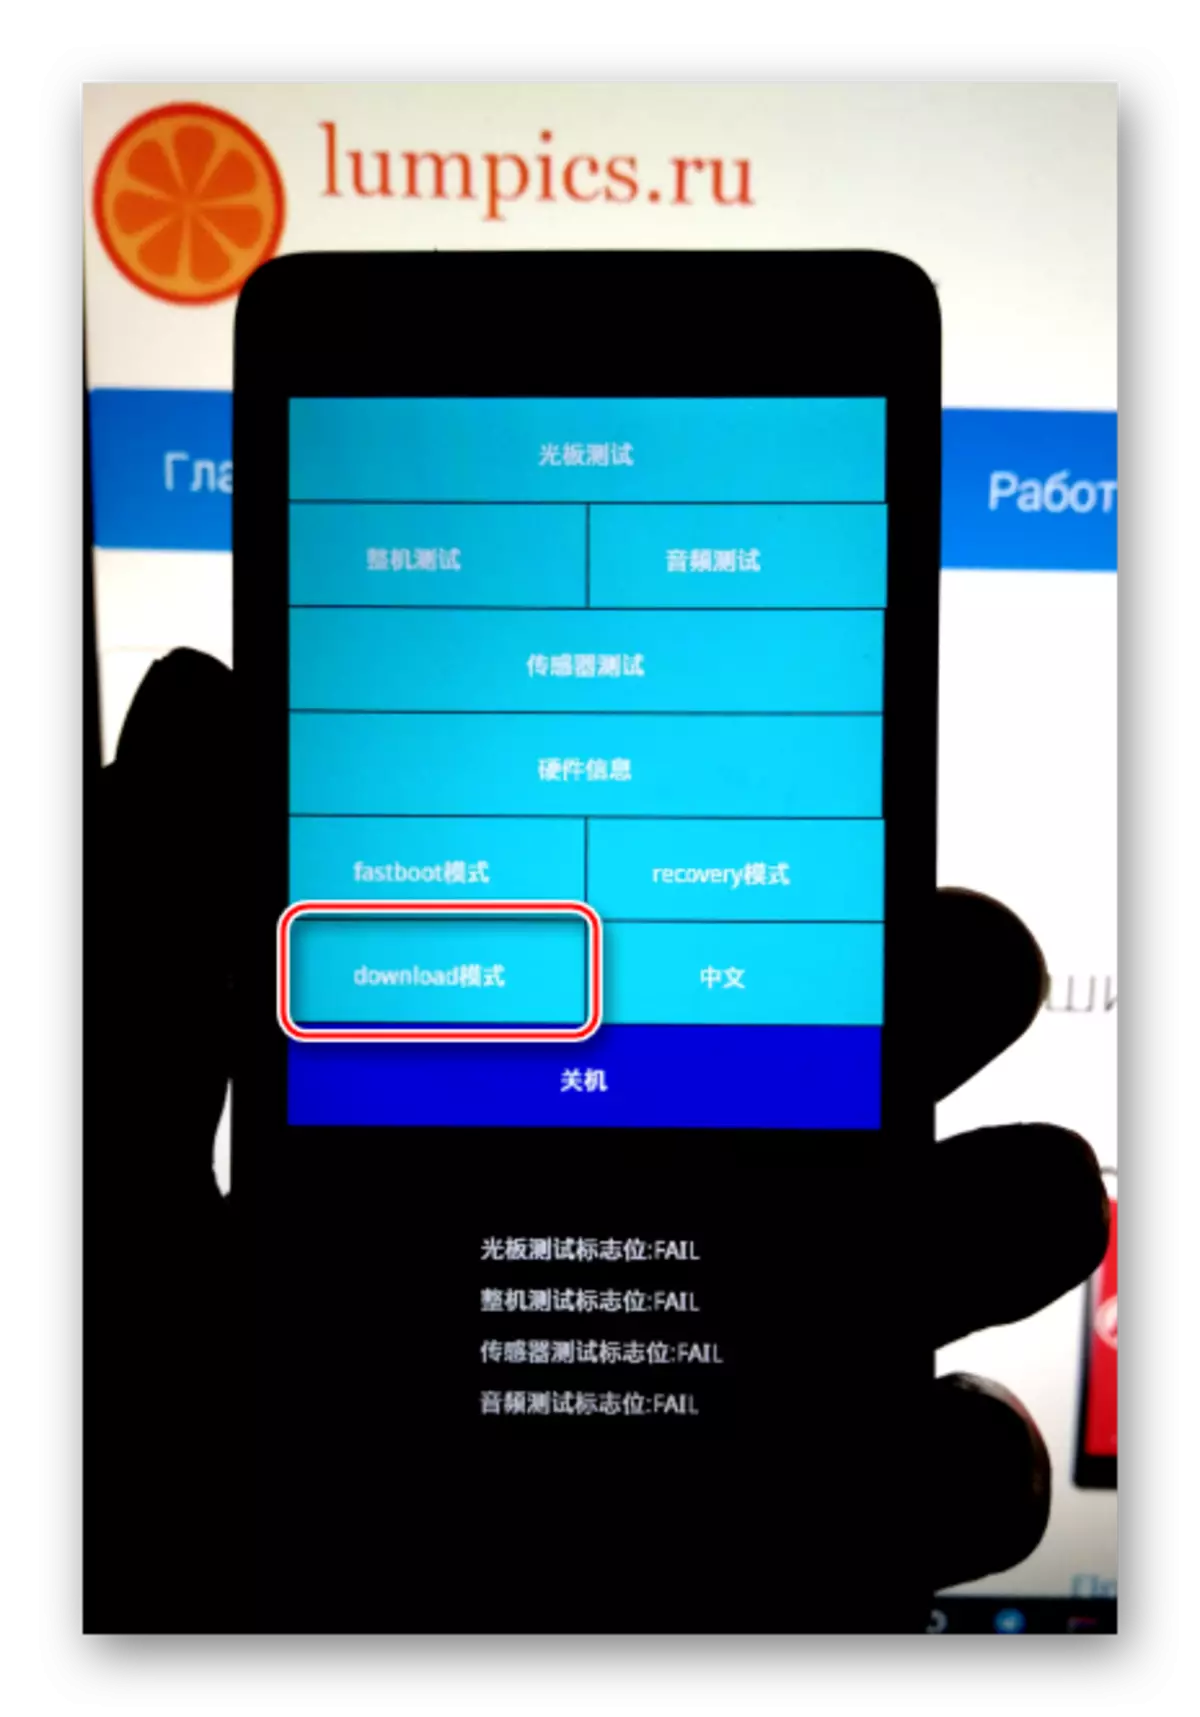
Translate the model in question in QDLoader mode can be independently. To do this, select "Download" in the "Prelader" or uses the combination of the "Volume +" keys and "Volume-". Pressing both buttons and hold them, connect the cable connected to the USB port of the PC.
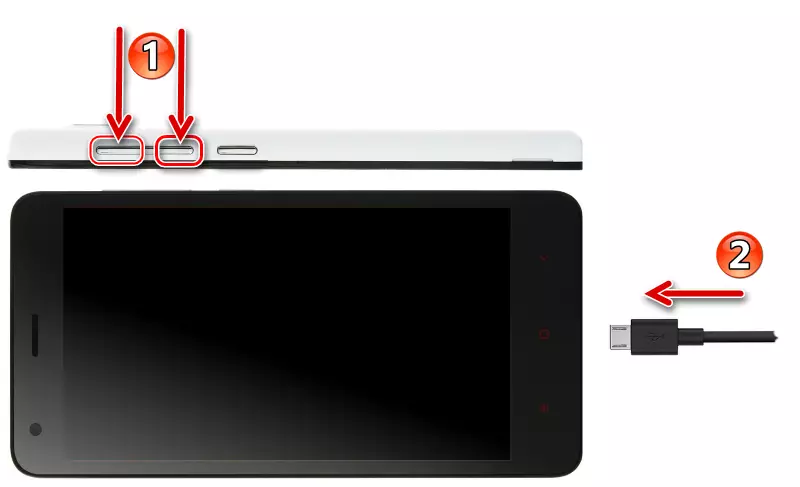
The phone screen when switching to "Download-Mode" remains dark. It is possible to understand that the device is determined by the computer, you can only with the Device Manager.

The output from the state is carried out after a long pressing of the "Power" key.

Hardware version
In view of quite significant differences between communication standards, which use operators that provide their services in China and the rest of the globe, almost all Xiaomi models are produced in several versions. As for REDMI 2, it is easy to get confused here and it will become clear why.

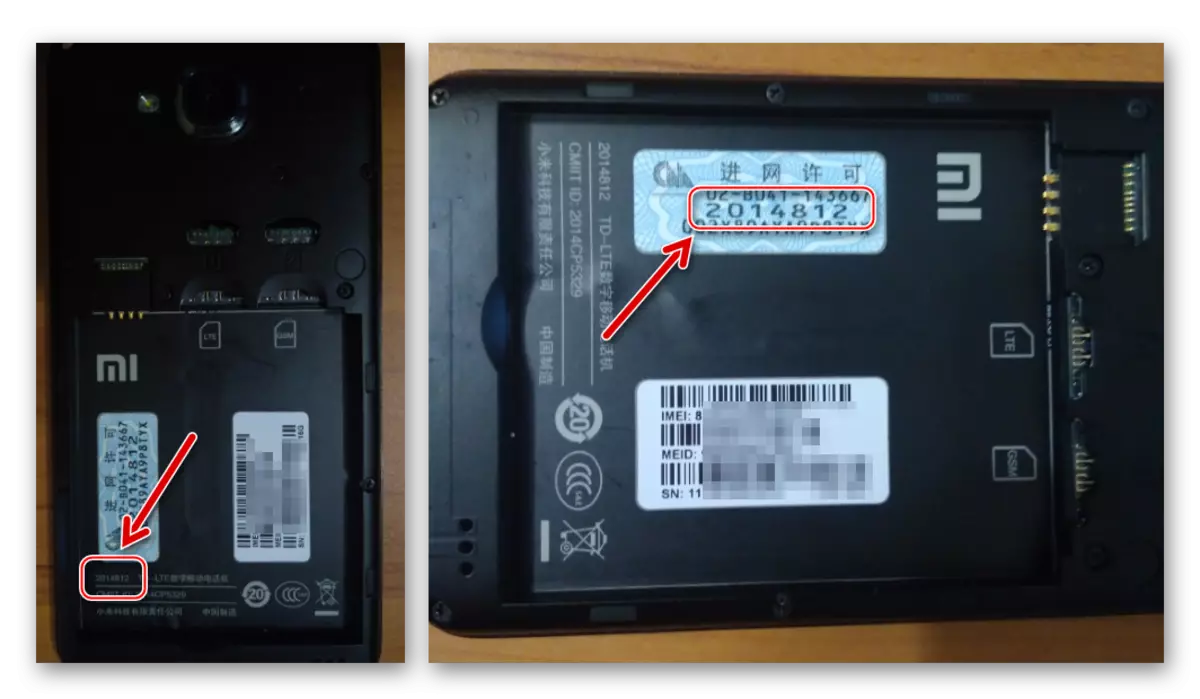
The hardware identifier of the model can be determined by looking at the inscriptions under the battery. The following identifiers are found here (combined into two groups):
- "WCDMA" - WT88047, 2014821, 2014817, 2014812, 2014811;
- "TD" - WT86047, 2014812, 2014113.
In addition to the difference in the list of supported communication frequencies, devices with different identifiers are characterized by different firmware. Among other things, there are two models options: the usual RedMI 2 and the improved version of Prime (Pro), but they use the same software packages. Several generalizing, you can say when selecting files should be considered, for the phone of which ID IDs they are intended - WCDMA. or TD. , the remaining hardware differences of versions can not be taken into account.
Instructions that assume the installation of the Android and set forth in the description of the methods below include the same steps and are generally identical for all variants of Redmi 2 (prime), it is important to only use the correct package with system software to install.
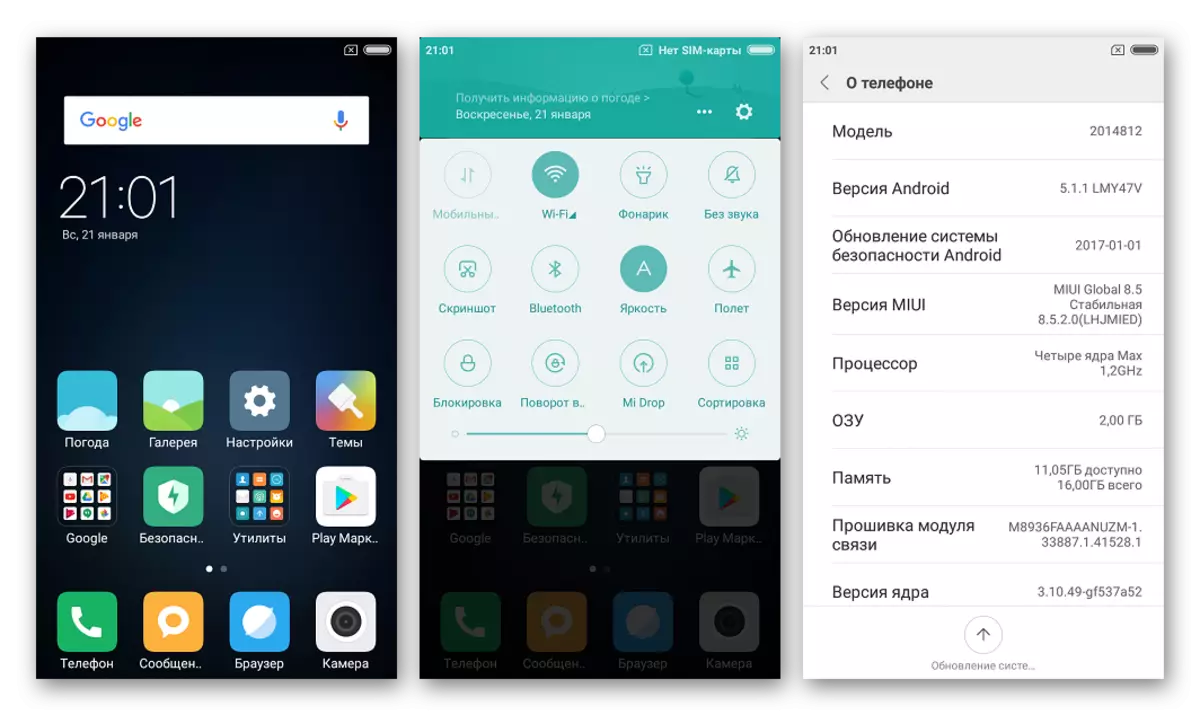
In the examples under consideration, the experiments were made with the apparatus REDMI 2 Prime 2014812 WCDMA . Software archives that are downloaded by references from the present material can be used for smartphones. wt88047, 2014821, 2014817, 2014812, 2014811.
If there are TD versions of the model component for installation, the reader will have to search independently, which, however, is completely simple - both on the official website of Xiaomi, and on the resources of third-party names-developer names of all packages contain information about the variety of the device for which they are intended.
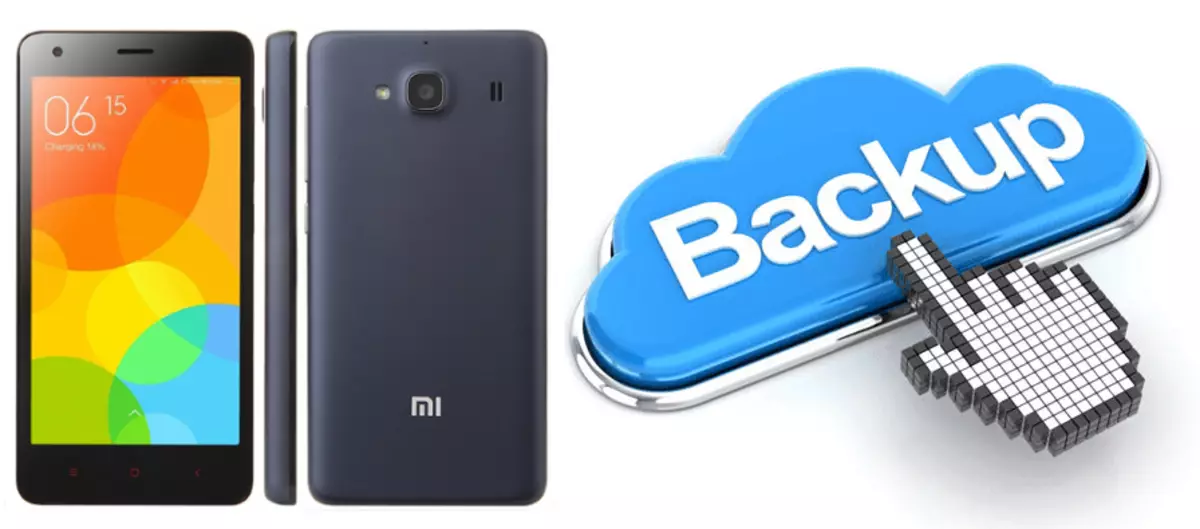
Bacup
It is difficult to overestimate the importance of information that is stored in the smartphone for its owner. Firmware procedures suggest cleaning memory from the information contained in it, so only on time the created backup copy of all important will allow to replace, update or restore the Redmi 2 program part without losing user information.
Installation of a specific package
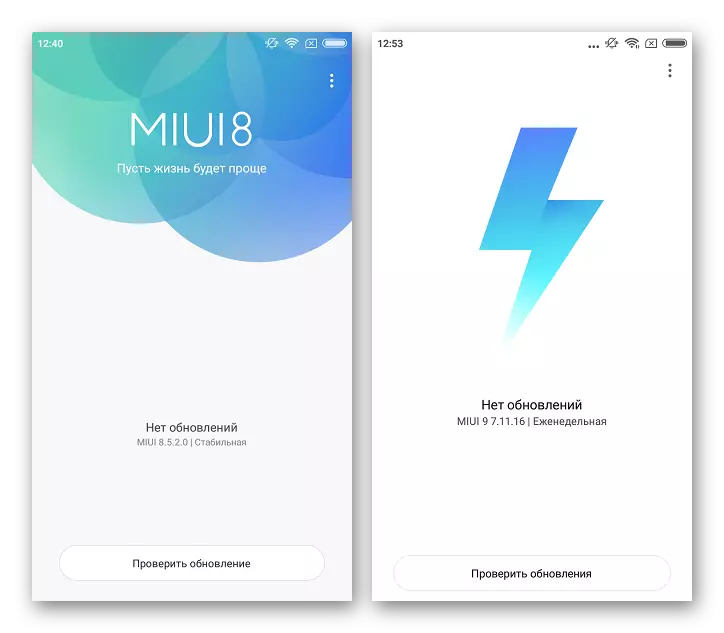
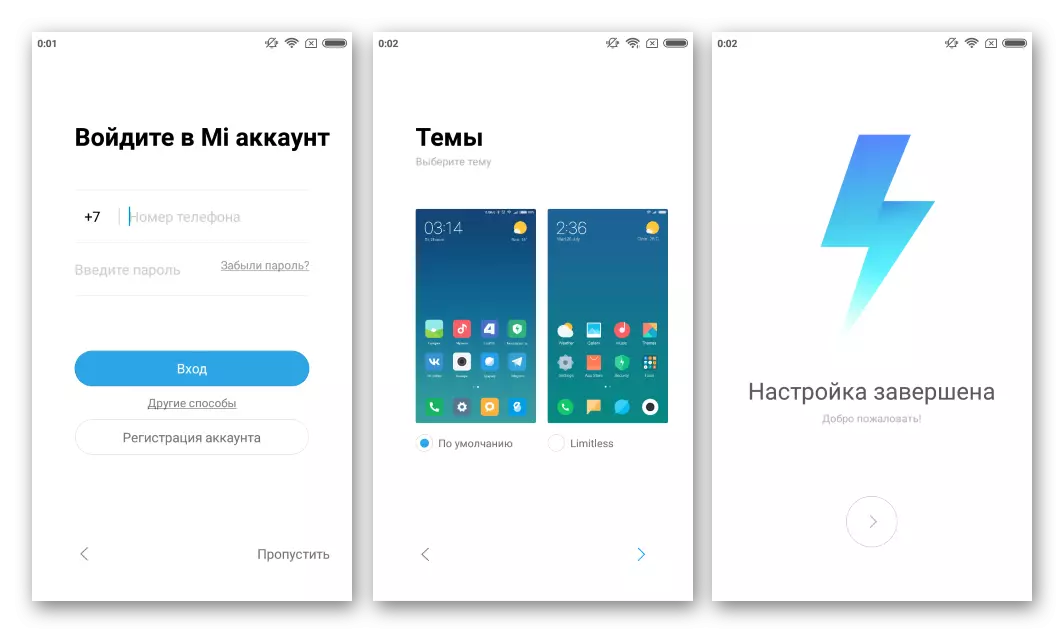
In addition to the usual enhancement of the MIUI assembly number, the tool in question allows you to install packages from the official OS software option. Below in the example demonstrated the transition from a stable firmware of the latest version to the development of MIUI9 7.11.16.

You can upload a file with this assembly by reference:
Download Recovery firmware MIUI9 v7.11.16 for Xiaomi Redmi 2
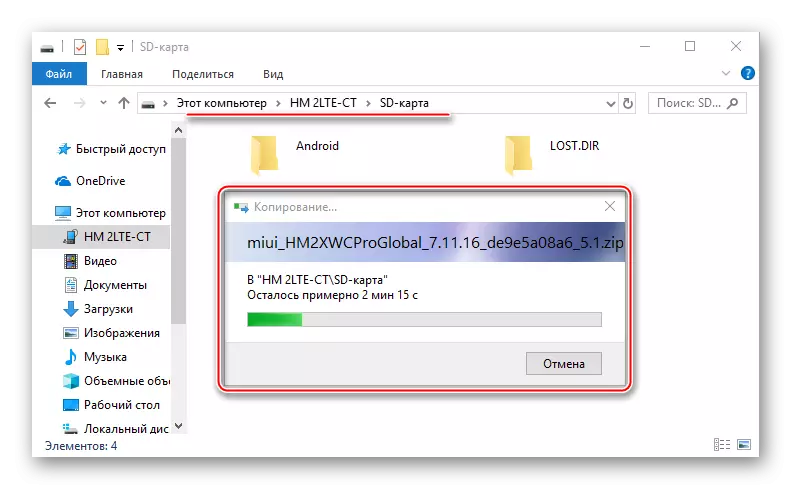
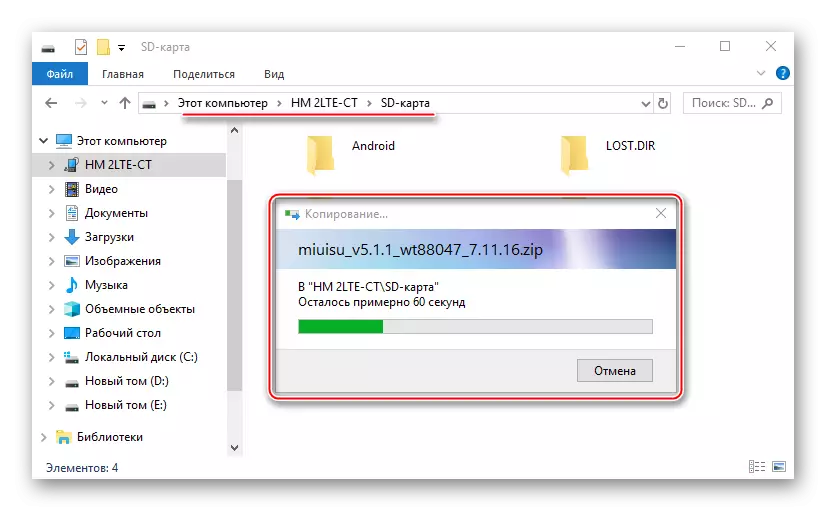
- Download the Zip-package from the OS and put it in the root of the microSD card installed in the device or internal memory.
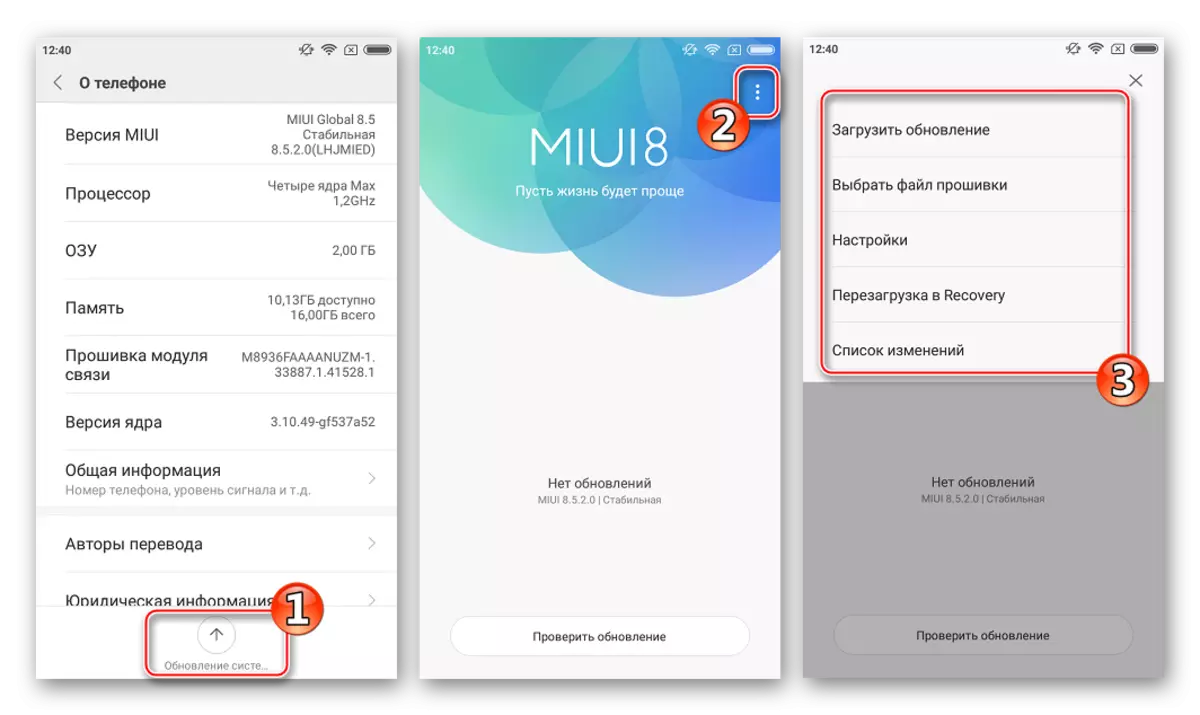
- Open the "System Update", call the list of options by pressing the image of three points in the upper corner of the screen on the right.
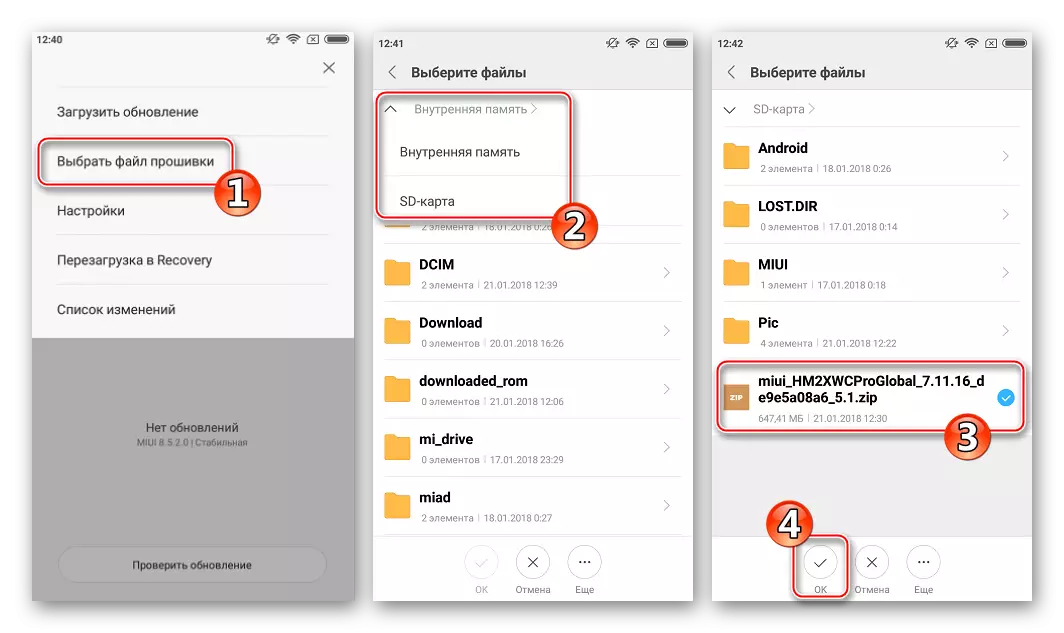
- The item you are interested in to set a specific package - "Select the firmware file". Following while clicking on it, it will be possible to specify the path to the zip-package with software. We celebrate it with a check mark and confirm the choice by pressing "OK" at the bottom of the screen.
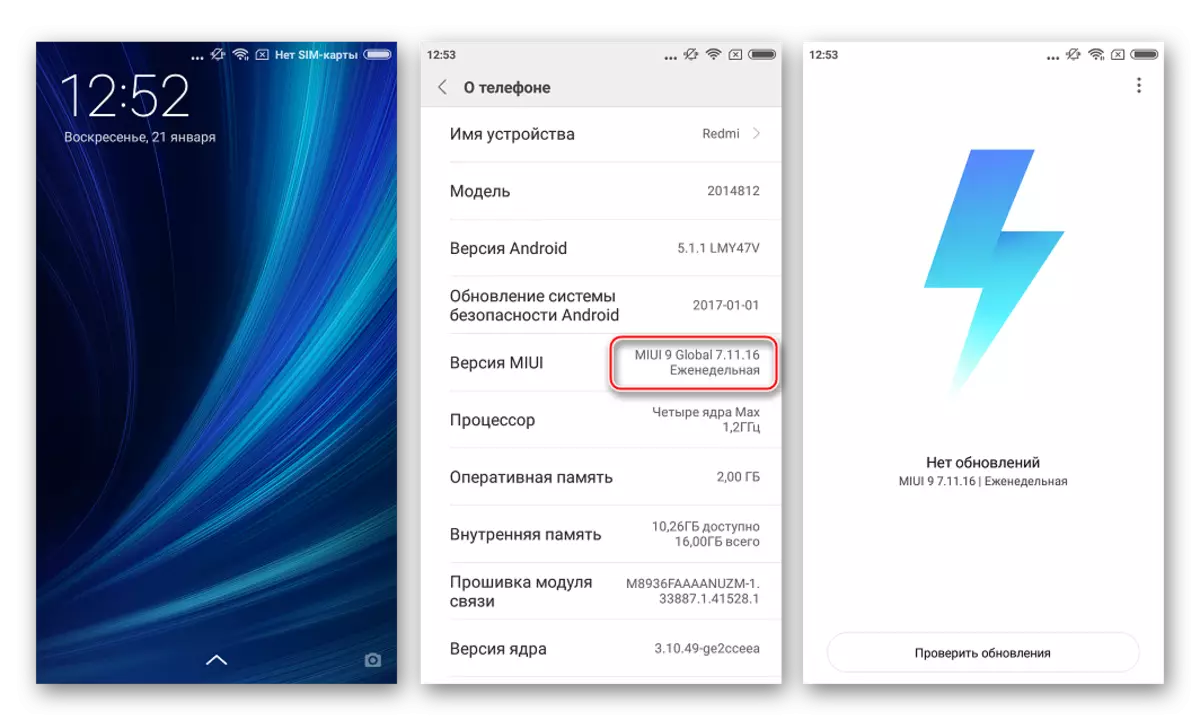
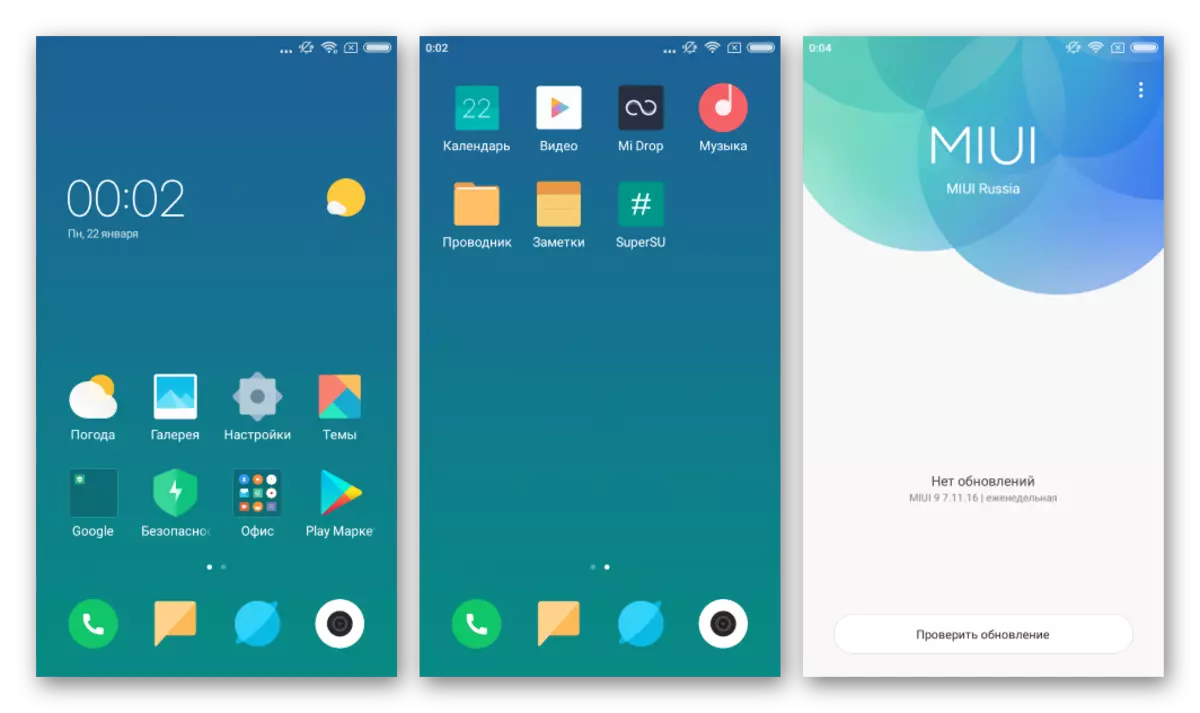
- The further process of updating / reinstallation of software is automatically sorted and without user intervention. We observe the completed execution indicator, and then wait for download to MIUI.
Method 2: Factory Recovery
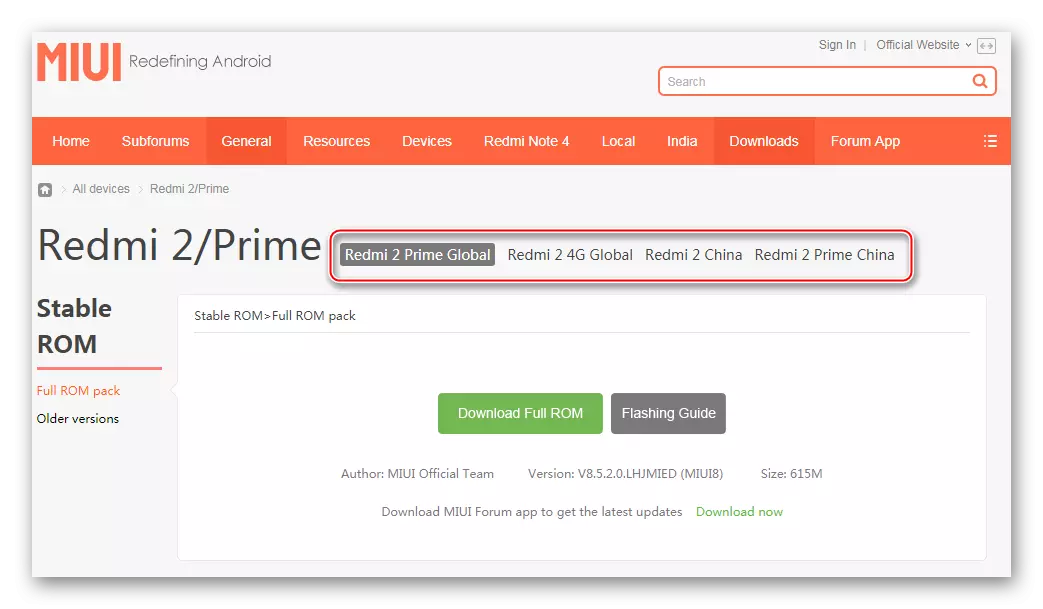
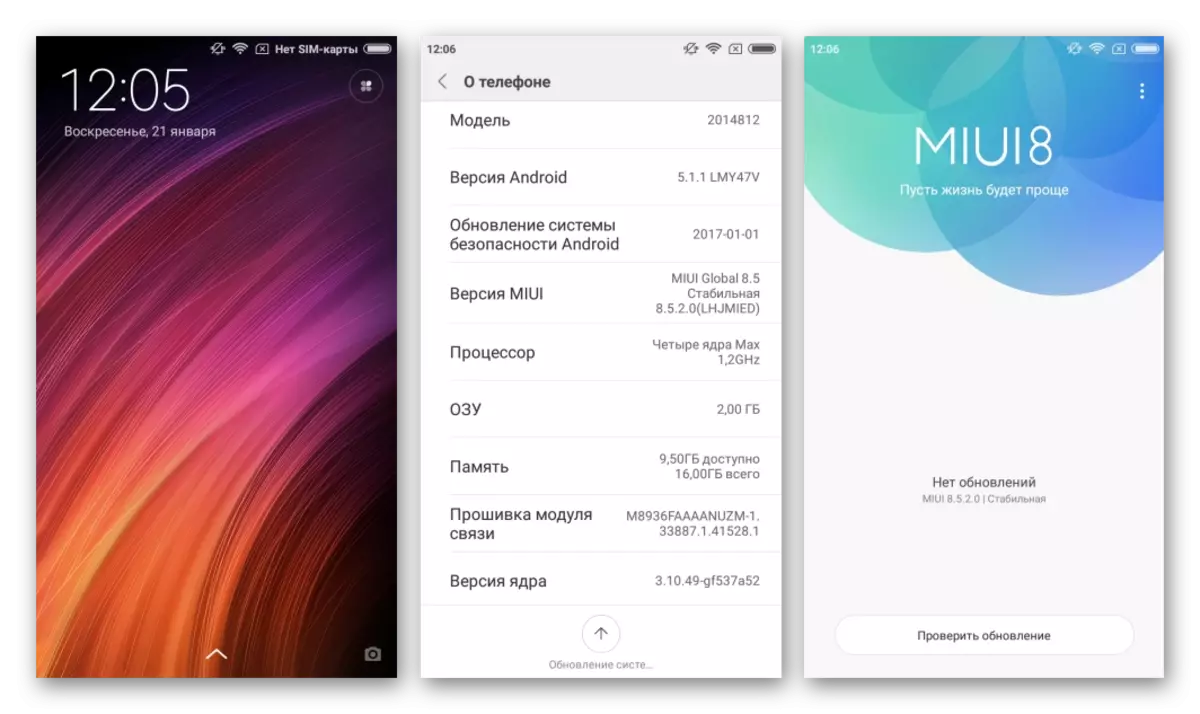
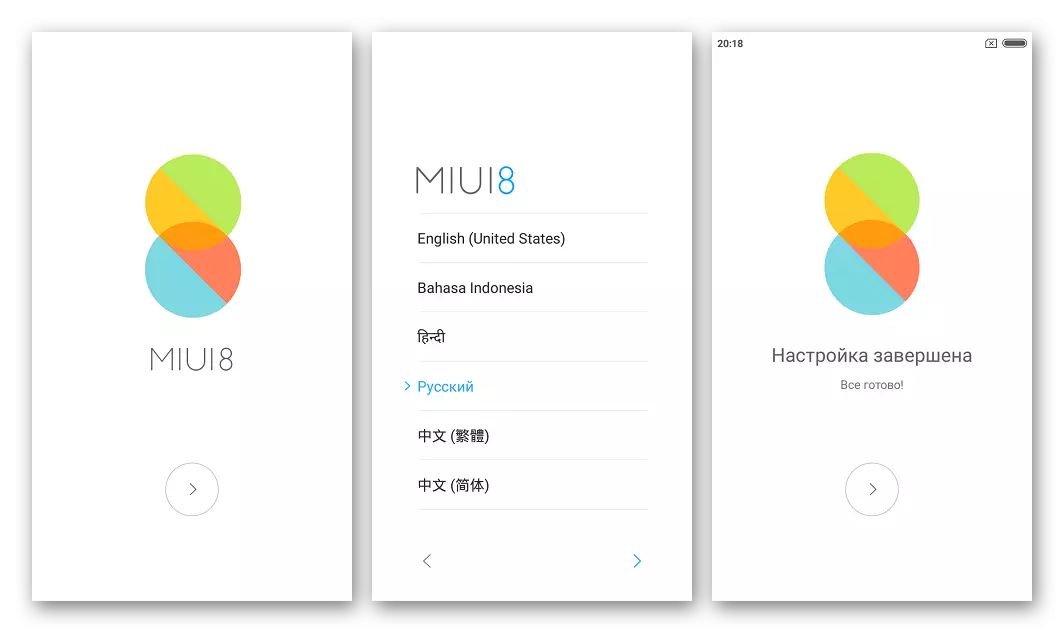
Recovery Wednesday, which is equipped with Xiaomy Redmi 2 during production, provides the ability to reinstall android, as well as transition from Stable-type firmware on Developer and vice versa. The method is official and relatively safe. Installed in the example below the shell - Miui8 8.5.2.0. - Last assembly of the stable version of the OS for the apparatus.
Download Recovery firmware MIUI8 8.5.2.0 for Xiaomi Redmi 2
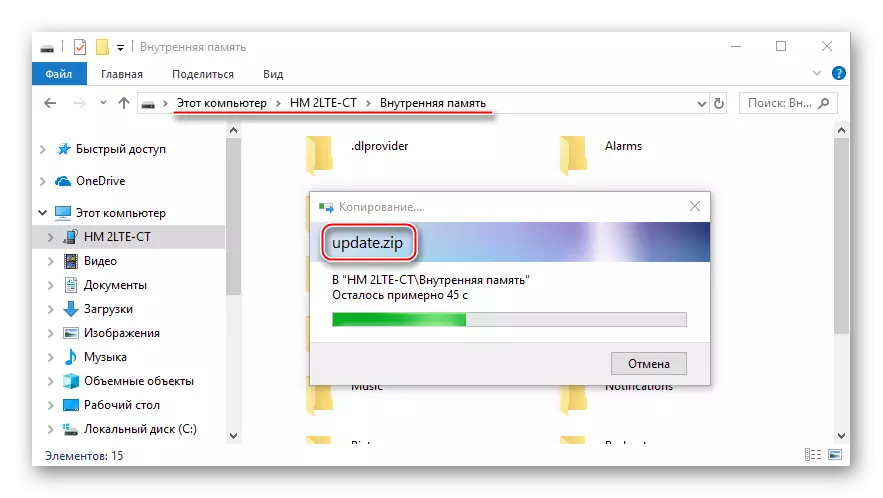
- Load the archive with the firmware, be sure to rename the received (in our example - file miui_hm2xwcproglobal_v8.5.2.0.lhjmied_d9f708af01_5.1.zip. ) In "Update.zip" without quotes, and then put the package to the root of the internal memory of the device.
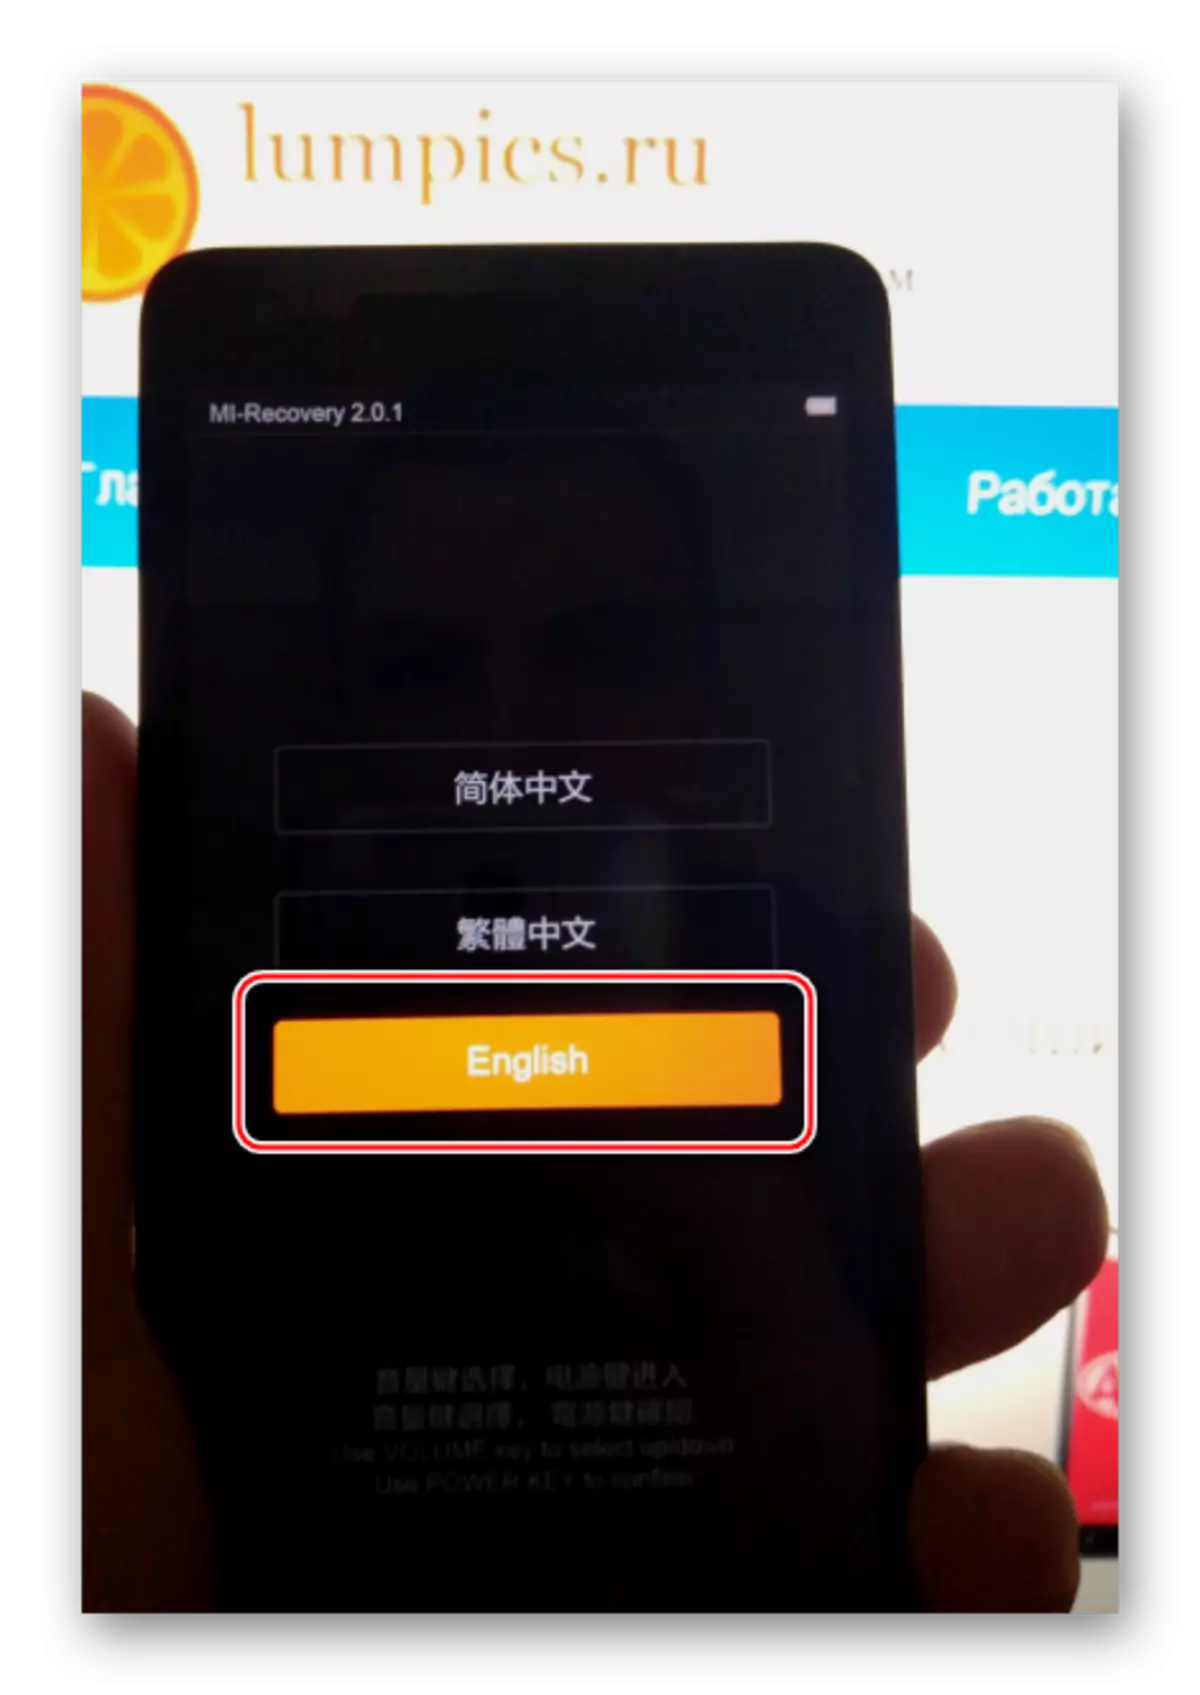
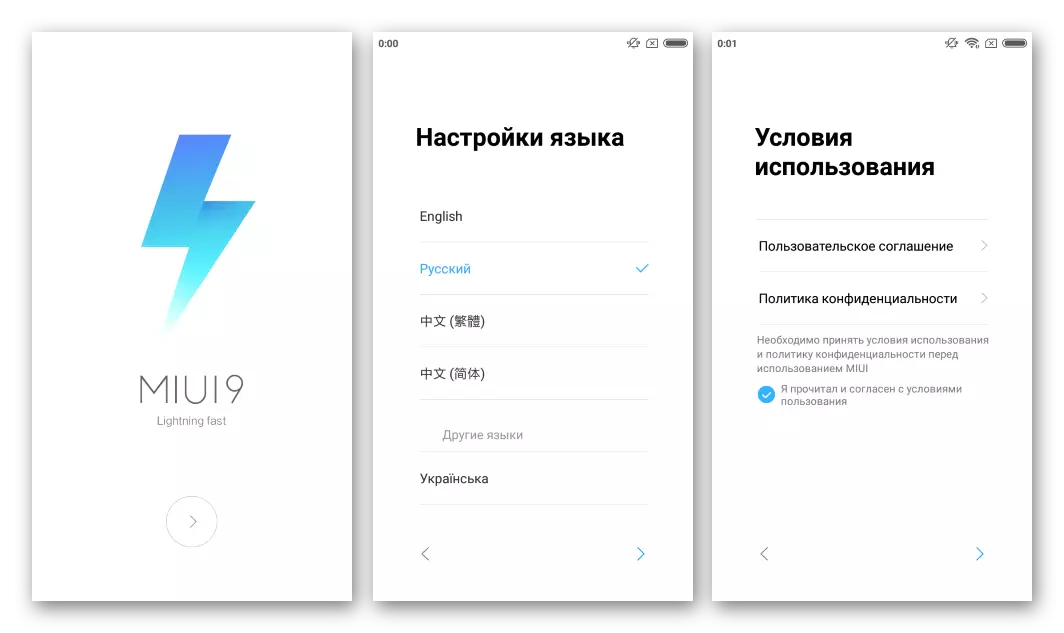
- After copying, turn off the smartphone and run it in "Recovery" mode. With the level of volume control keys, select the "English" item, confirm the switching of the media interface language with the POWER button.
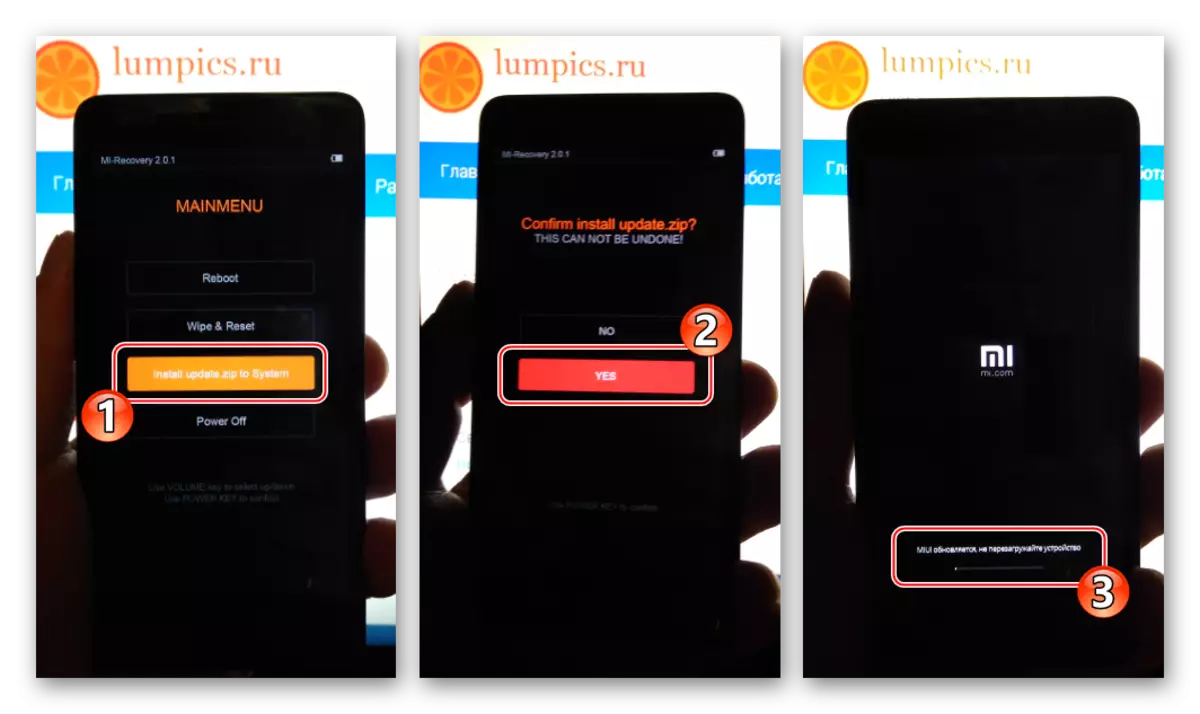
- We start reinstalling Android - select "Install Update.zip to System", confirm with the "Yes" button. The data transfer process in the memory sections starts and will last automatically, signaling the execution indicator on the screen.
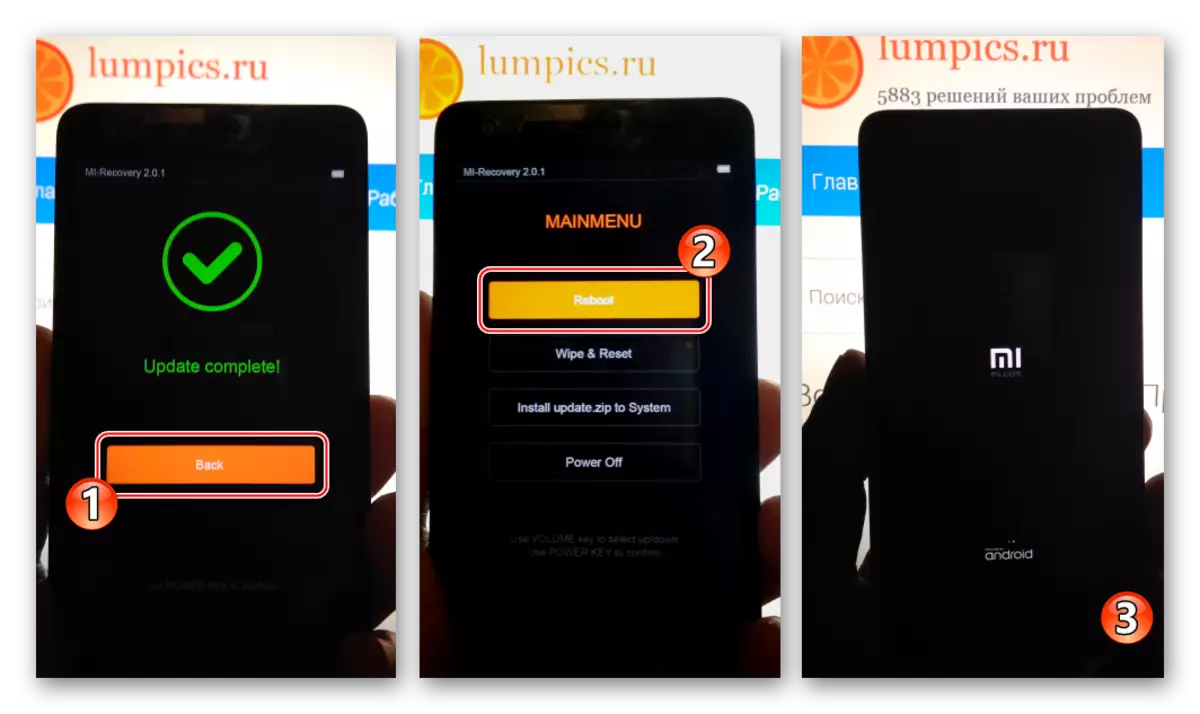
- Upon completion of the update or reinstallation of the system, confirming the success of the operation The inscription "Update Complete!". Using the "Back" button, go to the main screen of the medium and reboot to MIUI by selecting the "reboot" item.
Method 3: Miflash
Universal Xiaomi Device Firmware - Miflash Utility is a mandatory component of the toolkit of the brand device owner, which is enjoys the modification of the program part of its device. Using the tool, you can install any official types and versions of MIUI into a smartphone.
QDLoader.
If the phone does not give signs of life, that is, it does not turn on, not loaded in android, etc., and get to the "FastBoot" and "Recovery" there is no possibility, it is not necessary to despair. In most cases, when connecting the "surpited" devices to the PC, it is found that the "Qualcomm HS-USB QDLoader 9008" point "Device Manager" is present in the "Device Manager", and Miflash will help restore the REDMI 2 software and in such cases.

For example, as a system when restoring the "brick" Redmi 2, a package of MIUI 8 Stable is the last of the existing versions for the model under consideration - 8.5.2.0.
Download FastBoot firmware MIUI 8 8.5.2.0 Stable for Xiaomi Redmi 2
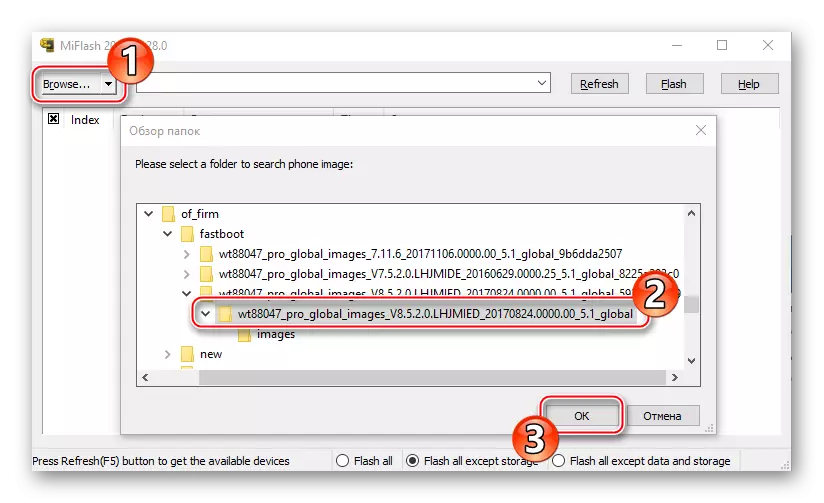
- Run Miflash and by pressing the "Browse ..." button, specify the Flash path to the catalog with the software components.
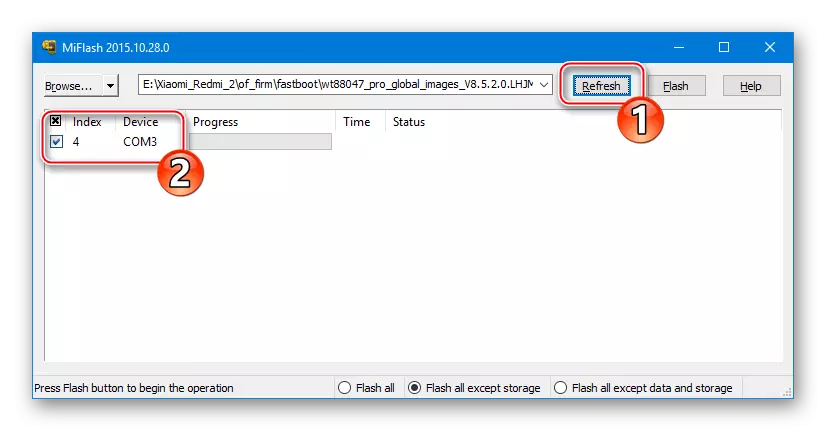
- Connecting Redmi 2 in the "download" mode to the USB port of the PC (it does not matter whether the device is translated into this mode by the user independently either it switched into it as a result of the system collapse). Press the "Refresh" button. Next, you should make sure that the device has been determined in the program as a port "COM XX".
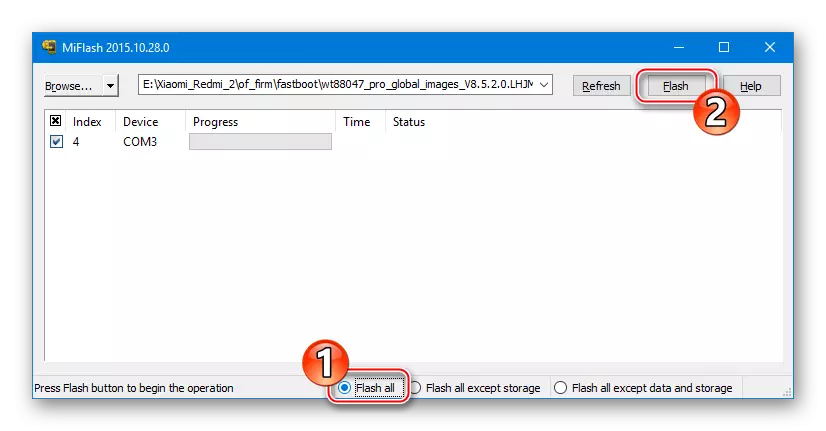
- Select the Flash All installation method and only when you restore the smartphone in QDLoader mode, then click "Flash".
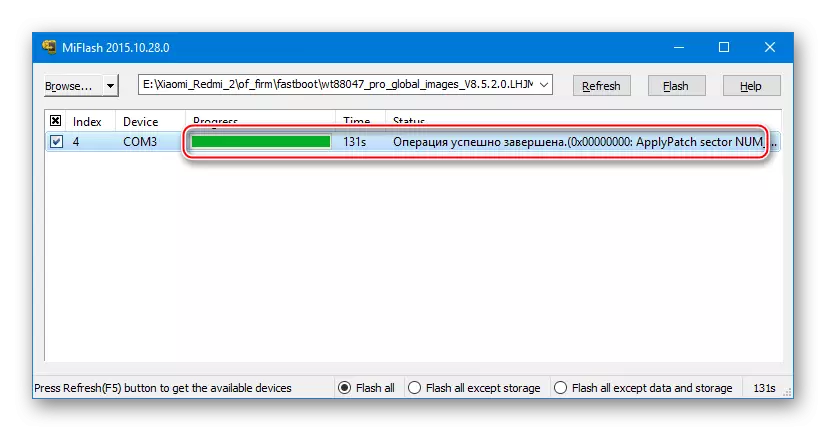
- We expect to complete the transfer of data to the memory sections Redmi 2 and appearing in the message status field: "The operation is successfully completed."
- Disconnect your smartphone from the USB port, remove and install the battery in place, and then turn on the device, while pressing the "POWER" button. We wait for the download of Android.
- OS Xiaomi Redmi 2 reinstalled and ready to operate!
Method 4: QFIL
Another tool providing the ability to flash Redmi 2, as well as restore the device that does not give signs of life is the QFIL application (QualcommflashimageLoader). The tool is part of the QPST tool kit, which is designed by the creator of the hardware platform of the phone. The Android installation methodology via QFIL requires the use of FastBoot firmware intended for the above MIFLASH, and all manipulations through the program are conducted in QDLoader mode.

We load a fastboot package according to one of the references in the description of the method of manipulation through the mythlash and unzipped the received in a separate directory. The QFIL files will be downloaded from the "Images" folder.
- We install the QPST, after downloading the archive containing the software distribution list by reference:
Download QPST 2.7.422 for Xiaomi Redmi 2 firmware
- Upon completion of the installation, go along the way: C: \ Program Files (x86) \ Qualcomm \ qpst \ bin \ and open the file Qfil.exe..
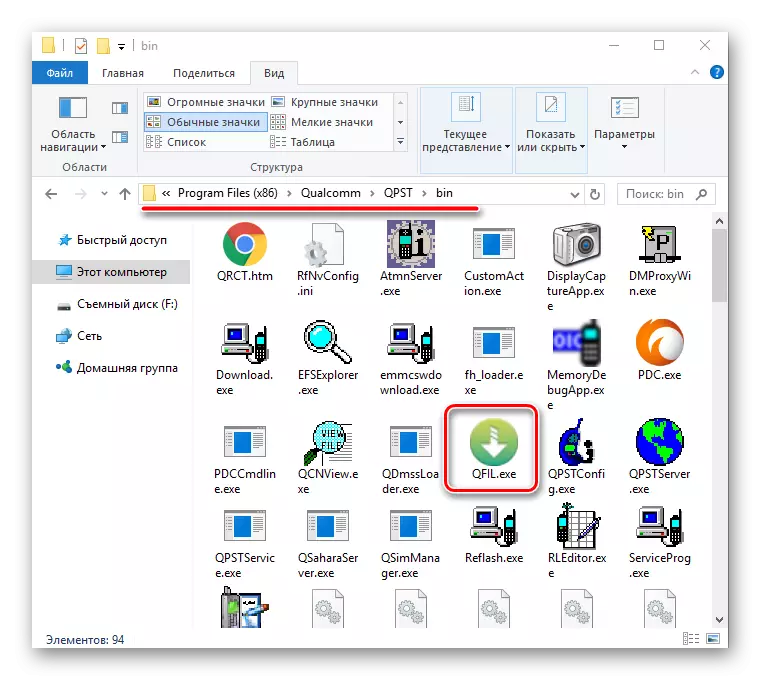
And you can also run QFIL from the "Start" menu Windows (located in the QPST section).
- After starting the application, we connect the smartphone in QDLoader mode to the USB PC port.
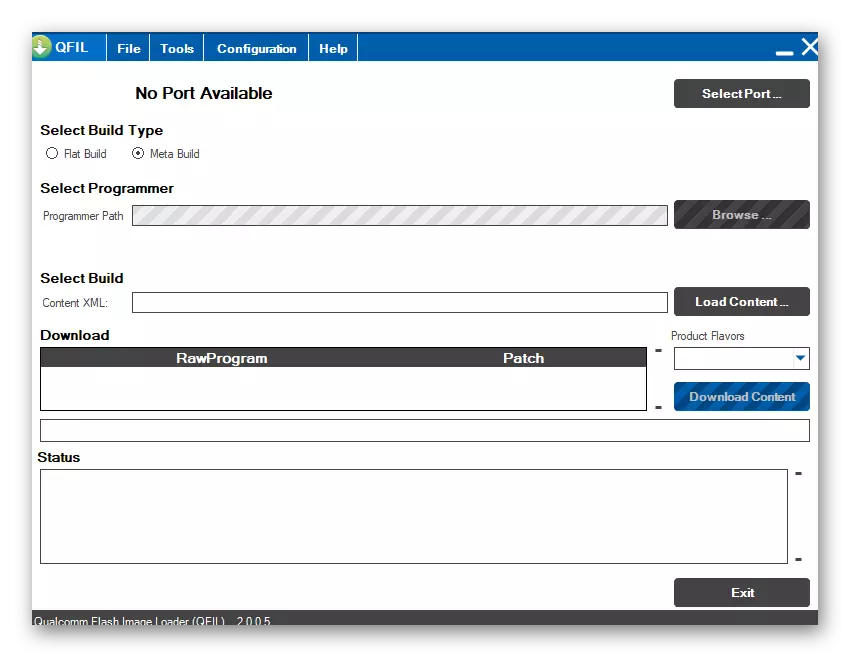
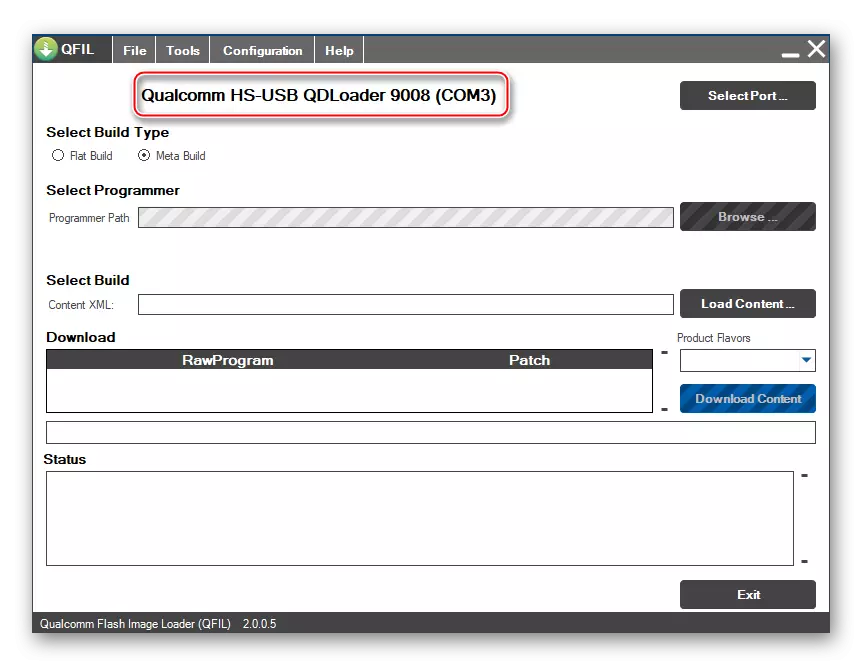
The QFIL device must decide as a COM port. In the top of the program window, an inscription will appear: "Qualcomm HS-USB QDLoader 9008".
- Install the "Select Buildtype" switch to the "Flat Build" position.
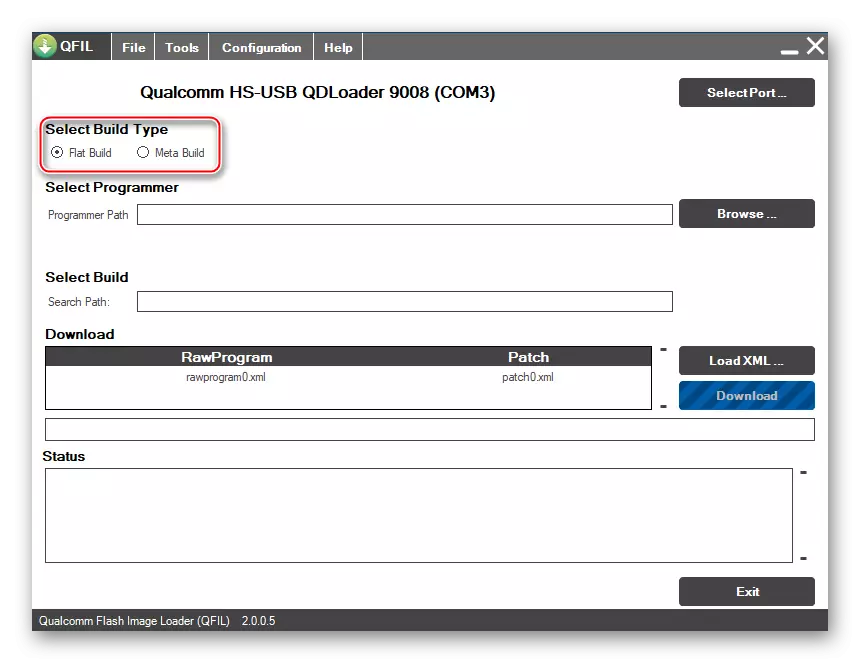
- We add using the "browse" button "prog_emmc_firehose_8916.mbn" from the catalog with the image images.

- Next, click "Loadxml",
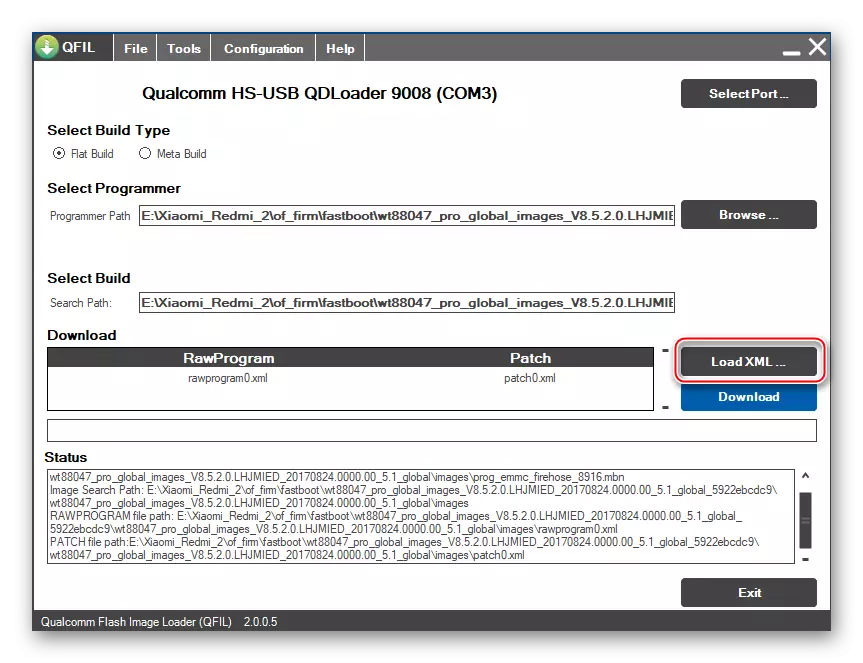
Alternately open the components:
Rawprogram0.xml.

Patch0.xml.

- Before starting the firmware, the QFIL window must be like as a screenshot below. We are convinced of the correctness of the filling of the fields and click "Download".
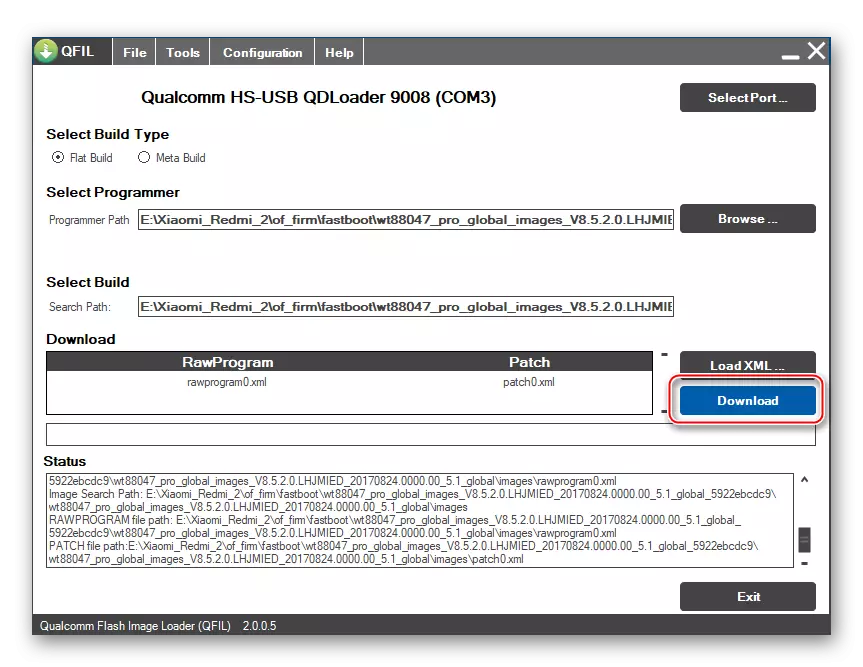
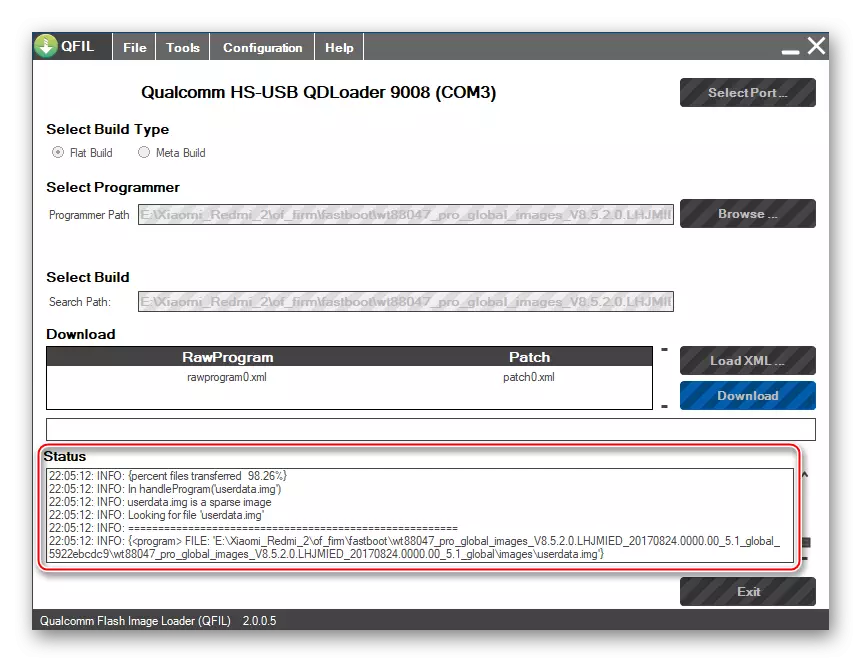
- The process of recording information in the REDMI 2 memory will begin, which is accompanied by the filling of the "Status" log field messages about the processes and their results.
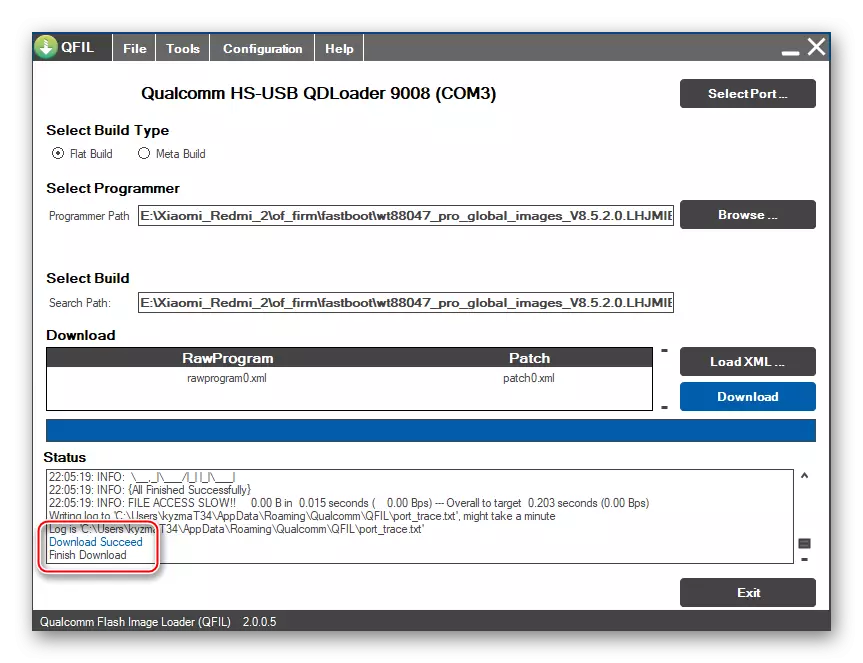
- After completing all the manipulations in QFil, and it will take about 10 minutes of time, the success of the message operation will appear in the log field: "Download succeed", "FINISH DOWNLOAD". The program can be closed.
- Disconnect the device from the PC and turn it on by pressing the "POWER" key. After the appearance of the butter "Mi" will have to wait for the initialization of the installed system components - this is a rather long process.
- The end of the installation of the OS in Redmi 2 through QFIL is considered the appearance of the greeting screen of MIUI.

Method 5: Modified Recovery
In those situations where the purpose of the Xiaomi Redmi 2 firmware is obtaining a modified system on a smartphone from one of Miui localizer and replacing the official Android-shell on a custom, created by third-party developers, can not do without TeamWin Recovery (TWRP). It is with the help of this recovery that all the unofficial OS on the model under consideration are established.
Equipping the device with a custom recovery medium, and then installing modified firmware is made by performing fairly simple instructions. Act step by step.
Step 1: Replacement of native recovery on TWRP
The first step is to install a custom recovery. This manipulation is carried out using a special installer script.
- We update the MIUI of the device to the last version or install a fresh OS assembly according to one of the instructions above in the article.
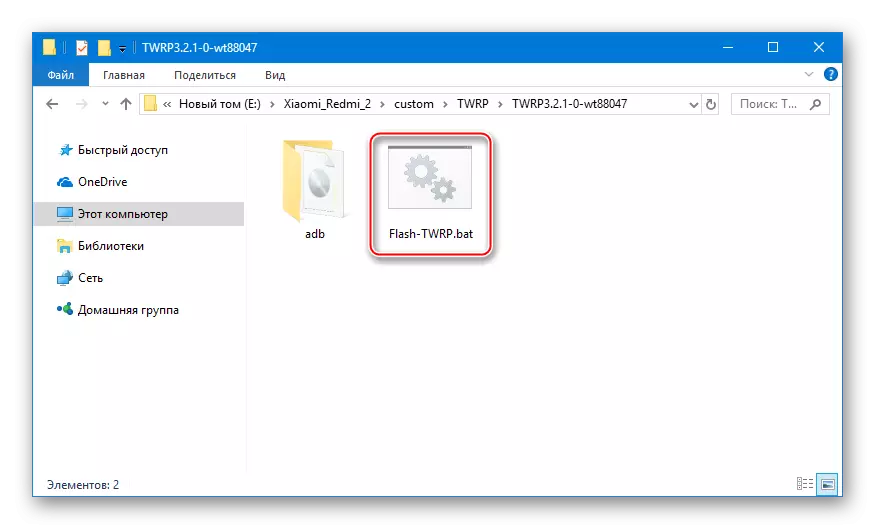
- Load the archive containing the TWRP image, and the BAT file for its transfer to the corresponding section of the memory of Redmi 2 by reference below and unpack it.
Download Teamwin Recovery (TWRP) for Xiaomi Redmi 2
- We switch the device to "FastBoot" and connect it from PC.
- Launch Batnik "Flash-TWRP.BAT"
- We wait for the invitation to click any key to start the TWRP image recording procedure into the appropriate memory section and perform an action, that is, press any button on the keyboard.
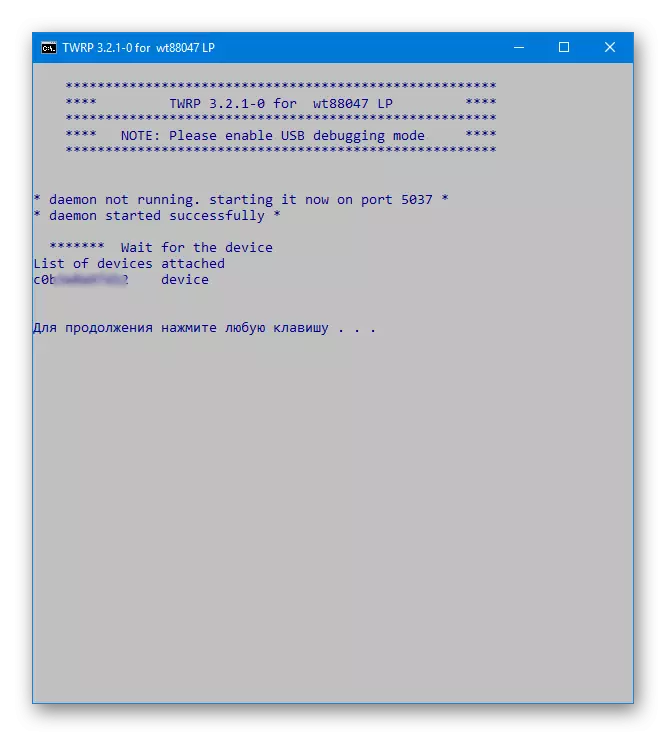
- The process of overwriting the recovery section takes a few seconds,
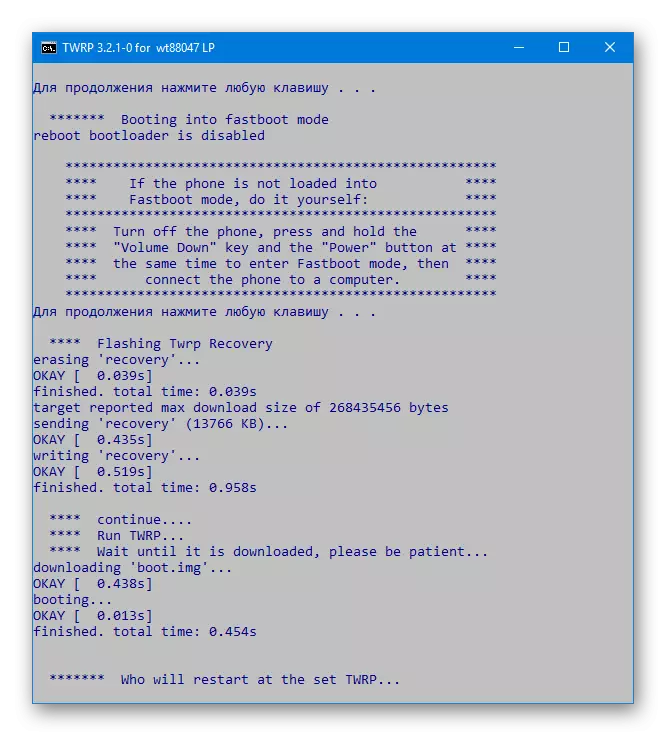
And the smartphone will restart in TWRP automatically upon completion of the transfer of the image into memory.
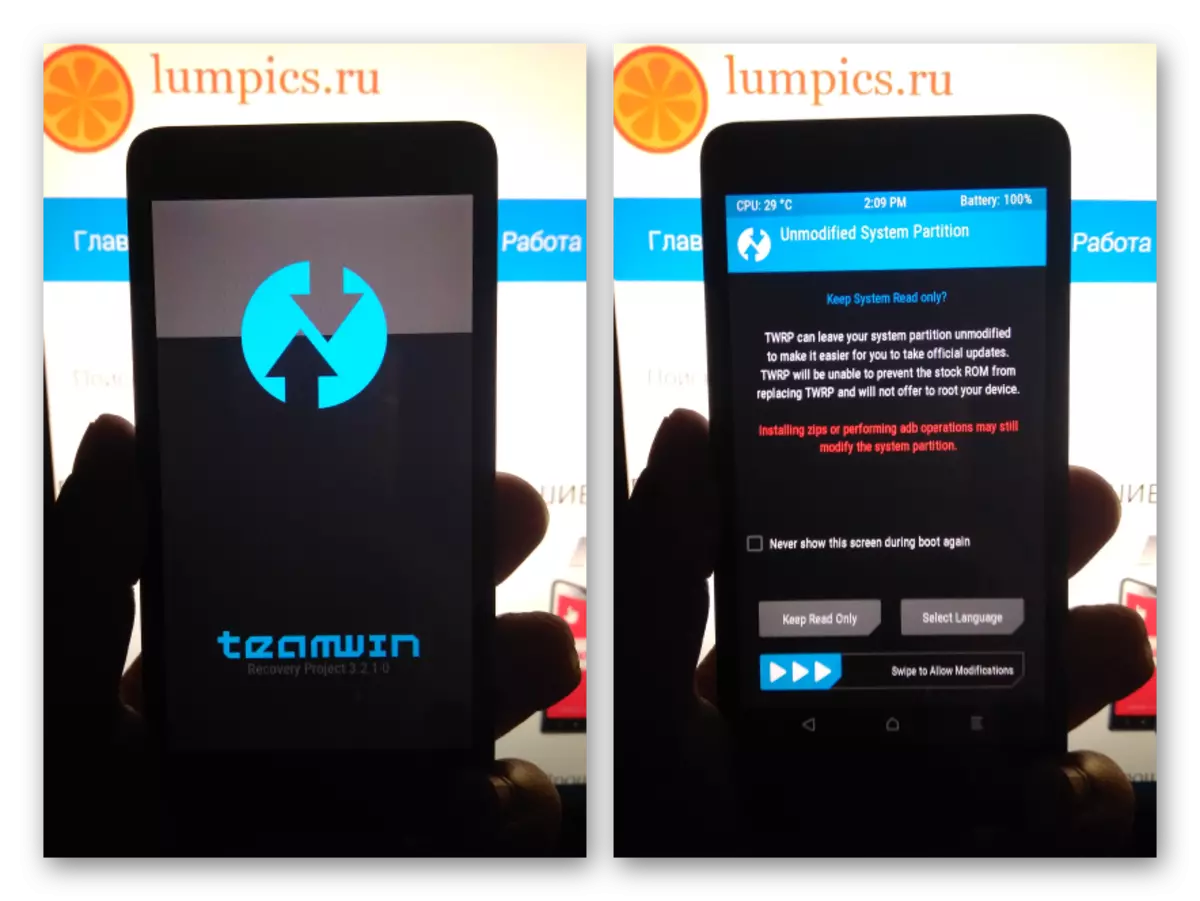
- Select a Russian-speaking interface by calling a list of localization using the "Select Language" button, and then activate the Resolute Change Switch.

Custom recovery TWRP ready to operate!
Step 2: Installing Localized Miui
Conquered the commitment of many owners of Xiaomi devices, the so-called "translated" firmware from different localizer commands are easily installed using TWRP obtained as a result of the execution of the previous step.
Read more: How to flash an Android device via TWRP

You can choose a product from any project by downloading packages from the official resources of the developers using the links from the article on our website. Any modification of MIUI is installed through custom recovery using the universal instruction discussed below.
Read more: Localized MIUI firmware

As a result of the execution of the following steps, set the decision from the team Miui Russia. . You can download the package offered to the installation by reference below. This is the developer version of MIUI 9 for the phone under consideration.
Download MIUI 9 from Miui Russia for Xiaomi Redmi 2
- We place the package from the localized MIUI on the memory card of the device.
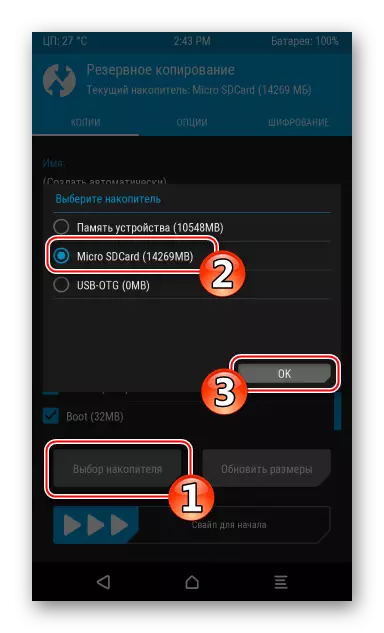
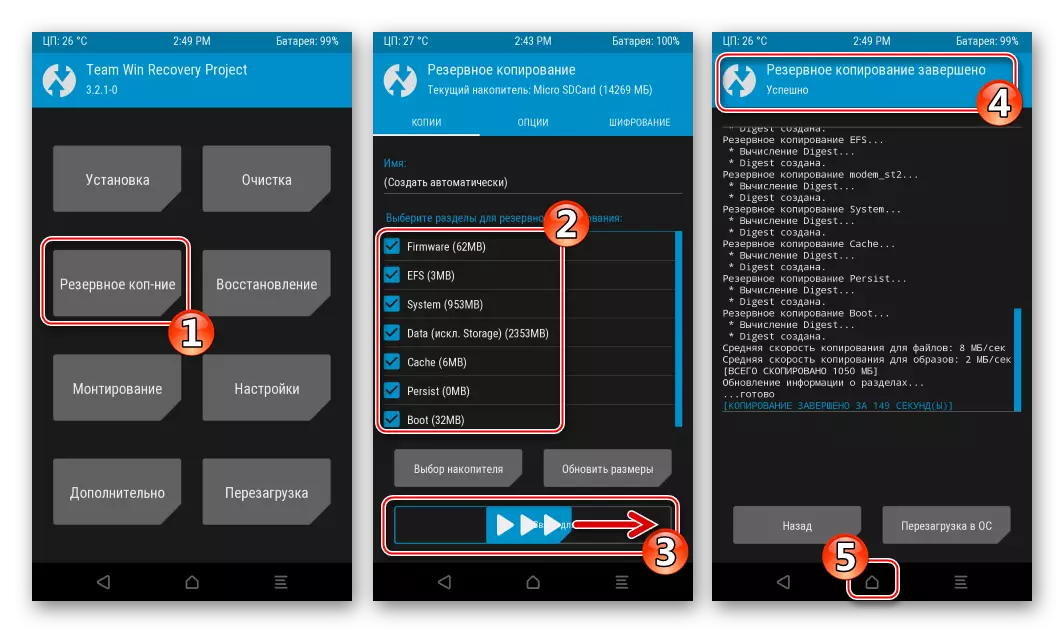
- Reboot to TWRP, make a backup of the installed system using the "Backup" option.

As a backup storage, select "Micro Sdcard", since all information from the internal memory of the smartphone will be removed during the firmware process!
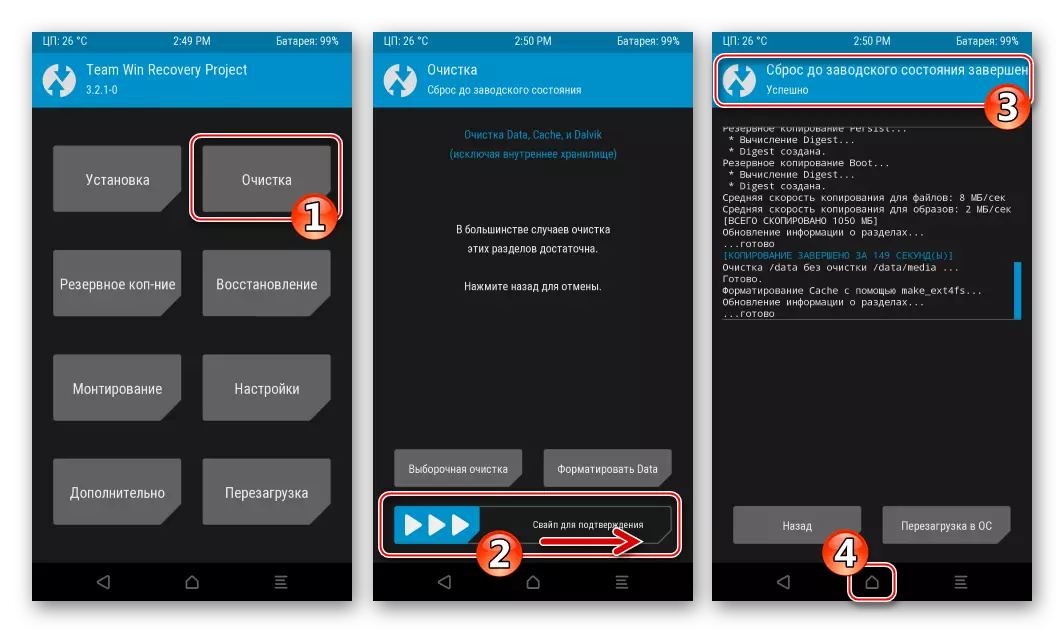
- Select the point "Cleaning" and formatting sections.
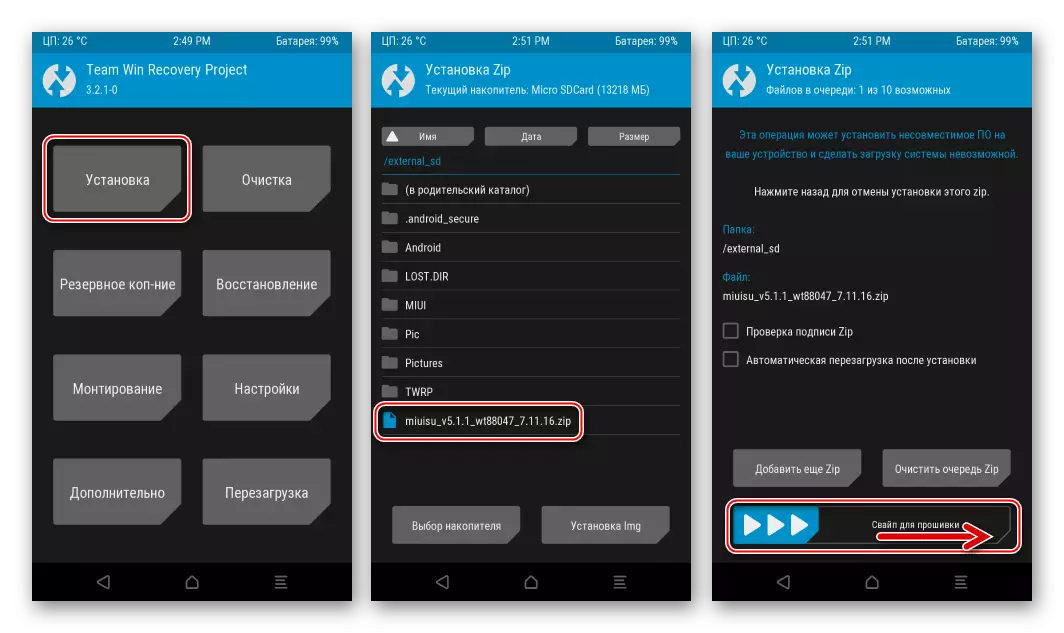
- Click "Installation" and specify the path to the package with a localized firmware. Then activate the "swatch for firmware", which will give the beginning of the installation procedure.
- We expect to end the installation and click "Restart in OS" upon completion.
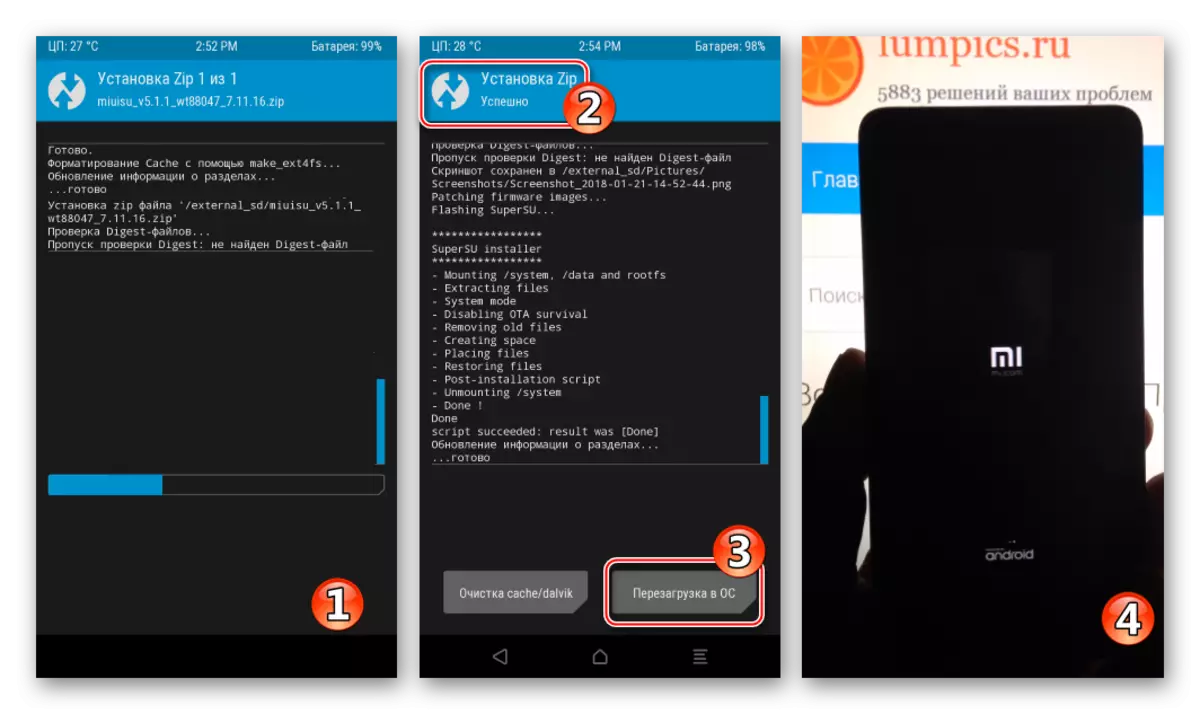
- It remains to wait for the advent of the welcoming screen of the modified Miui
And configure the system.
- Firmware localized MIUI completed!
Step 3: Installation of custom OS
Many users in the desire to get on their Redmi 2 android the latest version to pay attention to custom firmware. The leader in the number of installations among such systems is the decision from the team Lineageos. . With this firmware, we will equip the device, executing the items of the instructions below, but users can choose any other decision based on android 7 for the apparatus, the installation methodology is not different when using different customs.
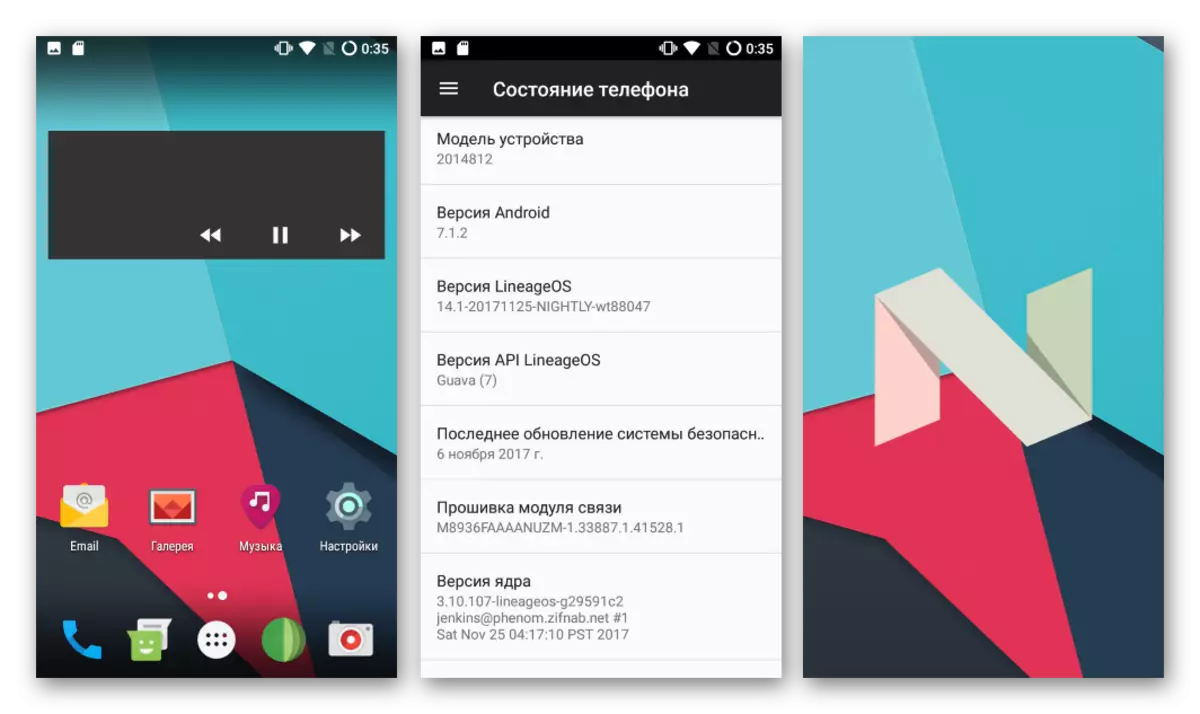
The following link below the package containing the latest at the time of creating the material to build LineageOS 14.1, which is based on Android 7.1, as well as a specialized file designed to go to Nougat.
Download everything you need to install LineageOS 14.1 based on Android 7.1 in Xiaomi Redmi 2
- Unzipped the resulting link above and put the contents (two zip files) to the root of the device's memory card.
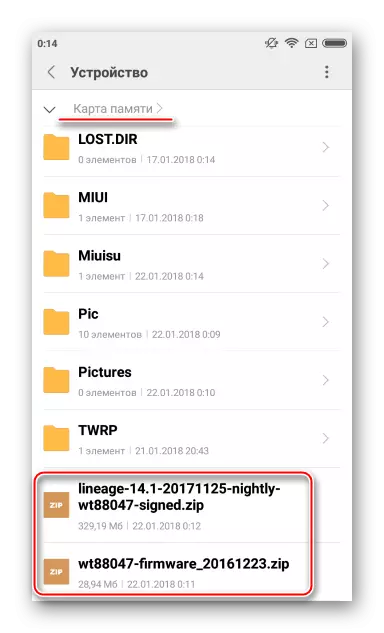
- Reboot to TWRP and create a backup of all sections.
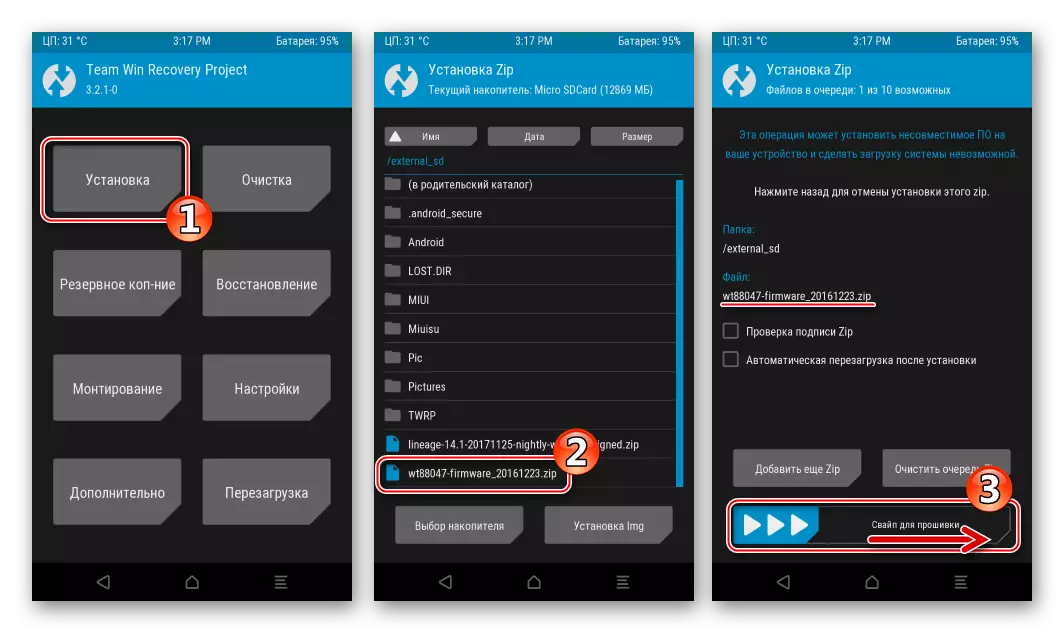
- Install the file "WT88047-Firmware_20161223.zip" by calling the "Installation" function.
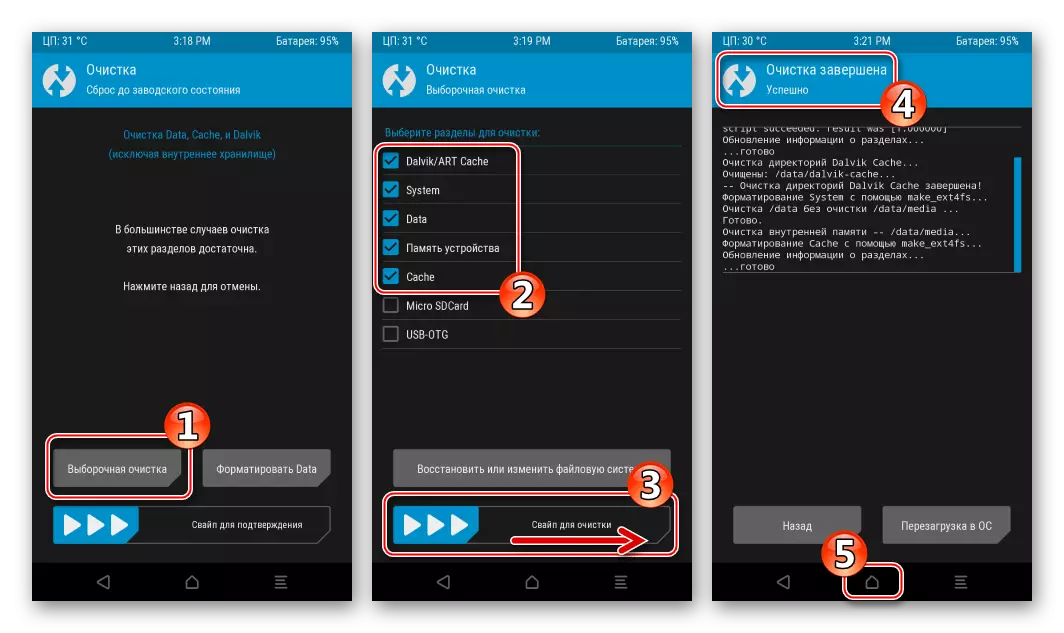
- Go to the TWRP main screen and clean all sections, with the exception of Micro SDCard, passing on the next way: "Cleaning" - "Clearing Cleaning" - Setting the marks in front of the sections - "Swipe for cleaning".
- After completing the formatting, go to the main screen and restart TWRP: "Restart" - "Recovery" - "swipe for reboot".
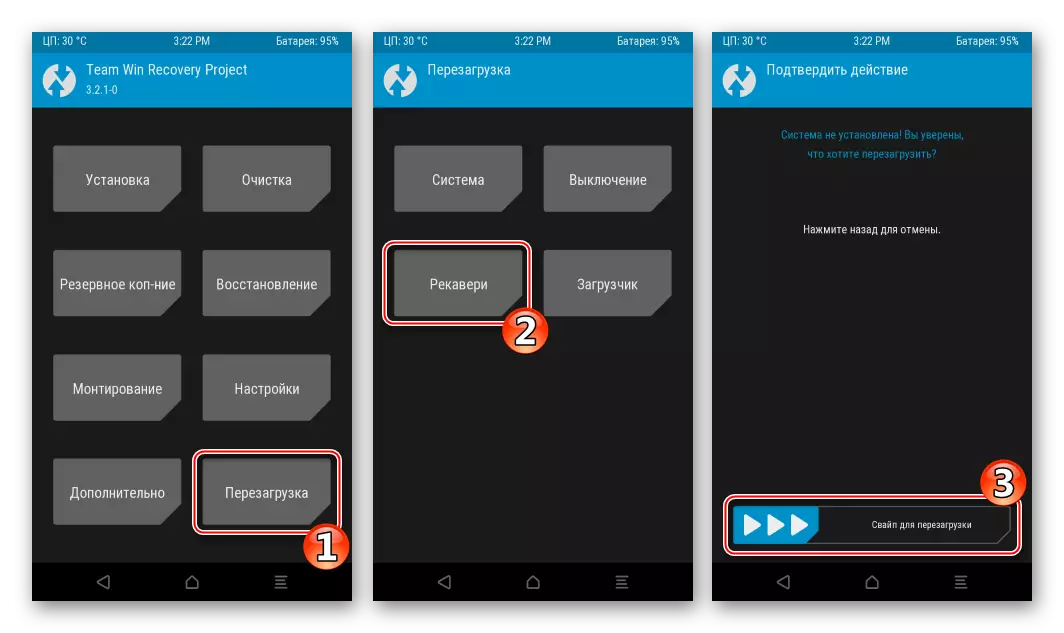
Restarting the recovery will reset its parameters. Re-select Russian interface language and shift "Allow the changes" to the right. As with the initial TWRP configuration.

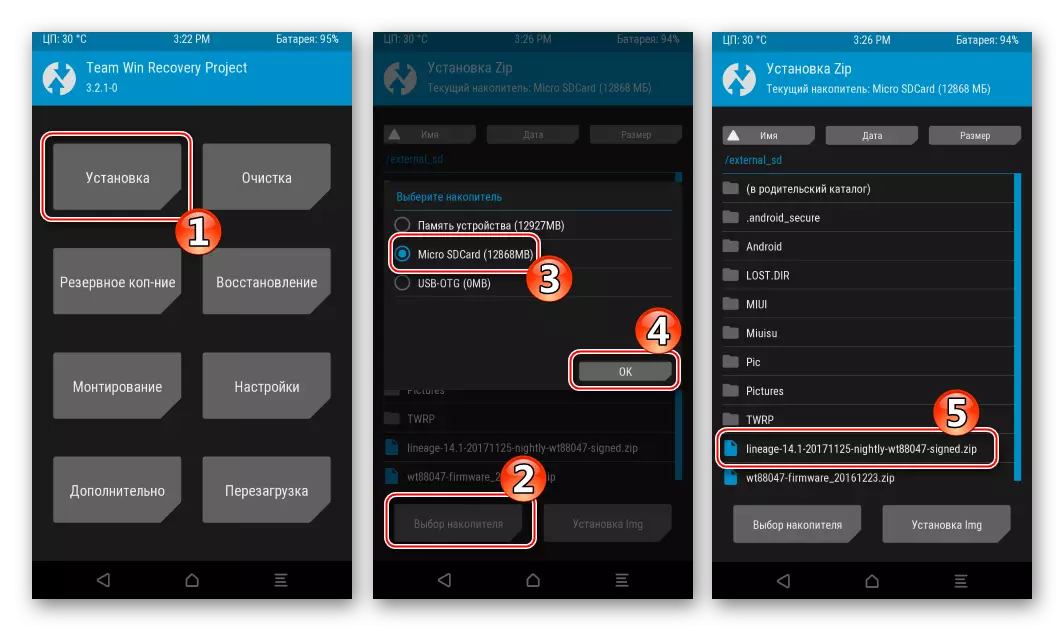
- We call the "Installation" option, select "Micro SDCard" by clicking "Selecting a Drive", and specify the zip file containing the custom firmware.
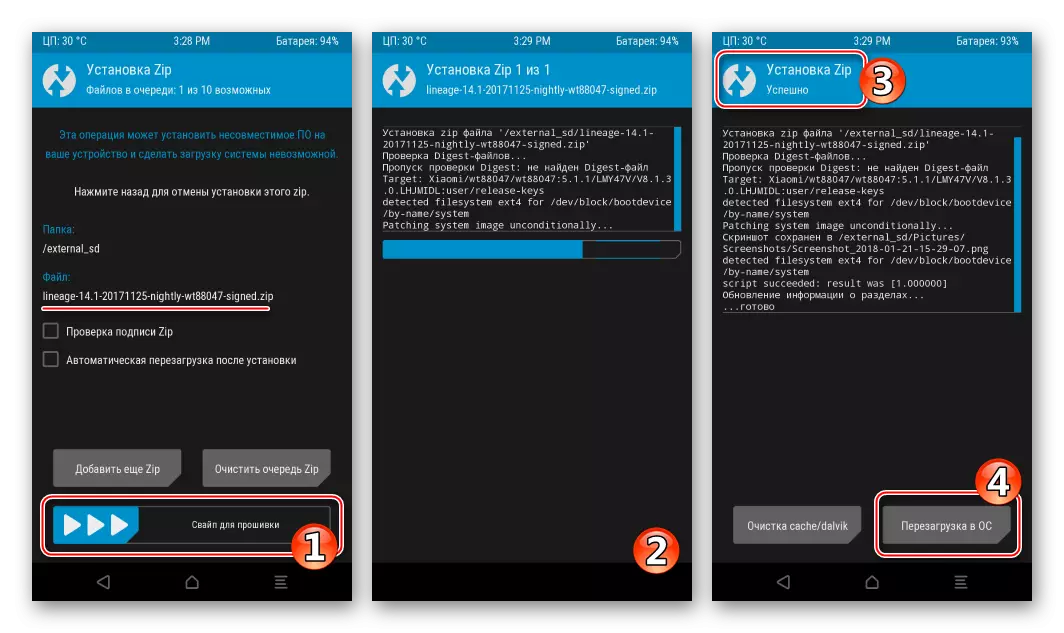
- Everything is ready to start installation. We move the switcher "Swipe for firmware" to the right and expect the files to be transferred to the appropriate sections. After the status "Successful" appears at the top of the screen, tap the "Restart in OS" button
- It remains to wait for LineageOS initialization and define the basic Android parameters after the welcoming screen appears.
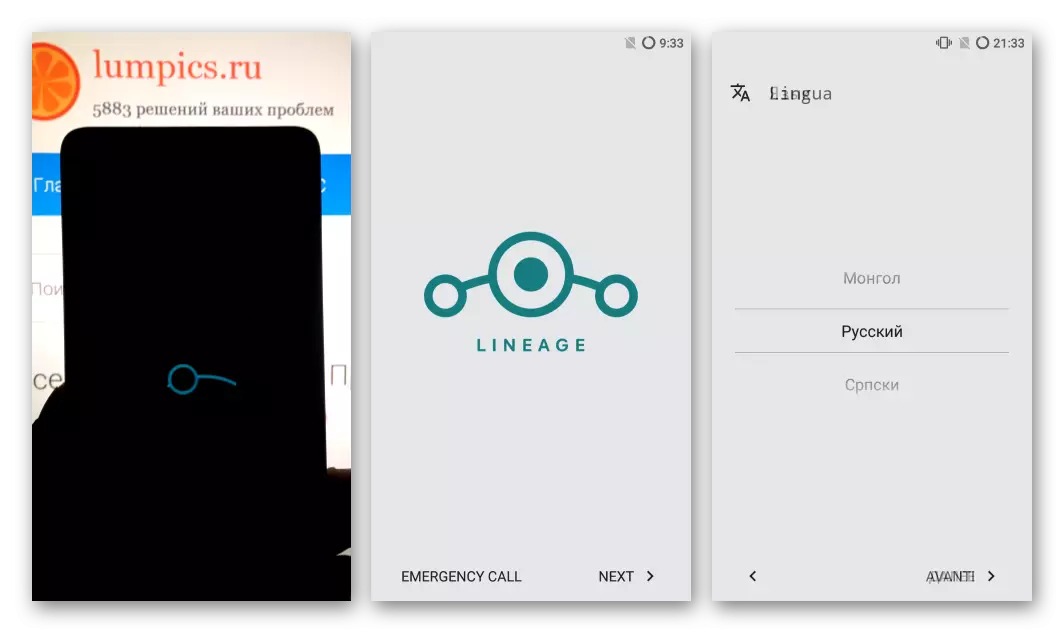
- One of the most popular unofficial systems for Xiaomi Redmi 2 based on Android 7.1
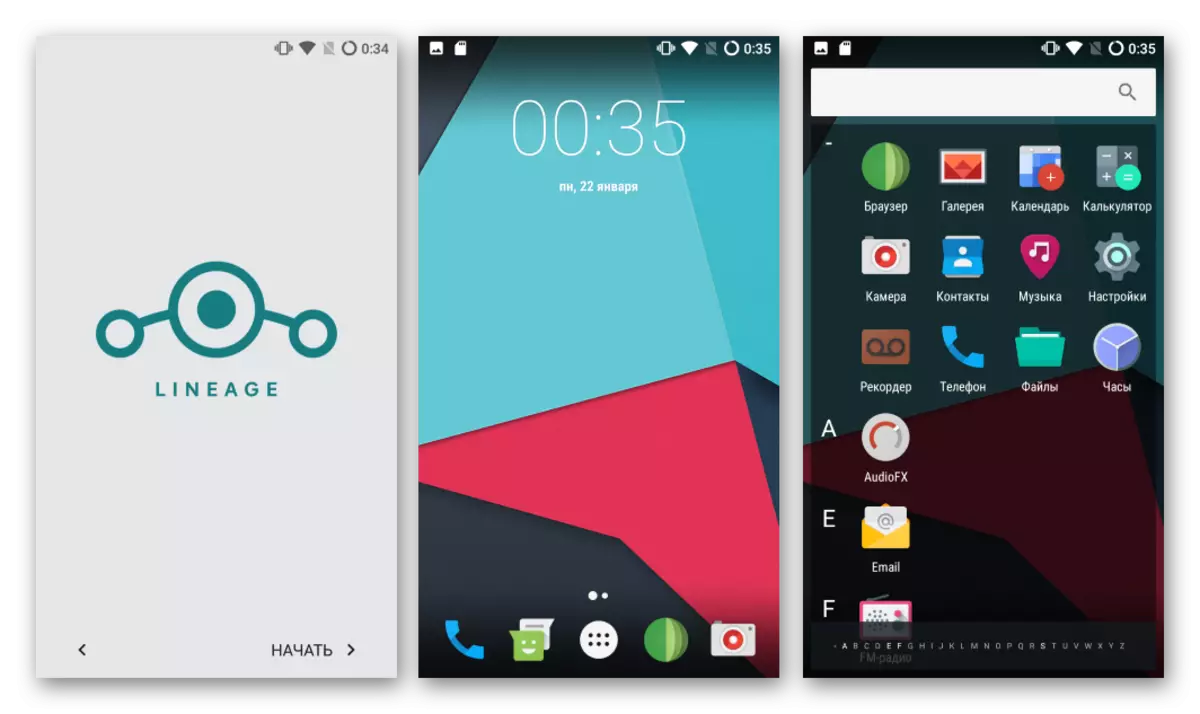
Ready to fulfill your functions!
Additionally. The official version of LineageOS, like many other custom operating systems for the model under consideration, does not contain in their composition of services and Google applications, that is, after installation, many familiar features are not available after installation. To correct the situation, we will use the recommendations from the link below.
Read more: How to install Google services after firmware

So, the main methods are considered above, using which you can update, reinstall, restore and completely replace the operating system in reality a very successful Redmi 2 smartphone from Xiaomi. Performing instructions carefully without hurrying and pondering every step, you can easily give the device "second life" and eliminate all possible problems with its program part!