

Shadow Copy Service - Embedded in Windows Option that allows you to copy files in automatic mode with which the current time is working. This allows you to restore their previous versions if necessary. However, initially this parameter is disabled and the user will have to manually not only activate it, but each time you create new copies to always have access to topical backups. Today we will demonstrate two methods for implementing this task, and as a third, consider copying automation.
Method 1: System Properties Menu
The method using the graphics menu is not the easiest because you have to go to different windows and search for appropriate items. If you want to speed up the process of creating a shadow copy and are not afraid to use the command line for this, immediately go to the next instruction, but consider that the space allocated to the backup copies will be selected automatically. Manual setting allows you to flexibly set suitable values, which is carried out like this:
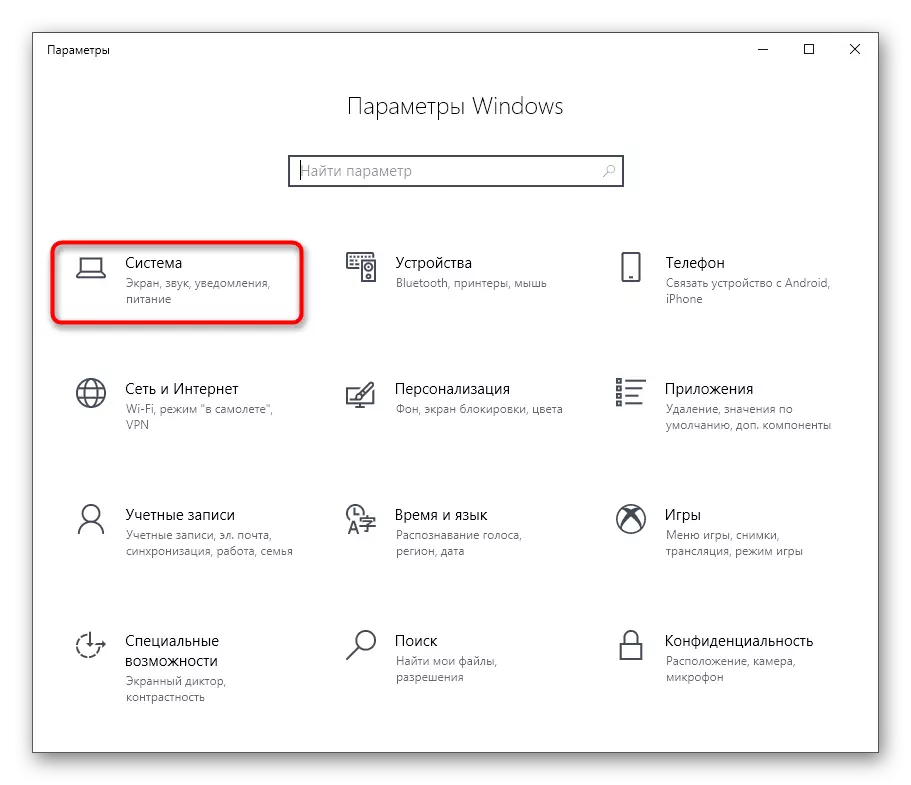
- Open "Start" and go to "Parameters" by clicking on a special button in the form of a gear.
- In the menu that appears, select the first section called "System".
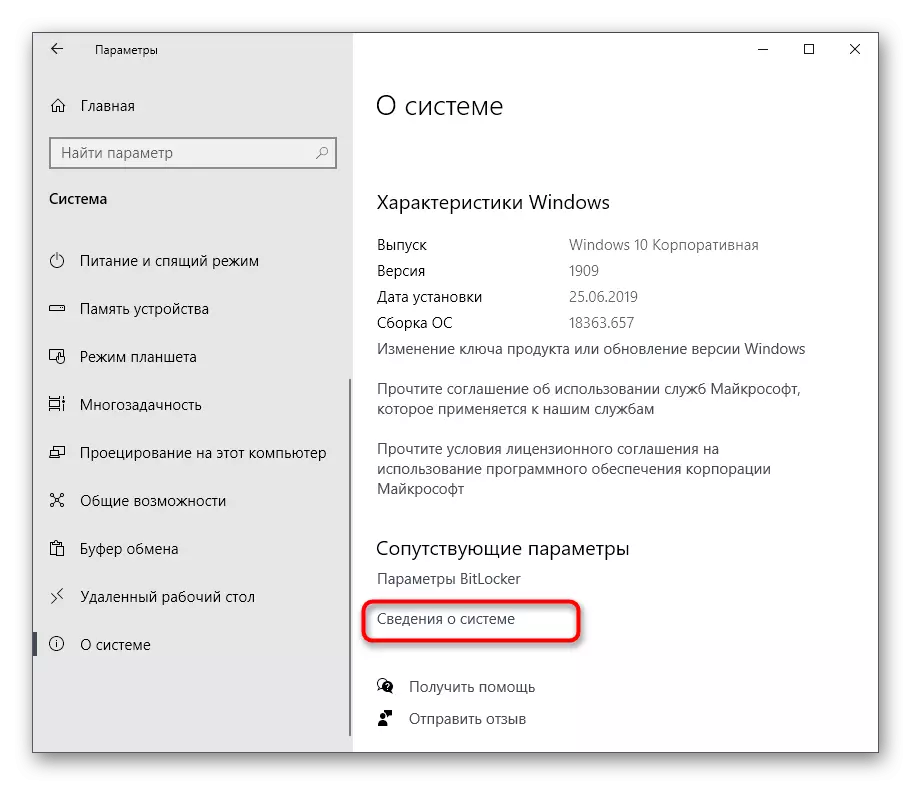
- Through the left panel, move to the category "On System".
- Source down where to find the line "System Information" string.
- There will be a transition to the "System" section, which is in the control panel. Here you are interested in the inscription "System Protection".
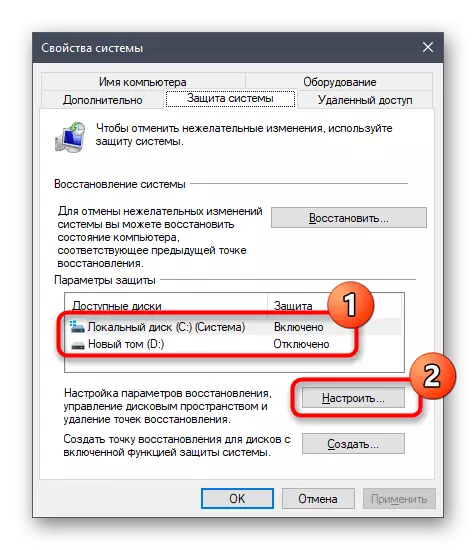
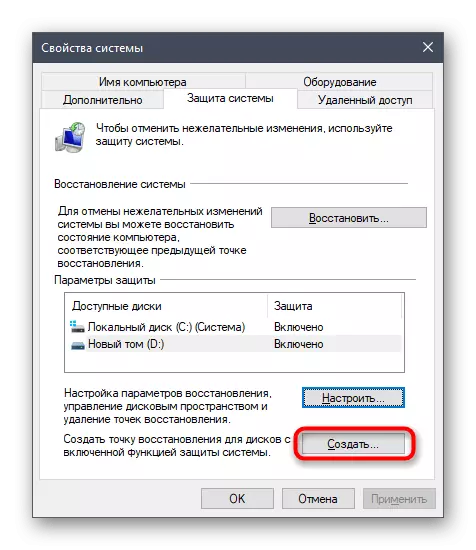
- In the Properties window, select the logical volume of the disc with which you want to work, and go to "configure".
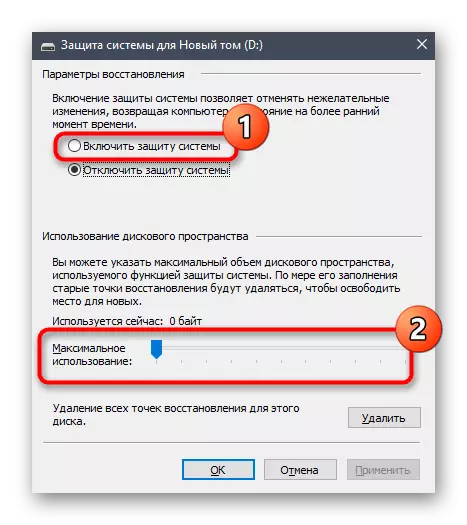
- Mark the marker "Enable System Protection" and set the maximum space that can be highlighted for backup copies. The amount of information is selected by the user independently, pushing away from personal preferences and available media.
- After applying the changes, go back to the previous menu, where press the "Create" button.
- Enter the name of the recovery point and confirm the creation.
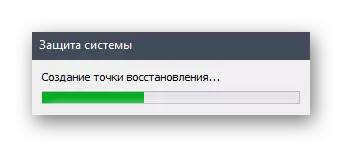
- Expect the process completion. It will take literally a few minutes, which directly depends on the amount of information on the disk.
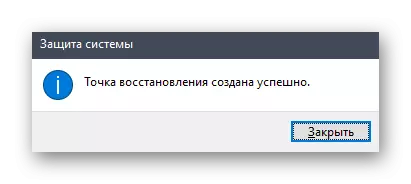
- You will receive a notice of successfully creating a recovery point.
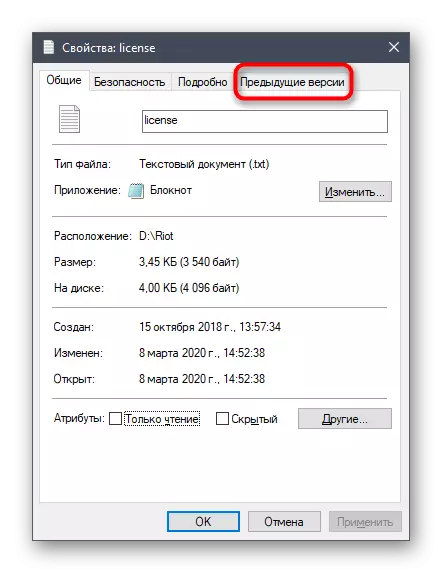
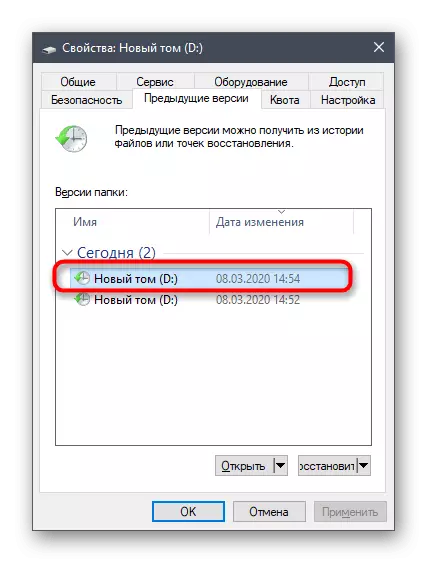
- To check, change any file located on the selected disk, and then click on it by PCM and select "Properties".
- Switch to the "Previous Version" tab.
- Now you see that there is an old version of the file, which can be restored if you want.


As you already understood, the last version of the file will be created only after making changes, which characterizes the technology of shadow copying. We will specify that when performing previous actions, you have created only one recovery point, from which it will be necessary to repel if necessary to return objects. We advise regularly create new records as it was shown above to maintain the operating system up to date and accidentally do not lose important objects.
Method 2: Command String
An easier option to create a backup shadow copy of the selected media is to use the console command. However, in this case, you will not have the ability to independently select disk space for the previous versions. If you are satisfied with this state of affairs, follow these steps:
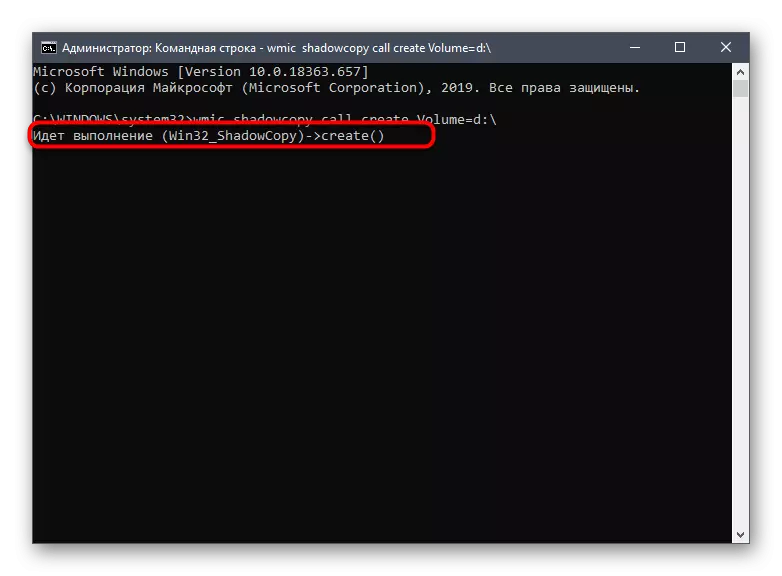
- Run the command prompt on behalf of the administrator in any convenient way, for example, finding the application itself through the search in the "Start" menu.
- Enter the WMIC ShadowCopy Call Create VOLUME = D: \ and click on ENTER. Literature D Replace the Tom label for which a copy is created.
- The execution of the operation will begin, which will notify the corresponding console message.
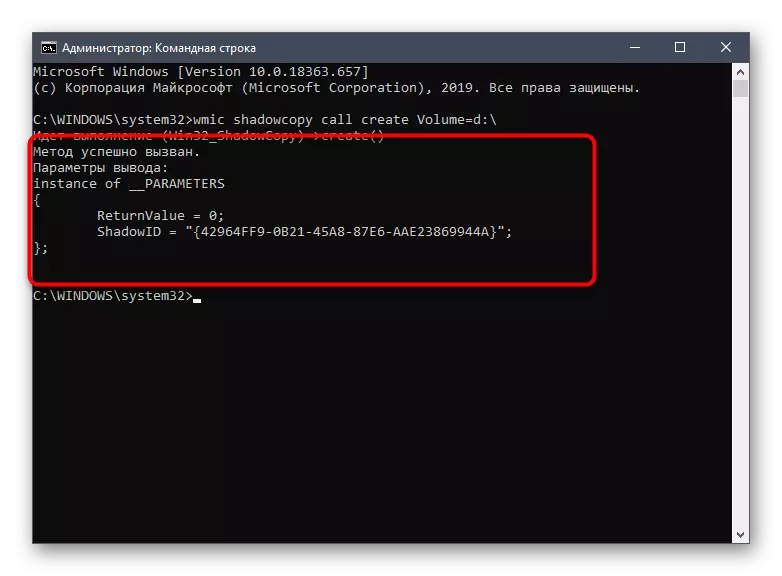
- At the end you will receive a string with the output "The method is successfully summoned."
- Go to the disk properties and on the "Previous versions" tab, see whether the new version of the directory has been created.


If you need to re-create a shadow copy, call the same command and wait for the operation. Do not forget to change the letters of disks if this process is performed for different logical partitions.
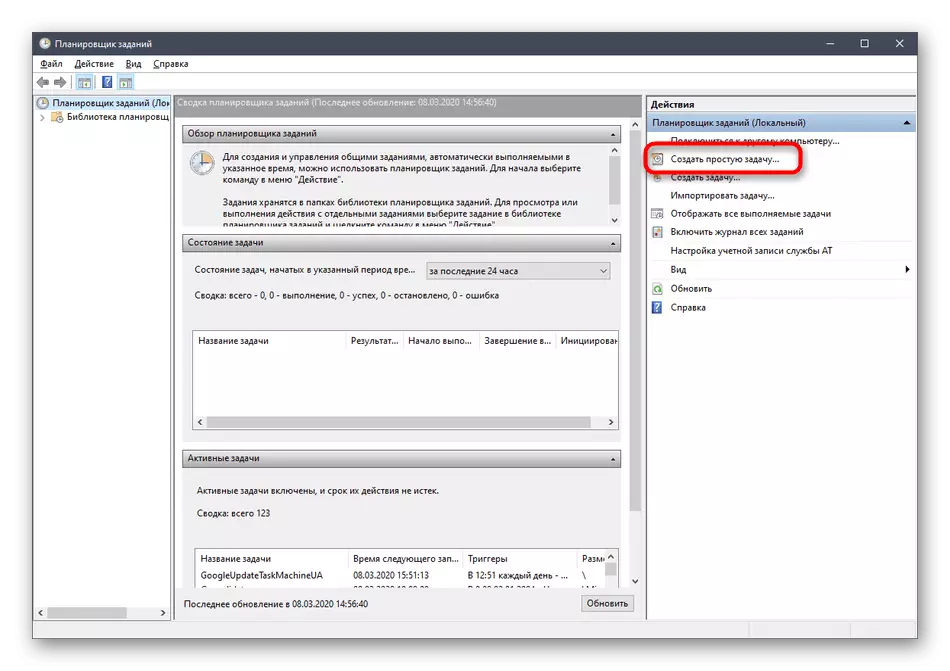
Method 3: Shadow Copy Automation
At the beginning of the article we promised that we would tell about the method of automating shadow copying. This is done by adding a new task through the "job scheduler". Then, at a certain period of time, the command considered above will be called and create a new recovery point.
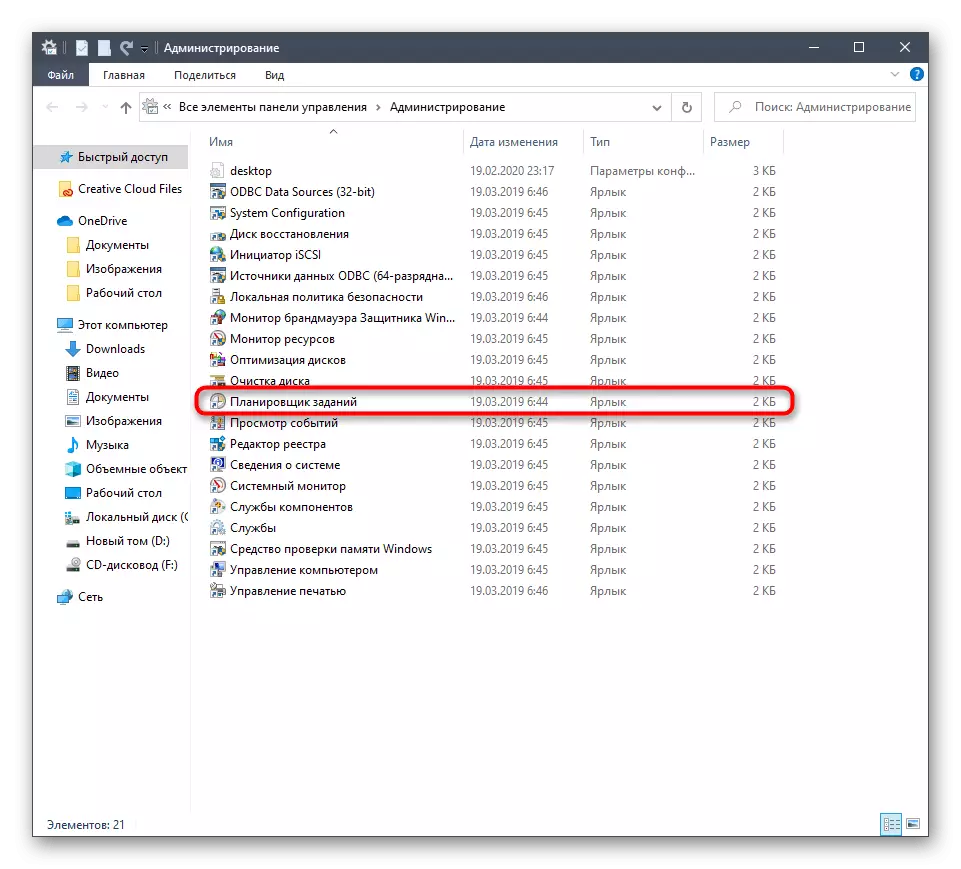
- Open the "Start" and find the "Control panel" view through the search.
- There, select the "Administration" section.
- Run the job scheduler module.
- In the "Actions" block, which is located on the right, click on the "Create a simple task" line.
- Enter an arbitrary name to distinguish this task from others in the list, and then go to the next step.
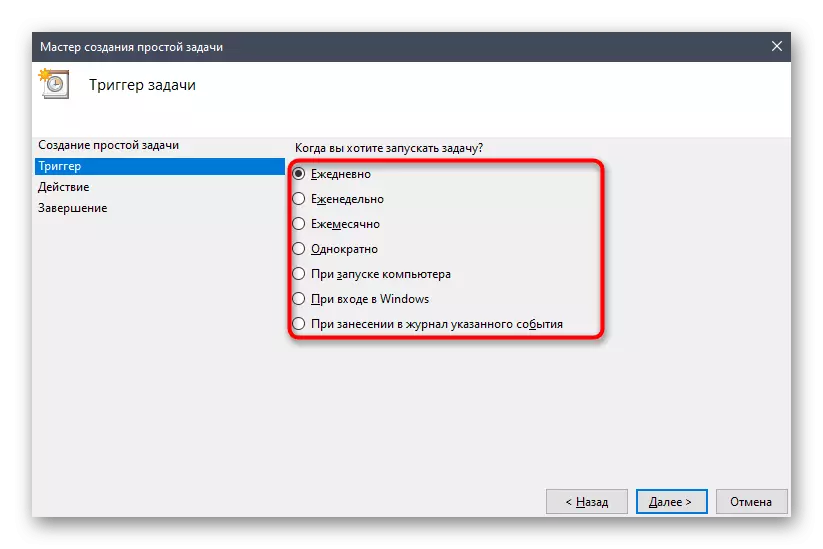
- Install the trigger to start the task, putting a marker near the appropriate item. For example, you can perform a new shadow copying every day or only once a week.
- After that, set the gap for the task and set the repetition if required.
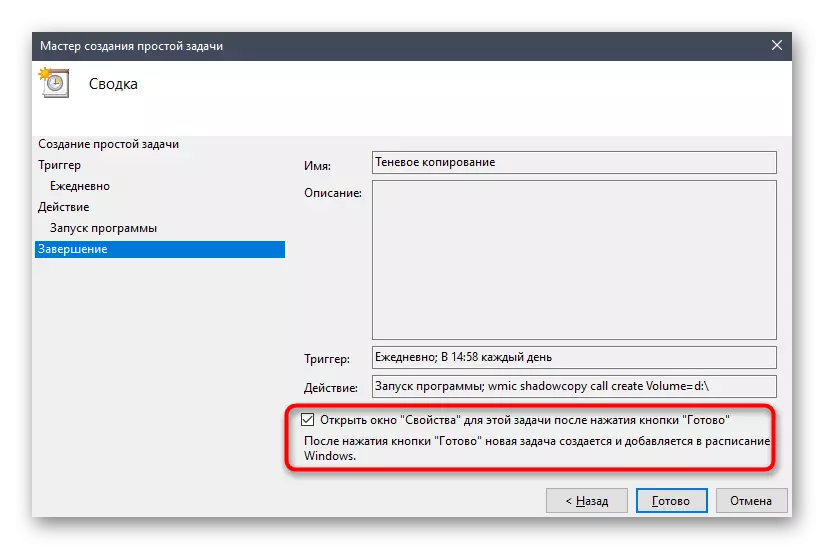
- As an action, check "Run the program".
- In the "Program or Script" field, enter WMIC, and for "add arguments optional)" to assign ShadowCopy Call Create Volume = C: \, replacing the drive letter to the desired one.
- At the final stage, tick the "Open Properties" window for this task after pressing the "Finish" button.
- After opening properties, assign the status "Run with the highest rights" and complete the job.


Now you can be sure that the task will be executed at the designated time period and the shadow copies of the files will automatically be updated. In the Preview window of previous versions, you can delete all recovery points. Consider this and periodically make this task so as not to save on the computer unnecessary files.
It was all information about the shadow copying in Windows 10, which we wanted to submit in today's manual. If you are interested in the topic of direct backup operating system, read the appropriate third-party thematic programs and staff in the article on the link below.
Read more: Windows 10 Backup Backup Instructions