

When connecting the Internet from the NetByNet provider, many users acquire routers provided by the company itself, because often there are discounts or other reasons for such a purchase arise. If employees from the Internet service provider did not configure the equipment or there is a situation where this procedure is done manually, it is recommended to use the Special Guide that you will see.
Preparatory actions
For a new router, you should choose the optimal location in the house or apartment, as it will affect the subsequent connection of the cables and the quality of the operation of the wireless access point. Highlight a place that it came to not to do unnecessary cable laying, and the signal from Wi-Fi covered all the workplace, because smartphones and laptops are often functioning in different rooms, and do not want the connection stability when moving the device. If you have not yet connected the router to the Internet cable from the provider and to your computer through which configuration will be configured, it's time to do this operation.
Read more: Connecting a router to a computer
There are different conditions for receiving network settings that depend on the Protocol provided by the Provider. If you read further instructions, you will learn everything about their proper configuration, but now you need to make it so that the parameters of the operating system do not cause conflict with the router configuration. To do this, you will need to change only a few rules for the behavior of the network adapter in Windows by setting the receipt of DNS and IP addresses into the automatic mode. About how to make it as simple as possible, read further.
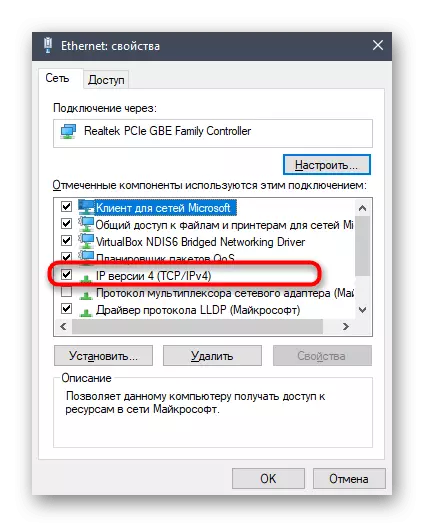
Read more: Windows network settings
Login to the web interface
We decided to select the entry procedure to the web interface into a separate section of our today's material, because we do not know which NetByNet router you purchased. The entire catch of this operation is to properly define the login and password for authorization. Most often both of these parameters are the value of the ADMIN, but sometimes the model manufacturer decides to specify other data to enter. Then they will have to be defined independently, using the instructions below.
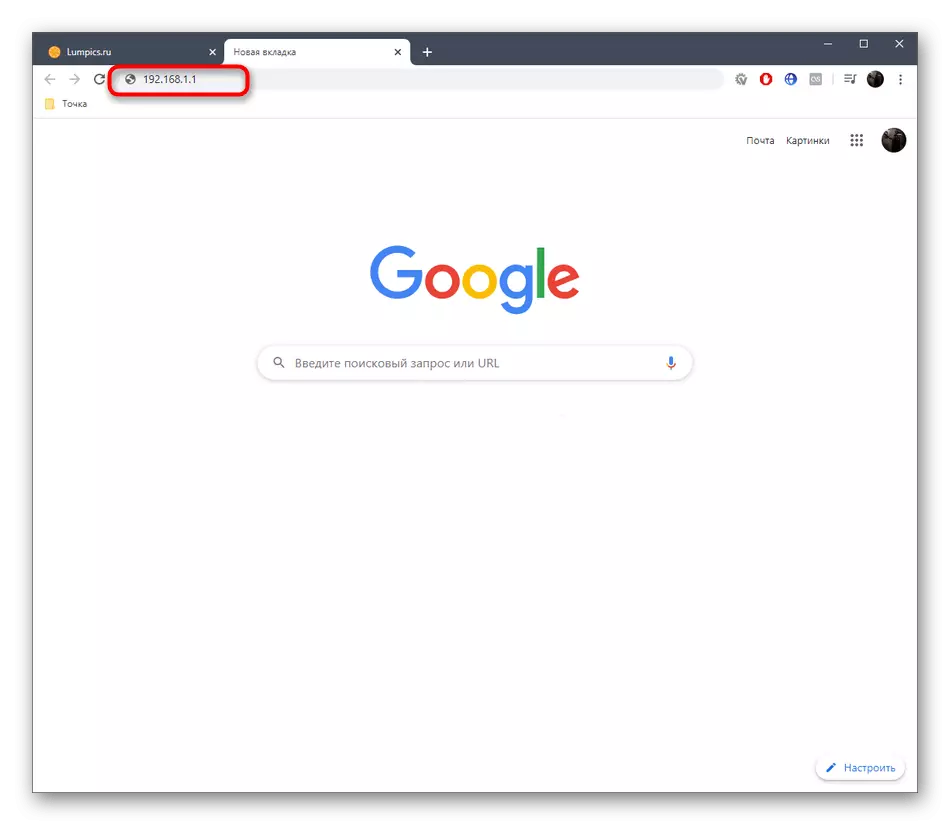
After that, open any convenient browser and in the address bar, enter 192.168.1.1 or 192.168.0.1. These are two options for entering the Internet center, which are considered universal for all types of routers.
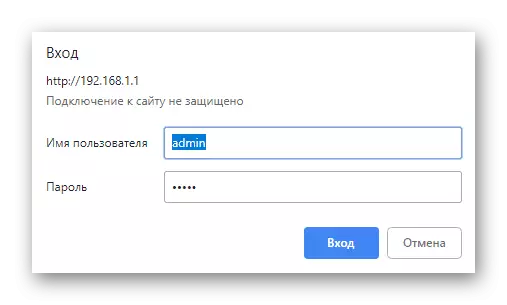
When displaying an authorization form, enter the username and password. You have already learned this information earlier, therefore no difficulties should have in the entrance.
Read more: Definition of login and password to enter the router settings
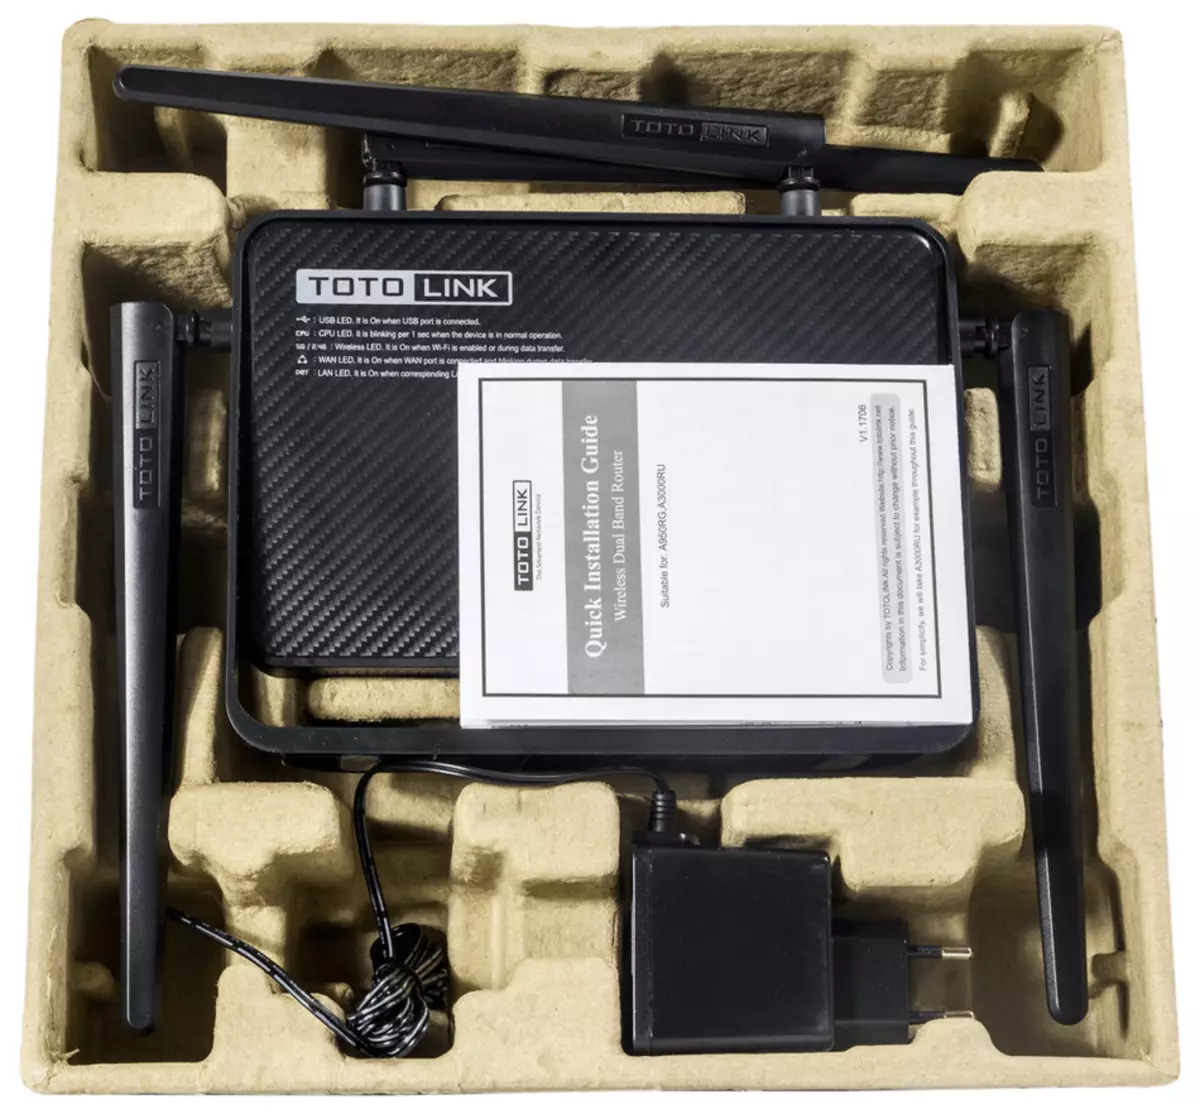
Once in the web interface, proceed to reading an article to explore all aspects of the router configuration. We clarify that today for example we took the most popular model of the routers provided by Totolink A3000RU. If you have another device, consider the features of the implementation of its web interface and follow the same actions. Additionally, we recommend using searching on our website. It is possible that we already have an article that is fully dedicated to the configuration of the acquired model of the equipment.
Fast setting
In TOTOLINK A3000RU, as in almost any modern router from this manufacturer, there is a quick setup mode, which allows you to install only the basic parameters required to ensure the correct operation of the wired network and Wi-Fi. Most users are suitable precisely such an option, so we offer to stay on it first.
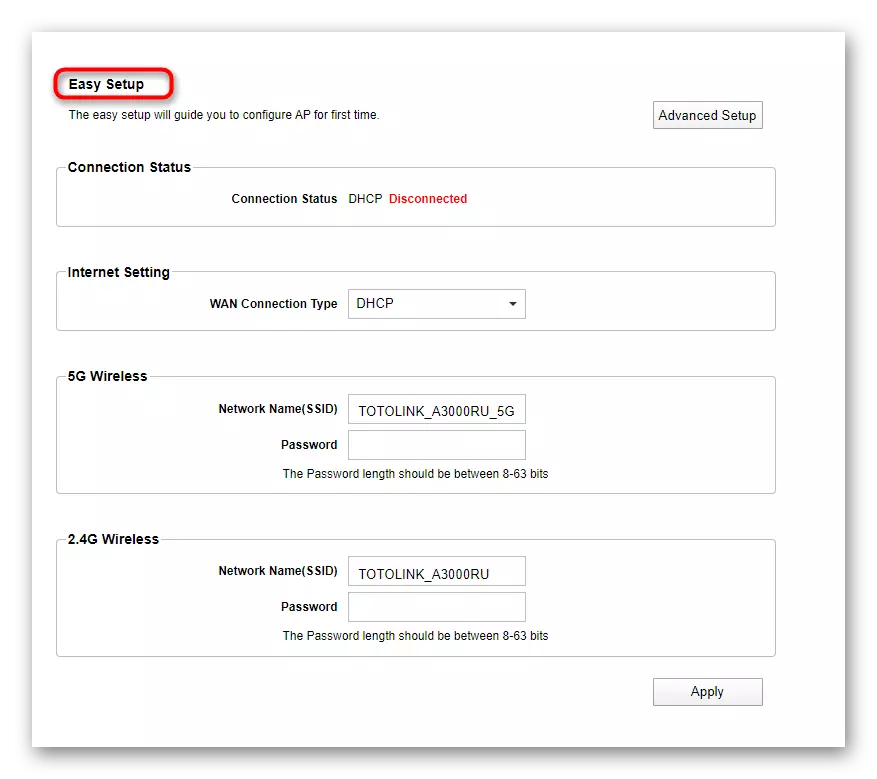
- After entering the Internet center, make sure that you are in the "Easy Setup" section. If not, you will need to click on the corresponding button to exit the advanced menu in the you need now.
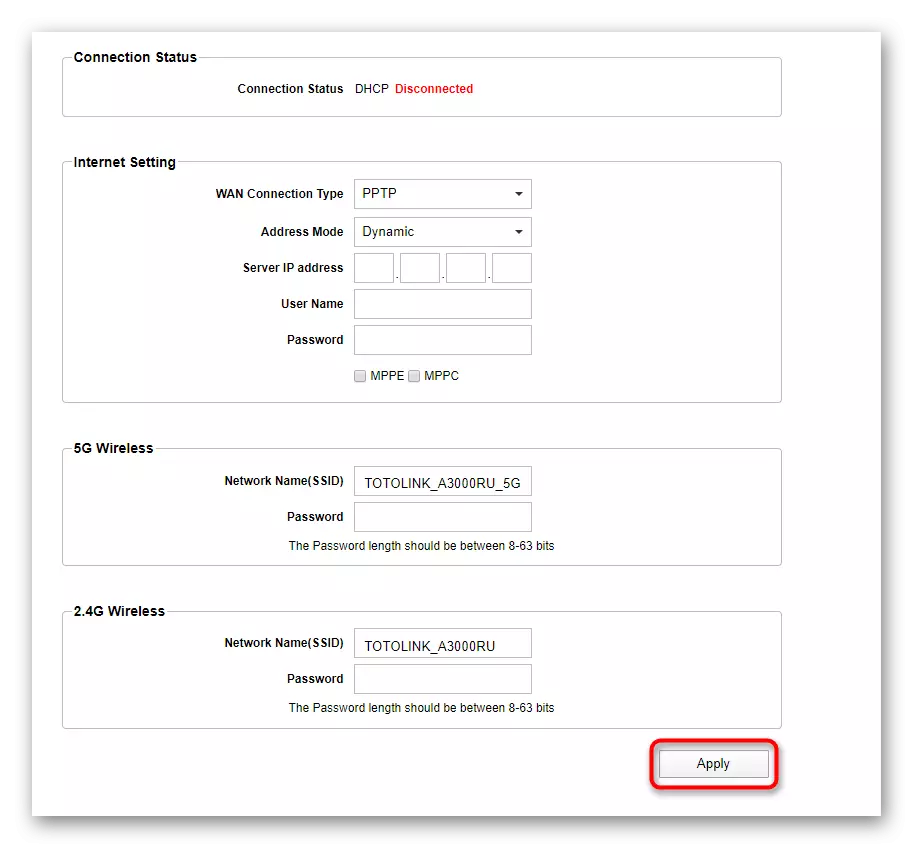
- For the correctness of the choice of further parameters will be answered by the "Connection Status". Thanks to it, it is automatically checking the connection that occurs when any changes are made. You need to ensure that the inscription "Connected" is displayed in the status.
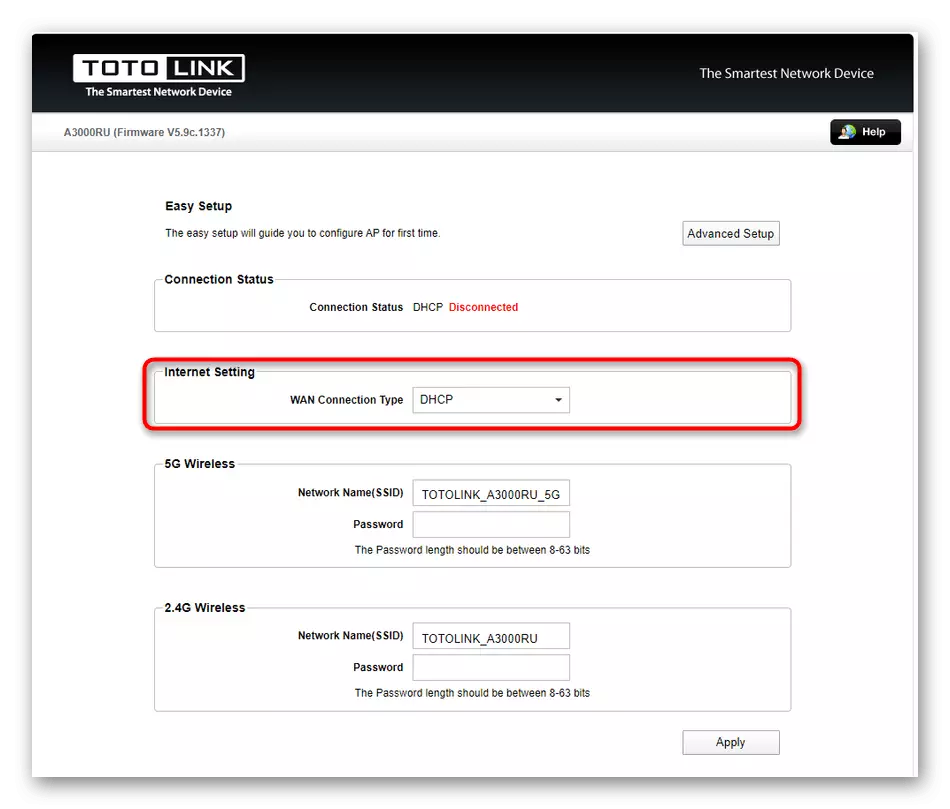
- Refer to the official documentation that is provided by the provider. In the contract or attached instructions, it must be specified which type of connection must be selected in the current tariff plan. It is this protocol and should be set to "Internet Setting". Now many Internet service providers choose a dynamic receipt protocol to obtain an IP address, and "DHCP" is selected in the drop-down menu. Additional configuration in this case is not required.
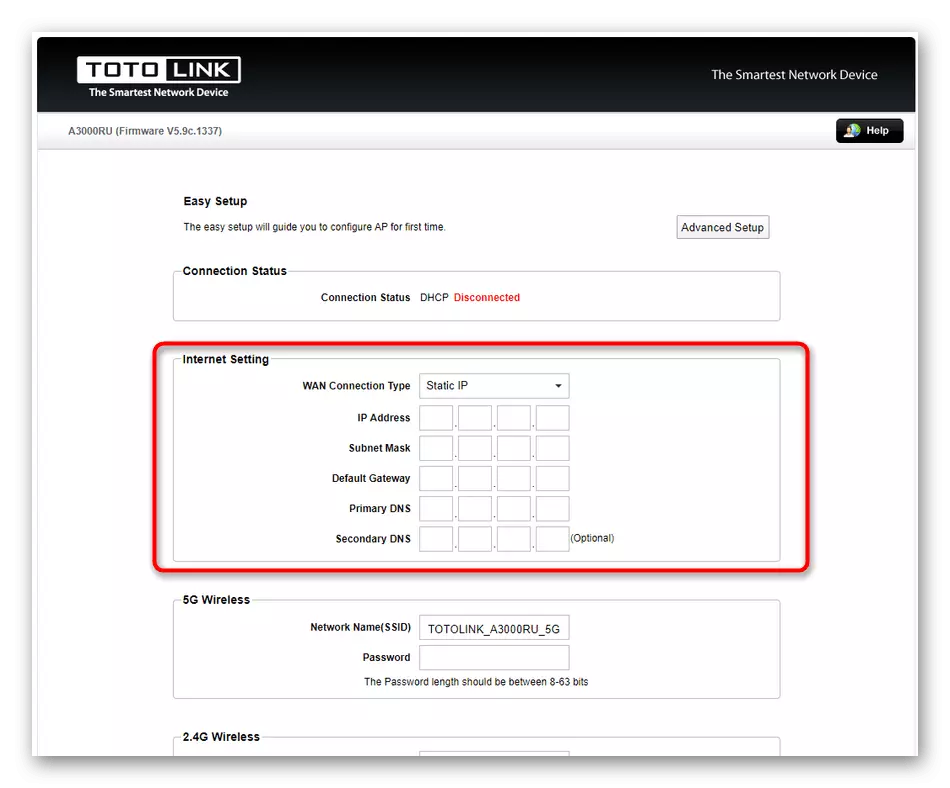
- When using a static IP address, all information is filled manually. This includes the IP address, subnet mask and DNS. All this information must be provided by the provider. If you can't find it, refer to the technical support and specify all the points that interest.
- In the Russian Federation, some companies prefer the PPPoE protocol, since it corresponds to the standards already established. If you select this setting, you only need to specify the username and password to enter the network. This data can already be guessing, also provides a provider.
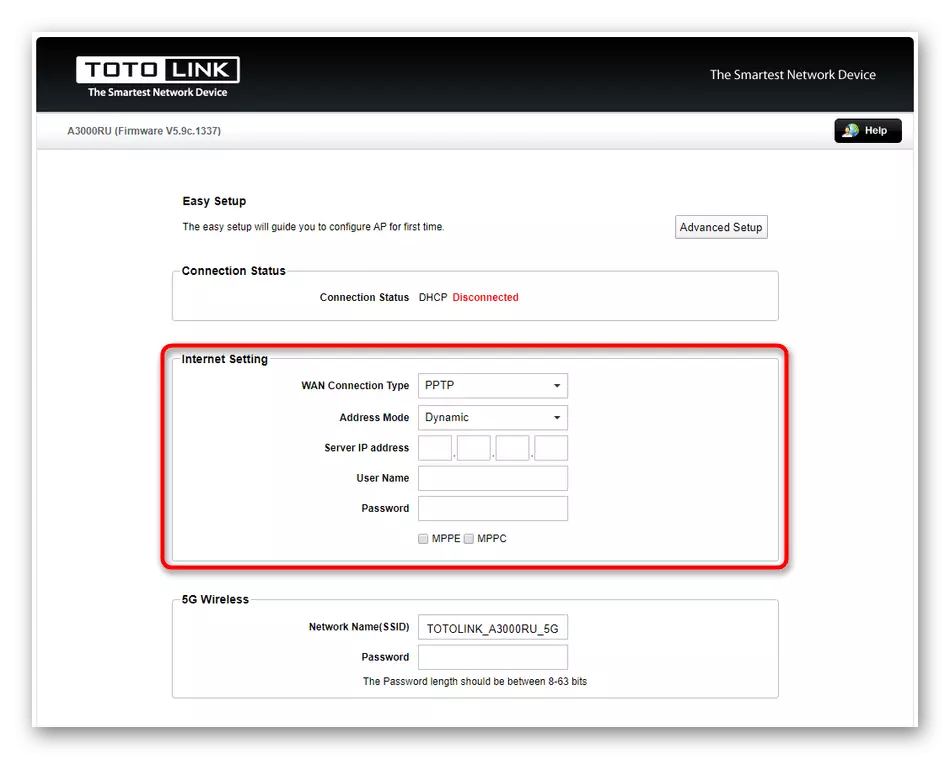
- Already an outdated PPTP protocol is configured approximately the same, but the server IP address and the type of it fits additionally.
- If the configuration of the Internet is received correctly, it should now appear access to the network when the computer is connected to the router via the LAN cable. To configure the wireless access point you just need to set it the name if the standard does not suit you, and then specify any convenient password consisting of a minimum of eight characters. At the same time, consider that some routers operate in two modes on different hertes and allow you to create two SSIDs to switch between them at any time, providing a more stable Wi-Fi signal.
- Before leaving the web interface, check out the correctness of the selected parameters, and then click on "Apply" to apply the changes and reboot the router.


Now you can safely switch to interaction with the TOTOLINK A3000RU router, opening the browser and using the Internet for other purposes. If in the future you will need to change any settings that are not included in the quick configuration mode, do this using the instructions in our next section.
Manual tuning TOTOLINK A3000RU
Manual adjustment of the router under consideration can also take not much time if the user needs to select the basic parameters. However, the extended menu has a huge number of auxiliary settings that can be useful in certain situations. We propose to deal with them in a step-by-step view of the leadership.Step 1: Network Settings
To begin with, it is necessary to ensure the correct receipt of the Internet from the provider so that there are no unexpected conflicts upon the subsequent editing of the parameters. In TOTOLINK A3000RU this process is happening like this:
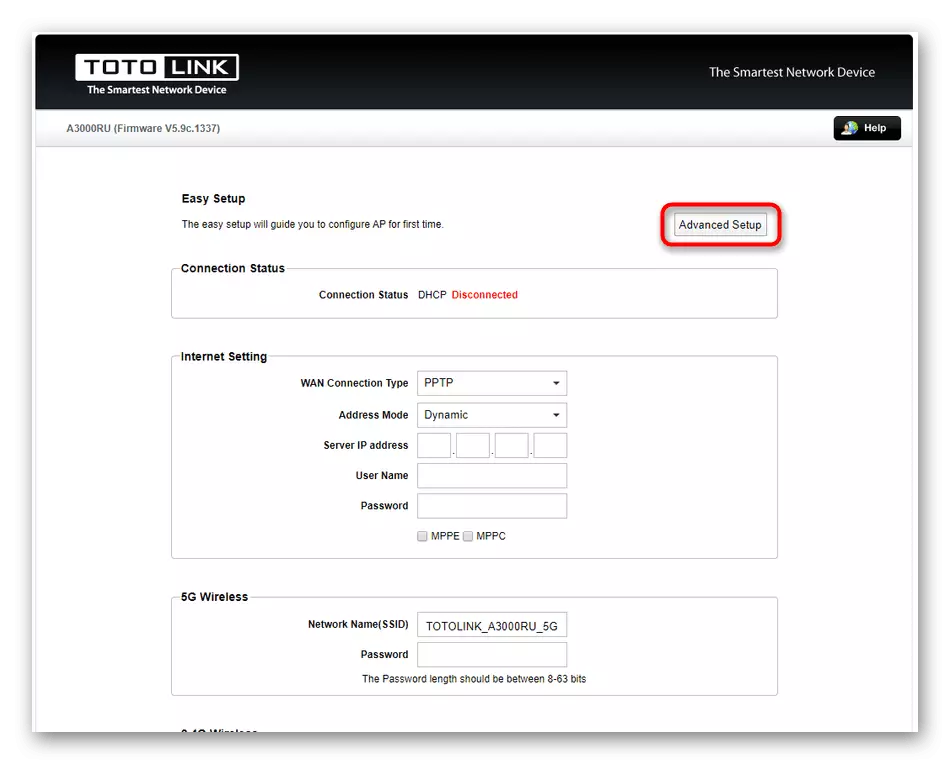
- Being in "Easy Setup" mode, click on the button on the right, which is called "Advanced Setup".
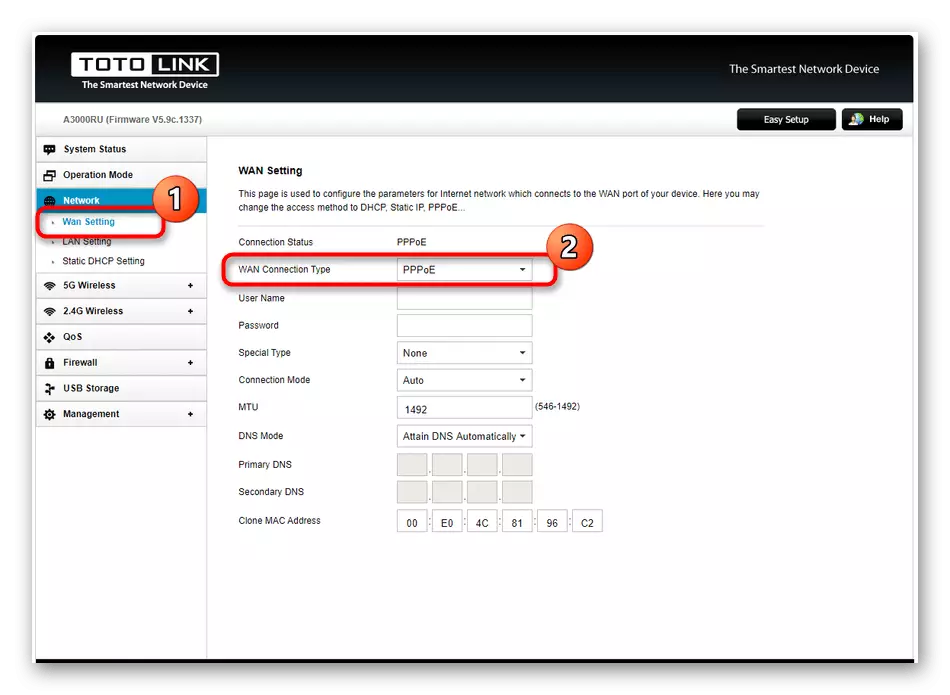
- Use the left pane to move to the "Network" section.
- Select the category "Wan Setting" and determine the connection type by using the Wan Connection Type menu. When considering a quick setting, we have already talked about which parameters should be specified with different WAN protocols. If you do not know what to enter in the emerging fields, refer to the previous instructions.
- As an additional parameter, the cloning option of the MAC address is present here. This operation is performed only in specific cases and is negotiated in advance with the provider. If you received a new MAC address, it must be entered in this menu, and then compulsory save all changes.
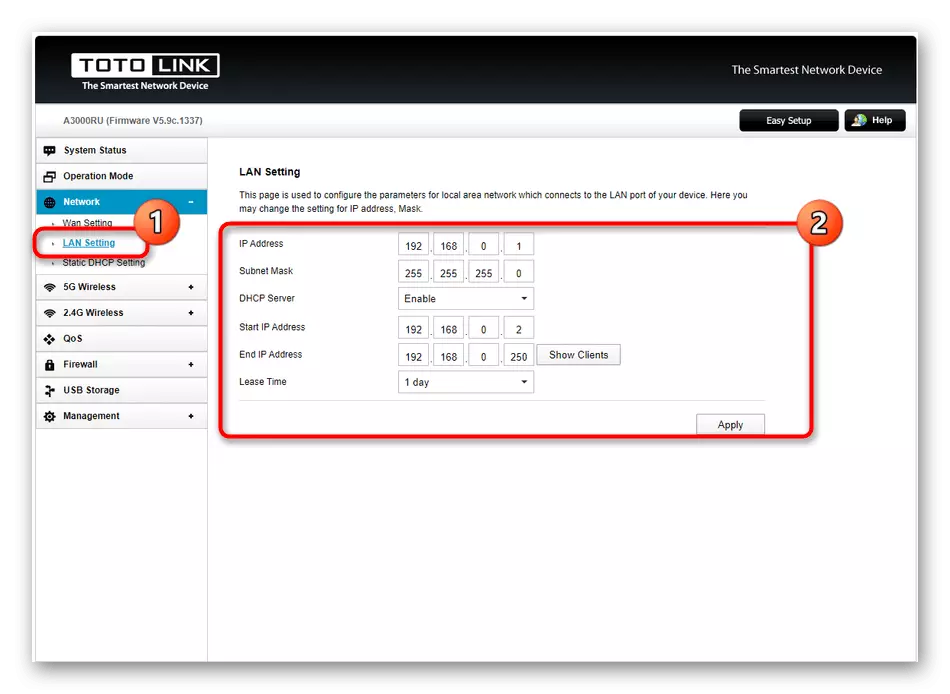
- In the same step, we will deal with the parameters of the local network, as they are in the section under consideration. Through the left panel, switch to "Lan Setting" and make sure that the default parameters are required required. Personal IP address should be viewed 192.168.1.1 or 192.168.0.1, subnet mask - 255.255.255.0. It is recommended to activate the DHCP server so that each connected device receives its IP, as well as set a free range of addresses, starting, for example, from 192.168.1.2 and finished 192.168.1.250. Time to reservation is not necessary in most cases.
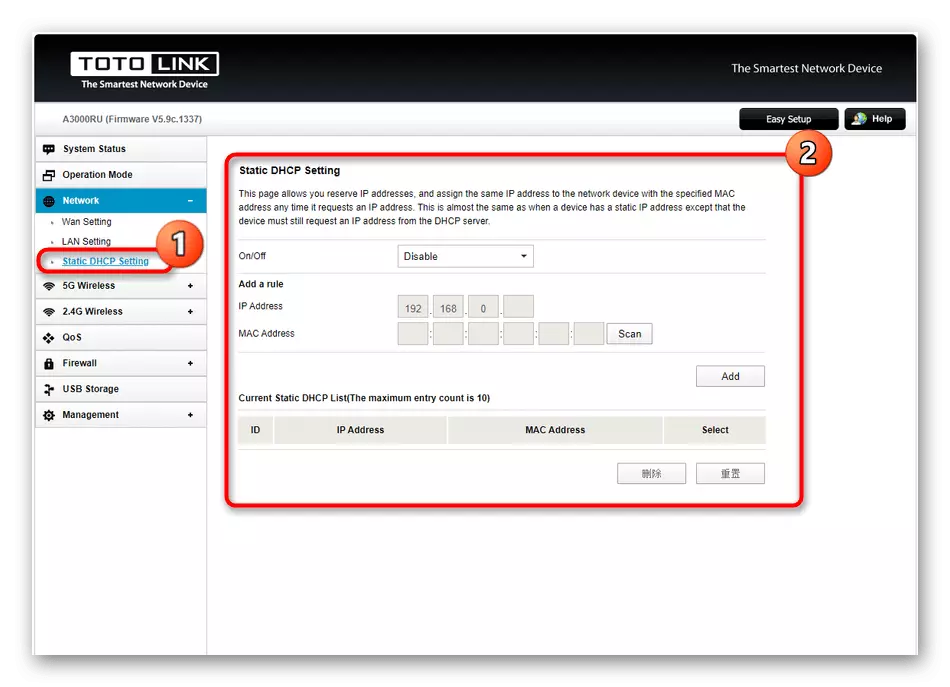
- The last category of the "Network" menu allows you to reserve IP addresses with Active DHCP for a specific device defined by the MAC address. If necessary, the rule itself should be activated, then scan a list of all available devices and select the necessary, specifying static IP for it. Sometimes it may be needed when editing the rules of the firewall or, for example, during the installation of any restrictions for a computer or a mobile device.


Save the changes and open any page in the browser to check the correctness of the network. If necessary, go back to the configuration menu and make sure that the settings are set correctly. When everything is correct, but there is no access to the Internet yet, it makes sense to contact the provider so that the specialists consult you and helped to cope with the difficulty arising.
Step 2: Wireless Access Point Settings
Almost always used router should handle the Wi-Fi signal so that the owners of mobile devices and laptops have the ability to connect to the Internet without using wires. Totolink A3000RU works on two frequencies and allows you to create different access points.
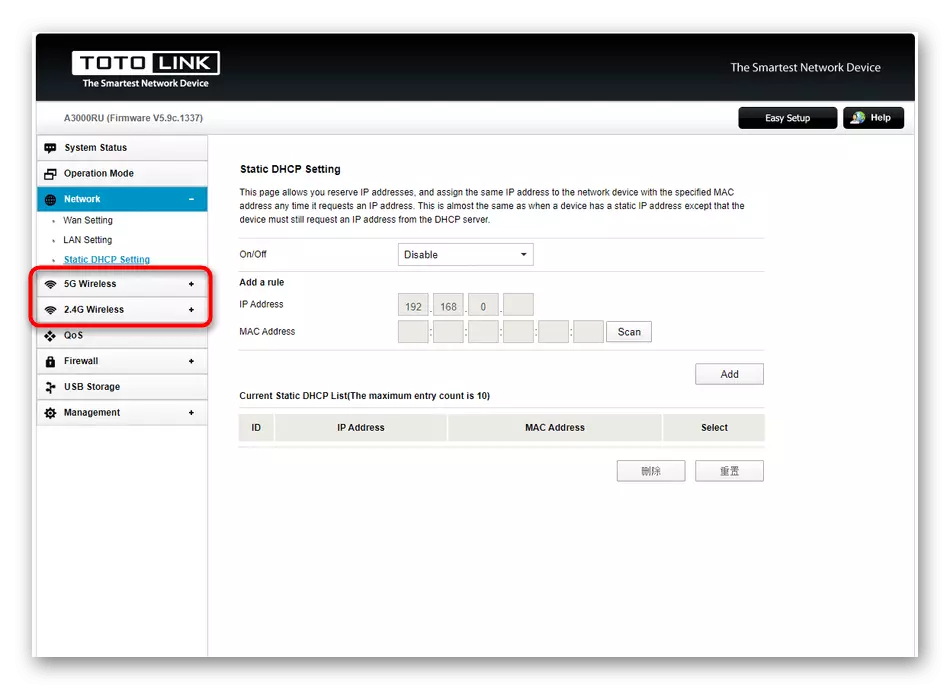
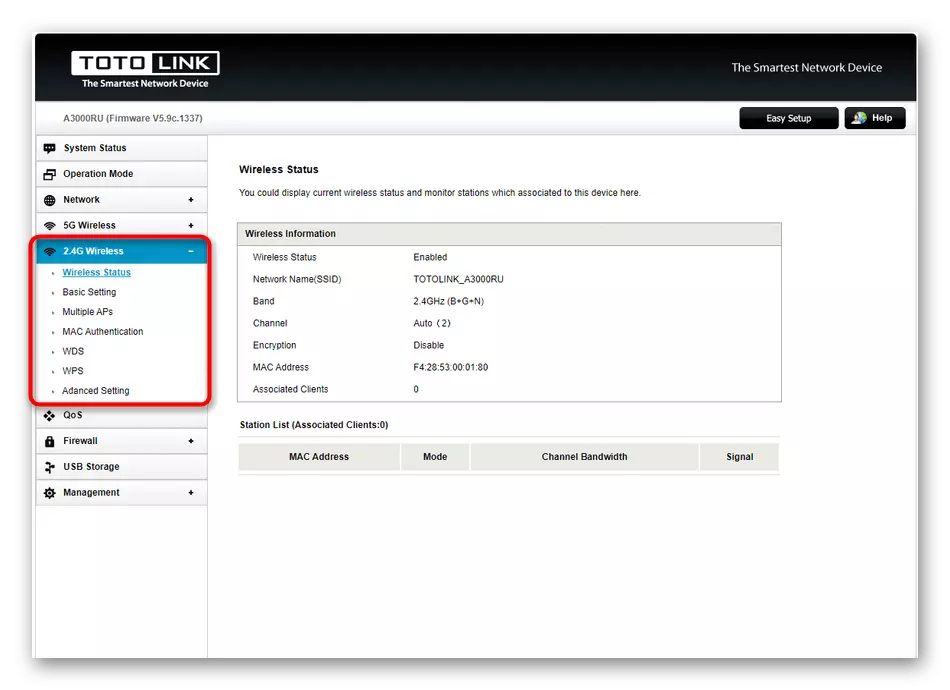
- On the left pane, select one of the available access points, pushing out the necessary hertes. We will specify that now there are not many routers at a frequency of 5G, so in places where there is a huge number of different routers distributing Wi-Fi, it is recommended to adjust the frequency of 5G to obtain the maximum stable signal.
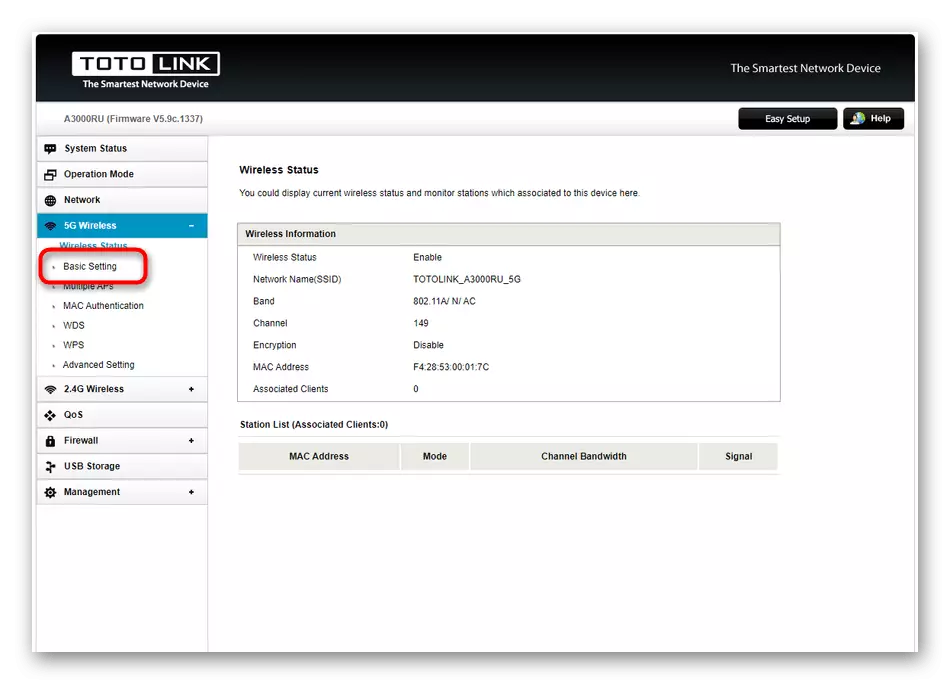
- In the 5G Wireless section, move to the category "Basic Setting".
- There are activating the distribution of the Internet by including Radio. Then Specify the SSID (name) for the access point with which it will be displayed in the list of available networks. The remaining settings that are here are changed by personal preferences. The region and free channel are often installed automatically. Protection is better to select the recommended, respectively, setting a password that will consist of at least eight characters.
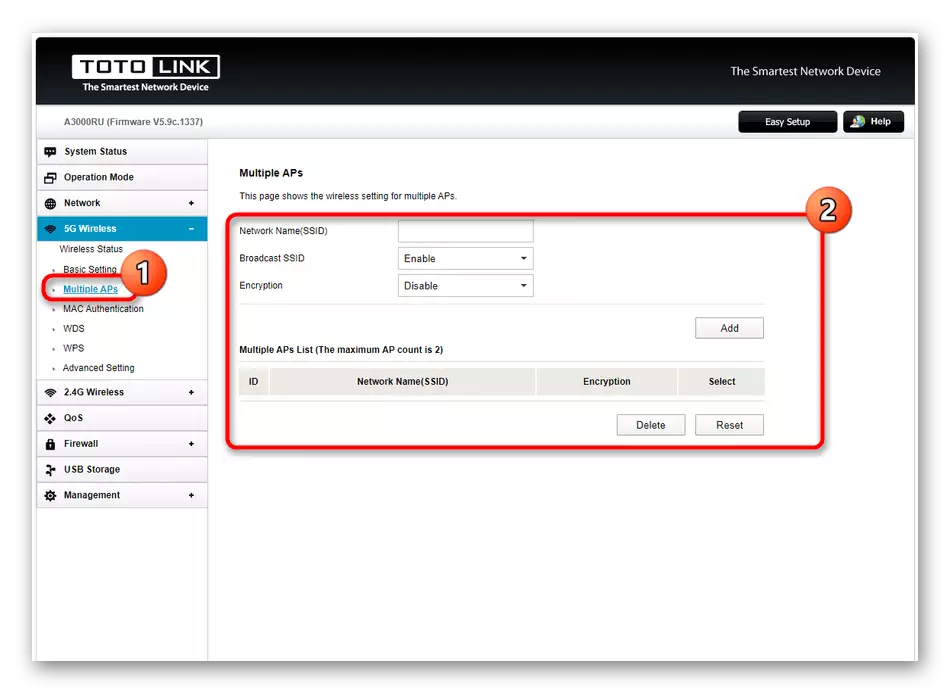
- If you wish to create multi SSIDs, which will be secured at one access point, go to "Multiple APS". Here you activate this option, specify the name for the network and select Protection, if required. After creating the network will be displayed in the appropriate table, and you can edit it or simply delete.
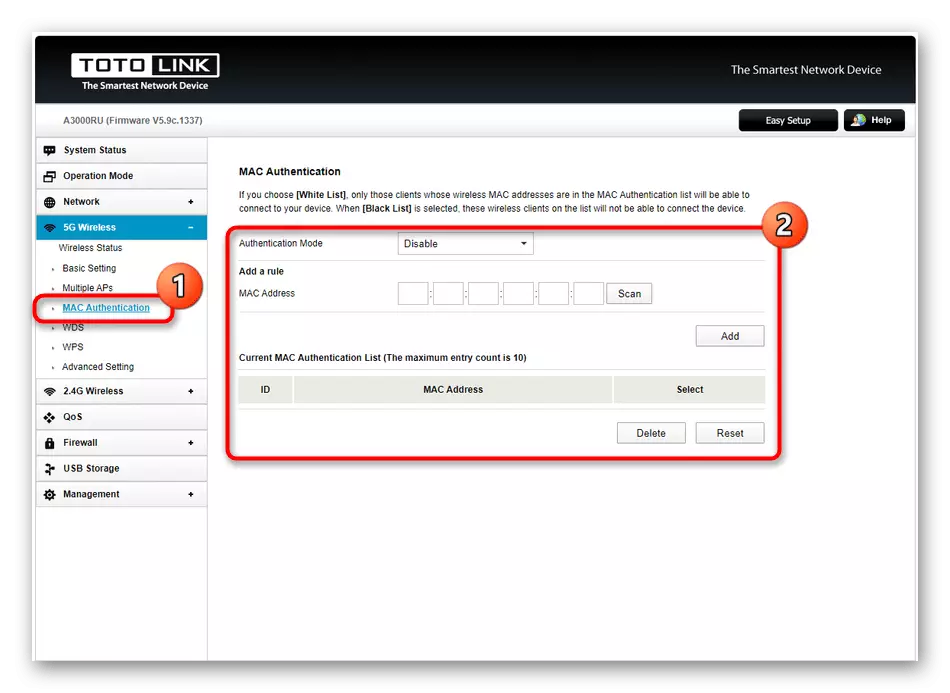
- The following category in the menu under consideration is called "Mac Authentication". It establishes rules that limit or allow the wireless network for certain devices identified by the MAC address. To install the rule of the user, you only need to select the type of behavior and set the address by adding the new parameter to the table present.
- WDS option allows you to use a router in a repeater or bridge mode. Some of the setting is made directly in the menu with the identical name, where you need to set the MAC address of another router and add it to the white list so that when requesting the connection has not happened random prohibitions.
- Finished configuration is recommended to look into the "WPS" section. Here is the ability to enable this technology, providing a quick connection via Wi-Fi for the necessary equipment to bypass the input of the previously installed password.
- As for the adjustment of the access point operating at the second frequency, this is carried out exactly by the same principle where the user selects the parameters, pushing away from its own preferences.


Usually all parameters associated with the wireless network come into force immediately after their use in the web interface, but sometimes it is necessary to restart the router so that it functioned with the new configuration.
Step 3: QoS Setup
QoS - built into the router technology that allows you to control traffic and priority between individual devices. This will allow you to limit the speed of downloading and unloading to all computers connected to the network, or only specified when creating the rule. In the web interface of the TOTOLINK A3000RU router under consideration today, the QoS setting is removed into a separate section, so we decided to pay a little time to this item.
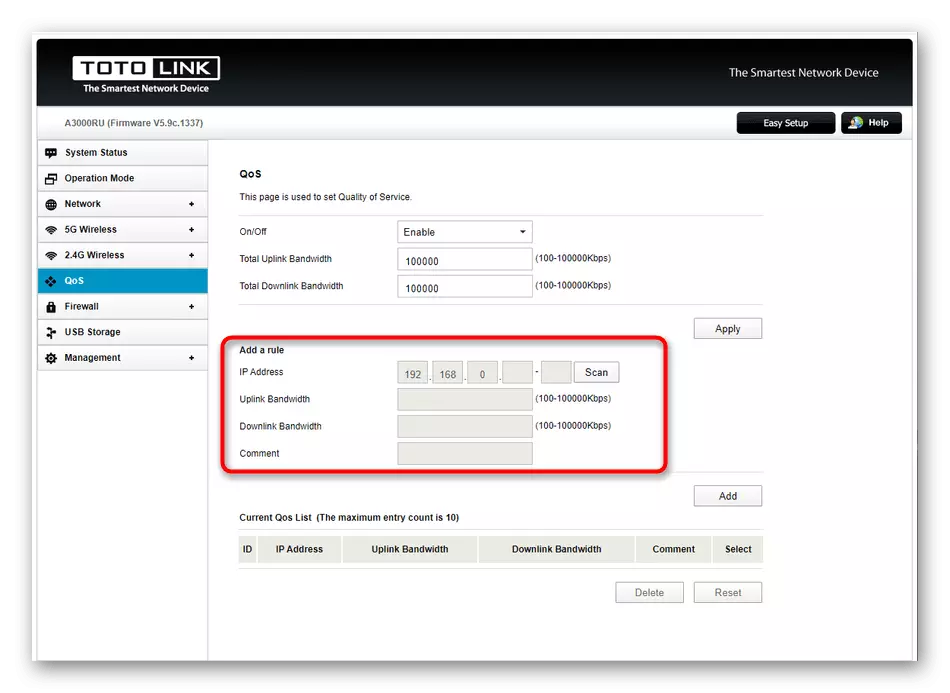
- To enable restrictions, go to the "QoS" menu and activate this option. Immediately under the switch, you can set the general limitations on downloading and unloading for all devices by specifying the value in kilobits per second.
- If you need to create restrictions for specific computers or mobile devices that are connected to the current router, use the ADD A Rule unit. Here you specify IP target equipment by scanning the network. After that, it remains only to set limitations by filling out the appropriate fields.
- Do not forget to add a rule to the table so that it is applied. Similarly, such settings are installed in the same way for the other required computers, laptops, smartphones or tablets.

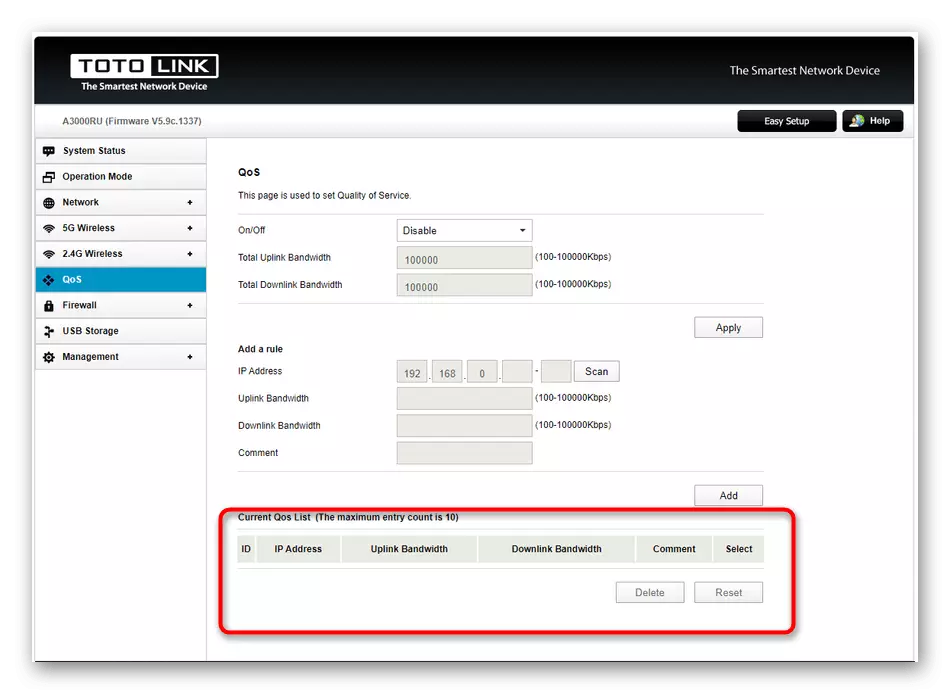
All changes regarding traffic restriction will be applied only after rebooting the router. Consider this if you decide to independently create QoS rules.
Step 4: Firewall Settings
We affect the topic and standard defender built into the TOTOLINK A3000RU router software, since some users have to resort to creating rules, for example, when restricting access to sites or ports. Let's take turns in turn every category present in the relevant section.
- Open the "Firewall" menu, and you will immediately find yourself in the first category. Here is simply selected type of behavior of the firewall. You can make that all added rules will be blocked or resolved. We offer a more detailed explanation by these parameters. The "Black List" mode limits only the targets added to the list. "White List" - blocks everything in a row except independently specified devices.
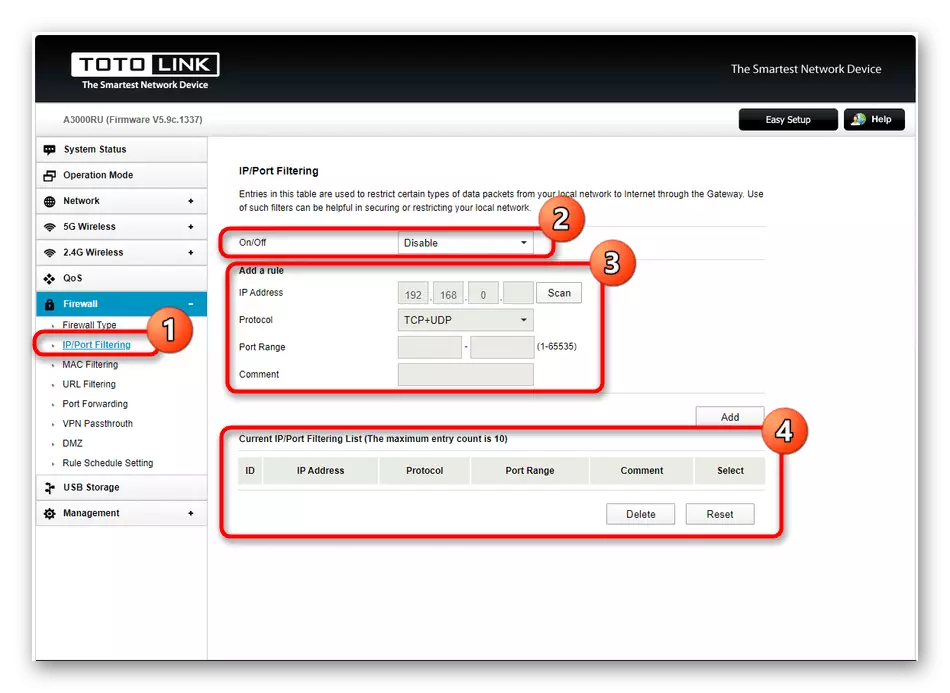
- The following category is called "IP / Port Filtering". In it, you can add devices or specific ports on their network addresses to create a rule. To begin with, the filter is activated, then the table is filled out the target characteristics and add to the table. All existing rules will be displayed as a single list, which can be edited, selectively delete elements or completely reset.
- Mac Filtering is performed almost the same, but restrictions or permits are more suitable for physical purposes, such as computers, mobile phones or routers, since each of them has its own unique MAC address, which is characterized by it. The principle of creating rules is no different from what you saw before.
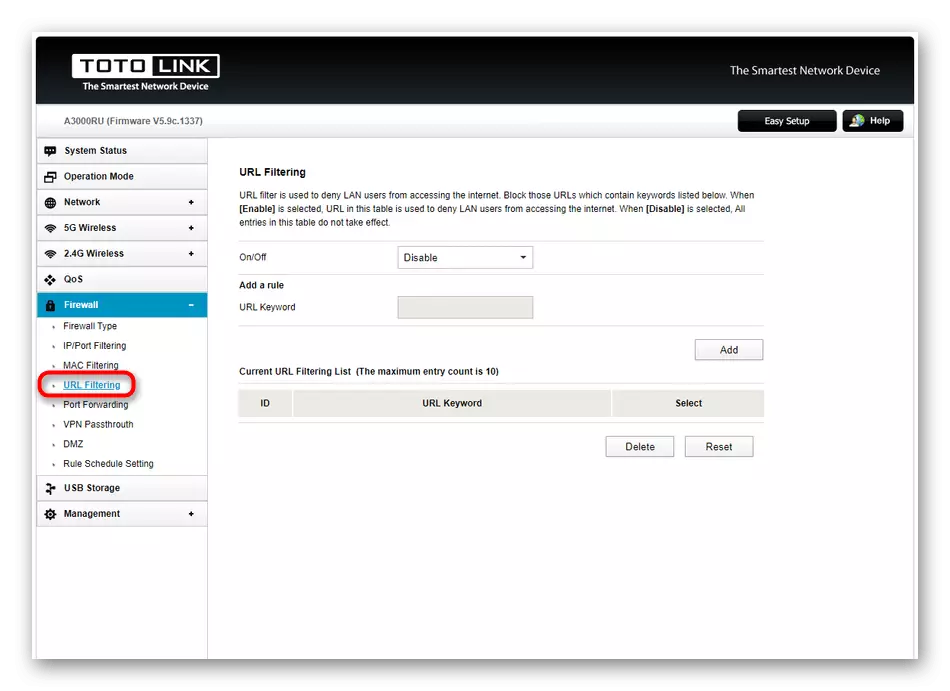
- More interesting for ordinary users will be the URL Filtering parameter. Here the user manually introduces complete sites of sites or only keywords for which the rules will be triggered. This will allow you to restrict access to certain web resources, for example, for children. The lack of implementing this option in Totolink A3000RU is that you do not have the opportunity to choose a goal, so the sites will be blocked on all devices connected to the custom network.
- If you are interested in opening certain ports, for example, to ensure the correct operation of applications that require an Internet connection, make it in "Port Forwarding". Specify the port protocol, its IP address and number, then confirm the addition to the table.
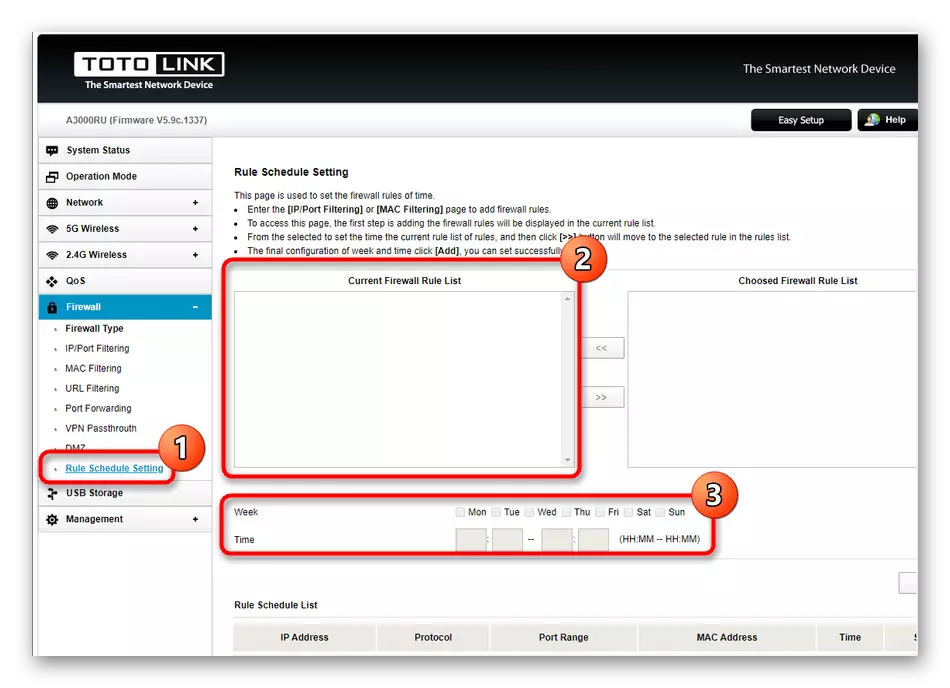
- In the complete posting of the "Firewall" section, consider the "Rule Schedule Setting" menu. It opens the possibility of setting the mode of operation of each rule individually, deciding which one should function in a specific period of time. The principle of editing behavior is simple as possible, because the user will only need to select an existing parameter and specify the period of its activity.


The choice of settings associated with the router firewall depends only on the user's wishes, so we did not provide specific recommendations, but talked about the general principle of their creation.
Step 5: Complete Settings
So we came to the last section of the web interface. Almost all the basic settings are set, and it remains to do only a few recent steps, after which you can safely complete the interaction with the router settings window.
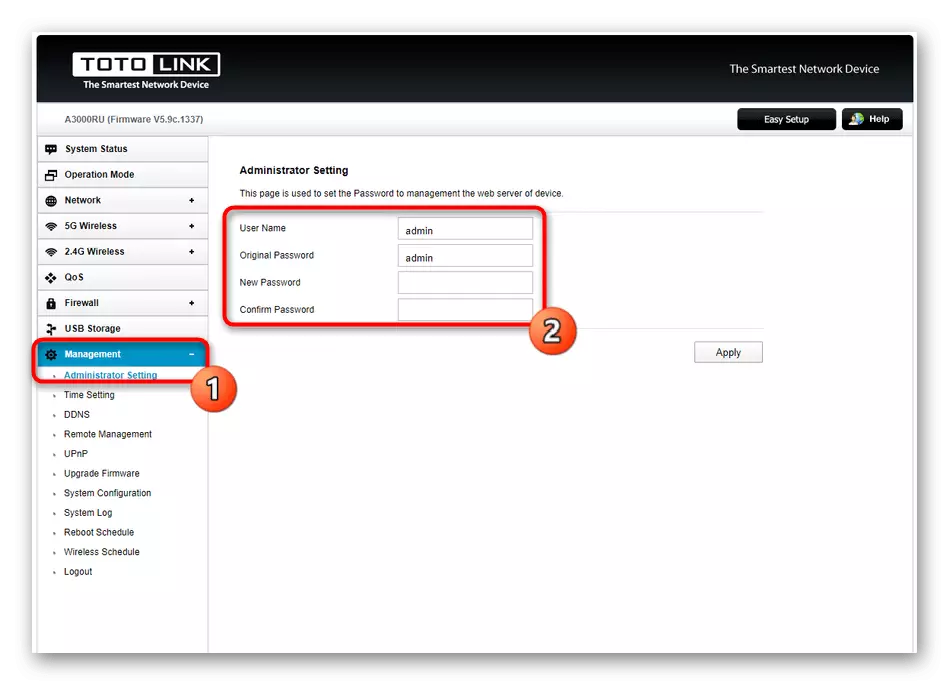
- Open the Management menu and select the first category "Administrator Setting". Here we advise you to change the username and password to enter the web interface. It is necessary only to ensure security, because anyone, knowing standard authorization data, after connecting to the router, can connect to the Internet center and change any parameters, including the rules of the firewall.
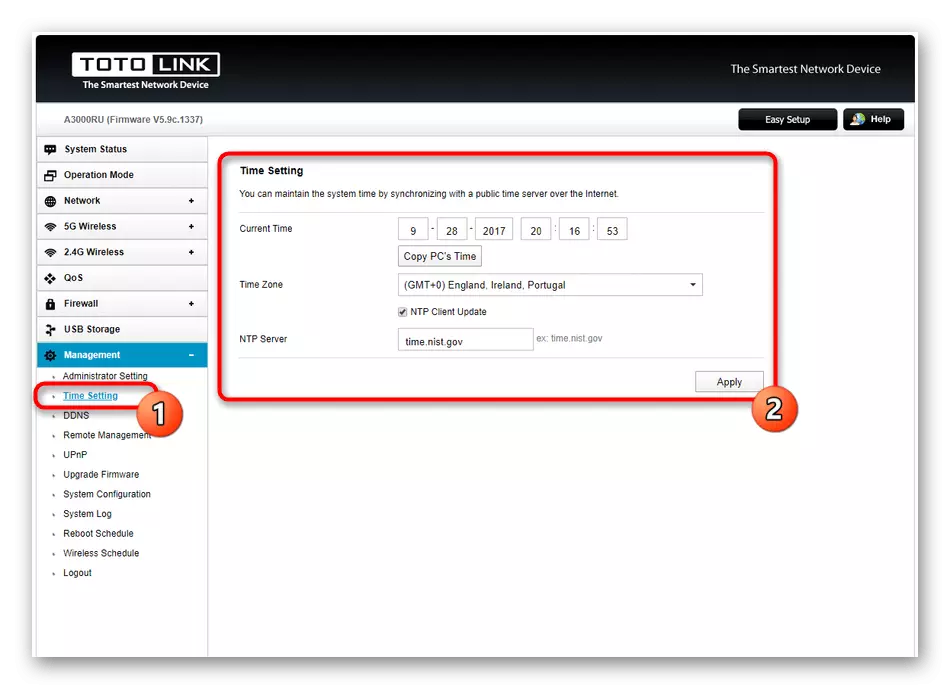
- Next, move to Time Setting. It is not necessary to set the exact time and the date, but if you want to get the correct statistics displayed in "System Status", we advise you to set the correct parameters, considering the time zone.
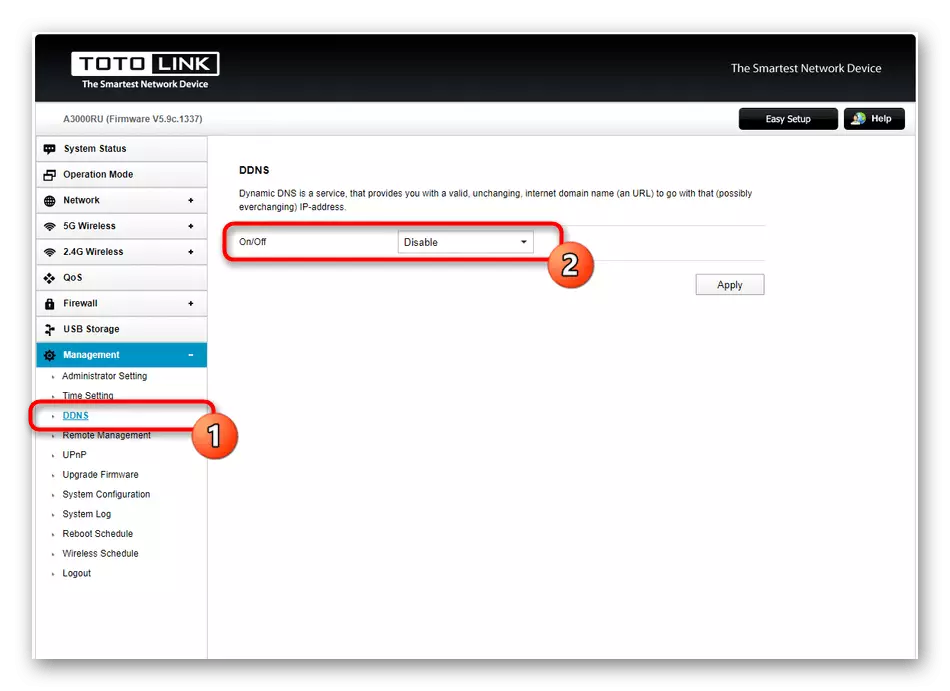
- The dynamic DNS connection is also carried out through the section in question, but already in the DDNS block. All owners of such technology, it is necessary to activate it and enter your personal account data, which is also assigned a tariff plan from the server owner, providing a real-time DNS service.
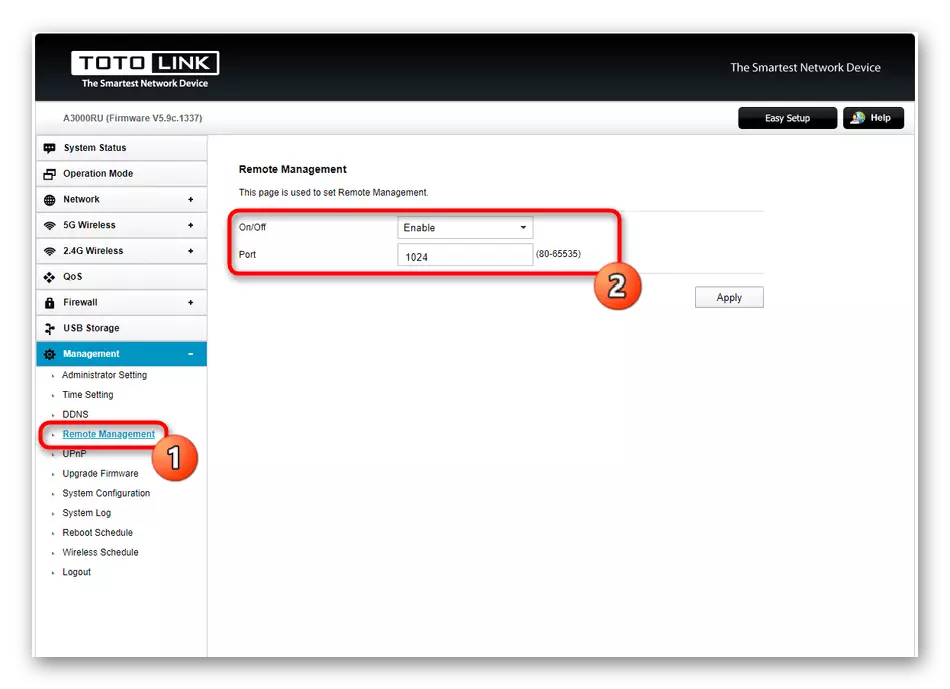
- If you plan to remotely manage the current router, being connected to another network, contact the "Remote Management", activate this technology and remember the free port, which is needed to provide a connection through a third-party network.
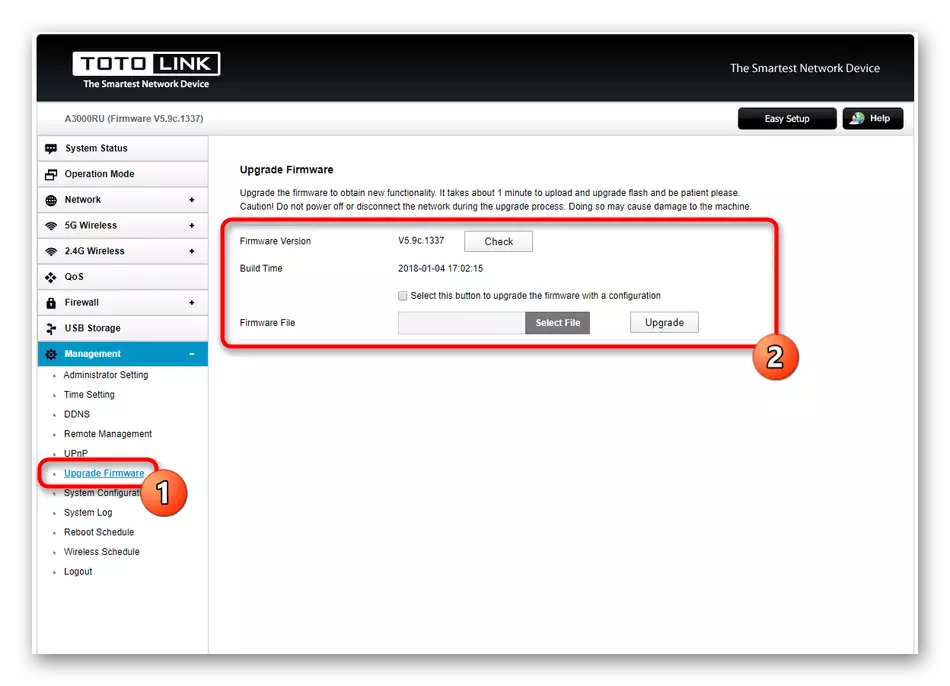
- Updating TOTOLINK A3000GU software occurs through Upgrade Firmware. Here you can check the availability of updates both in automatic mode and independently download the firmware file, downloaded from the official site.
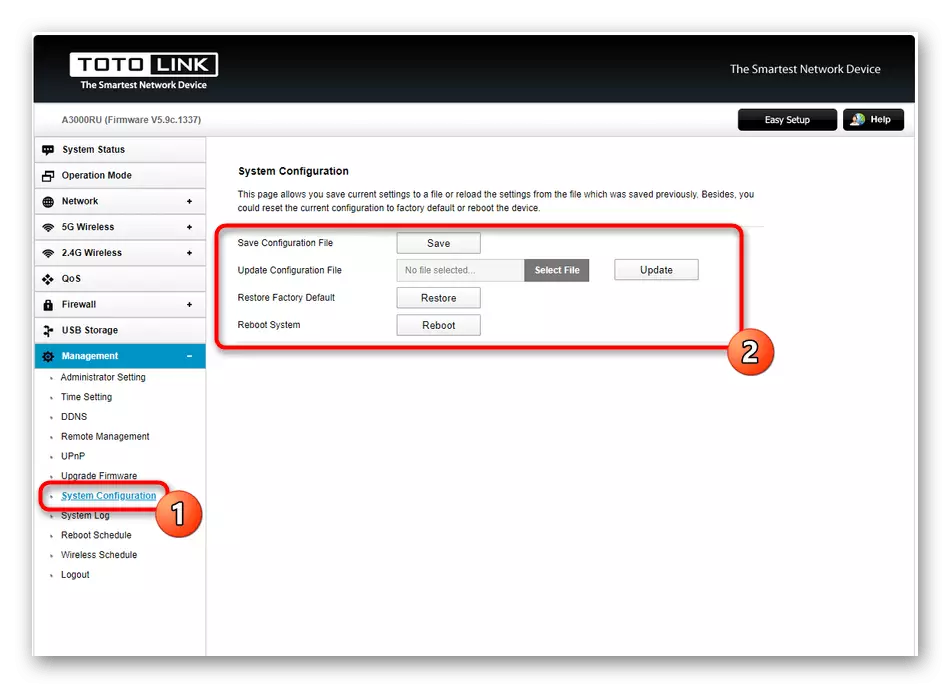
- Special attention deserves the category "SYSTEM CONFIGURATION". It is here that the current configuration is saved in a separate file to provide a backup. If necessary, this object remains only to upload through the same menu to restore the settings if they suddenly be reset. If you specified the rules of the firewall or produced many other changes, it is better to create a backup copy so that in the case of which it did not have to make complete configuration again.
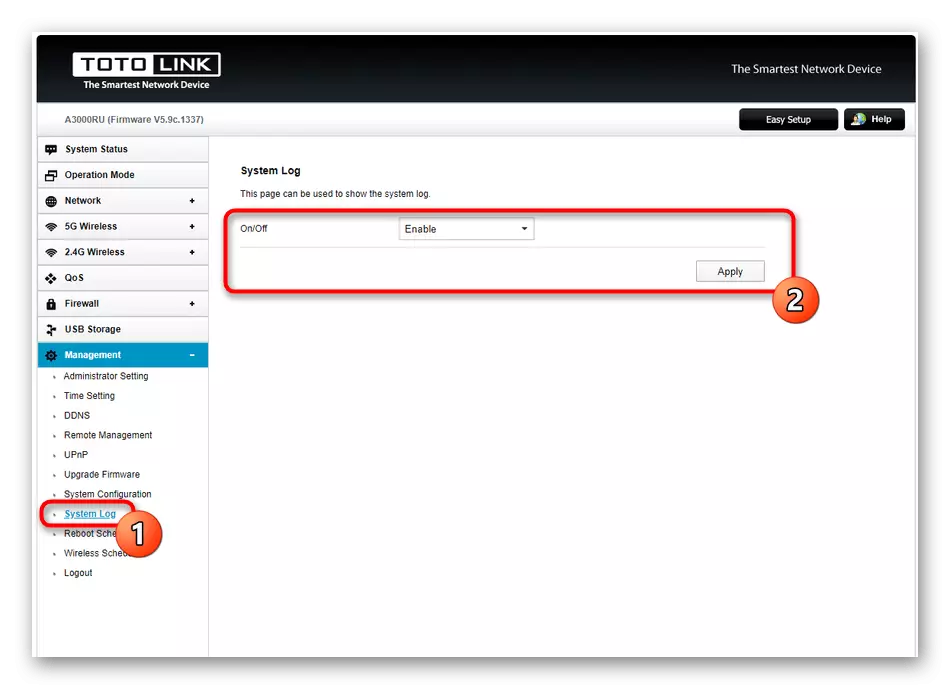
- Activate "System Log" if you want the router to save reports on its operation and recorded important events associated with the connection of devices or errors in operation.
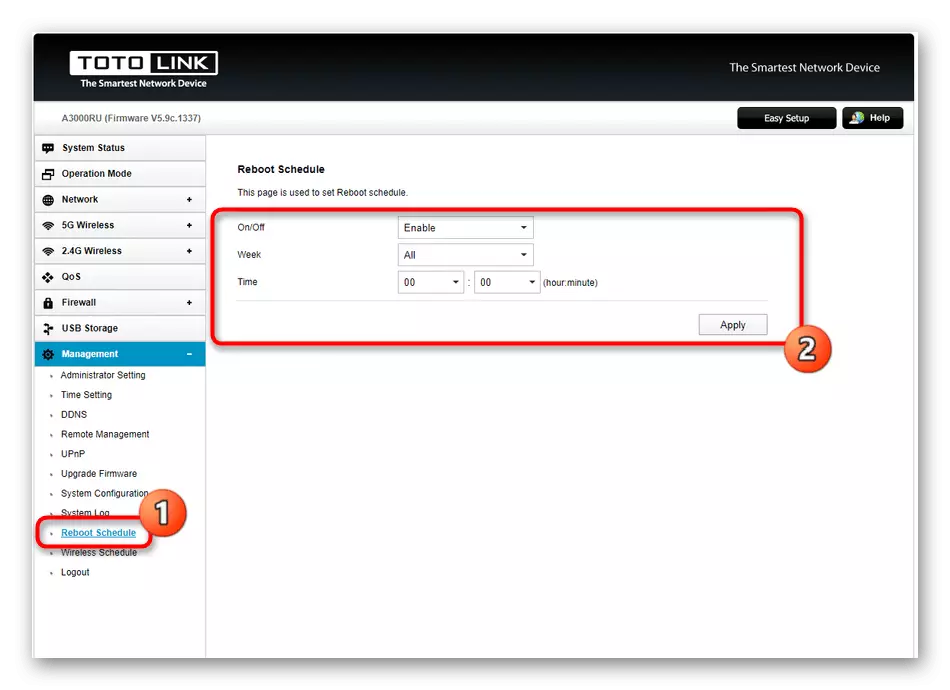
- In Reboot Schedule, it is possible to create a rule that will send a router to reboot on certain days at the specified time. This will reduce the operational memory of the equipment, which stabilizes its work, but you need such a regular reboot only in cases where frequent circulation occurs to the router throughout the day from different devices.
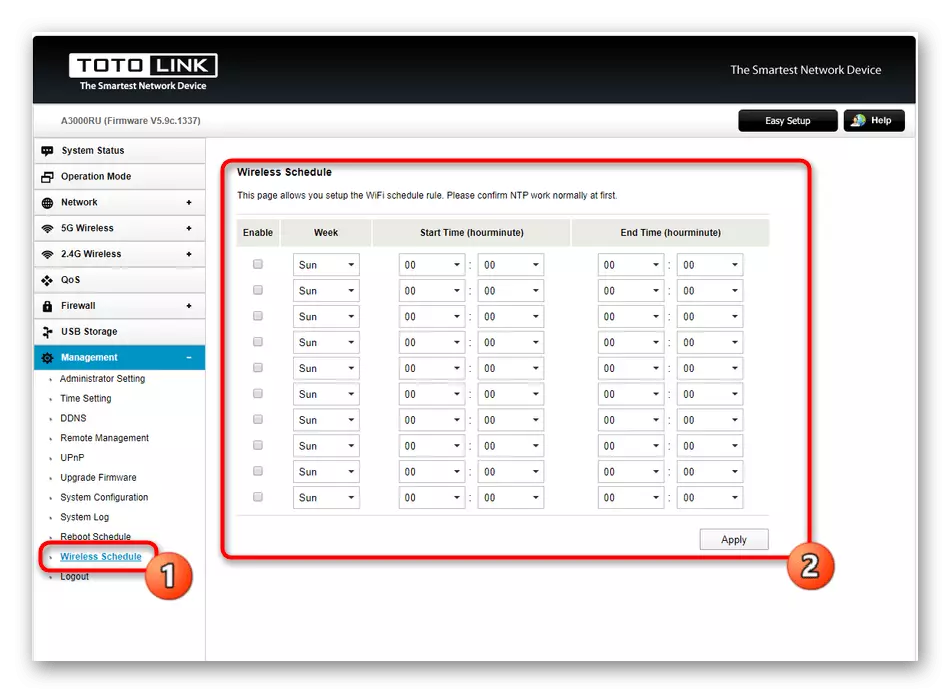
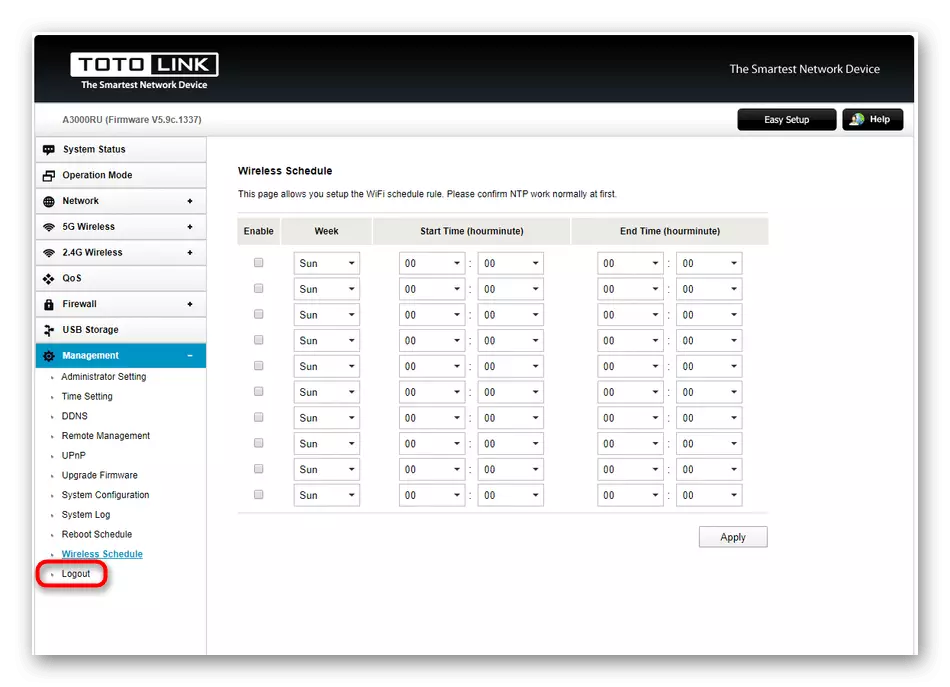
- Approximately the same schedule setting is performed in Wireless Schedule, but here the user chooses, at what time of day the wireless access point will work every day.
- Upon completion of the configuration, it remains only to click on "logout" to exit the web interface and proceed to further interaction with the browser.
You have read the configuration of the TOTOLINK A3000RU router under the NetByNet provider. Models from other manufacturers are configured approximately the same, so the instructions given can be considered universal and repeat them in the existing device, given the differences in the appearance of the web interface.