

The name of the wireless network when configuring the router can be selected both automatically and manually specified by the user. With subsequent interaction with network equipment, sometimes there is a desire to change this name so that the access point has another SSID when displaying in the network list. You can do this only through the web interface by editing the corresponding parameters.
Login to the web interface
Further, three representatives of routers from different companies will be taken for an example so that any user can understand the principle of fulfilling the task, given the features of the available Internet center. Combines all the authorization options in the web interface, which is carried out through the browser, input in the address bar 192.168.1.1 or 192.168.0.1. Password and login - parameters are individual, because they depend on the specific manufacturer and manual settings. If the standard value for both Admin fields is not suitable, we recommend reading the instructions below.
Read more:
Definition of the login and password to enter the web interface of the router
Solving the problem with the entrance to the configuration of the router

We change the name of the wireless network of the router
You probably know that the implementation of the web interface depends on the company that released the router. Sometimes this difference causes difficulties from certain users, since it is almost impossible to choose a universal instruction. Instead, we suggest familiarizing yourself with three different and most popular Internet centers on D-link, TP-Link and Asus, and then move to changing the name of the wireless network, given our recommendations.D-Link
The first queue will be a web interface from D-Link. This is due to the fact that the manufacturer tried to adhere to general standards and made the minimum number of its changes to the usual structure of the settings menu. There are two options for changing the name Wi-Fi in this web center. The first is to start the configuration wizard and looks like this:
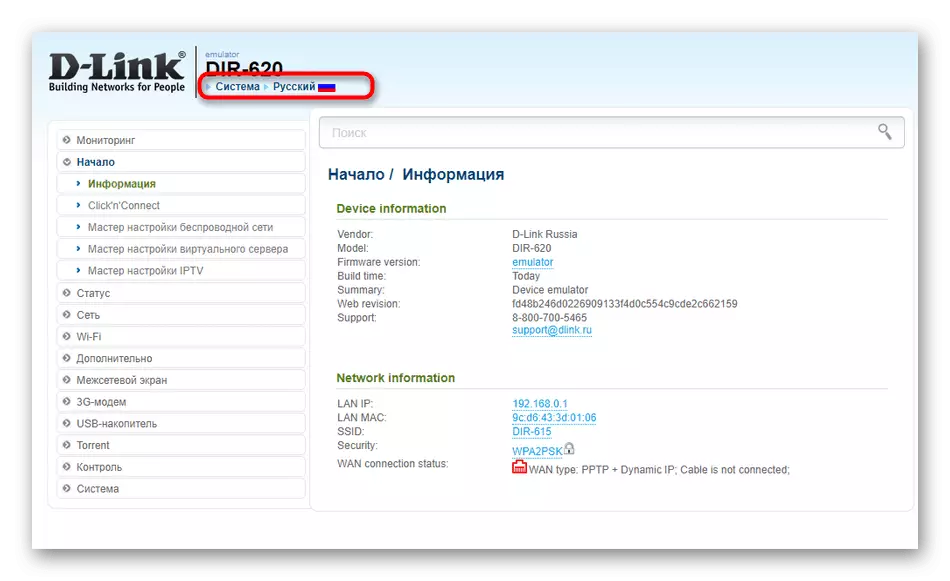
- After authorization, we advise you to change the language into Russian to avoid further misunderstanding the names of the menu items.
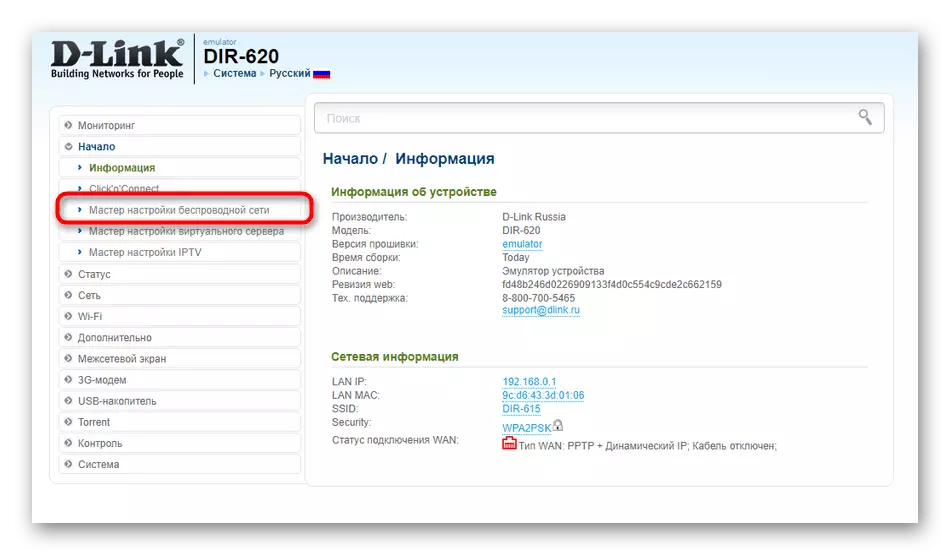
- Then through the "Start" section, click on the "Wireless Network Settings" row.
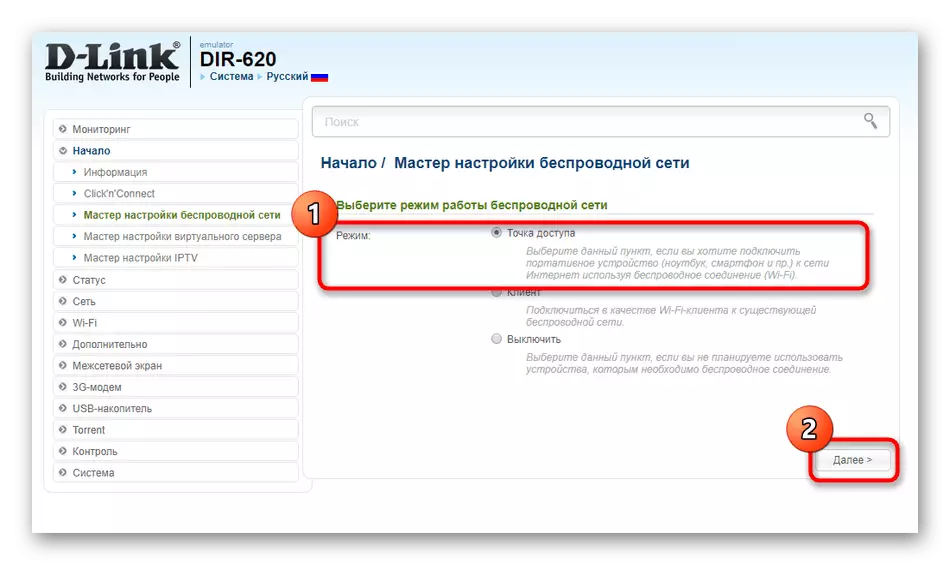
- Select the operation mode "Access point" and go further.
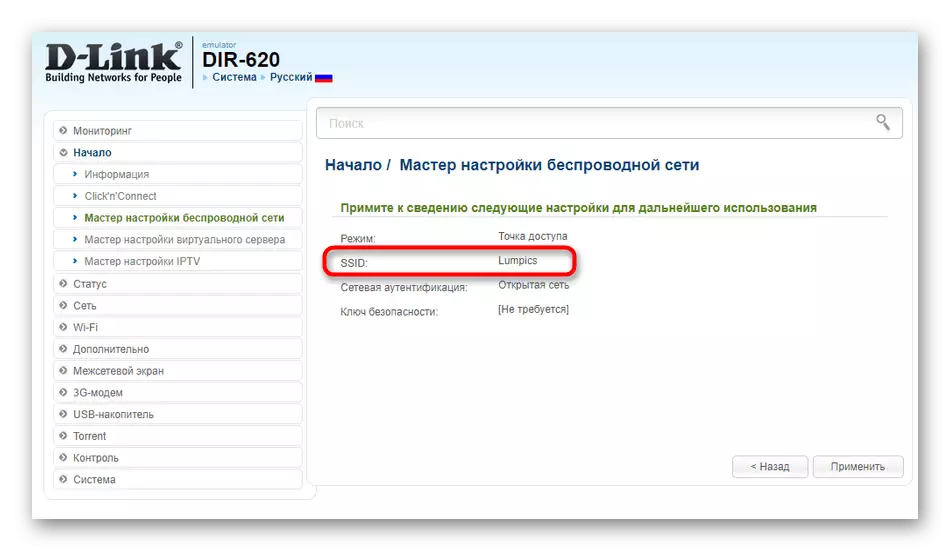
- Now set the name for the access point. This parameter is just called SSID.
- It remains only to choose a security mode by specifying a password if necessary.
- When the setup is completed, make sure that the SSID matches the desired, and then click on "Apply" to save the changes.


When using the wizard, you will have to fully complete the configuration process, which is not always suited by the user. In the Internet center there is a separate section where only the name of the network can be changed, which we offer to do.
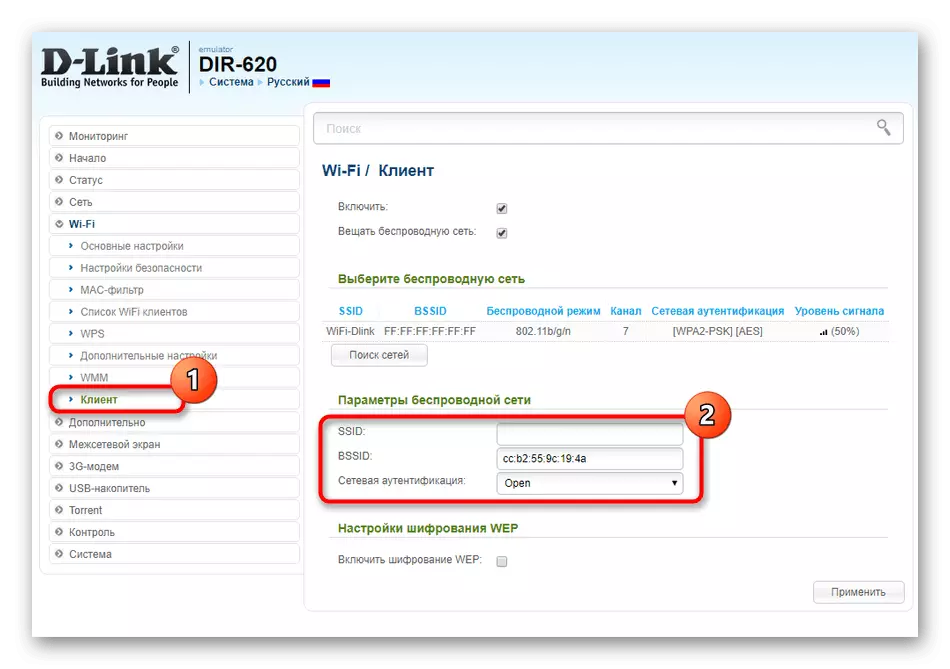
- Through the left panel, move to the "Wi-Fi" item.
- Here in the first category, change the SSID to the necessary and save the setting.
- If we are talking about the client point of access, then exactly the same editing occurs in the "Client" menu.


In the case when the network has not yet changed its name after applying changes, it is recommended to simply restart the router to update the parameters. You can also do this through the web interface or by pressing the button on the housing.
TP-LINK.
TP-LINK is one of the most popular network equipment manufacturers in the world. Their representation of the Internet Center in the latest versions of the firmware is similar to D-Link, but some users still have to face problems when searching for a parameter to change. The first option setting the name Wi-Fi is carried out through the configuration module.
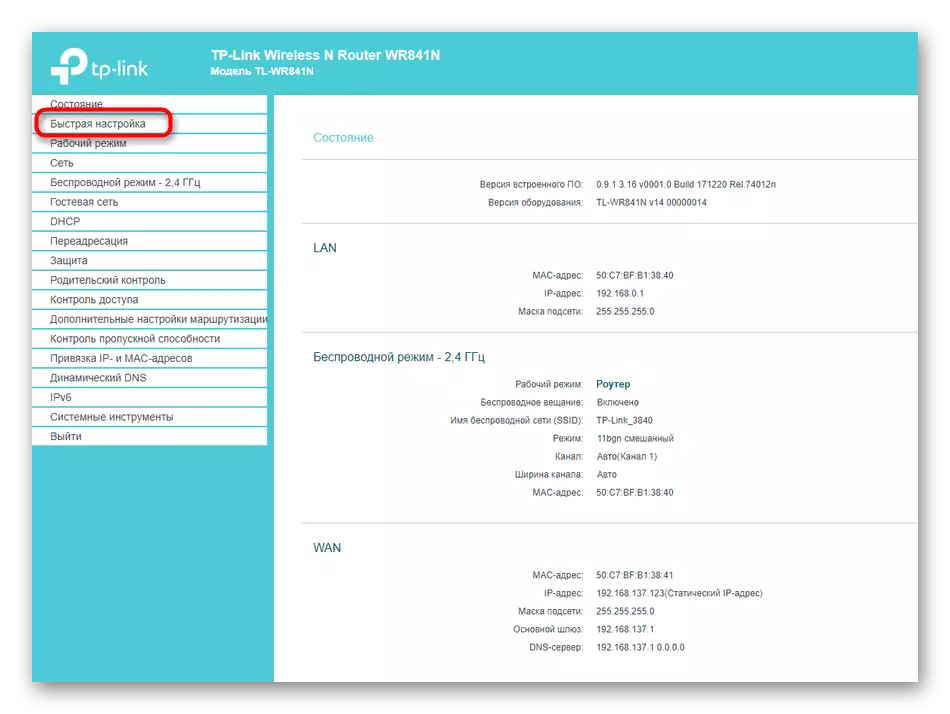
- After logging in to the settings on the left pane, click on the inscription "Fast Settings".
- Start this procedure by clicking on "Next".
- Mark the "Wireless Router" marker and go further.
- Set the WAN settings in accordance with the instructions from the provider. The correct execution of this setting is required, in which the feature of this option is.
- The next step is called "Wireless Mode". Here, specify the network name and set the related parameters according to your needs.
- When the settings are displayed, make sure that they all have the desired values, and only then save the changes.


The disadvantage of this method is the need to perform the entire configuration process, including WAN settings, which in many cases simply do not need. Then you should go to the advanced parameters, where the name of Wi-Fi is changed.
- Through the left menu, open the "Wireless Mode" section.
- There, change the "Wireless Network" value and save the changes.
- For the guest network, there are exactly the same settings.


ASUS
Our current manual will complete the representation of the ASUS router web interface. It is the most unusual of all, therefore it hit this article. Worders of routers from this manufacturer after authorization in the Internet Center should perform such actions:
- By tradition, let's start with quick customization. To do this, a special button is assigned to the menu.
- After starting the module, click on "Create a new network".
- The connection type must decide automatically.
- When configuring a wireless network, set a new arbitrary name to it and click on "Apply".


In the manual mode of change of parameters, this process will take much less time, and all other settings we will not touch.
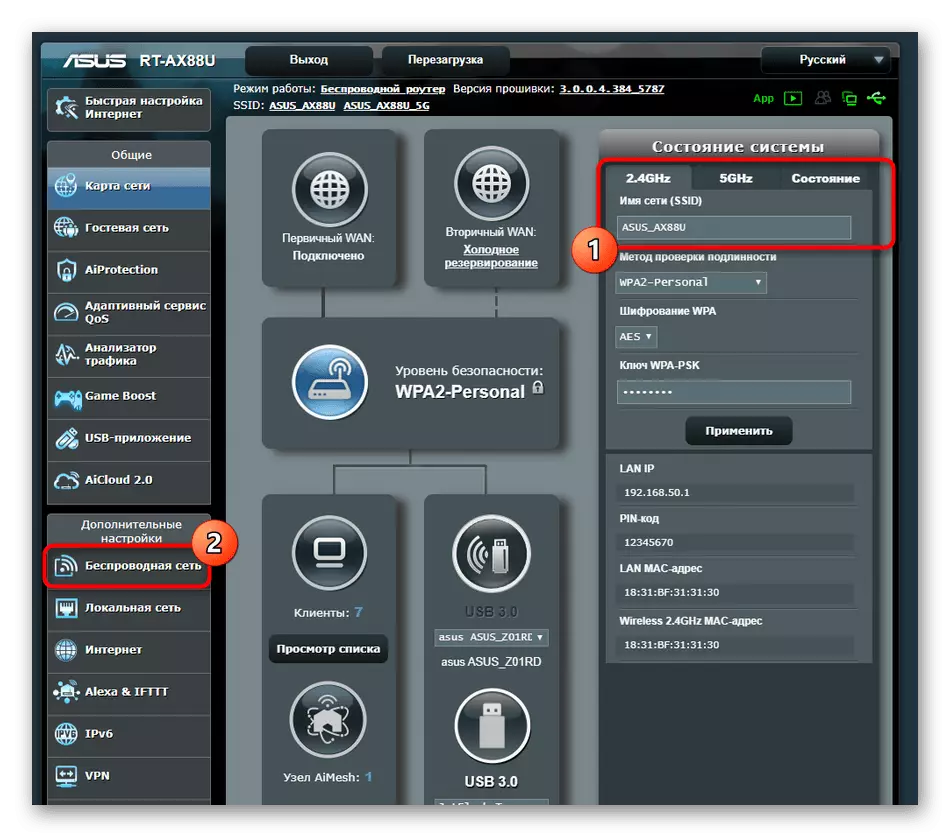
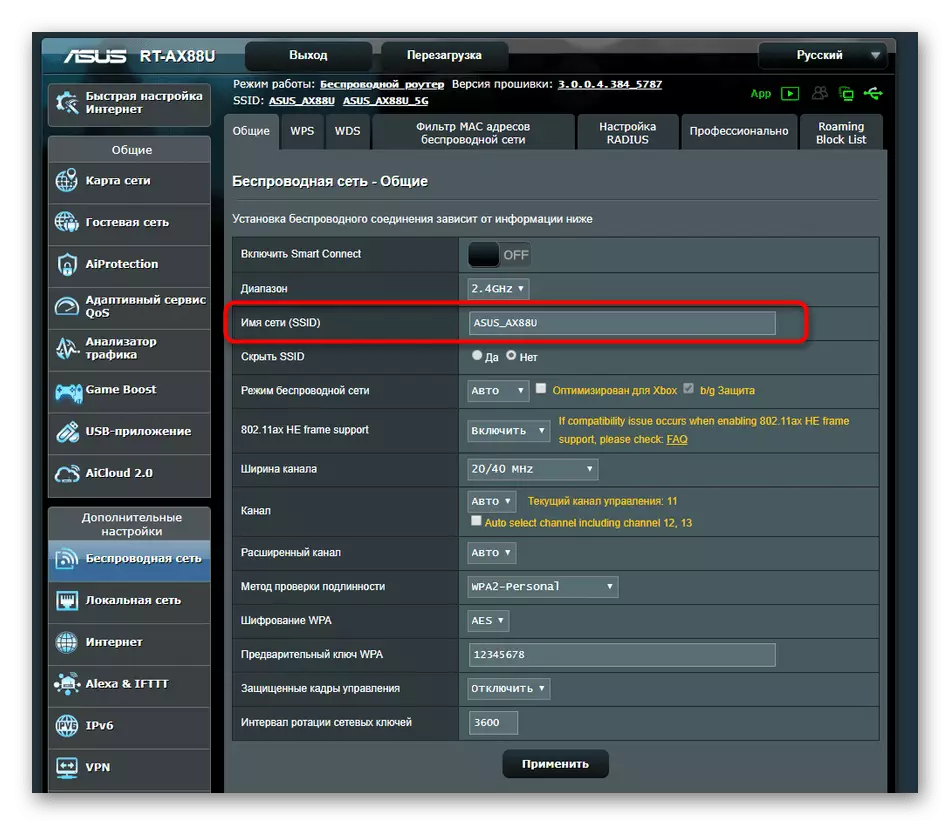
- You can directly in the category "Network Map" Select Access Point and change its name. If this is not suitable for you, via the "Advanced Settings" move to the "Wireless Network".
- Find the item responsible for the name, and set it again.
- After applying the settings, check the current Wi-Fi name to make sure that the configuration is correct.

Now you have only to make the Wi-Fi name change setting by selecting the most appropriate manual. There are no restrictions on this operation, so you can change the name how many times.