
By purchasing the router from the company D-Link, the user must be ready for the fact that the device will have to connect to the computer independently, if this does not make representatives of the provider when conducting the Internet. However, in this procedure there is nothing complicated, and it can be realized in two different methods, while the second depends on the first, so in most cases it can be done only after the previous one.
Option 1: Wired connection
We implement a wired option using a local cable that comes with network equipment or can be purchased separately. However, the connection of the devices by one of this wire is not the only action that the user needs to be produced. At first, the router must be unpacked and select the location for it to ensure that the wan cable and the local network wires are enough to connect. Consider the Wi-Fi coverage zone, because it is almost always required that the signal is equally good in any room at home or apartments. After that, proceed to the following instruction.
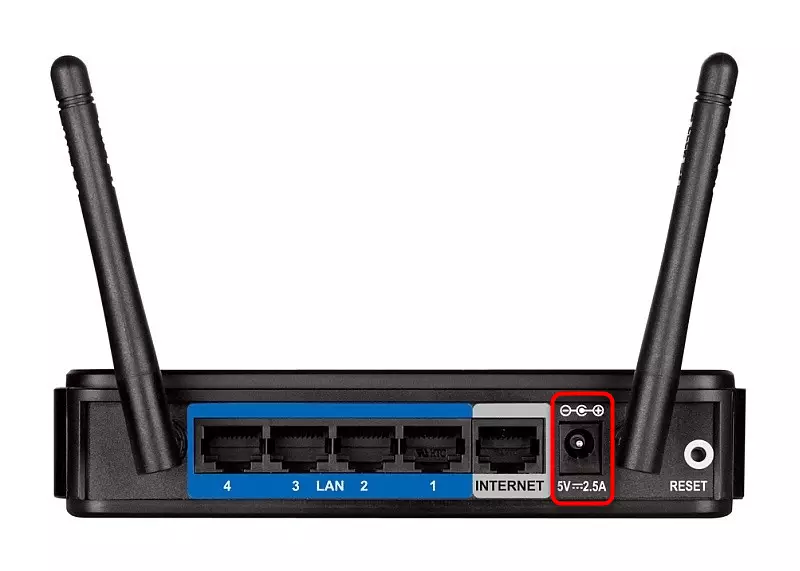
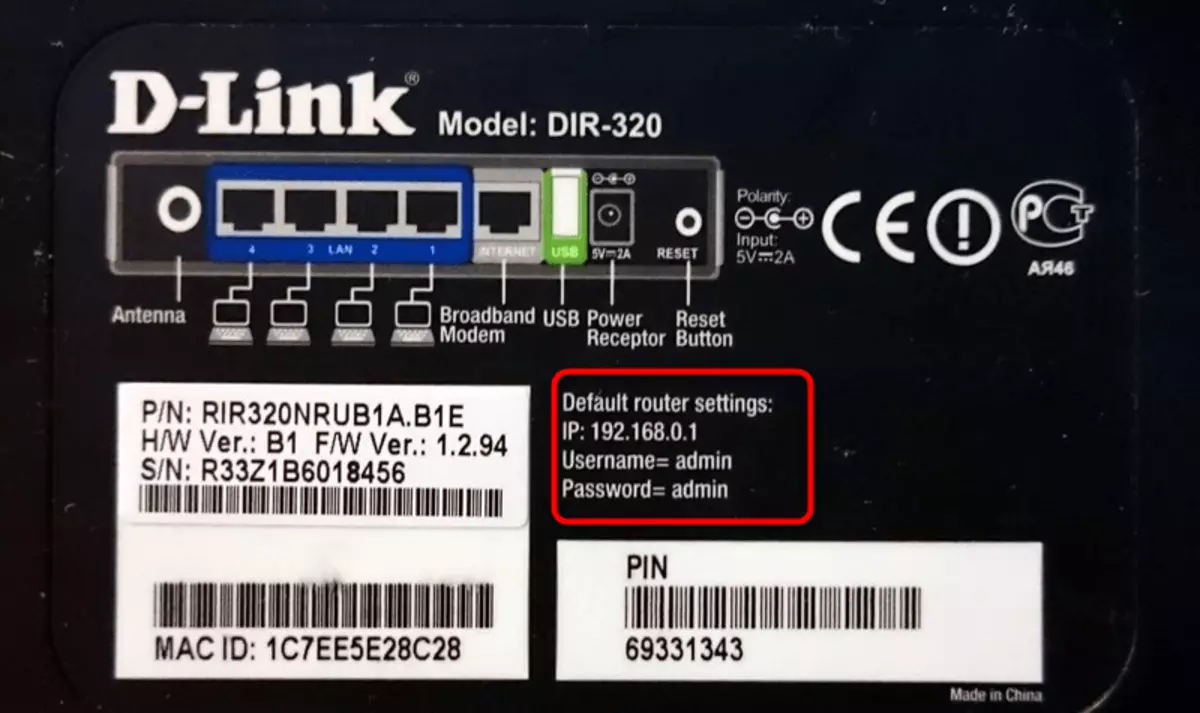
- Find the D-LINK power cable bundle. Stick it into the appropriate connector on the device itself, and connect the second side to the outlet.
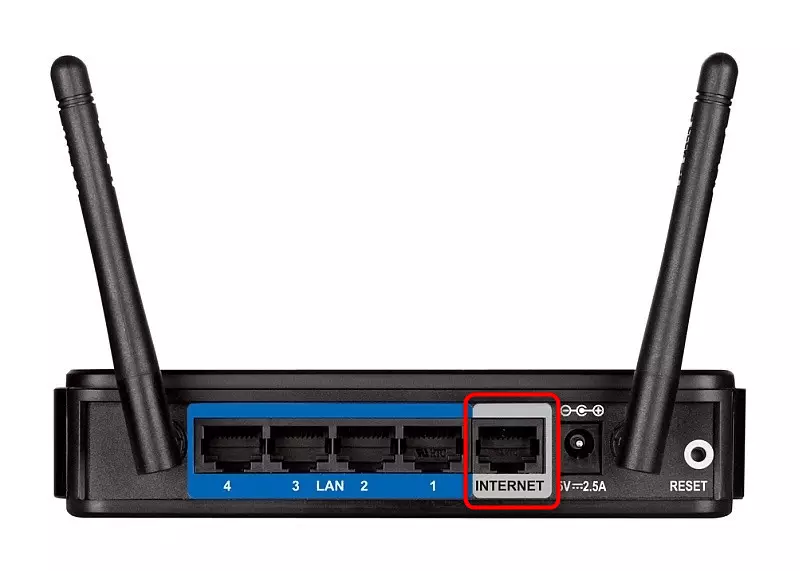
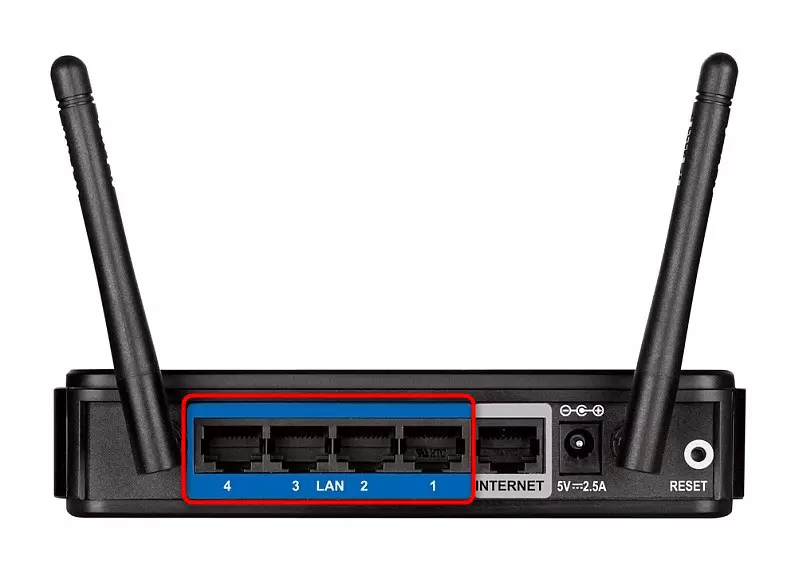
- The cable from the provider is inserted into the port called "Internet", "Ethernet" or "WAN". It will not be easy to find it on the housing, because it is marked with a separate color, and the corresponding inscription is printed from below.
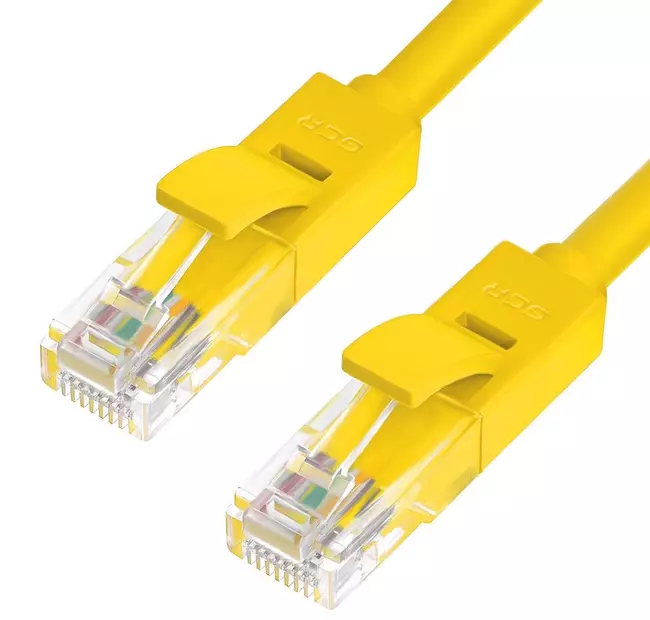
- Next prepare a local network cable. You see his idea in the following image. In most cases, the set is a meter wire of yellow. Its lengths may not be enough, so consider it in advance, and if necessary, purchase a suitable wire in a computer store.
- Any of its sides stroke into one of the LAN connectors located on the router housing. They are not wary marked by numbers: during configuration of the device through the web interface, you may need to specify the active port or one that will be assigned to IPTV.
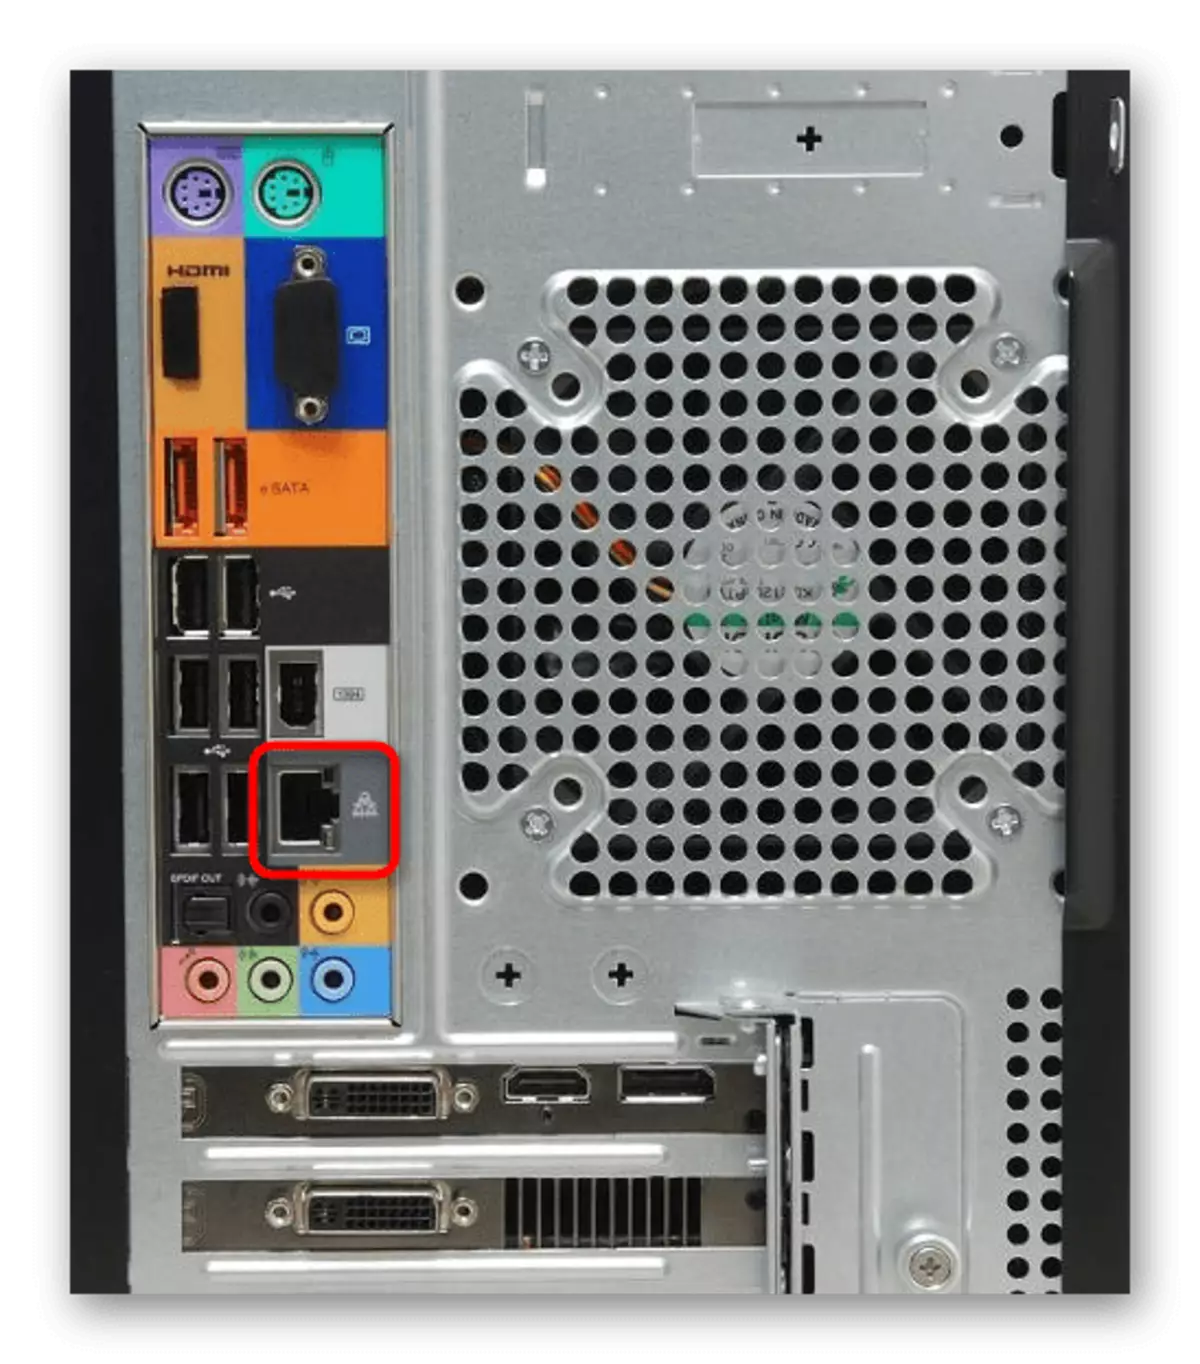
- The second side is connected to the computer motherboard or laptop. The PC LAN-port is located on the back of the panel, and the laptop has the side of the housing.
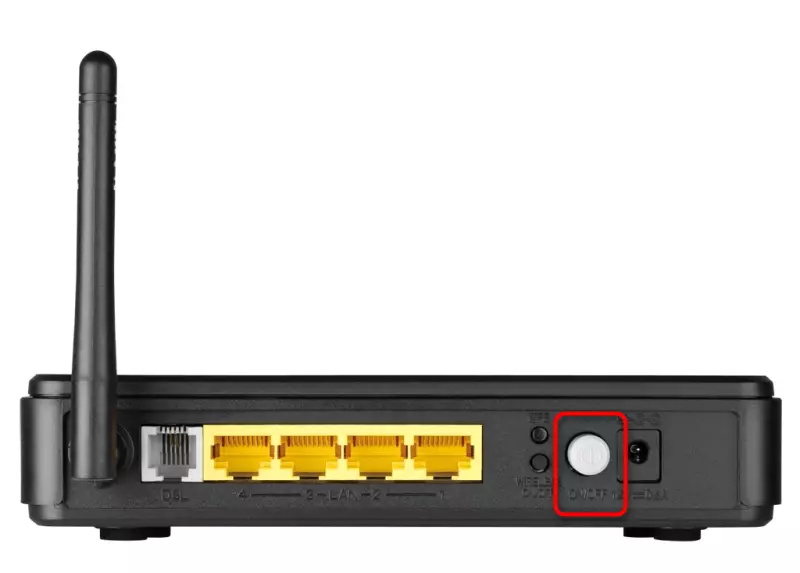
- Now that all wires are connected, it remains only to start the router. Make it by clicking on a specially designated button on its enclosure.
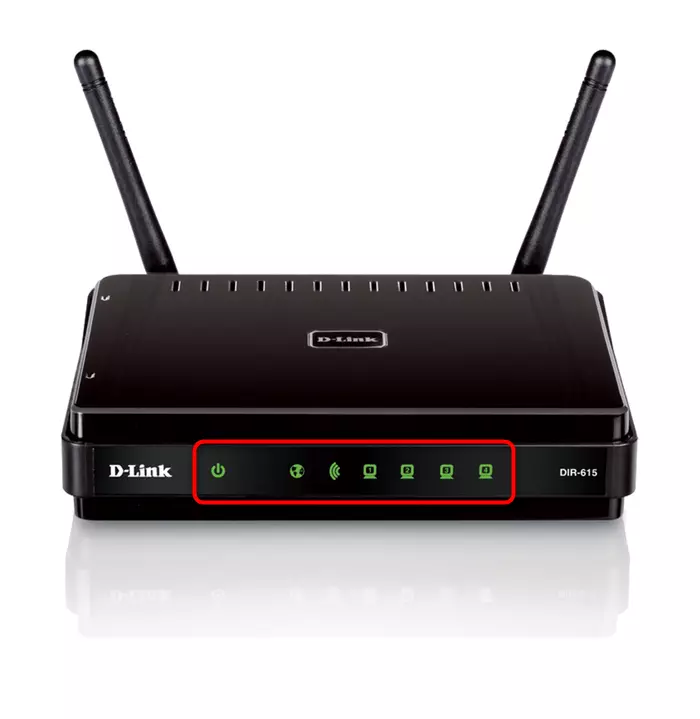
- After a few seconds, different indicators will flash and start blinking. One of them is responsible for food, the second - for connecting to the provider, the third indicates whether Wi-Fi works now, and the rest indicate the LAN active port. In different models of D-Link network equipment, these indicators can litek static or flashing, which means completely different condition of the device. We recommend to read this in more detail in your instructions, so that in the future it is necessary to deal with any situation associated with the need to check indicators.
- Look at the taskbar directly in the operating system. After starting the router, there must be displayed information about connecting to the network.

This connection router D-Link to a computer via a local network cable can be considered complete, however, in some cases additional setting of the operating system is required. More detailed instructions on this topic can be found in another article on our website by clicking on the link below.
Read more: Connecting a computer to the Internet
Additionally, take into account that not always after the first connection, the network status will seem like "connected". Often access to the Internet is missing, and this is due to the fact that the WAN parameters are not specified through the web interface, and the provider uses a protocol that differs from dynamic IP. We will tell more detail about this at the end of the second option.
Option 2: Wireless Access Point (Wi-Fi)
Not in all models of devices from the D-Link, the wireless access point is activated by default, which causes it to further configure it in the web interface. You can enter it only after the router is connected to the computer via a local network cable. Implement first such a connection, and then proceed to the instruction.
- Look at the rear panel of the router, find the address and authorization data there and the log interface.
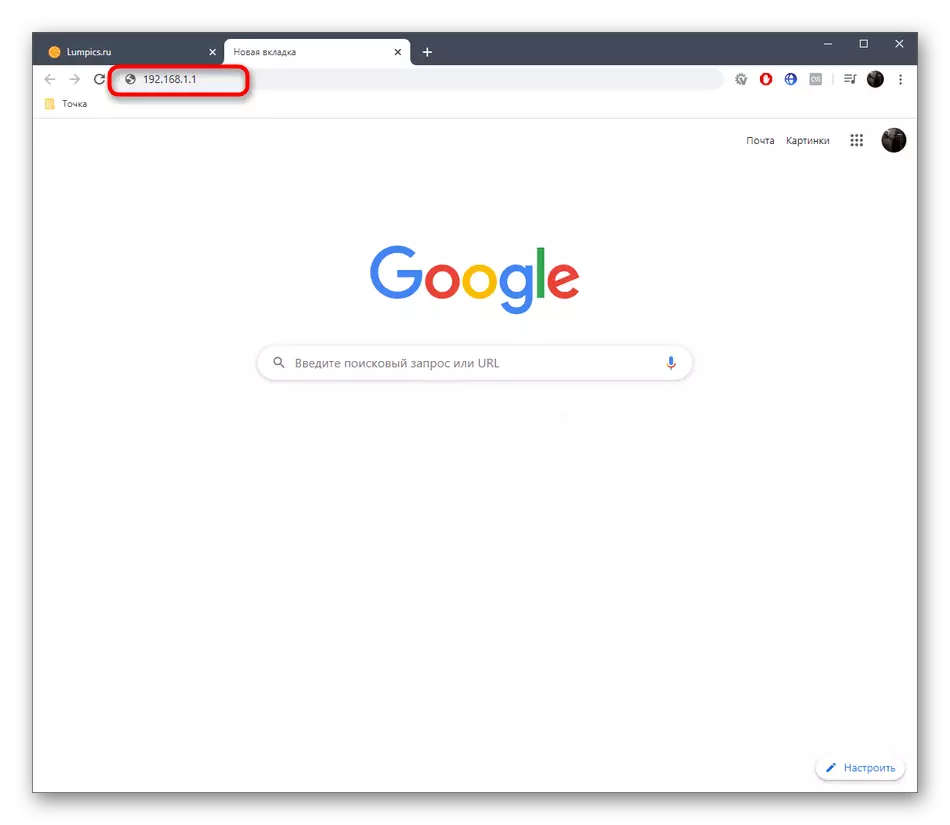
- Open the browser on your computer and enter the same IP address there. Most often, the standard will be 192.168.1.1 or 192.168.0.1.
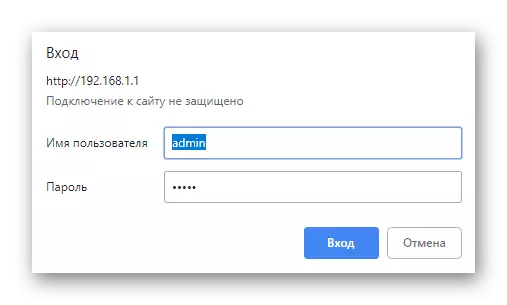
- After pressing the ENTER key, the login form will appear. Here you need to write a login and password. By default, the Admin value is entered in each field.
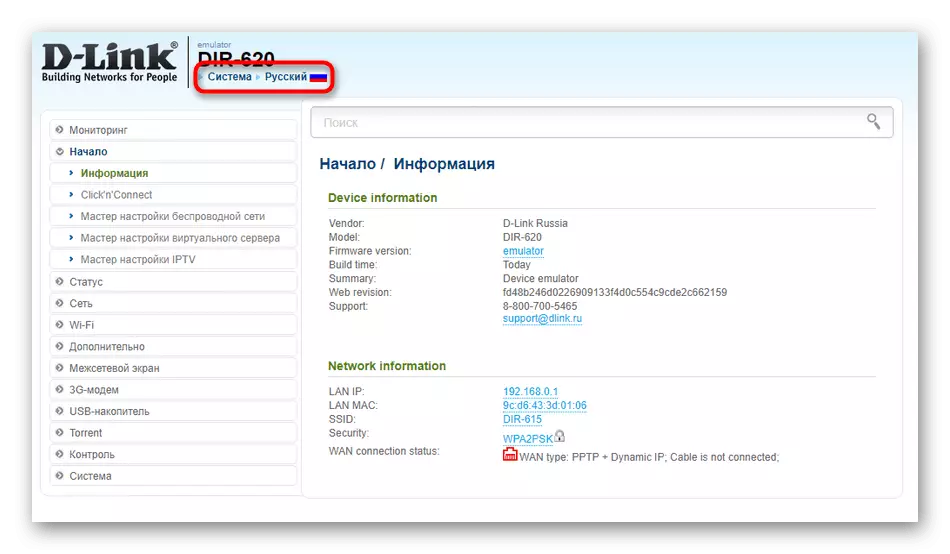
- In the Internet center, select Russian Interface Language to easier to navigate in the following steps.
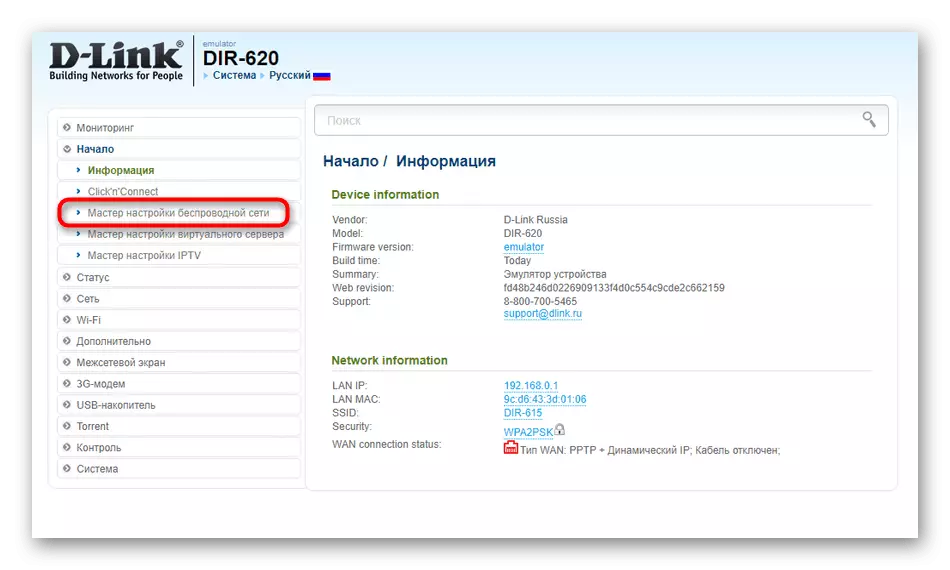
- The easiest way to configure the wireless network will be through the appropriate master. Run it through the "Start" section by selecting the Wireless Setup Item.
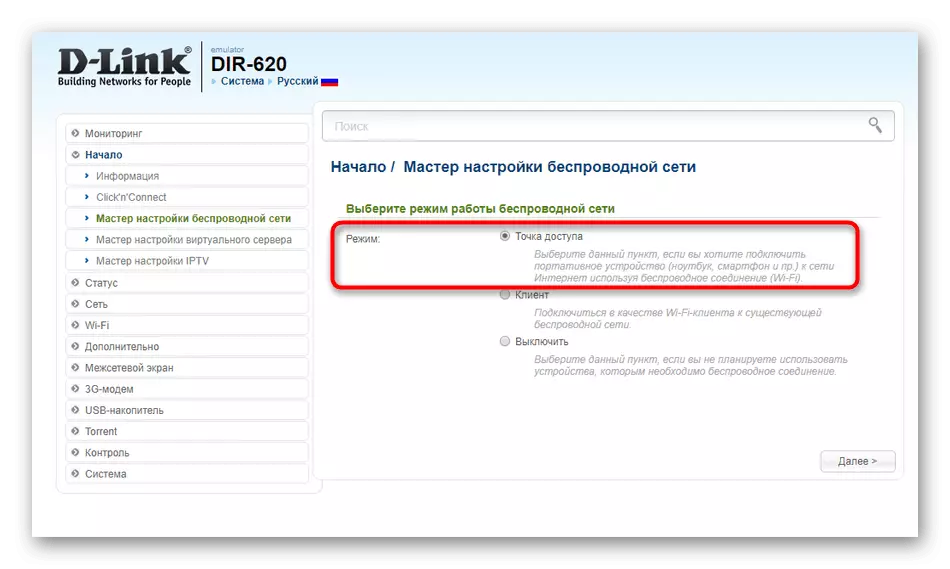
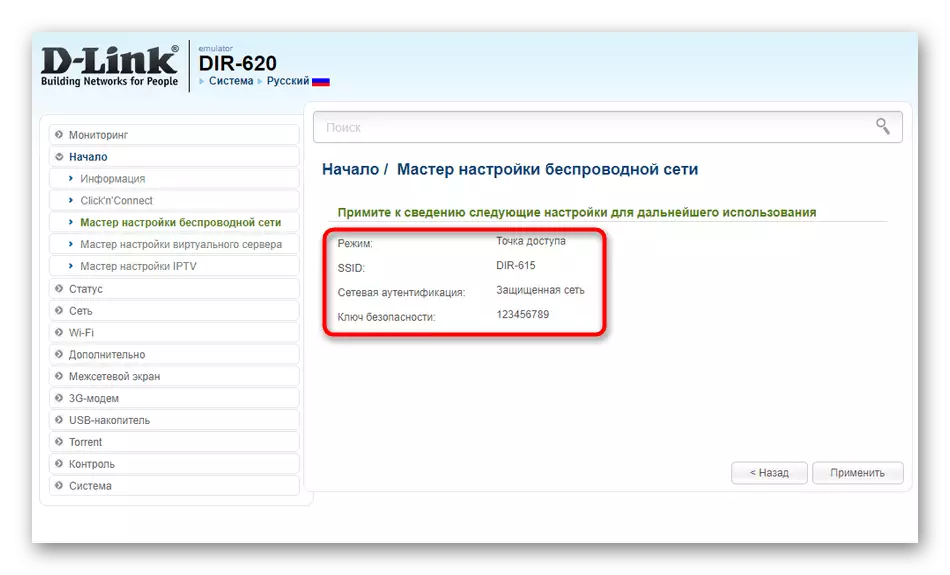
- When you select the wireless network mode, mark the "Access Point" marker.
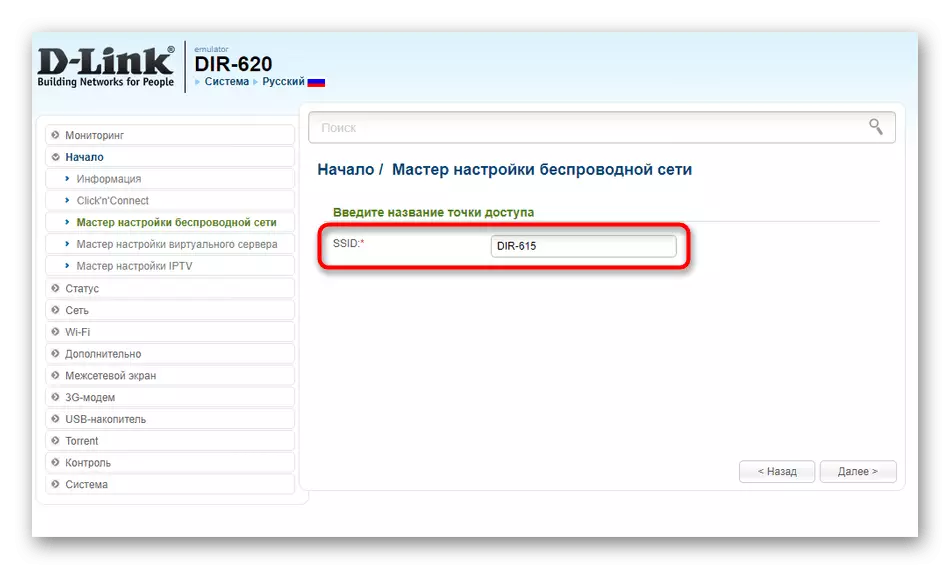
- Next, specify the name (SSID) with which the network will be displayed in the list available, and go to the next step.
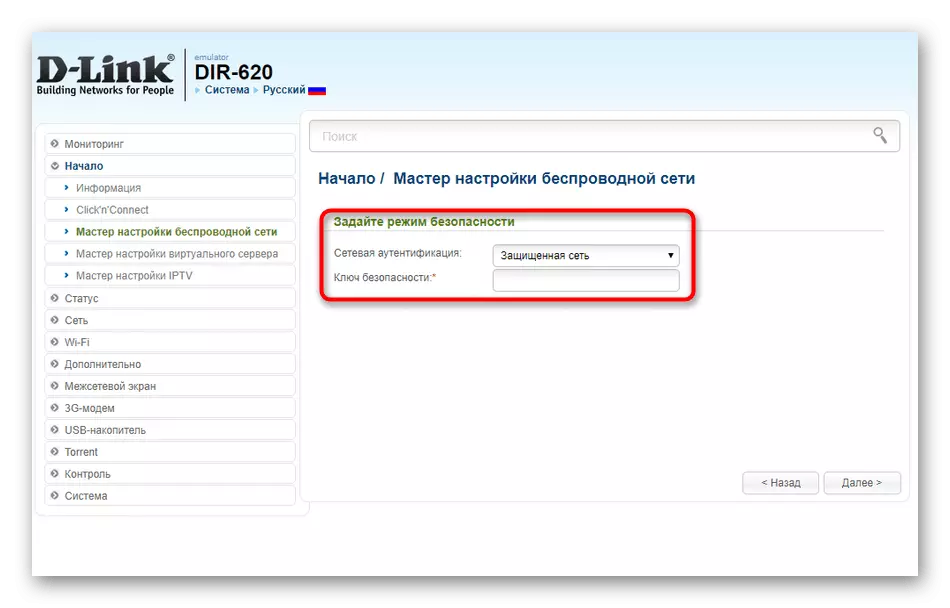
- Type of network authentication is recommended to install a "secure network" state, and then set a password consisting of at least eight characters. This will protect Wi-Fi from unauthorized connections, for example, by the neighbors.
- Check all the settings, and then click on "Apply" to save them. If necessary, go back to make changes.
Read more:
Definition of the login and password to enter the web interface of the router
Solving the problem with the entrance to the configuration of the router
Let's return to the moment of setting up the network type, which we mentioned at the end of the first option. The fact is that WAN parameters need to be configured separately so that you can not only log in to the web interface, but also have access to the Internet. We advise you to familiarize yourself with the detailed analysis of the full configuration of the routers from D-Link to understand which parameters should be changed to ensure the correct receipt of traffic from the provider. Only after that you can enter the Internet both on your computer and on mobile devices, regardless of the type of connection.
READ ALSO: D-LINK routers setting
These were all recommendations for configuring the D-Link router connection with a computer and mobile devices. Perform the instructions given, given all the nuances of each option to easily cope with the task.