What you need to know before starting work
All nuances regarding Facebook advertising to embrace in one article is impossible, but there are highlights that you need to know. There are two options for setting up campaigns: do everything yourself manually or trust automatic parameters. The second method will take several times less time, but the result is not always pleased.In the instructions below, we consider the combined option when part of the action is manually adjustable, and the part remains unchanged.
Defining a goal
- Brand recognition or coverage - are located in one category. Such advertising will be aimed at receiving an instant result and feedback, but to increase the number of people who know about your company. Fits large companies with big budgets.
- Traffic is the optimal option for beginners. Facebook automatically optimizes declaration display for maximum feedback.
- Messages - suitable for those whose main goal is to bring the client to contact. When this parameter is selected, it is necessary to take into account that it does not like all areas of activity.
- Last Visitors Video is ideal for commercials.
- Installing an application - most often used for computer and mobile games placed in the App Store and Play Market.
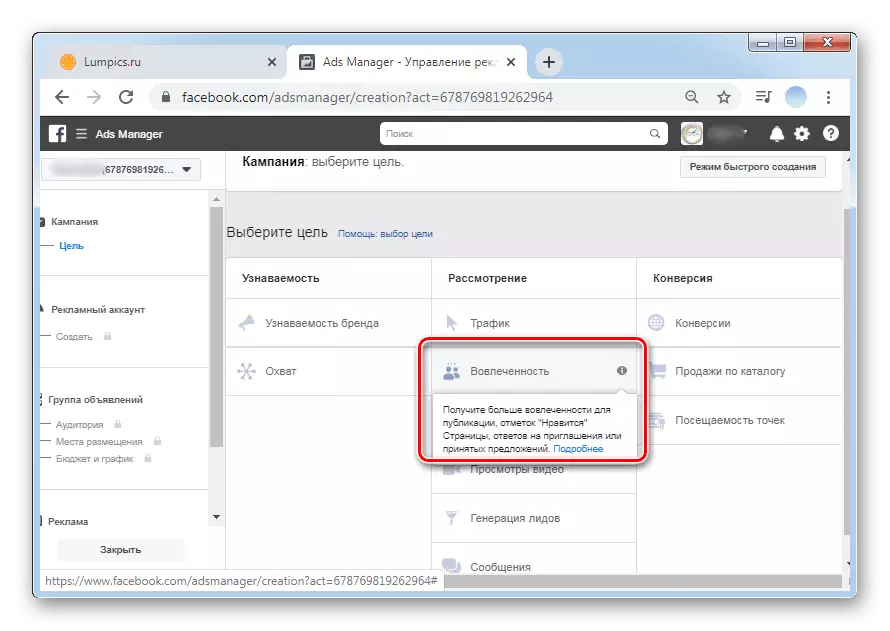
- Conversion - Category includes three subsections: "Conversion", "Sales on the product catalog" and "Visit of points". The goal will be relevant to online and offline stores with the possibility of buying through the site.
When you hover the cursor pointer to any of the rows on the site, you can read detailed information and decide what is suitable.
Definition of audience
One of the most common questions is how to understand which audience is to celebrate in the campaign. First of all, it is important to know your target client. This is necessary not only for advertising on Facebook, but also for doing business in general. You can narrow all users according to the following data:
- Countries and cities are especially important for offline services and goods that cannot be sent by mail or to provide online.
- Floor - Many business segments are quite clearly divided into sexual sign. Show advertising of a manicure salon The man from the neighboring city is definitely not worth it.
- Age is an important criterion, since certain categories of services and goods are not simply impossible, but also forbidden to advertise. The list of prohibitions by age is extremely wide, it can be studied in detail in the section "Help" of the social network. If your advertisement does not carry anything forbidden, just learn your client or subscriber. It is better to remove the average potential age and mark it in the campaign.
- Detailed targeting is a large section that helps to separate users of special criteria. In fact, you should independently study all the signs and look for suitable. As an example, advertising on the provision of psychological services is very profitable to show people who recently changed family status.
In addition to the independent creation of an advertisement, the "Promote" buttons are located under all posts. Thus, several stages are immediately passed, which saves time significantly. But it is harder to set up a campaign for personal parameters. It is suitable if the goal is to a banal increase in the number of likes under the post, but for thoughtful promotion of the company is better to deal with the nuances.

Option 1: PC version
We will post all the steps of creating an advertising campaign through the official Facebook website. It is important to take into account the large number of nuances that can strongly influence the final result. Depending on the purpose and scope of activity, the principle of creation can differ dramatically. First of all, you need to create an advertising office for your business page. About how it is done, we have previously written in a separate article.Read more: How to create an advertising office on Facebook
Stage 1: Go to Business Manager
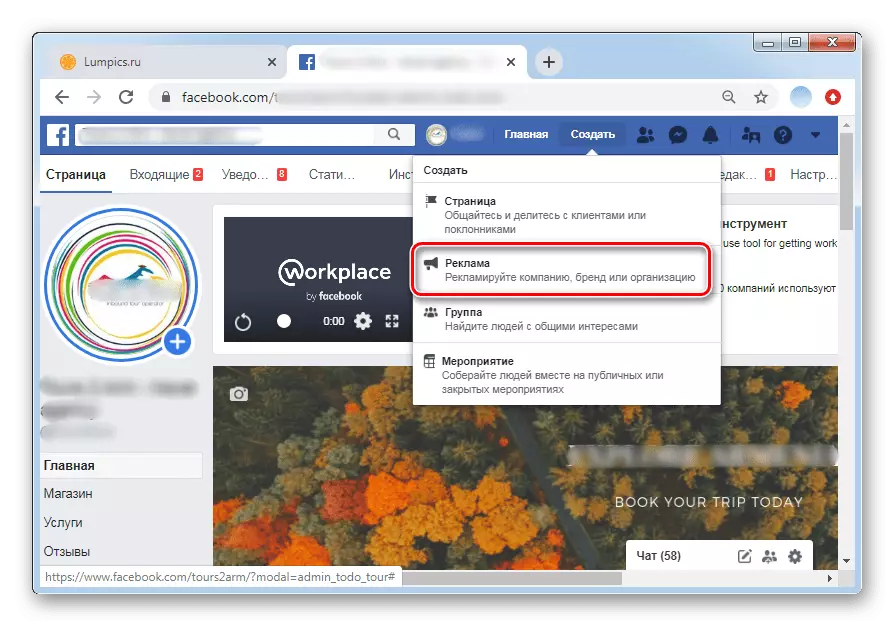
- Open the main page of your account and click on "Create" in the top field.
- In the drop-down list, select the "Advertising" section.
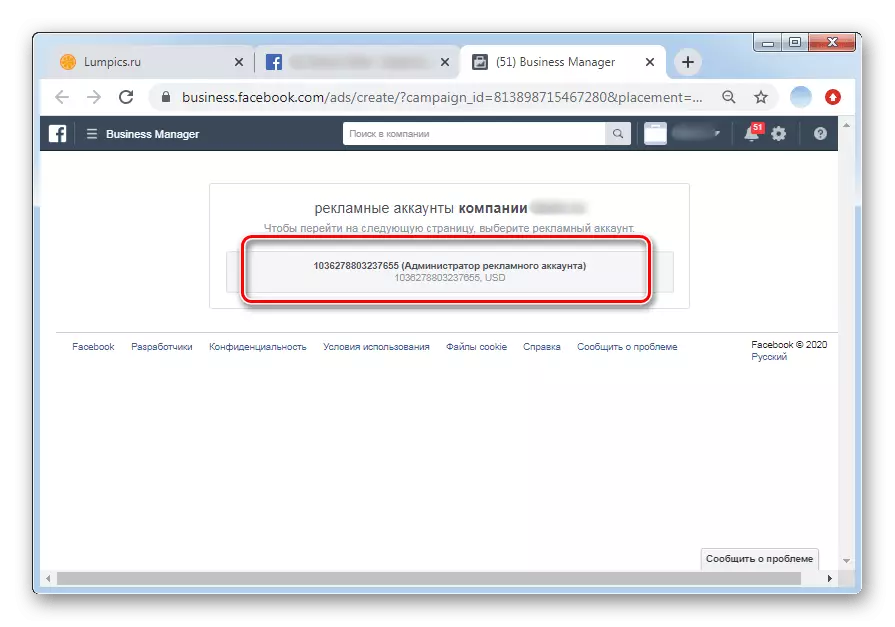
- A new tab will open Business Manager Facebook. You must specify the number of the advertising account of your page. The owners of standard groups in Facebook are usually only one account. Be sure to note that the "Administrator" was indicated in front of the code - which means access to work with advertising.

Stage 2: Choosing a Goal
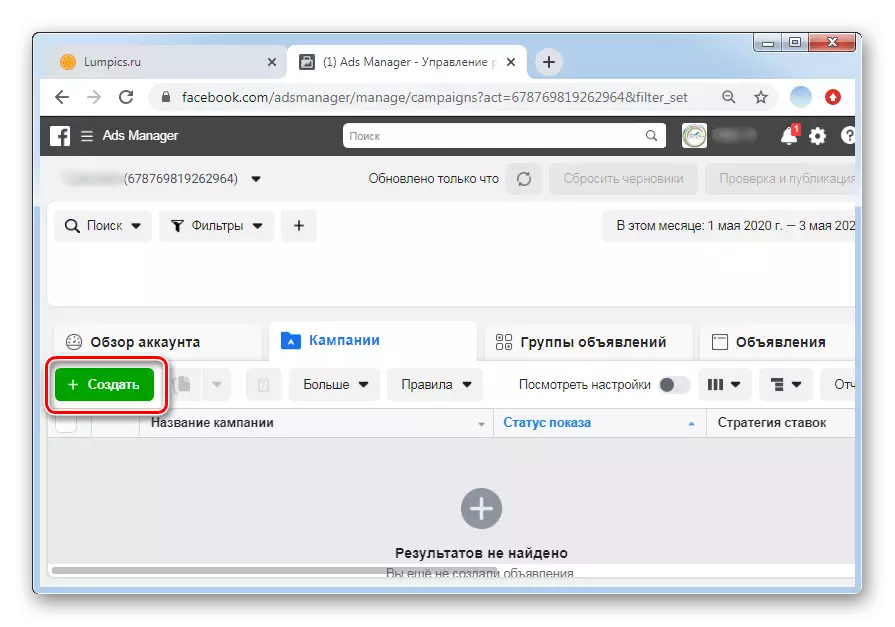
- After switching to your personal account Business manager, click on the green button "Create" on the left side.
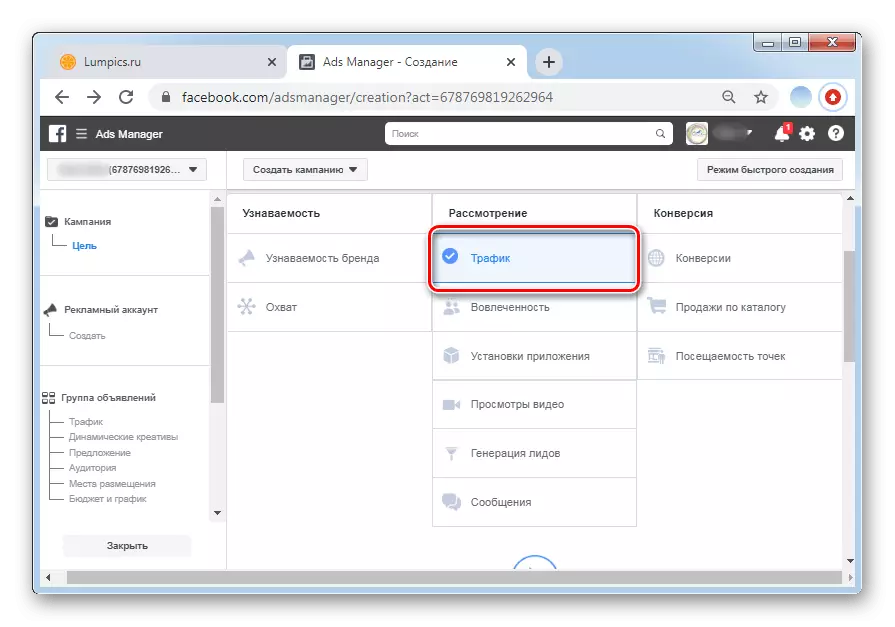
- Click on the purpose of the campaign that is necessary. In detail how to decide on this item, we told in the first part of the article. Consider an example on the most popular version - "Traffic". The instruction is practically similar to all sections.
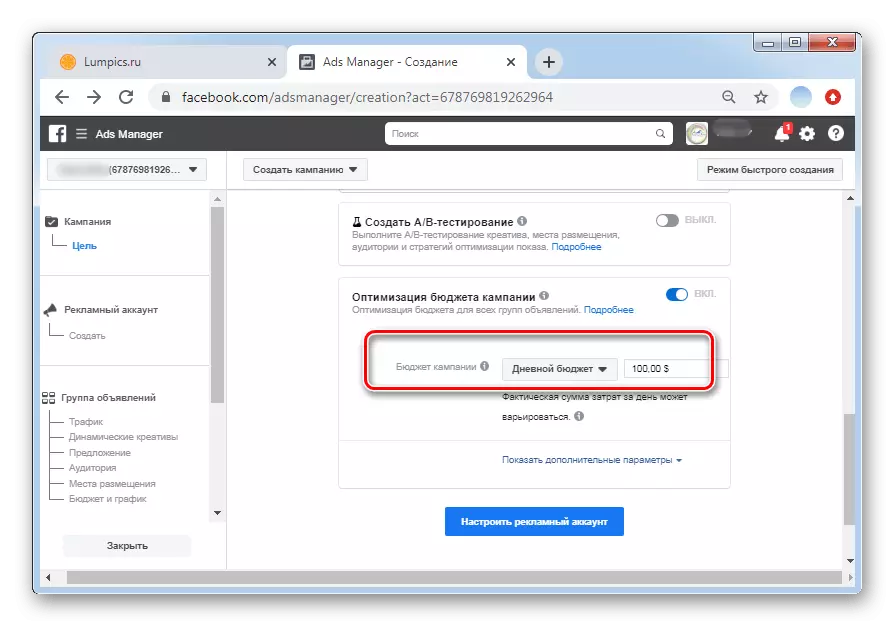
- The system will immediately need to specify the budget. Open the list to select the type of money distribution.
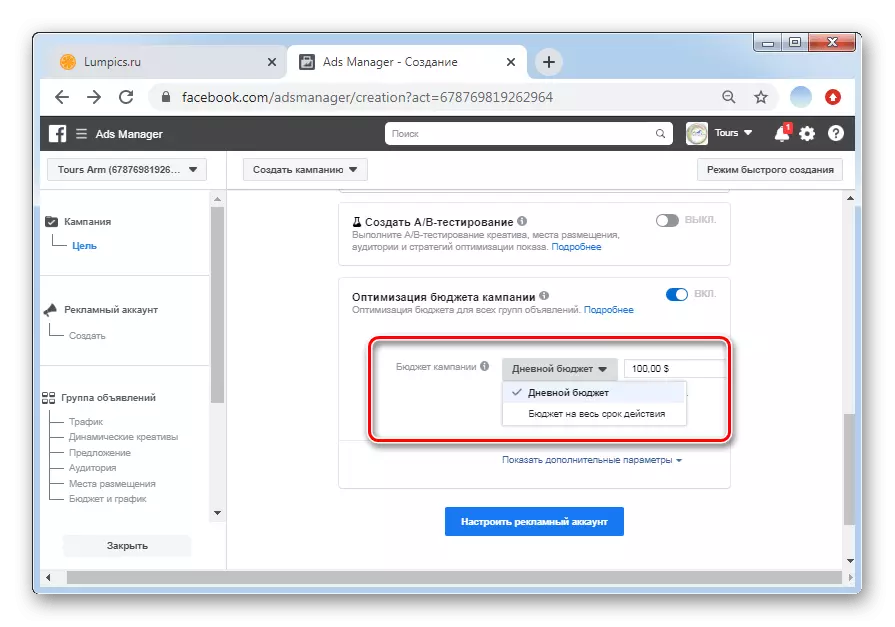
- There are two options: "Day budget" and "Budget for the entire validity period". The second is more suitable for professionals who have the skill of configuring and regulating traffic. When you specify a clear amount of expenses per day, it is easier to control the result.
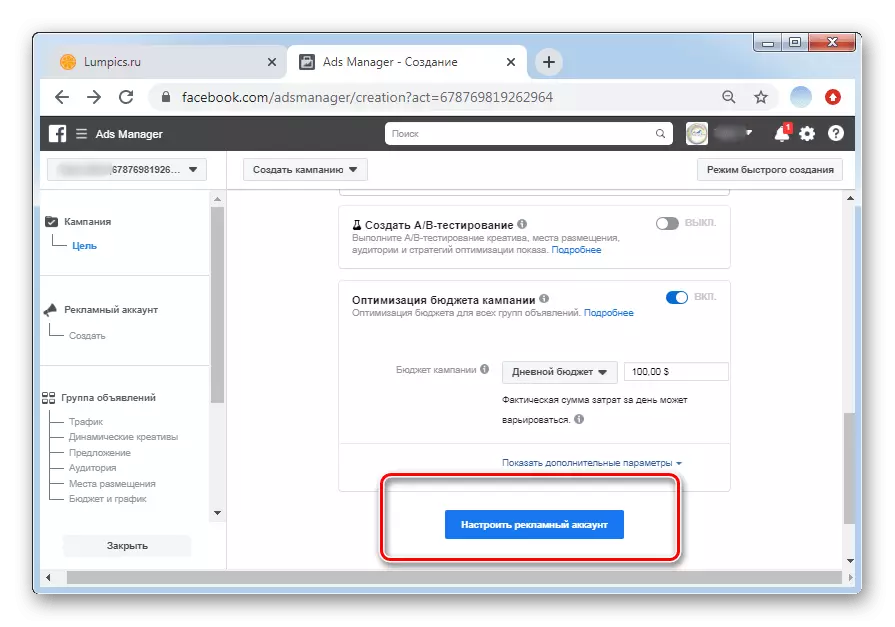
- To confirm, click on the "Configure Advertising Account" button.
Stage 3: Currency and Traffic Choice
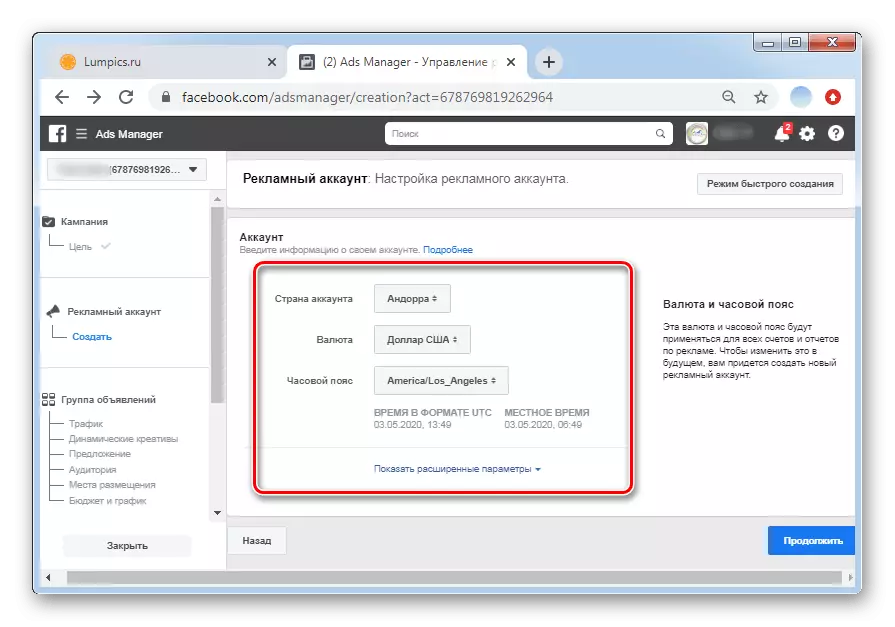
- The next step is to enter the advertising account data. Specify the country, currency (it is better to choose a currency of the payment card), as well as time zone. Time mark on the basis of the country to go promo.
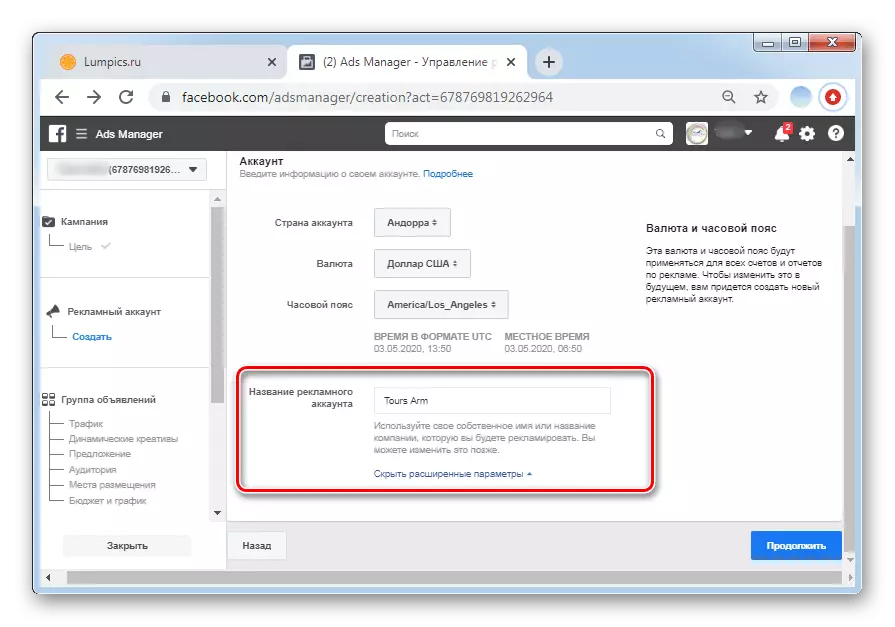
- For the convenience of working with advertising in the future, enter the name of the campaign.
- The choice of direction of traffic depends on personal preferences. For firms with well-designed, working sites, the ideal option is to send traffic to it. If there is no site, specify any other convenient communication method with you. The right side of the screen displays an approximate size of a potential audience.

Stage 4: Audience
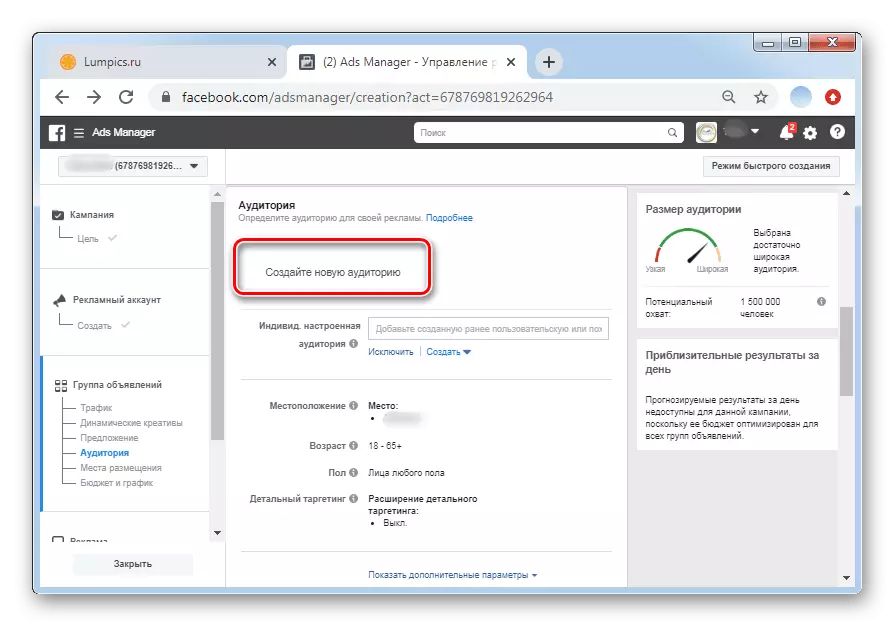
- From the correctly selected audience depends a lot. Before proceeding to this step, you should have an idea who is exactly a potential customer. Click on the "Create New Audience" button.
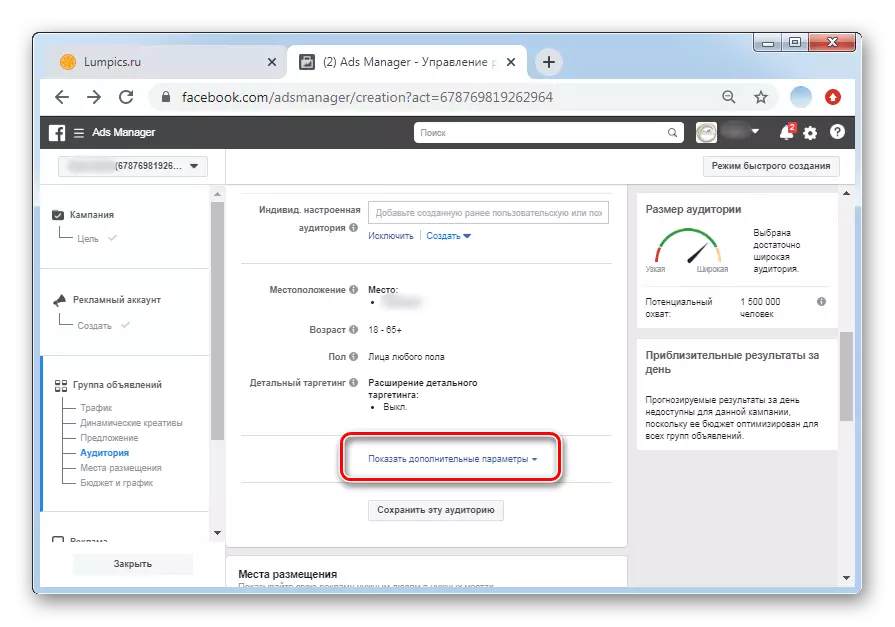
- It is immediately recommended to reveal all the additional parameters as indicated in the screenshot.
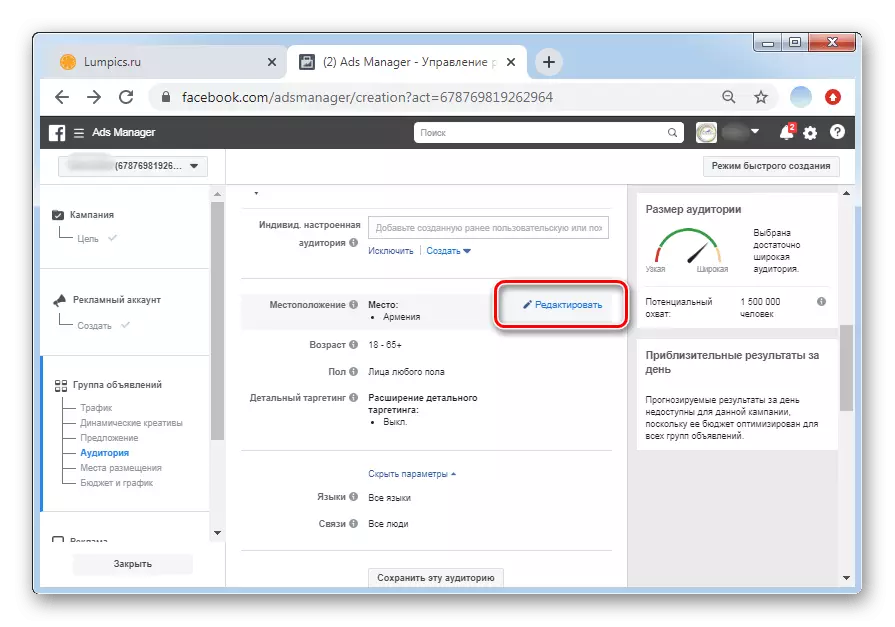
- In the Location string, add all regions, countries and individual cities. You can also choose from the remote point from the specific point. To do this, click "Edit".
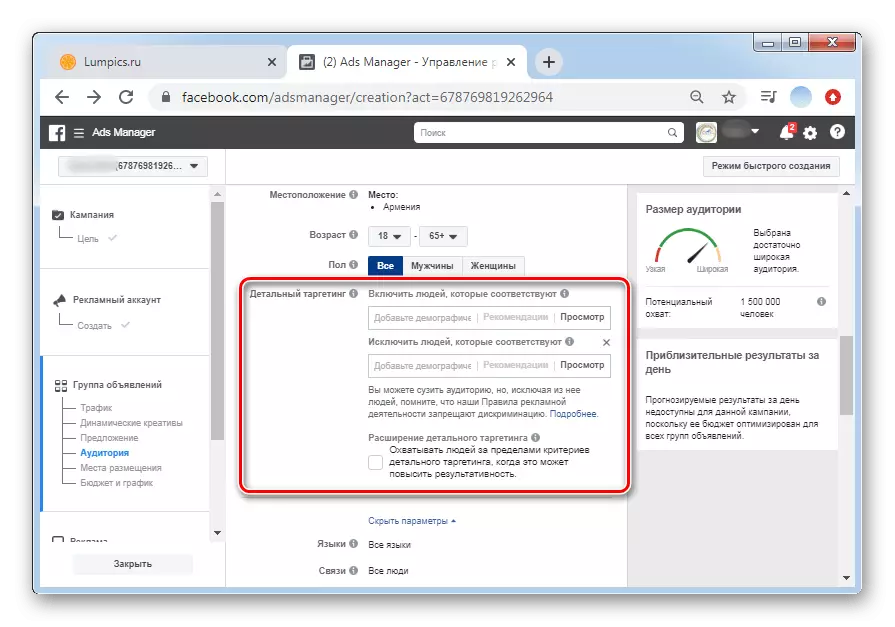
- Age and gender are determined depending on the scope of services or goods. Note that everything connected with alcohol cannot be advertised to children.
- Detailed targeting allows you to include or exclude certain categories of people from the audience. In the search string, start typing the word. Smart search will automatically offer suitable options. In parallel, pay attention to the size of the audience in the right-hand side. The value must be in the middle of the scale.

Stage 5: Platform selection
An independent selection of platforms to display advertising saves the budget. However, this stage should be performed only to those who understand the difference in places for accommodation. Newcomers are advised to completely skip it and go immediately to the next step.
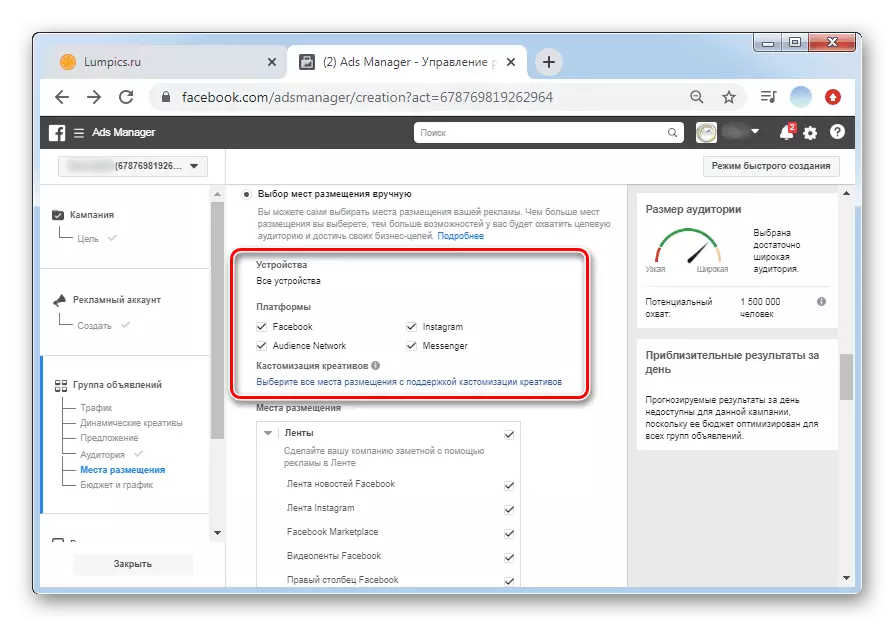
- Install the marker opposite the placement of manual placement points.
- It is necessary to mark the devices. With a small budget, it is recommended to leave only Facebook and Instagram.
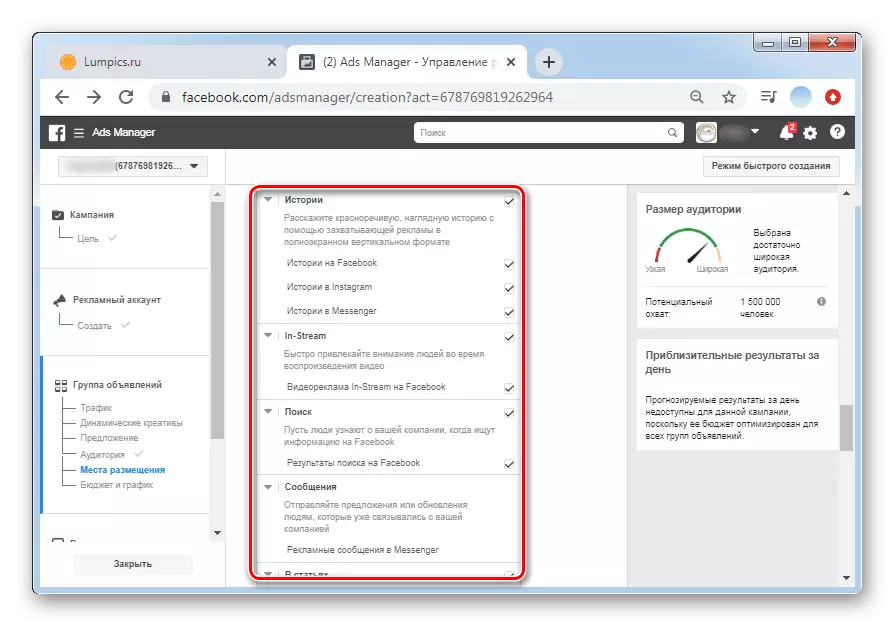
- This is followed by the choice of types of placement promotion. Extremely effective is the method of advertising through Stories on Facebook, Instagram and Messenger, as well as advertising in the search bar. Put the ticks opposite all the desired categories. If you can not decide - leave all values marked.

Stage 6: Budget and schedule
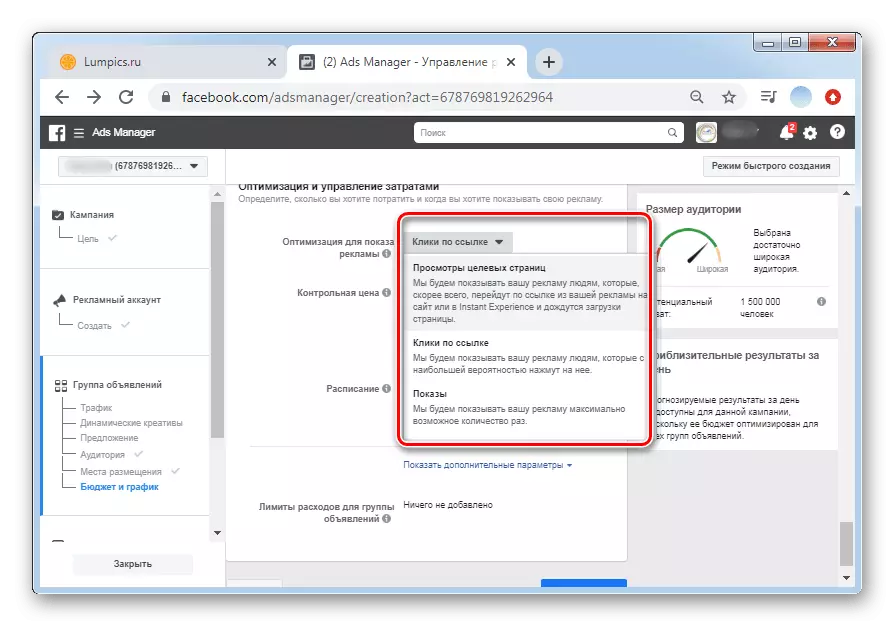
- The choice of optimization to display advertising depends on what is more important in this promotion: Show the image with the text or push the person to go to your link. The most standard for all situations option is the choice of "shows".
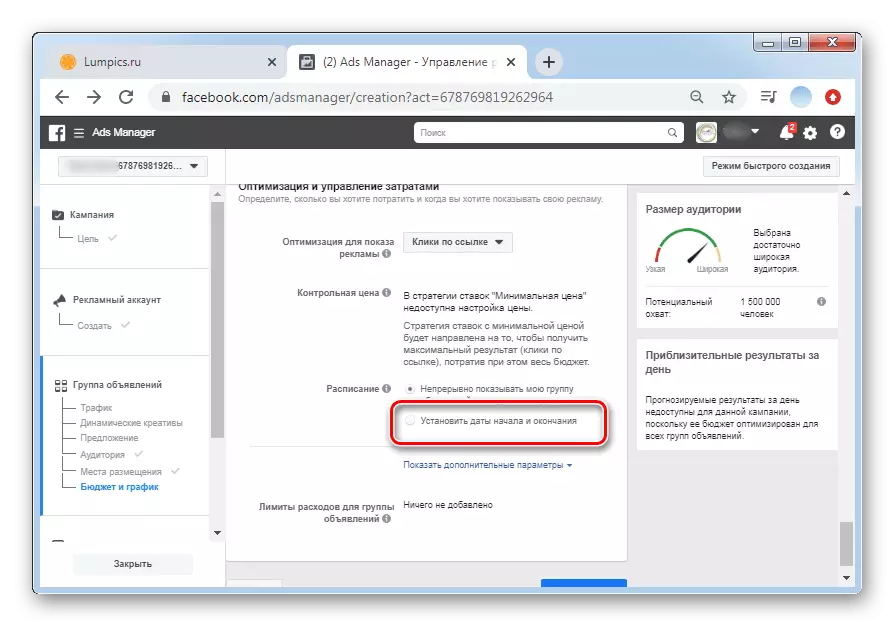
- Advertising display schedule is particularly relevant to promote services. Always take into account the mood of people and how much information obtained during certain hours is perceived. According to statistics, the best time for selling anything is the gap between the beginning of the day and 1-2 hours at night. Click "Set start and end dates" if you want to manually configure the schedule.
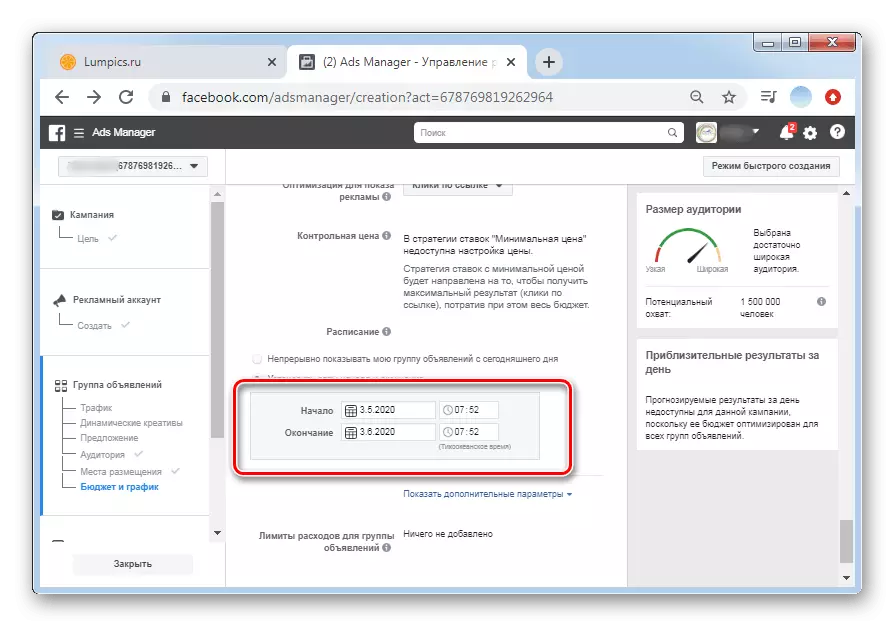
- Specify dates and time taking into account time zones of the regions.
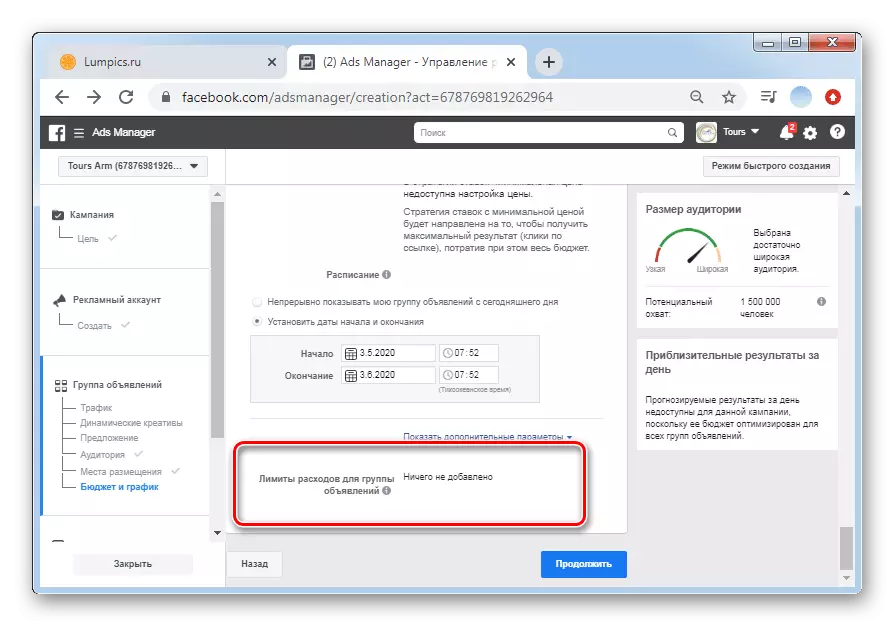
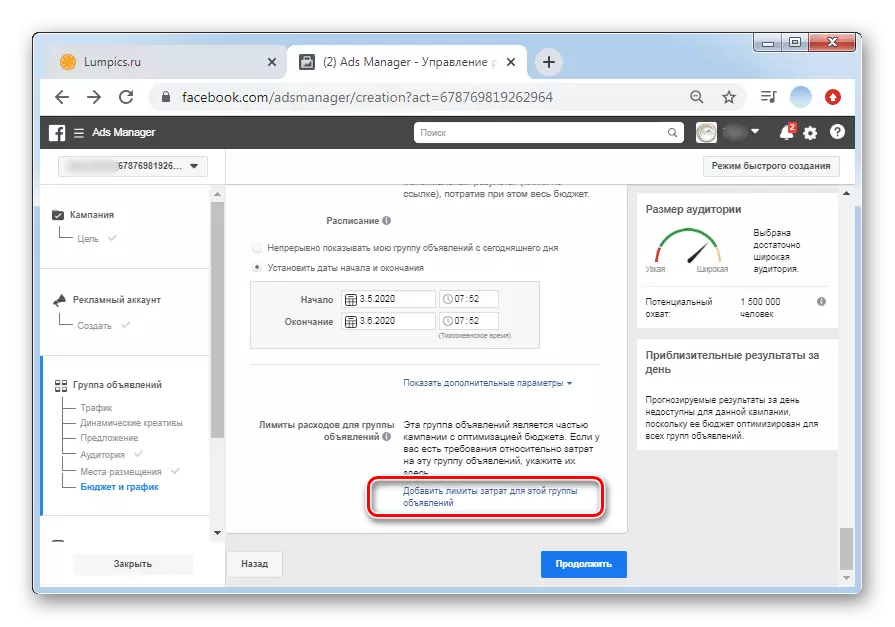
- The expense limit is the most important point that will not exceed the budget. Click on the string to add a maximum and a minimum.
- Select "Add Cost Limits for this ad group".
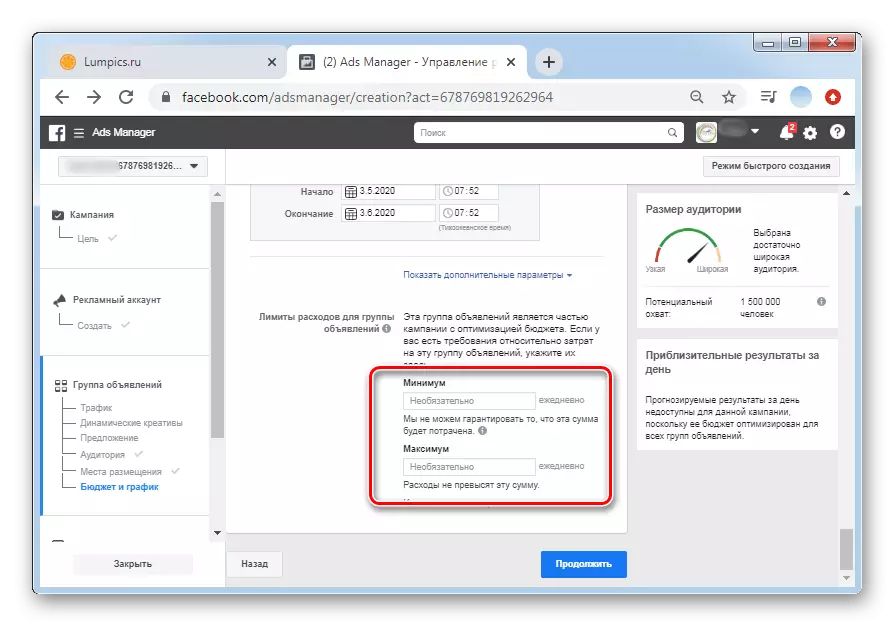
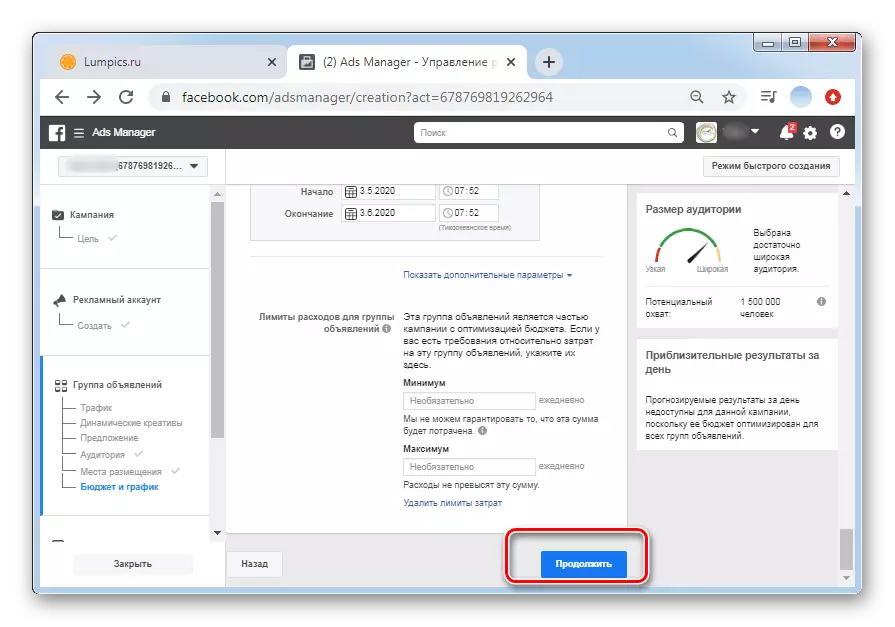
- At least you can not specify, but in the string "Maximum" enter your budget for this advertising campaign. As soon as the flow rate reaches the indicator, the display of promotions will automatically pause.
- Click on the "Continue" button.
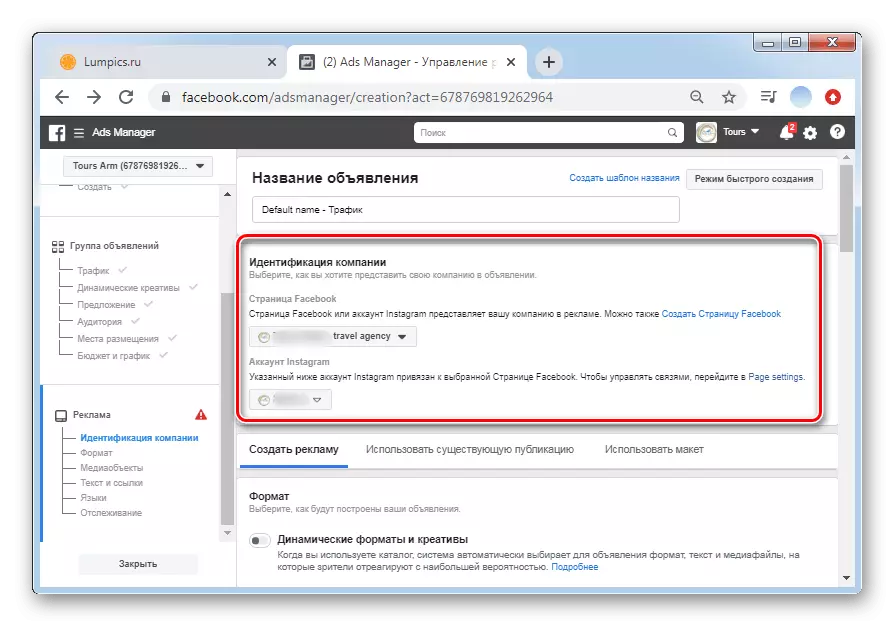
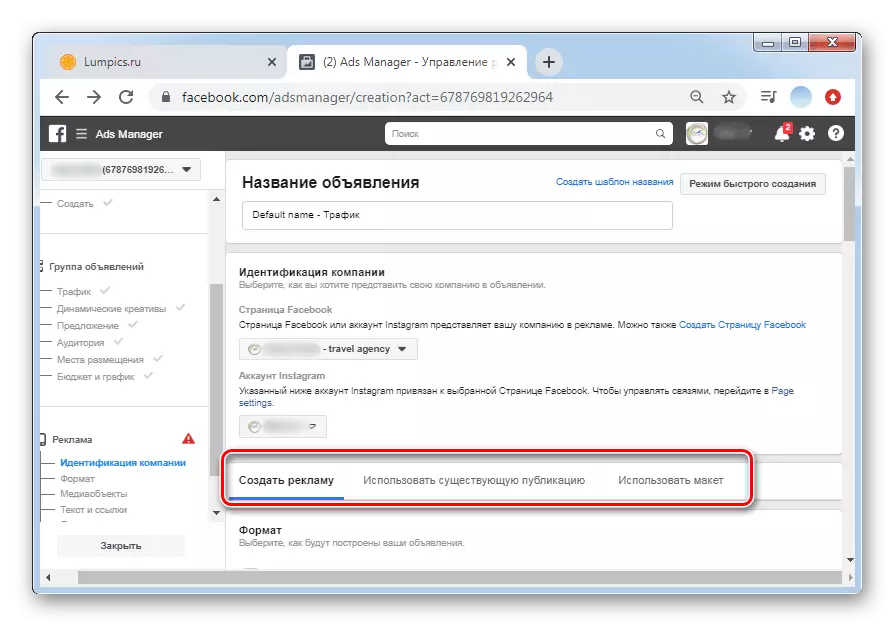
Stage 7: Setting and decoration
- In the "Company Identification" section you need to select your page on Facebook and Instagram.
- The last stage remains - registration of an advertising post. You can completely create a new post, but it is easier to use an existing one. If there is no suitable publication on the page, place it before you start creating an advertisement. Click "Use an existing publication".
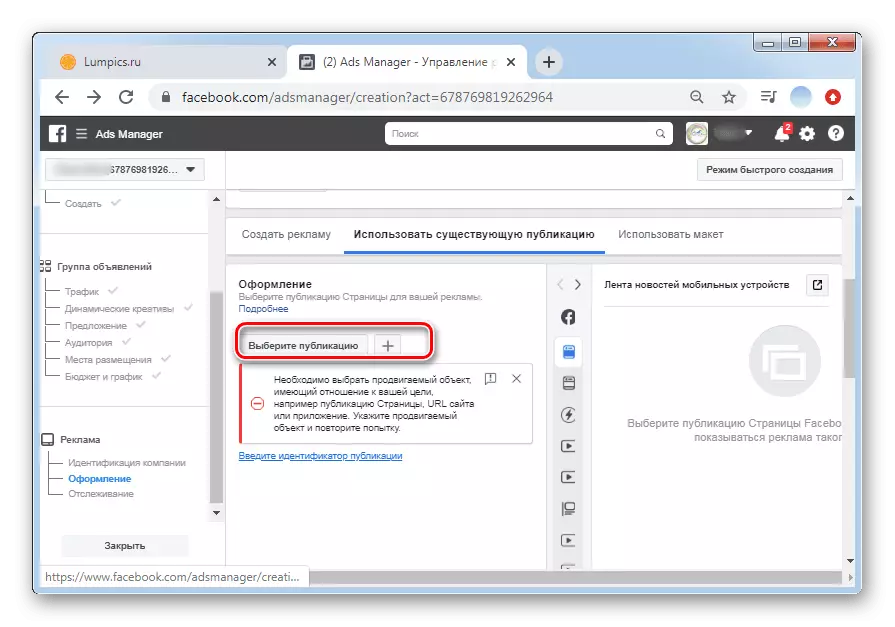
- Next click "Select Publication".
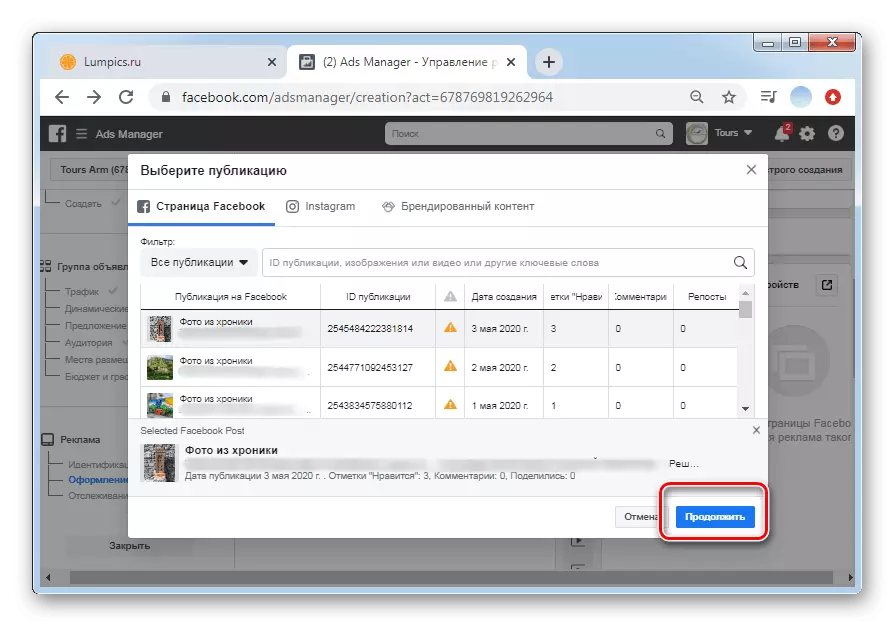
- The post can be selected from the list, as well as by ID and keywords.
- Click "Continue".
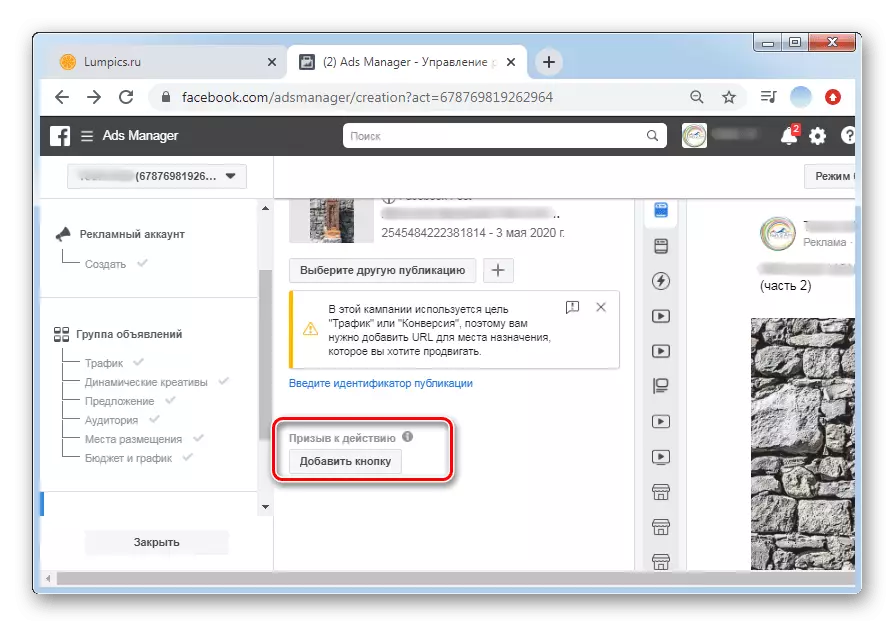
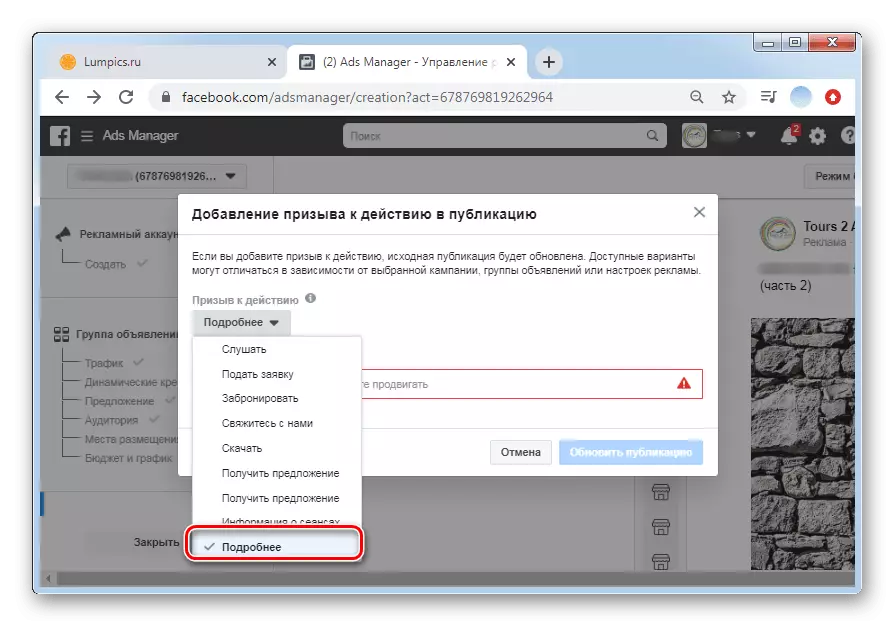
- Under any advertising there is a call to action. To add it to click "Add button".
- The standard call is the "More" button, but you can specify any other option depending on the type of your advertising.
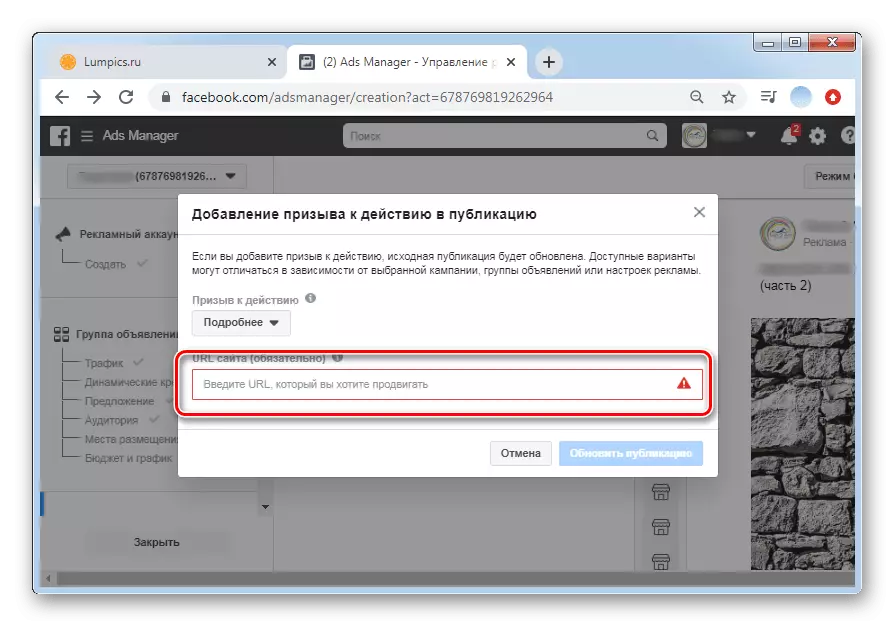
- Since initially in this example, the site specified in the section of the traffic directions, it is necessary to enter its URL. When selecting traffic directions on WhatsApp or Messenger, enter the link to the profile.

Stage 8: Check and Publication
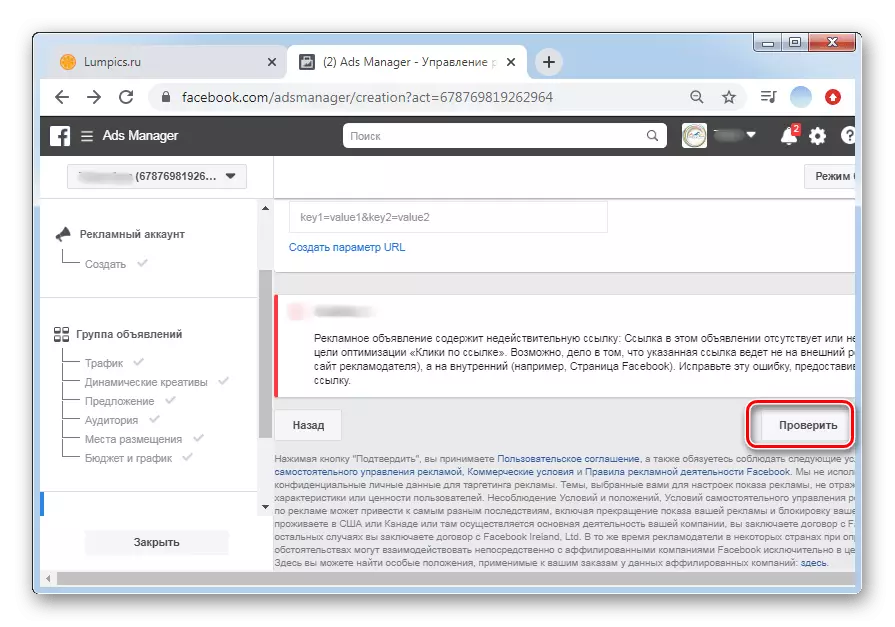
- Click on the "Check" button.
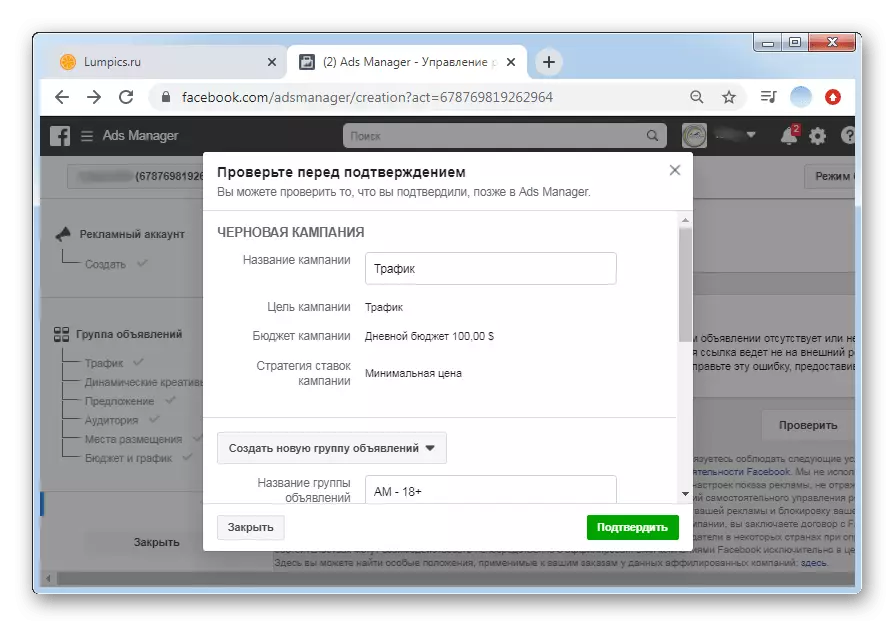
- In the window that opens, all information on the campaign will be provided. Scrolling down the list, carefully read the items. To change any parameters, click on the "Close" button and return to the desired stage. If everything is filled correctly, just select "Confirm".
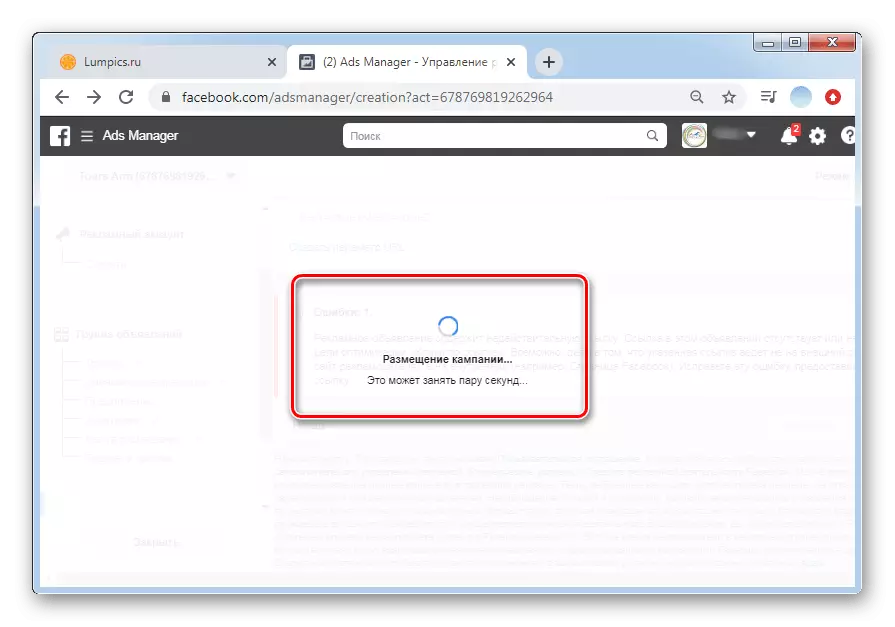
- There will be a message about the placement of the campaign. As a rule, the process of checking and publication takes up to one day.
Option 2: Ads Manager
The ADS Manager application for mobile phones on iOS and Android includes all the same functions for creating advertising on Facebook as the official website. With it, in a few minutes you can start promoting your product or service.Download Ads Manager from App Store
Download Ads Manager from Google Play Market
Stage 1: Choosing a Goal
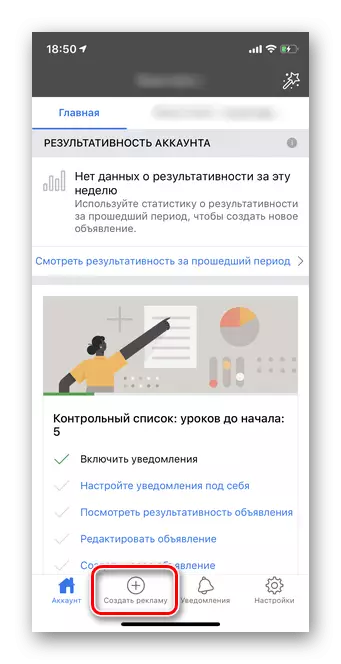
- In the ADS Manager application, go to your page account. Tap the "Create Advertising" button at the bottom of the display.
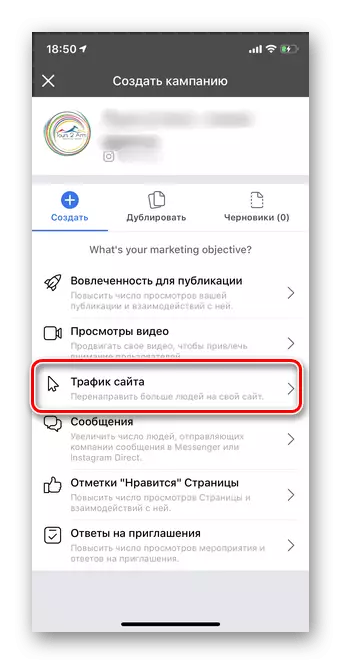
- The first stage is the choice of the purpose of the promotion. In detail what point is suitable for what purposes, we told above. Consider an example in the most common option, suitable for almost any business - "Traffic". With it, you can increase coverage and attract new customers.
Step 2: Image Selection
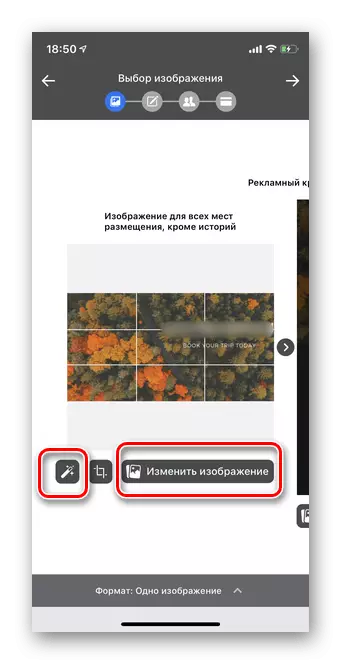
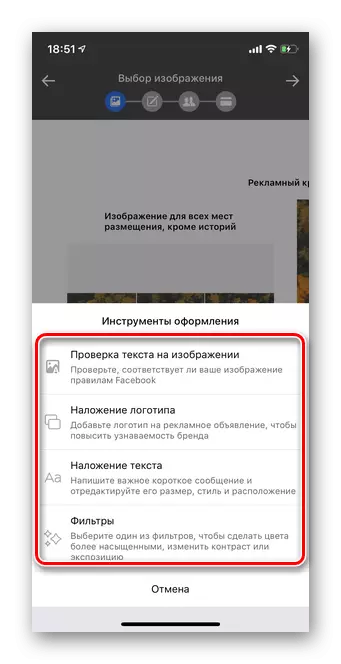
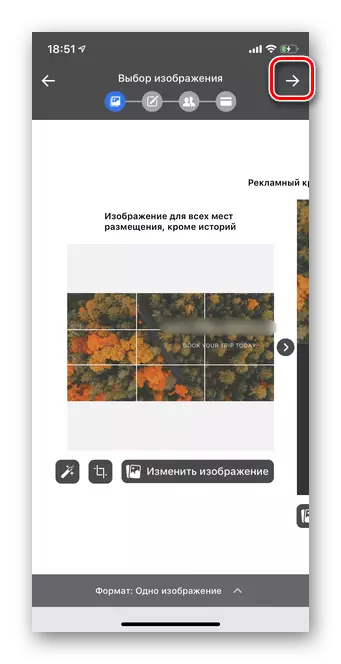
- ADS Manager will offer to choose the main photo for promotion at all sites except stories. Automatically added photo from page cover. Tools marked on the screenshot will allow you to apply filters, add logo, crop edges, edit text, etc ..
- The question of adding text in the photo has many nuances. On the one hand, it is a great way to save characters in the text and attract more attention, but on the other - Facebook prohibits creating banners with text that takes more than 30% of the photo square. By clicking on the "Magic Wand" icon, select "Text Checking on Image". The system will automatically check and inform if the format is suitable for promotion or not.
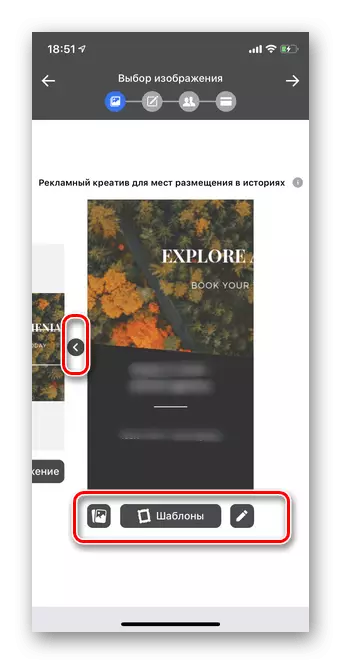
- Next, you should edit the photo for Stories. To do this, tap the arrow shown in the screenshot. Using templates and tools located under example, you can create a suitable option.
- Click on the arrow in the upper right corner to go to the next step of creating advertising.
Stage 3: Advertising Setup
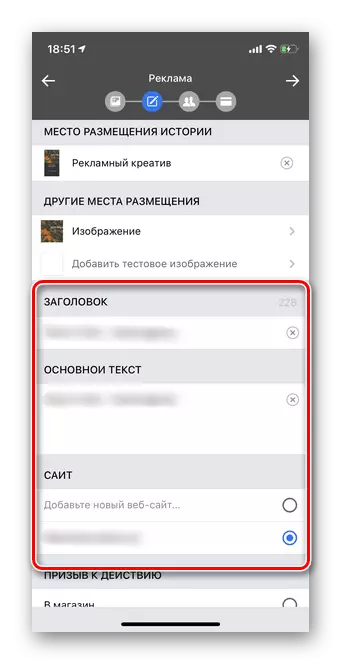
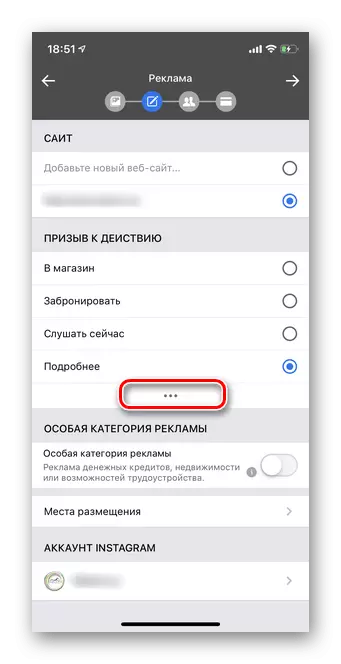
- The next stage is the writing of the text and the choice of placement places. To begin with, fill in the "Title" and "Main Text" fields. It is recommended briefly, but it is interesting to provide information about your product or service. If you have, specify the link to your site.
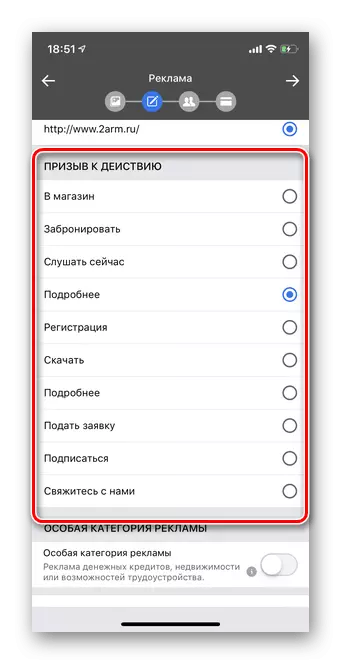
- The "Call for Action" section is a button that will be visible to users immediately under advertising. Tap three points under the list to open all options.
- Mark the most suitable for your advertisement call for the audience. If you doubt, the "Read more" button will be optimal.
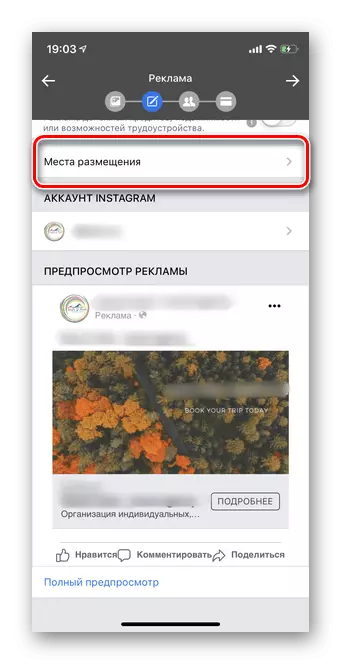
- Tap "placement places". You can not touch this section, if you do not want to configure the platforms yourself for displaying advertising.
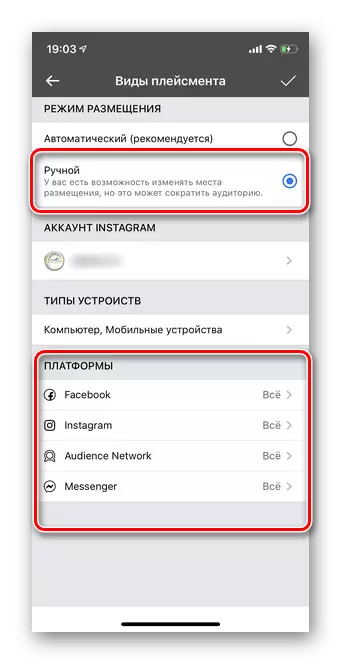
- Move the placement mode in the "manual" and in the lower list, turn off those platforms that you consider fit. In each of the four sections, you can choose your own version of banners.
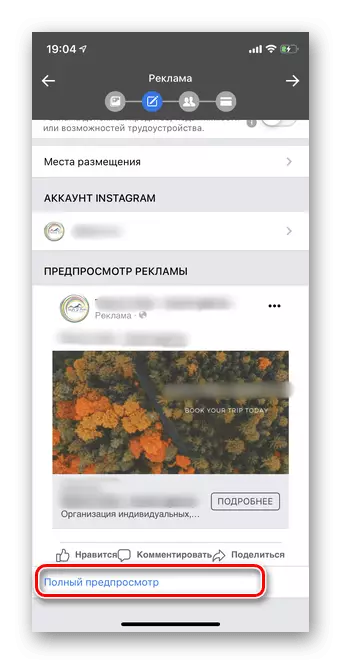
- Upon completion of the settings at this stage, click "Full Preview".
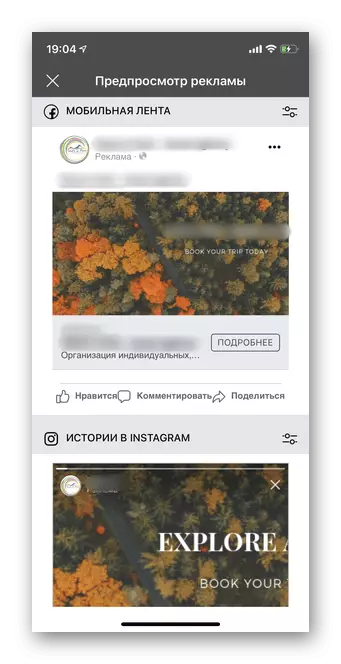
- The application will show how the audience will see your advertising from various devices and on different platforms.
- Tap the arrow in the upper right corner to go to the next step.

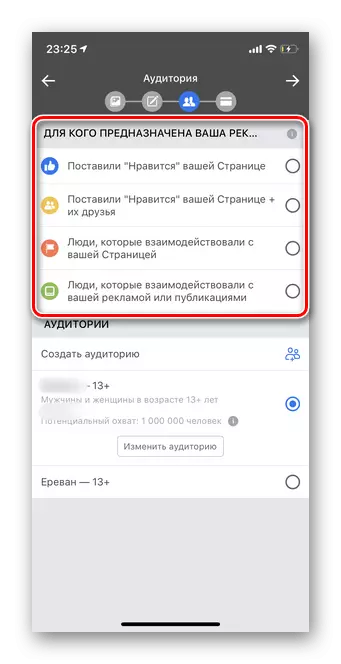
Stage 4: Audience Selection
- In the audience section, pay attention to all the smallest parameters, as it will depend on it, who exactly will see advertising. Select "Create an Audience".
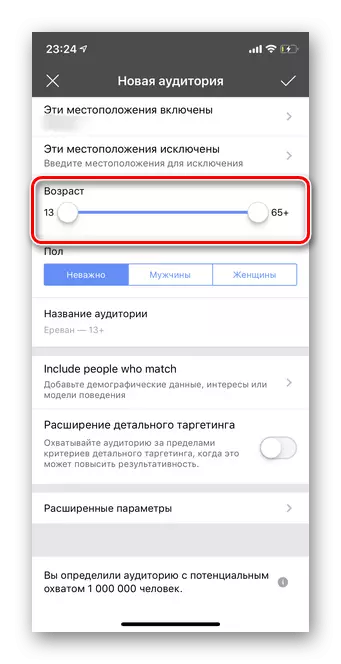
- First of all, the region is indicated. You can add separate countries, cities or entire continents. Next, you should define age and gender. Please note that when advertising some types of goods it is important to comply with age minimum established in the countries of the show. For example, any propaganda of alcohol in Russia is prohibited to show persons under 21 years. You can learn more about the rules and prohibitions in the "Help" section in ADS Manager.
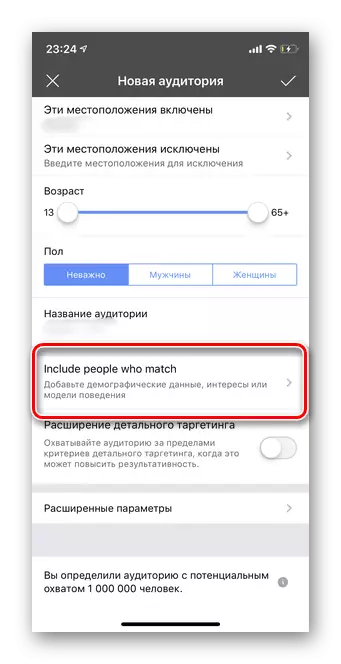
- Then you should add interests and various models of the behavior of potential customers. Click on the "INCLUDE PEOPLE WHO MATCH" button. In the last update of ADS Manager, the system does not translate this line into Russian.
- In the search bar, specify various parameters: interests, family status, demographic and geographic data. All this will eliminate potentially not suitable users.
- You can also narrow the audience by installing one of the specified parameters. Newcomers in creating advertising with a small number of subscribers are recommended to skip this item.


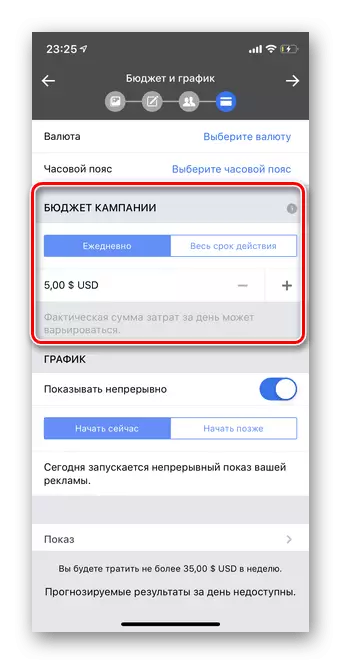
Stage 5: Budget and Campaign Schedule
- The last stage is a campaign budget. It should be determined in advance by thinking strategy and benefit. Be sure to set the limit on the map so that even when making an error in creating promotion not to lose money.
- It is better to choose the currency of your bank card - it will be easier to follow the costs.
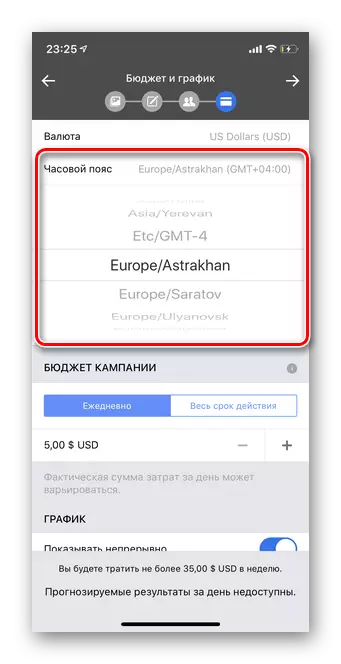
- In the "Time Zone" section, it is important to select the parameter according to the time of your audience. So it will be possible to clearly form an advertisement schedule.
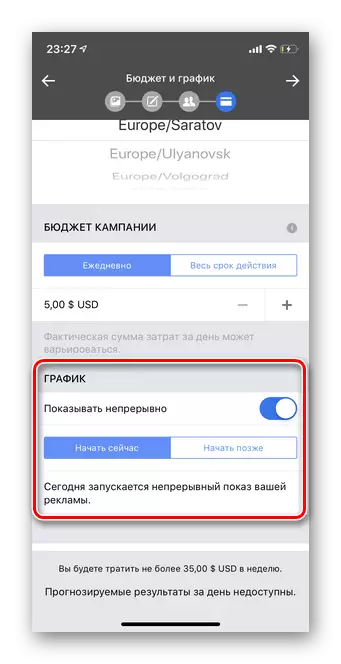
- The "Schedule" section basic is the choice of a continuous or accurate advertising time set. In the case of incorporating the continuous launch of Facebook promotion itself, it will analyze and decide which days and the clock is better to offer your product to people. If you clearly specify the most logically thoughtful schedule, install the beginning and end of the display of banners for every day. Then click on the arrow in the upper right corner.
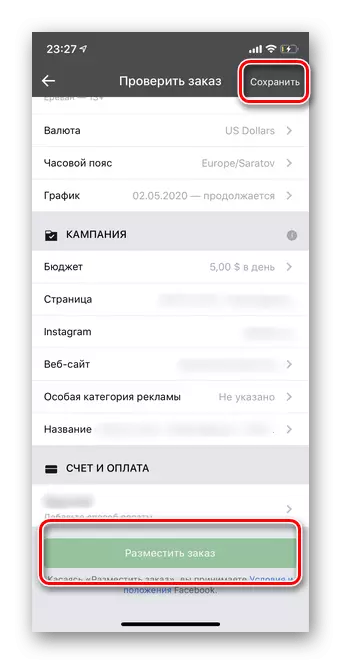
- Carefully check all the data, budget and promotional text. To start the campaign, tap "Place an order". Promotion will begin after moderation by Facebook. Check can take from a few minutes to day.