

Method 1: Account Settings
You can restore the Google Authenticator in case of loss using the internal account settings on a special page, the ability to deactivate codes from an old application, for example, if the smartphone was stolen.Step 1: Account Recovery
To make changes to settings without access to the old authenticator, the first thing you need to restore the Google account, guided by the relevant instructions on our website. The easiest way to use emergency codes or confirmation with the help of a temporary code to the phone number, but you may also need to appeal to the support service.
Read more: How to restore Google Account
Step 2: Connect the application
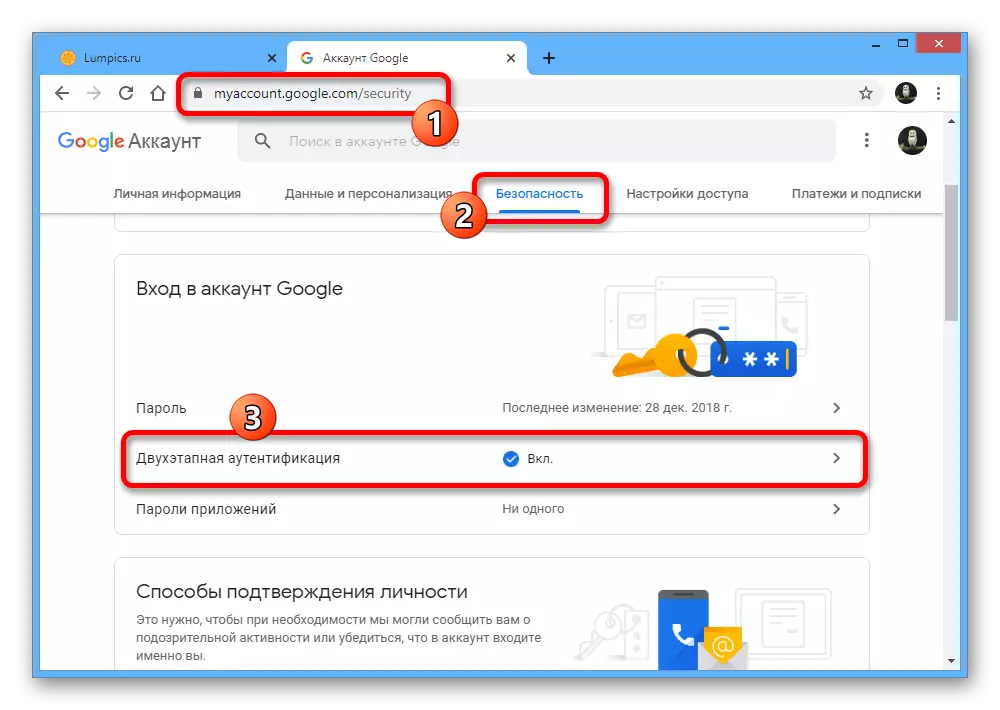
- Open the page with the account settings by the following link below and switch to the Safety tab. Here it is necessary to find the item "Two-stage authentication".
Go to the account settings
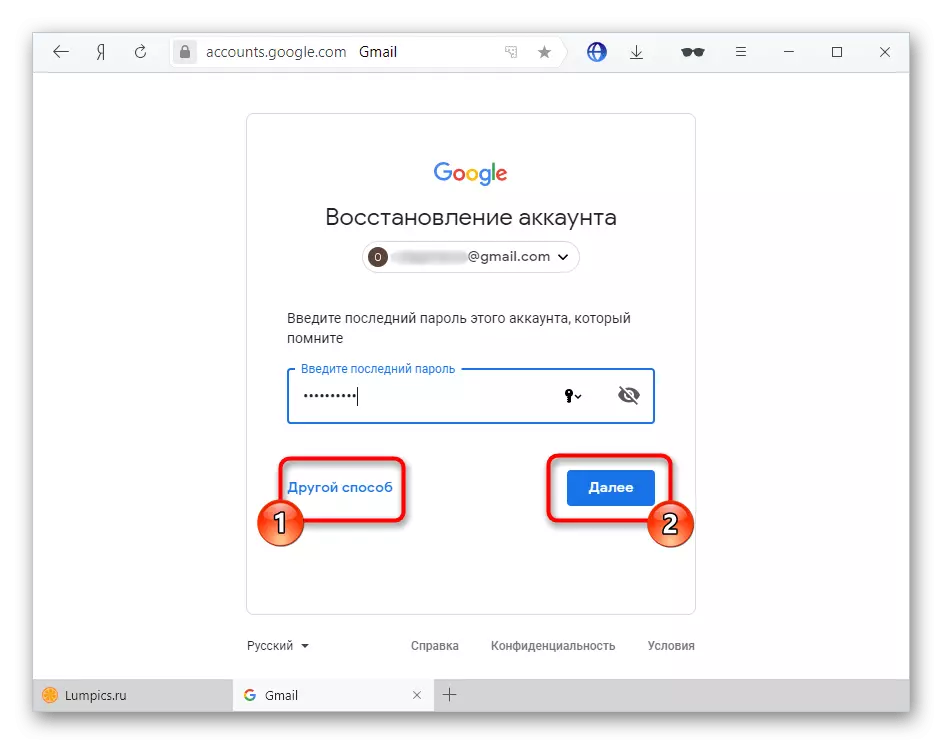
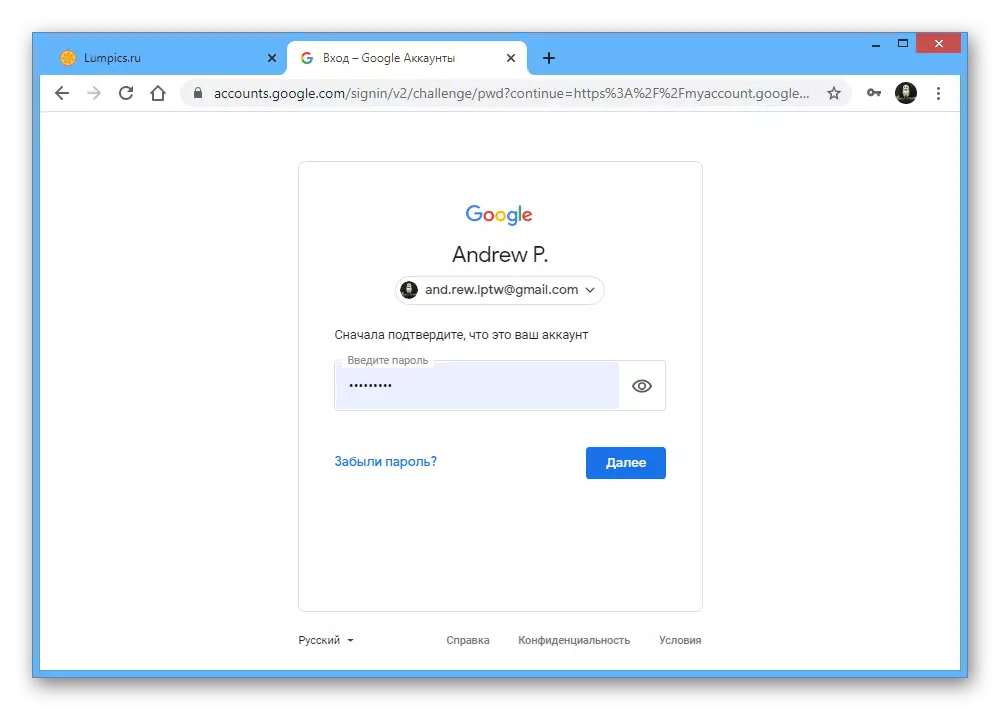
Perform a confirmation using the current password from the account.
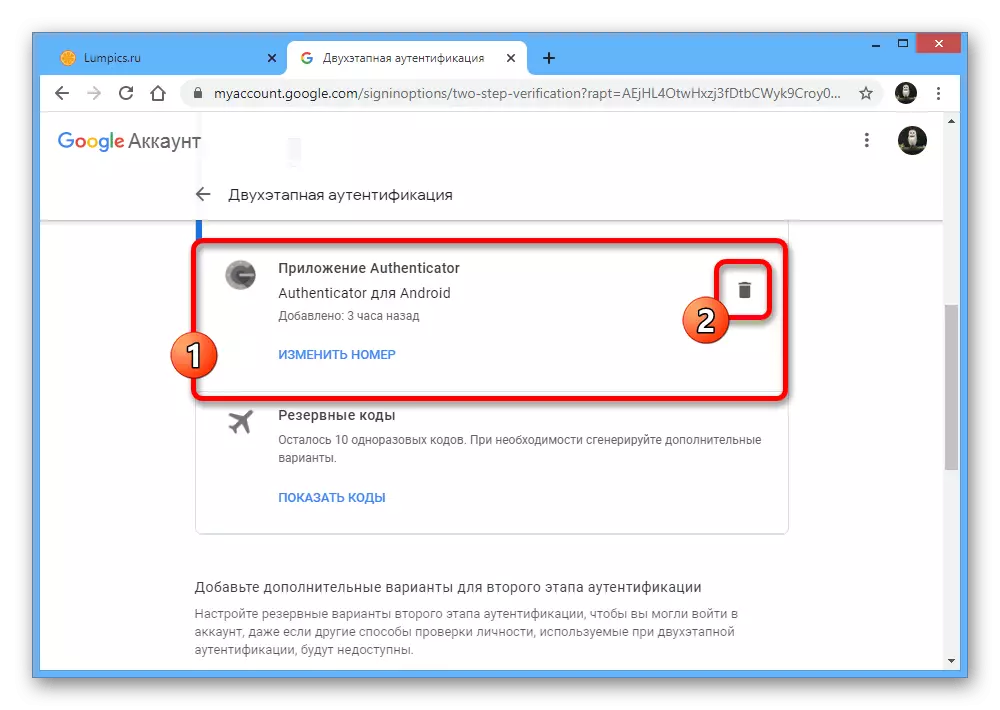
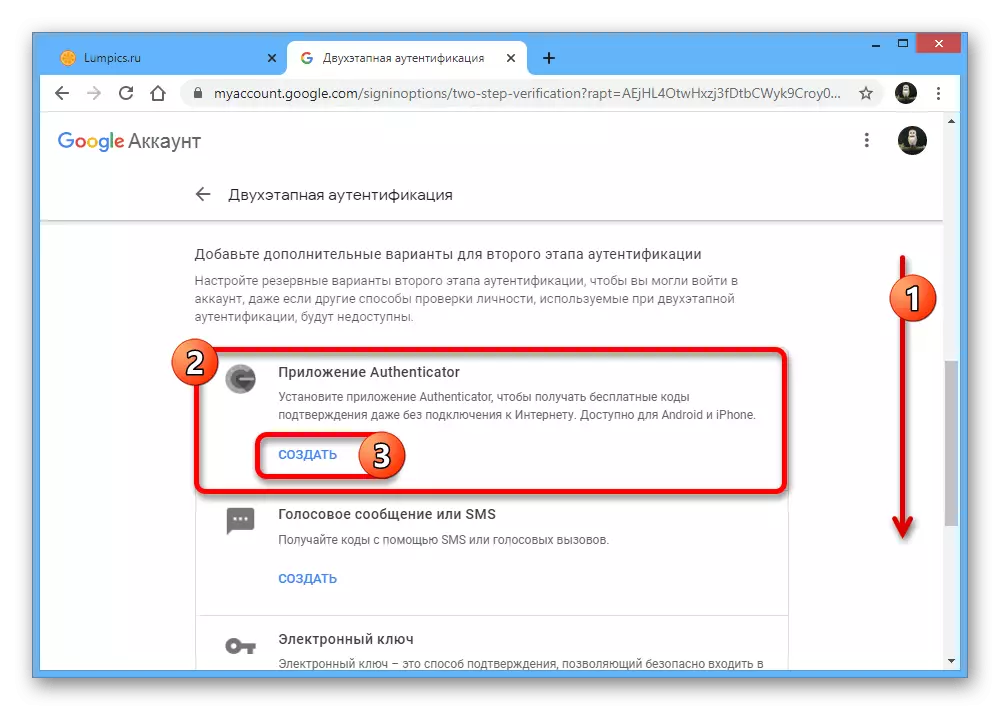
- Scroll down the page down and in the AUTHENTICATOR application block, use the removal button. This will disable the previously added authenticator.
To add a new device, scroll down the window even below and in the section that we are marked with "Create".
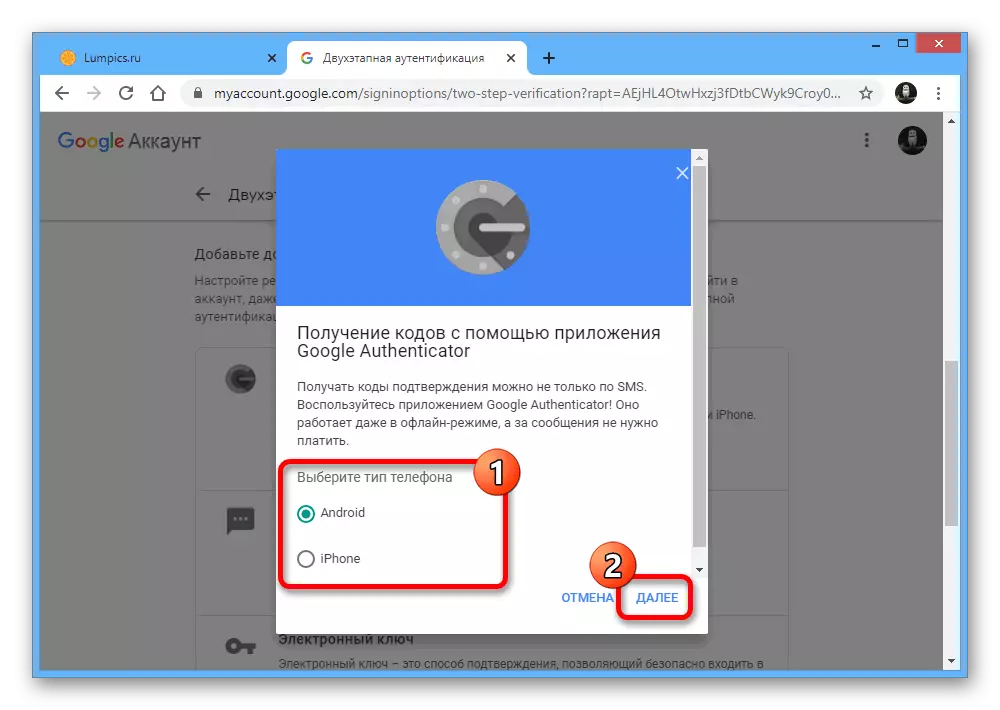
- Specify the type of phone you want to use to confirm, and click "Next".
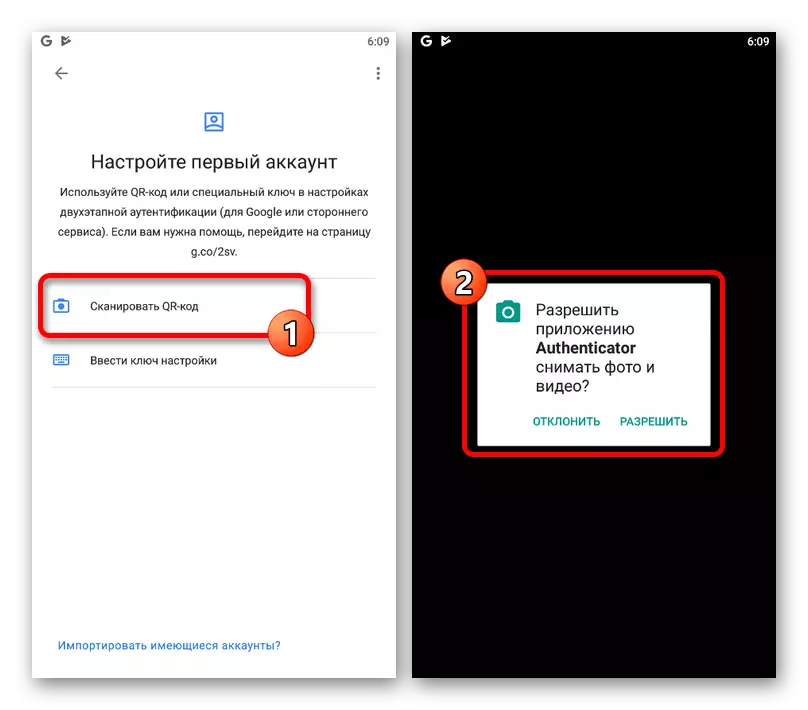
- After that, the QR code will appear on the page, which must be scanned using the phone camera.

In the application for this, it is enough to choose "Scan QR code" on the first page and bring the camera to the computer screen so that the code is inside the red area.
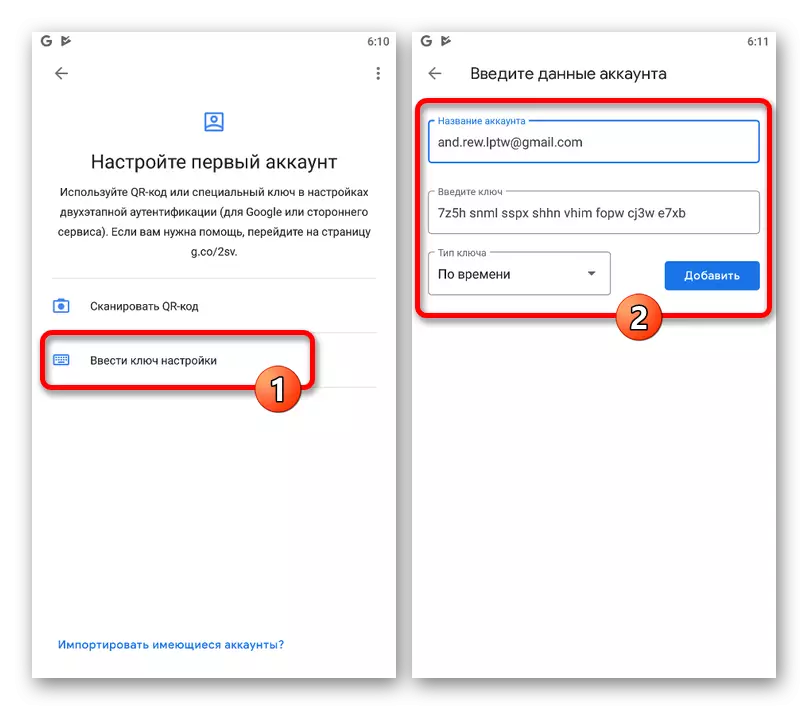
- If you are not convenient to use such a confirmation method, use the link "Unable to scan QR code" to get a text code.
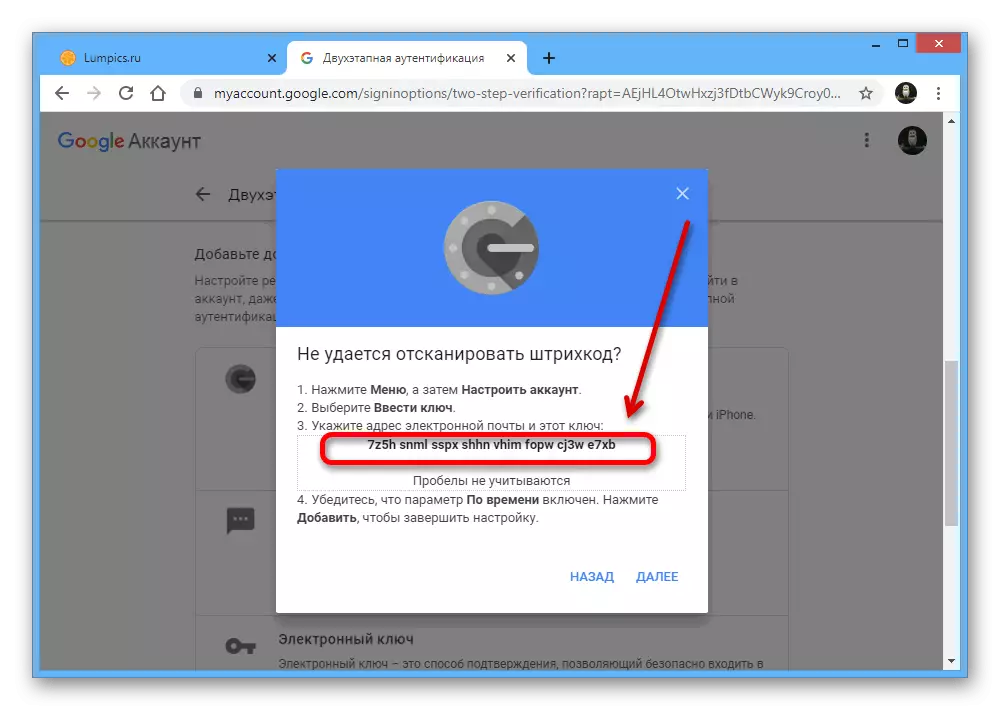
You can specify this set of characters on the smartphone in the "Enter Setup Wheel" section using the "Enter Key" text field. At the same time, as the "Account name", you must specify the email address and be sure to set the value "in time" in the key "key type".
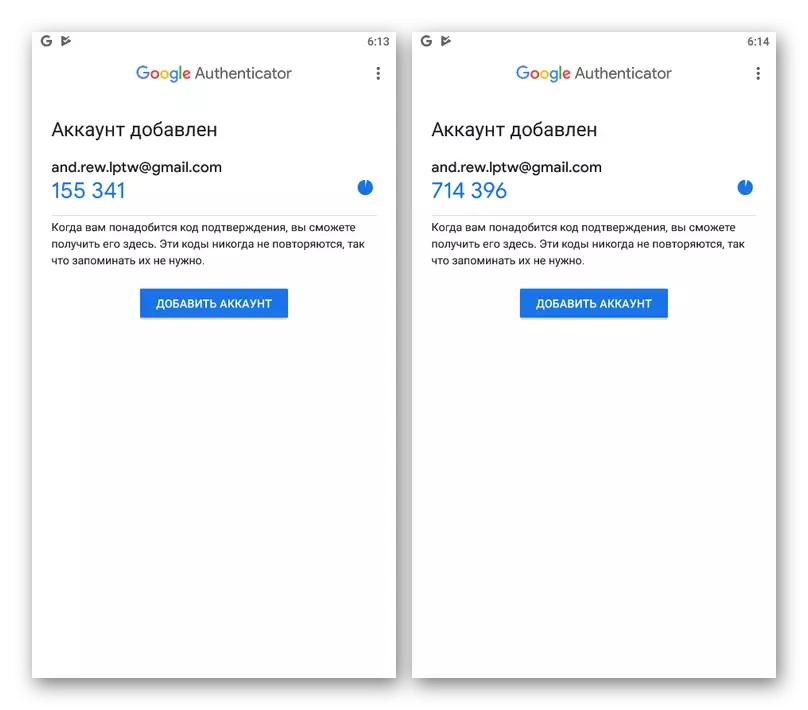
- Use the "Add" button to apply the data, and, if everything was specified correctly, the authenticator will start creating temporary codes for your account.
- Do not forget to return to Google's website and in the previously used pop-up window at the last step "Configure Authenticator application" enter code from just activated application.
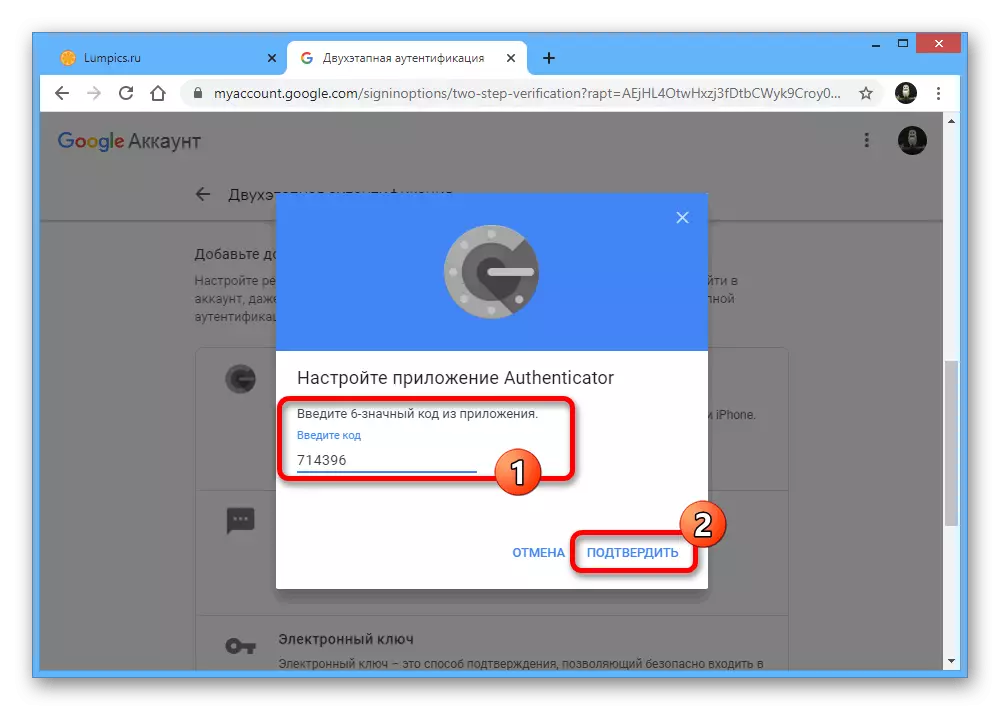
When performing the procedure described, you should not be slow, since with some periodicity, the Google site in the browser reuses confirmation using a password, while throwing out all made, but unsaved changes.
Method 2: Authenticator Transfer
The latest versions of the Google Authenticator mobile application, regardless of the platform, provide the ability to import an authenticator to another device. Thus, if you are preparing to the transition to another phone, the easiest way to do is the transfer, rather than restoration in the future.Step 1: Data Preparation
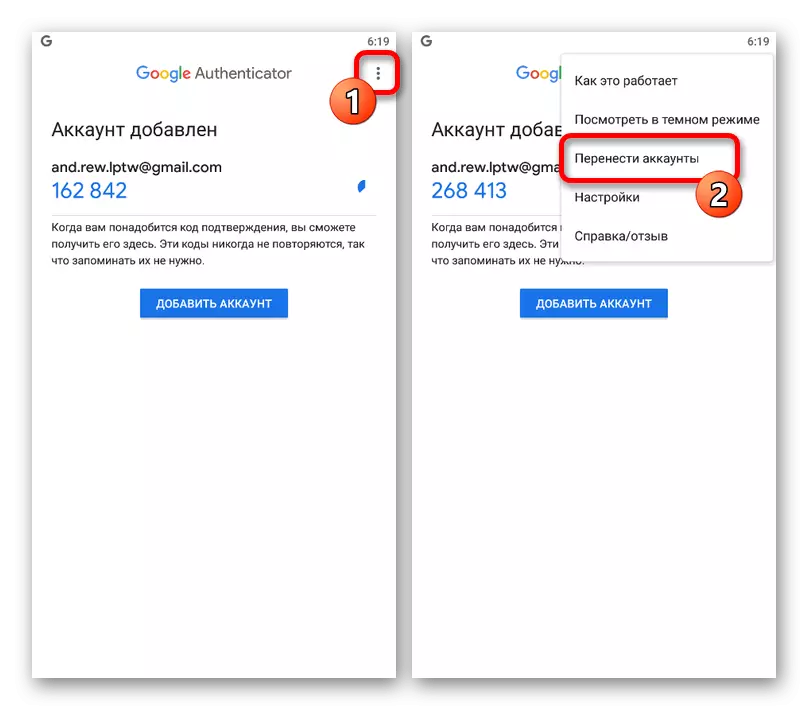
- Run the application and on the main page in the upper right corner tap the icon with three vertical points. From this list, you must select "Transfer Accounts".
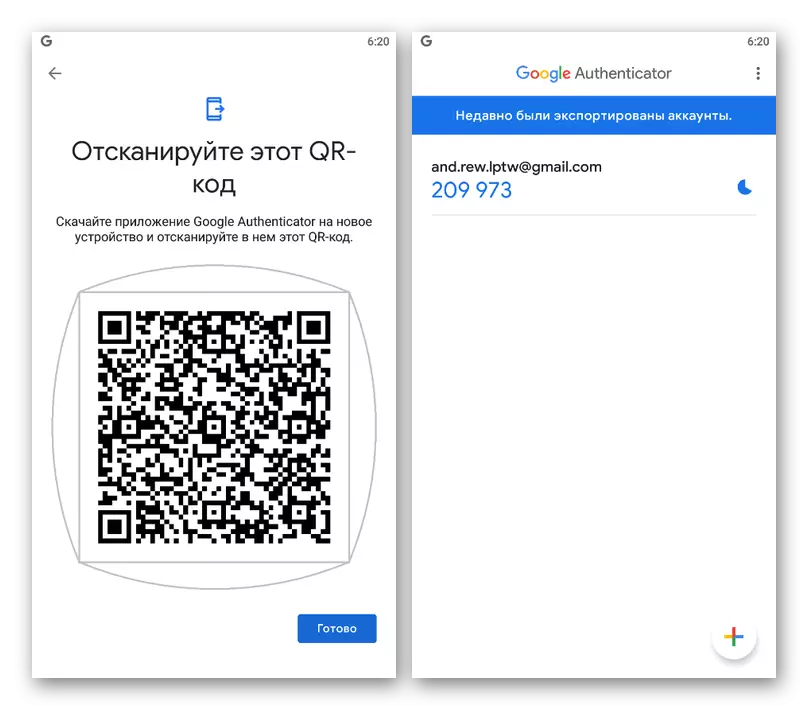
- In the "Account Transfer" section, use the Account Export items and on the screen that opens, set the checkboxes next to the accounts you want to transfer.
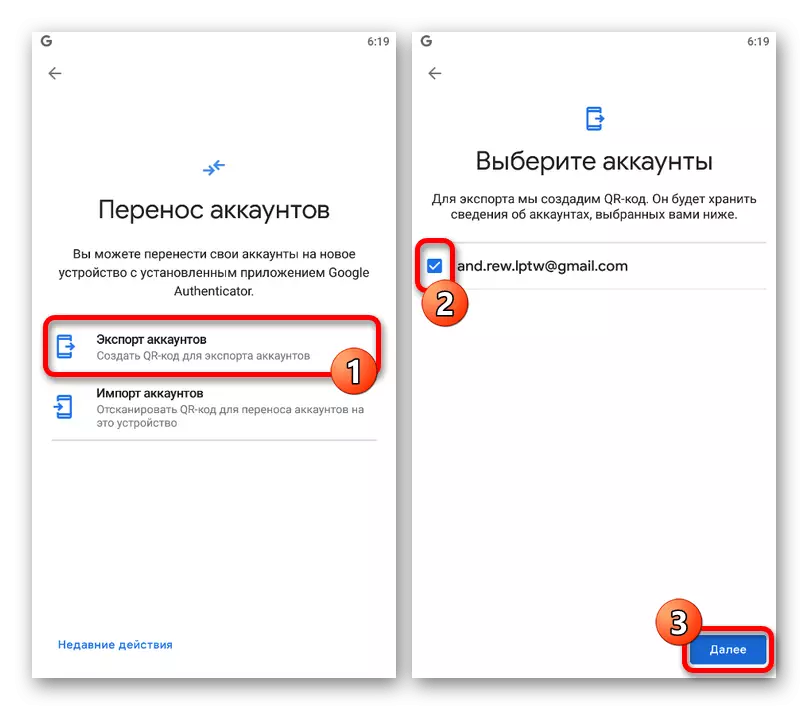
After that, a QR code appears on the screen containing information to transfer data on dedicated accounts to a new device.
Step 2: Data Import
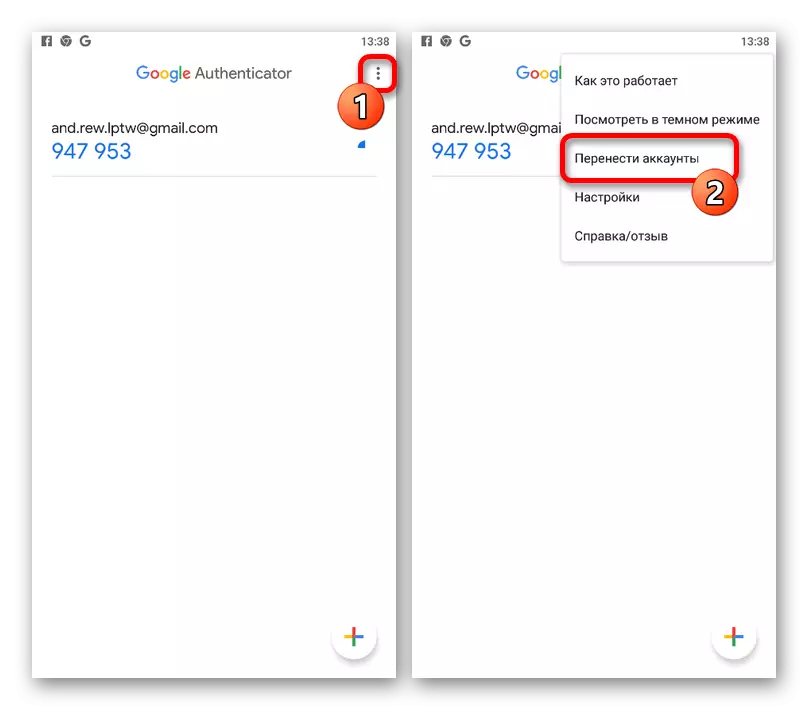
- To carry out the transfer, now on another phone, open Google Authenticator, Expand the menu with three points in the upper right corner and select "Transfer Accounts".
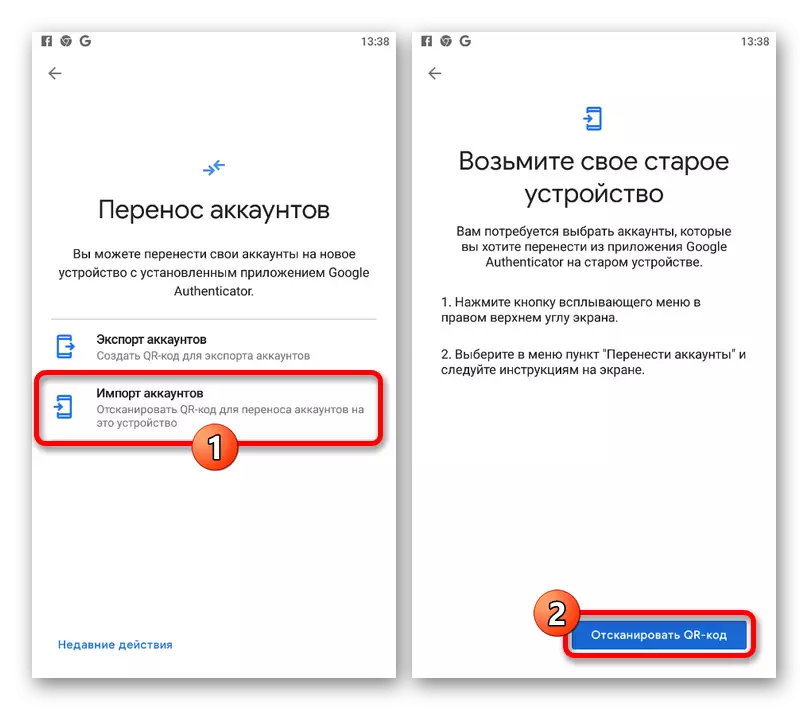
- Touch the Account Import item and in the "Take Your Old Device" section, use the "Scan QR code" button. To import, it will be enough to bring the chamber to the area with the QR code on the screen of the previously used phone.
When successful scanning and additional confirmation, data will occur. Subsequently, you can use a new device for time codes.
Method 3: Third Party Services
If the authenticator was used for individual applications and previously presented recommendations do not help with recovery, the only thing you can do is use the means of the desired services. In most cases, it is necessary to apply to technical support with the provision of all data to confirm or use predetermined backup codes. Unfortunately, on this issue we cannot provide more accurate advice.