

General information about the change of protocol
The only method available that allows you to fully go with the IP protocol, dynamic address to a static, - order the relevant service provider of Internet services. Of course, not all providers are involved in this, and even if a caller is transferred, it is carried out for an additional fee. However, you should call the hotline, to talk about their goals and to consult with experts. Perhaps they will offer profitable option DDNS or still implement transfer to Static IP.Next, we will focus only on the sub-variant, which is suitable, for example, when it is necessary to organize continuous remote access to a router or somewhere to use the IP-specific address on a permanent basis. But first you need to deal with the explanation of all the parameters to prevent configuration errors.
Preparatory actions
Under the preparatory actions meant checking the current status of the network and determining whether the gray provides IP provider. In turn, will look at how to find out the protocol and talk about the nuances of using gray and white IP for dynamic and static connections.
To start, do the authentication in the router Web interface to view information about the network. For more on this we propose to read in a separate article on our website by clicking on the following link.
More information: Log in to the web interface Router

In the user menu that opens interests tab "Monitoring" or "Status." Usually all the necessary information is displayed in it. Notice the «WAN», where you have to remember the current IP-address, as well as find out which protocol is used for the connection.

When suddenly it turned out that the address is already so static, so no additional action is not necessary to produce. Otherwise, the check is carried out whether or not this IP white. To do this, click on the following link to go to a special website and determine there current address.
Go to the official website 2IP
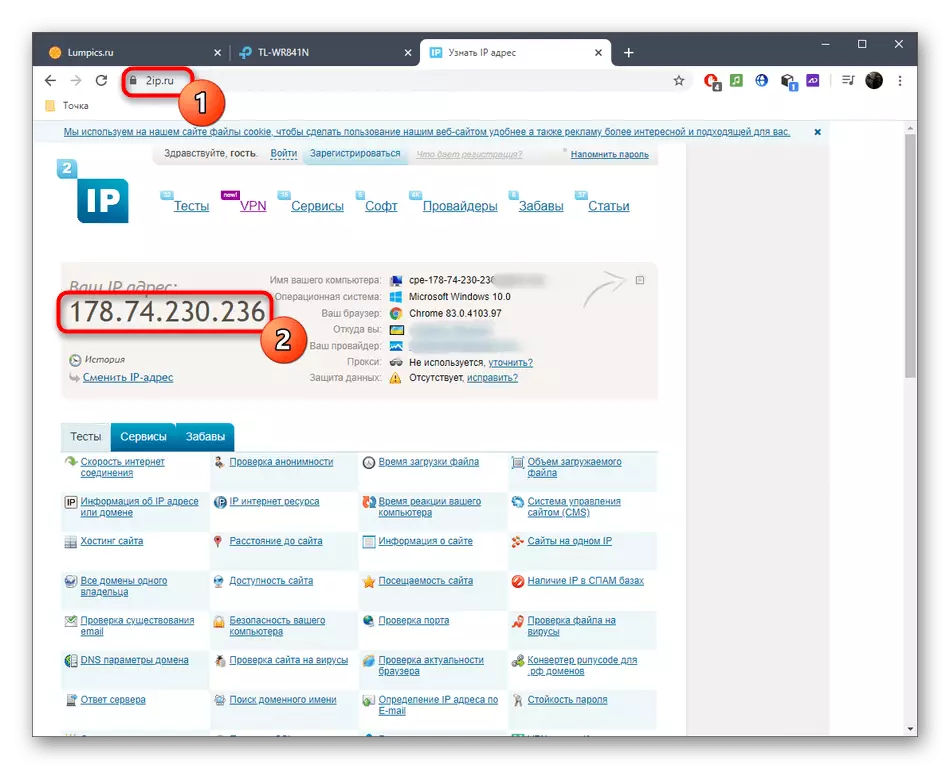
In the case where it does not match with the one specified in the router, and you are currently not using a VPN or Proxy Servers, IP is considered to be gray. A more detailed explanation is as follows:
- Gray IP. When specifying your address in any configuration of the router or in some program, most likely, you will see that the settings will be accomplished immediately and will not be active. For example, it concerns those situations where a remote connection with the router or setting the rules of the firewall is carried out. None of these actions can be performed, as IP does not match the goal and the rule is simply not applicable. The further instruction considered in this article will not result in any result, so it remains directly to contact the provider to solve this issue.
- White dynamic IP. If the addresses correspond to, it means that the dynamic IP protocol functions normally. You can change the rules or settings every time it changes its shift, or go to the connection of DDNS, which will be discussed further.
Connecting DDNS.
Connecting a dynamic domain name (DDNS) for the router allows you to get rid of the problem associated with the constant variability of its address, because during the configuration of this technology it creates not only the letter address of the router, it is assigned to a certain IP that can be used for its own purposes. The DDNS connection process is divided into several steps, which will be variable, because the web interface of each router is different, and the user is to manually find the appropriate site providing the appropriate setting.Step 1: Site selection
The first thing to do is to choose the appropriate site. Some of them allow free to get DDNS, while others work on subscription. In any case, it is better to look in advance in the web interface and find the necessary menu there to read the board of choosing a web service from the developers what is happening:
- After authorization, open the "Dynamic DNS" section. This menu item can also appear as a category of another partition, so look at "Advanced" or "System Tools" if it does not work out this parameter.
- Check out the service provider item. Here you will see all recommended sites from the router developers and can immediately go to the subscription. NO-IP is a priority option, since it allows you to create a DDNS free.


Step 2: Creating a host on the site
The next stage is to register on the site with a further introduction of a new domain name for the router. Consider the overall process:
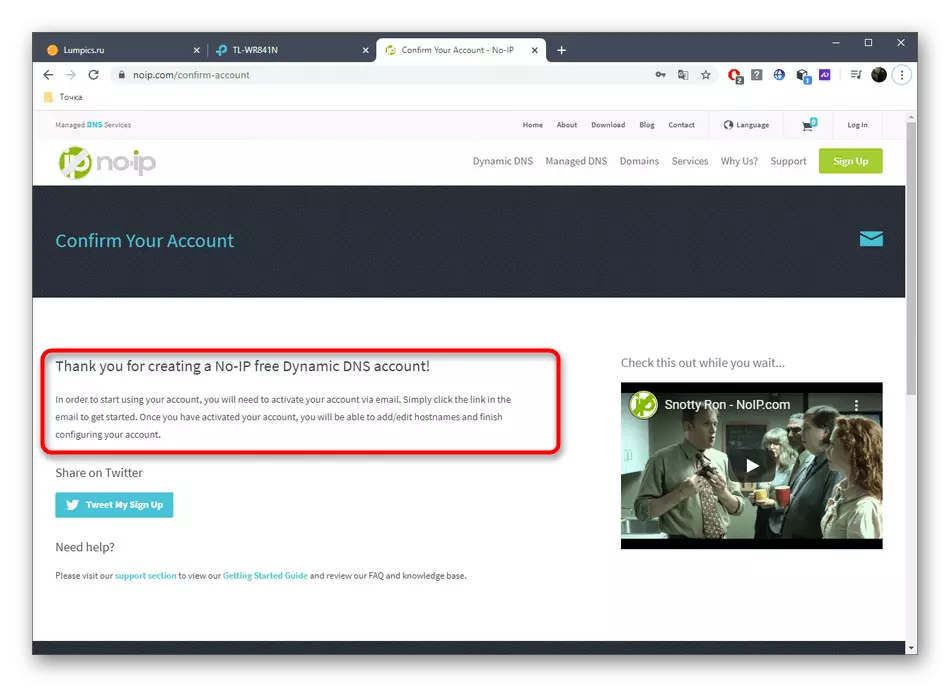
- At the site, enter the host name and give it a domain name, then register an account.
- Fill in the basic information about your account to ensure security, as well as familiarize yourself with other subscription options, if you suddenly need to extend or switch to a more advanced tariff plan.
- Confirm the web service usage rules and complete the registration process.
- You will be notified that all processes have passed successfully and can be passed to interaction with the service.
- Familiarize yourself with additional instructions: they can be useful in cases where you need to download the client to the computer and set it up. Most often it needs to be experienced users who themselves will understand with the entire procedure without detailed instructions.
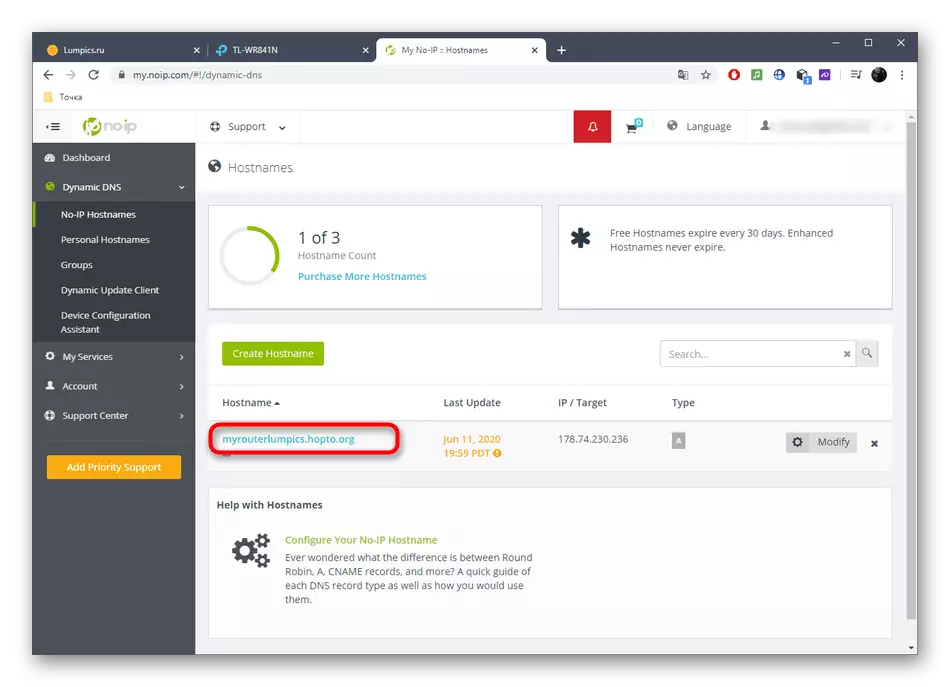
- In a personal account of the site, you must see the name of your host and the IP address to which it is tied. Now it can be considered static and apply for its own purposes.


Step 3: Enable DDNS in Router
To normalize the functioning of the dynamic domain name, it is necessary to activate in the routing web interface itself, since otherwise the redirection does not happen. This is as follows:
- Open the same section "Dynamic DNS", enter the resulting domain name and authorization data to enter. Additionally activate the technology itself.
- Make sure the state has passed into the "Successful" mode.
- Now you can go over the domain name to log in to the web interface, as well as use the attached IP as static.


