Multi-load flash drive - creation

Anonim

Creating a multi-load flash drive
Today we will create a multi-load flash drive. Why is it needed? The multi-load flash drive is a set of distributions and utilities with which you can install Windows or Linux, restore the system and make many other beneficial things. When you call the computer to repair computers, with a huge probability of his arsenal there is such a flash drive or an external hard disk (which, in principle, the same thing). See also: a more advanced way to create a multizrode flash drive

This instruction was written relatively long ago and at the moment (2016) is not entirely relevant. If you are interested in other ways to create boot and multi-load flash drives, I recommend this material: the best programs for creating a boot and multi-load flash drive.

What will be required to create a multi-load flash drive

There are various options for creating a multi-load flash drive. Moreover, you can download a ready-made carrier image with many download options. But in this instruction, we will do everything manually.

Directly for the preparation of the flash drive and the subsequent recording on it the necessary files will use the WinSetupFromusB program (version 1.0 Beta 6). There are other versions of this program, but I most like this is exactly the specified, and therefore an example of creating I will show it in it.

The following distributions will also be used:

  • ISO image of the Windows 7 distribution (you can also use Windows 8)
  • ISO image of a Windows XP distribution
  • ISO disk image with RBCD 8.0 recovery utilities (taken from torrent, for my personal use of computer aid suits best)

In addition, the flash drive itself will be needed and the flash drive itself, from which we will do a multi-loading: such that everything that is required to be placed on it. In my case, it is enough 16 GB.

Update 2016: more detailed (compared to the fact that below) and the new instruction on using the WinsetUpFromusB program.

Preparation of flash drive
Multi-load flash drive in winsetupfromusb
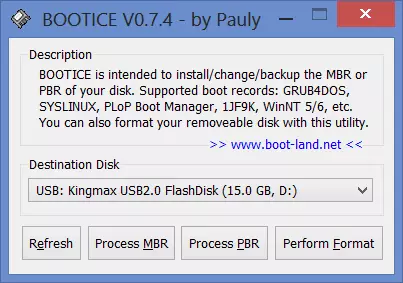
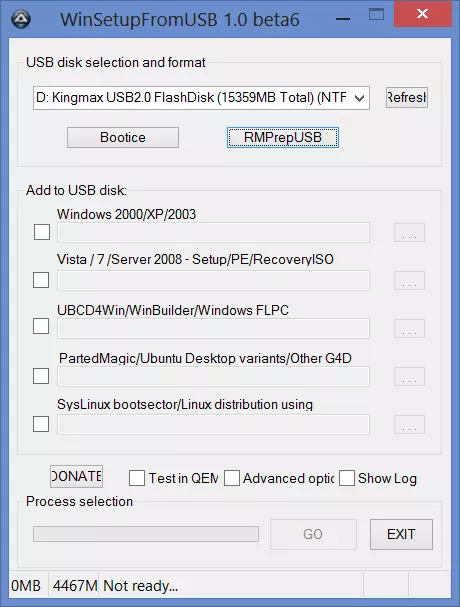
We connect the experimental USB flash drive and run WinsetupFromusB. We are convinced that in the list of media at the top specified it is the necessary USB drive. And click the Bootice button.

Preparation of a flash drive in Bootice
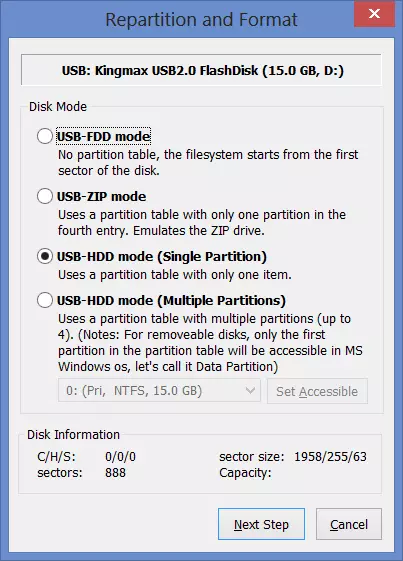
In the window that appears, click "Perform Format", before turning the flash drive in the multi-loading, it must be formatted. Naturally, all data from it will be lost, I hope you understand it.

Formatting flash drive
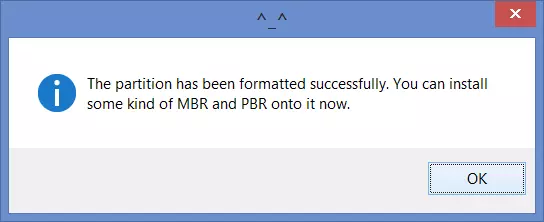
For our purposes, the USB-HDD MODE (Single Partition) is suitable. Select this item and click "Next Step", specify the format of NTFS and if you wish we write a label for a flash drive. After that, "OK". In the emerging warnings that the flash drive will be formatted, click "OK". After the second such dialog box, some time visually nothing happens - this is directly formatting. We wait for the message "The Partition Has Been Formatted SuccessFully ..." and click "OK".

Formatting completed
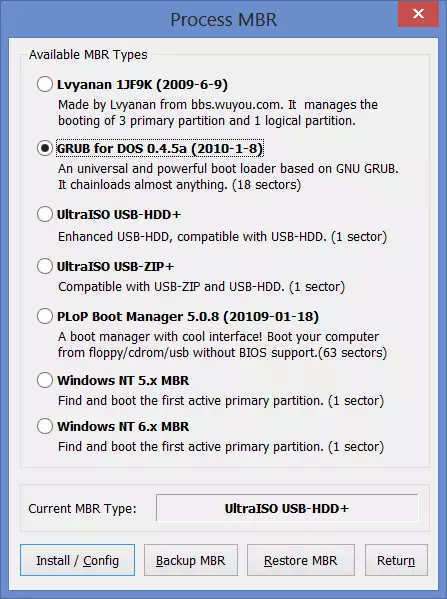
Now in the Bootice window, press the "Process MBR" button. In the window that appears, select "GRUB FOR DOS", then click "Install / Config". In the next window, you do not need to change anything, just click the "Save to Disk" button. Ready. Close the Process MBR and Bootice window, returning to the main window of the WindetupFromusB program.

Record the boot partition on the USB flash drive
In the main program window, you can see the fields to specify the path to distributions with operating systems and recovery utilities. For Windows distributions, you must specify the path to the folder - i.e. Not just to an ISO file. Therefore, before proceeding, mount images of Windows distributions in the system, or simply unpack the ISO images to the folder on the computer using any archiver (archivers can open the ISO files as an archive).

Choosing a Windows Distribution
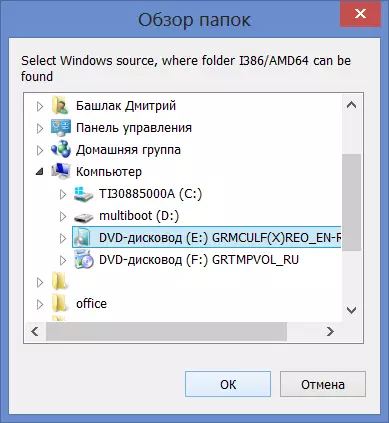
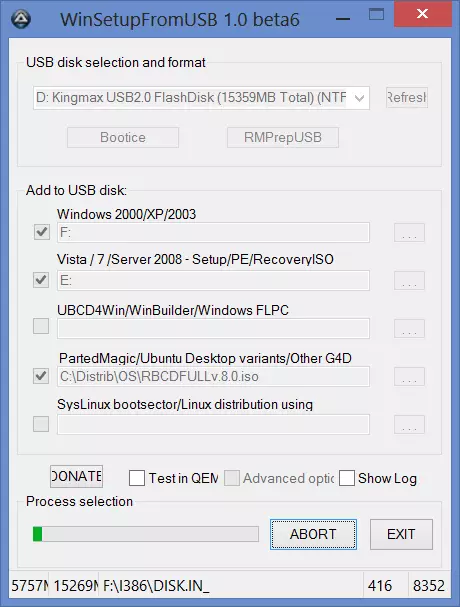
We put a tick opposite Windows 2000 / XP / 2003, press the button with the image of the dots right away, and specify the path to the disk or folder with the Windows XP installation (in this folder contains the subfolders i386 / AMD64). Similarly, relating to Windows 7 (next field).

For a LiveCD disk, you do not need to specify anything. In my case, it uses the G4D bootloader, and therefore in the PartedMagic / Ubuntu Desktop Variants / Other G4D field simply specify the path to the .iso file
Multi-load flash drive is created
Click "go". And wait, when everything we need is copied to the USB flash drive.

Upon completion of the copying, the program issues some kind of license agreement ... I always refuse, because In my opinion it is not related to the flash drive just created.
Multi-load flash drive

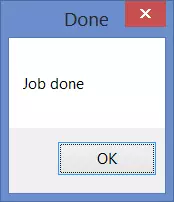
And here is the result - Job Done. Multi-load flash drive is ready to use. For the remaining 9 gigabytes, I usually write up everything else that I need to work - codecs, Driver Pack Solution, sets of free programs and other information. As a result, for most tasks, for which I am quite sufficient to this single flash drive, but for solidity I, of course, take a backpack with myself, in which there are screwdrivers, thermal paste, unlocked 3G USB modem, a set of CDs for various goals and other reasons. Sometimes they are impressed.

You can read about how to install the download from the flash drive in the BIOS in this article.

Read more