

Method 1: Button in the main menu
This option is suitable only in cases where it takes a time to change the speed of the cooler to a certain value in percent. When restarting Speedfan or automatic change of revolutions due to an increase or decrease in temperatures, this setting will be reset that you need to consider when it is executed.

You only need to run the program and look at three present values in a separate block. Press the up arrow up opposite the system or processor cooler to change the speed of revolutions. Do not close the app if you do not want to lose progress - it can be simply collapsed in the tray.
Method 2: "Speeds" menu
A more successful method of increasing the fan revolutions to the required value in percent is the use of a specially designated menu, which is called "Speeds". Previously need to check one parameter, and then change the setting.
- In the main menu Speedfan, click on the Configure button.
- A separate window with the settings, where you are interested in the "FANS" tab.
- Make sure that the configuration of the required processor or cabinet cooler is enabled. For this, the checkbox, installed next to the name of the component.
- Follow the "Speeds" tab.
- Make click on the required fan.
- Below will appear two values responsible for the minimum and maximum speed of revolutions. Change the value minimum, for example, up to 60%, so that the speed does not fall below this mark. Maximum can be left 100%. Before entering, make sure that the tick near the "Automatically Variated" item is missing.


No more action for the standard change speed of coolers will not have to produce. You can do the same with any other fans connected to the computer if they are displayed in this list.
Method 3: Advanced Setup Tool
The advanced setting tool present in Speedfan will create a smart system that adjusts the speed of the cooler when reached certain temperatures. To create one of these profiles and settings, follow these steps:
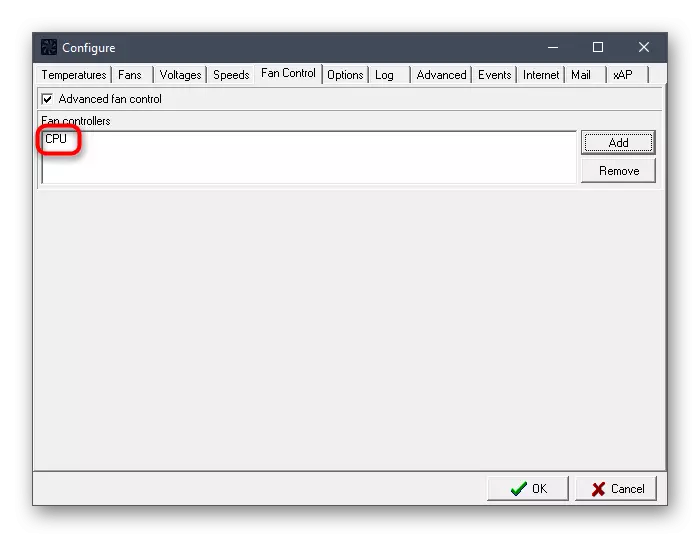
- In the menu with the settings, go to the "Fan Control" tab.
- Tick the "Advanced Fan Control" checkbox.
- Click "Add" to create a new controller.
- Ask him an arbitrary name for ease of orientation.
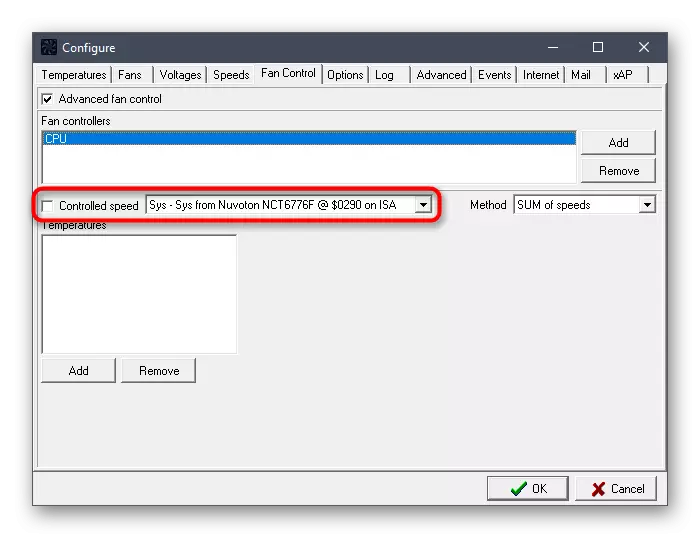
- Highlight it with the left mouse button.
- Control tools will appear, where first expand the "Controlled Speed" drop-down menu.
- Select the suitable cooler.
- The speed control method is not needed, and if you want to learn more about this setup, use the information presented on the official website.
- Under the Temperatures block, click "Add" to configure this profile.
- Specify the temperature of which component or processor kernel you want to track.
- It remains to choose a component profile, also clicking on it once.
- Change the values on the chart by dragging the present points. So you specify which fan speed will be at certain temperatures.
- Confirm the changes by clicking ok, and then proceed to add other temperatures of this profile or create a new one if you need it.


If, when you try to implement one of these methods, you found that the hull cooler is missing in the list, it means that it is connected to the power supply through the Molex cable. In this case, editing of its revolutions through different way is impossible. All fans connected to the motherboard should be displayed and adjusted if it is provided in the BIOS itself.