Step 1: Creating a notebook pages
In Microsoft Word, you can create a grid that is completely repeating in its size and similar to the cell on the notebook sheets. However, in order to make it simultaneously suitable for both the text set, and to a print on the printer, you must resort to some tricks. On how to create a layout suitable for solving our task, we have previously been told in a separate article - read it, follow the proposed recommendations, and only then go to the next step.
Read more: How to make a notebook in Word

Step 2: Adding and making handwritten text
Important! All further manipulations must be performed exclusively at a 100% pages, otherwise the cell, and other elements used in the Word document will be displayed incorrectly.
- Having an accurate electronic copy of the notebooks on the hands, it is necessary to add the text of the future abstract to it and make it correctly. As an example, we use the entry from the page "About us" site Lumpics.ru.
- Choose in the list preset in Word fonts one of those that, in your opinion, is as much as possible to handwritten as possible (pay attention to the fact that not all of them support the Russian language).

Step 3: Printing Document
The last thing remains to do with the electronic version of the document - print it on the printer. But before you need to activate the display of the page background, which is not displayed by default.
Call the "Parameters" of the text editor, open the "Display" tab and set the mark in front of the "Print Background Colors and Pictures" item, and then click OK.

Next, go to the "Print" section, instead of one-sided, select "Print manually on both sides" and start the process.
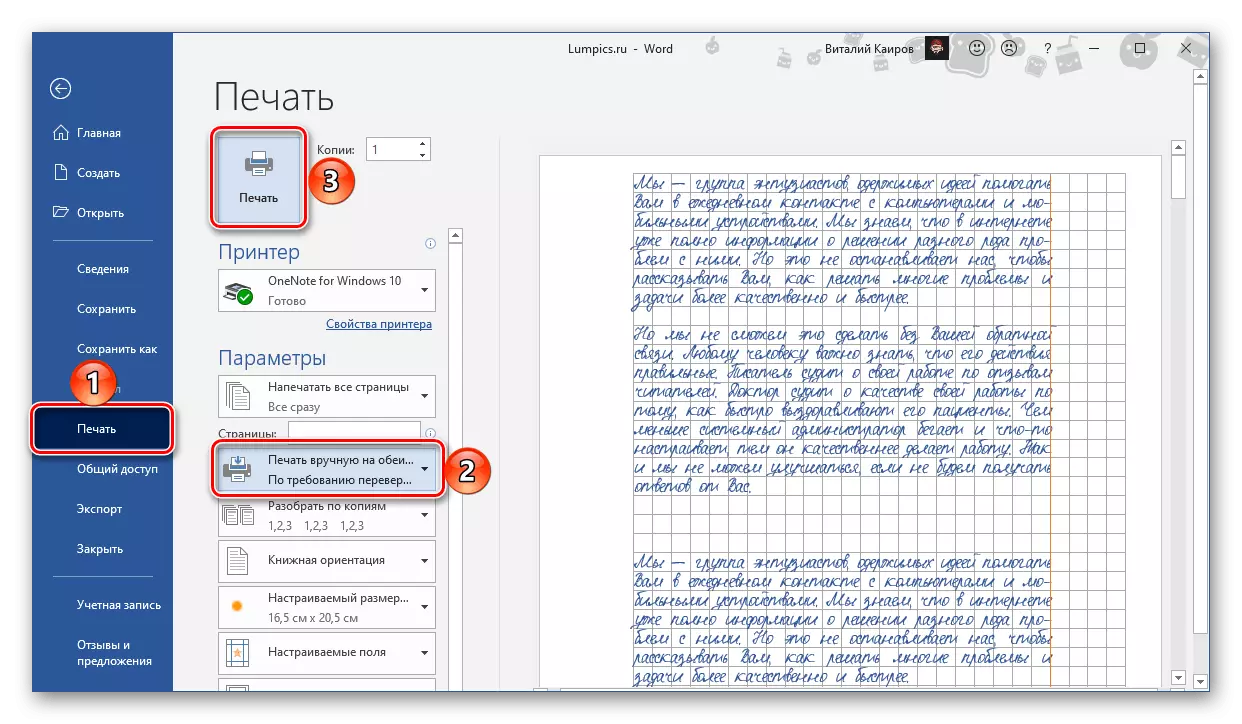
Important! Be sure to take into account how "drawn" fields are located on the pages.
Read more: Print documents to Word
Step 4: Creating a Paper Abstract
Collect printed sheets, gluing them with a thin strip of tape and making a hole in those places where brackets should be included. It is better to make them in accordance with the location on a pre-prepared cover, "borrowed" from this notebook. In it, it is necessary to carry out the resulting abstract, inserting the brackets into the well-done holes and bent them. Ideally, there should be something similar to the image below.