Step 1: Connecting a webcam to a computer
This step will be needed to fulfill all those who have not yet connected the webcam to the computer and did not configure it for further interaction with OBS. On our site you will find thematic instructions that will help to deal with all the features of the connection and preliminary configuration of such equipment.Read more: Connecting a webcam to a computer
Step 2: Adding video capture device
After the webcam was determined by the operating system and the verification is complete, you can proceed to adding it to the video capture device in OBS. To do this, do only a few simple actions:
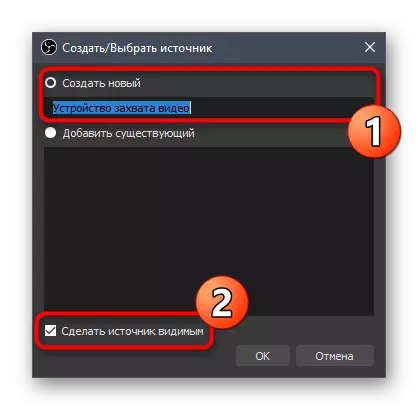
- Open the program and immediately go to the profile you want to use as a basic work with scenes. In the "Sources" block, press the button in the form of a plus to add a new device.
- A list appears in which to find the video capture device.
- Create a new source with any name and be sure to check the item "Make a source Visible", so that there are no difficulties with its further setting.
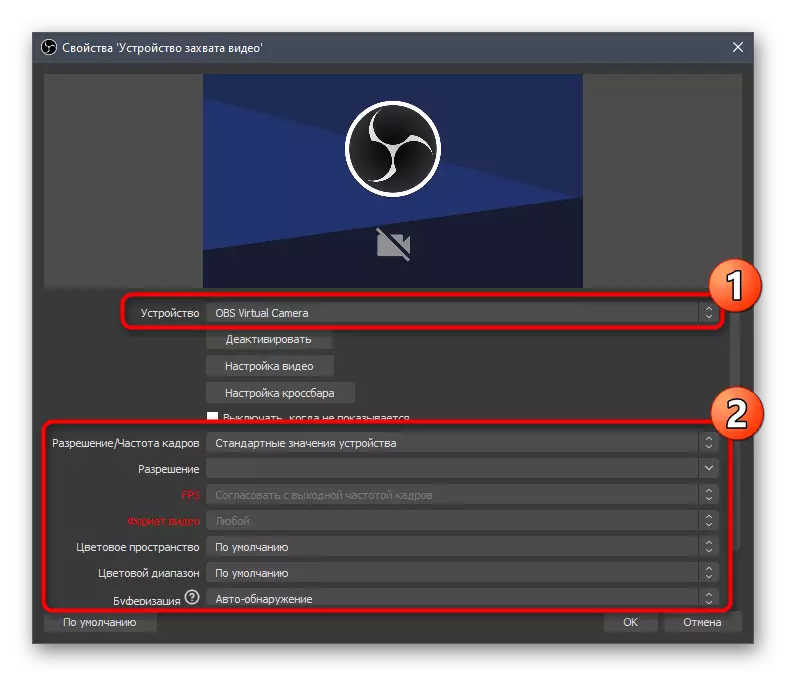
- A window with properties is displayed, which is the main one when adding. In it, select the device itself from the drop-down list, set the frame rate for it and the resolution if these parameters should differ from the standard. The remaining items almost always remain in default values.
- As soon as you confirm the addition, the video capture source will be displayed in the scene and you can edit not only its size, but also position.


Such seizure sources can be somewhat and all of them are added the same way, that is, as it was shown above. In the scene itself, only additionally select the size of each source and the place where it should be located.
Step 3: Sound source selection
This stage will be needed to implement only the users who when broadcasting wants to use the microphone built into the webcam if there is such. By default, it is not automatically selected, so the program must be specified, where exactly you want to write sound.
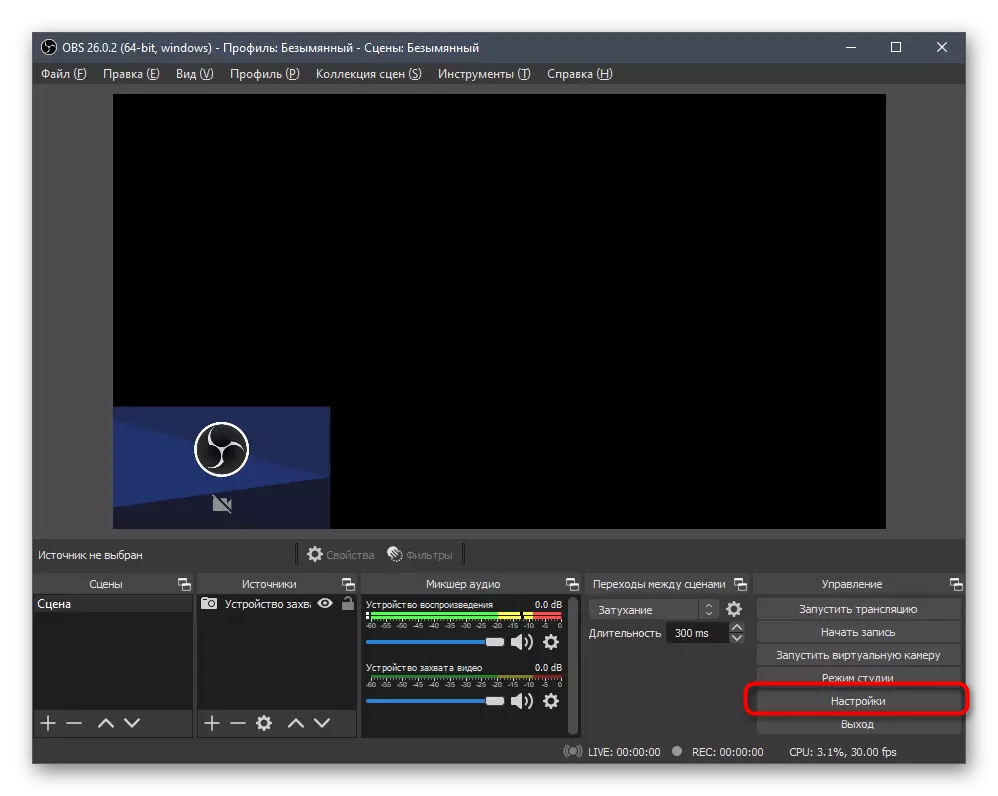
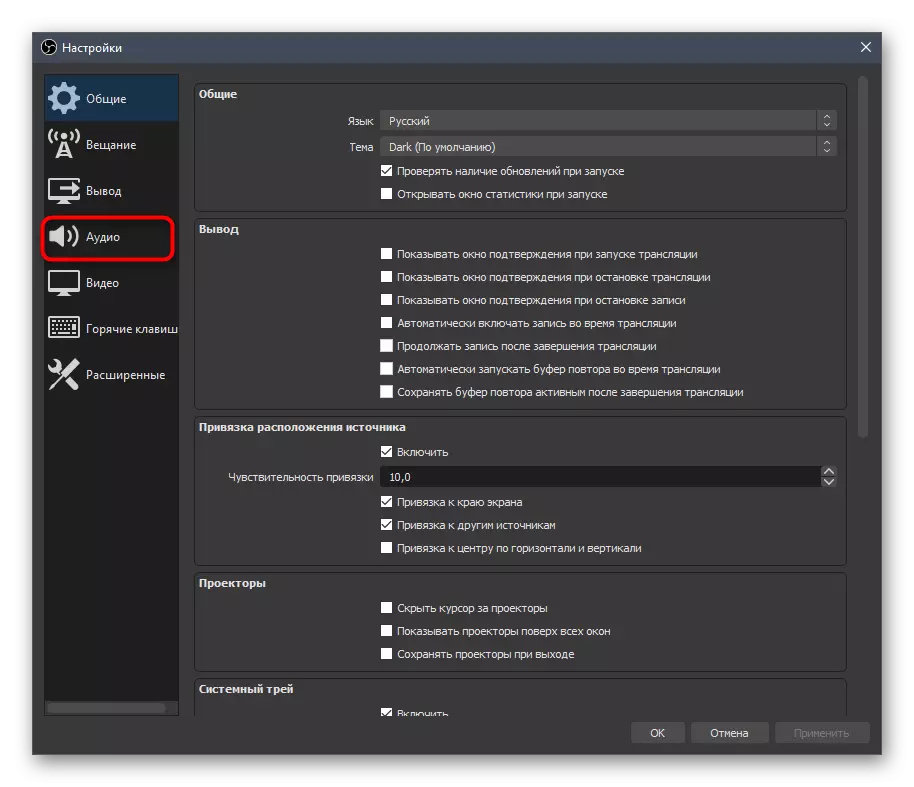
- To do this, in the main menu, click the "Settings" button on the right.
- Go to "Audio".
- Find a list with microphones as an additional audio and select sound from a webcam for one of the sources to be used when recording.

The setting of such a microphone is performed in the same way as the usual, which we have already spoken in another article on our website, go to which you can link below.
Read more: Microphone setting in OBS
Step 4: Adding Filters
OBS offers to add different filters from the list of built-in video capture devices by converting the appearance of the transmitted image, increasing the detail or activating unusual effects. This also includes sound filters, if we are talking about the microphone built into the webcam. Their setting is performed through the built-in menu of the program, where one or more filtering options are selected.
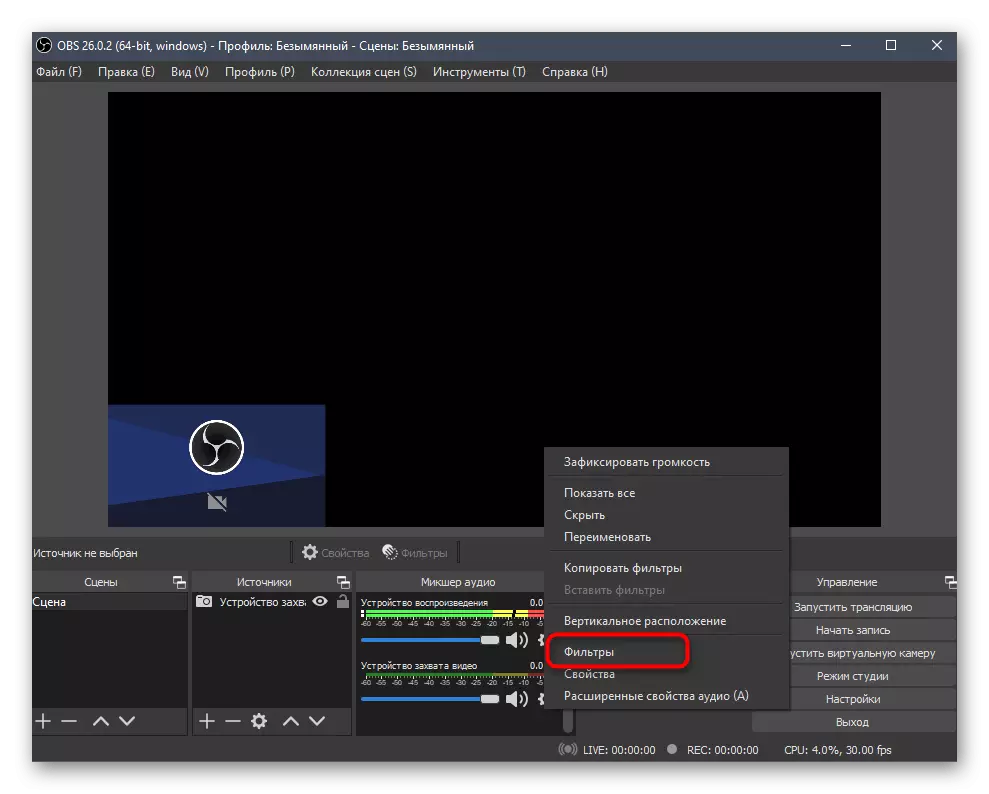
- The video capture device is displayed in the "Audio Mixer", where there is a button in the form of a gear that opens the source settings.
- In the drop-down menu you are interested in "Filters".
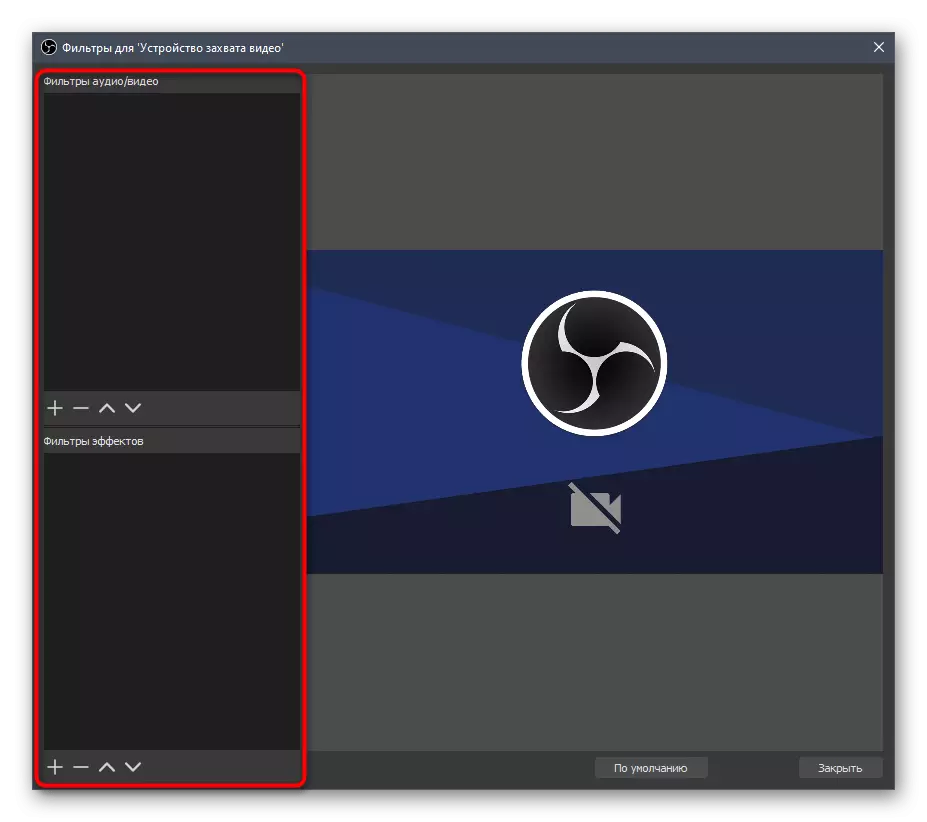
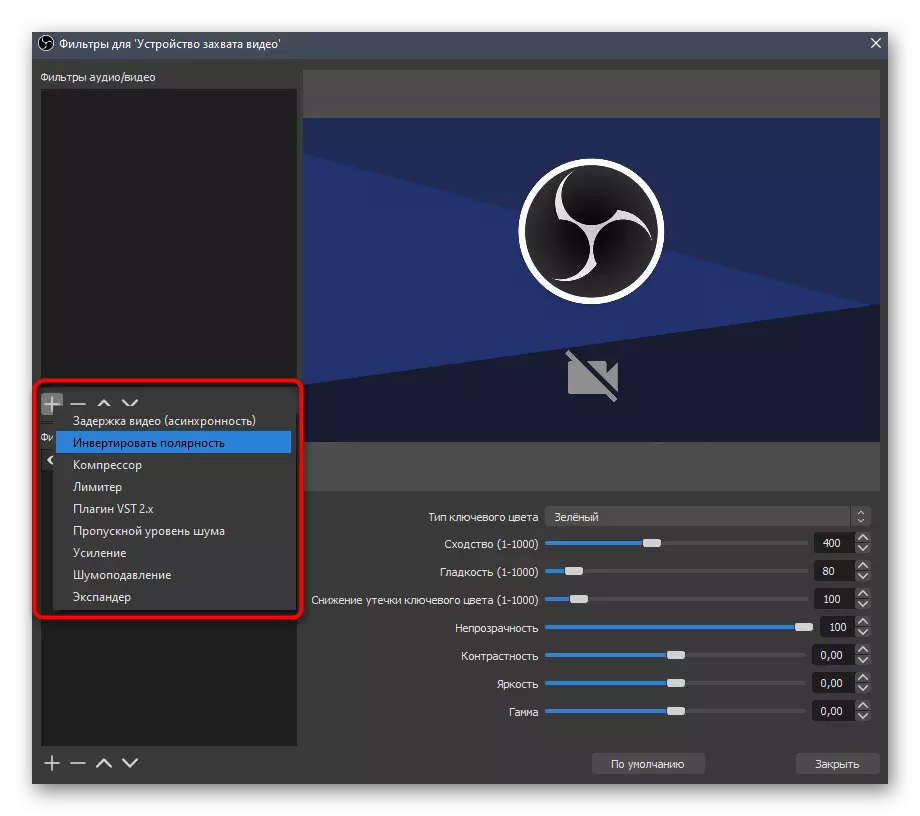
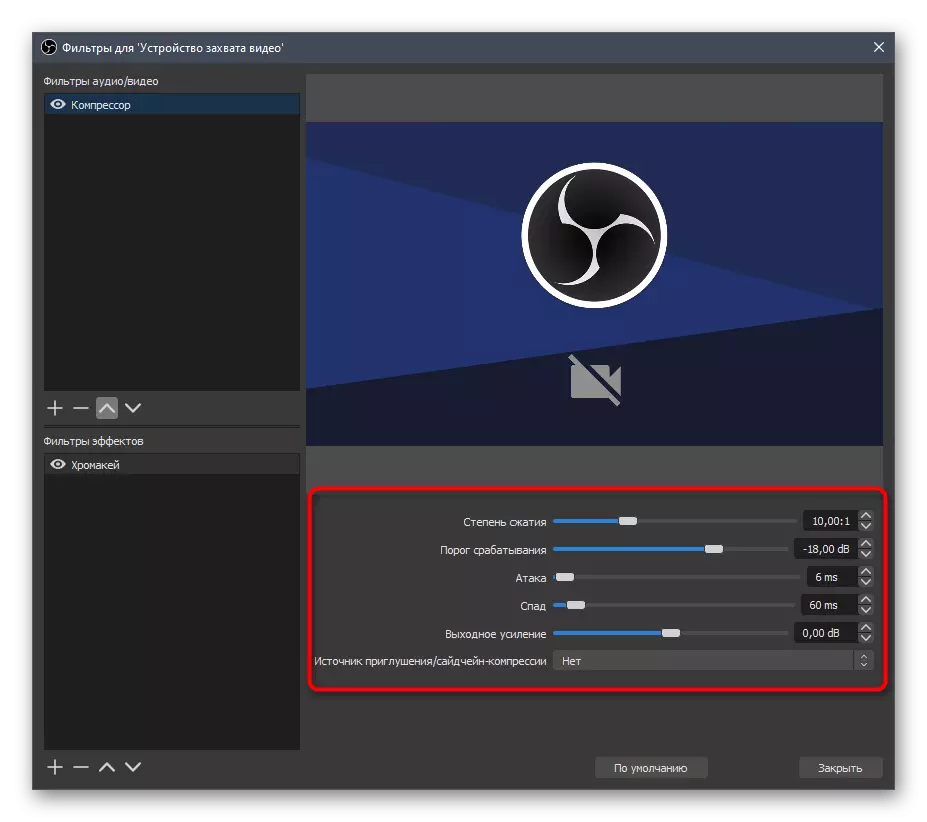
- After opening the filters window, two different types will appear: "Audio / video filters" and "Filters of Effects". Accordingly, in each of these blocks there are different settings, and we will start with those that below.
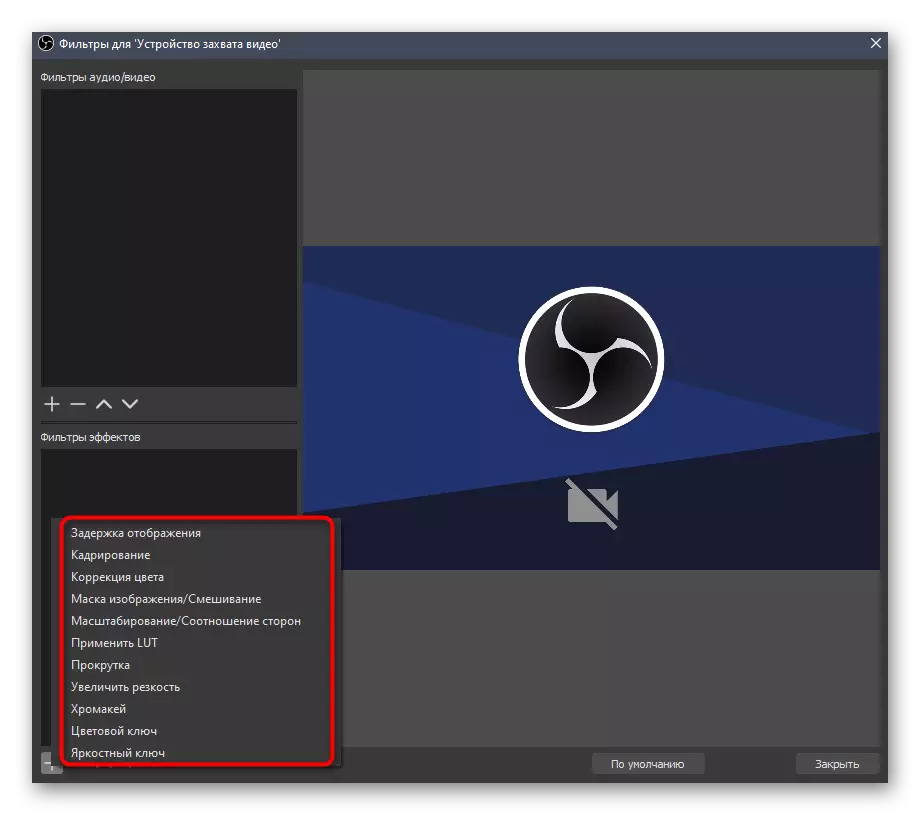
- Click the button in the form of a plus to open the list of all available effects and select there the one you want to use.
- For example, we took a chromium, which is configured depending on the background located in the background. Type of key color Let's leave green, and then configure the basic parameters, following the changes in the preview window. Do the same with other effects by moving the slider to the desired distance to achieve the desired effect.
- "Audio / video filters" are mostly intended for audio, but "video delay (asynchrony)" will be useful if you are watching the slouch in sound and video.
- Filters are configured in different ways because they have a set of parameters. All of them we cannot consider, so we recommend to activate and edit only those functions that need when working with a specific source of video capture.


If the microphone built into the webcam was added to the mixer separately, it is assigned to other filters, including to eliminate noise. All interested in the execution of the task should pay attention to the reference guide below.
Read more: Reducing microphone noise in OBS
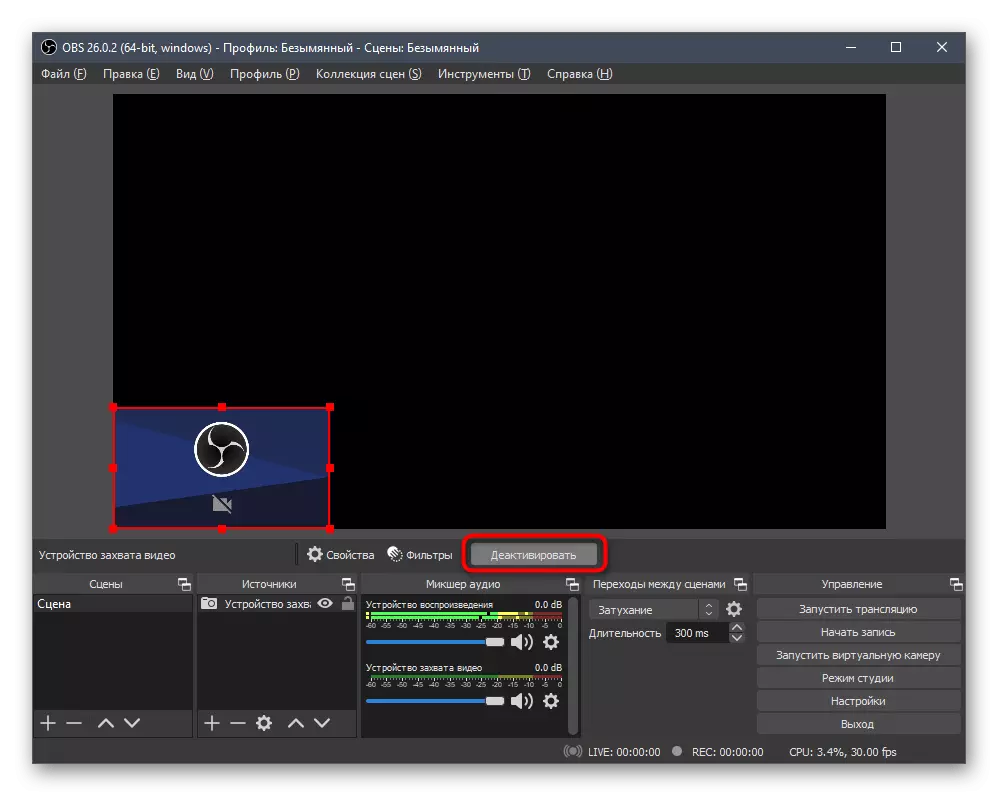
Step 5: Disable webcam during broadcast
During direct flow, the casters occur when the camera needs to turn off for a while so that the audience did not see what is happening. This is done using the "Deactivate" button, which appears after selecting the source in the corresponding window. To turn on, you will need to click "activate", after which the picture will immediately appear in the same place on the screen.
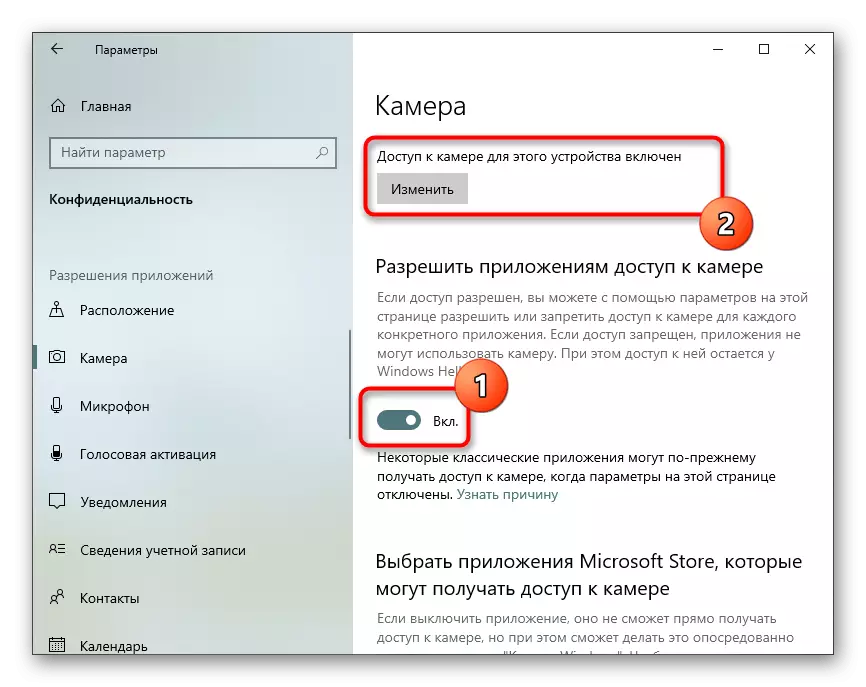
Configuring a webcam in Windows
If for some reason, when adding a webcam, the OBS has difficulties or default settings you are not satisfied, check the device configuration in the operating system. Perhaps there are settings that you want to activate or change so that when interacting with the program for capturing video complexities no longer appeared.
Read more: Configuring webcams in Windows 10