

Step 1: Adding a new scene
Setting up OBS to record games begins with adding a new scene, which acts as a separate profile with its parameters and active sources. This step can be skipped if you do not use the program for other purposes, such as Stringing.
- After starting in the "Scene" window, press the button in the form of a plus.
- A window appears in which enter the convenient name of the new scene to not get involved in them in the future.


Now you have a separate scene in OBS, designed exclusively for recording games. It will take it to choose with further configuration. The instruction above must be performed in the event that the scene created by default for some reason was removed.
Step 2: Adding Screen Capture Sources
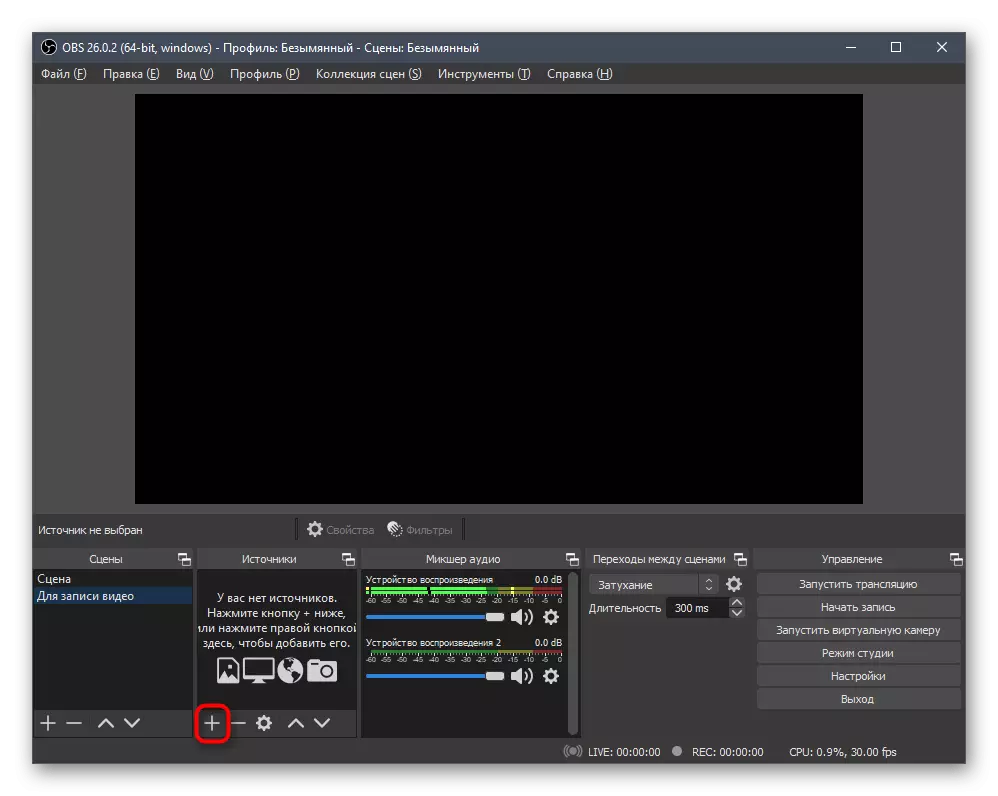
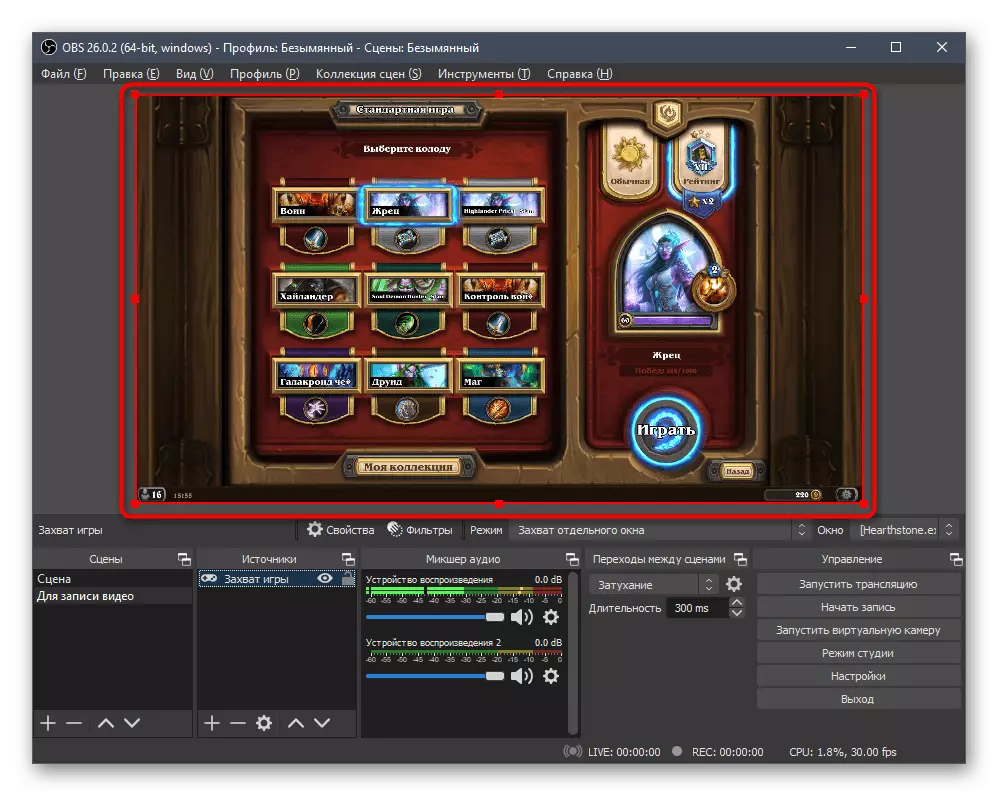
The record of what is happening on the screen is not possible without adding a source to which one window or the entire desktop should be. We will analyze the basic principles of this configuration of the scene for all users so that even when starting an incompatible application, there has not arisen with a black screen.
- In the "Sources" block, press the button plus to appear the corresponding menu.
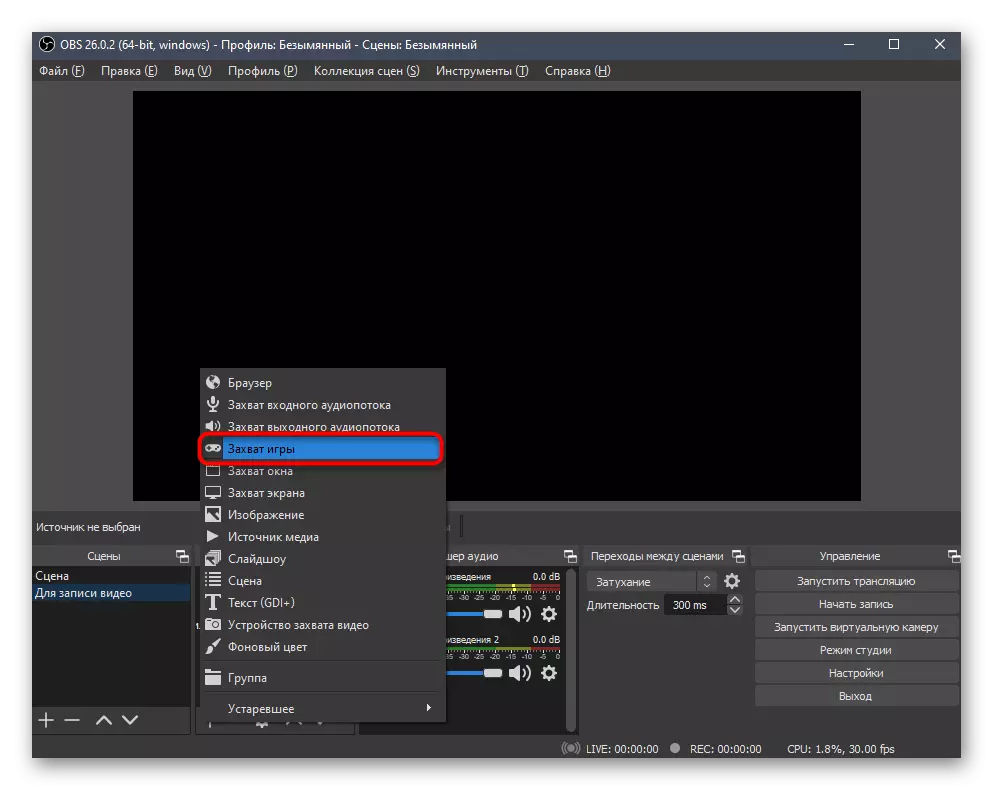
- Consider the most popular option - "Capture Games". This source implies that only the game window in full-screen format will fall into the frame. When switching to the desktop or another program, it will not fall into the frame, which is very convenient for streaming, but often applies to record games.
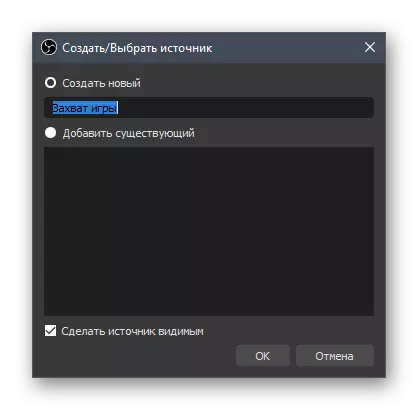
- After the new source creation window appears, change the name or leave it by default.
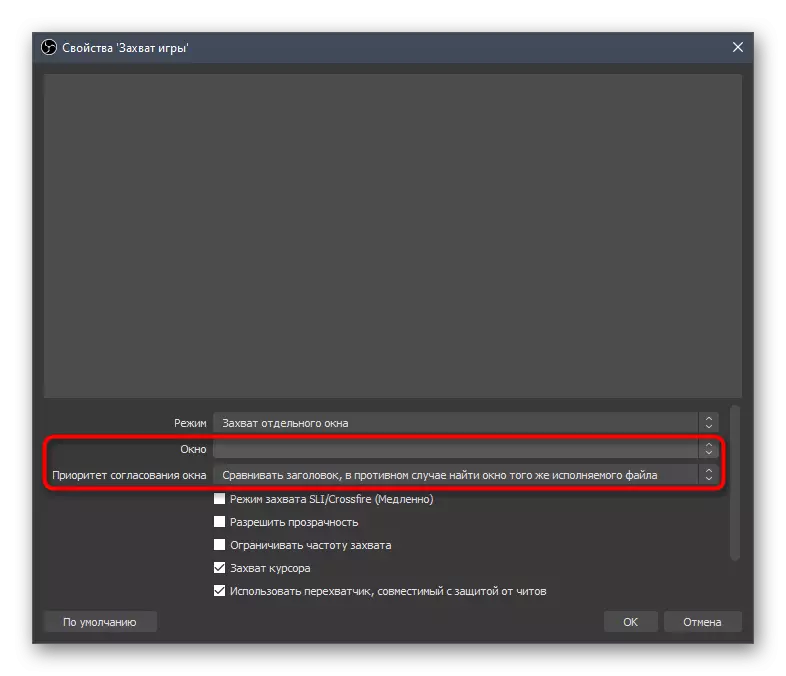
- Next, a window will appear with the properties where you can select the capture mode of any full-screen application or specified.
- When determining a specific window, the game must already be running so that the OBS recognize the process. The priority of the window matching usually remains in the default state.
- Additional parameters you choose yourself, but be sure to leave a tick near the item "Use an interceptor compatible with the protection from cheats".
- After completing the configuration, you will see that the running game is now displayed in the main menu and ready to write.


Almost all modern games are normally recognized by the program and this source of capture copes with its task, displaying the image on the screen. If you encountered the fact that instead of the game a black screen appears, first make sure that you have chosen the correct window when setting up. In the case when it does not help, change the source to "Capture Screen".

There are no special settings for it: only the screen itself is selected, which is relevant when several monitors are connected to the system unit.

The disadvantage of this source of the output is absolutely all the windows, the desktop and even the OBS program, if you suddenly decide to switch from the game running in a full-screen format to another place, but this is the only way out for those who have difficulty implementing the first option.
Step 3: Adding a webcam
Now many users write games like content that they will spread to their entertainment resources. Usually, a webcam is connected during recording, allowing the viewer to see the author's author himself and follow its emotions. OBS allows you to fully implement such a combination by simply adding a new grip source.
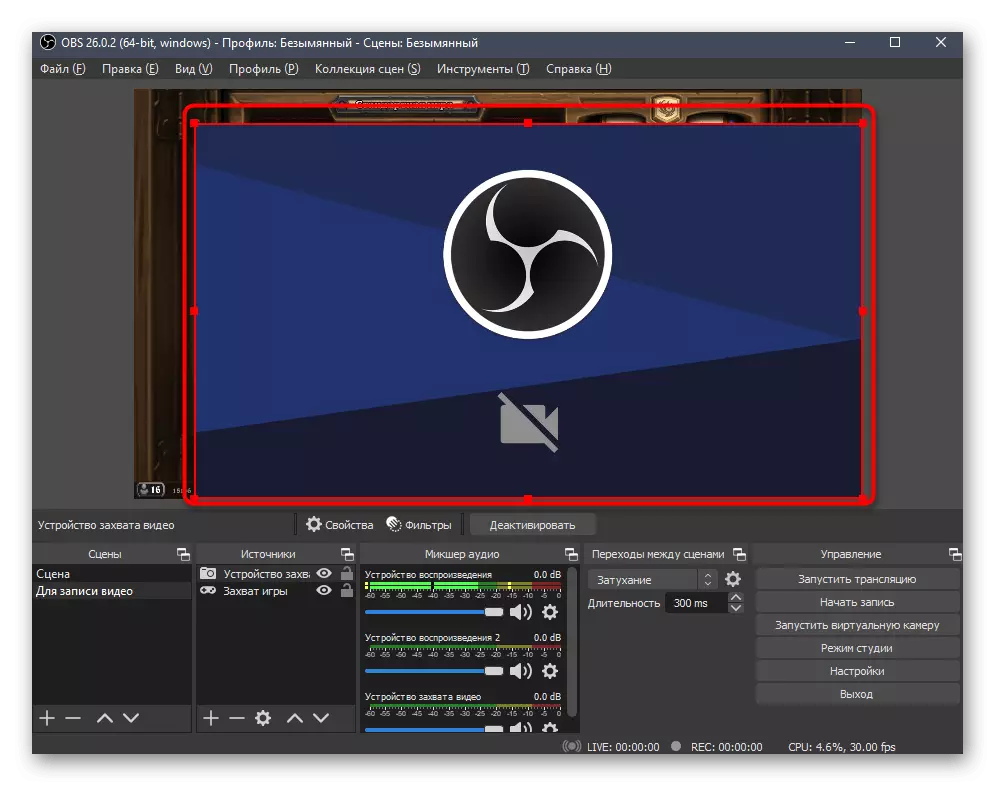
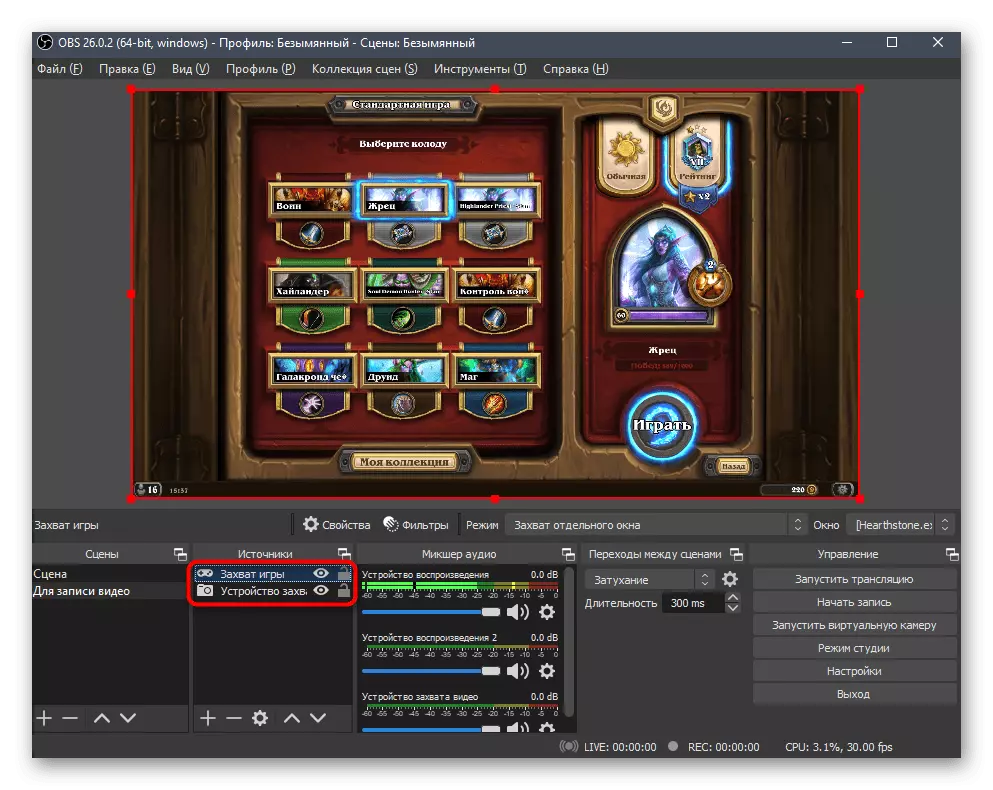
- From the "Source" list, select "Video Capture Device".
- Create a new source and set any name for it.
- In the Properties window, you will need to specify the device used and change the additional parameters if there is a need. Usually, the permission and frequency of frames remain in the default value, as well as the other webcam settings.
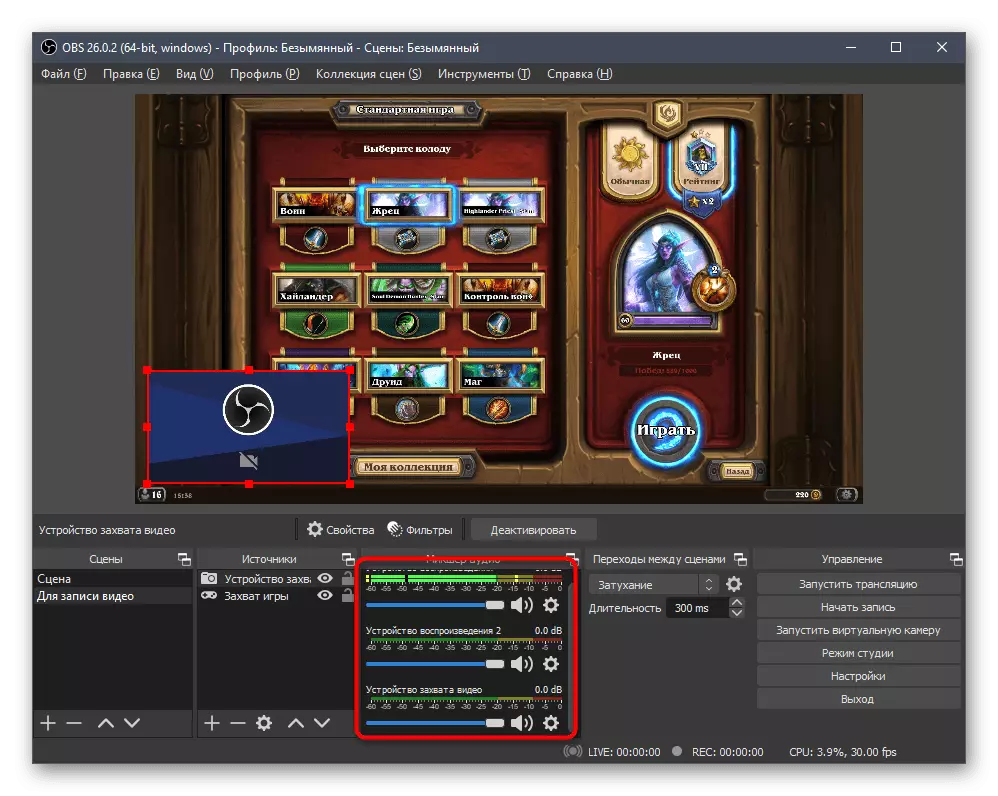
- After return to the scene, edit the size of the camera and its position on the screen.
- It must necessarily be a layer above the capture of the game, because in this case the same principle of overlay works, as in the editors, when the upper layer overlaps the lower.


You can read more in detail with the addition and adjustment of the webcam in OBS in another article on our website by clicking on the headline below.
Read more: Setting up webcam in OBS
Step 4: Mixer Management
Mixer management is another basic parameter to which it is important to pay attention to the recording of games. We only note important parameters, because it is rare to write two microphones or capture the sound immediately from several applications.
- Pay attention to the general parameters of the mixer to which include: volume controls, indicators and buttons for full disabling devices. Move the sliders and record test videos to check the balance. Next, we will also tell about the recording of several tracks at the same time, which will help to adjust the volume of the microphone and the game during video processing, if necessary.
- You can turn off the sound right during recording if it is necessary. We advise you to do this with a microphone from a webcam if you want to use another microphone connected to a computer during video creation.
- Call the settings window any of the audio devices and in the context menu, click on "Advanced Audio Properties".
- A full-length window will appear, where all equipment from the mixer is shown. The focus is on the activated record tracks. Disconnect the last four, as they are unlikely to use.
- Make so that one track is recorded for the sounds of the game, and the other is for the microphone, as shown in the following screenshot. This will allow you to edit each track separately through the video processing program, setting the volume balance.


On our site you can find an instruction that is fully dedicated to the sound setting in OBS. It will be useful if some problems arise with the recording or you use several different input / output devices at once.
Read more: Sound setting in OBS
Step 5: Basic recording parameters
It remains only to look into the settings of the program itself to check the recording settings and change them. There are several basic rules that should be considered when preparing a game video. They differ slightly from the live broadcasts, so consider them in more detail.
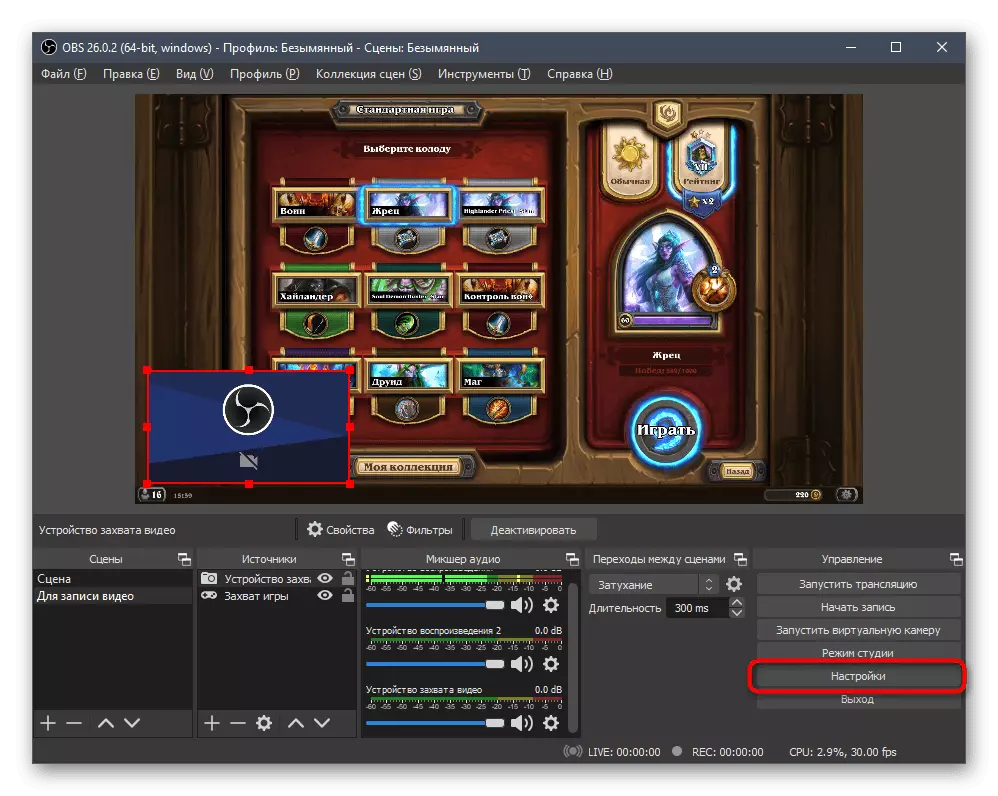
- To begin with, go to "Settings" by clicking on the appropriate button on the panel on the right.
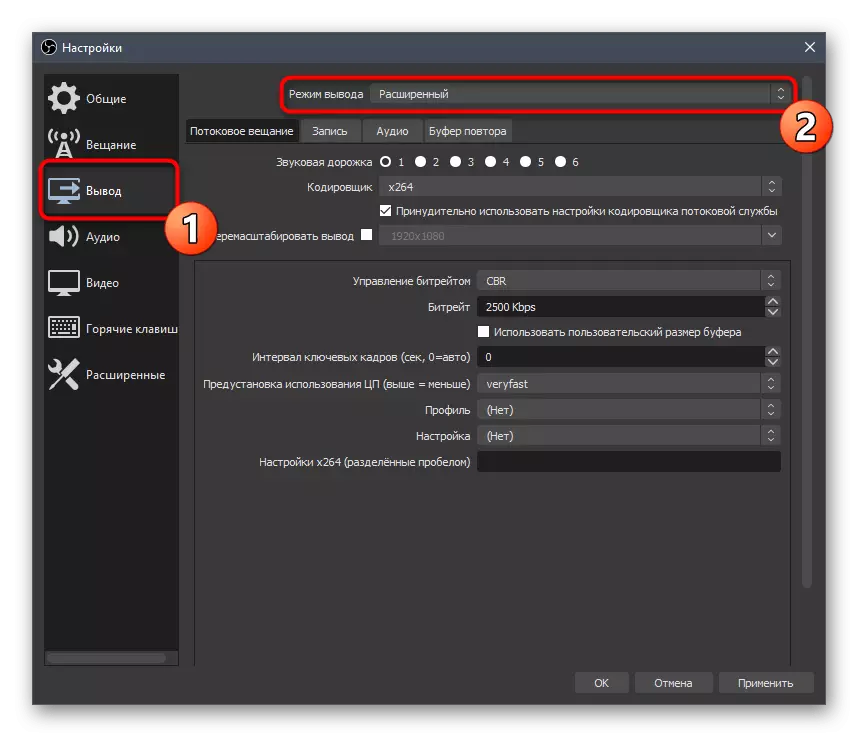
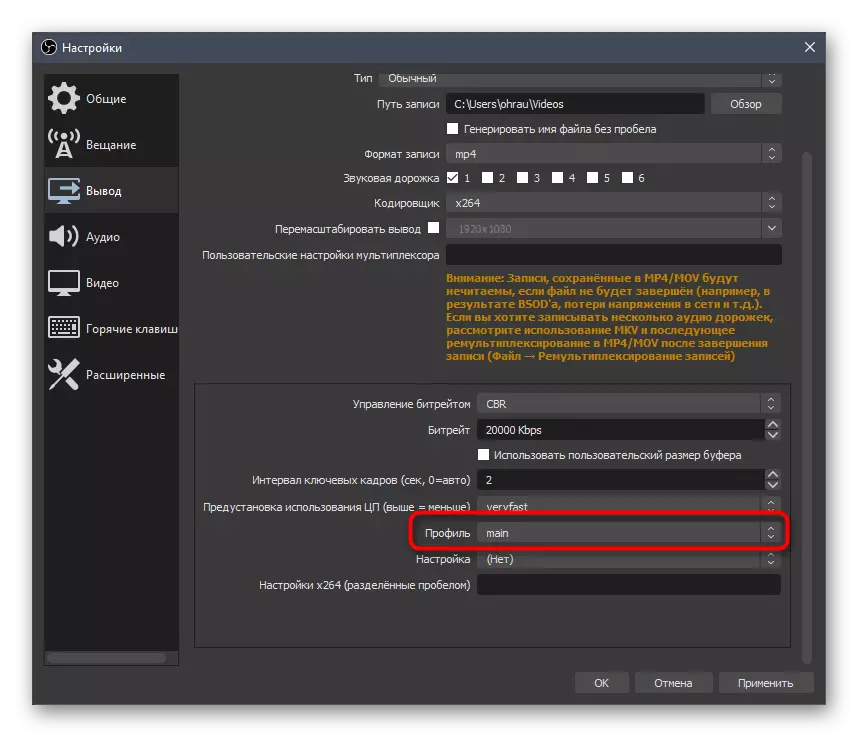
- Open the "Output" section and in the output mode drop-down list, select "Advanced".
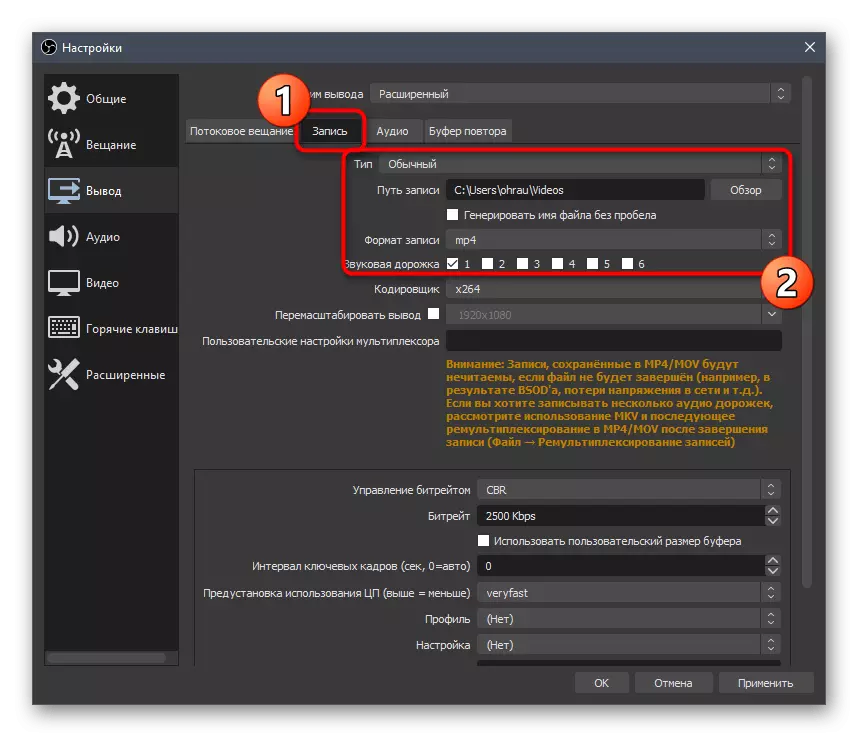
- Open the "Record" tab and see where the video is saved. Change this path if the standard does not suit you, additionally specify the recording format - "MP4" and mark the tracks to be recorded by the markers.
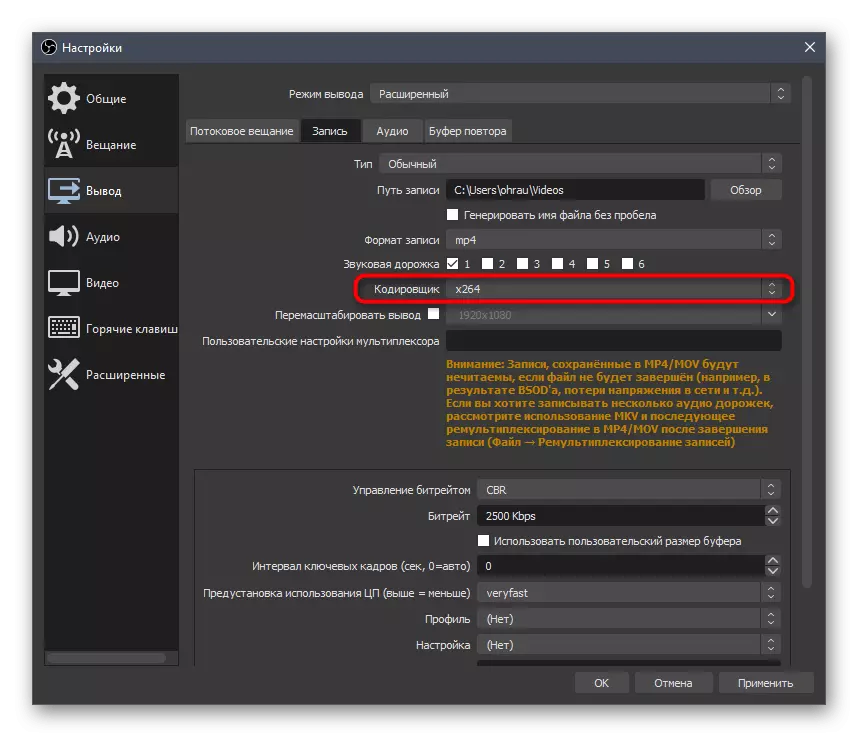
- Enter the encoder at your own request, repulse from the configuration of the computer and its overall productivity.
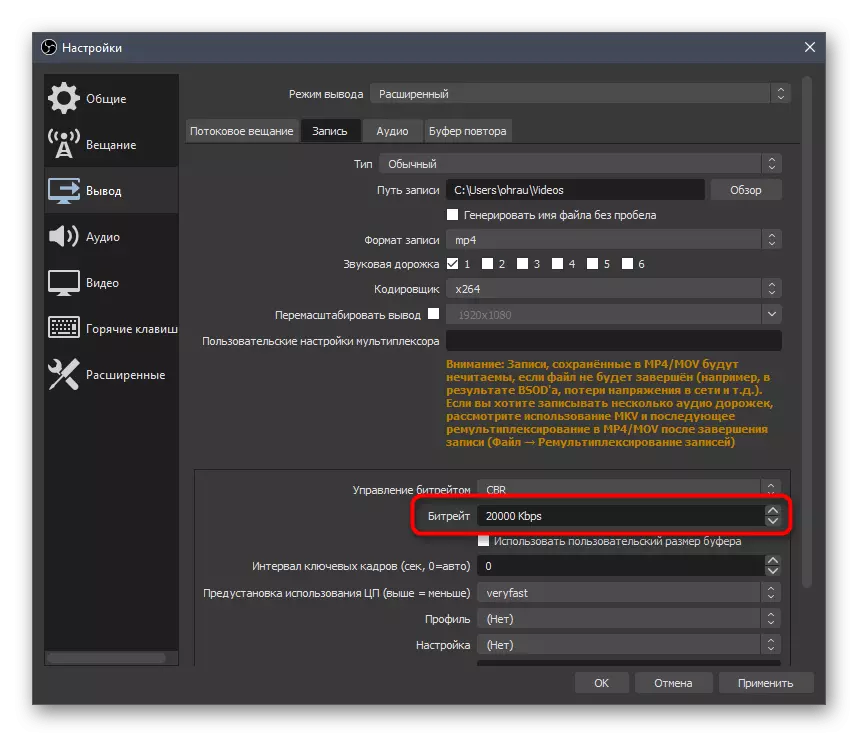
- For the coder itself, the parameter of the constant bitrate is set - "CBR".
- The bit rate is ideally put to the value of 20,000 kbps. So it does not heat the system, but it allows the picture to be better.
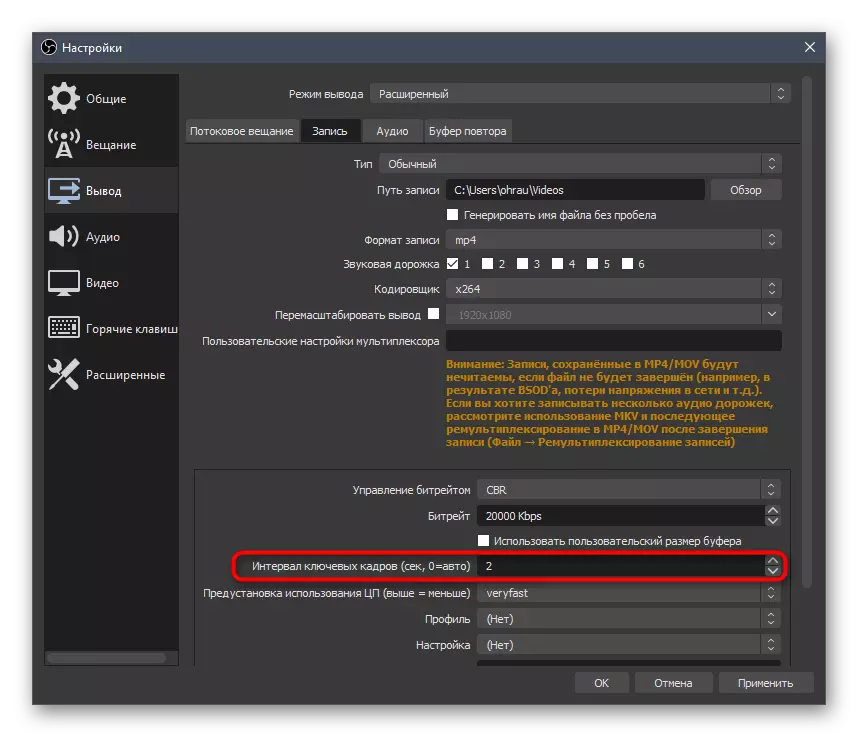
- To interval key frames, set the number "2".
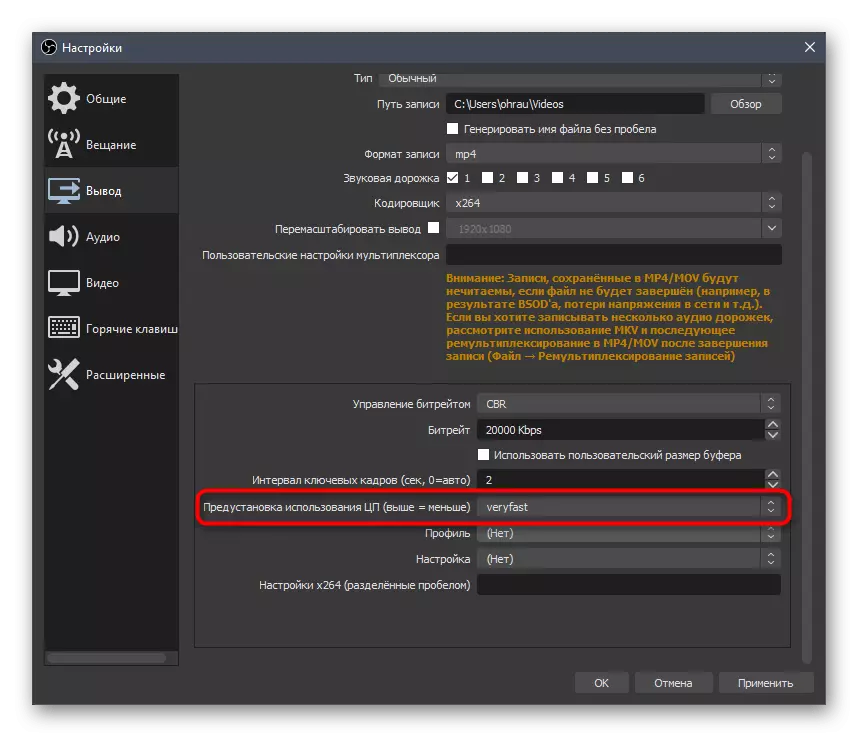
- Another important point, which affects the load of components during recording, is "Presetting the use of the CPU" (if it comes to the X264 encoder). The faster the preset, the less details are processed, which means that the load on the processor is lower. Even the owners of powerful computers are recommended to choose the value "Fast" to ensure the balance between quality and load. For a weak PC, try selecting "Veryfast".
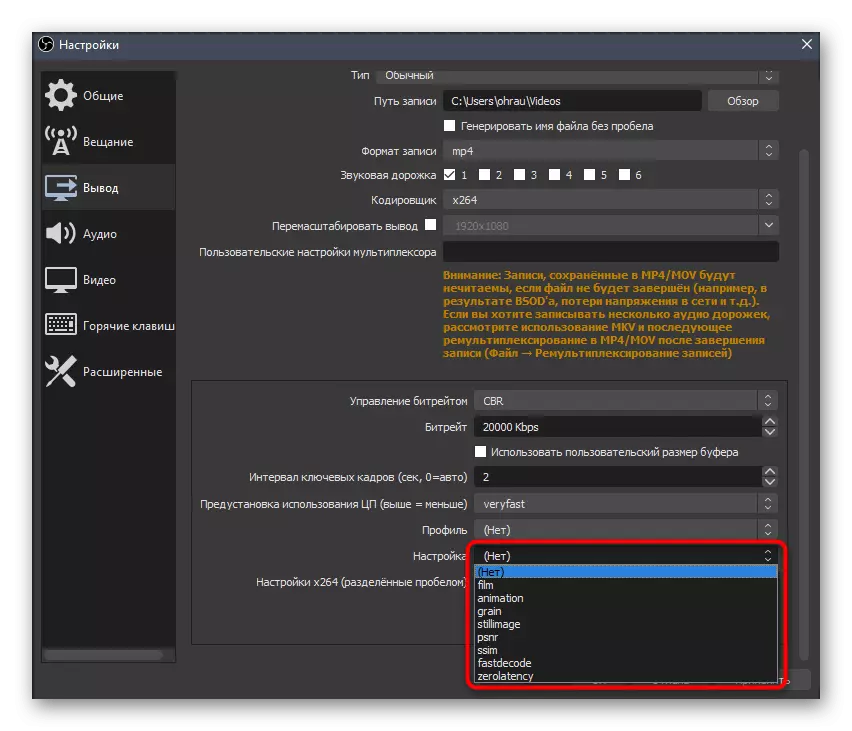
- The "Settings" parameter usually remains default, but know that there are the same effects that change the appearance of the picture and do not affect performance.
- As a profile, select "Main".
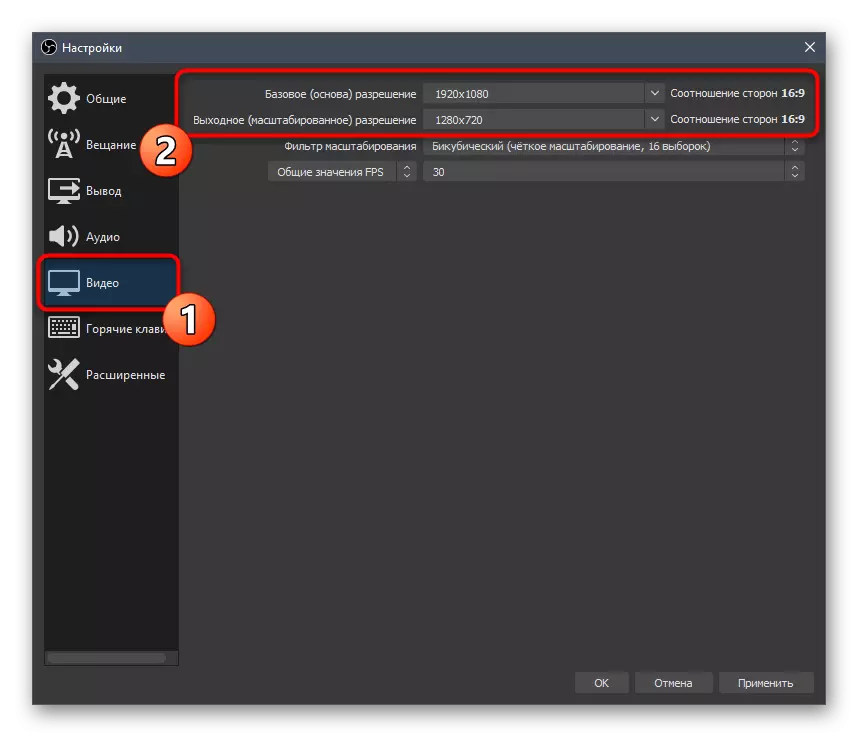
- After that, go to the "Video" section and check the basic and output resolution. The priority selection is the most supported resolution for both parameters, but in order to save system resources, the output can be reduced to an acceptable value.
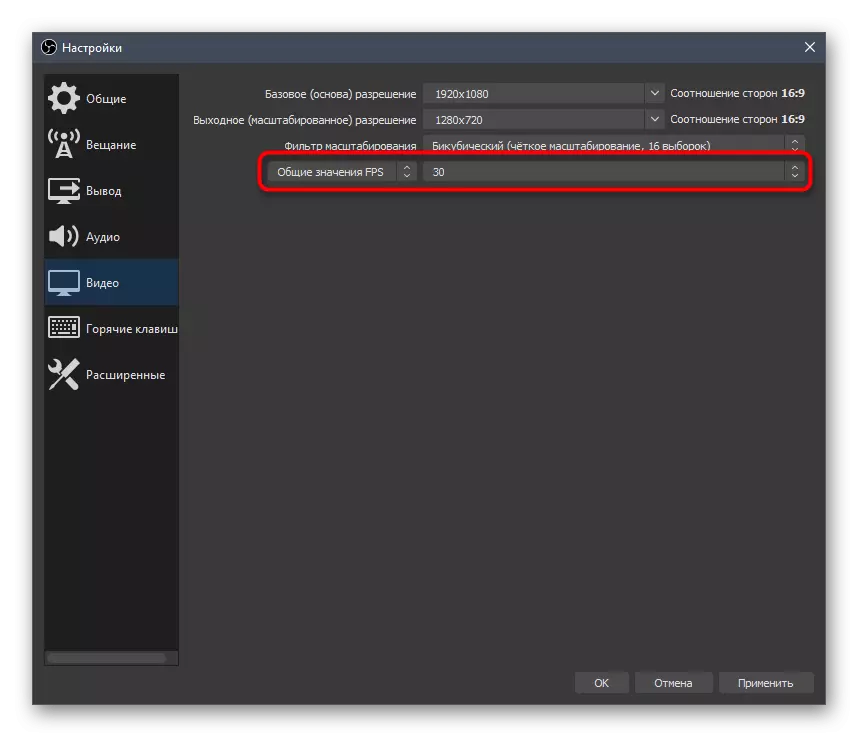
- "The total FPS value" is set to the personal discretion of the user, and the default is 30.
- The last item of this menu is "Scaling Filter". It can be left in the default value, but if you want to make a picture better, respectively, with a higher load on components, select the Lantseos method.
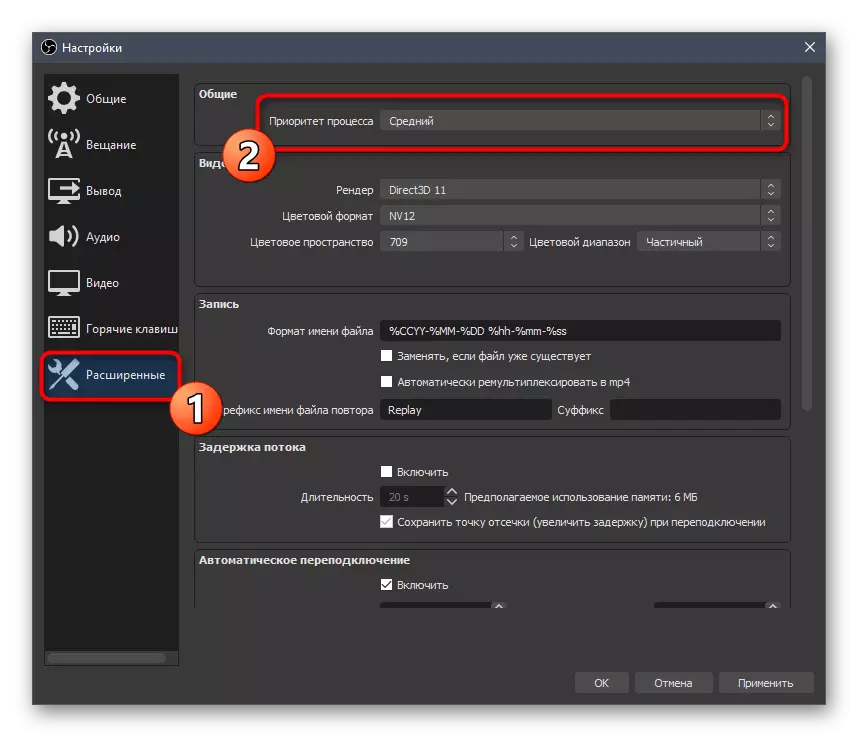
- Look at the "Extended" where make sure that the process priority for the program is set as "medium". If necessary, change it and go further.
- The color space is better to indicate in the range of 709, that is, changing its standard value. This will not add much load on iron, but the quality will be slightly higher.
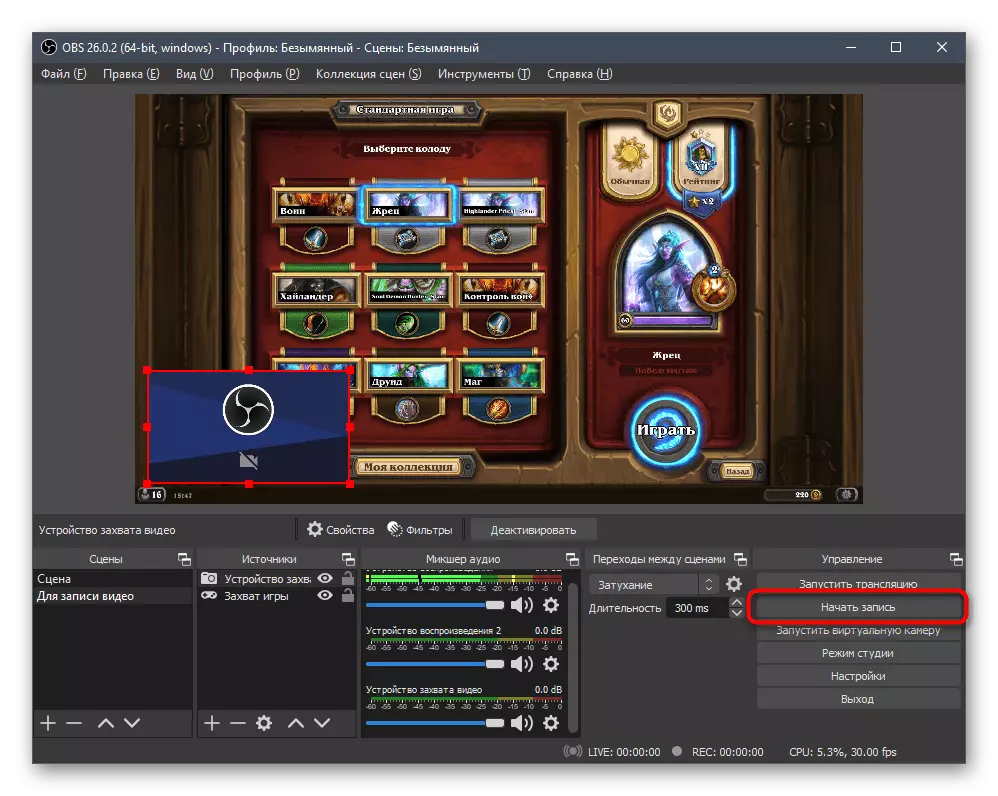
- Apply the changes and close the current menu. At this stage, you can start a recording by clicking on the button allotted for this.
- Create a test roller, open it through any player and see whether the current quality is satisfactory.


In this instruction, we touched the topic of the encoder settings. This action is not always possible to immediately perform properly due to differences in the assemblies of computers. In another article on our site you will find general encoder optimization tips if errors or friezes appear during recording. They should help choose optimal parameters and get rid of difficulties.
Read more: Error correction "The encoder is overloaded! Try to downgrade video settings »in OBS