

Corel Draw is known to many designers, illustrators and artists-graphs as a multifunctional convenient drawing tool. To use this program rationally and not be afraid of its interface, novice artists should become familiar with the basic principles of its work.
In this article, we will tell about how Corel Draw is arranged and how to apply it with the greatest efficiency.
How to use Corel Draw
If you have conceived to draw an illustration or create a business card layout, a banner, poster and other visual products, you can safely use Corel Draw. This program will help you draw whatever and prepare a print layout.
Select a computer graphics program? Read on our website: What to choose - Corel Draw or Adobe Photoshop?
1. Download the software installation file from the developer's official site. To begin with, this can trial application version.

2. After waiting for the download, install the program to the computer, following the assembly wizard prompts.
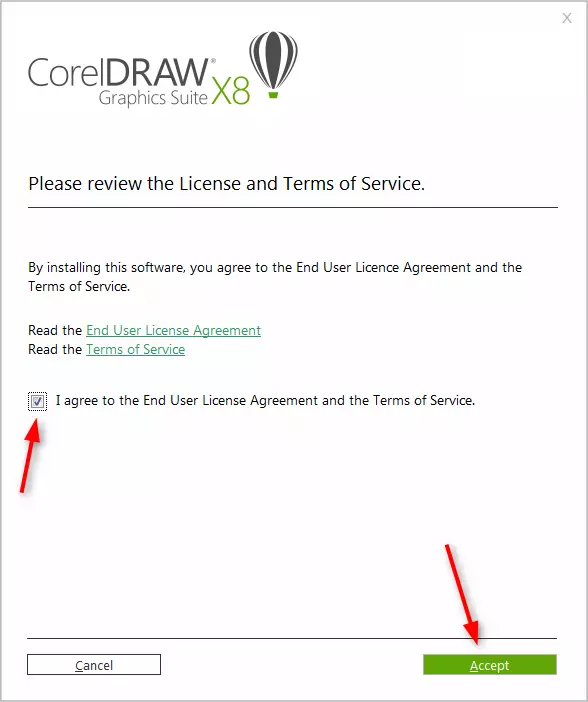
3. After installation, you will need to create a Corel custom account.
Creating a new document Corel Draw
Useful information: Hot keys in Corel Draw
1. In the starting window, click "Create" or apply the CTRL + N key combination. Set the PARMETERS document: name, sheet orientation size in pixels or metric units, number of pages, resolution, color profiles. Click OK.
2. Before us is the working field of the document. Sheet parameters We can always change under the menu bar.

Drawing objects in Corel Draw
Start draw using the toolbar. It contains tools for drawing arbitrary lines, curves Beziers, polygonal contours, polygons.
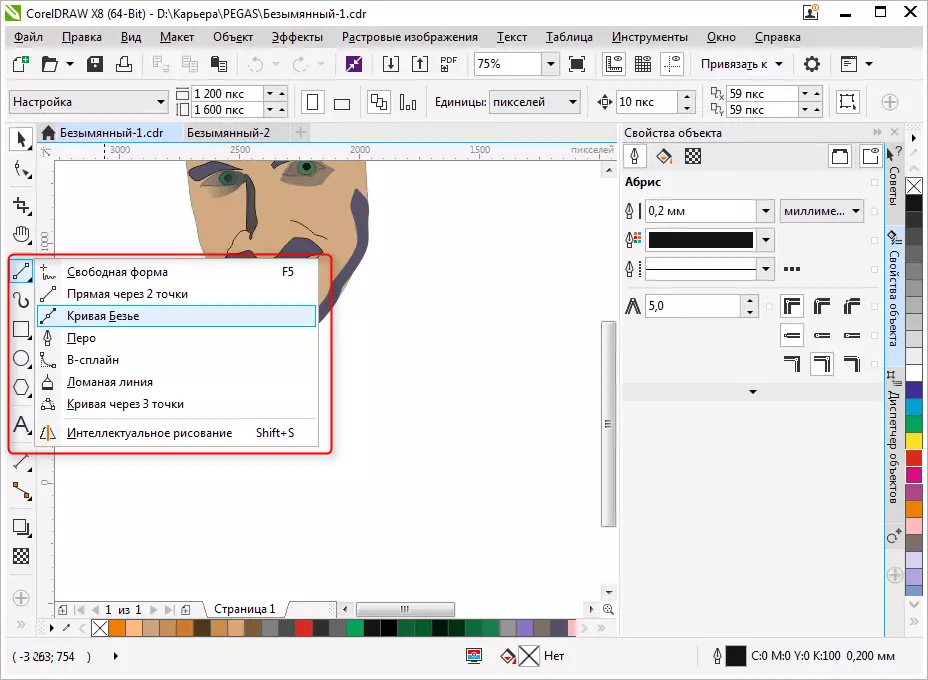
On the same panel, you will find the cadry and panning tools, as well as the "Form" tool, which allows you to edit the node points of the splines.

Editing objects in Corel Draw
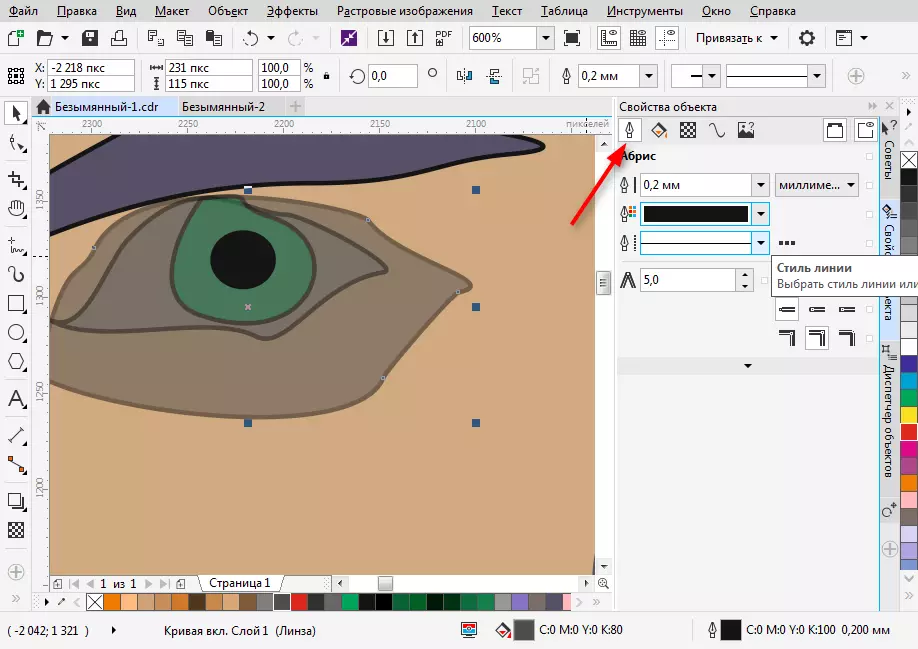
Very often in your work, you will use the object properties panel for editing the drawn items. The selected object is edited by the following properties.
- Abris. On this tab, set the object circuit parameters. Its thickness, color, type of line, chamfer and features of the angular angle.
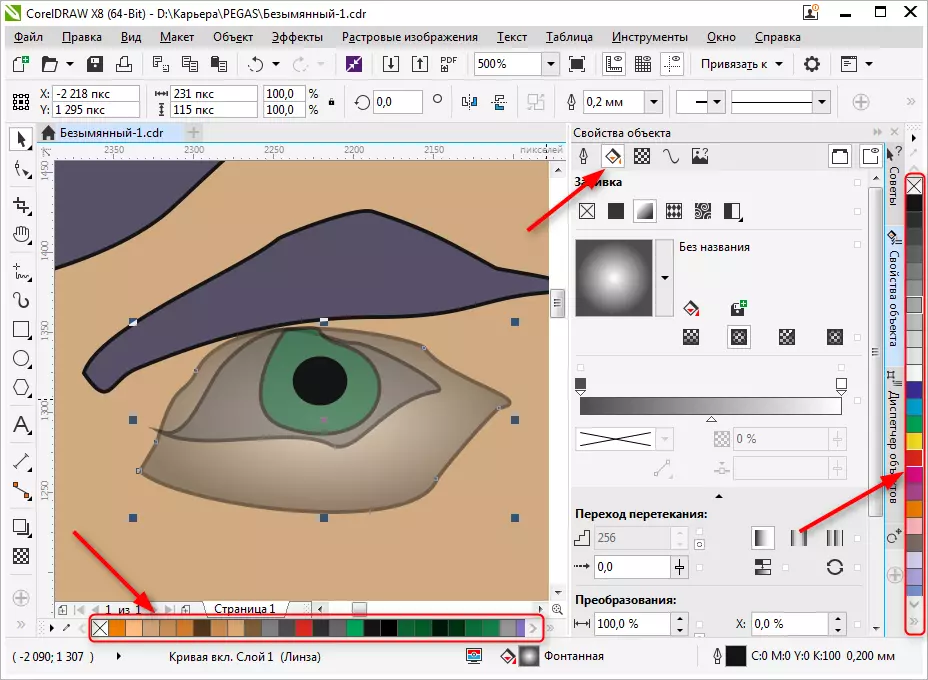
- Fill. This tab determines the fill of the closed area. It can be simple, gradient, patterned and raster. Each type of fill has its own settings. The color of the fill can be selected by the palette in the properties of the object, but the most convenient way to choose the desired color is to click on it in a vertical color panel near the right edge of the program window.
Please note that the colors used during the work are displayed at the bottom of the screen. They can also be applied to the object by simply clicking on them.
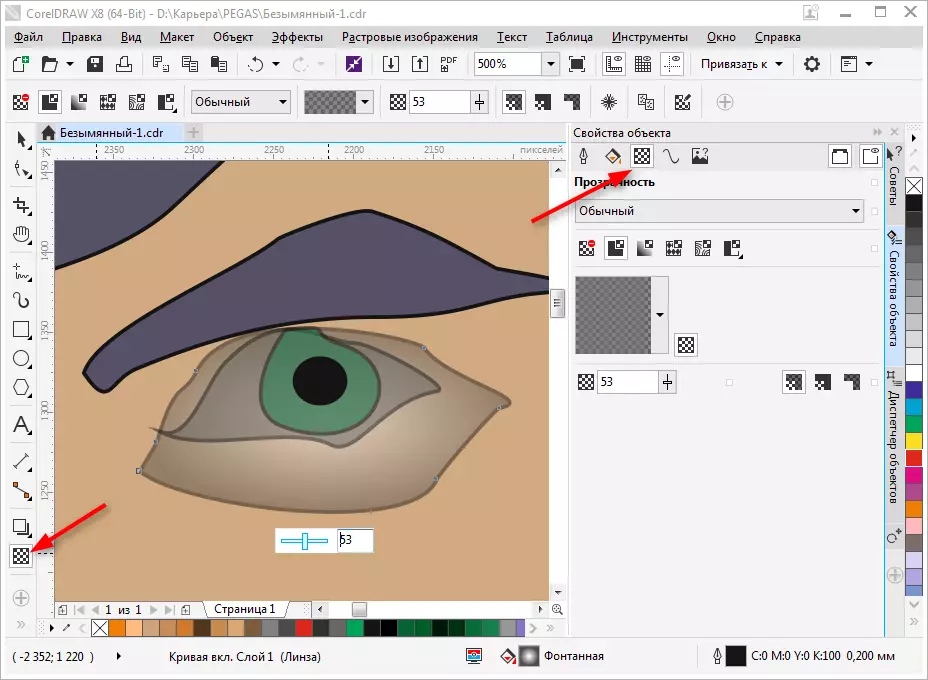
- Transparency. Pick up the type of transparency for the object. It can homogeneous or gradient. Using the slider, set its degree. Transparency can be quickly activated from the toolbar (see Screenshot).
The selected object can be scaled, rotated, mirroring to reflect, change the proportions. This is done using the conversion panel, which opens on the settings tab of the right to the right of the workspace. If this tab is missing, press "+" under the existing tabs and check the box opposite one of the conversion methods.

Set the shadow object to the selected object by clicking on the appropriate icon in the toolbar. For the shadow, you can set the form and transparency.

Export to other formats
Before exporting your drawing must be inside the sheet.
If you want to export to raster format, such as JPEG, you need to highlight the grouped pattern and press Ctrl + E, then select the format and put a tick in "only selected". Then click "Export".
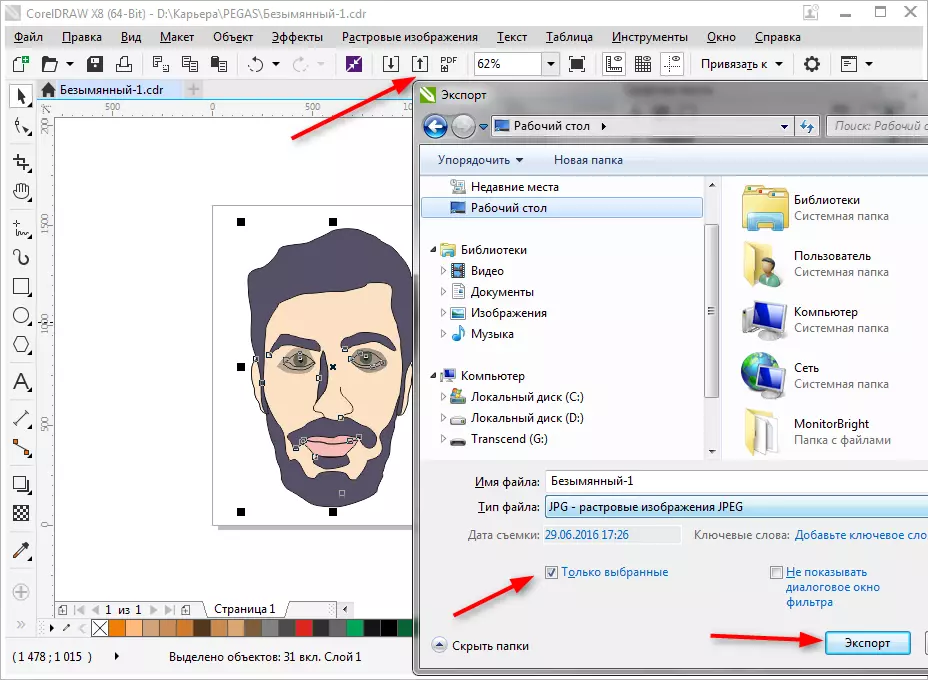
A window will open in which you can specify the final settings before exporting. We see that only our image without fields and indents is exported.

To save the whole sheet, you need to carry it out before exporting it with a rectangle and highlight all objects on the sheet, including this rectangle. If you do not want it to be visible, simply disconnect the Abris or ask the white color of the stroke.
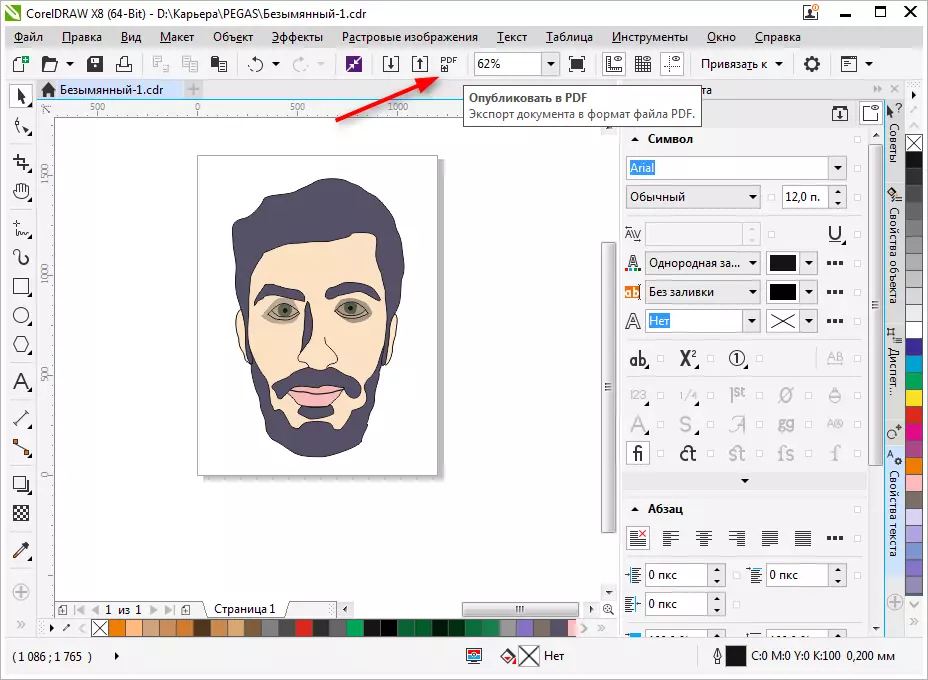
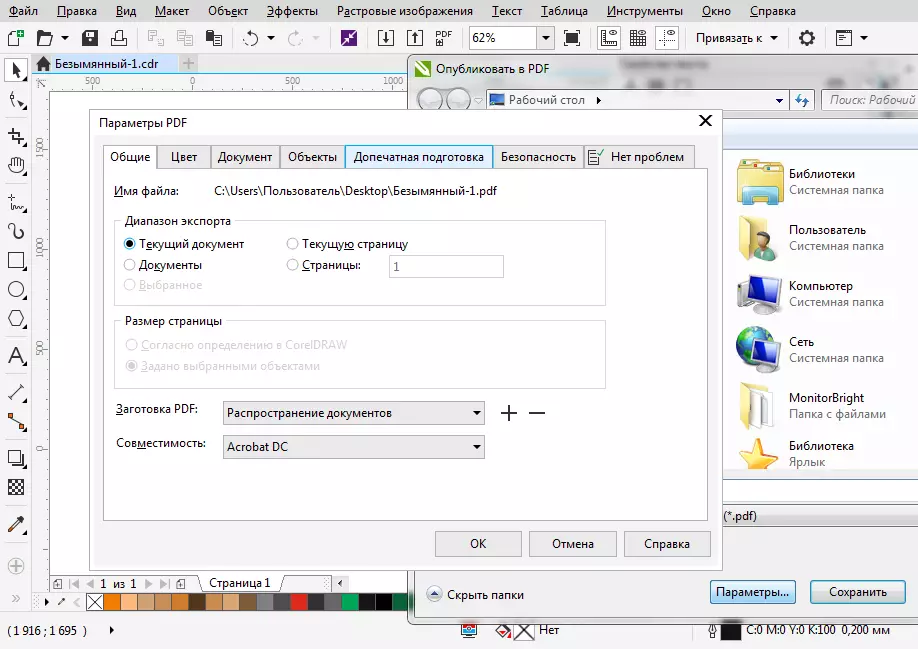
To save in PDF, you do not need any manipulations with a sheet, all the contents of the sheet will automatically be saved in this format. Press the pictogram, as in the screenshot, then "Parameters" and set the Document settings. Click "OK" and "Save".
We advise you to read: the best programs for creating arts
We briefly reviewed the basic principles of using Corel Draw and now studying it will become clearer and faster for you. Successful experiments in computer graphics!