

While working with pictures in Photoshop, we often need to replace the background. The program does not limit us in the species and colors, so you can change the original background image to any other.
In this lesson we will discuss ways to create a black background in the photo.
Creating a black background
There is one obvious and several additional, rapid ways. The first is to cut the object and insert it over the layer with black fill.Method 1: Cutout
Options for how can be highlighted, and then cut a picture to a new layer of several, and all of them are described in one of the lessons on our website.
Lesson: How to cut an object in photoshop
In our case, for simplicity of perception, we apply the tool "Magic wand" on the simplest picture with a white background.
Lesson: Magic wand in photoshop
- Take the instrument.

- To speed up the process, remove the daws in front of the "adjacent pixels" on the parameter panel (at the top). This action will allow us to highlight all the sections of the same color immediately.

- Next, it is necessary to analyze the picture. If we have a white background, and the object itself is not a monophonic, then click on the background, and if the image has a one-color fill, it makes sense to allocate it.

- Now cut out (copy) an apple to a new layer using a Ctrl + J key combination.

- Further everything is simple: Create a new layer by pressing the icon at the bottom of the panel,

Poured it in black, using the "Fill" tool,

And put under our carved apple.

Method 2: The fastest
This technique can be used in pictures with simple content. It is with that we work in today's article.
- We will need a newly created layer painted by the desired (black) color. As it is done, it has already been described slightly higher.

- From this layer, you need to take visibility by clicking on the eye next to it, and go to the bottom, source.

- Further, everything happens according to the scenario described above: we take a "magic wand" and highlight an apple, or use another convenient tool.

- We return to the layer with black fill and turn on its visibility.

- Create a mask by clicking on the desired icon at the bottom of the panel.

- As you can see, the black background retired around the apple, and we need a reverse action. To perform it, press the CTRL + I key combination, inverting the mask.

You may seem that the described method is complicated and requires a lot of time. In fact, the entire procedure takes less than one minute even with an unprepared user.

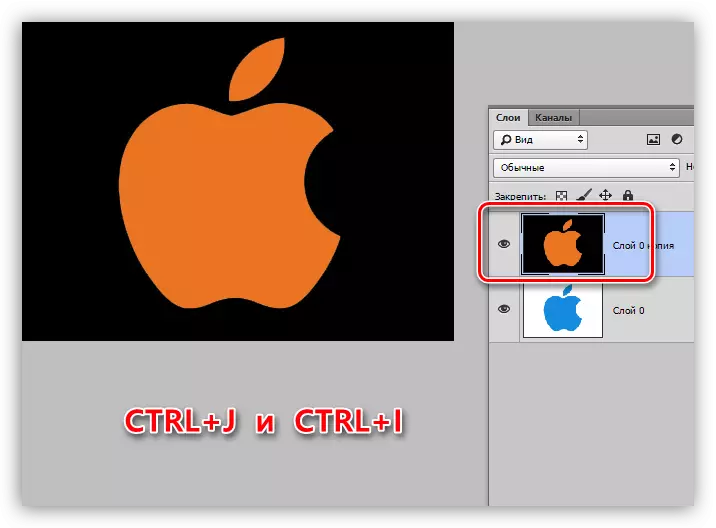
Method 3: Inversion
Excellent option for images with a completely white background.
- We make a copy of the original picture (Ctrl + J) and invert it as well as a mask, that is, press Ctrl + I.
- Next there are two ways. If the object is monotonous, then we highlight it with the "Magic wand" tool and press the Delete key.

If the apple is multicolored, then click the wand on the background,

We carry out the inverting of the selected area with the CTRL + SHIFT + I keys and remove it (Delete).

Today we studied several ways to create a black background in the image. Be sure to practice their use, as each of them will be useful in a specific situation.
The highest quality and difficult is the first option, while the other two save time when working with simple pictures.