
Not all of us can boast the perfect figure, moreover, even quite well-folded people are not always satisfied. Slender would like to look at the photo of a muddle, and chubby - buildings.
Work skills in our favorite editor will help to correct the flaws of the figure. In this lesson, let's talk how to lose weight in Photoshop
Correction of Figure
It is worth noting that all the actions described in this lesson must strictly dose to keep the personality character, unless, of course, it is planned to create a cartoon or caricature.
More information on the lesson: Today we consider a comprehensive approach to the correction of the figure, that is, we use two tools - "puppet deformation" and filter "Plastic". If you wish (need), they can be used separately.
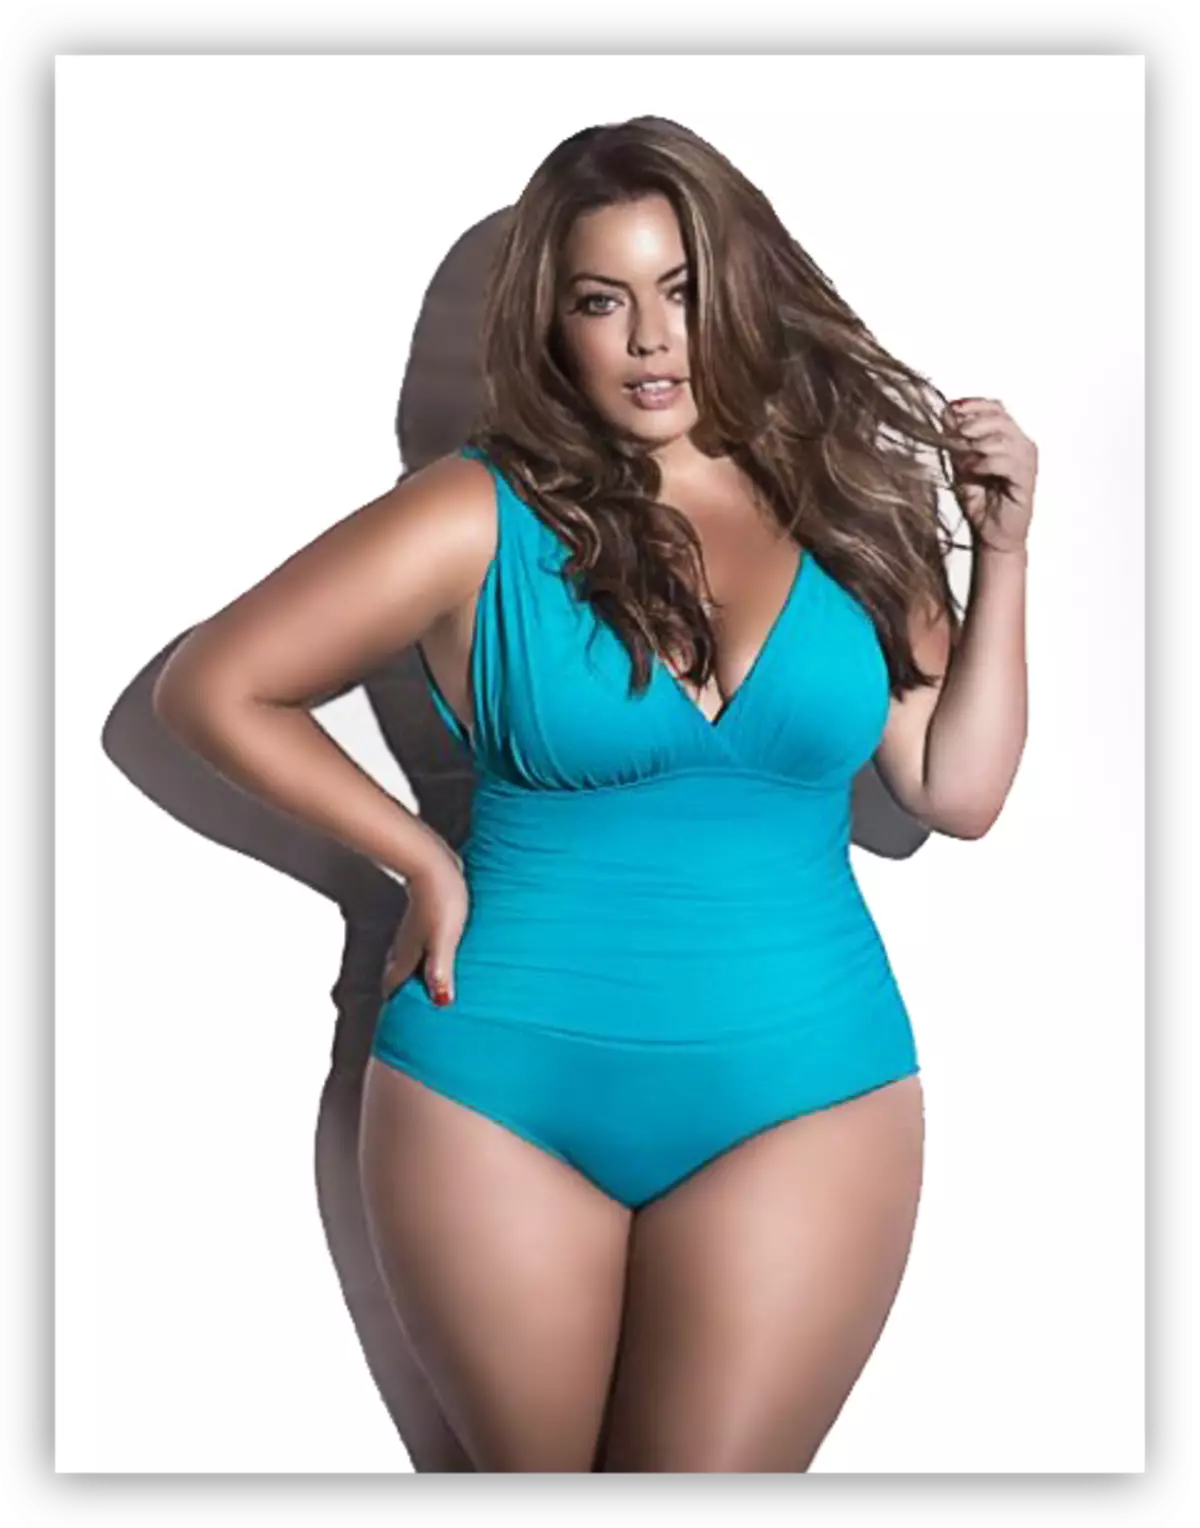
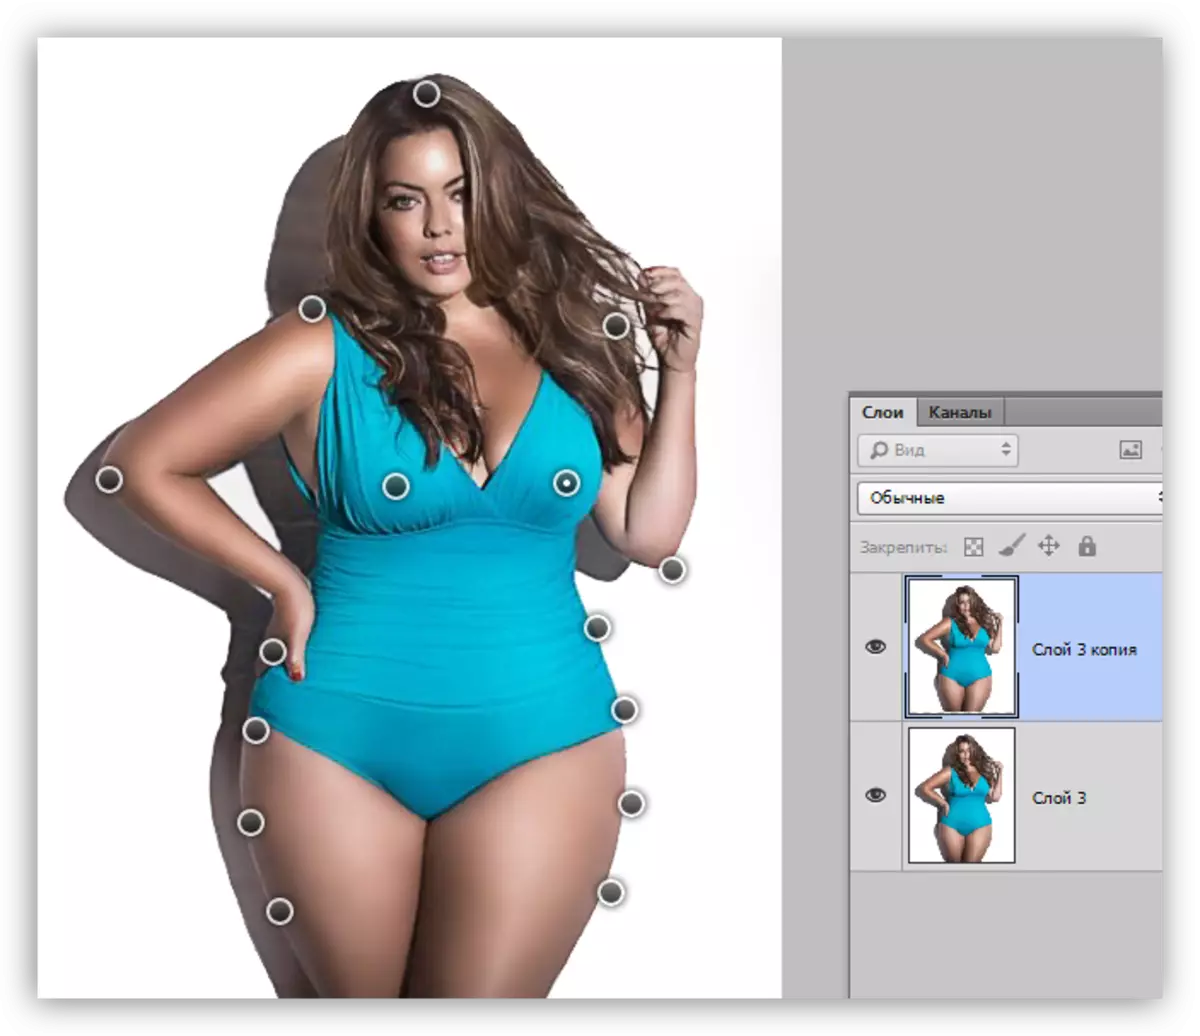
Source image model for lesson:
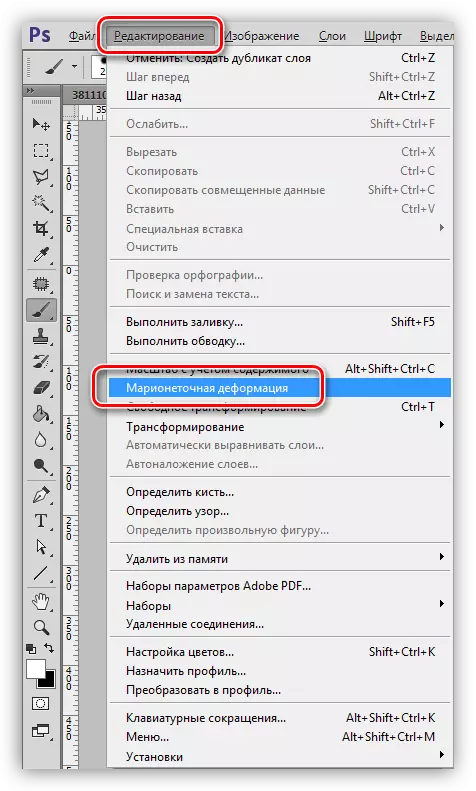
Puppet deformation
This tool, or rather the function, is a type of transformation. You can find it in the "Editing" menu.
So let's see how "puppet deformation" works.
- Activate the layer (preferably a copy of the source), to which we want to apply the function, and call it.
- The cursor takes the point of the button, which in photoshop for some reason is called pins.
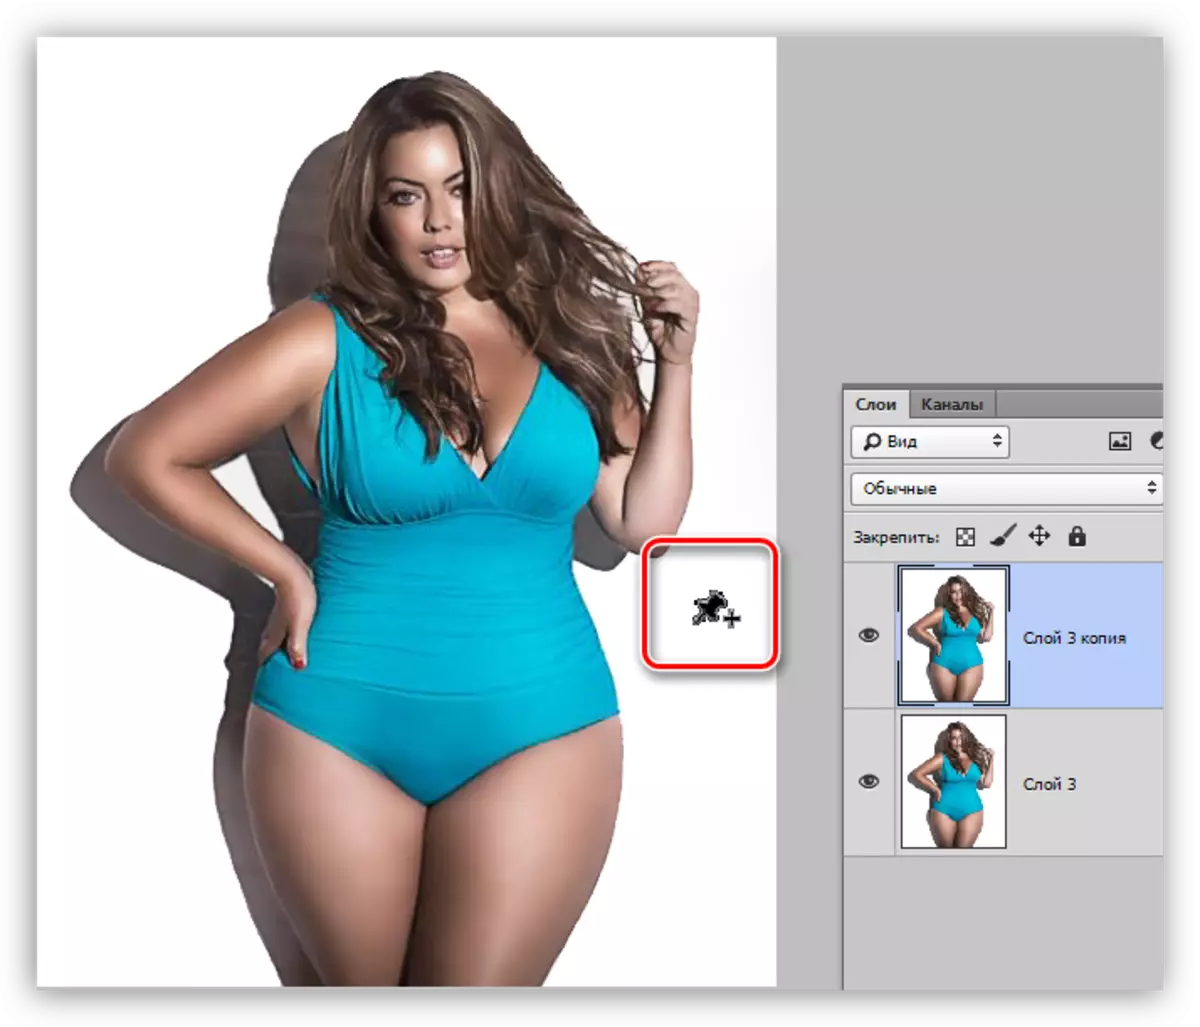
- With the help of these pins, we can limit the area of exposure to the image to the image. We arrange them as shown in the screenshot. Such an alignment will allow us to adjust, in this case, hips, without distorting other parts of the figure.
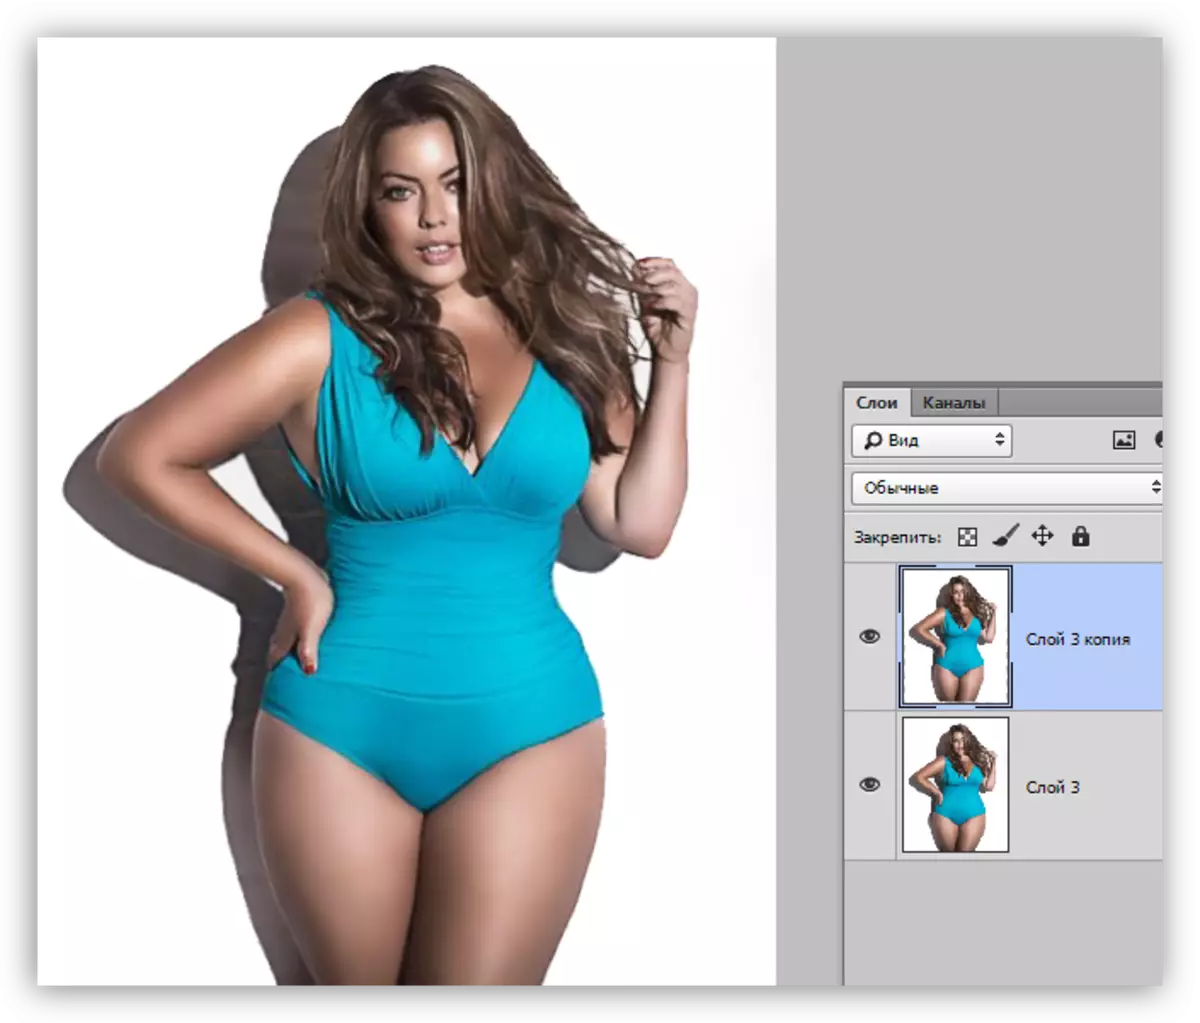
- By moving the buttons installed on the hips, reduce their size.
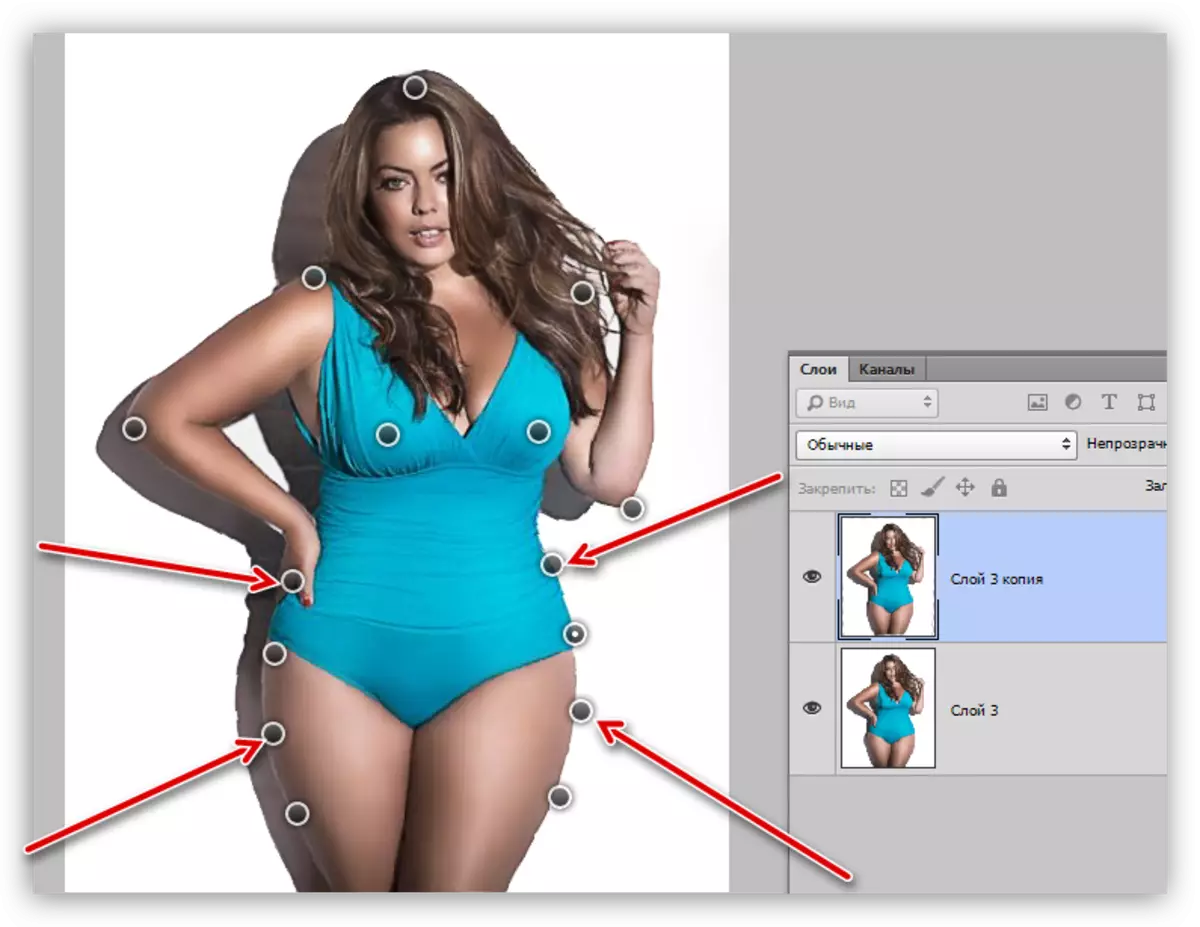
Additionally, you can also reduce the size of the waist, setting additional pins on both sides of it.
- Upon completion of the transformation, press the ENTER key.
Several told tips.
- Reception is suitable for editing (correction) of large sections of the image.
- Do not put too much pins to avoid unwanted distortion and breaks of the figures.
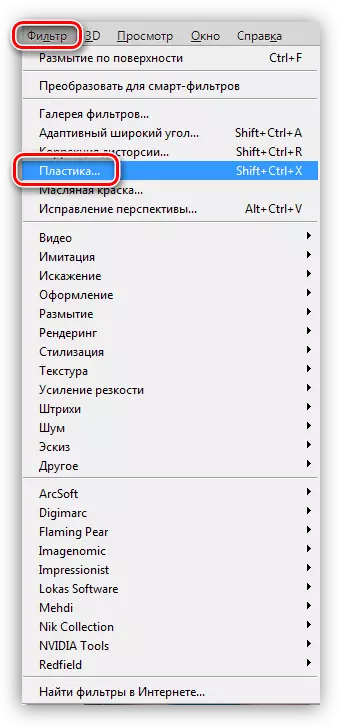
Plastic
With the help of the filter "Plastic", we will produce a correction of smaller parts, in our case it will be the hands of the model, and also correct possible shortcomings that have arisen at the previous stage.
Lesson: Filter "Plastic" in Photoshop
- Open the filter "Plastic".
- On the left panel, choose the deformation tool.
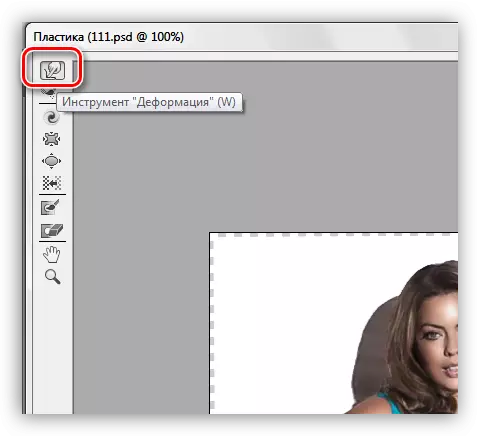
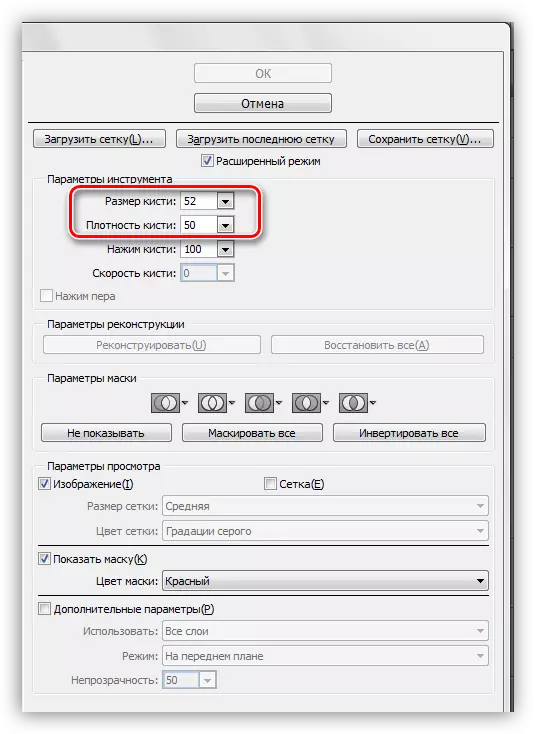
- For the density of the brush, set the value 50, select the size depending on the size of the editable area. The filter works according to certain laws, with experience you will understand what.
- We reduce the plots that seem to us too large. We also correct the disadvantages on the hips. We do not rush anywhere, work carefully and thoughtfully.
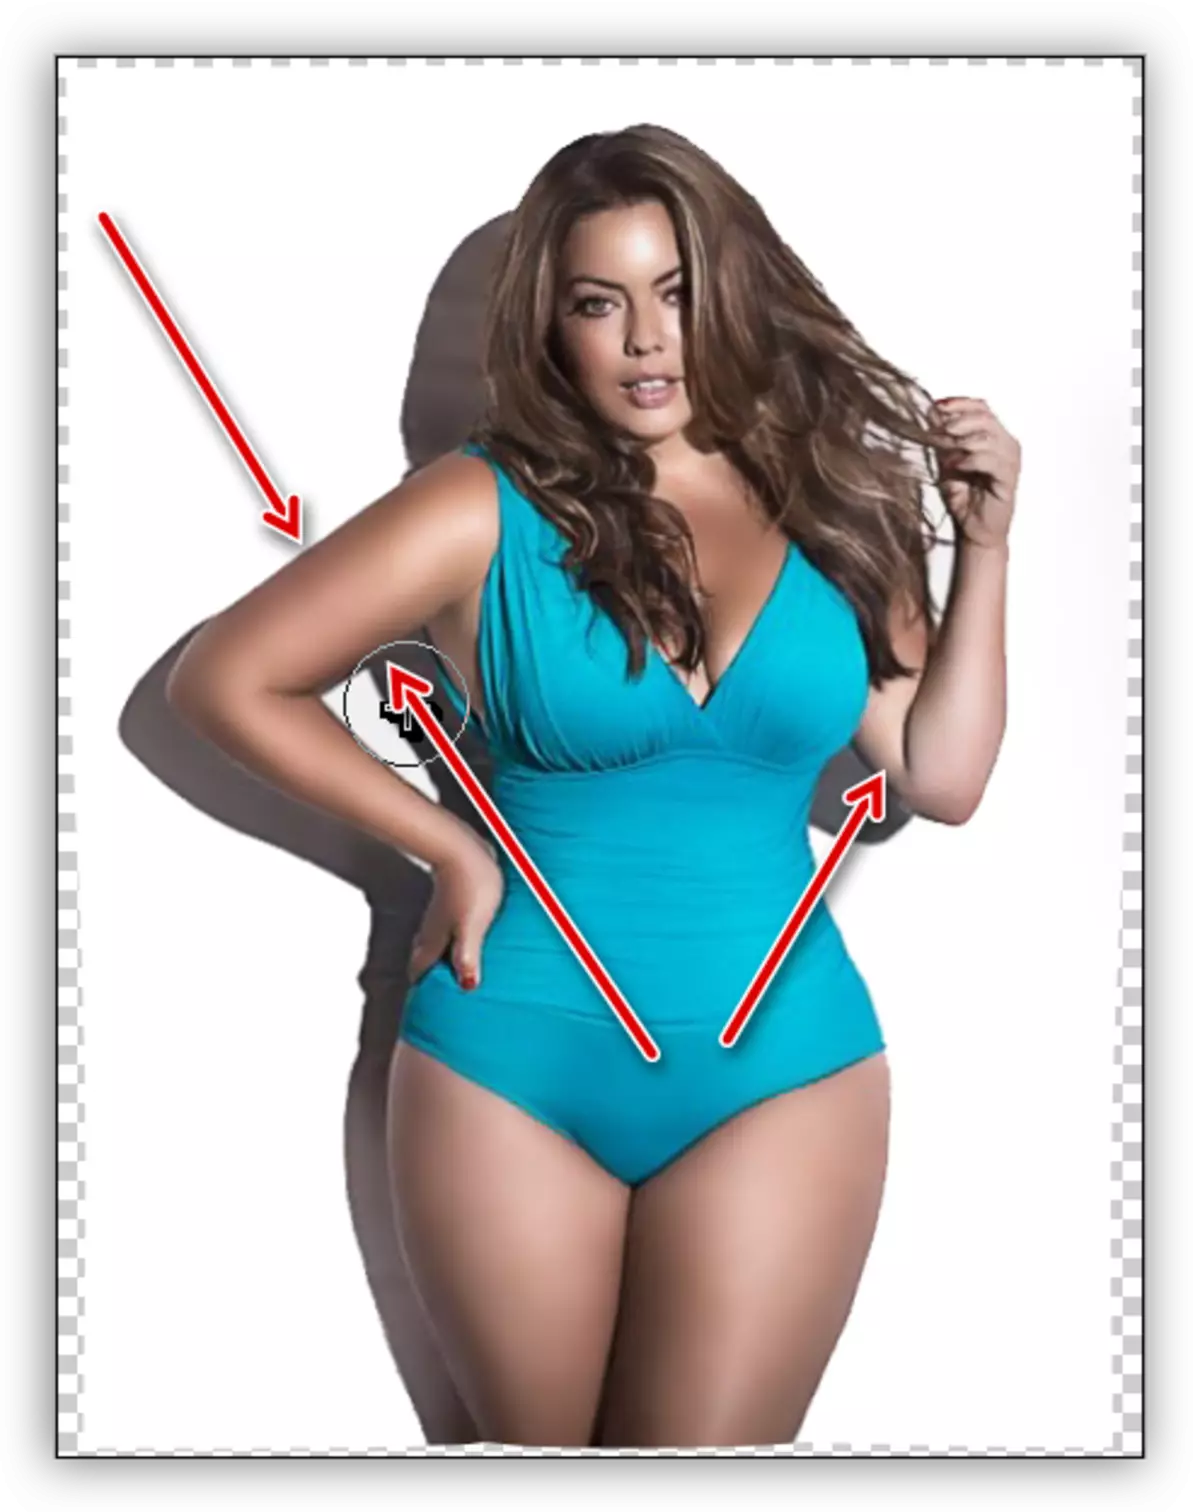
Do not too dilute, as unwanted artifacts and "climbing" may appear in the picture.
Let's look at the end result of our work in the lesson:
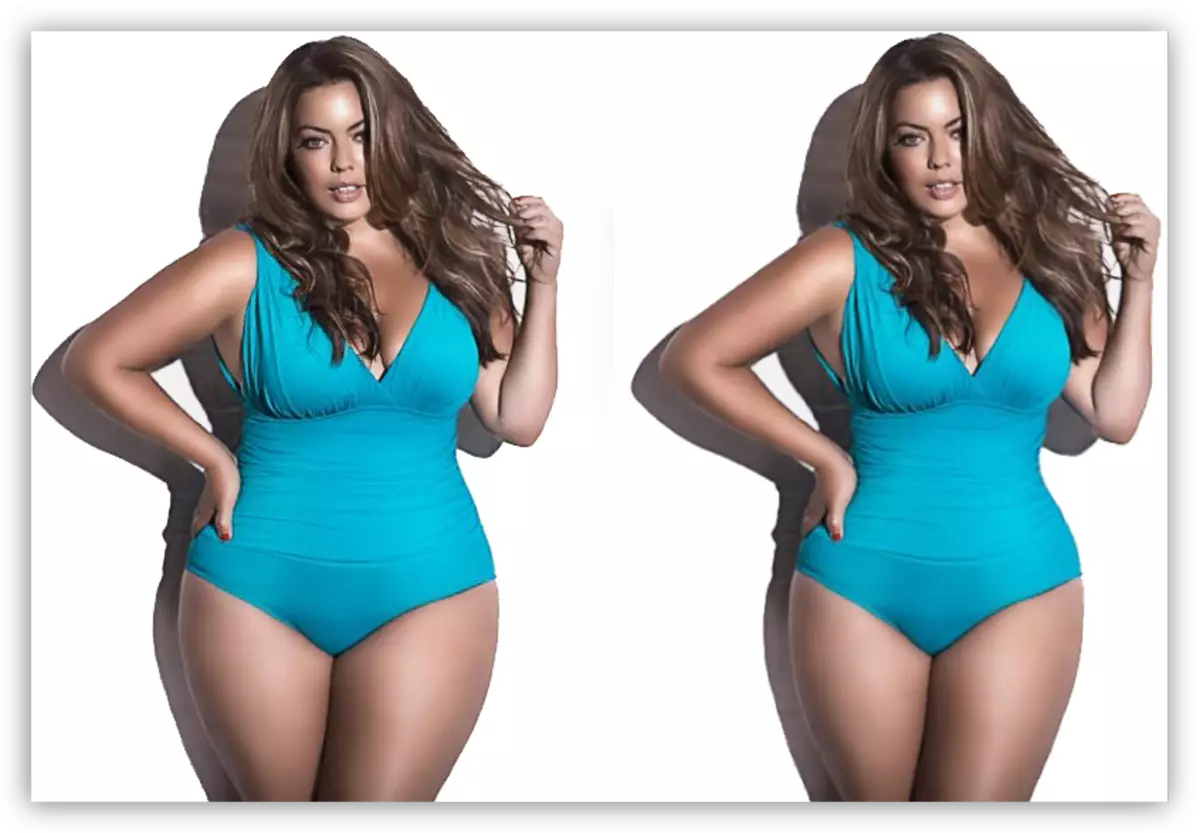
Thus, using the "puppet deformation" and the filter "Plastic", you can quite effectively make a correction of the figure in the photoshop program. Using these techniques, you can not only lose weight, but also to straw in the photo.