

Now any computer user is primarily experiencing for the safety of its data. There is a huge number of factors that during operation can damage or delete any files. - These include malware, systemic and hardware failures, incompetent or random user intervention. Under the threat not only personal data, but also the operability of the operating system, which, following the law of meanness, "falls" at the moment when it is most needed.
Data redundancy - literally panacea, which solves 100% of problems with lost or damaged files (of course, provided that the backup is created by all the rules). This article will feature several options for creating a full backup of the current operating system with all its settings and data that are stored on the system section.
Bacup System - Warranty Stable Computer Work
You can, in the old manner, documents for saving to copy to flash drives or parallel partitions of a hard disk, worry for the darkness of the settings in the operating system, shake over each system file during the installation of third-party decor and icons. But manual work from now on in the past - there is enough software in the network, which has proven itself as a reliable means for the entire system redundancy. A little bit after the next experiments - at any time you can return to the saved version.The Windows 7 operating system also has a built-in copy function of the copy itself, and we will also talk about it in this article.
Method 1: Aomei Backupper
The right is considered one of the best backup programs. She has only one drawback - the lack of the Russian interface, only English. However, with the instructions below, you can even press a backup copy.
Download aomei backupper
The program has a free and paid version, however, for the needs of an ordinary user with a head, there is enough first. It contains all the necessary tools for creating, compressing and checking backup system partition. The number of copies is limited only by free space on the computer.
- Go to the official website of the developer on the link above, download the installation package to the computer, start it with a double mouse and follow the simple installation wizard.
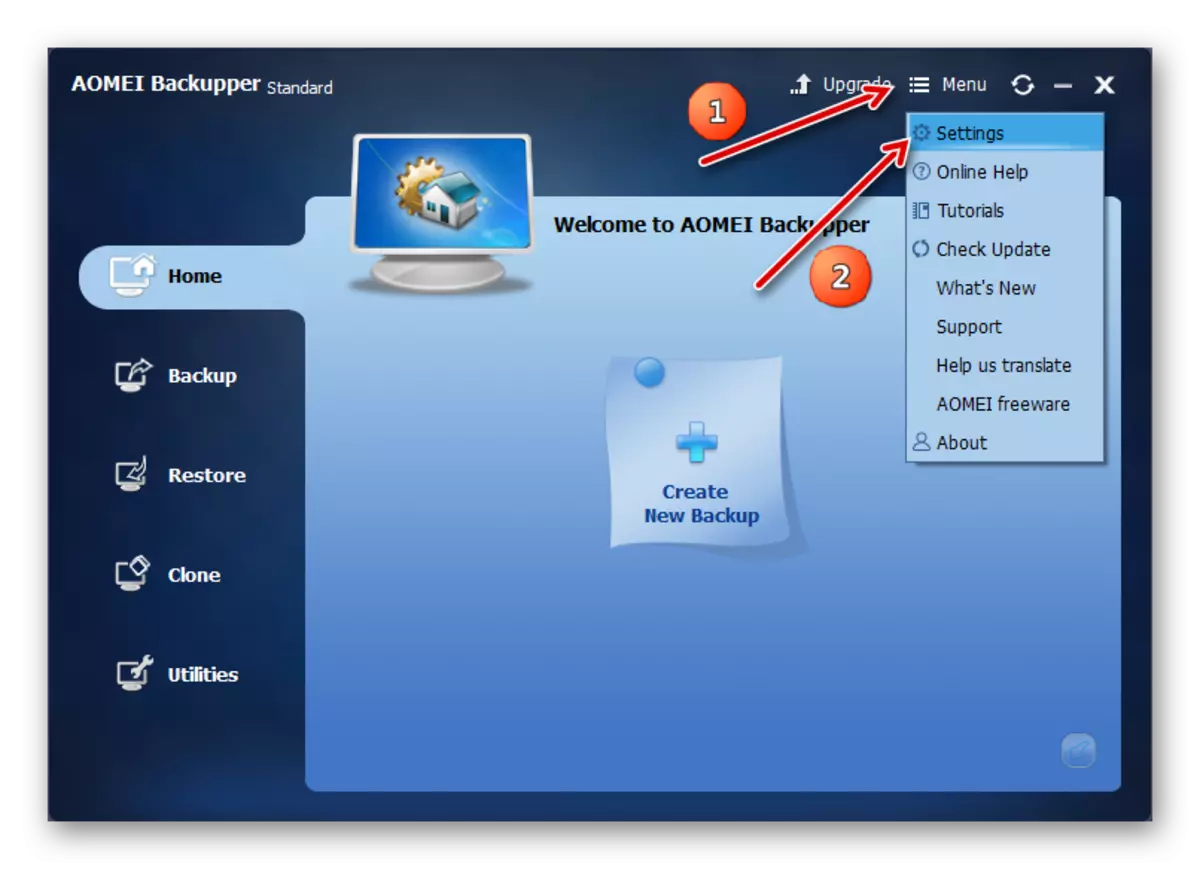
- After the program is integrated into the system, start it with a shortcut on the desktop. After starting, Aomei Backupper is immediately ready to work, but it is desirable to perform several important settings that will improve the backup quality. Open the settings by pressing the "MENU" button at the top of the window, in the drop-down window, select "Settings".
- In the first tab of the opened settings, there are parameters responsible for compressing the created copy to save space on the computer.
- "None" - copying will be performed without compression. The size of the outcome file will be equal to the size of the data that will be recorded in it.
- "Normal" - the selected default parameter. The copy will be compressed approximately 1.5-2 times in comparison with the original file size.
- "HIGH" - the copy is compressed by 2.5-3 times. This mode is very saved on the computer when creating multiple copies of the system, however requires more time and system resources to create a copy.
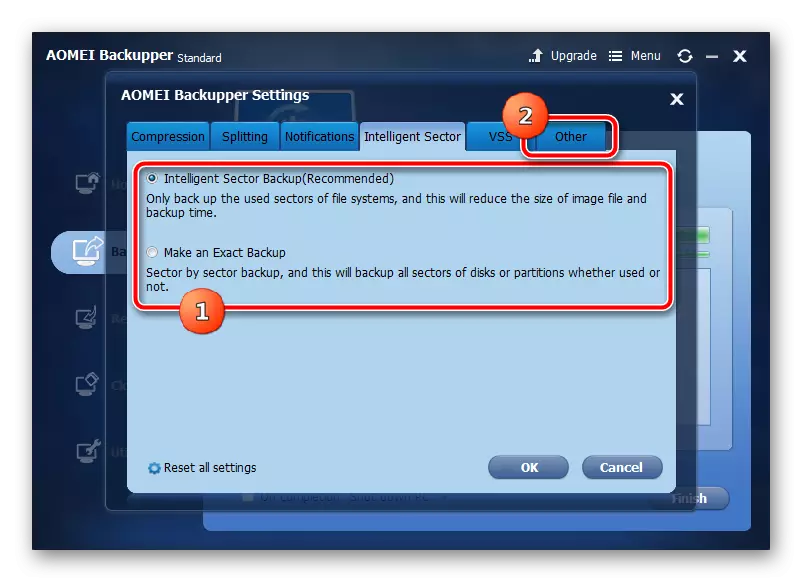
Select the option you need, then immediately go to the "Intelligent Sector" tab
- The opened tab contains parameters responsible for sectors of the section that the program will copy.
- "Intelligent Sector Backup" - the program will save the data of those sectors to a copy that are most often used. The entire file system and recently used sectors (cleaned basket and freed location) fall into this category. It is recommended to create intermediate points before experiments over the system.
- "Make An Exact Backup" - Absolutely all sectors that are in the section will be entered into the copy. It is recommended for hard drives that have been used for a long time, information suitable for special programs can be stored in unused sectors. If the copy is recovered after the working system is defeated by the virus, the program will overwrite the entire disc to the last sector, without leaving the virus is either a chance for recovery.
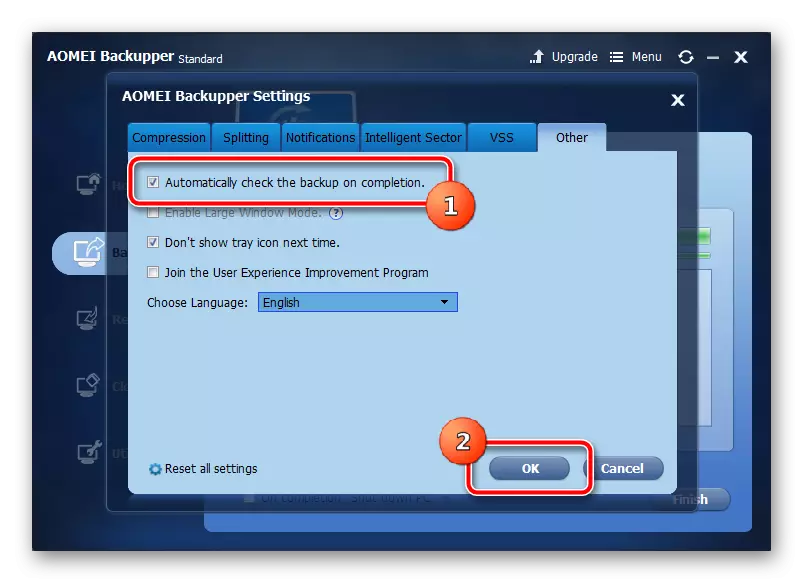
By selecting the desired item, go to the last tab "Other".
- Here you need to check the box at the first point. It is responsible for automatic checking backup after its creation. This setting is the key to successful recovery. It almost doubles the copy time, but the user will definitely be sure to save data. Keep the settings by pressing the "OK" button, the program setting is complete.
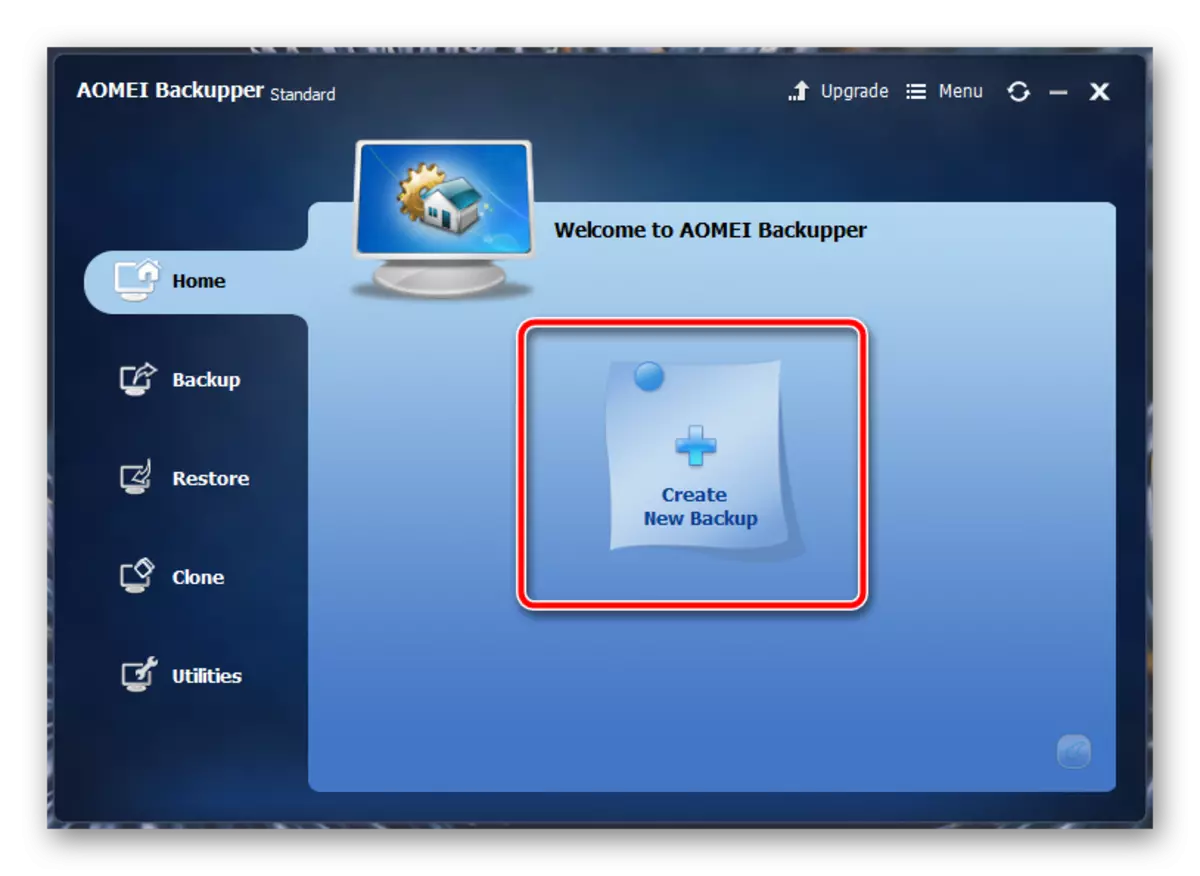
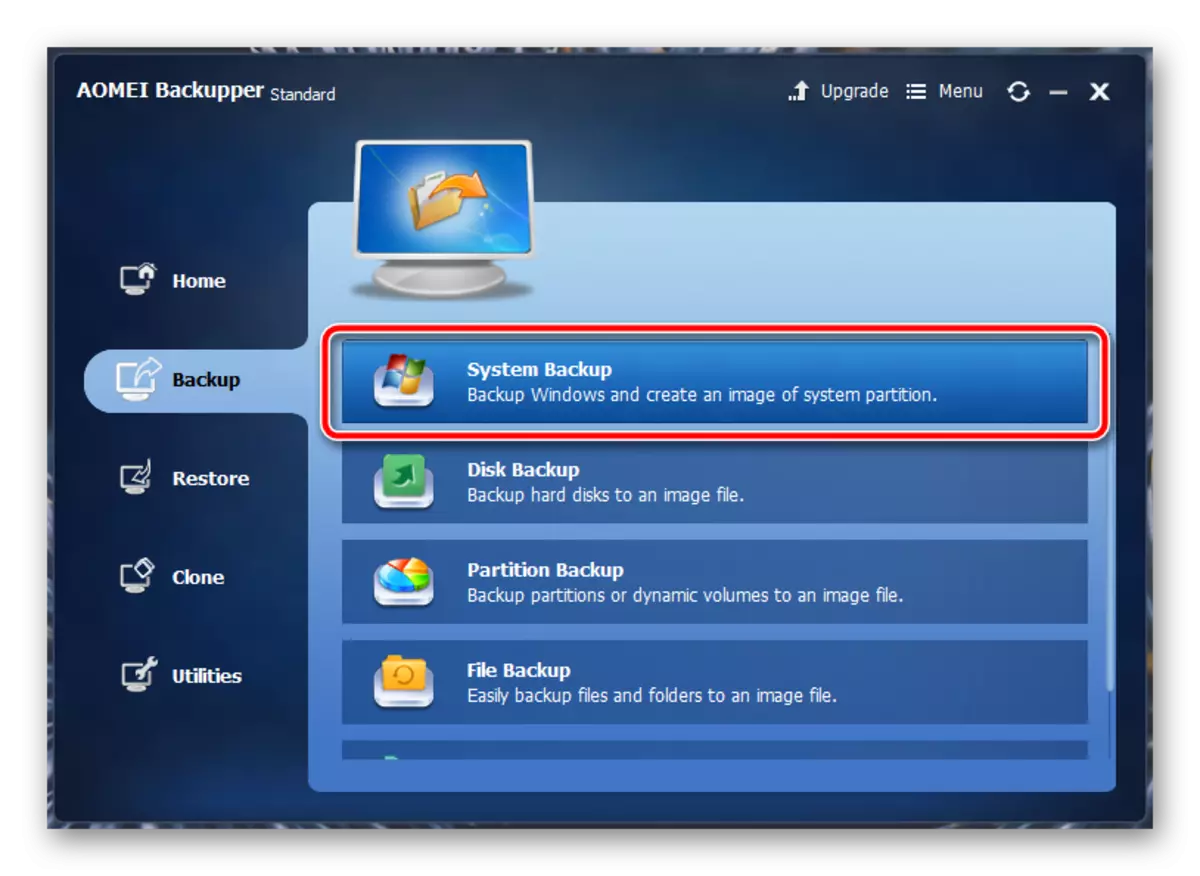
- After that, you can proceed directly to copying. Click on the large button in the middle of the Create New Backup program window.
- Select the first "System Backup" item - it is he who is responsible for copying the system partition.
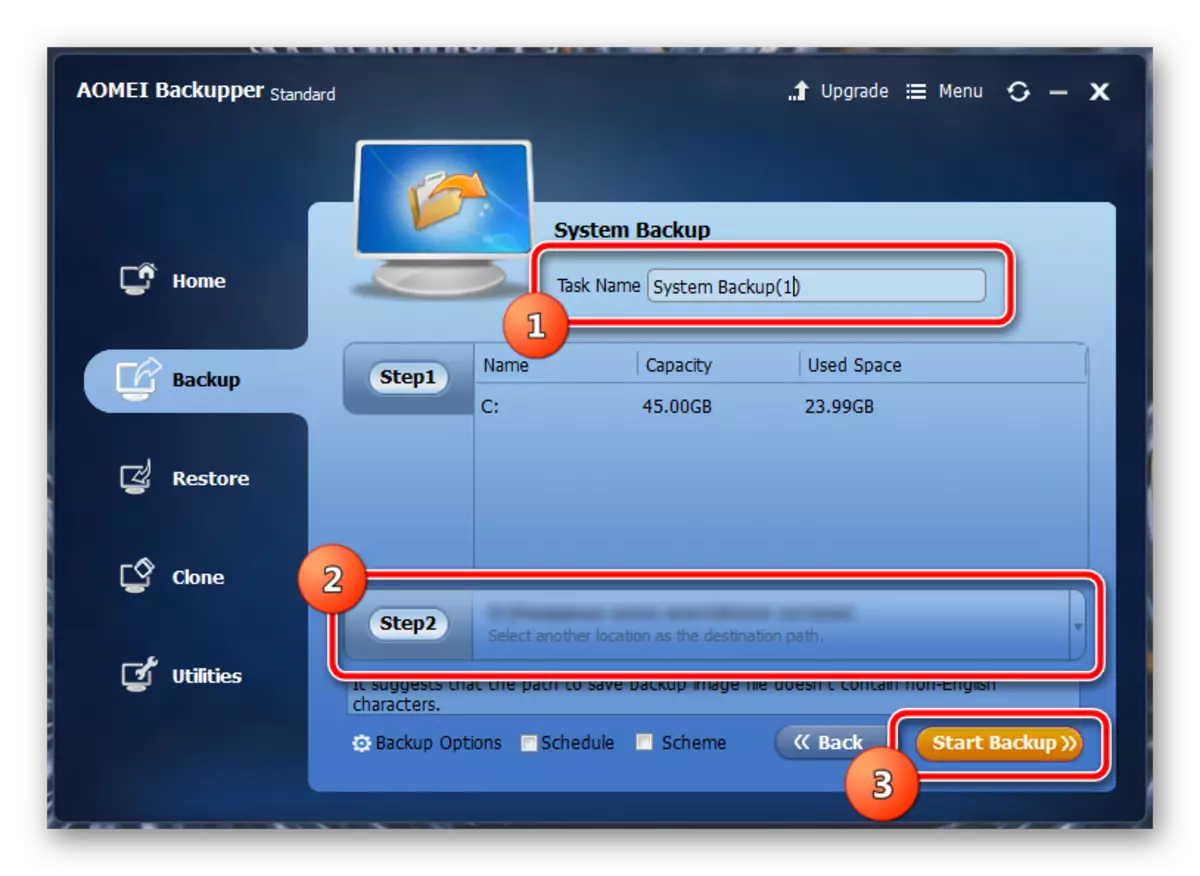
- In the next window, you must set the final parameters of the backup.
- In the field, specify the name of the backup. It is advisable to use only Latin characters in order to avoid problems with associations when recovering.
- You need to specify the folder where the destination file is saved. You must use another section other than systemic, to protect from deleting a file from a section during a failure in the operating system. The path must also contain only Latin characters in its name.
Start copying by clicking on the Start Backup button.
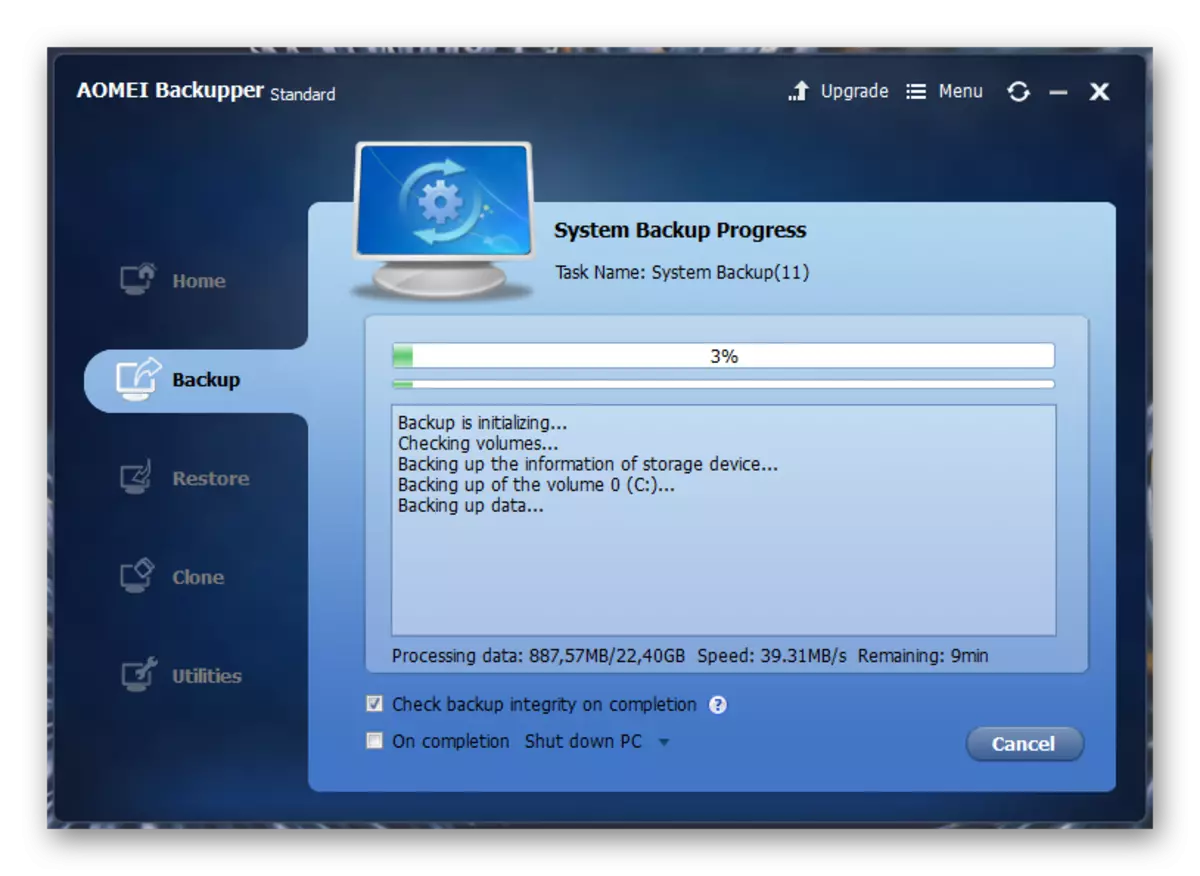
- The program will start copying a system that can take from 10 minutes to 1 hour depending on the selected settings and the size of the data you want to save.
- First, all the indicated data on the configured algorithm will be copied, then check will be performed. After completing the operation, the copy is ready for recovery at any time.

Aomei Backupper has a number of secondary settings that will necessarily use the user, seriously worried about their system. Here you can find and configure the deferred and periodic backup tasks, breaking the created file into pieces of a certain size to download to cloud storage and records for removable media, encrypt a copy of the password for confidentiality, as well as copying individual folders and files (perfectly suitable for saving critical system objects ).
Method 2: Recovery Point
We now turn to the built-in features of the operating system itself. The most popular and quick way to create a backup copy of the system is the recovery point. It takes a relatively little place, it is created almost instantly. The recovery point has the ability to return the computer to the checkpoint, restoring critical system files without affecting the user data.
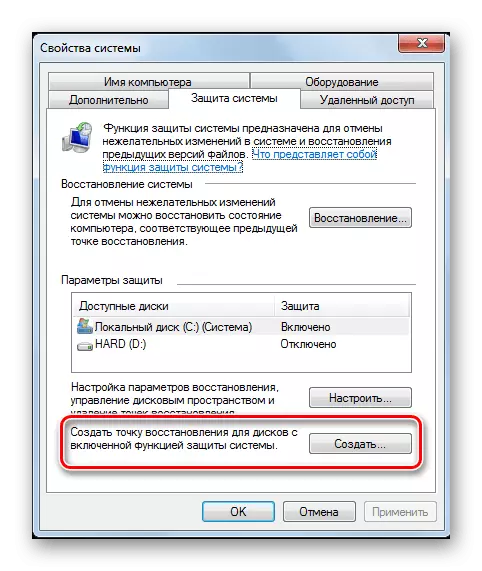
Read more: How to create a recovery point in Windows 7
Method 3: Data Archiving
Windows 7 has another way to create backup data from a system disk - archiving. With proper configuration, this tool will save all system files for subsequent recovery. There is one global drawback - it is impossible to archive those executable files and some drivers that are currently used. However, this is an option from the developers themselves, so it also needs to be considered.
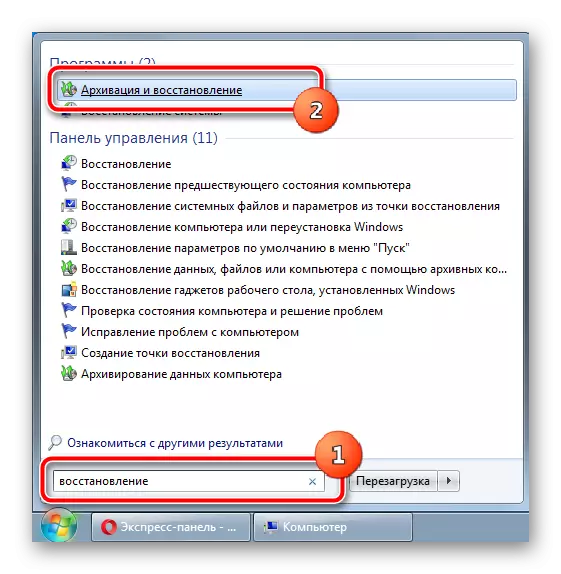
- Open the Start menu, enter the word in the search field. recovery , Select the first option from the list that appears - "Archiving and Restore".
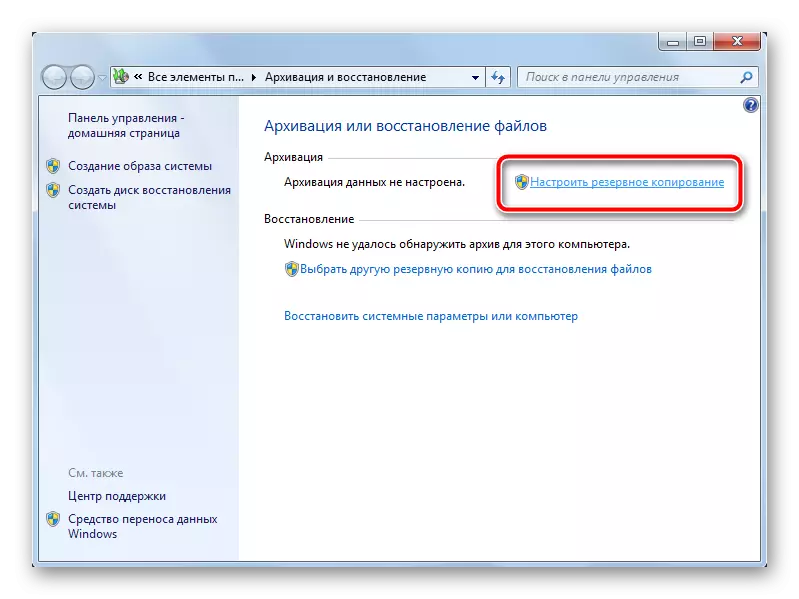
- In the window that opens, open the backup settings by pressing the left mouse button to the appropriate button.
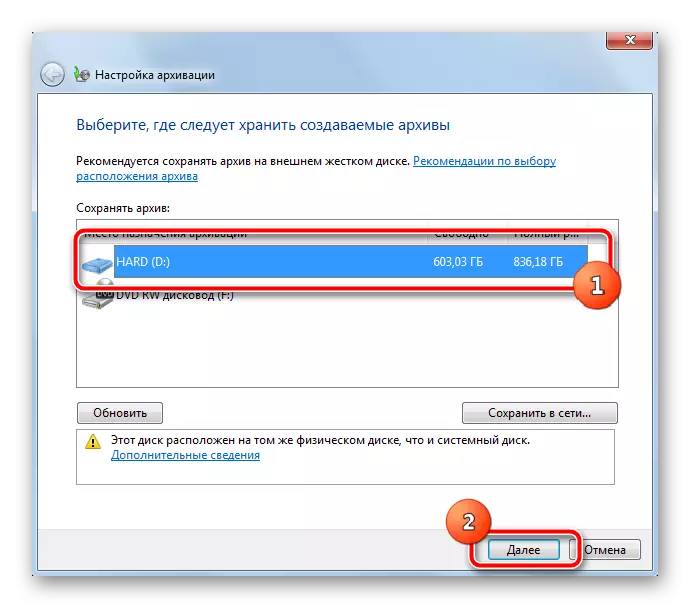
- Select the section to which backup will be saved.
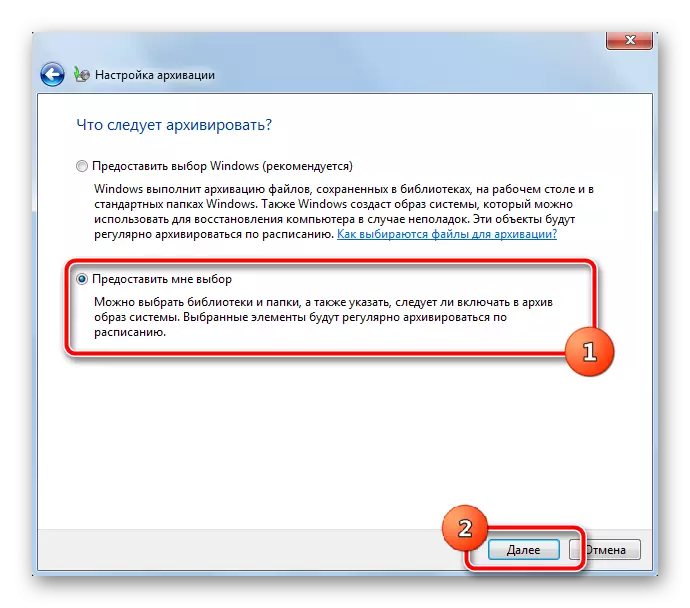
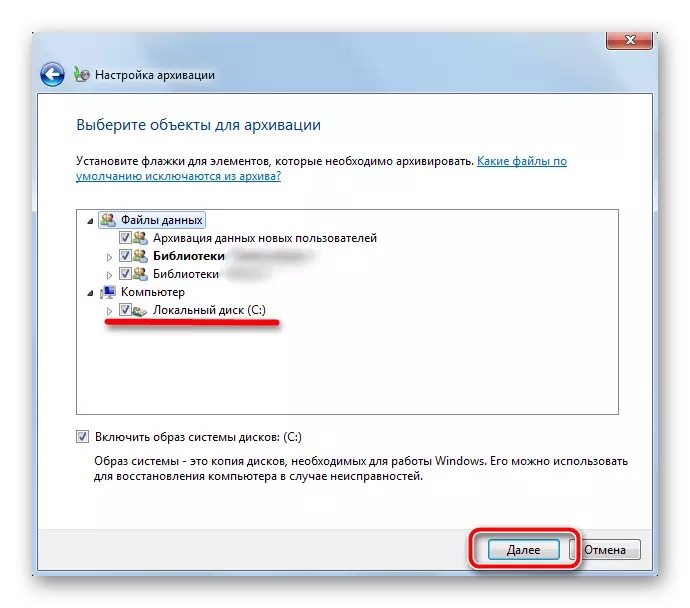
- Specify the parameter responsible for the data that will be saved. The first point will collect only user data in a copy, the second will give us the whole system partition.
- Specify the checkbox and disk (C :).
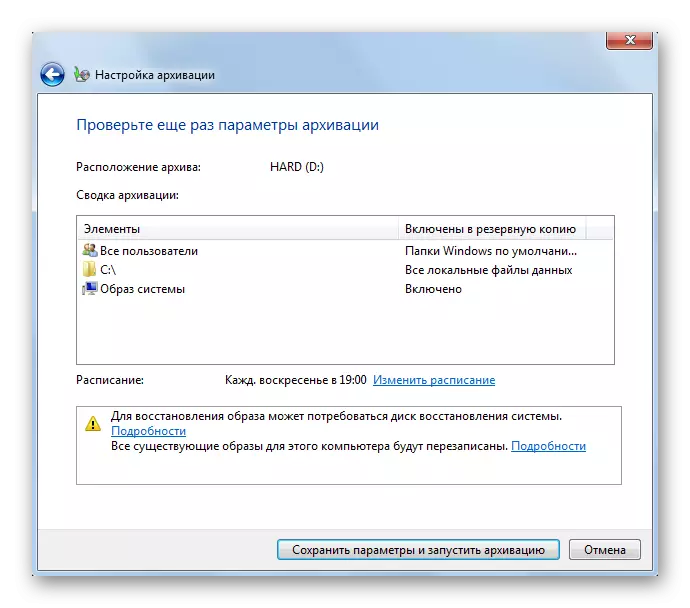
- The last window displays all configured information to check. Note that the task will automatically be created for periodic data archiving. It can be disabled in the same window.
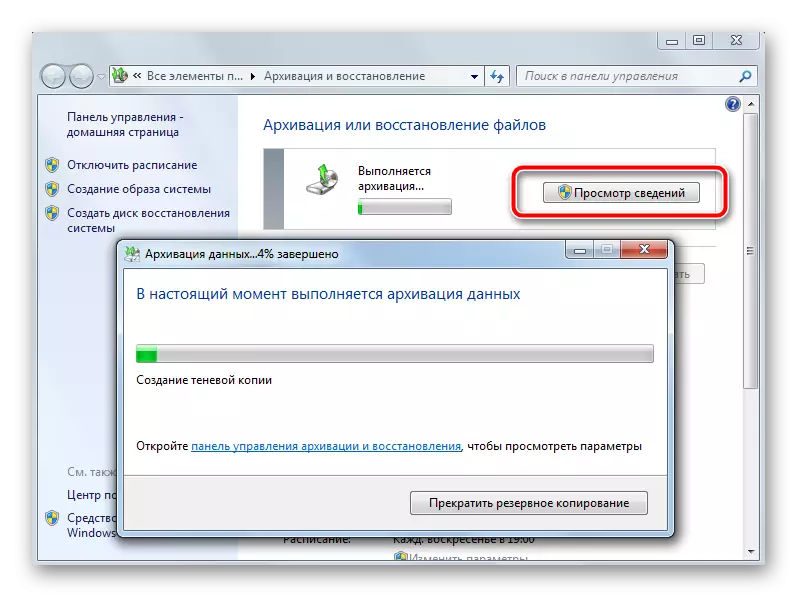
- The tool will begin its work. To view the progress of data copying, click on the "View information" button.
- The operation will take some time, the computer will use quite problematic, because this tool consumes a sufficiently large amount of resources.
Although the operating system has built-in functionality for creating backup copies, it does not cause sufficient trust. If the recovery points are very often charged by the experimenters, then problems often arise with the recovery of archived data. The use of third-party software significantly increases the reliability of copying, eliminates manual labor, automating the process, and provides enough accurate setting for maximum convenience.
Backups are desirable to store on other sections, ideally on third-party physically shut-off media. In cloud services, backup download only encrypted reliable password for secure storage of personal data. Regularly create new copies of the system to avoid loss of valuable data and settings.