
When editing photos in Photoshop, the election of the model plays the very last role. It is the eyes that can become the most striking element of the composition.
This lesson dedicate how to highlight the eyes in the picture using the photoshop editor.
Help
We divide work on the eyes into three stages:- Lightening and contrast.
- Strengthen texture and sharpness.
- Adding volume.
Lighten the iris
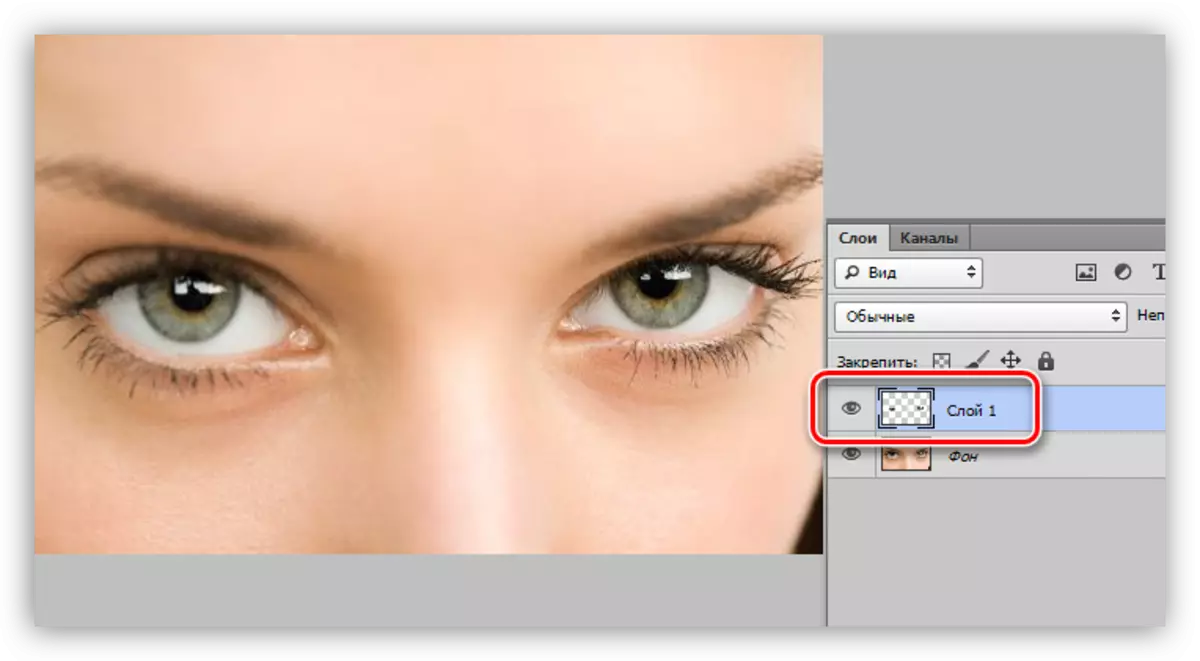
In order to start working with a rainbow shell, it must be separated from the main image and copied to a new layer. You can do this in any convenient way.
Lesson: How to cut an object in photoshop
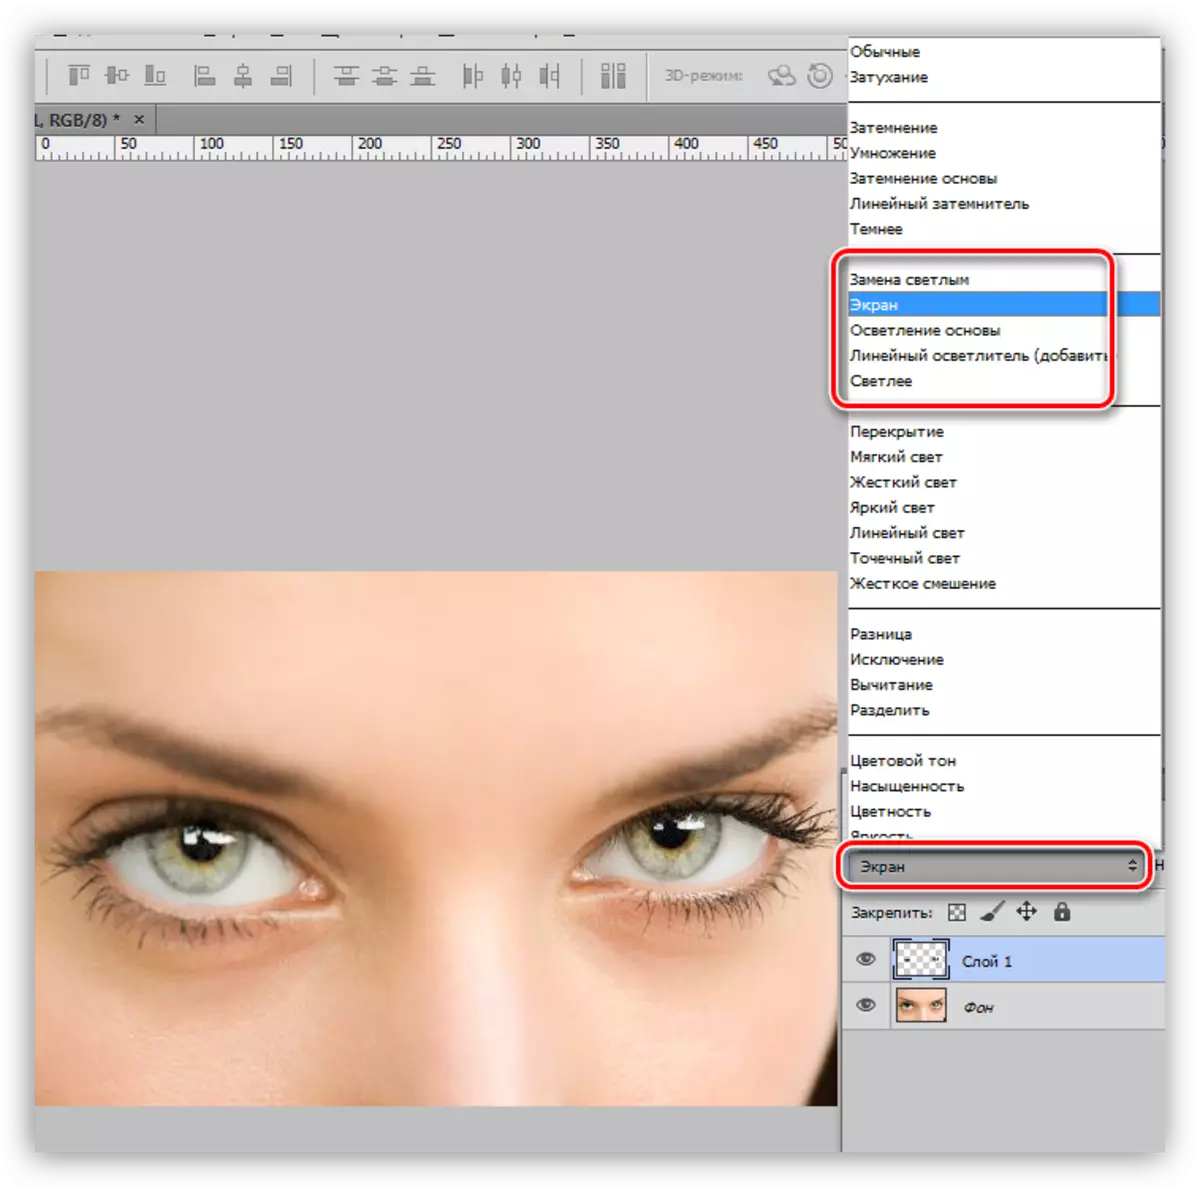
- To clarify the iris, change the overlay mode for the layer with the cut-off eyes to the "screen" or on any other of this group. It all depends on the source image - the darker the source, the more powerful impact you can implement.
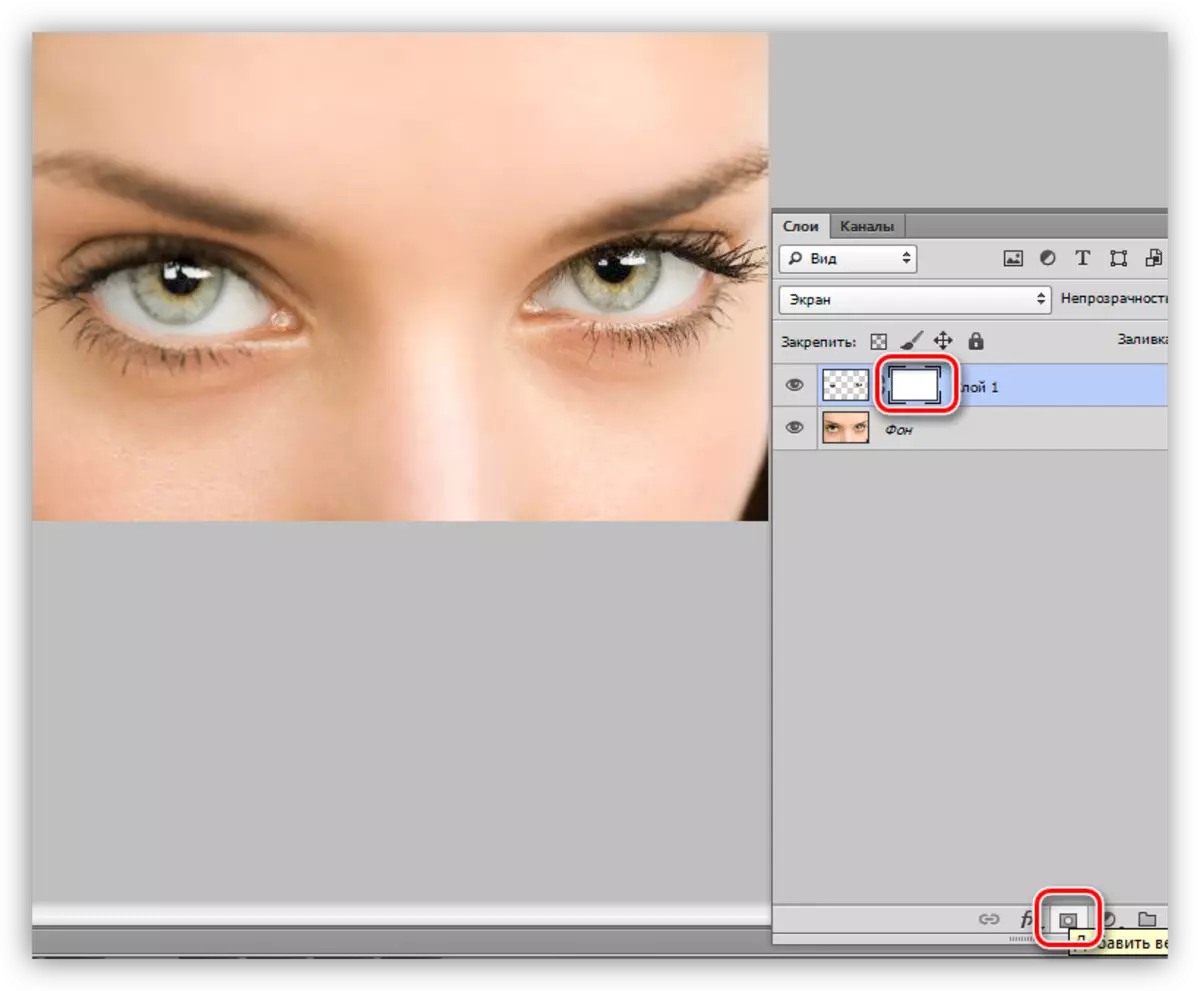
- Apply to the white mask layer.
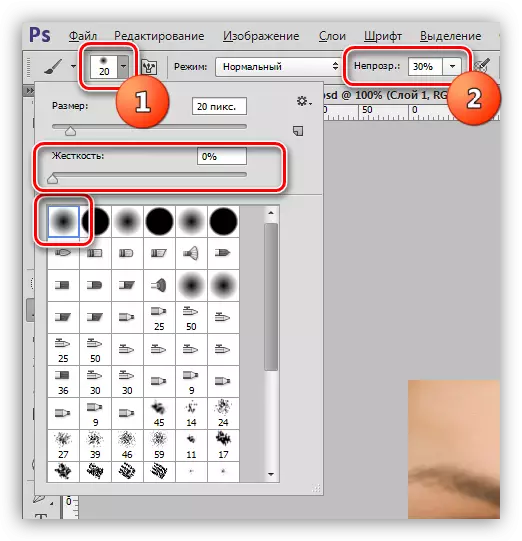
- Activate the brush.

On the top of the parameters, select the tool with rigidity of 0%, and the opacity is adjusted by 30%. Color brush black.
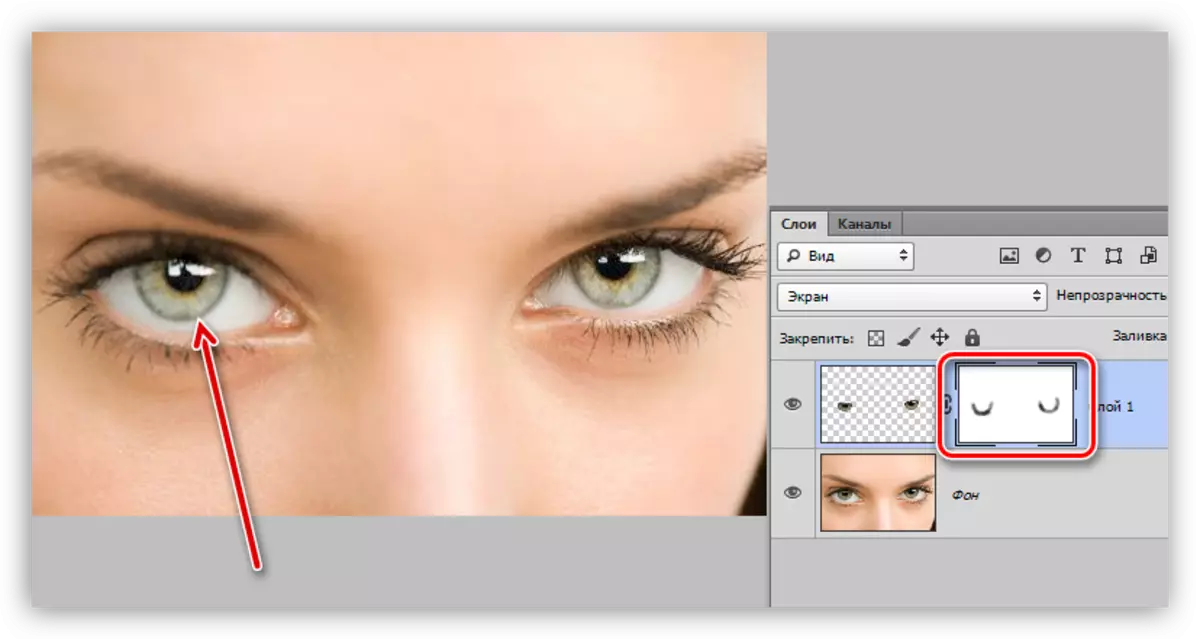
- Launching on the mask, carefully score the boundary of the iris, washing part of the loop along the contour. As a result, we should get a dark rim.
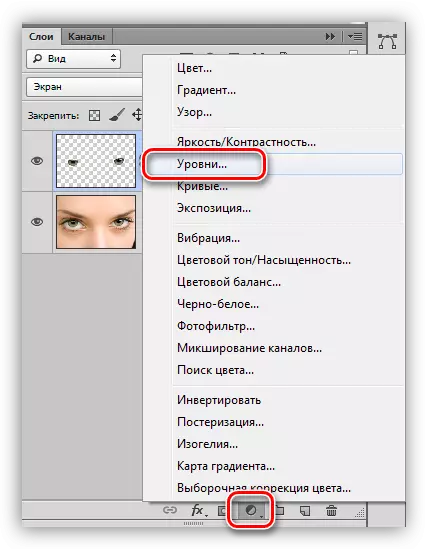
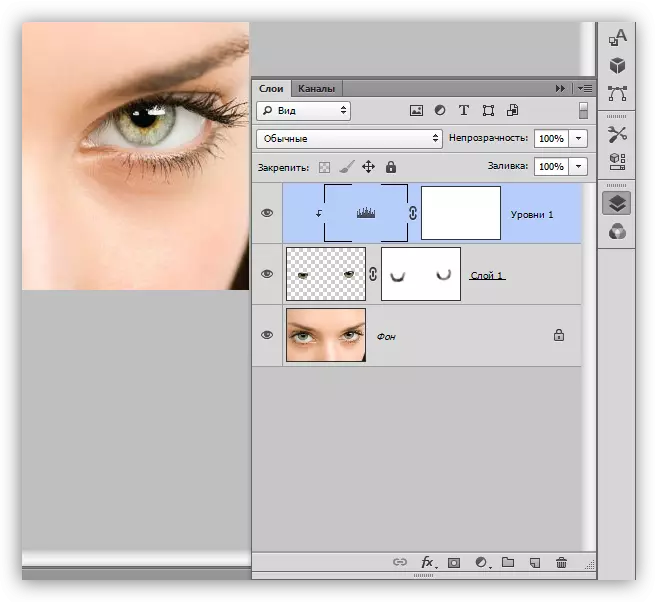
- To increase the contrast, apply the correction layer "Levels".
Extreme engines adjust the saturation of the shadow and the luminosity of light areas.
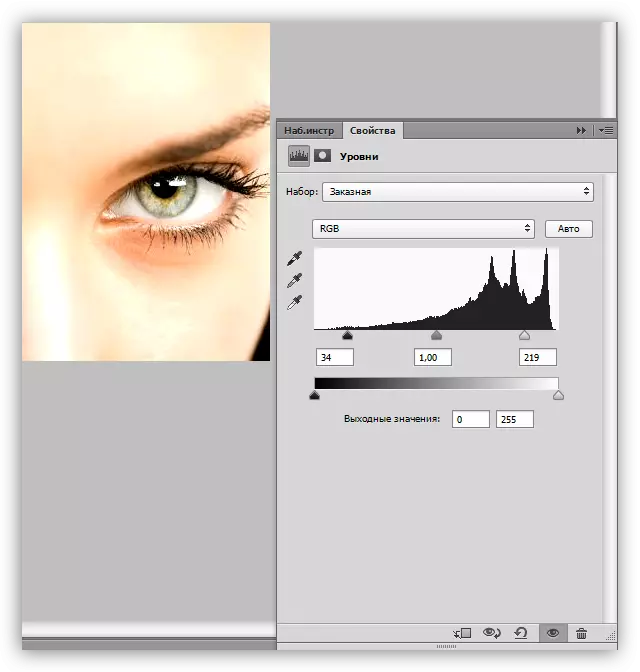
In order for the "levels" applied only to the eyes, activate the "Binding" button.

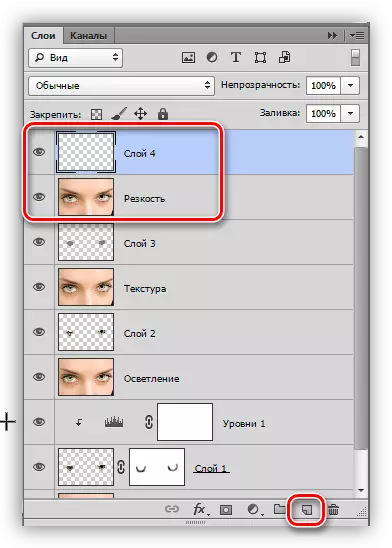
The palette of the layers after clarification should look like this:
Texture and sharpness
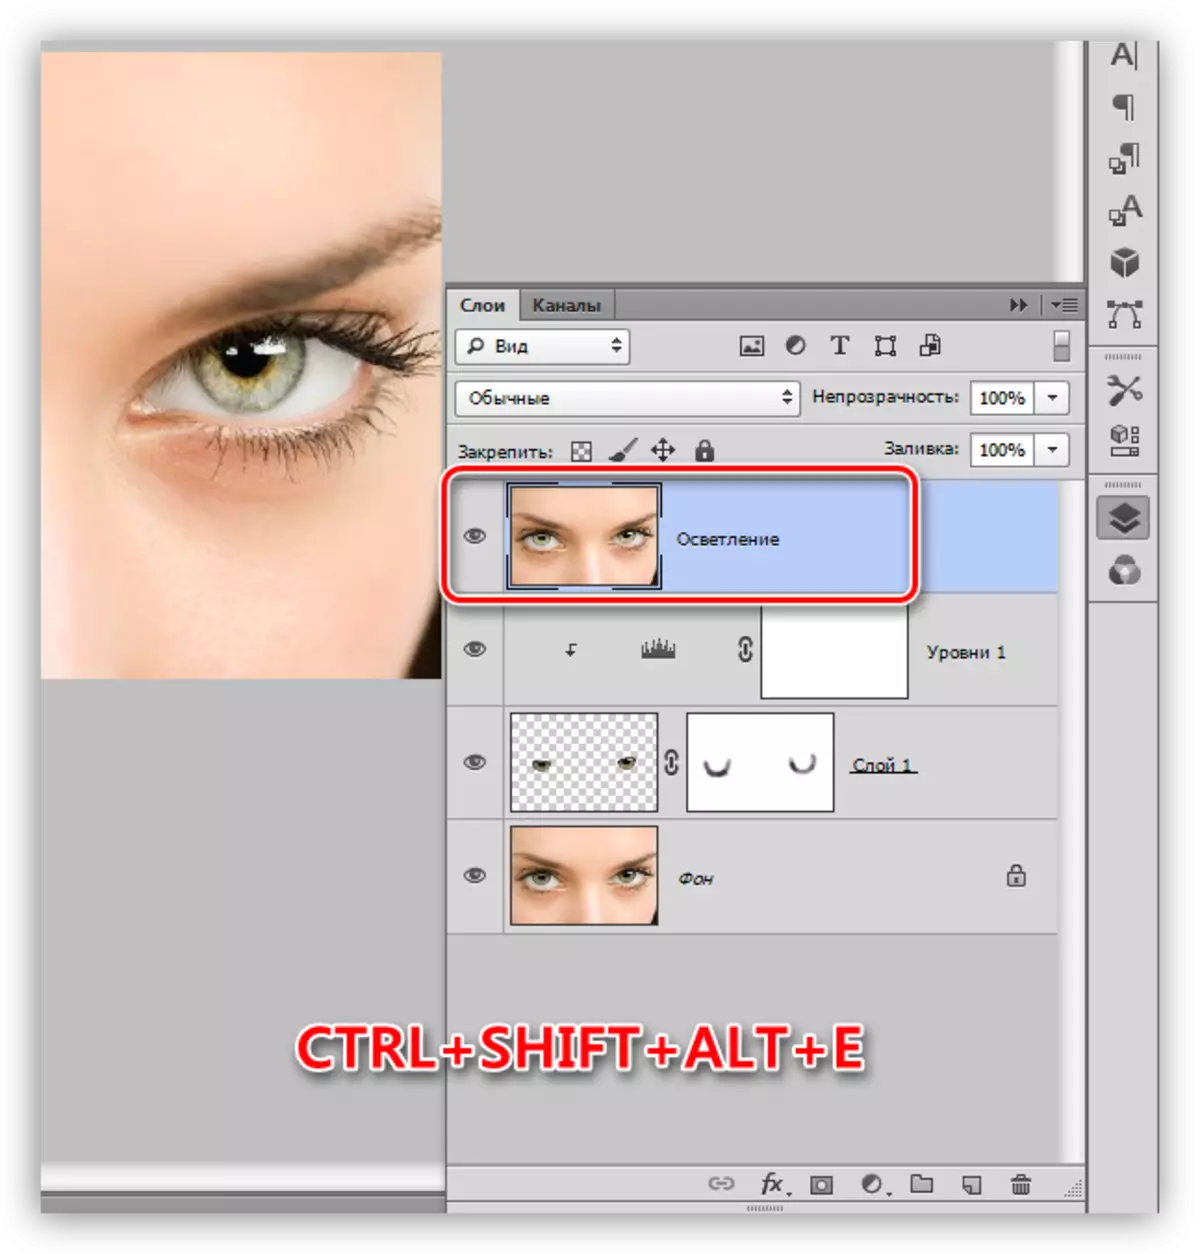
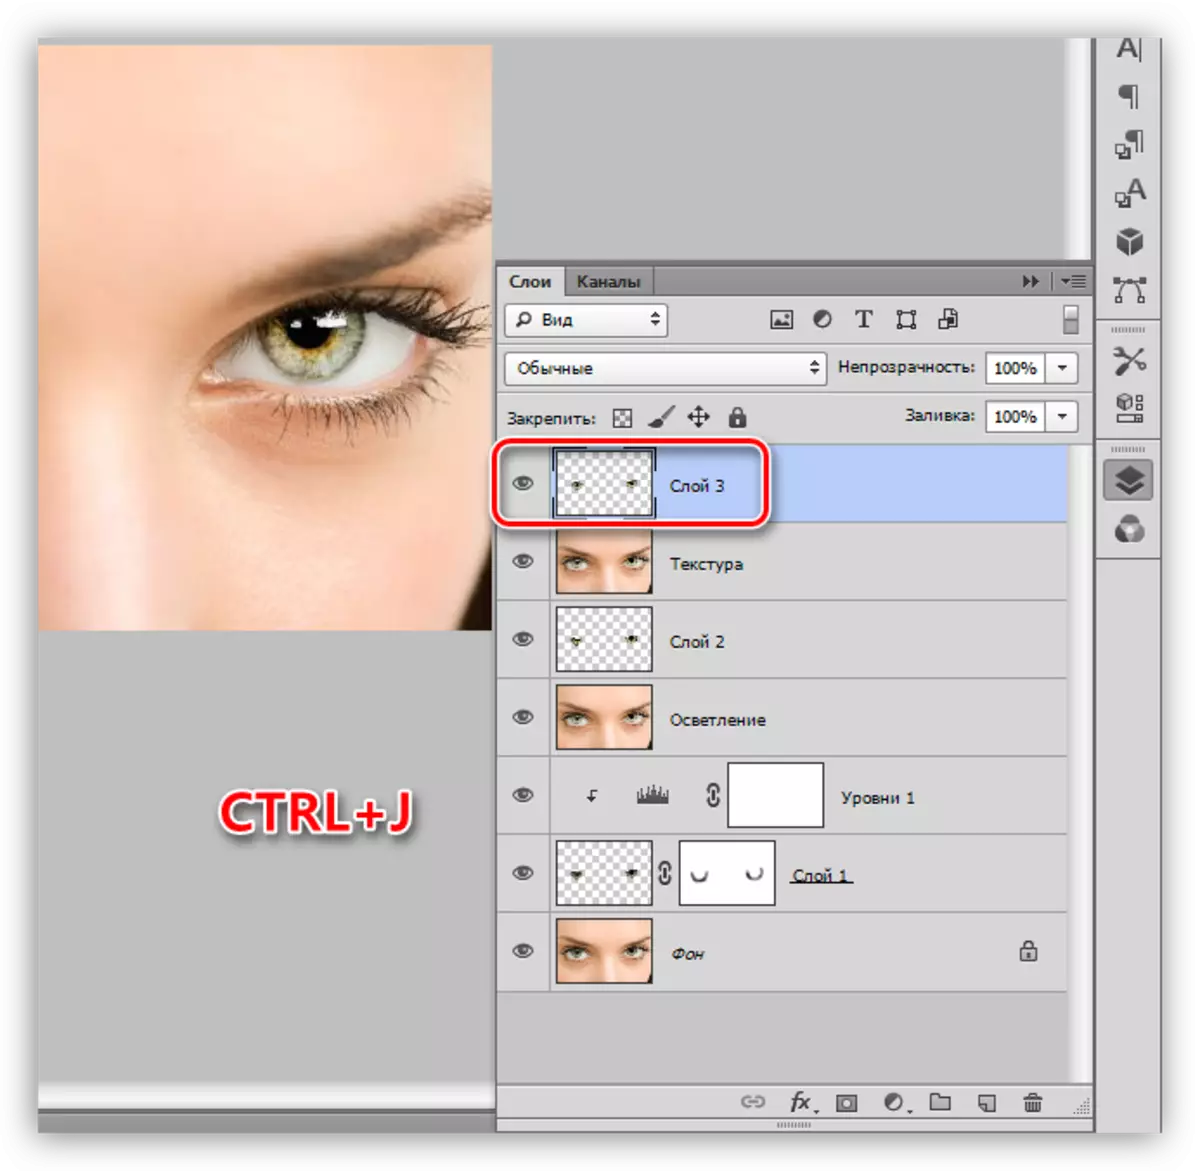
To continue the work, we will need to make a copy of all visible layers with the CTRL + ALT + SHIFT + E keys. Copies Let's call "Lightening".
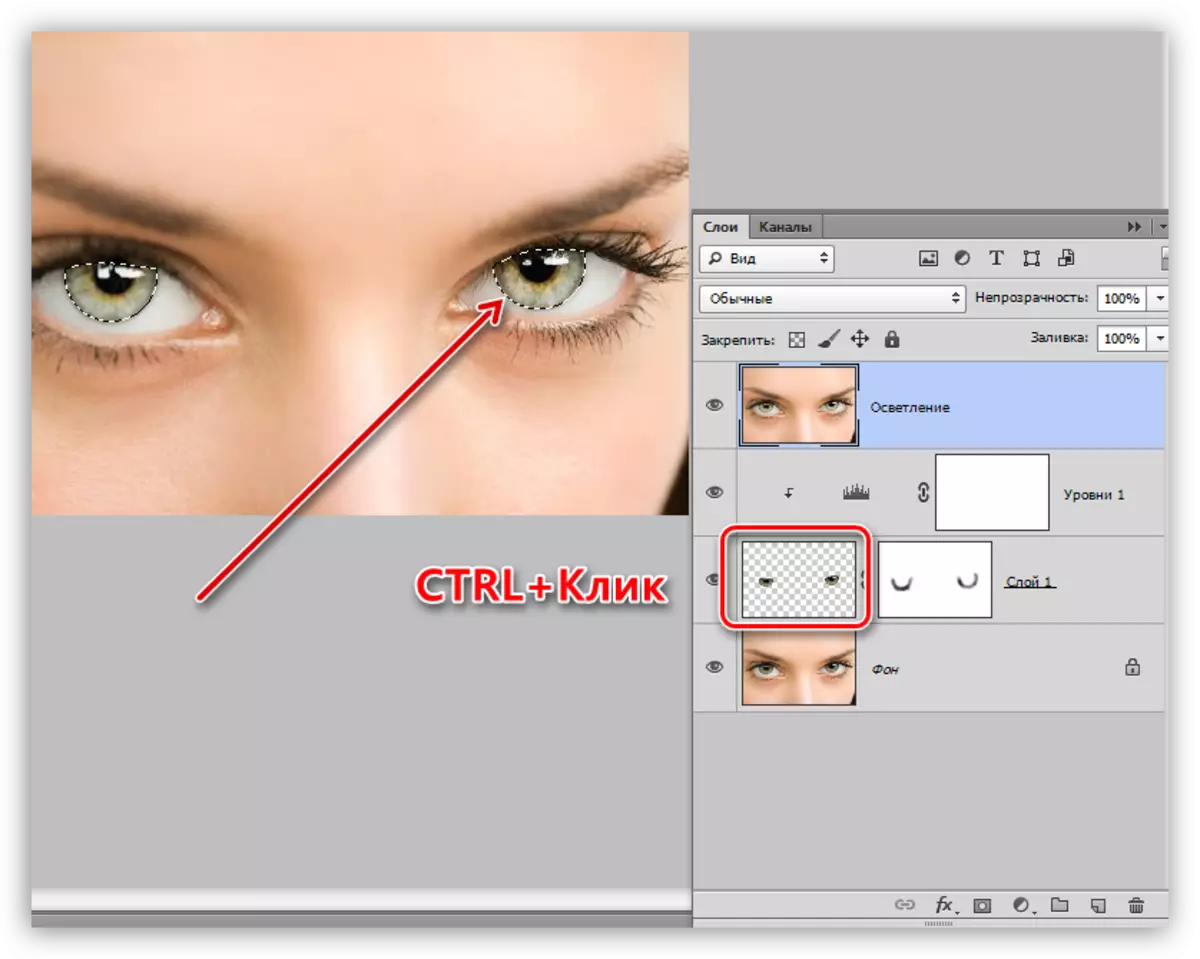
- Click on a miniature layer with a copied iris with a pinned Ctrl key, uploading the selected area.
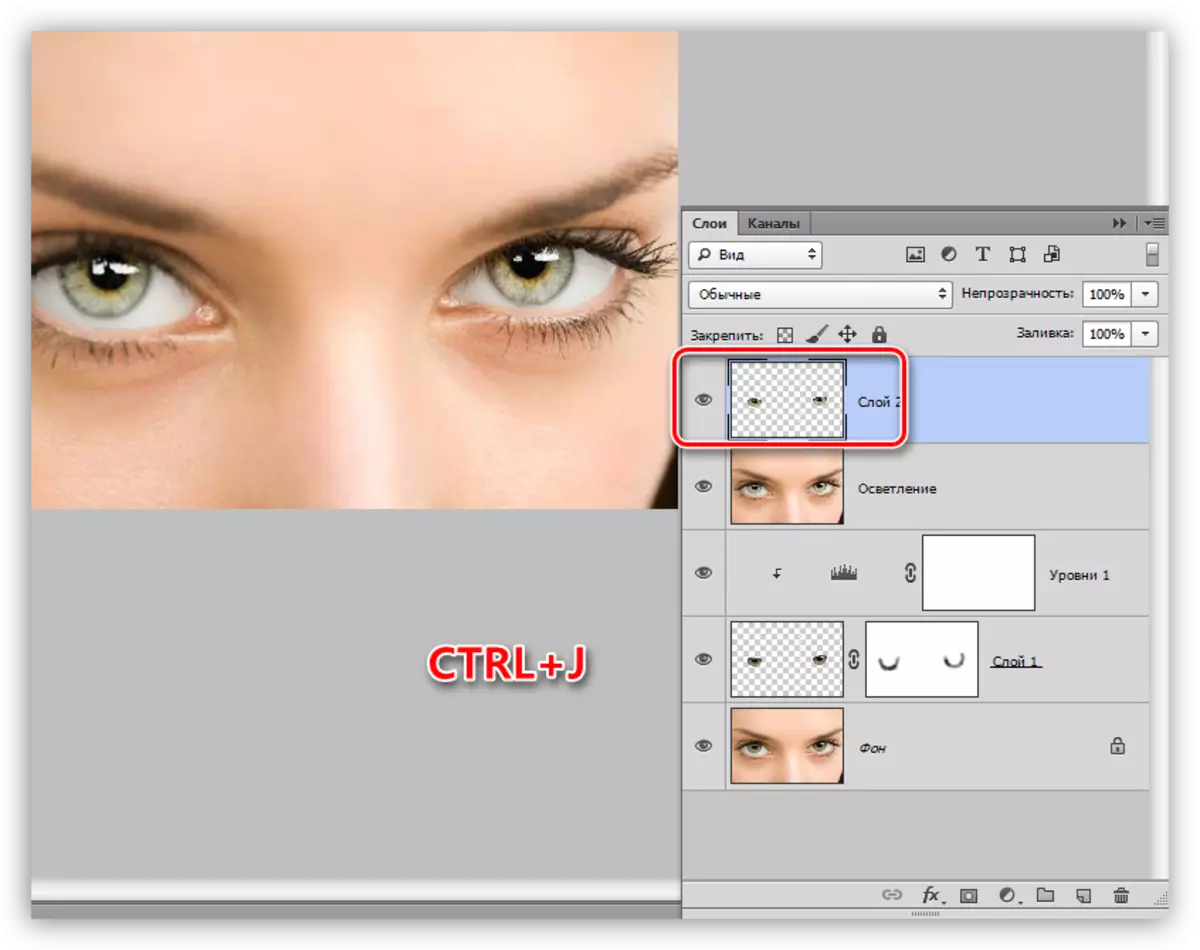
- Copy the selection to the new layer of the hot keys Ctrl + J.
- Next, we will force the texture using the "mosaic pattern" filter, which is in the "Texture" section of the corresponding menu.
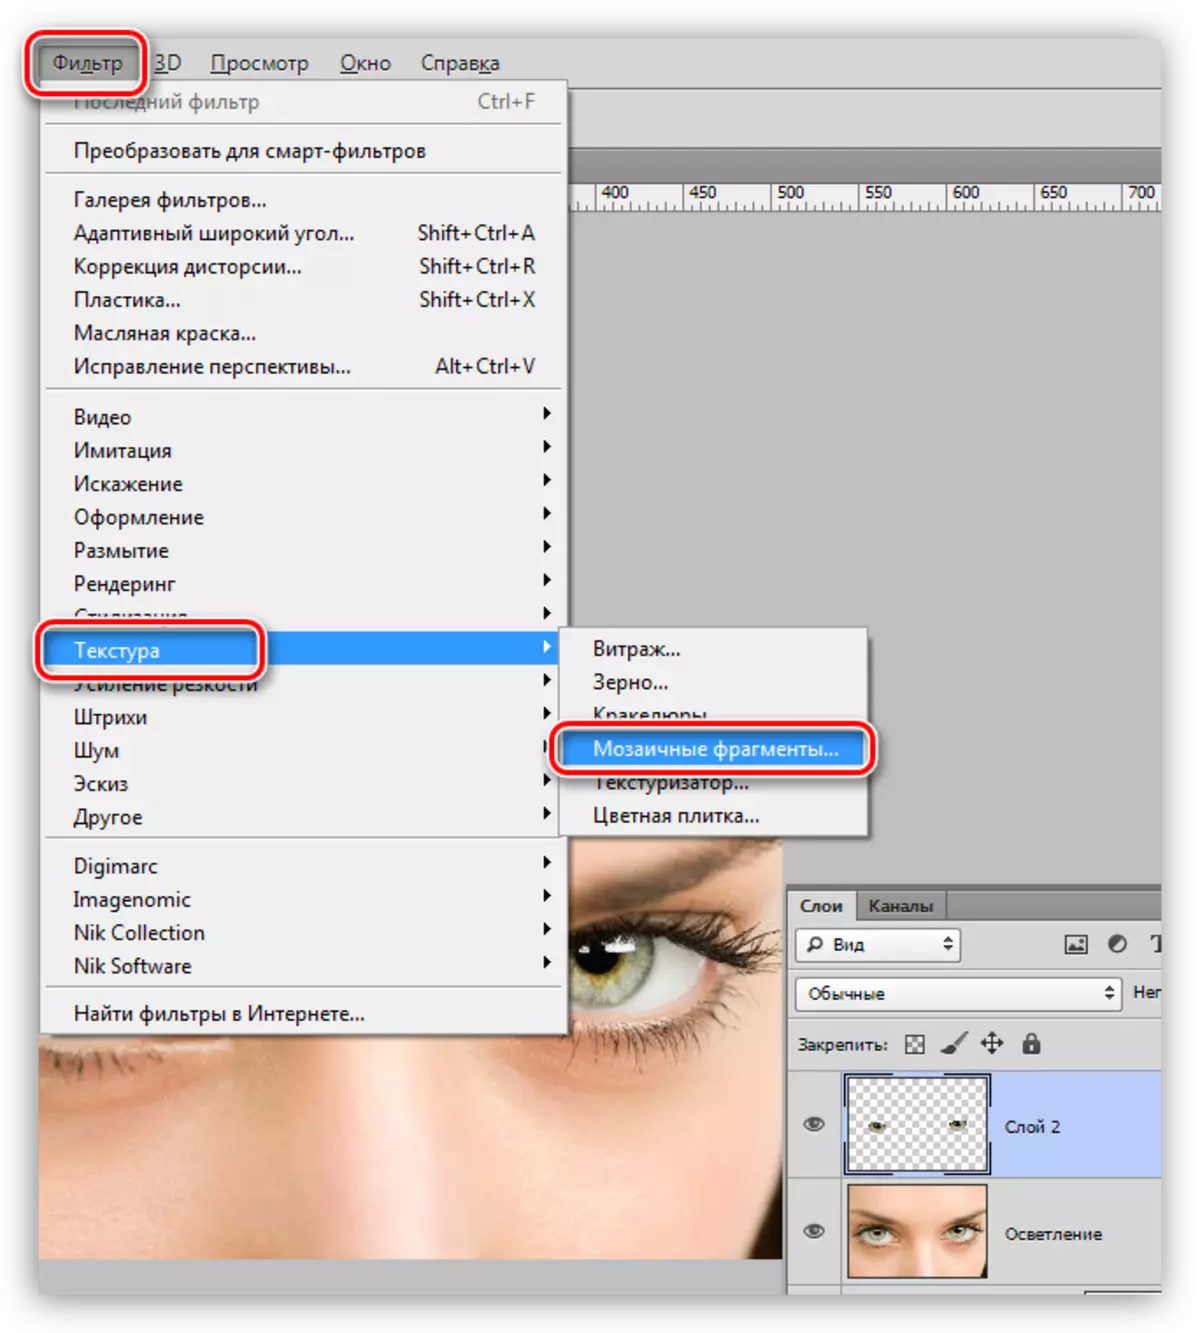
- With the filter setting will have to be a little tinker, because each picture is unique. Look at the screenshot in order to understand how the result should happen.

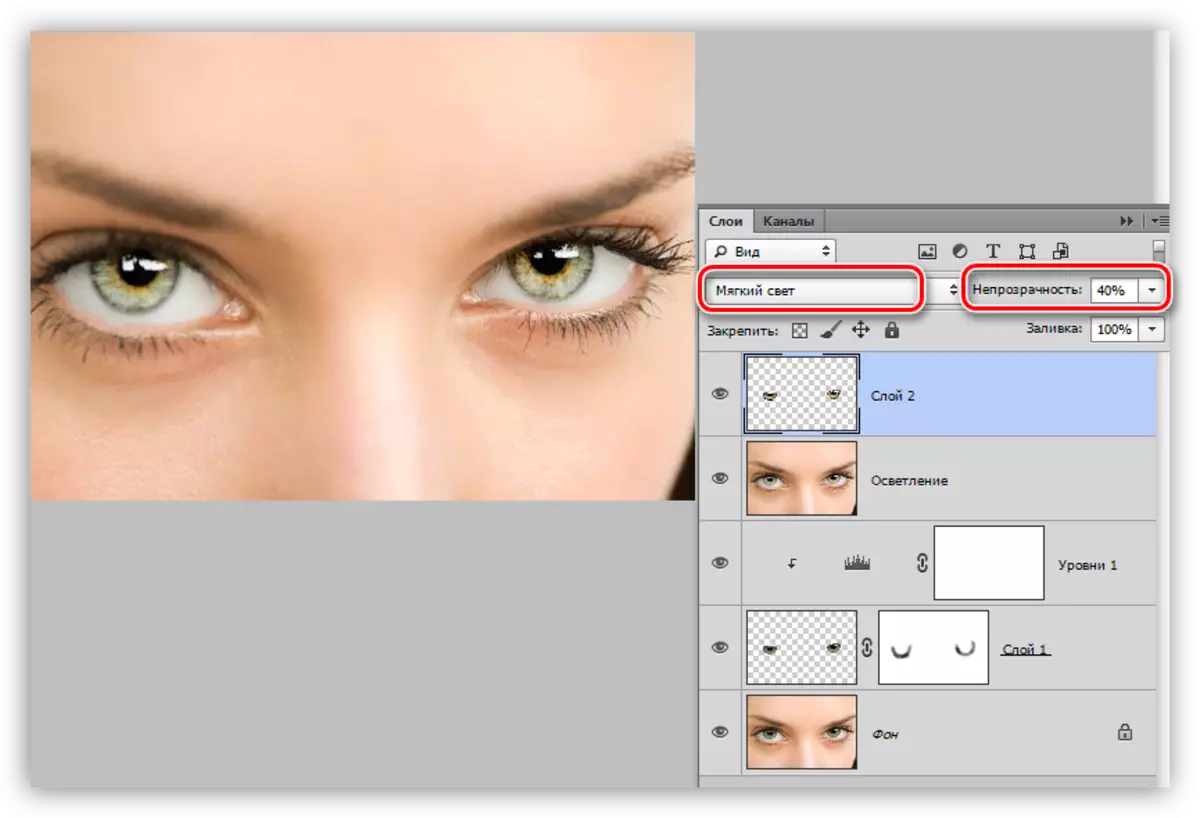
- Change the mixing mode for a layer with the applied filter to "soft light" and lower opacity for a more natural effect.
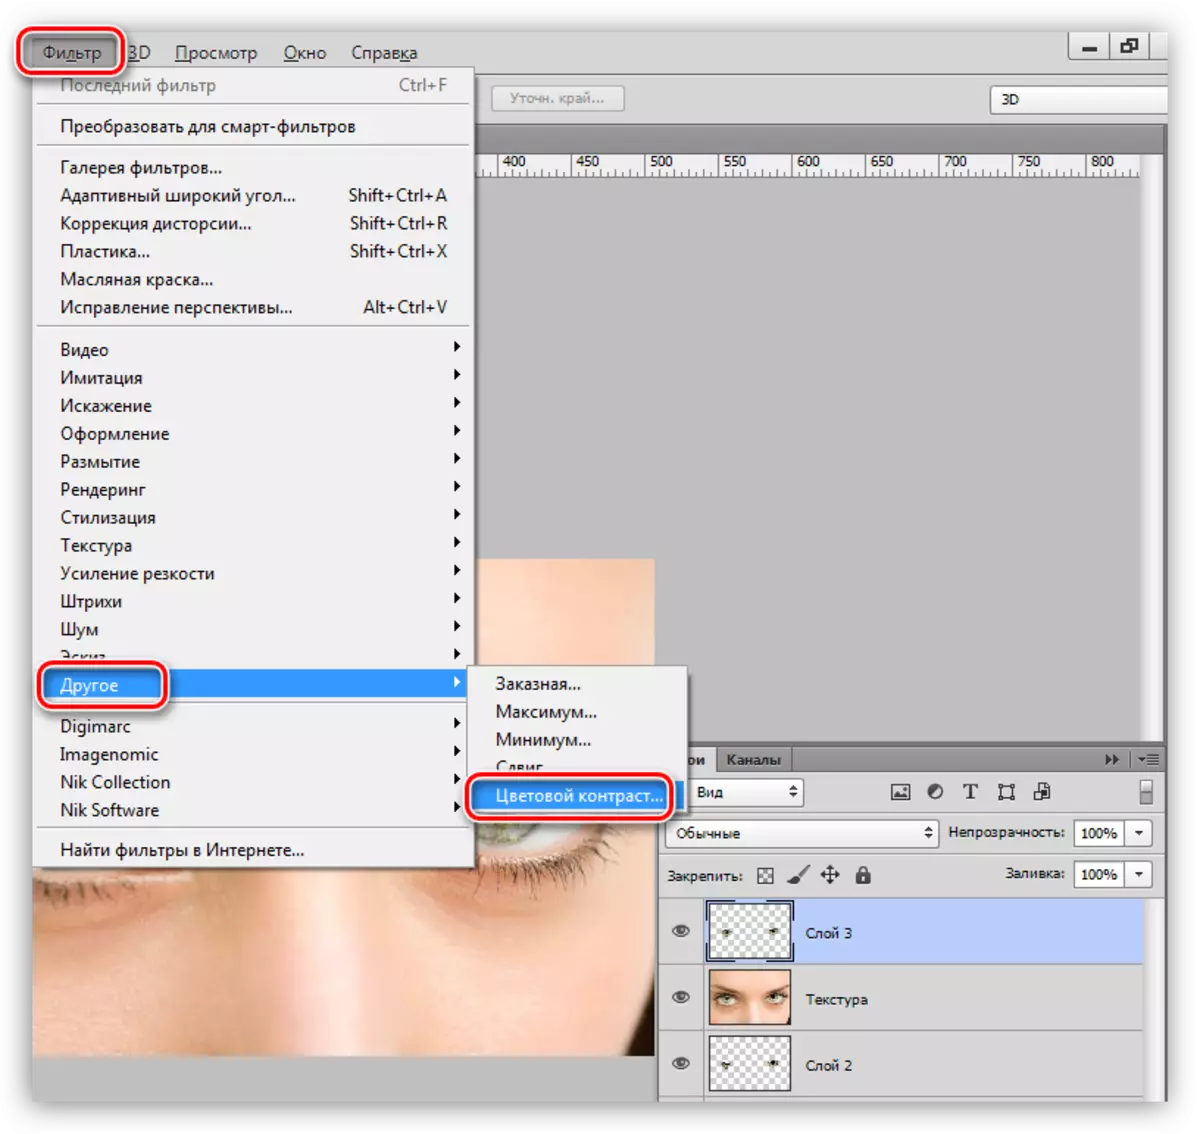
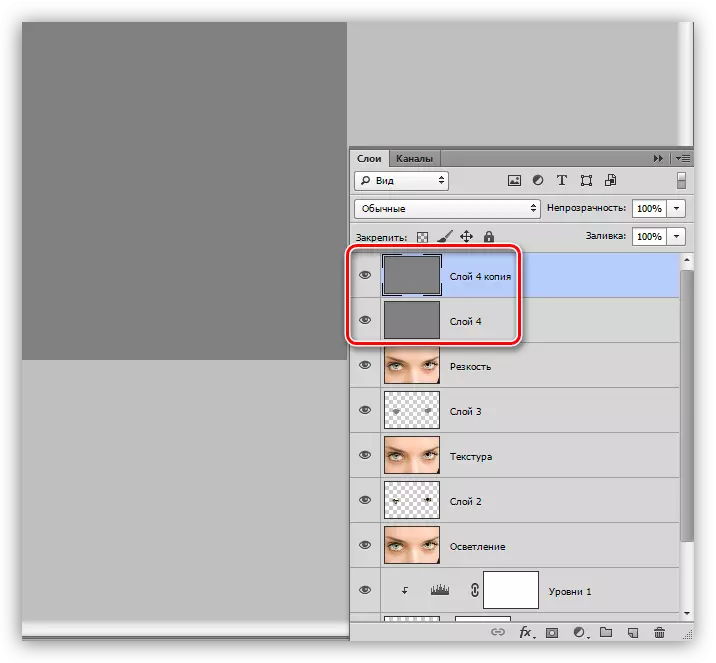
- Create a combined copy again (Ctrl + Alt + Shift + E) and let's call it "texture".
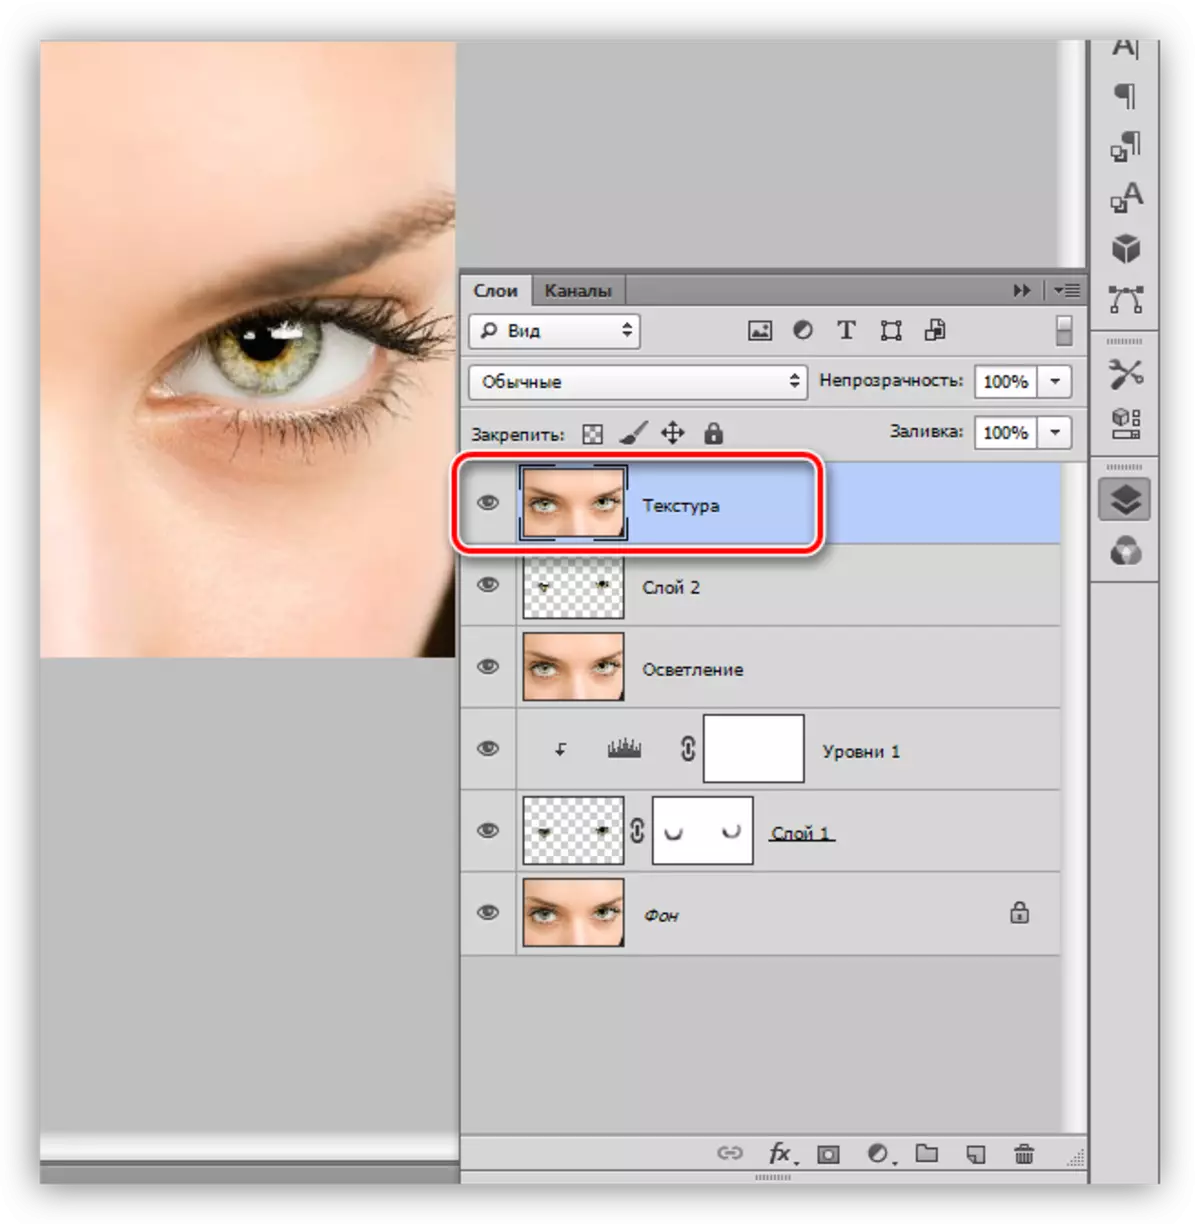
- We load the selected area by clicking on the clamping Ctrl on any layer with the cut-off iris.
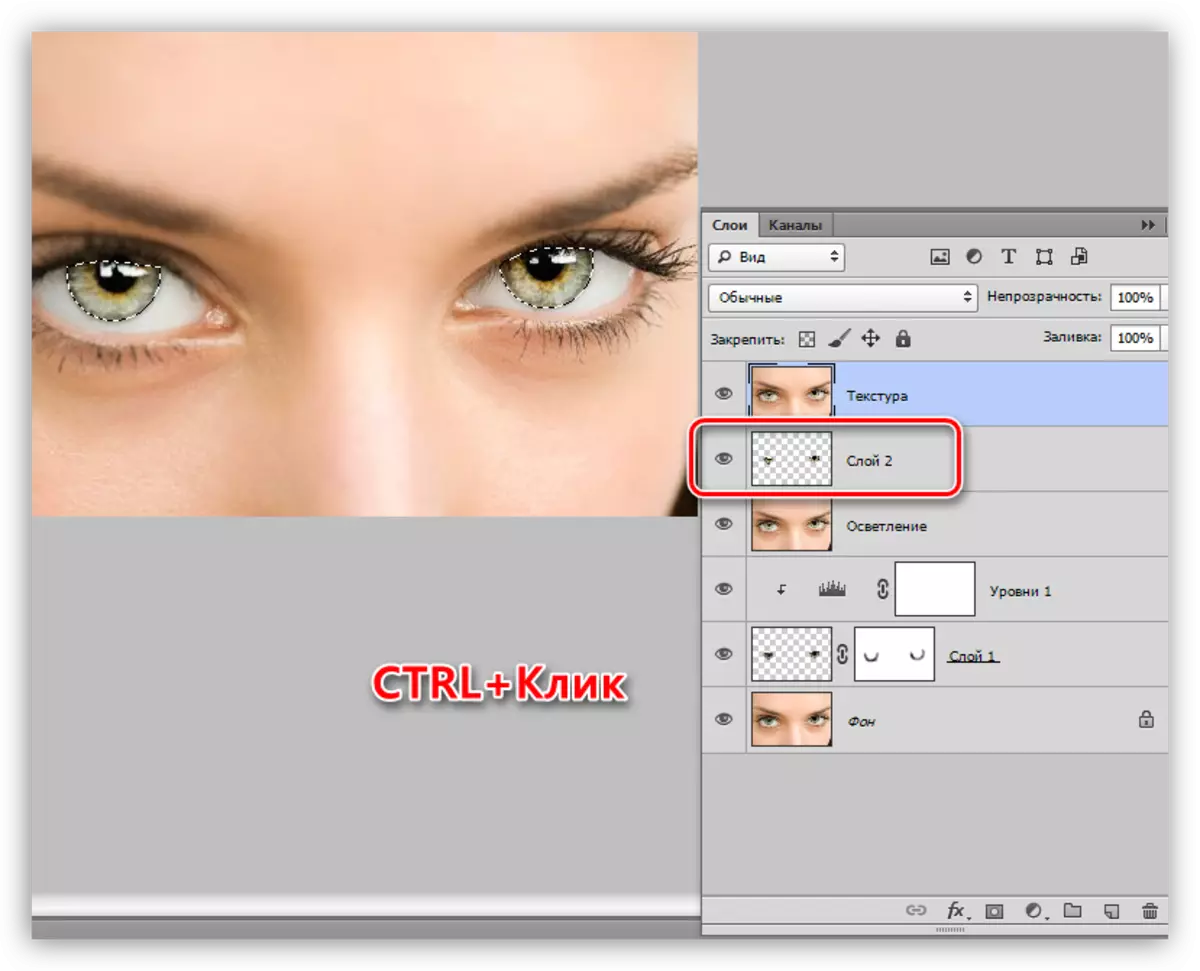
- We again make copy allocation to a new layer.
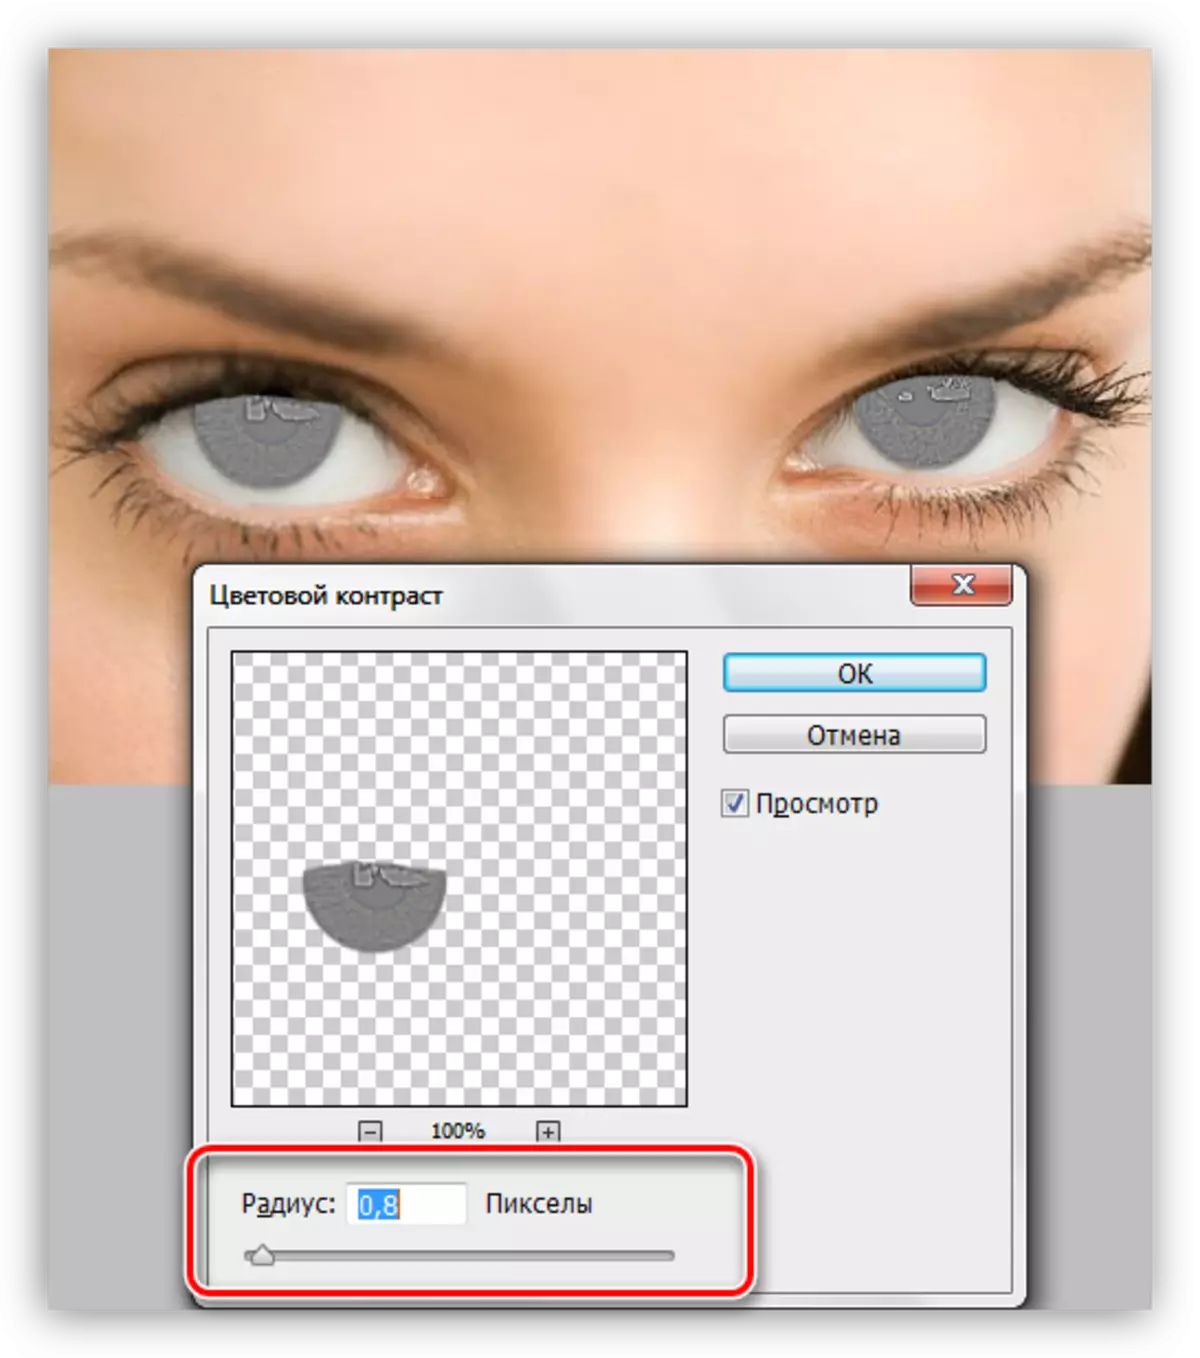
- Sharpness will cause a filter called "Color Contrast". To do this, open the "Filter" menu and move on to the "Other" block.
- The radius value makes such a small detail as much as possible.
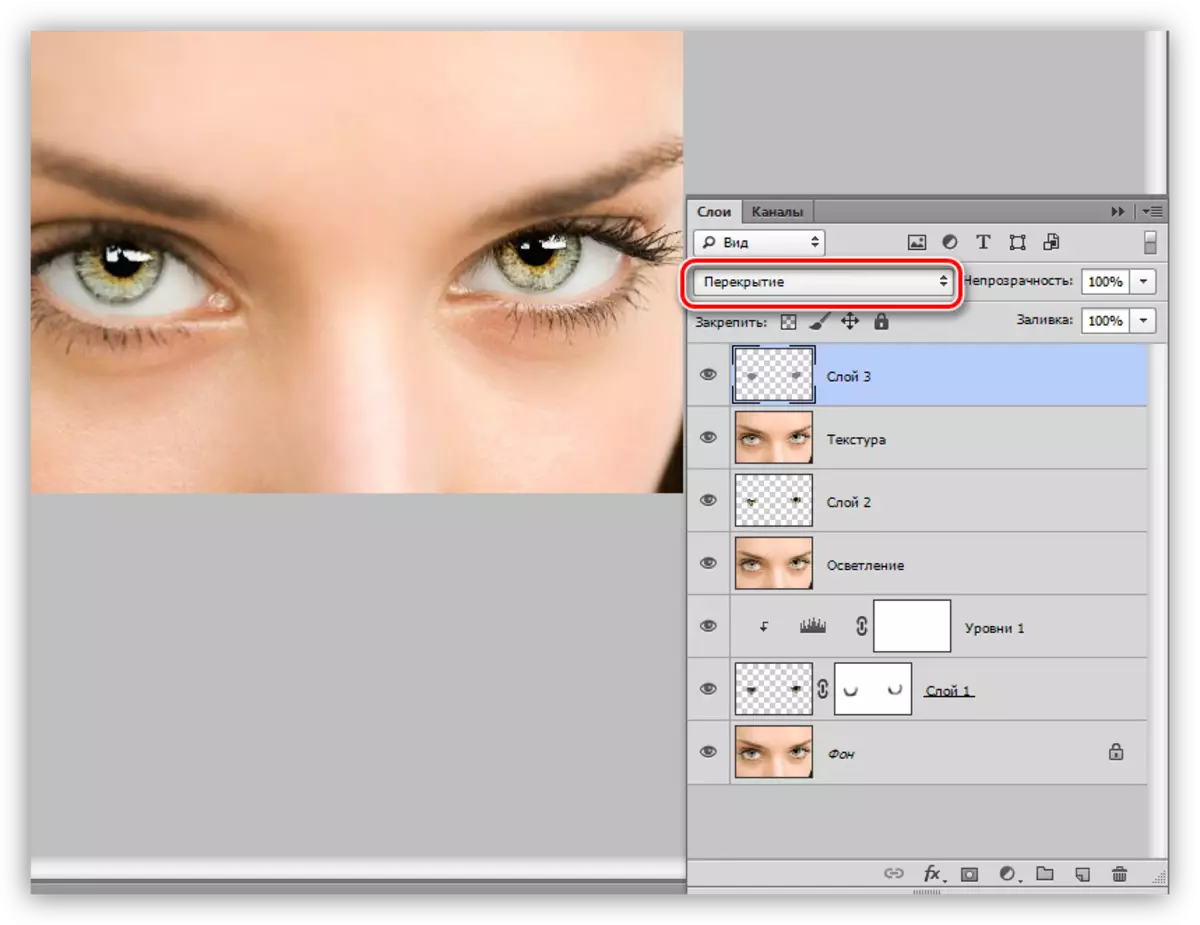
- Go to the layers palette and change the imposition mode to the "soft light" or "overlap", it all depends on the sharpness of the original image.
Volume
To give the look of additional volume, we use the Dodge-N-Burn technique. With it, we can manually evil or darken the necessary sections.
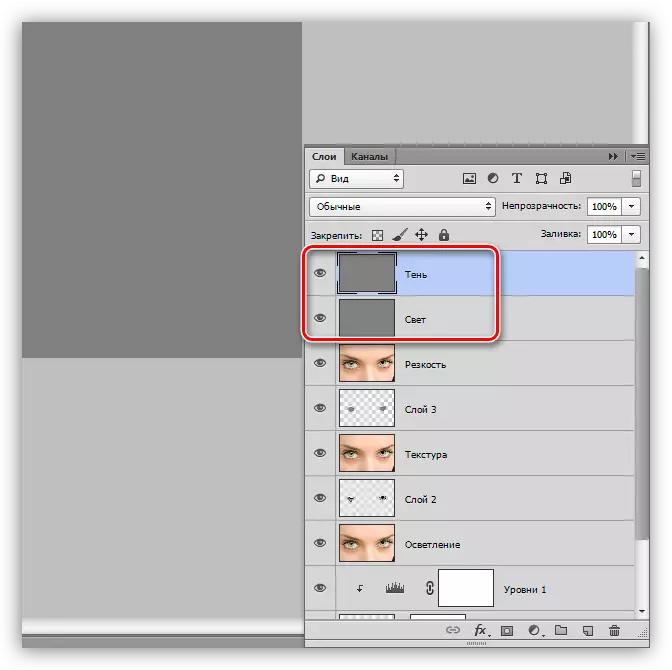
- Again, make a copy of all the layers and call it "sharpness". Then create a new layer.
- In the Editing menu, you are looking for the "Fill" item.

- After activating the option, the Settings window opens with the name "Fill". Here, in the "Content" block, choose "50% gray" and click OK.

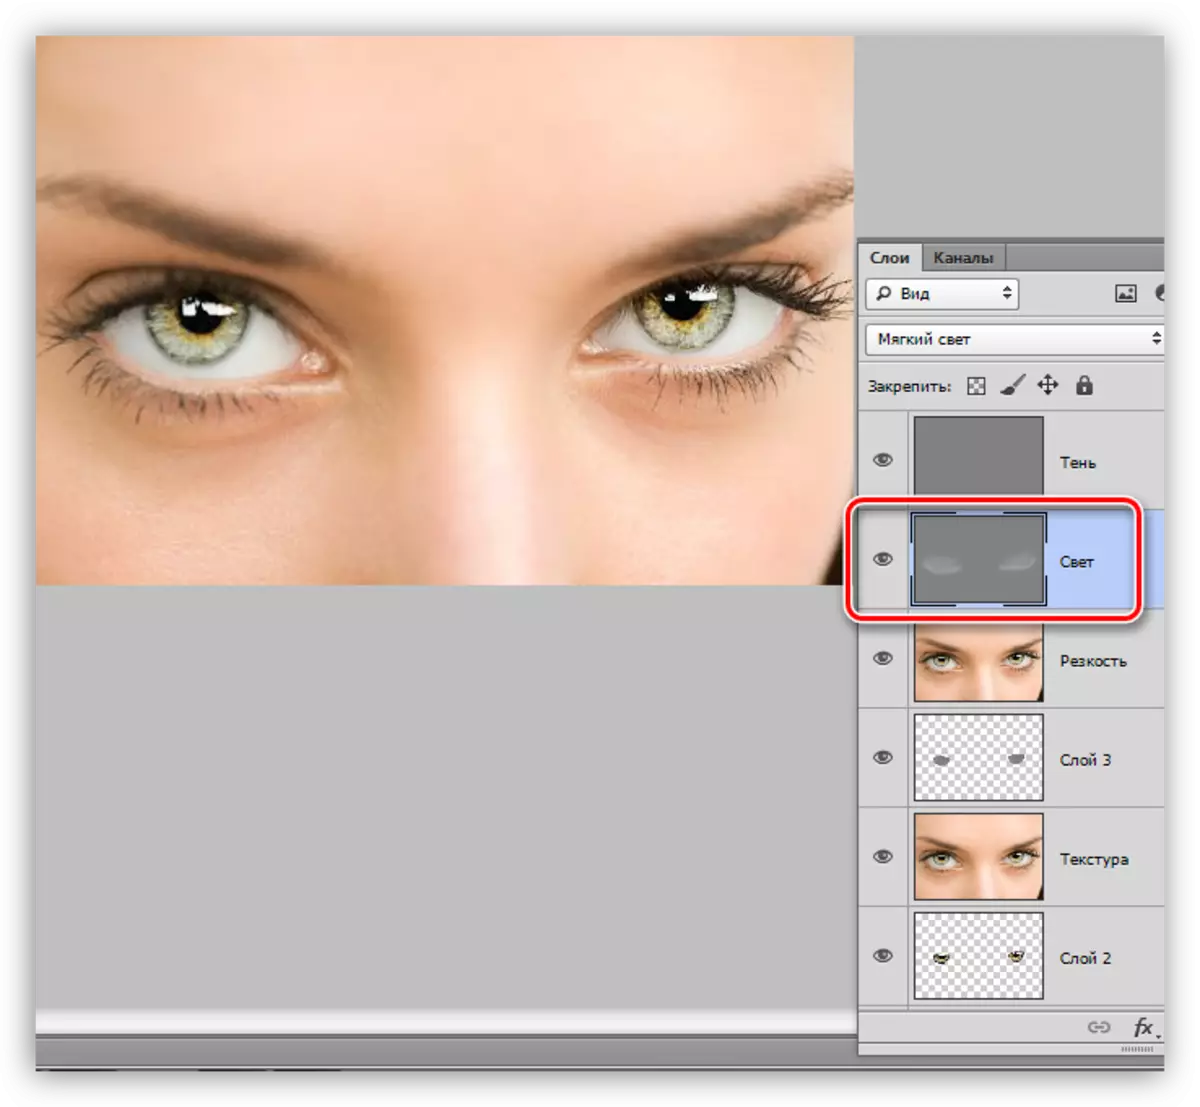
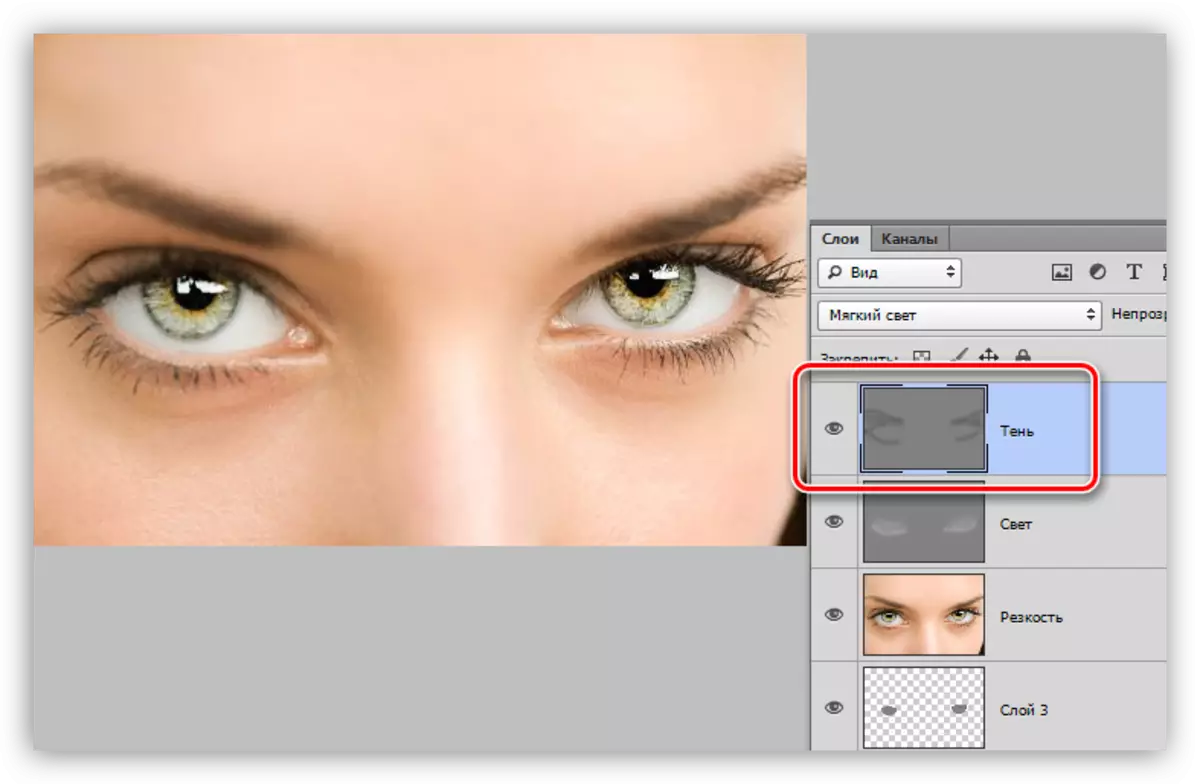
- The resulting layer must be copied (Ctrl + J). We get this kind of palette:
Top layer We call "Shadow", and the lower - "light".
The final step of preparation will be shown by the imposition of each layer on the "soft light".
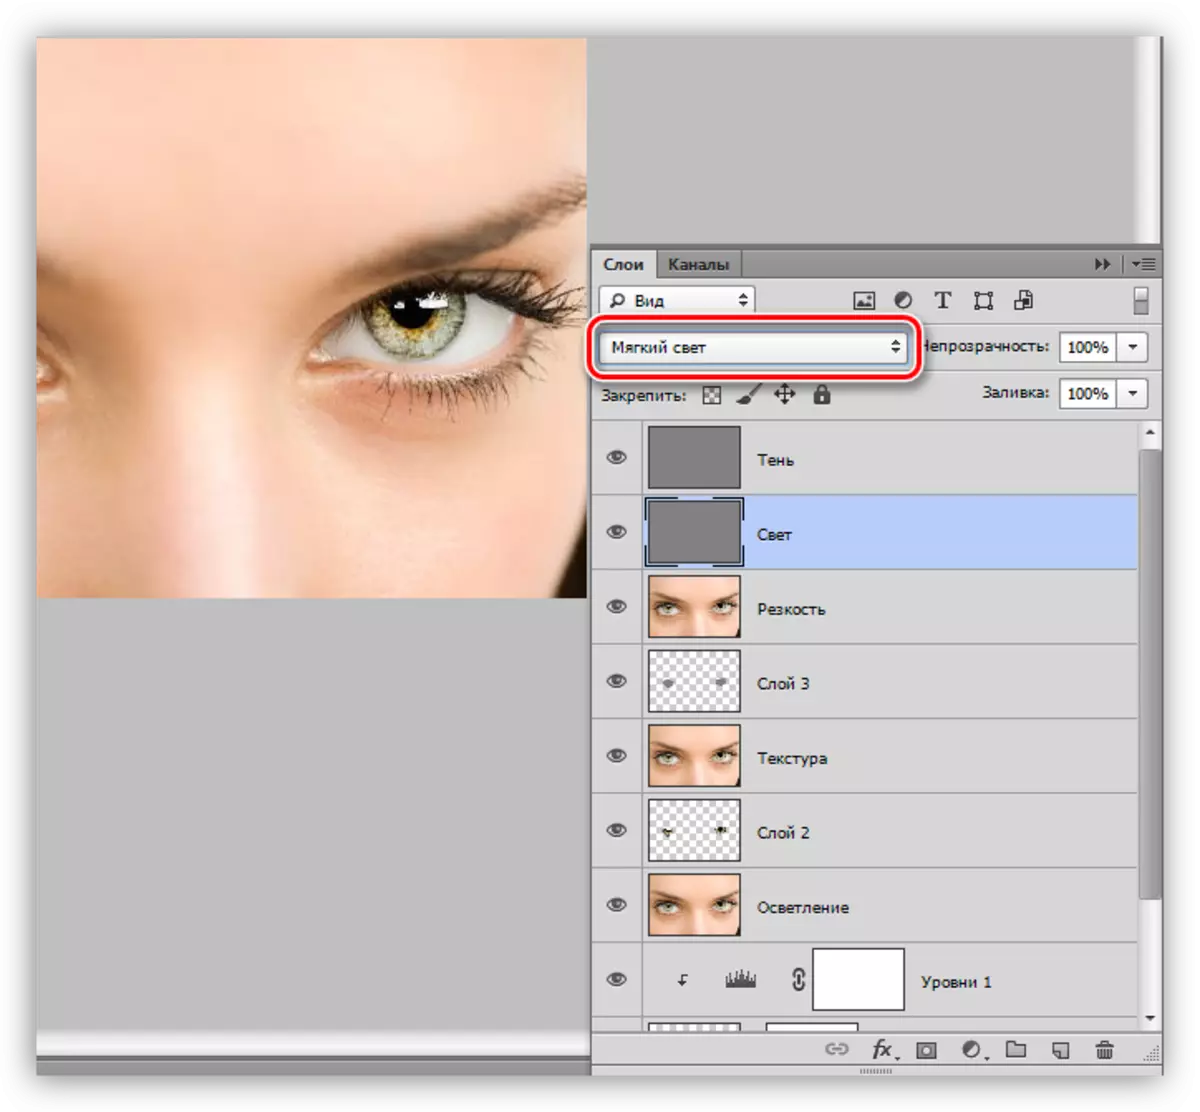
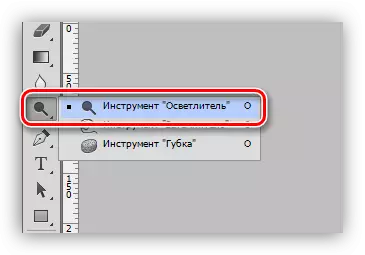
- Find on the left panel tool entitled "Lighter".
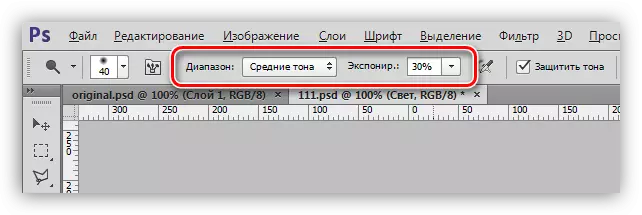
In the settings, specify the "Light Tone" range, exposure - 30%.
- Square brackets we select the diameter of the tool, approximately equal to the iris, and 1 - 2 times we pass along the light sections of the picture on the Light layer. This is the whole eye. With a smaller clarifying corner and lower parts. Do not overdo it.
- Then take the "darkener" tool with the same settings.
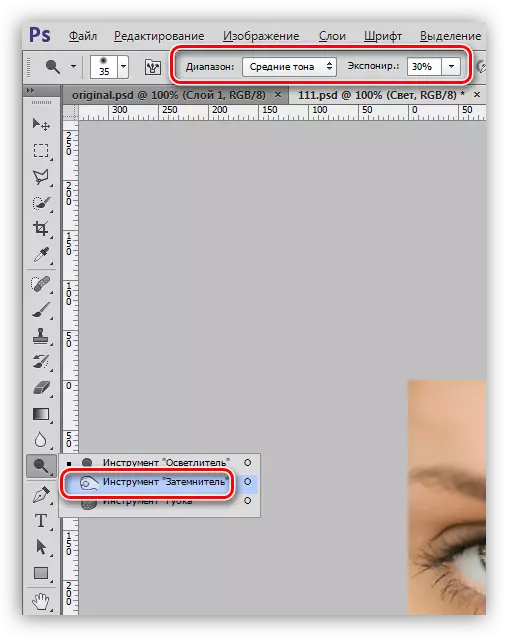
- This time the field of exposure is: eyelashes in the lower eyelid, the area on which the eyebrow and eyelashes of the upper eyelid are. Eyebrows and eyelashes can be emphasized stronger, that is, to punish a larger number of times. Active layer - "Shadow".
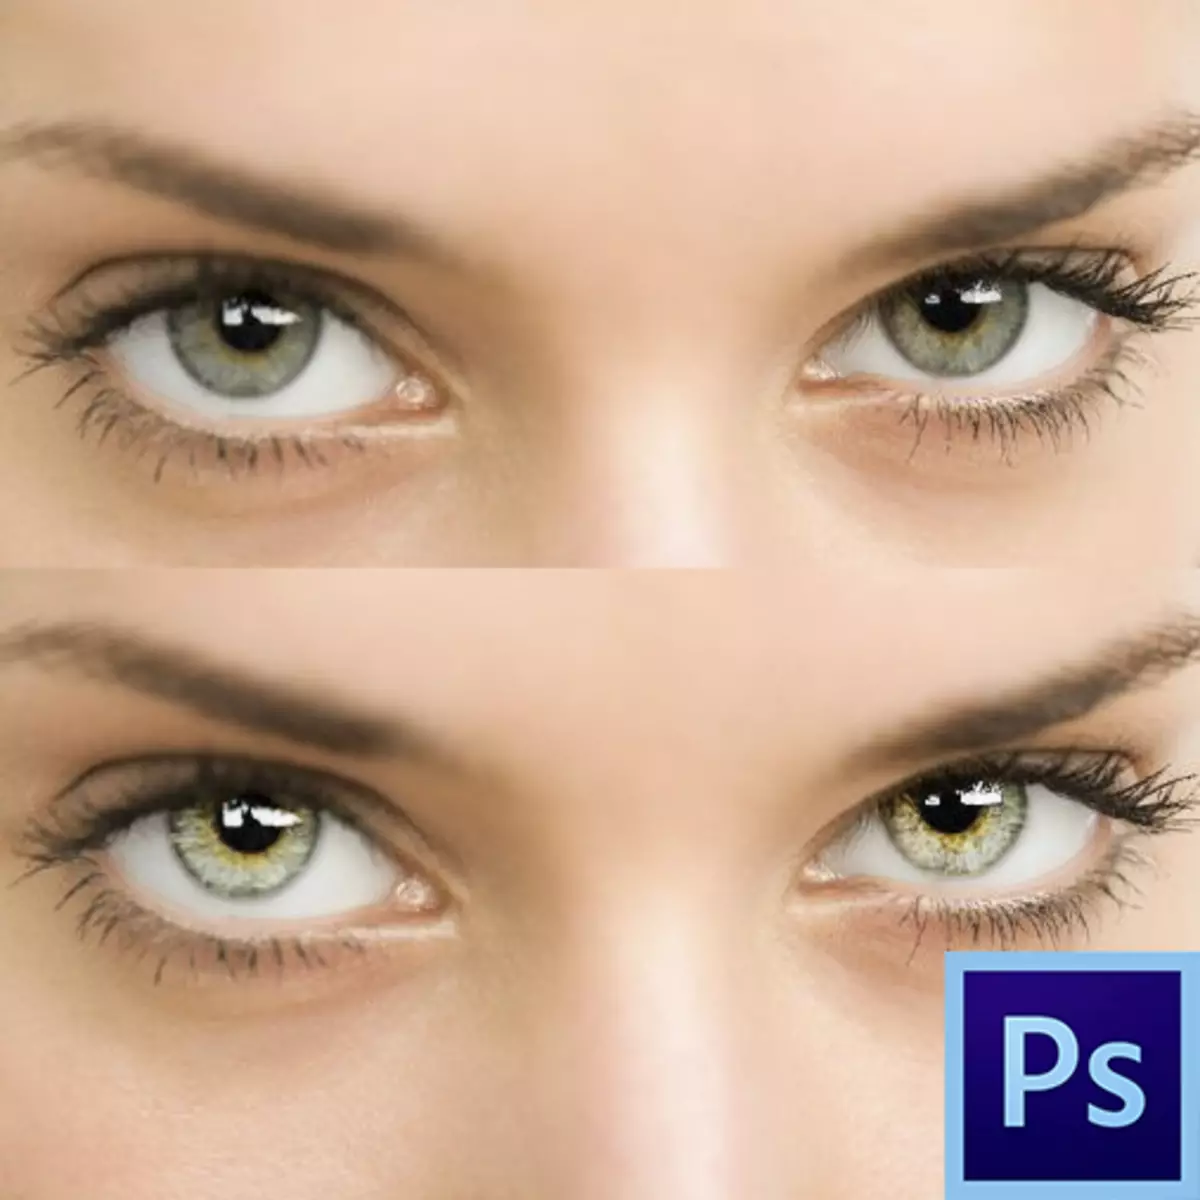
Let's see what was before processing, and what result managed to achieve:
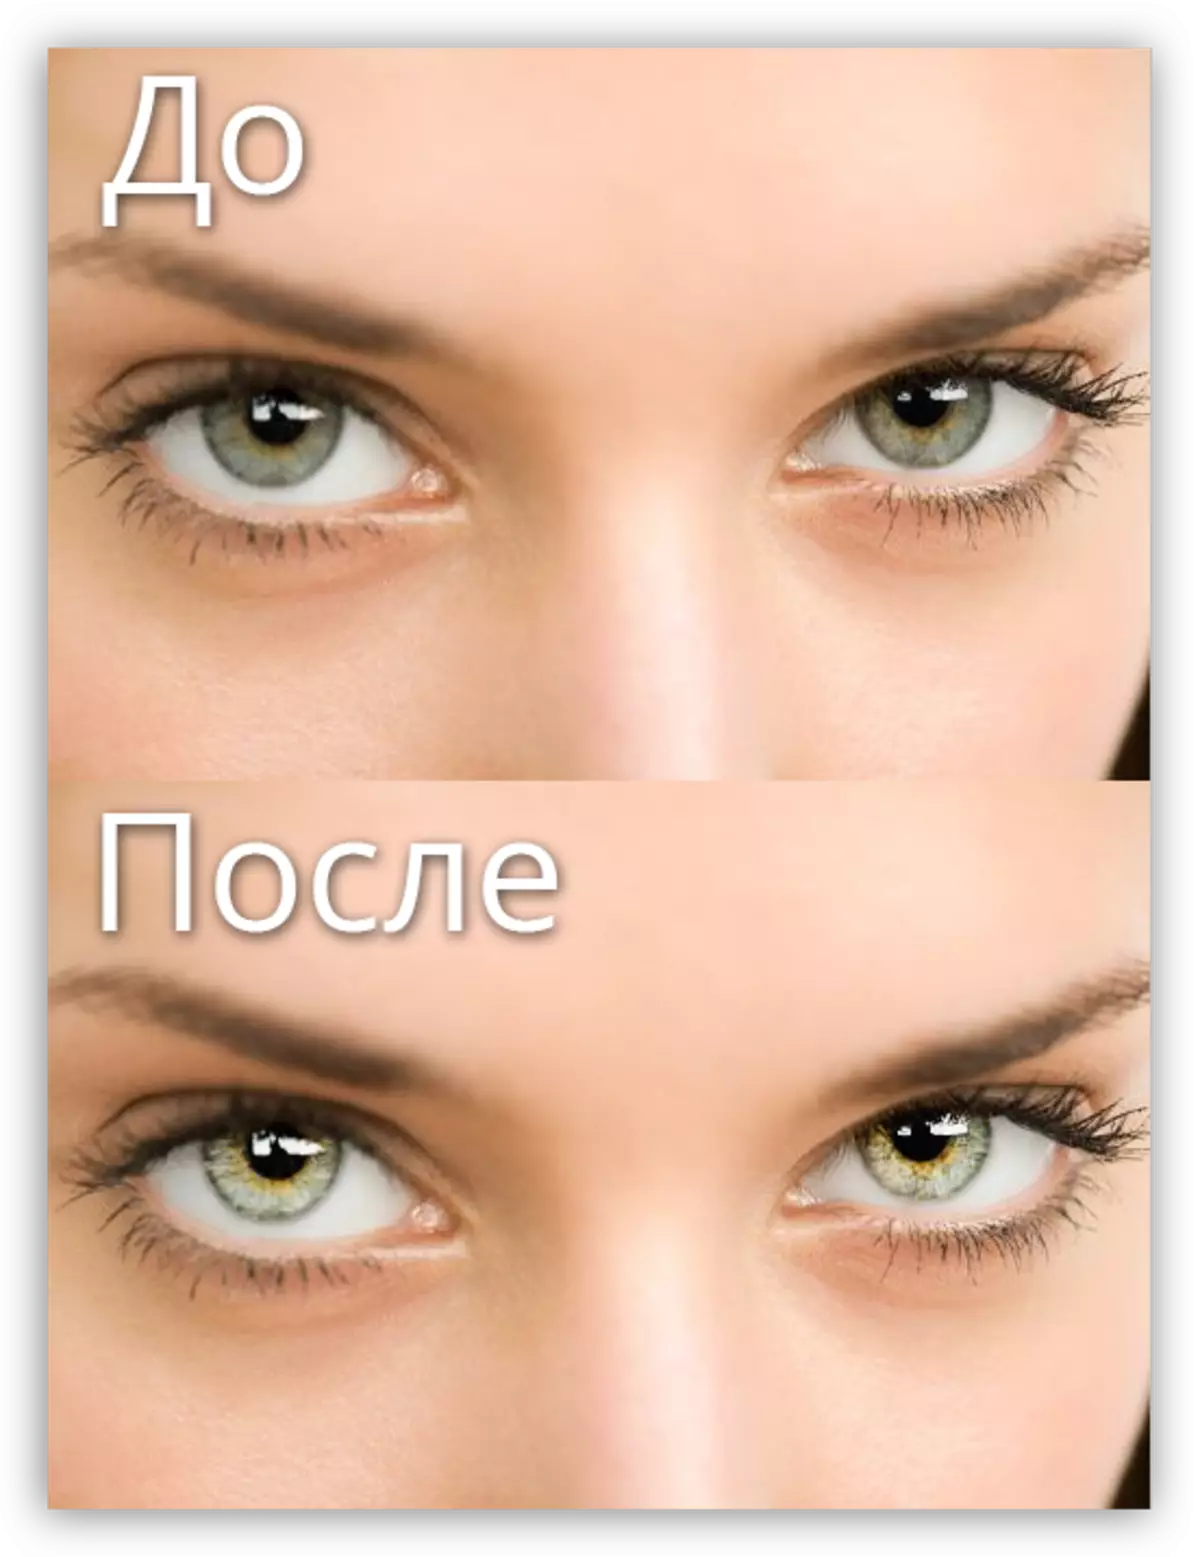
The techniques studied in this lesson will help you effectively and quite quickly allocate your eyes in photos in Photoshop.
When processing a rainbow shell in particular and eye as a whole, it is important to remember that naturalness is valued higher than bright colors or hypertrophied sharpness, so be restrained and neat when photographing is edited.