

After creating an animation in Photoshop, it must be saved in one of the available formats, one of which is GIF. A feature of this format is that it is intended to display (play) in the browser.
If you are interested in other options for saving animation, we recommend reading this article:
Lesson: how to save video in photoshop
The process of creating a GIF animation was described in one of the previous lessons, and today we will talk about how to save the file in GIF format and on optimization settings.
Lesson: Create a simple animation in Photoshop
Saving GIF.
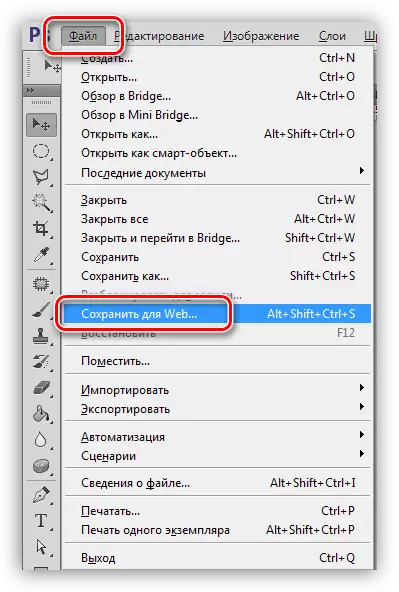
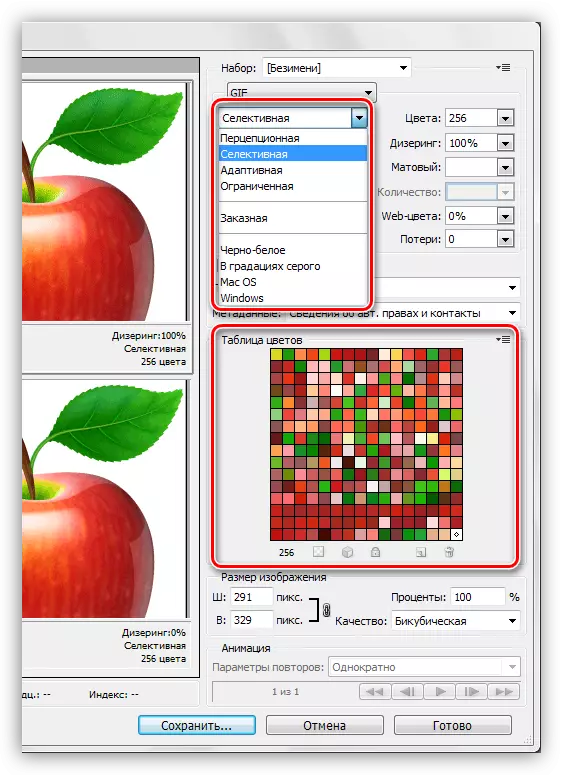
To begin with, we repeat the material and read the save settings window. It opens by clicking on the "Save for Web" item in the File menu.
The window consists of two parts: a preview block
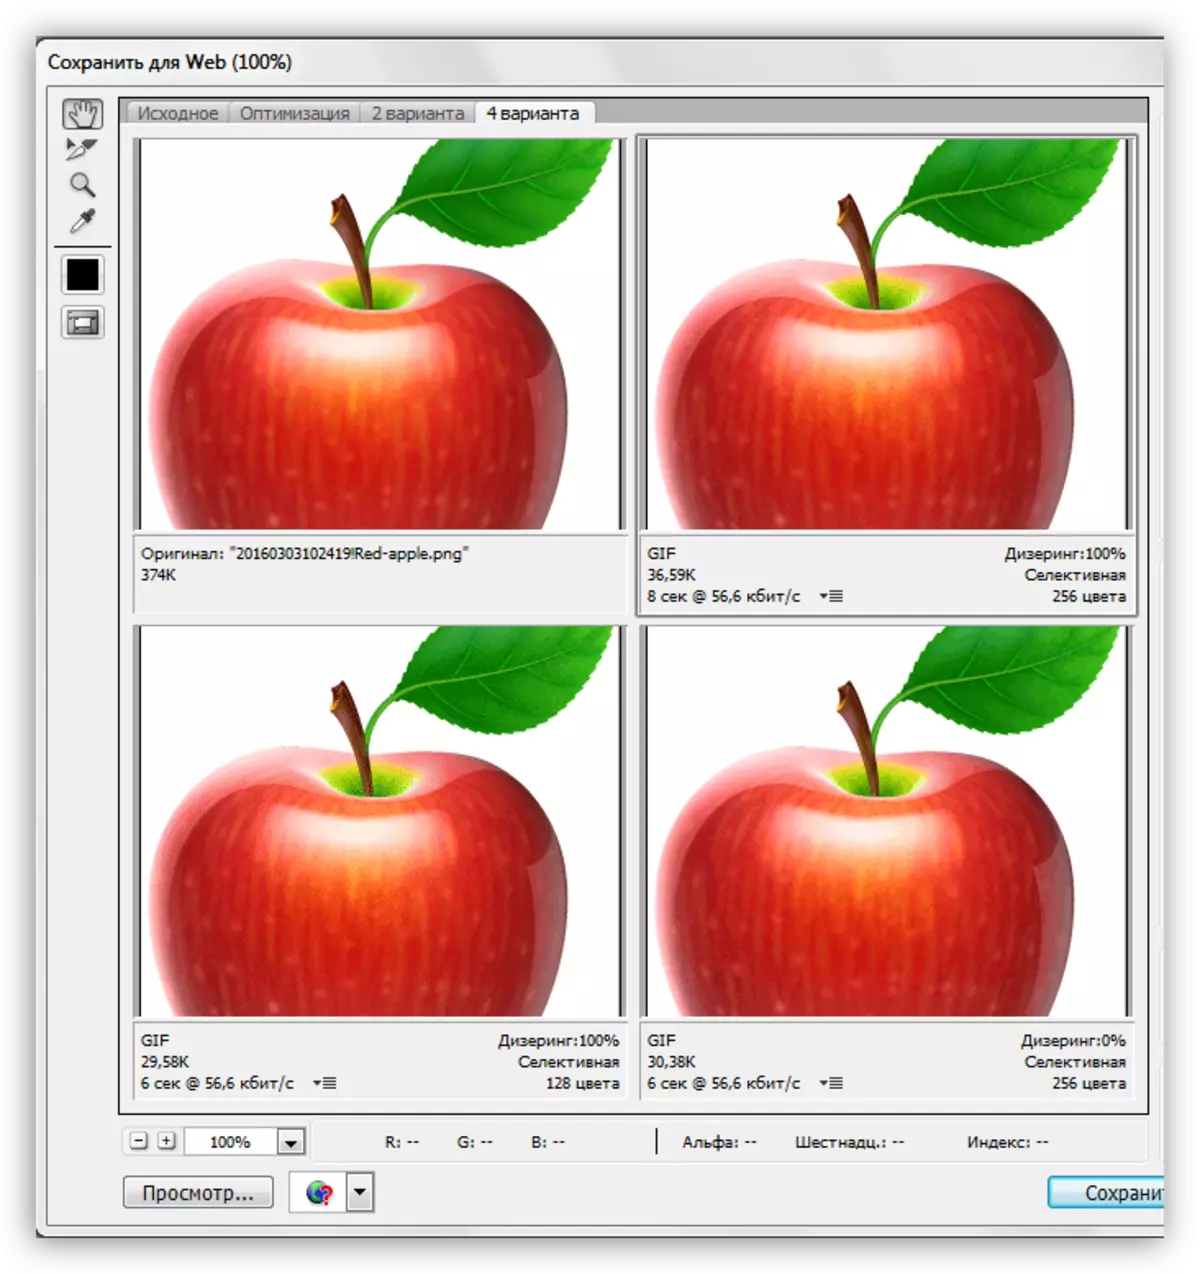
and settings block.
Block preview
Select the number of view options is selected at the top of the block. Depending on the needs, you can select the desired setting.
The image in each window, except the original, is configured separately. This is done so that you can choose the optimal option.
In the left side of the block there is a small set of tools. We will use only the "hand" and "scale".
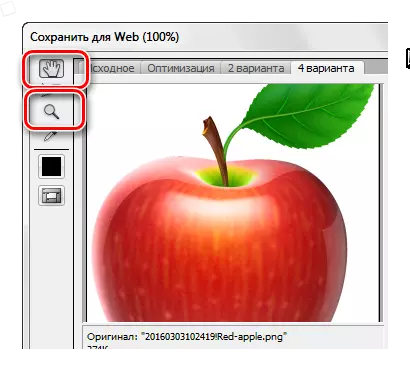
Using the "Hand" you can move the image within the selected window. The choice is also made by this tool. "Scale" performs the same action. Approx and delete the picture can also be buttons at the bottom of the block.
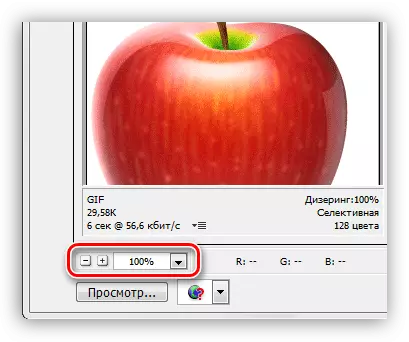
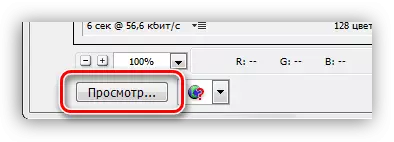
Low below is the button with the inscription "View". It opens the selected option in the default browser.
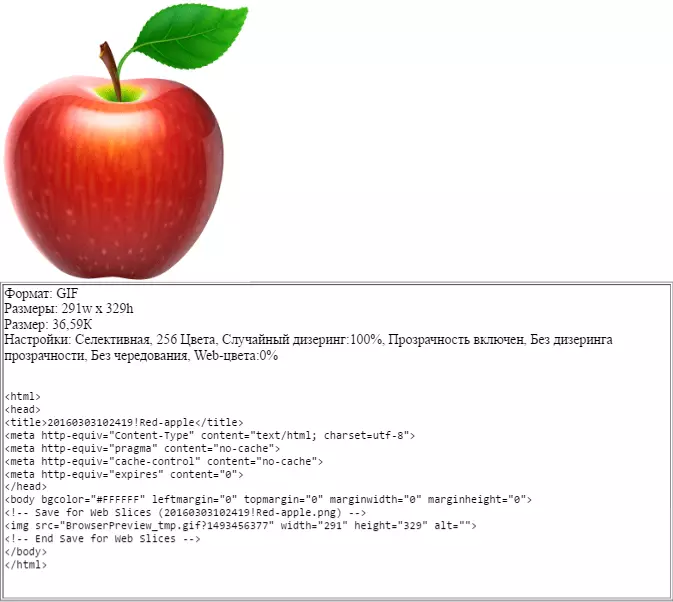
In the browser window, except for setting parameters, we can also get HTML gif code.
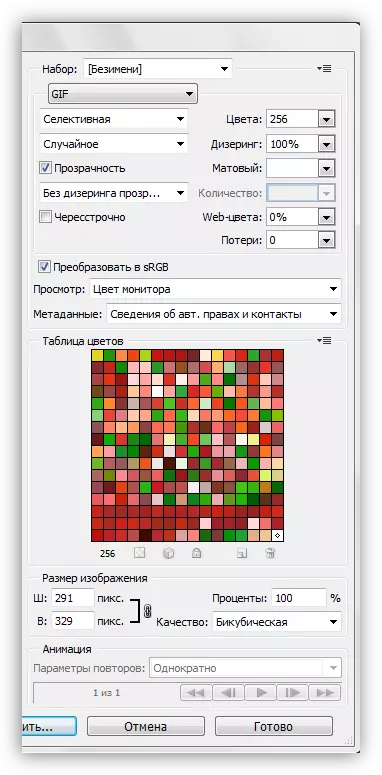
Block settings
In this block, the image parameters are configured, consider it more.
- Color scheme. This setting determines which table of indexed colors will be applied to the image when optimizing.
- Perceptual, and simply "scheme of perception." When it is used, Photoshop creates a table of colors, guided by the current shades of the image. According to the developers, this table is as close as possible to how the human eye sees the color. Plus - the image is the most close to the original, the colors are maximally saved.
- The selective scheme is similar to the previous one, but the colors relating to the Web secure for the Web are predominantly used in it. It also focused on the display of shades approximate to the initial one.
- Adaptive. In this case, the table is created from colors that are more common in the image.
- Limited. Consists of 77 colors, some of the samples of which are replaced with white in the form of a point (grain).
- Custom. When choosing this scheme, it is possible to create your own palette.
- Black and white. This table uses only two colors (black and white), also using grain.
- In grades of gray. There are various 84 levels of shades of gray.
- MacOS and Windows. Table data are compiled based on the features of mapping images in browsers running these operating systems.
Here are some examples of applying schemes.
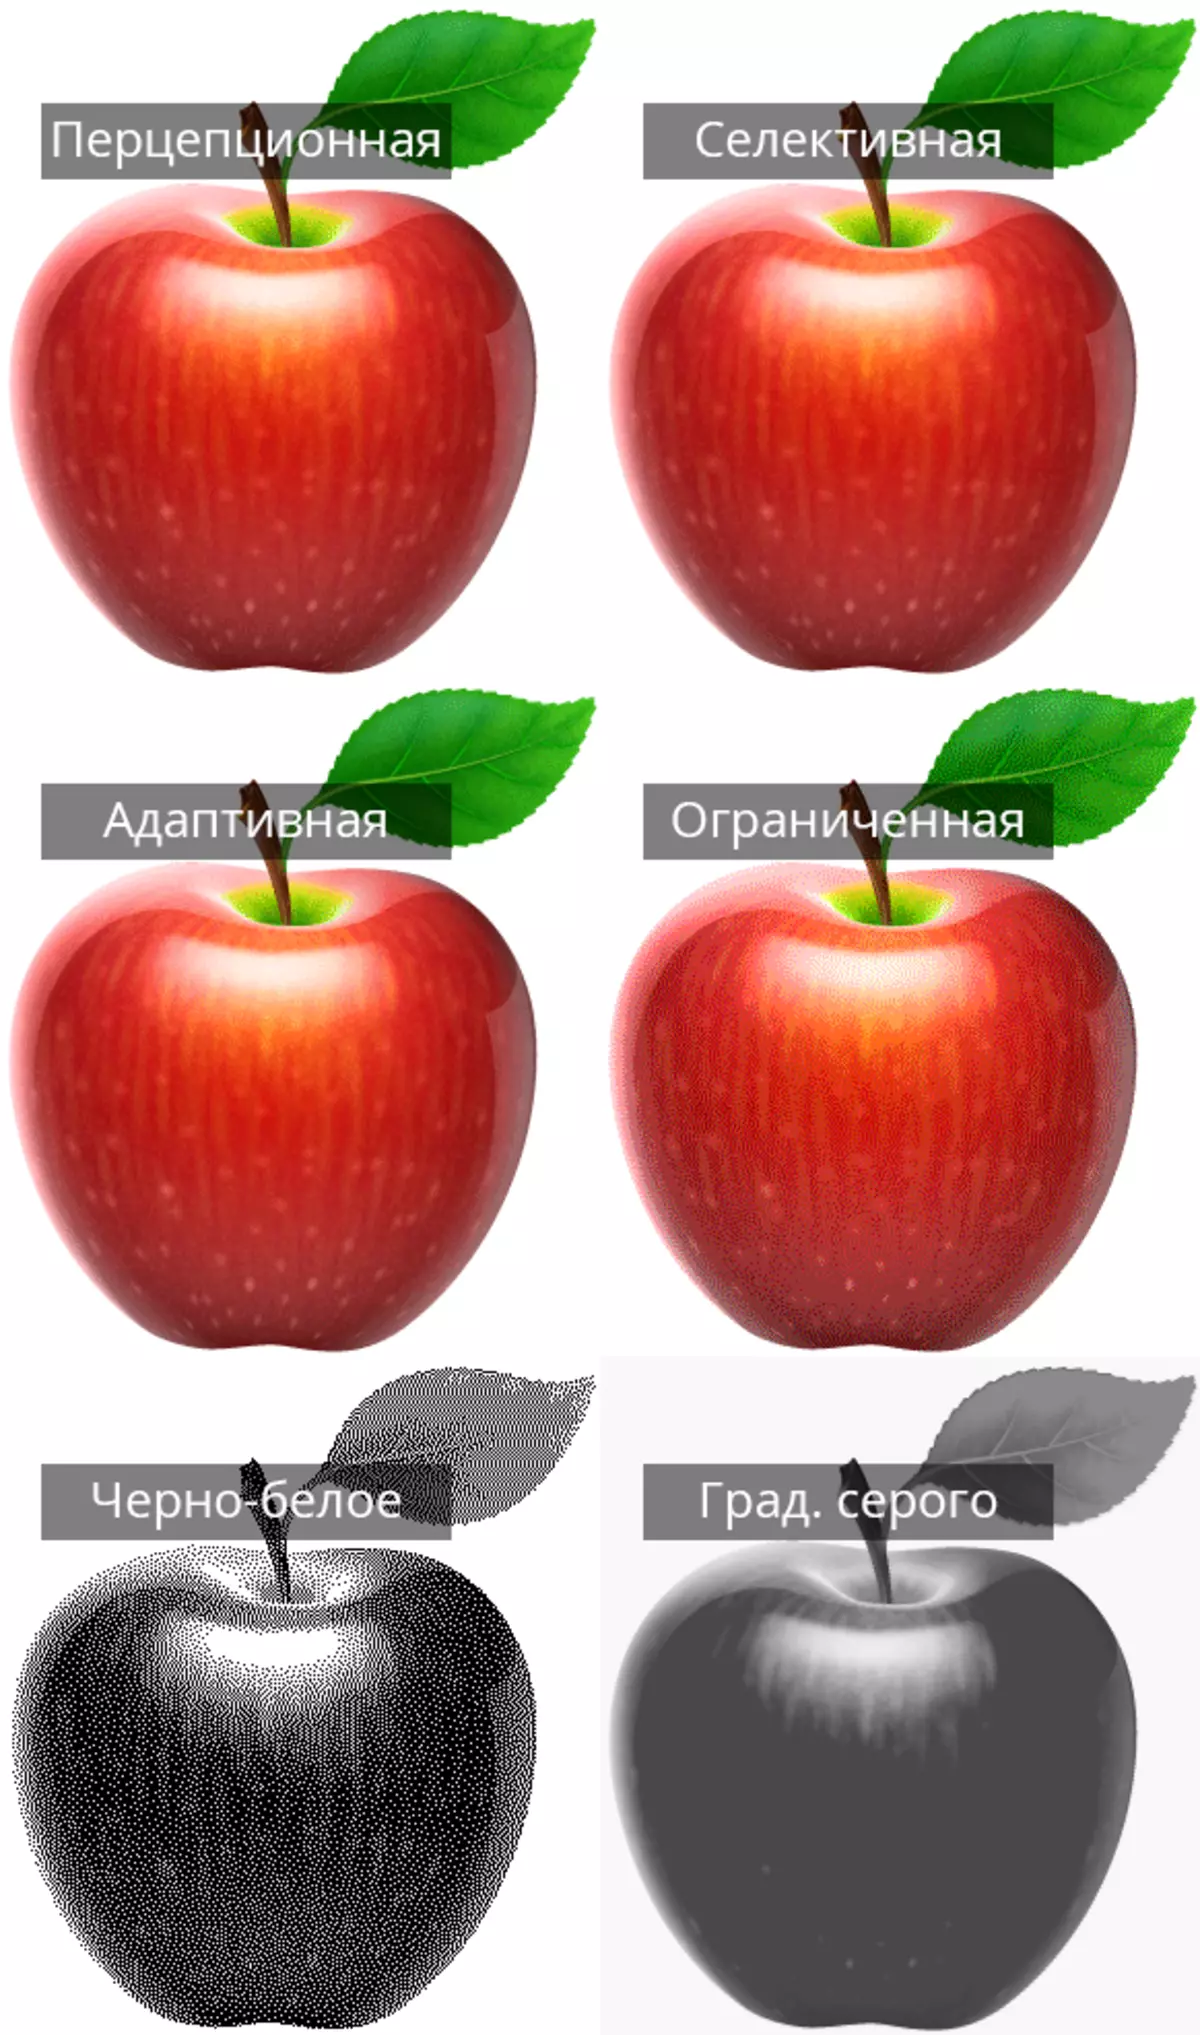
As you can see, the first three samples have quite acceptable quality. Despite the fact that visually they almost do not differ from each other, on different images these schemes will work differently.
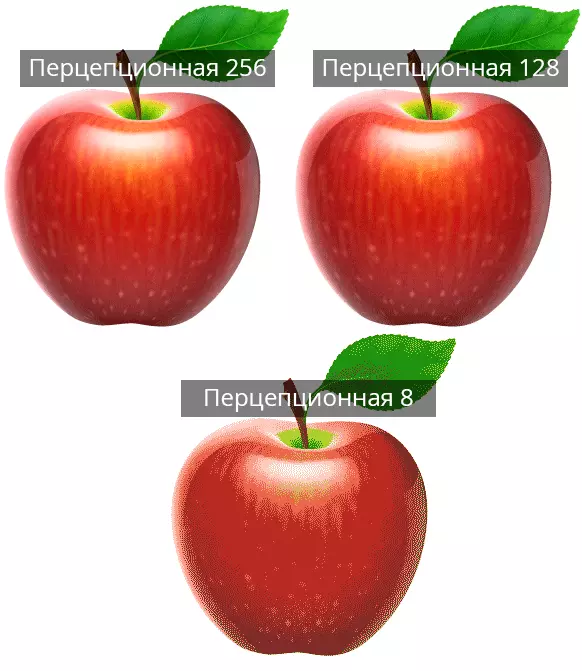
- Maximum number of colors in the color table.
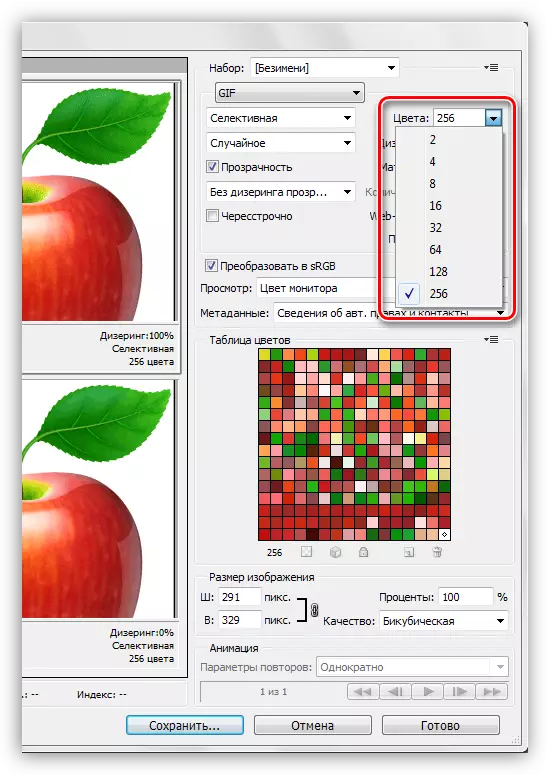
The number of shades in the image directly affects its weight, and, accordingly, on the download speed in the browser. The value of 128 is most often used, since this setting almost does not affect the quality, while reducing the weight of the gif.
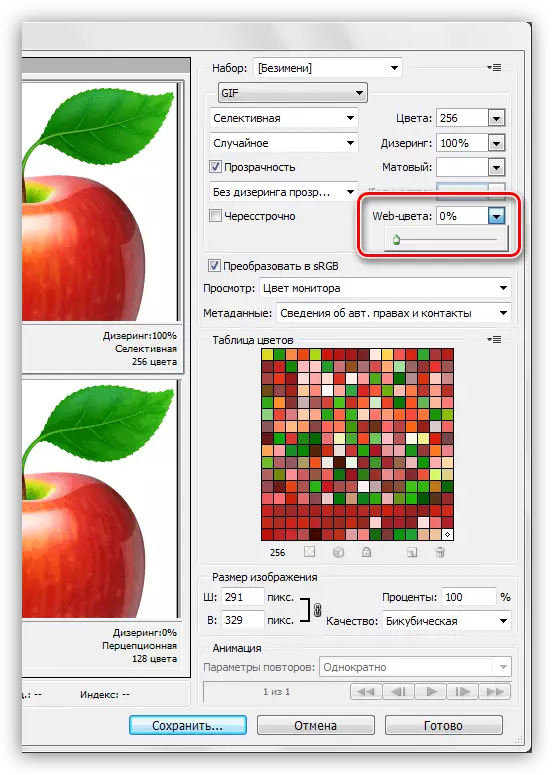
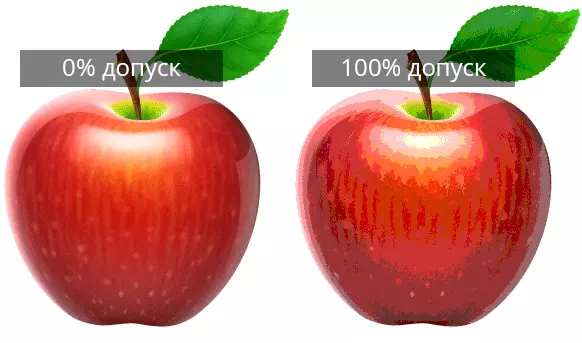
- Web colors. This setting establishes the tolerance with which the shades are converted to equivalent from a secure Web palette. The field of file is determined by the value set by the slider: the value is higher - the file is less. When setting up WEB-colors should not also forget about quality.
Example:
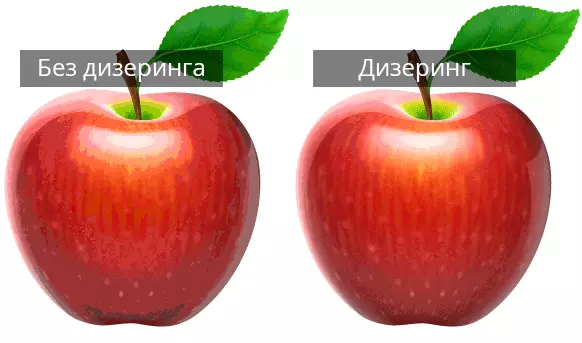
- Dysrying allows you to smooth out the transitions between colors by mixing the shades that are contained in the selected indexing table.
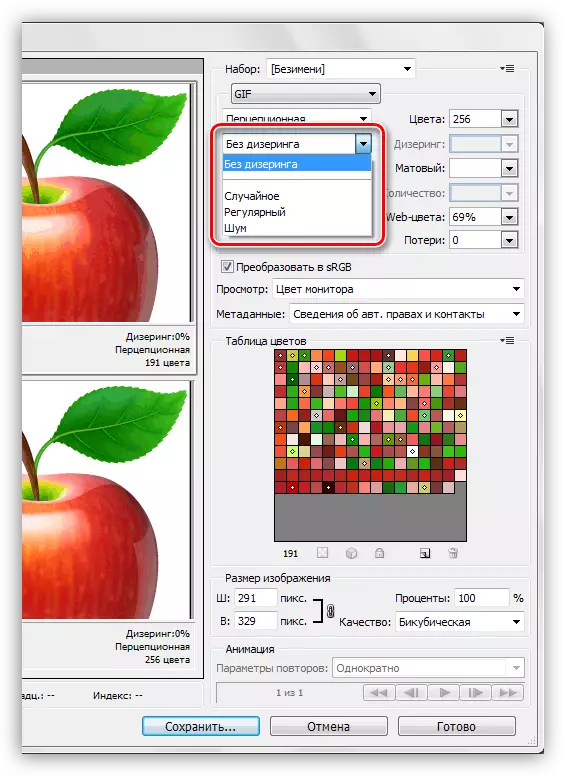
Also, the setting will help how to preserve the gradients and the integrity of monochromatic sites. When using dispensing increases the weight of the file.
Example:
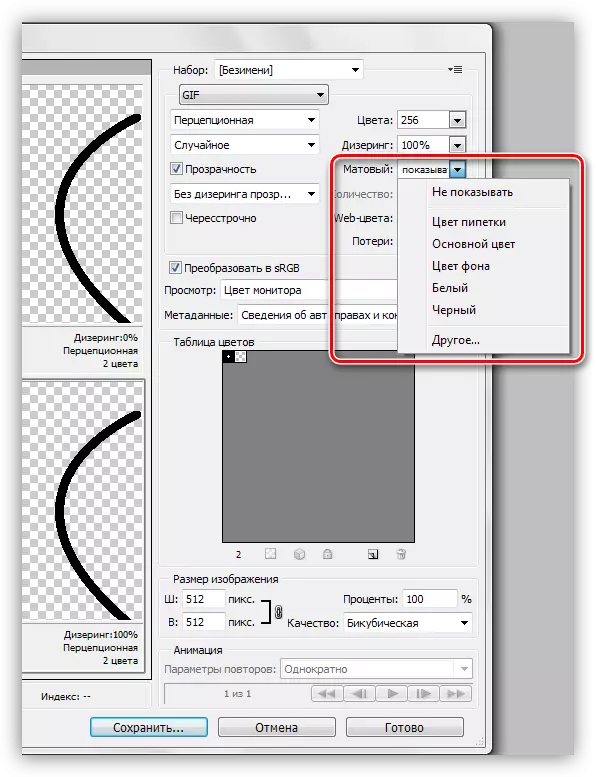
- Transparency. The GIF format supports only absolutely transparent, or absolutely opaque pixels.
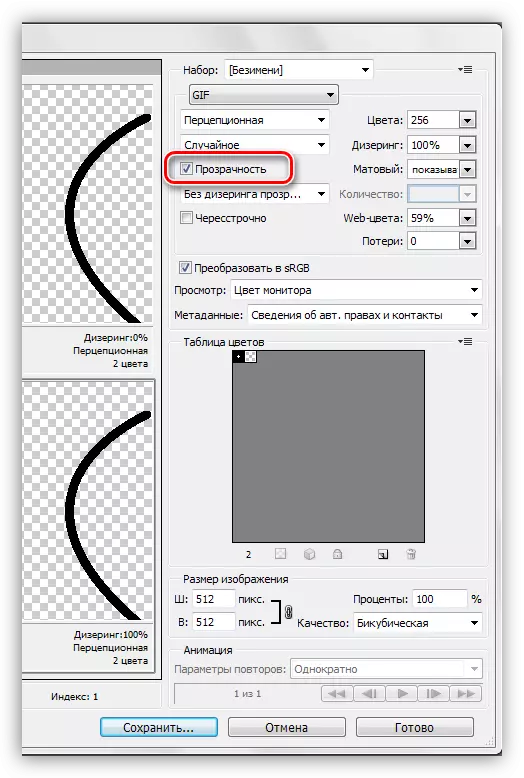
This parameter, without additional adjustment, poorly displays the lines curves, leaving pixel ladies.
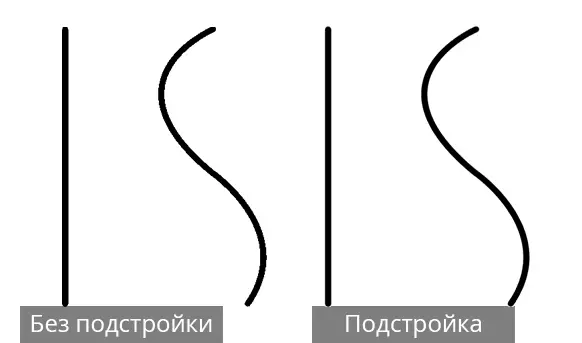
The adjustment is called "matte" (in some editors "Kaima"). With it, it is configured to mix pixels pictures with a background of the page on which it will be located. For the best display, choose a color corresponding to the color of the site background.
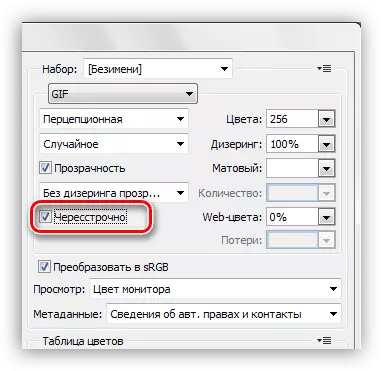
- Interlaced. One of the most useful for Web settings. In the event that the file has a considerable weight, allows you to immediately show a picture on the page, as it loads improving its quality.
- SRGB conversion helps save maximum original image colors while saving.
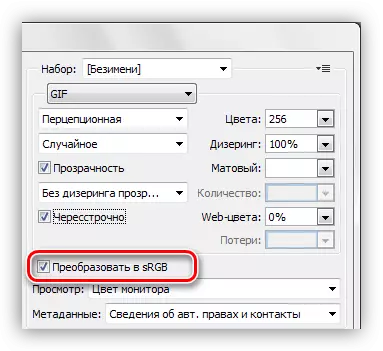
Setting up "Dysrying transparency" significantly worsens the image quality, and we will talk about the "loss" parameter in the practical part of the lesson.
For the best understanding of the process of setting up the preservation of gifs in Photoshop, you must practice.
Practice
The goal of optimizing images for the Internet is the maximum reduction of the weight of the file while maintaining quality.
- After processing the picture, go to the "File - Save for Web" menu.
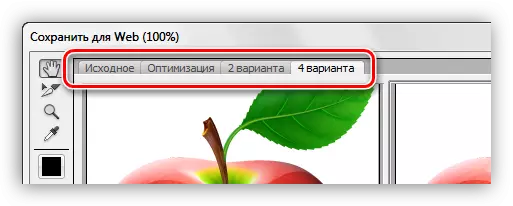
- Exhibit the "4 option" view mode.
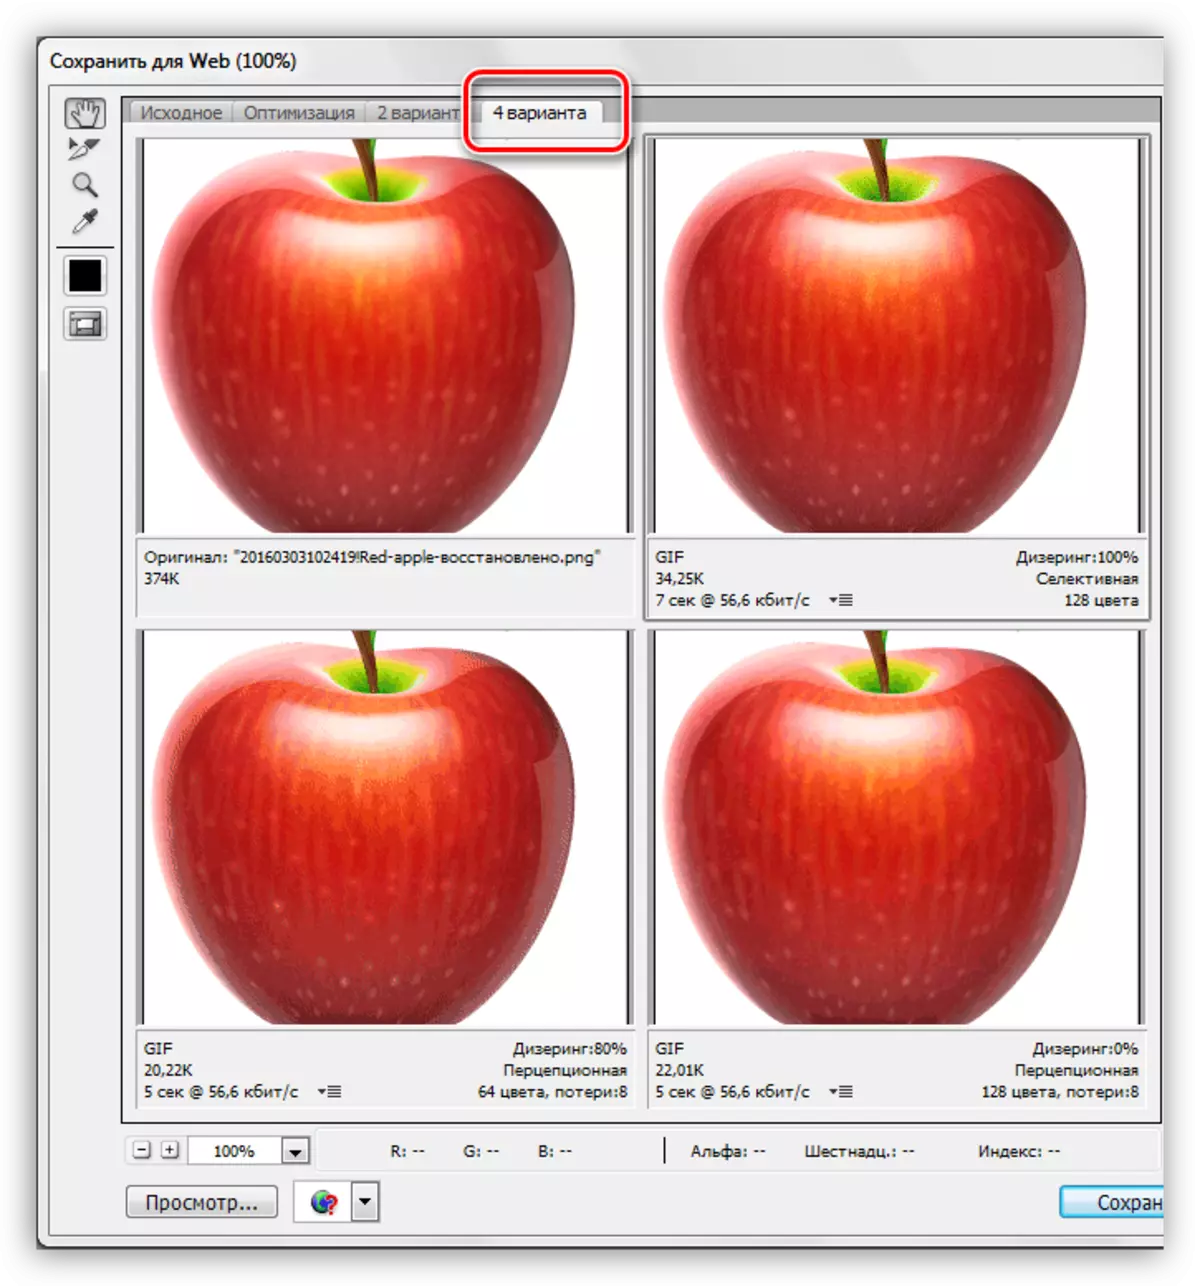
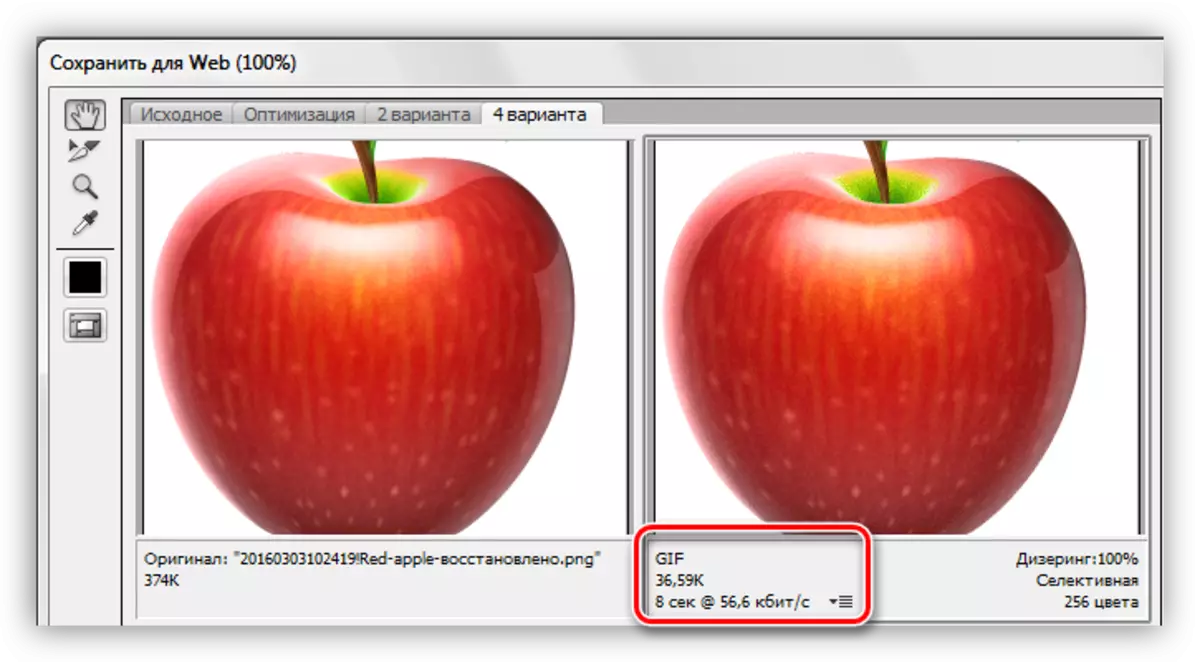
- Next, you need one of the options to make the most similar to the original. Let it be a picture to the right of the source. This is done in order to estimate the size of the file with maximum quality.
Settings settings are as follows:
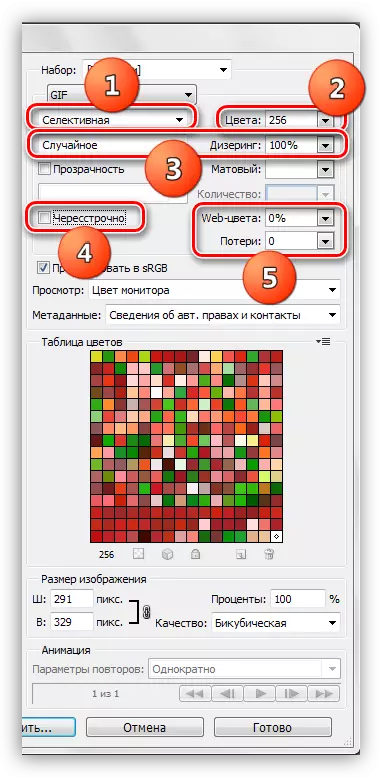
- Color scheme "Selective".
- "Colors" - 265.
- "Diazering" is "random", 100%.
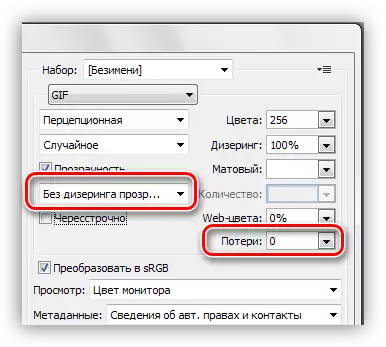
- Remove the daws opposite the "interlaced" parameter, since the final image of the image will be quite small.
- "Web colors" and "losses" - zero.
Compare the result with the original. At the bottom of the sample window, we can see the current gif size and the loading speed at the specified Internet speed.
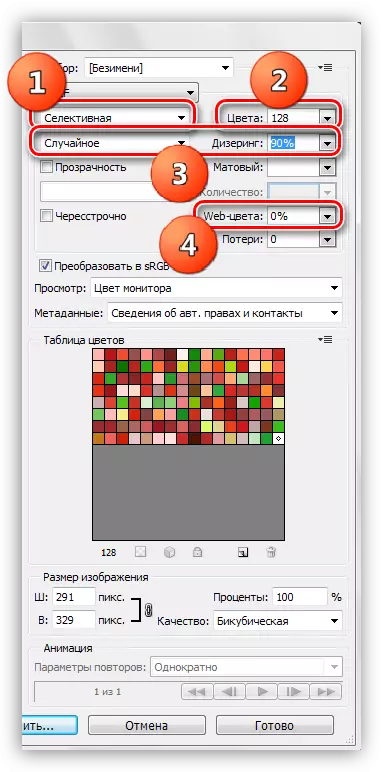
- Go to the picture below just configured. Let's try to optimize it.
- Leave the scheme unchanged.
- The number of colors reduce up to 128.
- Dysmering value reduced to 90%.
- Web-colors do not touch, because in this case it will not help us keep quality.
Gif size decreased from 36.59 KB to 26.85 KB.
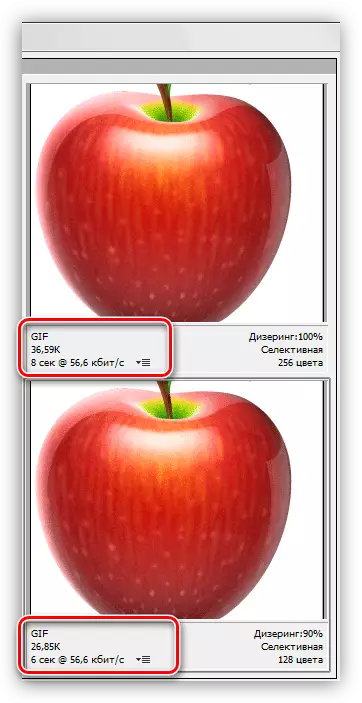
- Since some graininess and small defects are already present in the picture, let's try to increase "losses". This parameter defines a permissible level of data loss when compressing GIF. Change the value to 8.
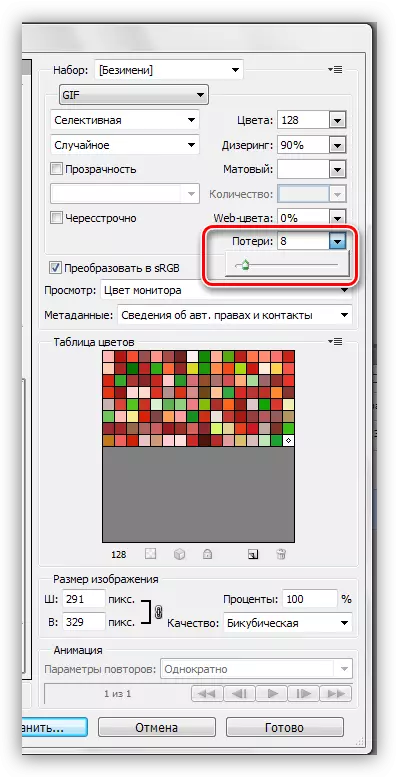
We still managed to reduce the size of the file, while losing a little in quality. Gifs now weighs 25.9 kilobytes.
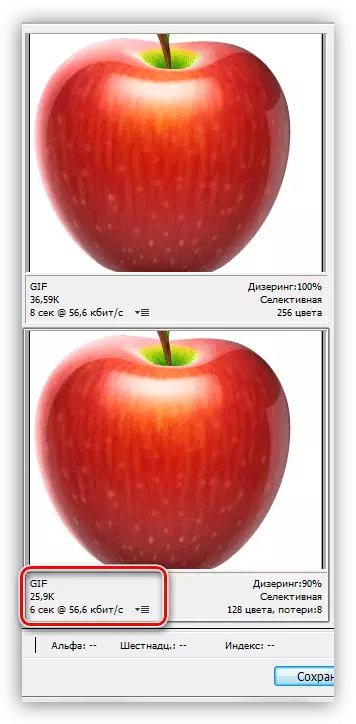
Total, we were able to reduce the size of the picture about 10 KB, which is more than 30%. Very good result.
- Further actions are very simple. Click on the Save button.
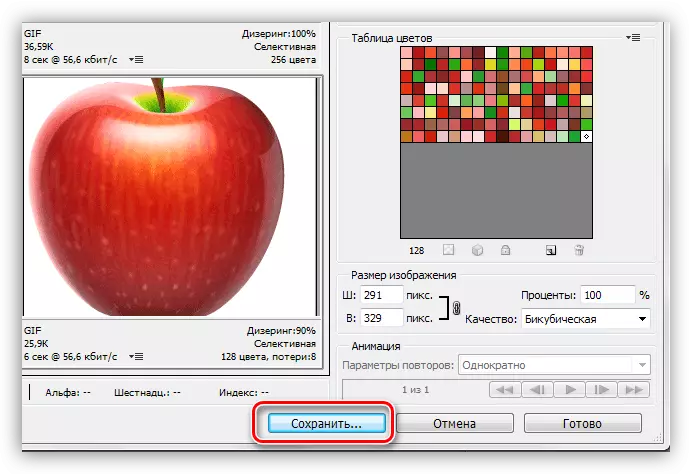
We choose a place to save, give the name of the gif, and press "Save" again.
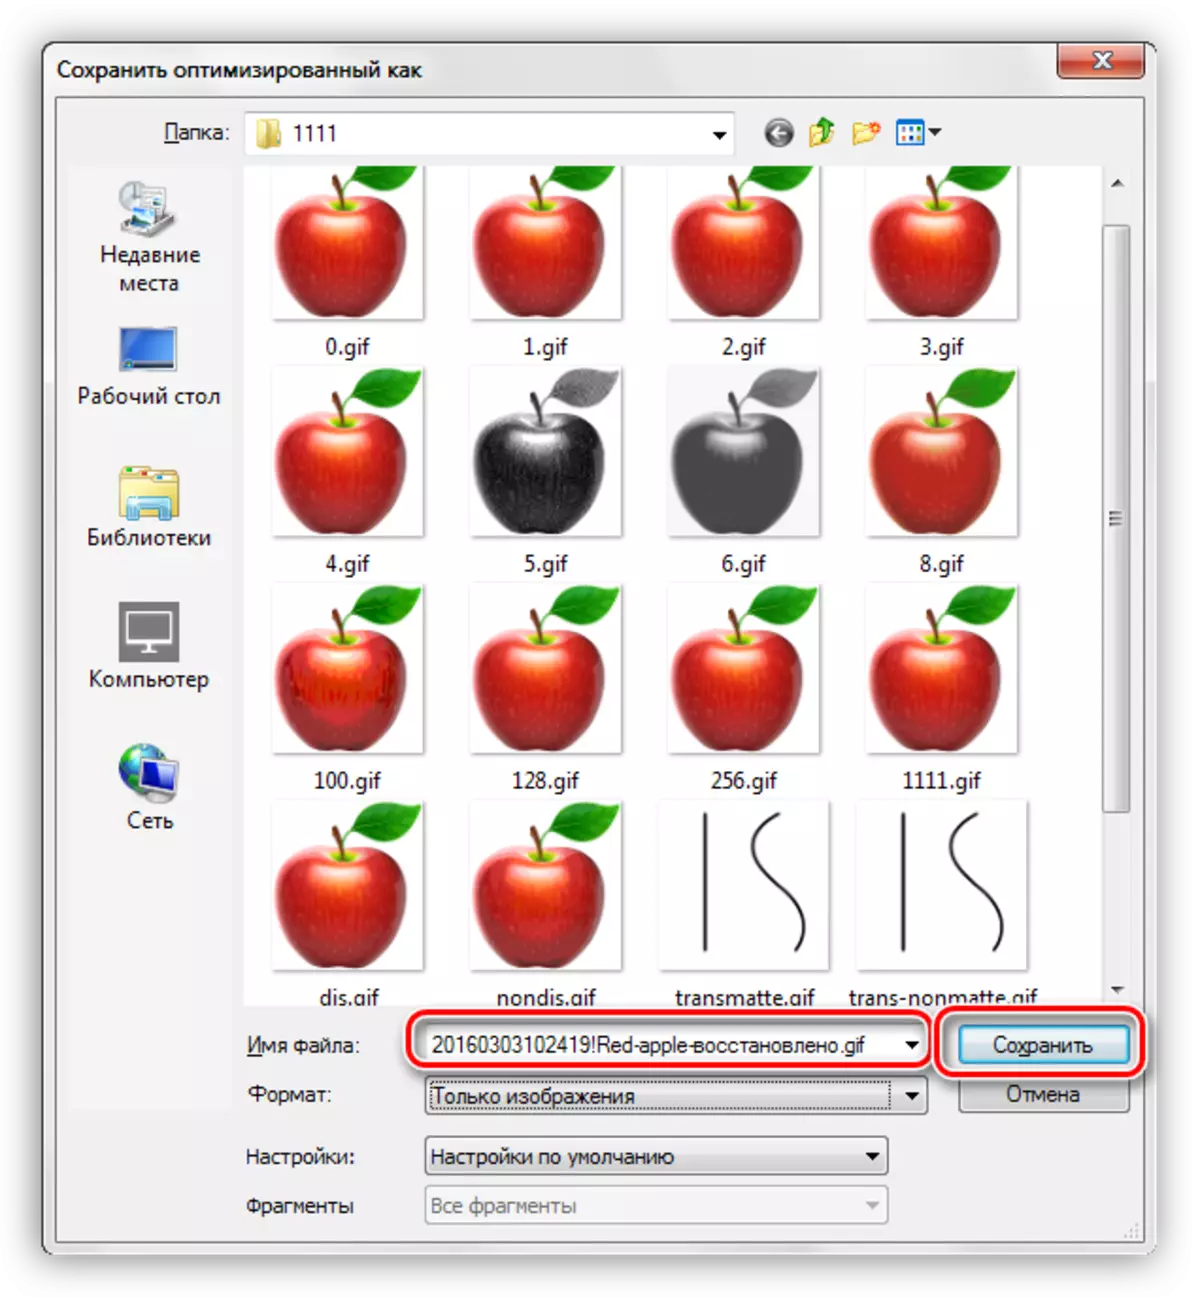
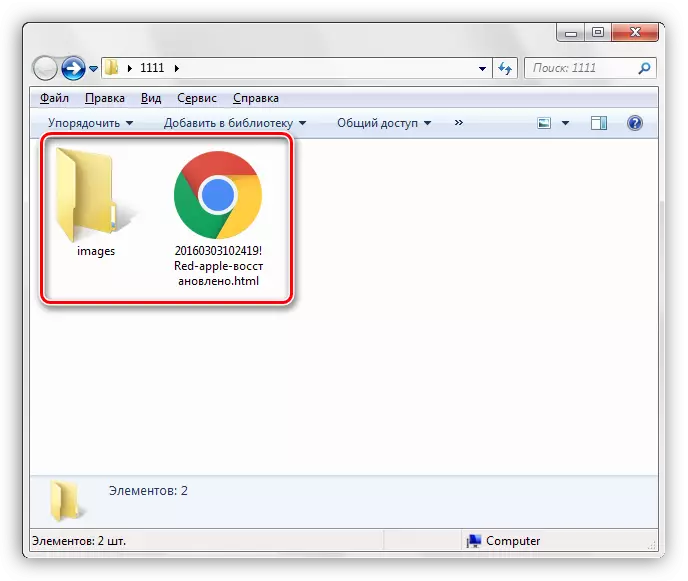
Please note that there is an opportunity together with the GIF to create a HTML document to which our picture will be built. To do this, it is better to choose an empty folder.
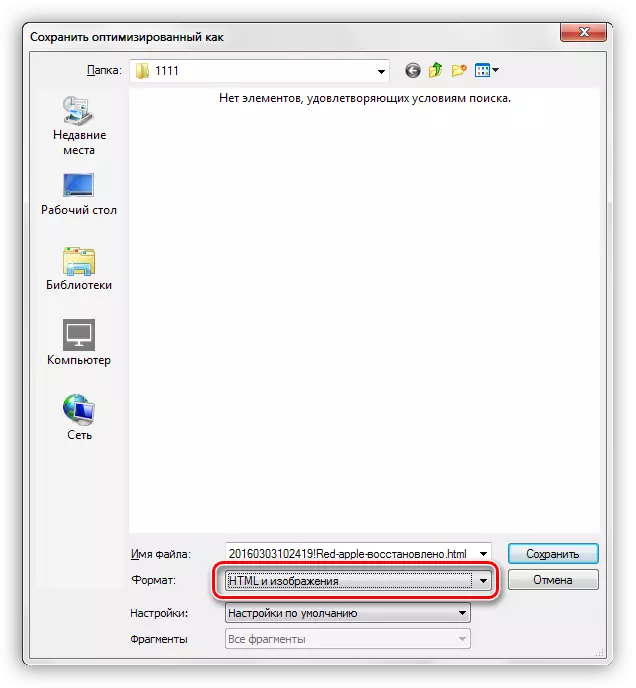
As a result, we get a page and a folder with the image.
Tip: When assigning a file name, try not to use Cyrillic characters, because not all browsers are able to read them.
This lesson for saving the image in the GIF format is completed. On it, we found out how you can optimize the file for placement on the Internet.