
Provided that the maternal card has failed or planned a global PC upgrade, you will need to change it. First you need to choose a suitable replacement for the old motherboard. It is important to take into account that all components of the computer are compatible with the new board, otherwise you will have to buy new components (first of all it concerns the central processor, video card and cooler).
Read more:
How to choose a motherboard
How to choose a processor
How to choose a video card to the motherboard
If you have a fee to which all the main components are suitable from PC (CPU, RAM, Cooler, Graphic Adapter, Winchester), then you can start setting. Otherwise, you will have to buy a replacement for incompatible components.
Lesson: how to apply thermal
Check if the board has successfully connected. To do this, connect the computer to the power grid and try to enable it. If any image appears on the screen (let it even error), it means that you all connected correctly.
Stage 3: Troubleshooting
If after changing the motherboard OS ceased to load normally, then it is not necessary to completely reinstall it. Use a pre-prepared flash drive with Windows installed on it. In order for OS again earned normally, you will have to make a certain change in the registry, so it is recommended to clearly follow the instructions below, in order not to "demolish" the OS.
To begin with, you need to make it so that the OS load starts from the flash drive, and not from the hard disk. This is done using the BIOS according to the following instructions:
- To start, log in to the BIOS. To do this, use the DEL or F2 keys from F12 (depends on the motherboard and the bios version on it).
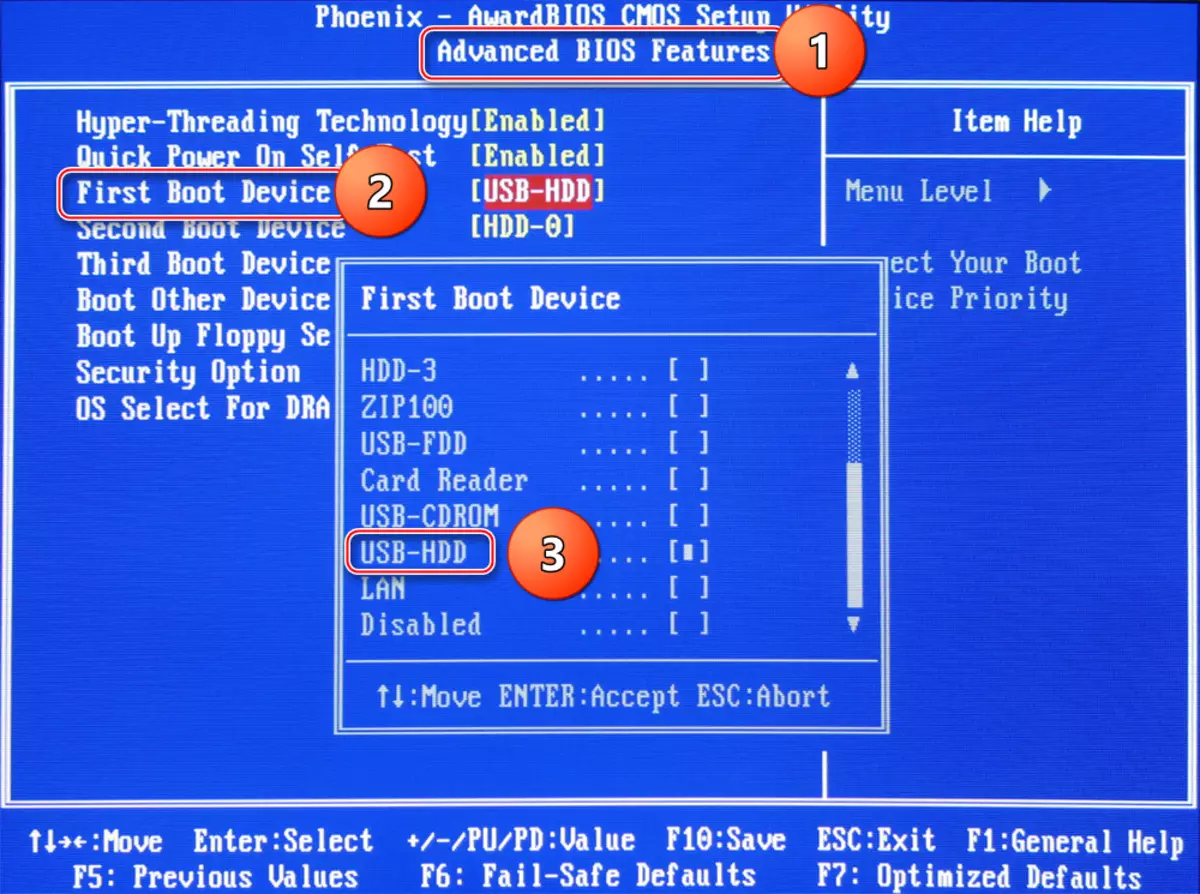
- Go to "Advanced Bios Features" in the top menu (this item may be called a little differently). Then find the "BOOT ORDER" parameter there (sometimes this parameter may be in the top menu). There is also another option "First Boot Device" name.
- To make any changes to it, you need to select this parameter using the arrows and press ENTER. In the menu that opens, select the "USB" or "CD / DVD-RW" download option.
- Save the changes. To do this, find the "Save & Exit" in the top menu. In some versions of the bios, you can make out the output using the F10 key.
Lesson: How to download the download from the flash drive in the BIOS
After rebooting the computer will start loaded from a flash drive where Windows is installed. With it, you can reinstall the OS and make the restoration of the current. Consider step by step instructions for restoring the current version of OS:
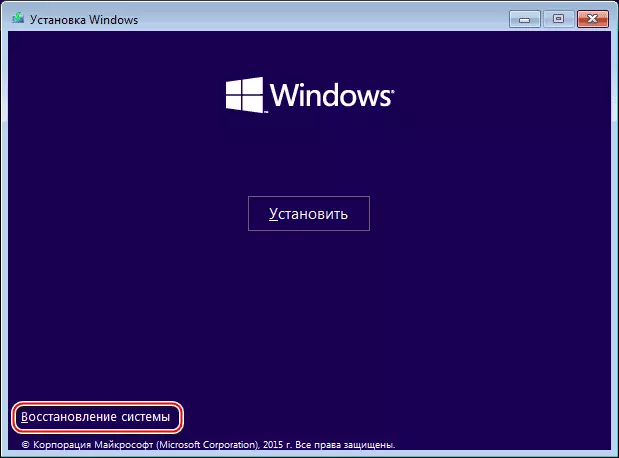
- When the computer launches the USB flash drive, click "Next", and in the next window, select "System Restore", which is in the lower left corner.
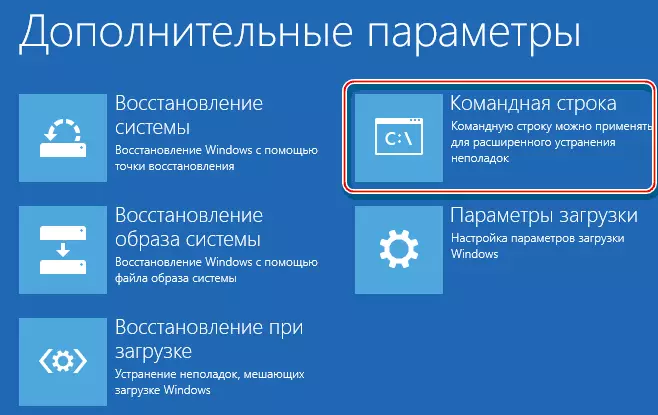
- Depending on the system version, the actions in this step will be different. In the case of Windows 7, you will need to click "Next", and then in the Select "Command Line" menu. For owners of Windows 8 / 8.1 / 10, you need to go to "Diagnostics", then to "Advanced Options" and select "Command Line".
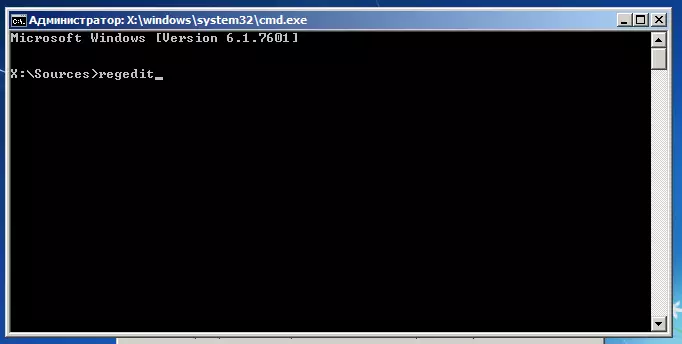
- Enter the Regedit command and press ENTER, after which you will open a window to edit files in the registry.
- Now click on the HKEY_LOCAL_MACHINE folder and select File. In the drop-down menu you need to click on the "Bush".
- Specify the path to the "bush". To do this, go through the next path C: \ Windows \ System32 \ Config and find the SYSTEM file in this directory. Open it.
- Come up with a name for the section. You can set an arbitrary name in English layout.
- Now in the HKEY_LOCAL_MACHINE branch, open a partition that has just created, and select the folder on this path HKEY_LOCAL_MACHINE \ Your_ Section \ ControlSet001 \ Services \ MSAHCI.
- In this folder, find the "Start" parameter and click on it twice with the mouse. In the window that opens, in the "Value" field, put "0" and click "OK".
- Find a similar parameter and do the same procedure at HKEY_LOCAL_MACHINE \ your_zel \ ControlSet001 \ Services \ Pciide.
- Now select the partition you created and click on the file and select "Unload bush" there.
- Now close everything, remove the installation disk and restart the computer. The system should boot without any problems.


Lesson: How to install Windows
When replacing the motherboard, it is important to take into account not only the physical parameters of the case and its components, but also the parameters of the system, because After replacing the system board, the system stops loading in 90% of cases. You should also be prepared for the fact that after changing the motherboard, all drivers can fly.
Lesson: how to install drivers