
In NEF format (Nikon Electronic Format), raw photos are saved directly from the Nikon camera matrix. Images with such an extension are usually high and accompanied by a large volume of metadata. But the problem is that most of the usual viewers do not work with NEF files, and there are many places on the hard disk such photos.
A logical output from the situation will be converting NEF to another format, for example, JPG, which can be opened exactly through many programs.
NEF conversion methods in jpg
Our task is to make conversion so as to minimize the loss of initial quality of photography. This can help a number of reliable converters.Method 1: ViewNX
Let's start with the branded utility from Nikon. ViewNX was created specifically for working with photographs created by the cameras of this company, so this is it perfect for solving the task.
Download program viewnx
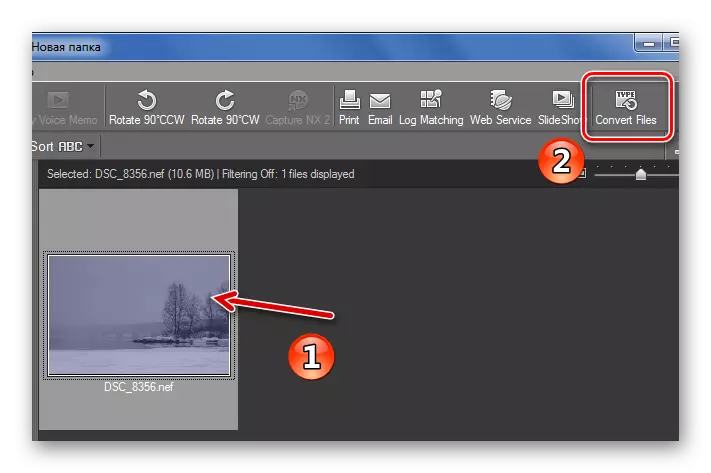
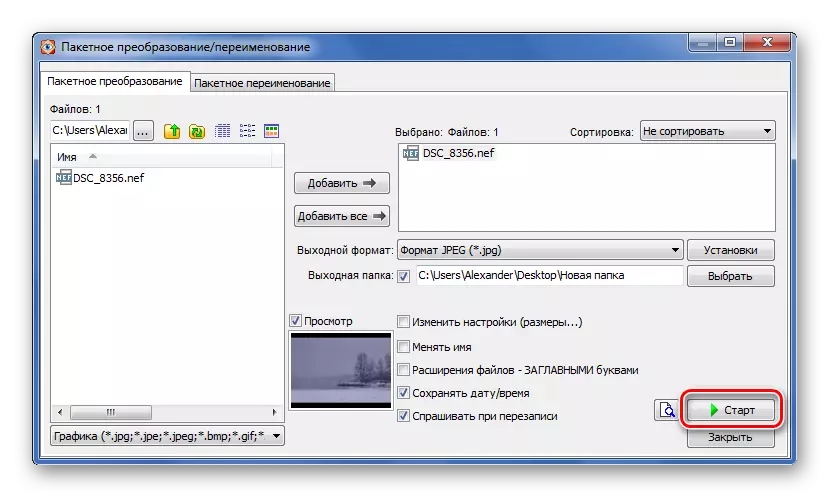
- Using the built-in browser, find and highlight the desired file. After that, click on the "Convert Files" icon or use the Ctrl + E key combination.
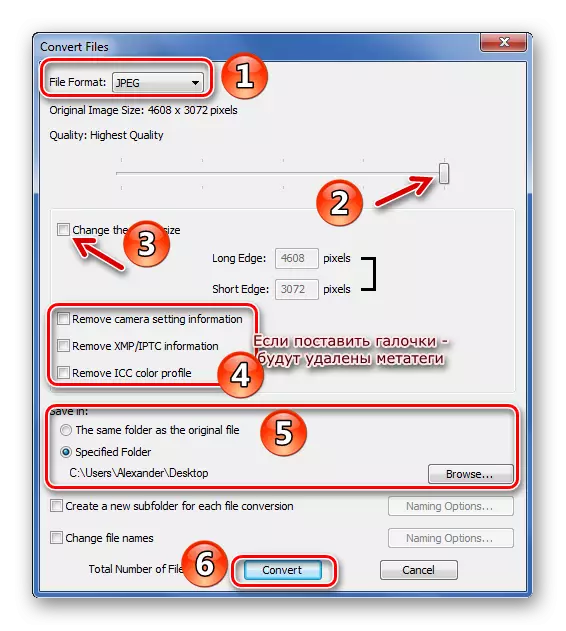
- Specify "JPEG" as the output format and exhibit the maximum quality using the slider.
- Next, you can choose a new permission, which may not be better reflected on the quality and doubt MetaTegi.
- In the last block, the folder is specified to save the output file and, if necessary, its name. When everything is ready, click the "Convert" button.
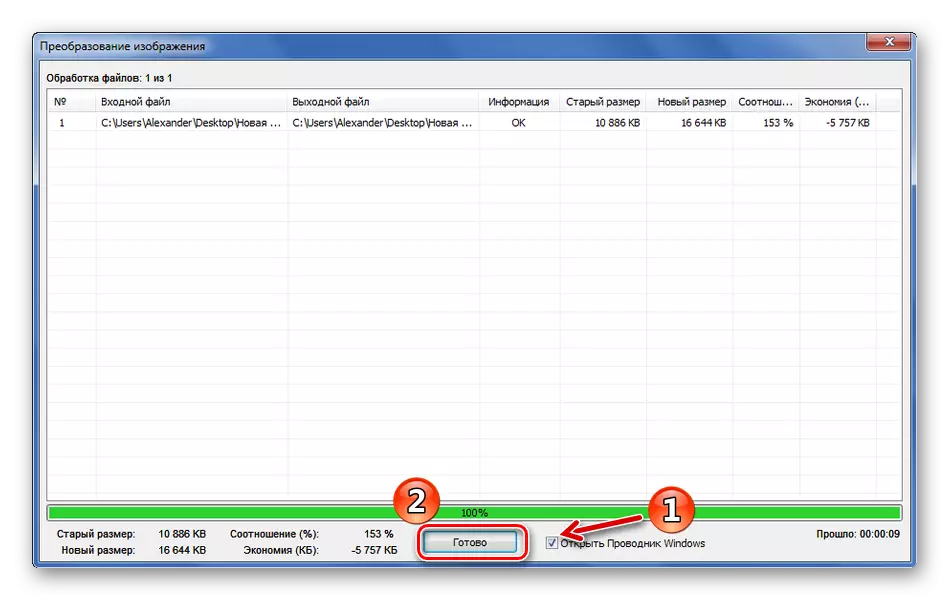
On the conversion of one photo weighing 10 MB takes 10 seconds. After it remains only to check the folder where the new file in the JPG format should be saved, and make sure everything happened.
Method 2: Faststone Image Viewer
You can use the Faststone Image Viewer as the next applicant to convert the NEF.
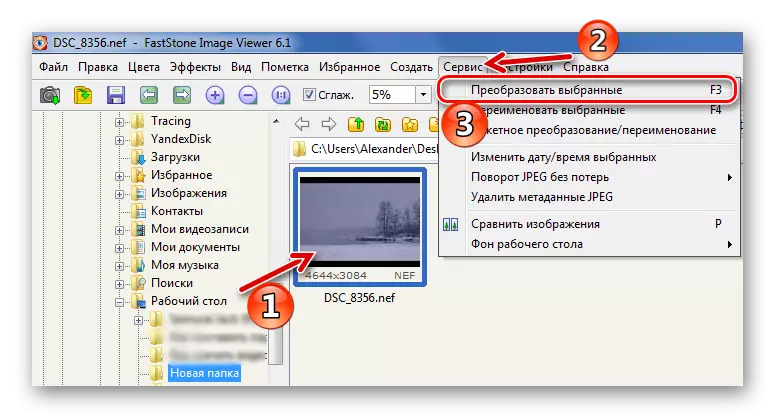
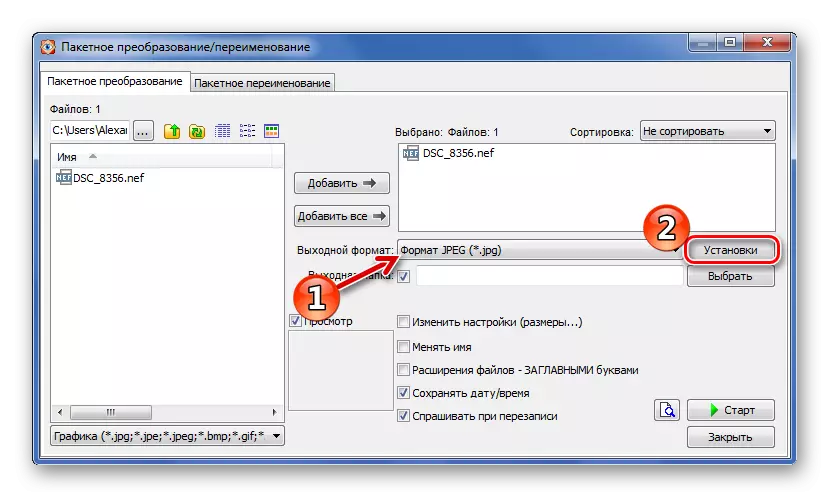
- You can quickly find the source photo through the built-in file manager of this program. Select NEF, open the "Service" menu and select "Convert Selected" (F3).
- In the window that appears, specify the "JPEG" output format and click the Settings button.
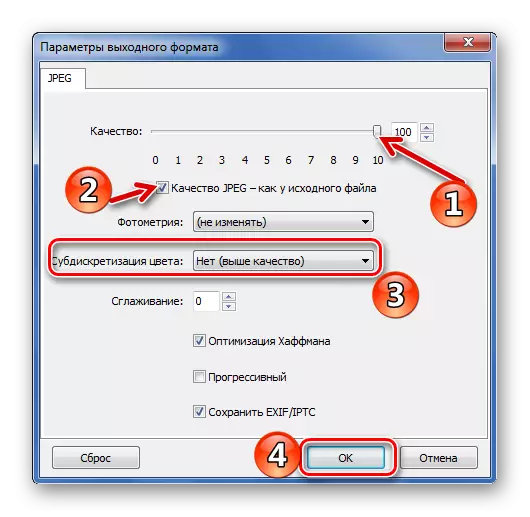
- Here, install the highest quality, check the "JPEG quality - like the source file" and in the "Color Subdiscrection" item, select "No (above Quality)". The remaining parameters change to your discretion. Click OK.
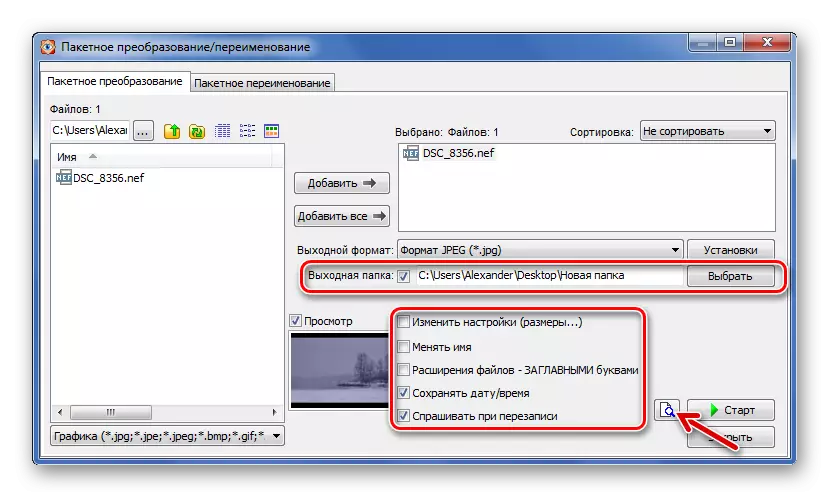
- Now specify the output folder (if you take a tick, the new file will be saved in the source folder).
- Next, you can change the jpg image settings, but it is a possibility of quality reduction.
- Configure the remaining values and click the Quick View button.
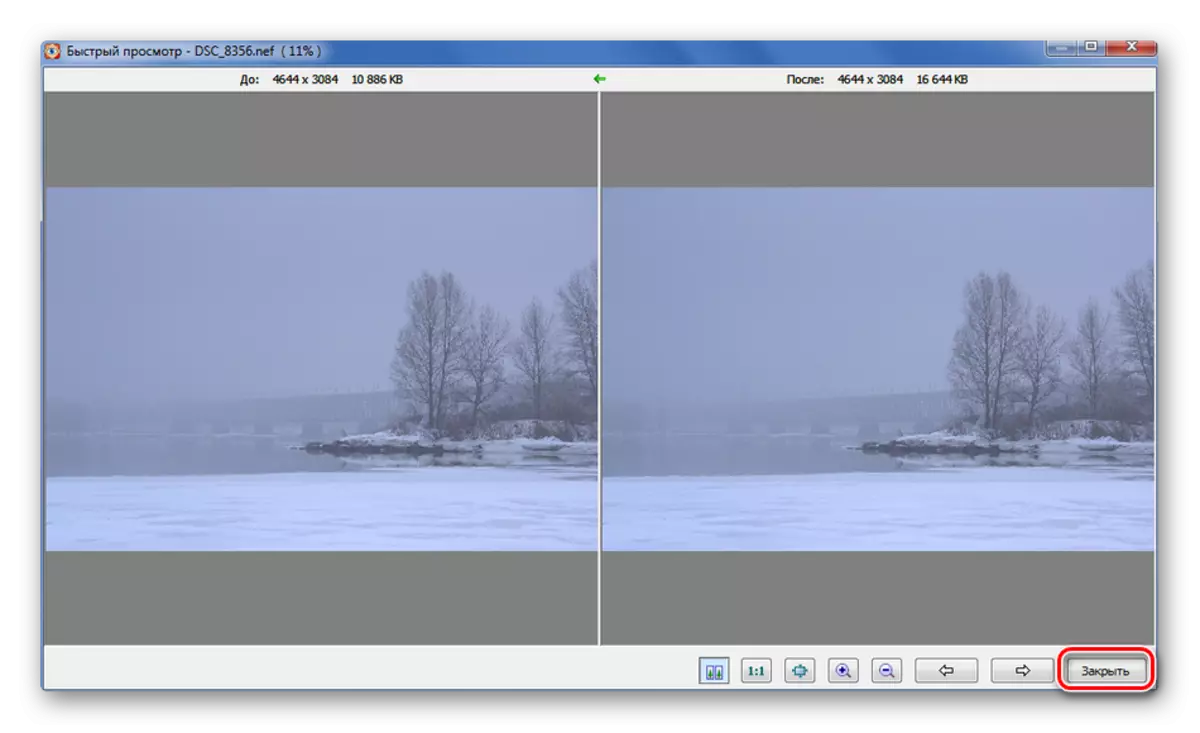
- In "Quick View" mode, you can compare the quality of the original NEF and JPG, which will be obtained in the end. Making sure everything is in order, click "Close".
- Click "Start".
In the image conversion window that appears, you can track the conversion stroke. In this case, this procedure occupied 9 seconds. Check "Open Windows Explorer" and click Finish to immediately go to the resulting image.
Method 3: XnConvert
But the XNConvert program is designed directly for conversion, although the editor's functions in it are also provided.
Download the XNConvert. program
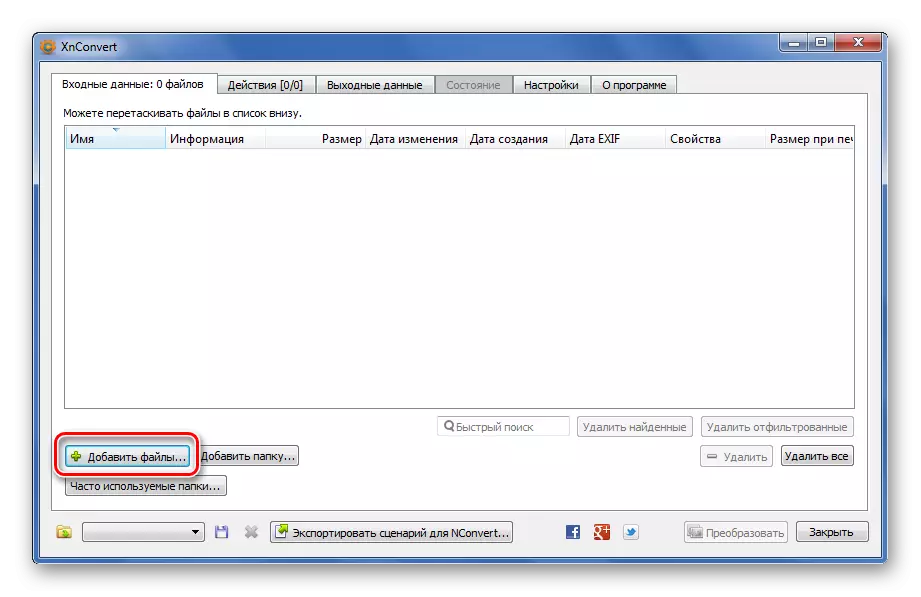
- Click the Add Files button and open the NEF photo.
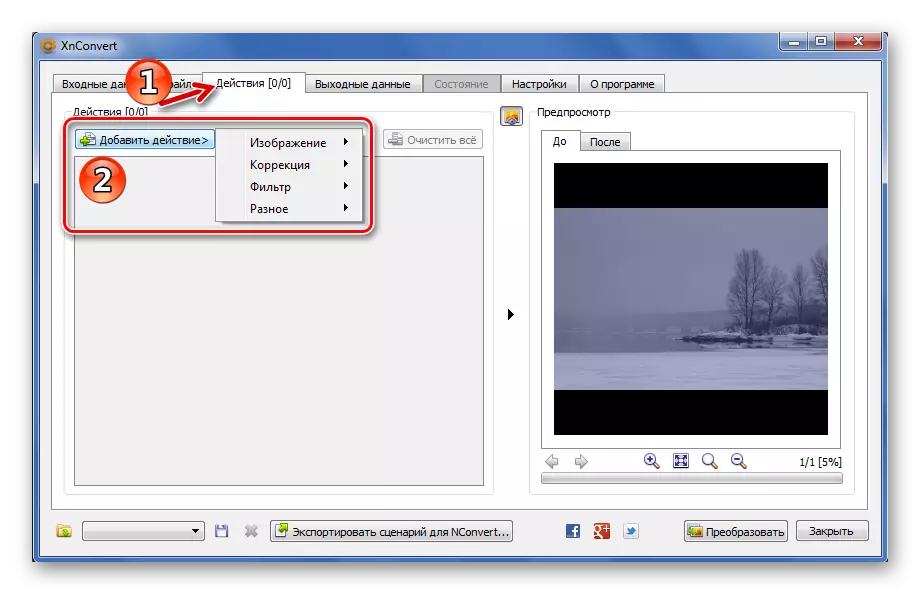
- In the "Actions" tab, you can pre-edit the image, for example, by trimming or leaving the filters. To do this, click "Add Action" and select the desired tool. Nearby you can immediately see the changes. But remember that thus the final quality can decrease.
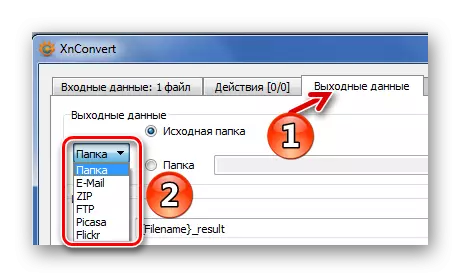
- Go to the "Output" tab. The transformed file can be not only saved on a hard disk, but also send e-mail or via FTP. This parameter is indicated in the drop-down list.
- In the "Format" block, select "JPG" Go to "Parameters".
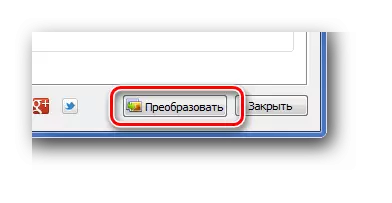
- It is important to establish the best quality, put the value "variable" for the "DCT method" and "1x1, 1x1, 1x1" for "discretization". Click OK.
- The remaining parameters can be configured at your discretion. After clicking the "Convert" button.
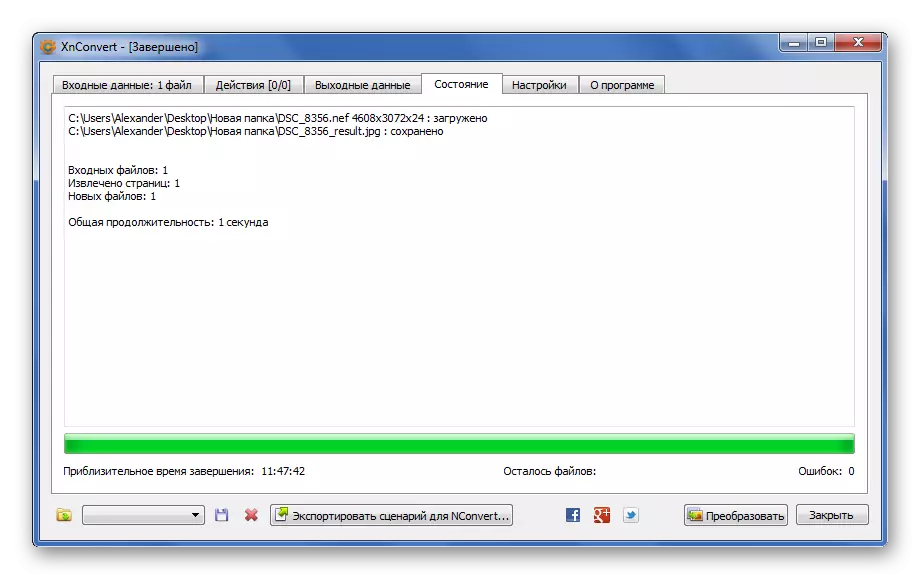
- The Status tab opens, where it is possible to observe the conversion. With XnConvert, this procedure has taken only 1 second.


Method 4: Light Image Resizer
A completely acceptable solution for converting the NEF in JPG can also be the program Light Image Resizer.
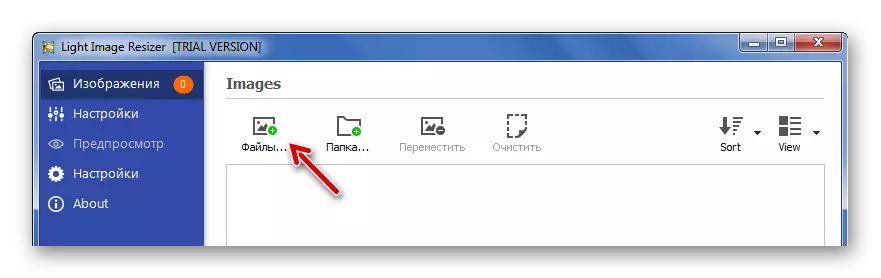
- Click the "Files" button and select a photo on your computer.
- Click the "Forward" button.
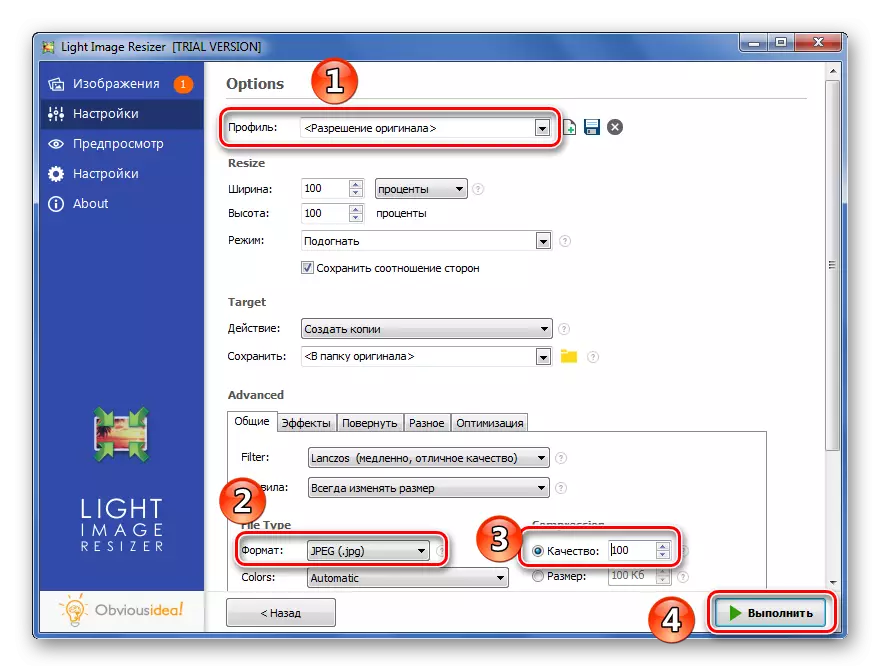
- In the "Profile" list, select "Original Resolution".
- In the Advanced block, specify JPEG format, configure the maximum quality and click the "Run" button.

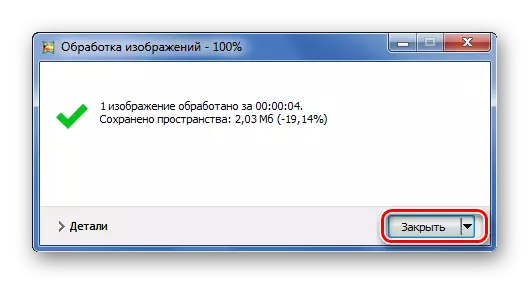
At the end, a window will appear with a brief conversion report. When using this program, this procedure occupied 4 seconds.
Method 5: Ashampoo Photo Converter
Finally, consider another popular photo conversion program - Ashampoo Photo Converter.
Download Program Ashampoo Photo Converter
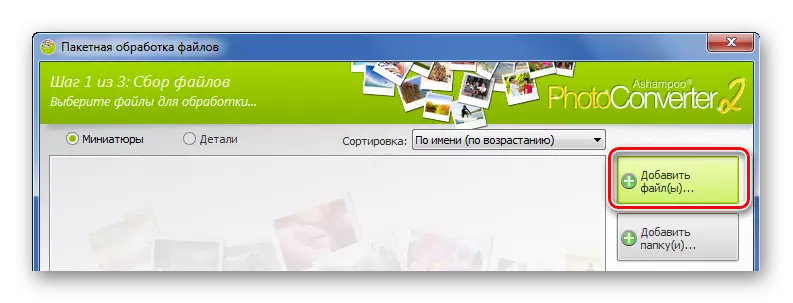
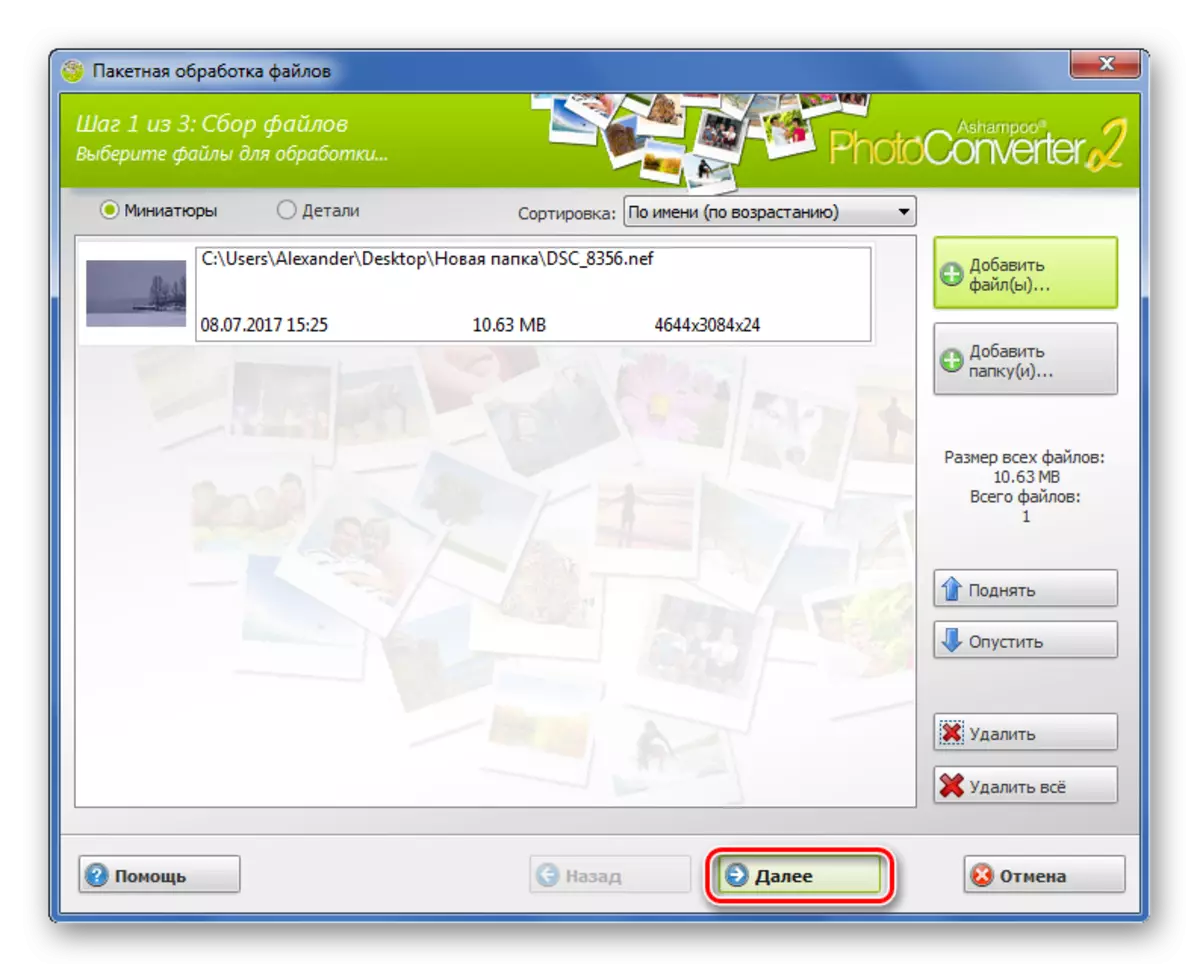
- Click the "Add Files" button and find the necessary NEF.
- After adding, click "Next".
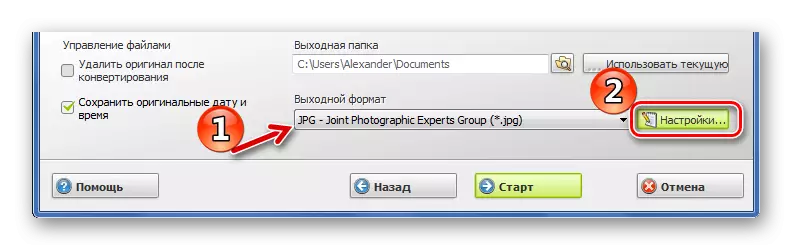
- In the next window, it is important to specify "JPG" as the output format. Then open it settings.
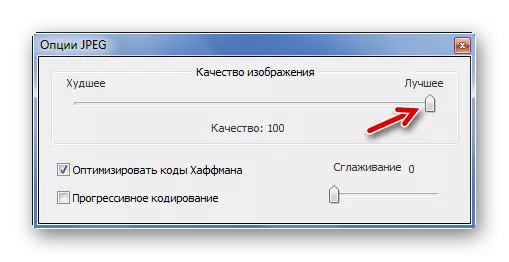
- In the options drag the slider to the best quality and close the window.
- The remaining actions, including editing the image, do, if necessary, but the final quality, as in the previous cases, can be reduced. Run the conversion by pressing the Start button.
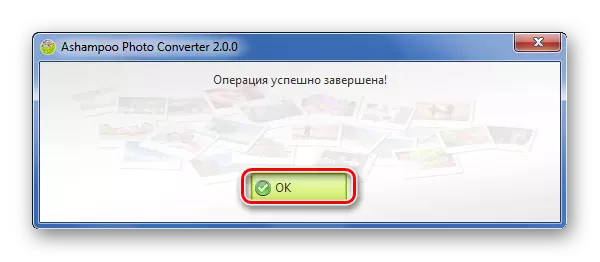
- Photo processing weighing 10 MB in Ashampoo Photo Converter takes about 5 seconds. Upon completion of the procedure, such a message will be displayed:

A snapshot stored in NEF format can be converted to JPG in seconds without loss of quality. To do this, you can use one of the listed converters.