

In many groups of VKontakte, it is possible to meet a quick transition unit to any section or third-party resource. Thanks to this feature, you can significantly facilitate the process of user interaction with the group.
Create a menu for a group VK
Any transition block created in the VKontakte community directly depends on the preliminary connection of special features used in the development of the wiki-pages. It is on this aspect that the above-mentioned menu creation methods are based on.
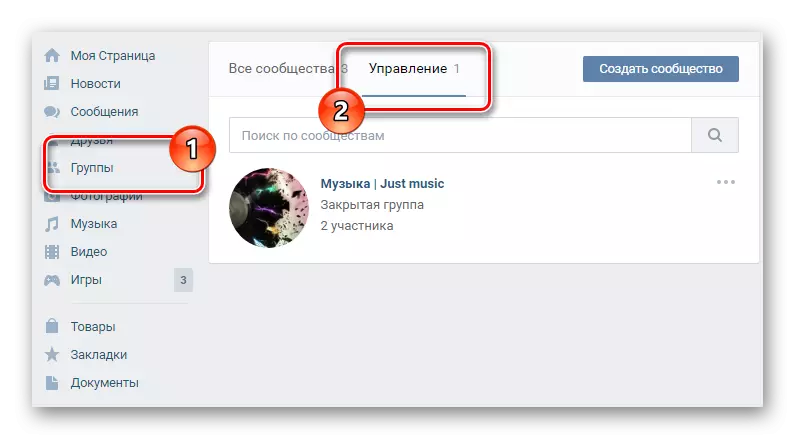
- On the VK website, go to the "Group" page, switch to the "Management" tab and go to the desired public.
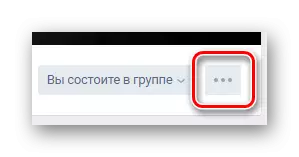
- Click on the "..." icon located under the main picture of the public.
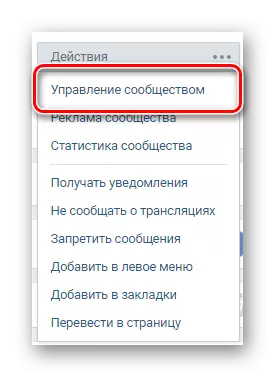
- Go to the section "Community Management".
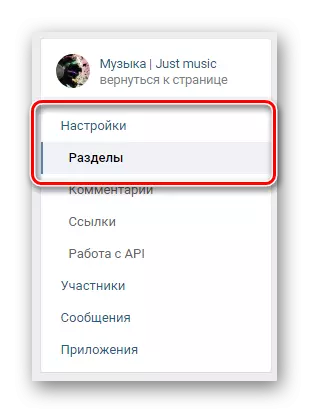
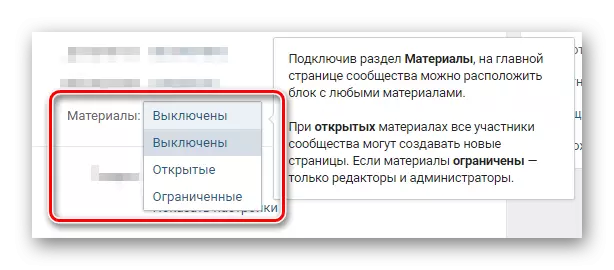
- Through the navigation menu on the right side of the page, switch to the "Settings" tab and select the Daughter item "Sections".
- Find the item "Materials" and transfer them to the status "limited".
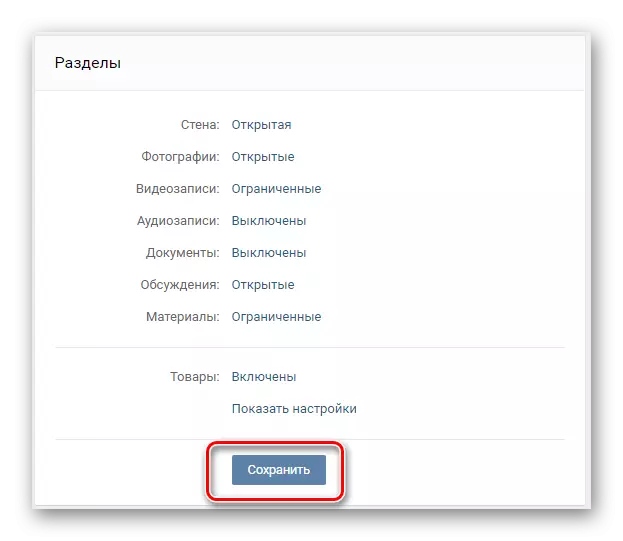
- Click the "Save" button at the bottom of the page.
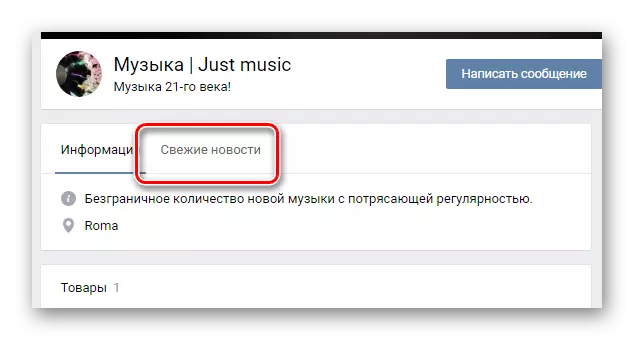
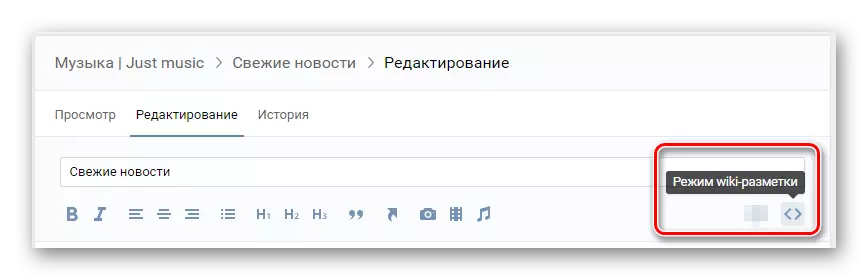
- Return to the community's main page and switch to the "Fresh News" tab, located called and the status of the group.
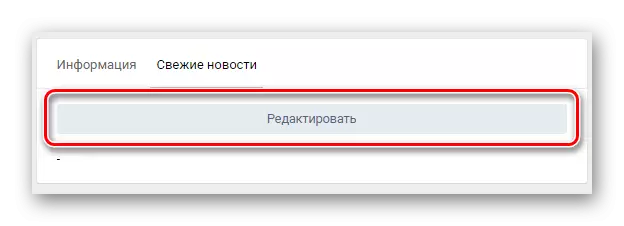
- Click the Edit button.
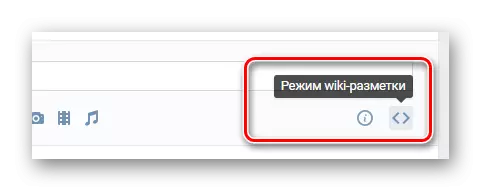
- In the upper right corner of the window that opened the window, click on the "" icon with a pop-up prompt "Wiki-markup mode".
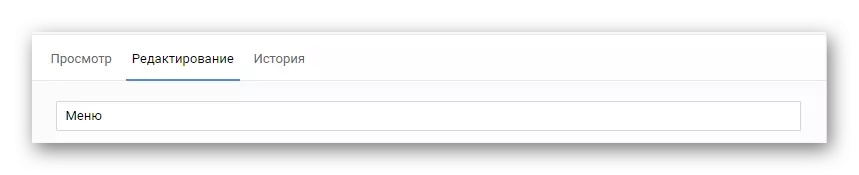
- Change the standard name of the "Fresh News" section for suitable.
You can do "Open" But in this case the menu will be available for editing by ordinary participants.
Switching to the specified mode allows you to use a more stable version of the editor.
Now, having finished with the preparatory work, you can proceed directly to the process of creating a menu for the community.
Text menu
In this case, we will consider the main points regarding the creation of the simplest text menu. If you judge in general, this menu type is less popular among the administration of various communities, due to the lack of aesthetic attractiveness.
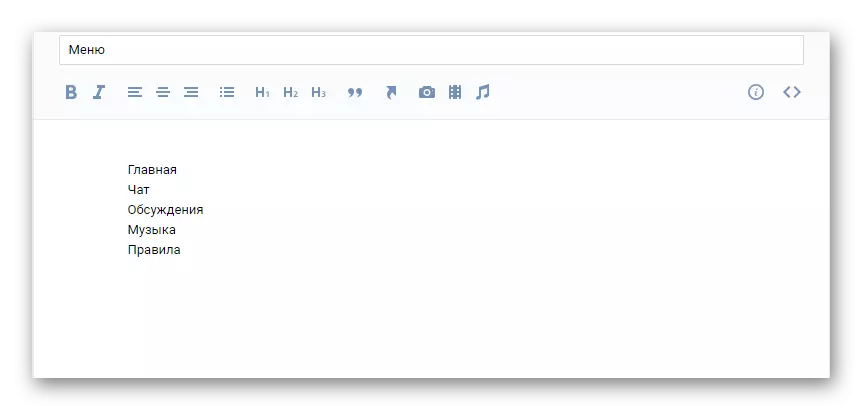
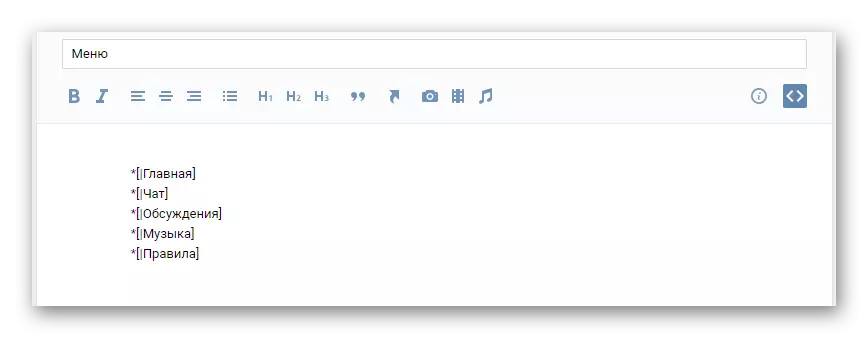
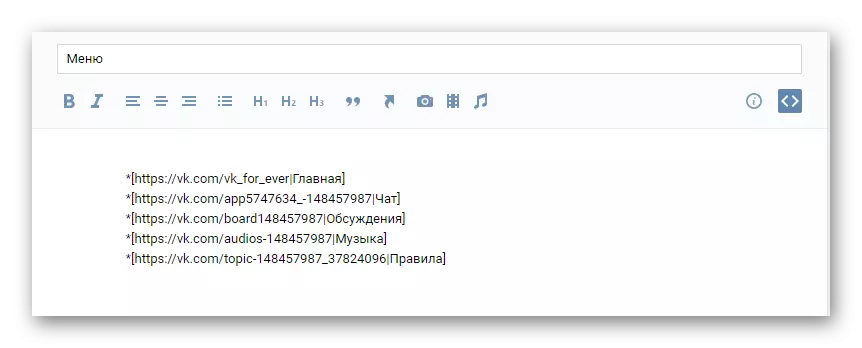
- In the main text box under the toolbar, enter a list of partitions that must be included in the list of links for your menu.
- Each listed item conclude into opening and closing square brackets "[]".
- At the beginning of all menu items, add one character asterisk "*".
- Before the name of each item inside square brackets, put a single vertical line "|".
- Between the opening square bracket and the vertical feature, insert a direct link to the page where the user will fall.
- At the bottom of this window, click the Save page button.
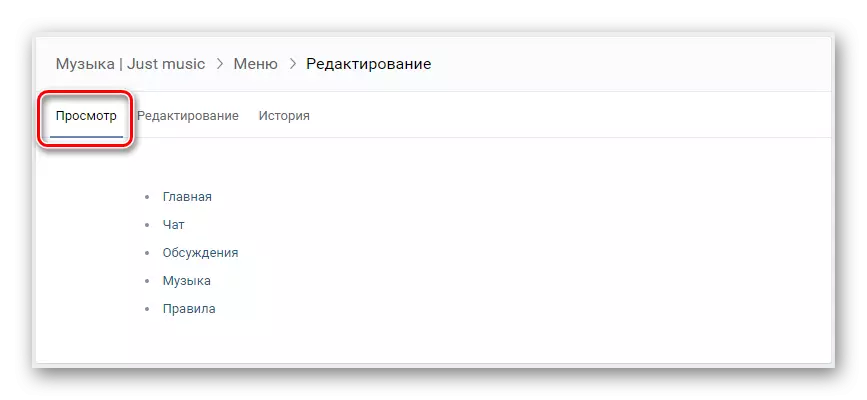
- Over the line with the name of the section, go to the View tab.


It is possible to use both internal links domain vk.com and external.

In mandatory, test your menu and bring it to perfection.
As you can see, the procedure for creating a text menu is not able to cause problems and is made extremely quickly.
Graphic menu
Please note that when executing the instructions under this section of the article, you will need at least the basic skills of possession of Photoshop program or any other graphic editor. If you do not possess such, you will have to learn in the course of action.
It is recommended to stick to those parameters that us are used in the course of this instruction to avoid any problems with incorrect display of images.
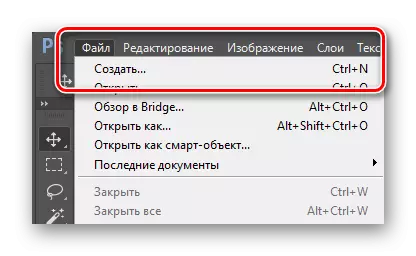
- Run the Photoshop program, open the "File" menu and select "Create".
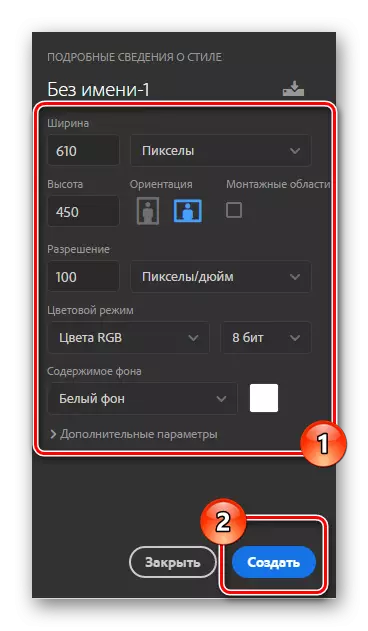
- Specify permission for the future menu and click the "Create" button.
- Drag the image to the workspace, which will play the background of the background in your menu, stretch it out as you comfortably and press the Enter key.
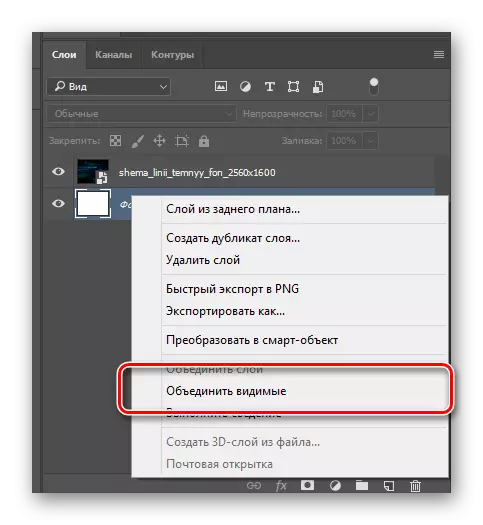
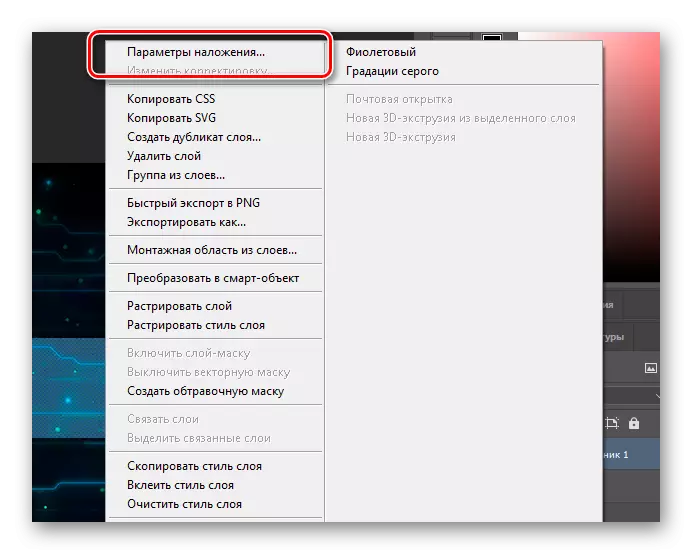
- Right-click on the main background of your document and select "Combine Visible".
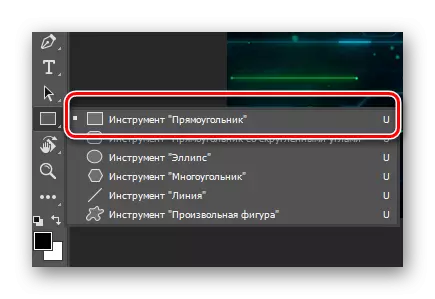
- In the toolbar, activate the "Rectangle".
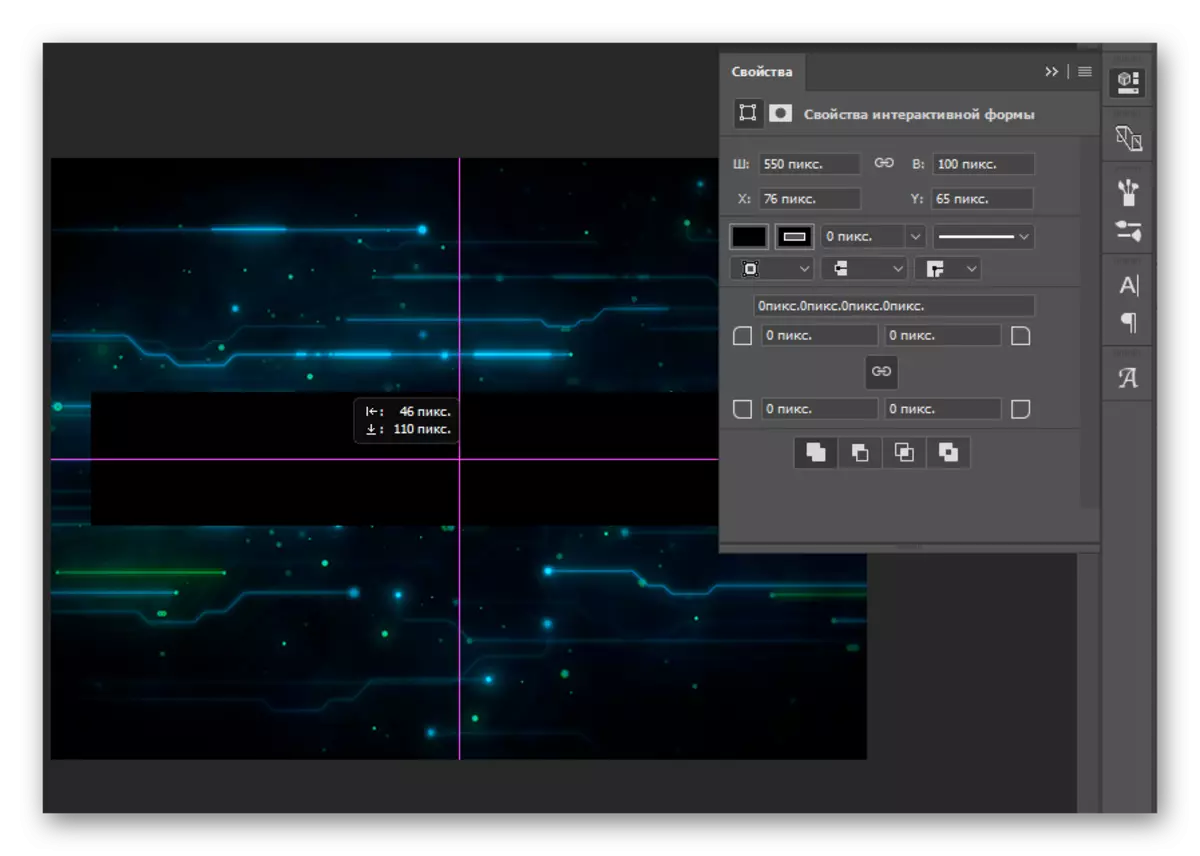
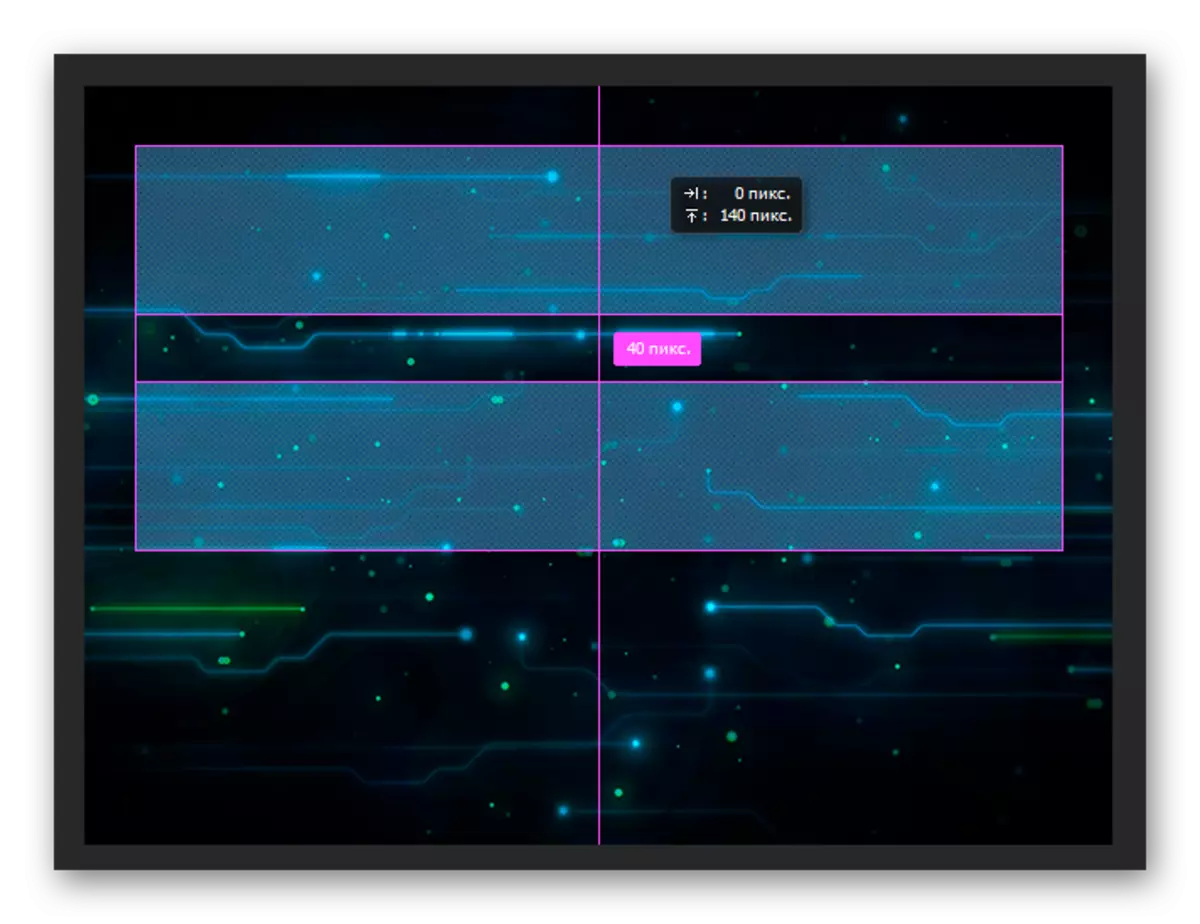
- Using the "Rectangle", in the workspace, create your first button, focusing on even dimensions.
- Purify your button such an appearance, what you would like to see using all the features of the PHOTOSHOP program known to you.
- Clone the created button by pressing the "ALT" key and dragging the image within the workspace.
- Switch to the "Text" tool by clicking on the corresponding icon on the toolbar or by pressing the "T" key.
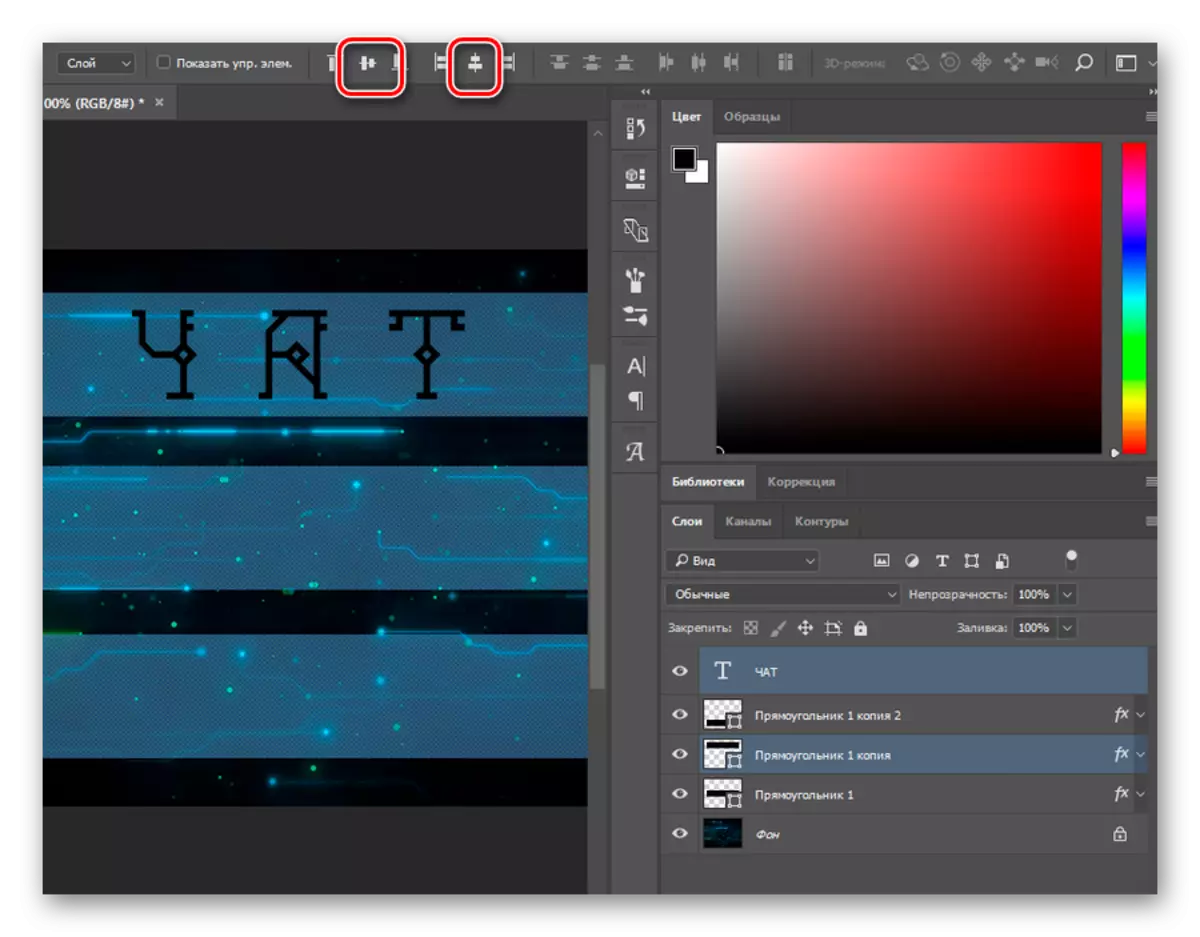
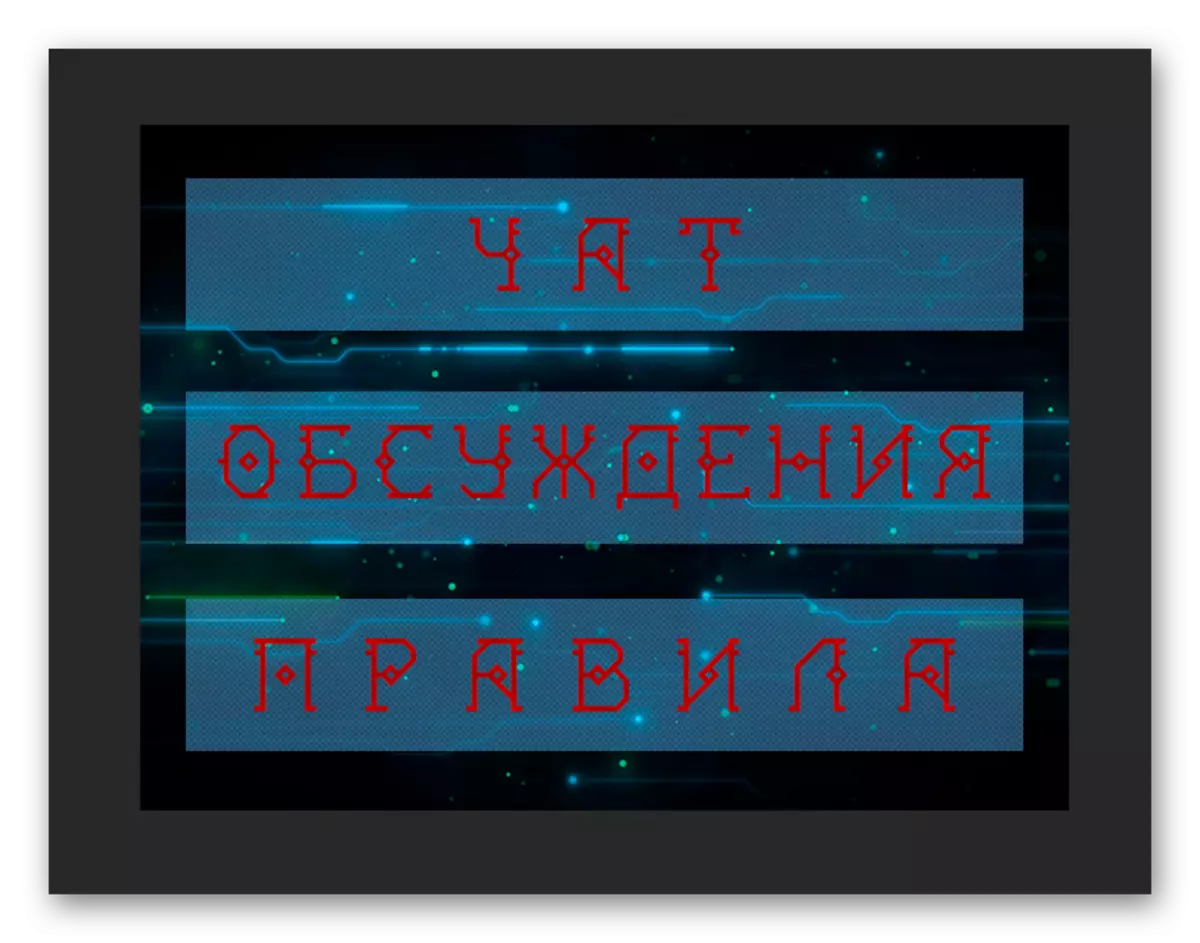
- Click anywhere in the document, type the text for the first button and place it in the area of one of the previously created images.
- In order to center the text on the picture, select the layer with the text and the desired image, pressing the "Ctrl" key, and alternately press the alignment buttons on the top toolbar.
- Repeat the described procedure with respect to the remaining buttons, speaking the text corresponding to the names of the sections.
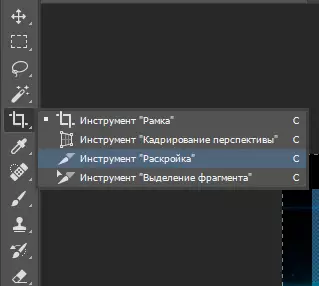
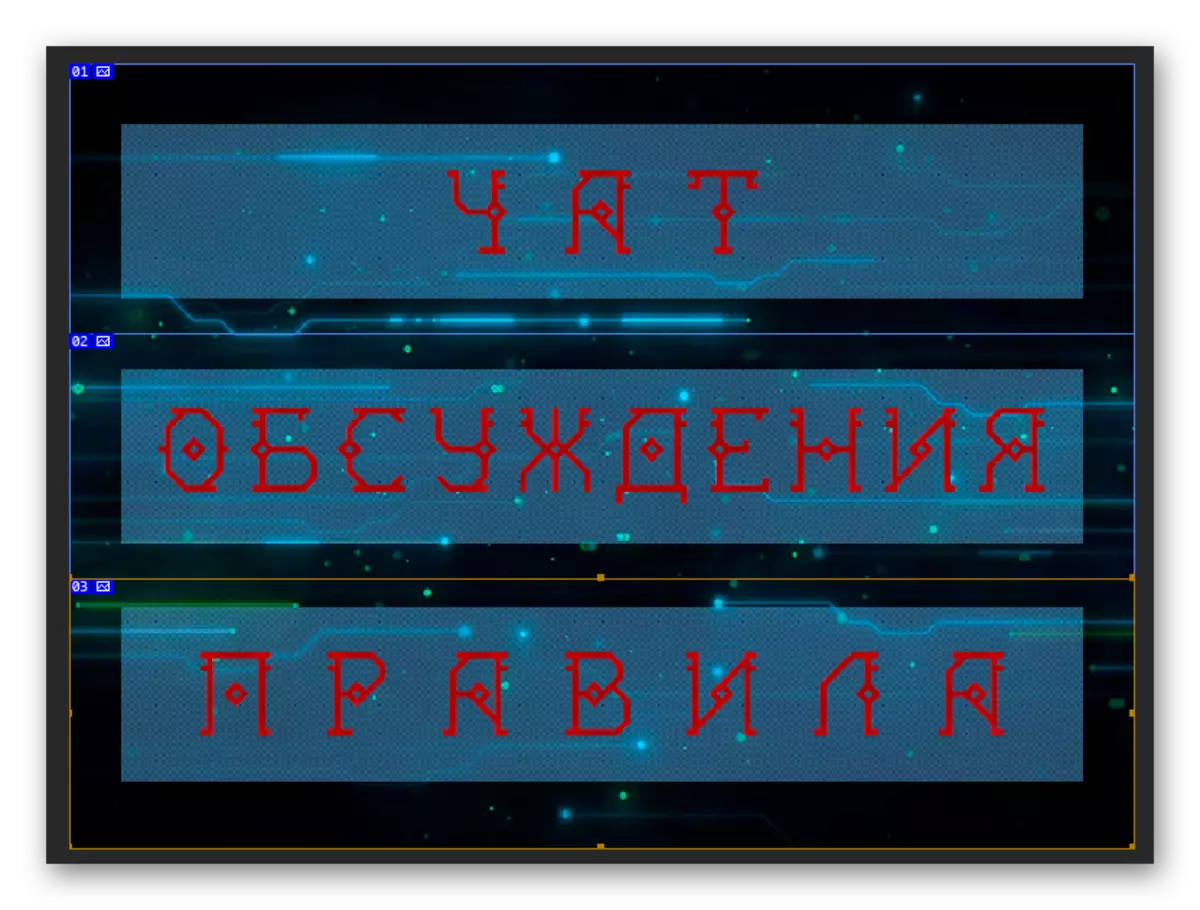
- Press the "C" key keypad or select the "Cutting" tool using the panel.
- Highlight each button, pushing out the height of the created image.
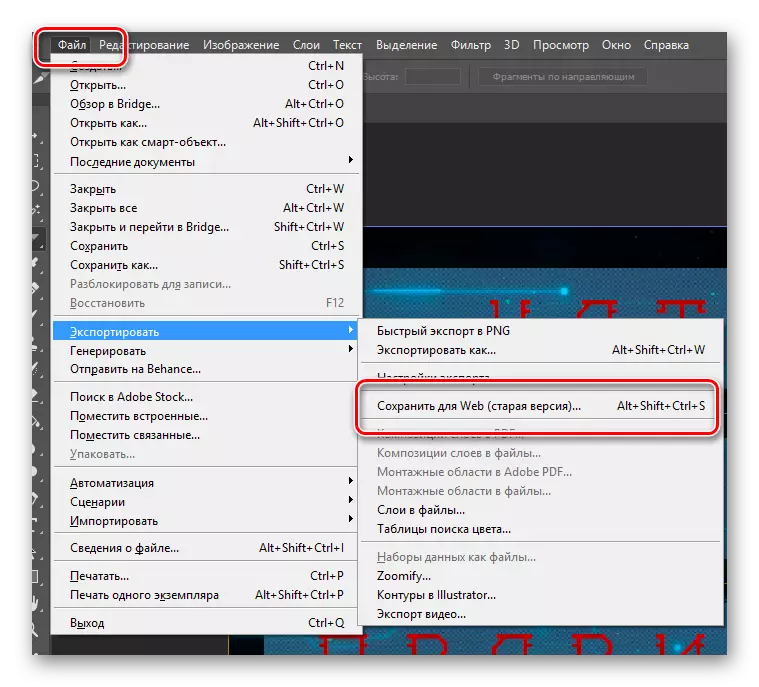
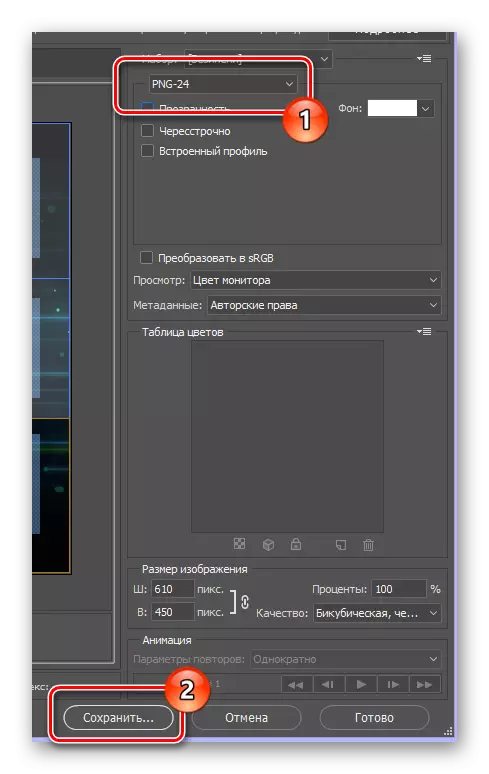
- Open the "File" menu and select "Save for Web".
- Set the file format "PNG-24" and at the bottom of the window, click the Save button.
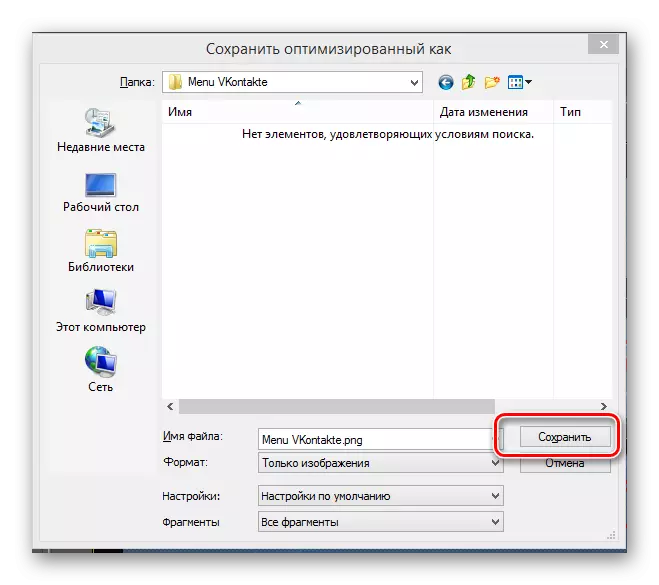
- Specify the folder where you need files, and without changing any additional fields, click on the "Save" button.
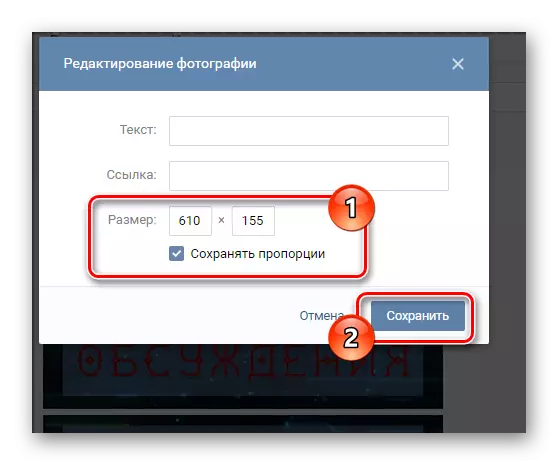
Width: 610 pixels
Height: 450 pixels
Resolution: 100 pixels / inch
Your image sizes may differ depending on the concept of the menu created. However, know that when stretching the picture within the WIKI section, the width of the graphic file cannot exceed 610 pixels.
Do not forget to use a clamping key SHIFT To evenly scaling the image.
For convenience, it is recommended to enable "Auxiliary elements" through the menu "View".
The number of copies required and the final and location comes from your personal idea.
Text sizes can set any that satisfy your desires.
Do not forget to issue text in accordance with the menu concept.
At this moment you can close the graphic editor and return to the VKontakte website.
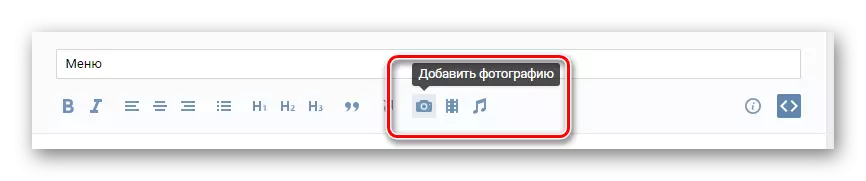
- Being in the menu editing section, on the toolbar, click on the Add photo icon.
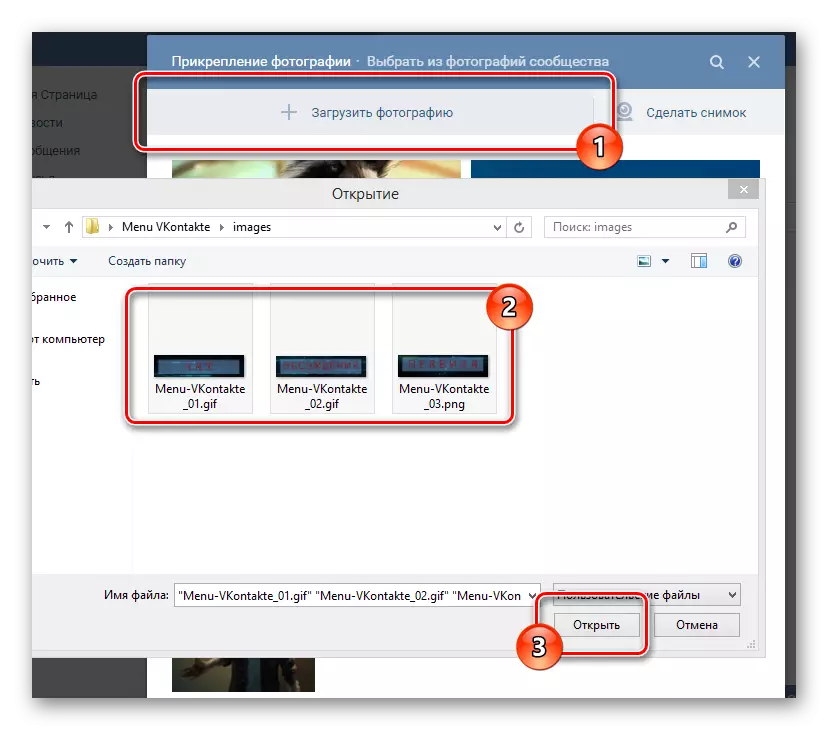
- Load all the images that have been saved at the last stage of working with Photoshop.
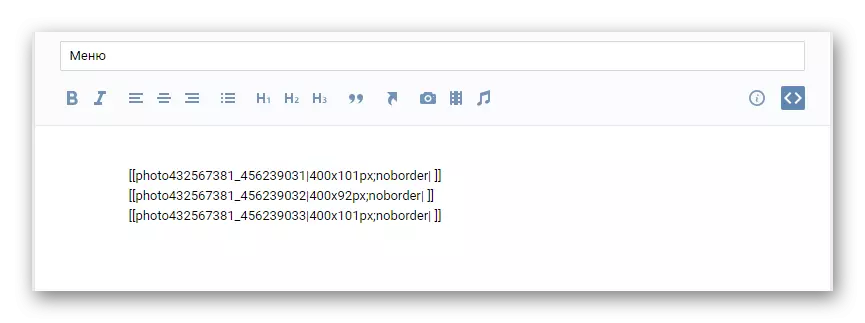
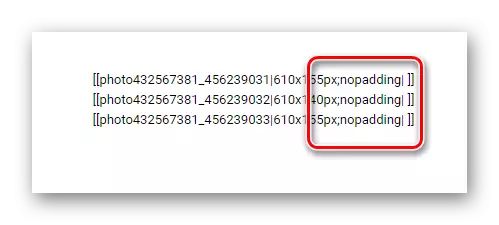
- Wait for the end of the picture loading process and add code lines to the editor.
- Switch to visual editing mode.
- Alternately click on each image, setting the maximum value "width" for the buttons.
- Return to Wiki-markup editing mode.
- After the resolution specified in the code, put the symbol ";" And register the additional parameter "nopadding;". It must be done so that there is no visual breaks between the images.
- Next, insert a direct link to the page where the user will move, between the first closing square bracket and the vertical feature, excluding all spaces.
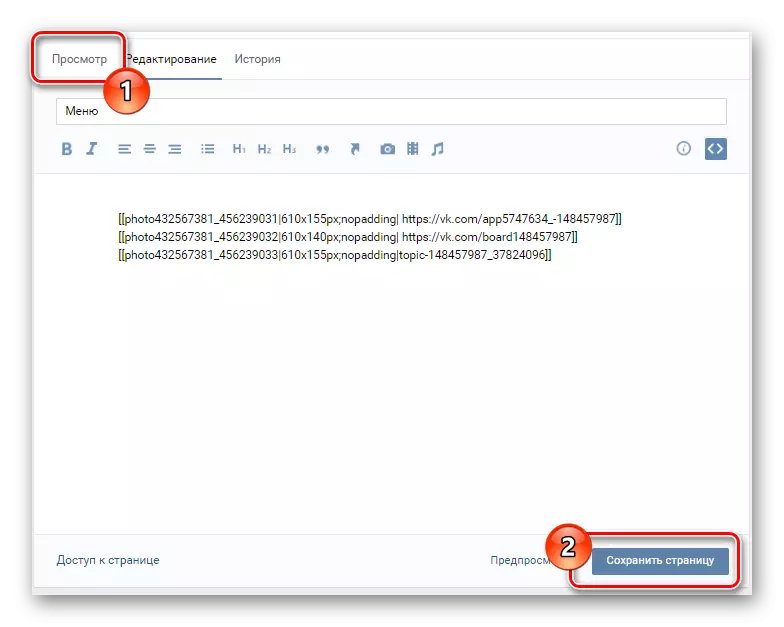
- Press the "Save Change" button below and go to the View tab to check the performance.
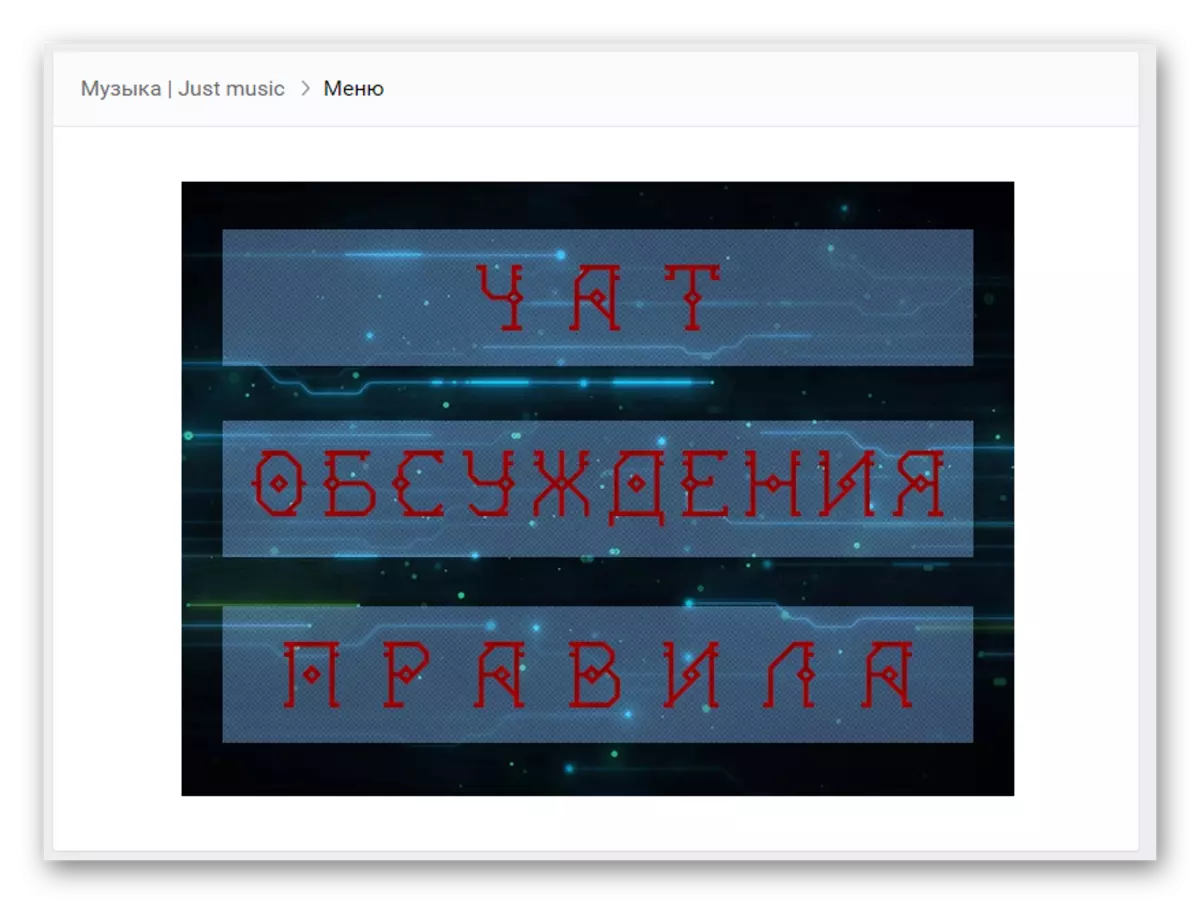
- As soon as your control unit is properly configured, go to the Main Community page to check the login of the group's menu.
Do not forget to save changes.
If you need to add a graphic file without reference, after the previously specified parameter "Nopadding" Propashite "NOLINK;".
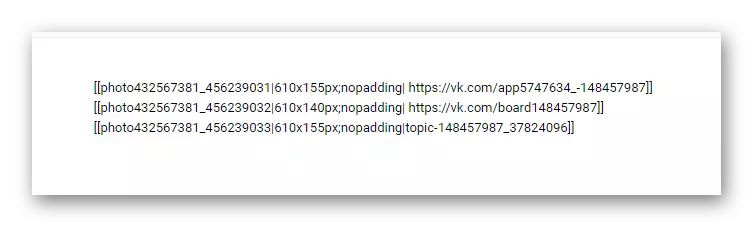
In the case of transition to the partitions of the group or on a third-party site, you should use the full version of the link from the address bar. If you go to any entry, for example, in discussions, use a shortened version of the address containing the characters going after "Vk.com/".
In addition, it is worth noting that you can always clarify the details of the markup using a special section "Marking Help" available directly from the window for editing your menu. Good luck!