
Provide a high speed of the system and the ability to solve various tasks on a computer, having a certain supply of free RAM. When loading RAM, more than 70% can be observed significant braking of the system, and when approaching 100%, the computer hangs at all. In this case, the issue of purification of RAM becomes relevant. Let's find out how to do this when using Windows 7.

Method 2: Application of the Script
Also to release RAM, you can burn your own script if you do not want to use third-party programs for these purposes.
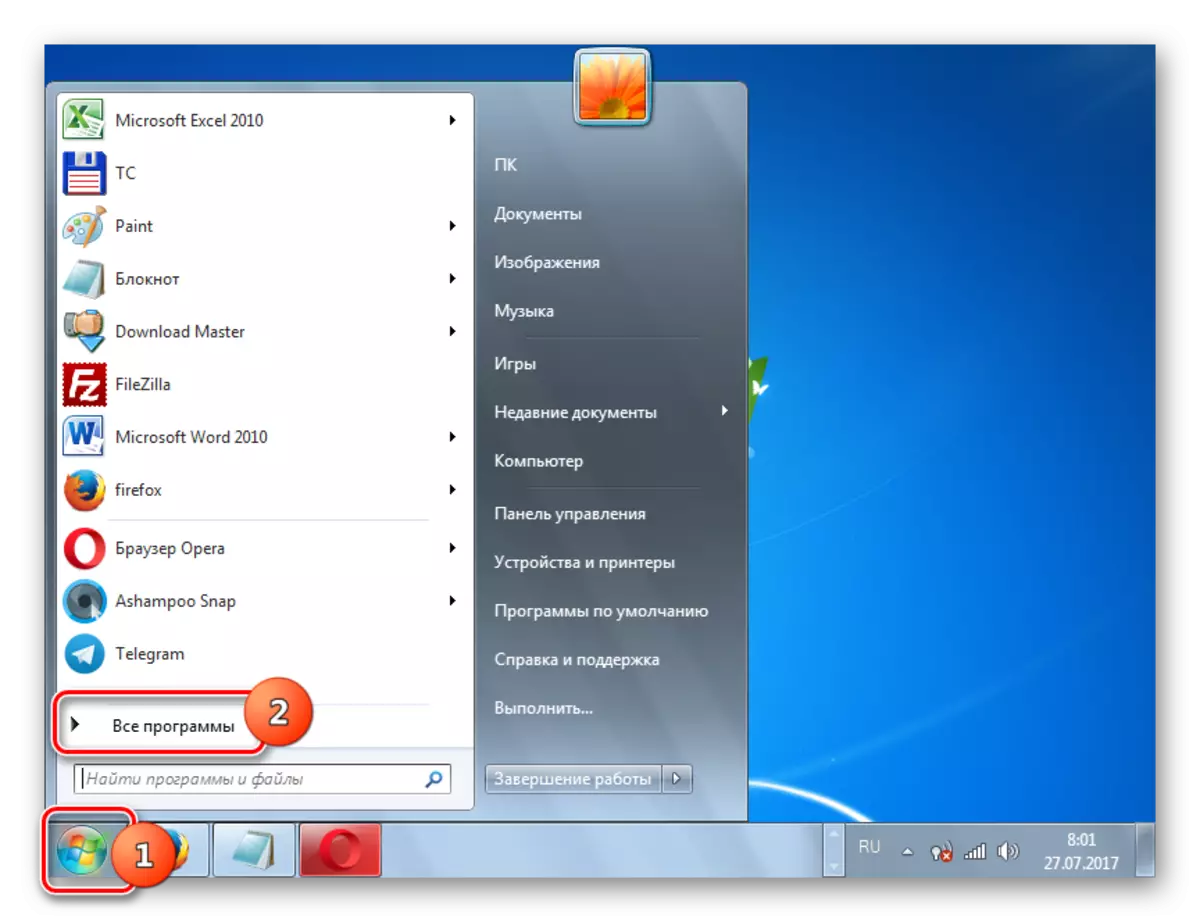
- Click "Start". Move on the inscription "All Programs".
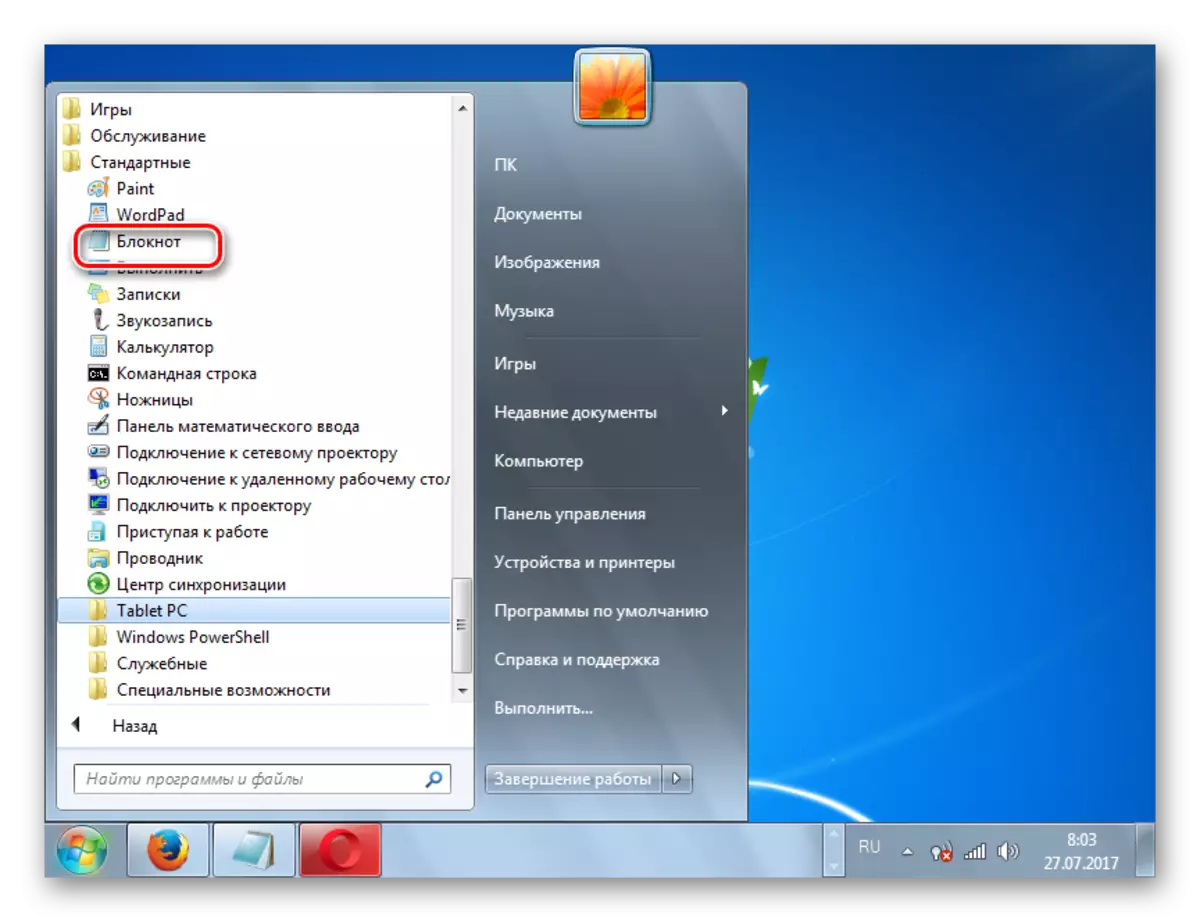
- Select the "Standard" folder.
- Click on the Inscription "Notepad".
- Run "Notepad". Insert the entry on the following template into it:
MSGBox "Do you want to clean RAM?", 0, "Clearing RAM"
FreeMem = Space (*********)
MSGBox "Cleaning RAM is successful", 0, "Cleaning RAM"
In this record, the "FreeMem = Space" parameter (*********) "will differ from users, as it depends on the size of the operational memory of a particular system. Instead of stars, you need to specify a specific value. This value is calculated by the following formula:
RAM (GB) x1024x100000
That is, for example, for a 4 GB RAM, this parameter will look like this:
FreeMem = Space (409600000)
And the general record will take this kind:
MSGBox "Do you want to clean RAM?", 0, "Clearing RAM"
FreeMem = Space (409600000)
MSGBox "Cleaning RAM is successful", 0, "Cleaning RAM"

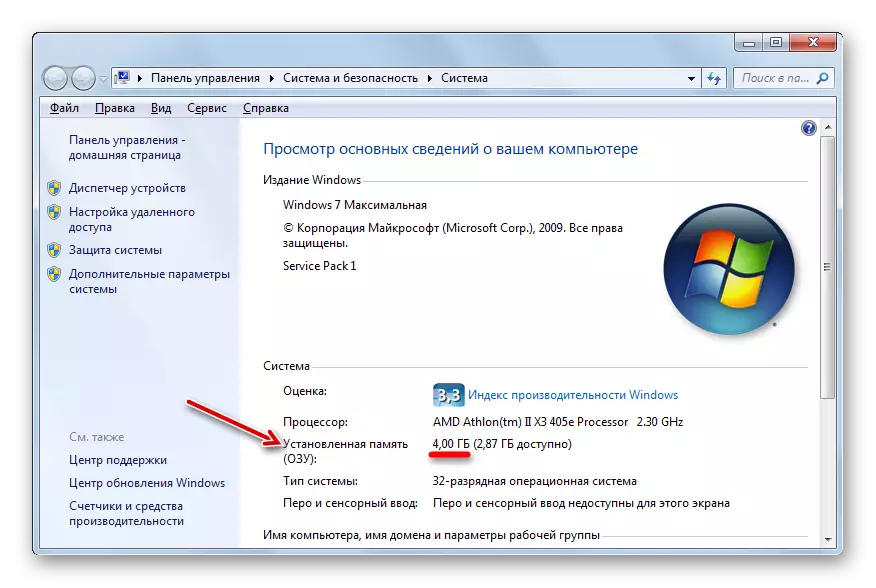
If you do not know the volume of your RAM, you can see it by following the following steps. Press "Start". Next PCM click on the "computer", and select "Properties" in the list.

The computer properties window opens. In the system "System" is the recording "Installed memory (RAM)". This is the right thing for our formula.
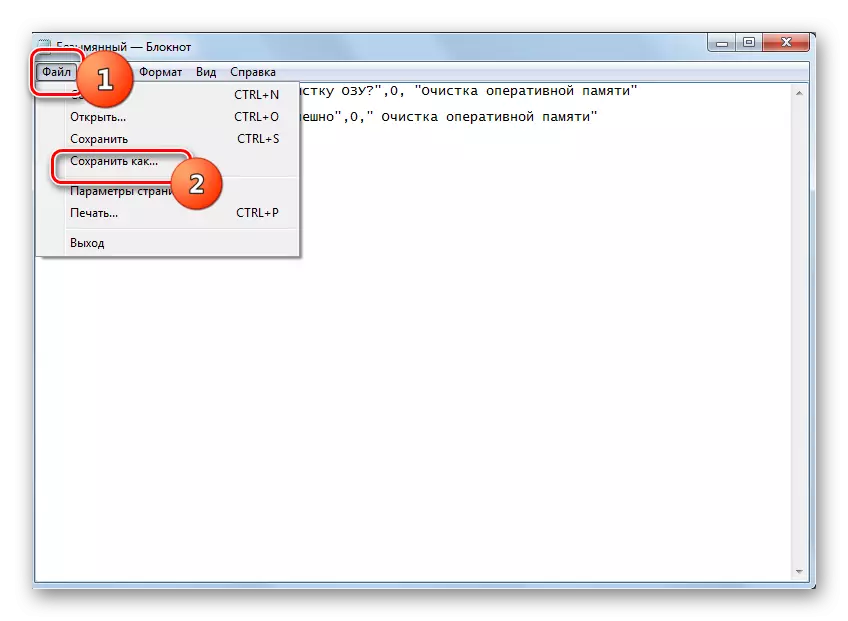
- After the script is recorded in "Notepad", it should be saved. Click "File" and "Save As ...".
- The "Save As" window is launched. Go to the directory where you want to store the script. But we advise you to choose the "Desktop" for this purpose to start the script. The value in the "File Type" field is defined to the "All Files". In the File Name field, enter the file name. It may be arbitrary, but must end .vbs extension. For example, you can use such a name:
Cleaning RAM.VBS
After the specified actions are manufactured, press "Save".
- Then close the "Notepad" and go to the directory where the file has been saved. In our case, this "desktop". Twice click on its name with the left mouse button (LKM).
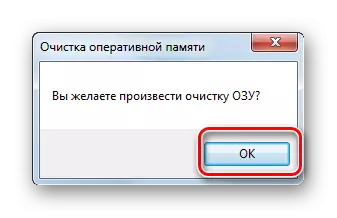
- A dialog box appears with a question, whether the user wishes to clean RAM. We agree by clicking OK.
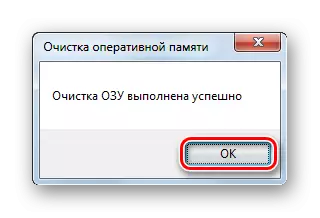
- The script performs the release procedure, after which a message appears that cleaning RAM is successful. To complete the work with the dialog box, click OK.


Method 3: Turning off the startup
Some application applications add themselves to autoload through the registry. That is, they are activated, as a rule, in the background, each time the computer is turned on. At the same time, it is possible that these programs are realistic to be realized, let's say, once a week, and maybe even less often. But, nevertheless, they work constantly, thereby climbing RAM. These are the applications and should be removed from the autorun.
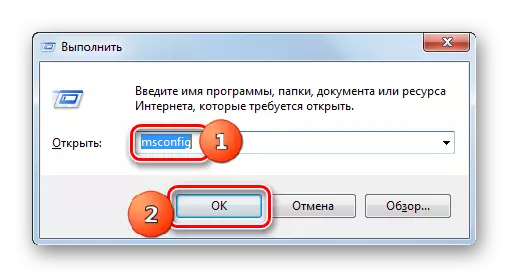
- Call the shell "Run" by pressing Win + R. Enter:
msconfig
Click "OK".
- The "System Configuration" graphic shell starts. Move into the "Startup" tab.
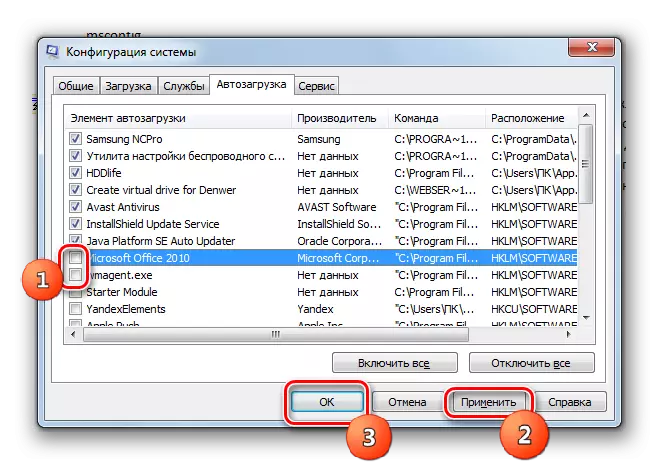
- Here are the names of the programs that are currently automatically launched or done before. Opposite those elements that still perform autorun, a check mark is installed. For those programs that have been turned off at one time, this tick is removed. To disable the autoload of those items that you think to run each time the system starts, just remove the checkboxes opposite them. After that, press "Apply" and "OK".
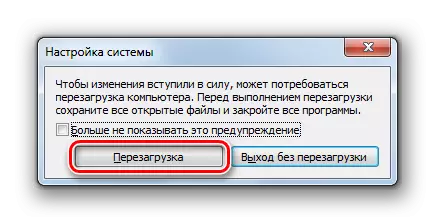
- Then, that the changes come into force, the system will offer you to reboot. Close all open programs and documents, after saving data in them, and then press "Restart" in the "System Setup" window.
- The computer will be rebooted. After its inclusion, the programs that you removed from the autorun will not automatically turn on, that is, the RAM will be cleared of their images. If you still need to apply these applications, you can always add them back to autorun, but even better just run them manually in the usual way. Then, these applications will not work in good, thereby useless to occupy RAM.

There is also another way to enable autoload for programs. It is made by adding shortcuts with reference to their executable file to a special folder. In this case, in order to reduce the load on RAM, it also makes sense to clear this folder.
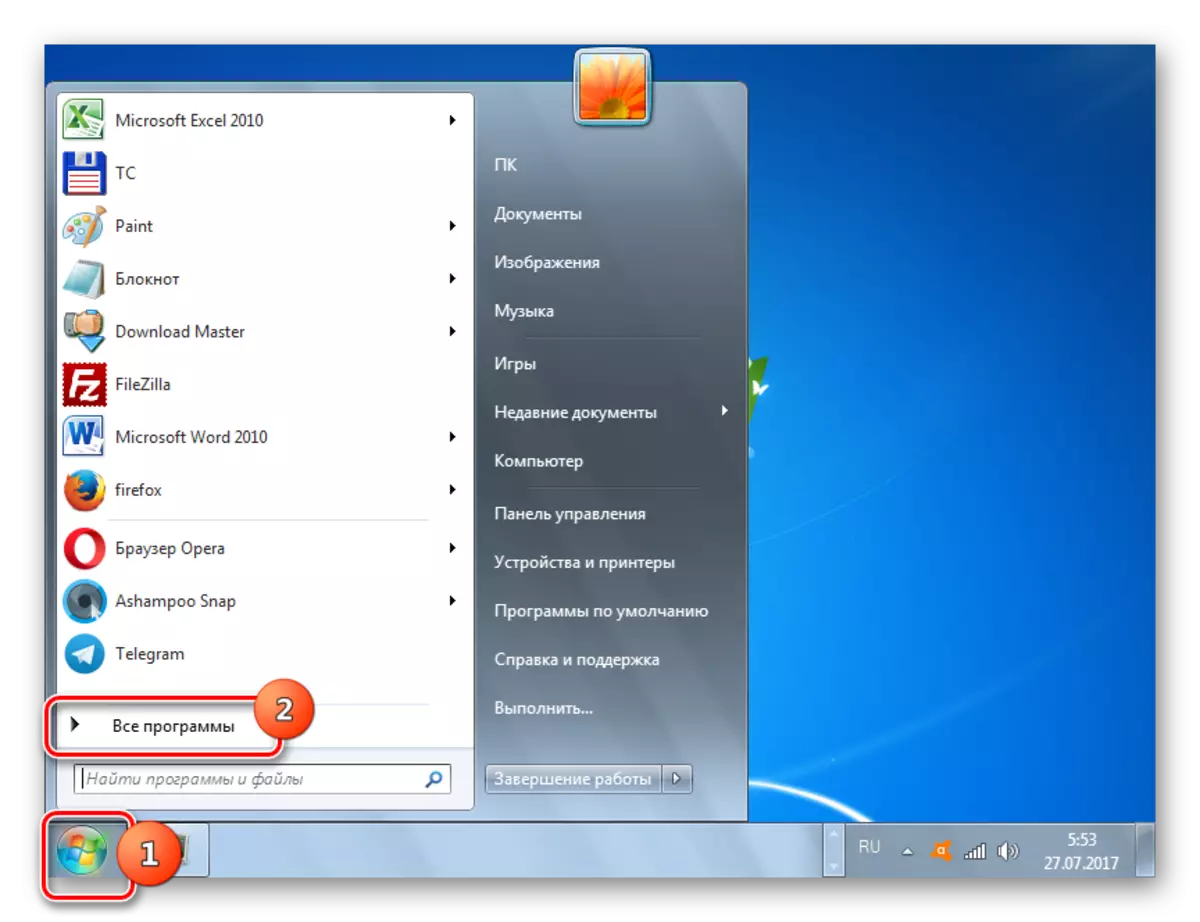
- Click "Start". Select "All Programs".
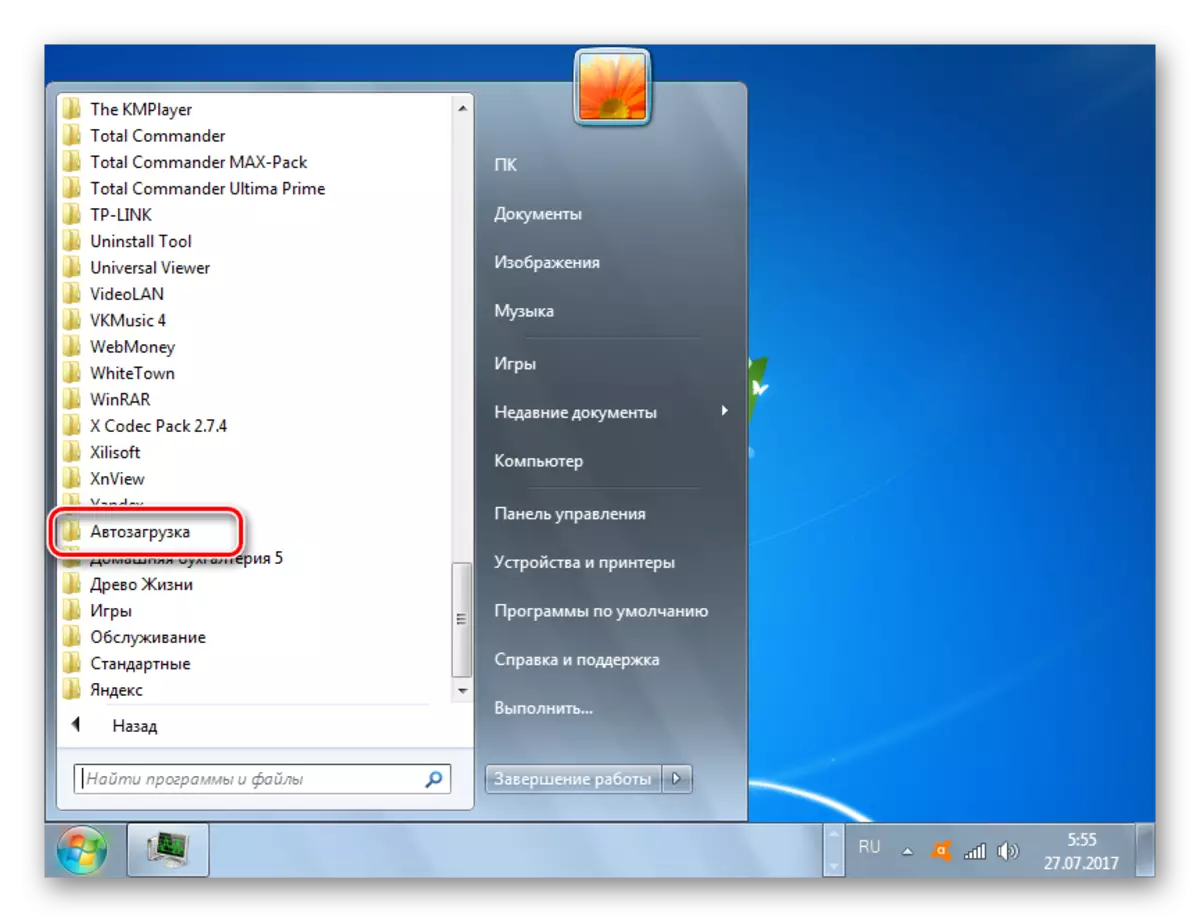
- In the open list of shortcuts and directories, look for the "Auto-loading" folder and go to it.
- A list of programs that are automatically started through this folder opens. Click the PCM on the name of the application you want to remove from autoload. Next, select "Delete". Or just after selecting an object, click Delete.
- The window will open, in which it is asked if you really wish to put a label basket. Since removal is performed consciously, press "Yes."
- After the label is removed, restart the computer. You will make sure that the program that matches this shortcut is not running that it releases the RAM to perform other tasks. In the same way, you can enroll with other shortcuts in the "Auto-site" folder, if you do not want the programs to be loaded automatically.


There are other ways to disable the autorun programs. But on these options we will not stop, as they are dedicated to a separate lesson.
Lesson: How to Disable Application Auto Task in Windows 7
Method 4: Disable Services
As already mentioned above, various started services affect the download of RAM. They act through the svchost.exe process, which we can observe in the "Task Manager". Moreover, several times can be launched with the images with such a name. Each svchost.exe corresponds to several services at once.
- So, run "Task Manager" and see which element svchost.exe uses the most RAM. Click on it PKM and choose "Go to services".
- The transition to the "Services" tab of the Task Manager is performed. At the same time, as you can see, the name of those services that match the svchost.exe selected selected by us are highlighted in blue. Of course, not all of these services are needed a specific user, but they take a significant place in RAM through the svchost.exe file.
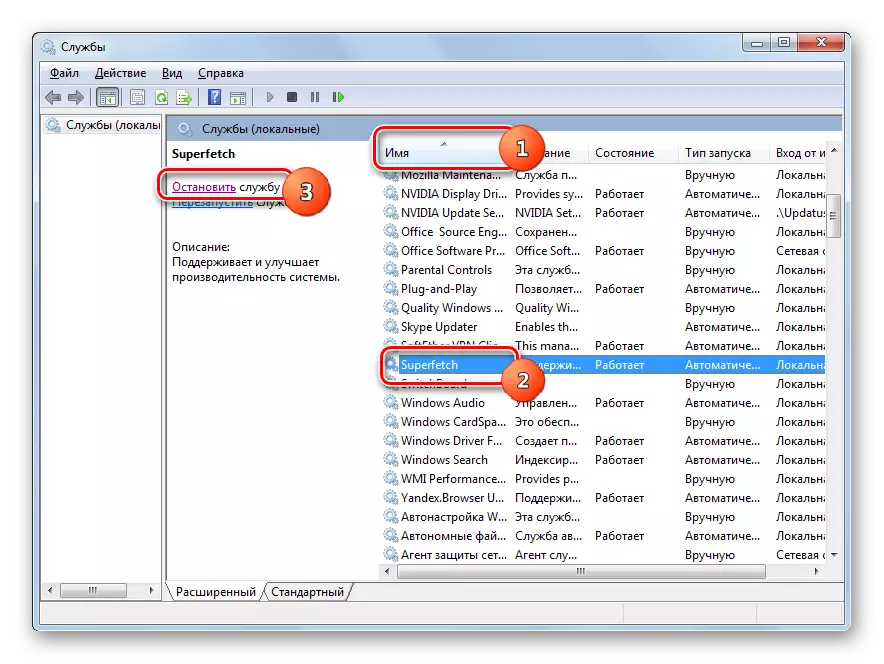
If you are among the services allocated in blue, you will find the name "Superfetch", then pay attention to it. The developers stated that Superfetch improves system performance. Indeed, this service stores certain information about frequently used applications for faster launch. But this function uses a significant amount of RAM, so the benefit from it is very dubious. Therefore, many users believe that it is better to disable this service.
- To go to disconnection in the "Services" tab of the Task Manager, click on the button of the same name at the bottom of the window.
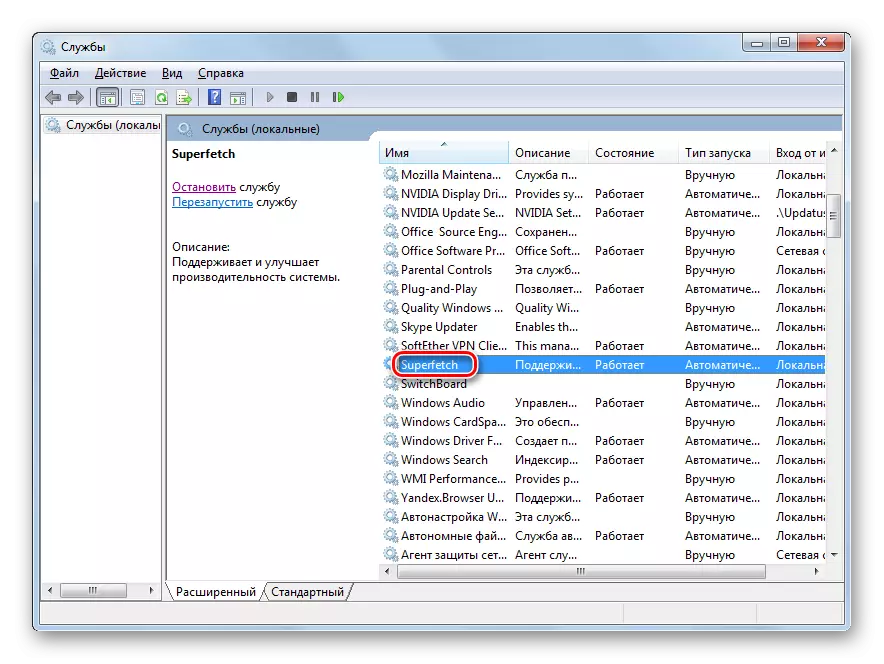
- The "Service Manager" is launched. Click on the name "Name" field to build a list in alphabetical order. Look for the "Superfetch" element. After the element is found, highlight it. You can shut down by clicking on the "Stop Service" on the left side of the window. But at the same time, although the service will be stopped, but it will automatically start the next time you start the computer.
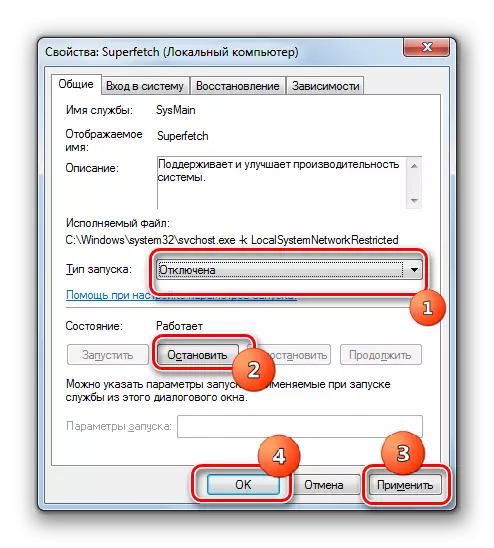
- In order for this not happened, double-click the LCM by the name "Superfetch".
- The properties window of the specified service starts. In the Start Type field, set the "Disabled" value. Next click on "Stop". Click "Apply" and "OK".
- After that, the service will be stopped, which will significantly reduce the load on the image svchost.exe, and therefore on RAM.


In the same way, you can disable other services if you know exactly that they will not be useful to you nor the system. Read more about what kind of services can be turned off, saying in a separate lesson.
Lesson: Disabling unnecessary services in Windows 7
Method 5: Manual cleaning of RAM in "Task Manager"
RAM can also be cleaned manually, stopping the processes in the Task Manager, which the user considers useless. Of course, first of all, you need to try to close the graphic shells of programs standard for them. It is also necessary to close those tabs in the browser that you do not use. This also frees the RAM. But sometimes even after the external closing of the application, its image continues to function. There are also such processes for which the graphic shell is not provided. It also happens that the program depended and the usual way to simply not close it. Here in such cases it is necessary to use the "Task Manager" to clean RAM.
- Run the Task Manager in the Processes tab. To see all running applications that are currently involved on the computer at the moment, and not only those that relate to the current account, click "Display All Users Processes".
- Find the image that you consider unnecessary at the moment. Highlight it. To delete, click on the "Complete Process" button or on the Delete key.
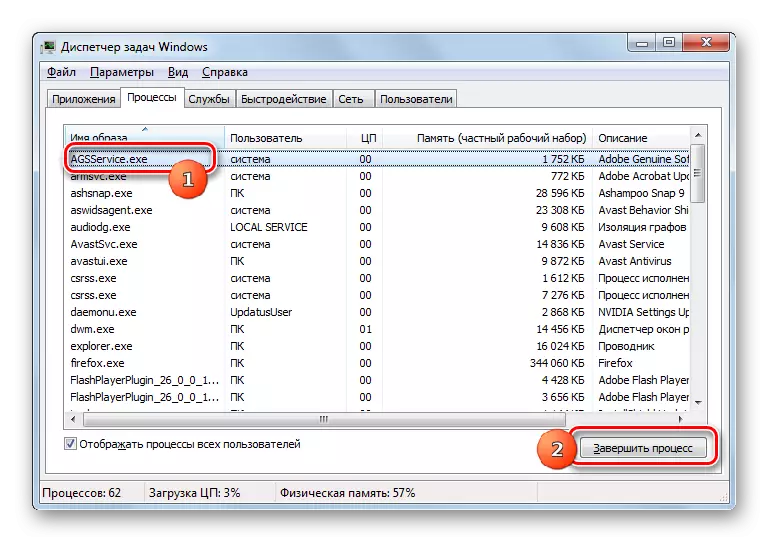
You can also use for these purposes and the context menu, click on the name of the PCM process and select "Complete Process" in the list.
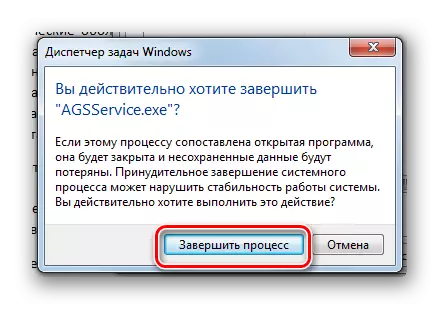
- Any of these actions will cause a dialog box in which the system will ask if you really want to complete the process, as well as warn that all incomplete data related to the application closed will be lost. But since we do not really need this application, and all valuable data relating to it, if any, were previously saved, then click "complete the process".
- After that, the image will be removed from both the "Task Manager" and from RAM, which will free up the additional space of RAM. In this way, you can delete all those elements that you currently consider unnecessary.


But it is important to note that the user must necessarily realize what kind of process he stops, for which this process is responsible, and how it will affect the operation of the system as a whole. Stopping important system processes can lead to incorrect operation of the system or to emergency exit from it.
Method 6: Restarting "Explorer"
Also, some amount of RAM temporarily allows you to free up the restart of the "conductor".
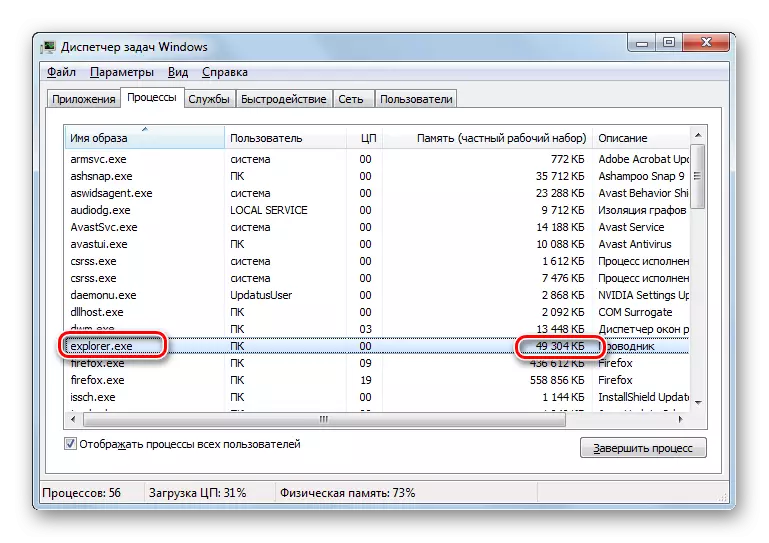
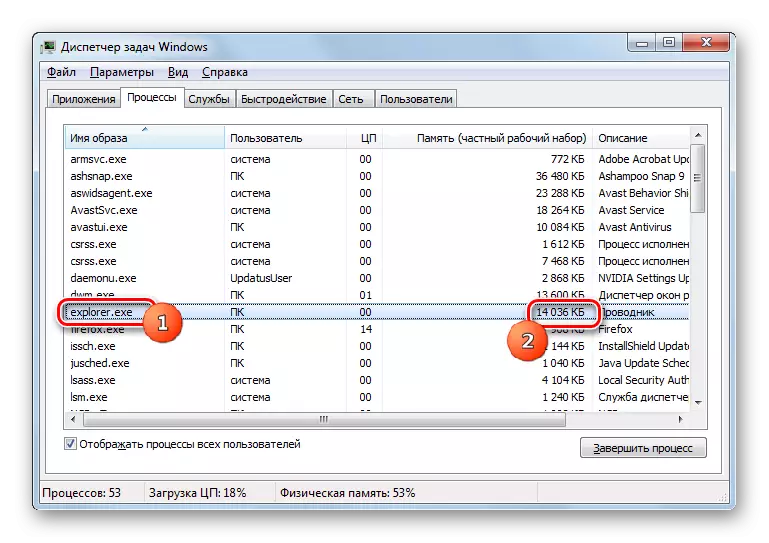
- Go to the Processes tab of the Task Manager. Find the element "explorer.exe". It is he who corresponds to the "conductor". Let's remember how many RAM it takes this object at this time.
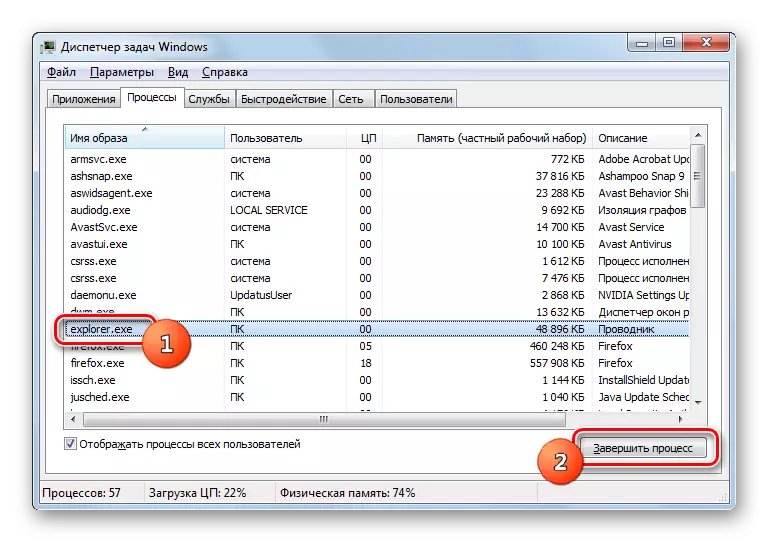
- Highlight "Explorer.exe" and click "Complete Process".
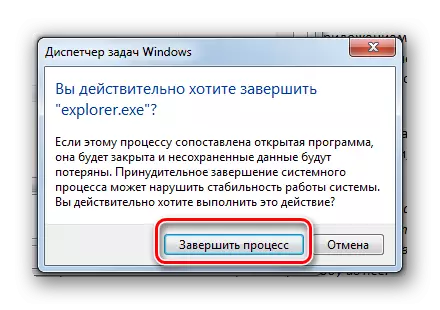
- In the dialog box, confirm your intentions by clicking "Complete Process".
- The "Explorer.exe" process will be deleted, and the "conductor" is disabled. But it is very uncomfortable to work without a "conductor". Therefore, restart it. Click the Task Manager position "File". Select "New Task". The usual combination of Win + R to call the shell "Run" with the "Explorer" disabled may not work.
- In the window that appears, enter the command:
explorer.exe.
Click "OK".
- "Explorer" will start again. As you can monitor the "task manager", the amount of RAM occupied by the "explorer.exe" process, now much less than it was before rebooting. Of course, this is a temporary phenomenon and as the Windows functions use this process will become all "harder", after all, reaching the initial volume in RAM, and may even exceed it. However, such a reset allows you to temporarily release the RAM, which is very important when the resource-intensive tasks are fulfilled.


There are quite a few options for cleaning the system operational memory. All of them can be divided into two groups: automatic and manual. Automatic options are performed using third-party applications and self-written scripts. Manual cleaning is performed by selectively deleting applications from autorun, stopping relevant services or processes loading RAM. The choice of a particular way depends on the user's goals and its knowledge. Users who have no extra time, or which have minimal PC knowledge, it is recommended to apply automatic methods. More advanced users, ready to spend time on the point cleaning of RAM, prefer manual options for performing the task.