

Now viewing the streams of a popular lesson among Internet users. Stream games, music, shows and more. If you want to run your broadcast, then you need to have only one program in stock and follow some instructions. As a result, you can easily create a working broadcast on YouTube.
Starting direct broadcast on YouTube
YouTube is very well suited in order to start streamer activity. Through it, it is enough just to start direct broadcast, no conflicts arise with the software used. You can return to a few minutes ago to reconsider the moment, while on other services, the same Twitch, you need to wait until Stream and the record will continue. Running and setting is carried out in a few steps, let's look them:Step 1: Preparation of YouTube Channel
If you have never been involved in anything like, most likely, direct broadcasts are disabled and not configured. Therefore, first of all, you need to do this:
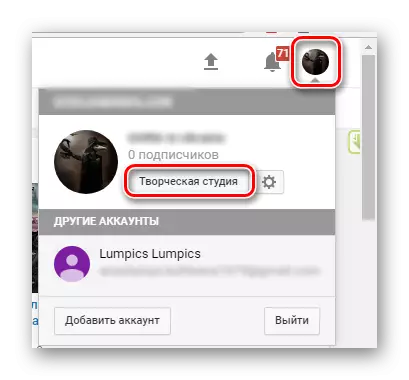
- Go to your YouTube account and go to the creative studio.
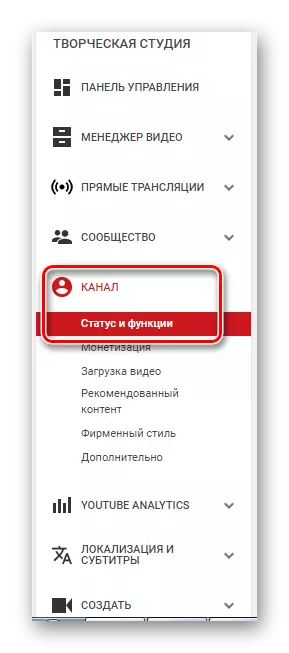
- Select the "Channel" section and go to the "Status and Functions" subsection.
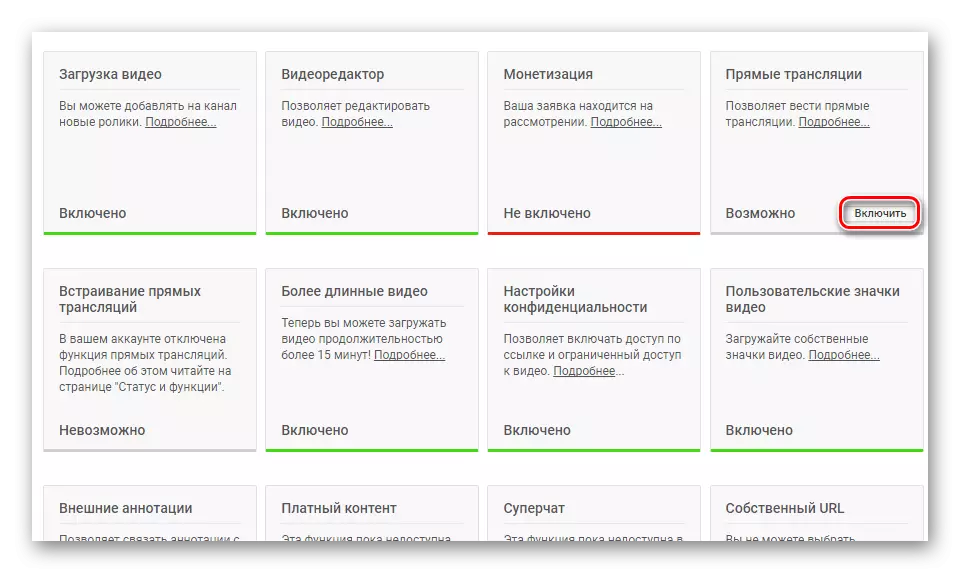
- Find the "direct broadcast" block and click "Enable".
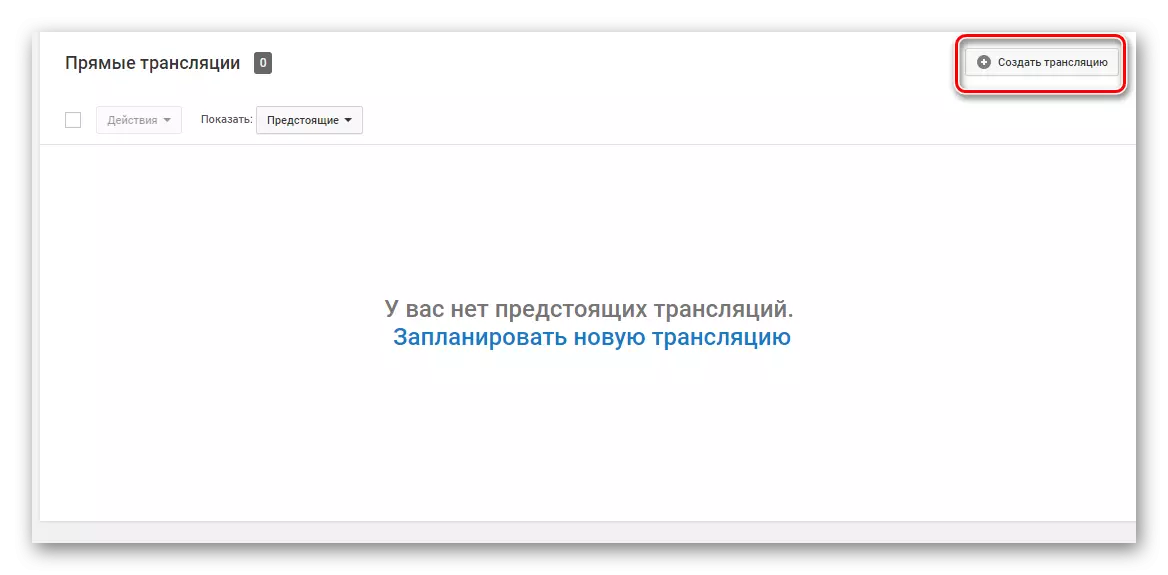
- Now you have a section "Straight broadcasts" in the menu on the left. In it, find "all broadcasts" and go there.
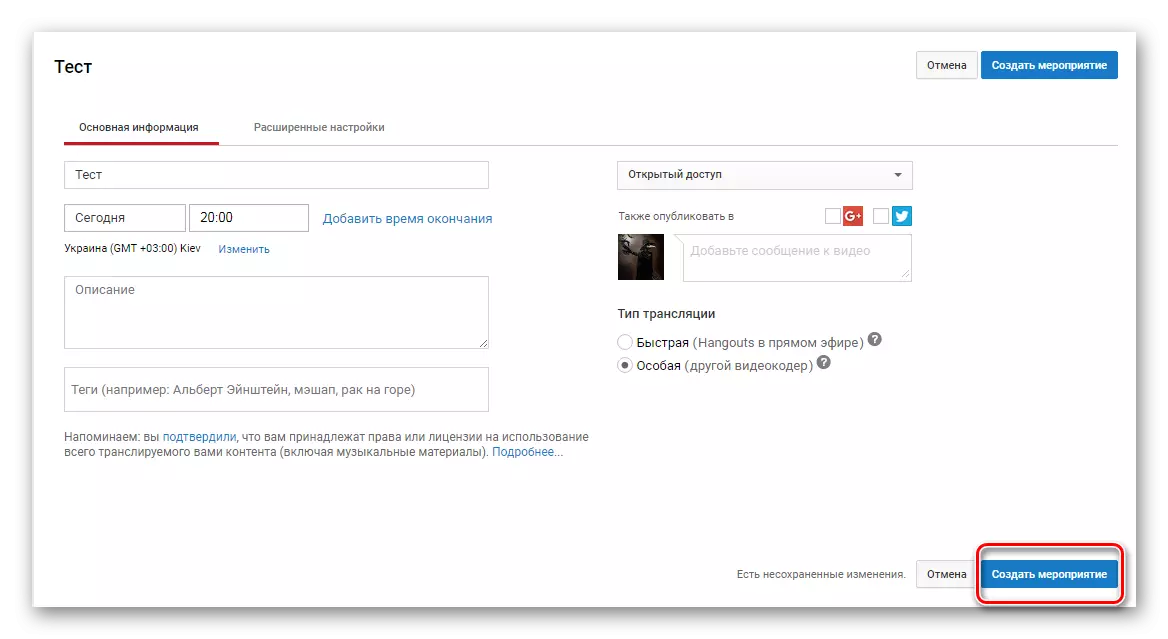
- Click "Create Broadcast".
- Type specify "special". Select the name and specify the start of the event.
- Click "Create Event".
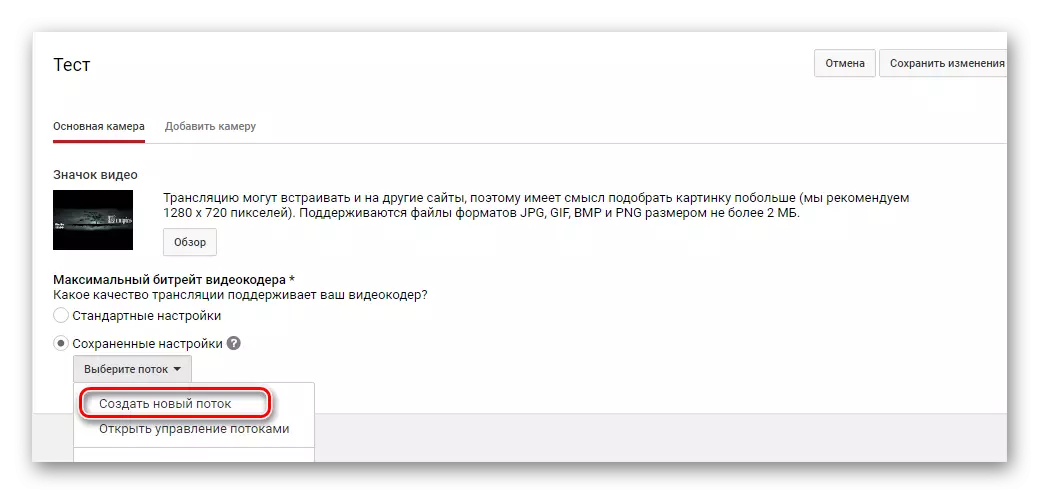
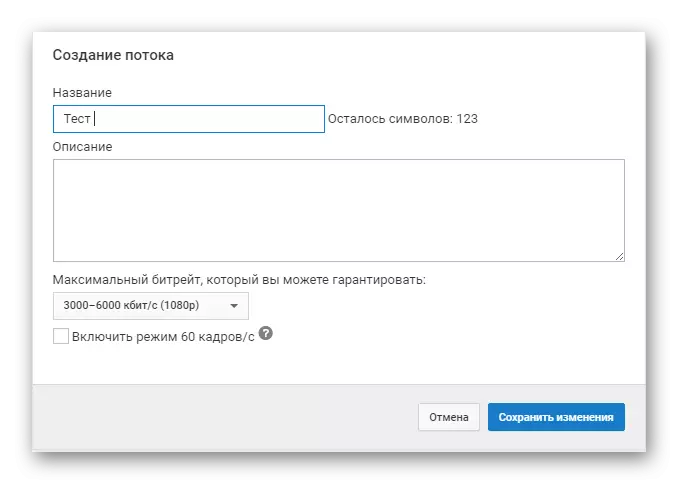
- Find the "Saved Settings" section and place the point opposite it. Click "Create a new stream". It is necessary to do so that every new stream does not configure this item again.
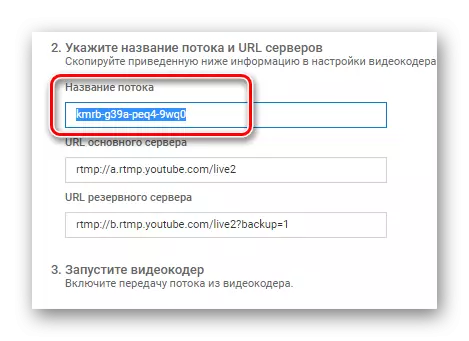
- Enter the name, specify the bitrate, add a description and save the settings.
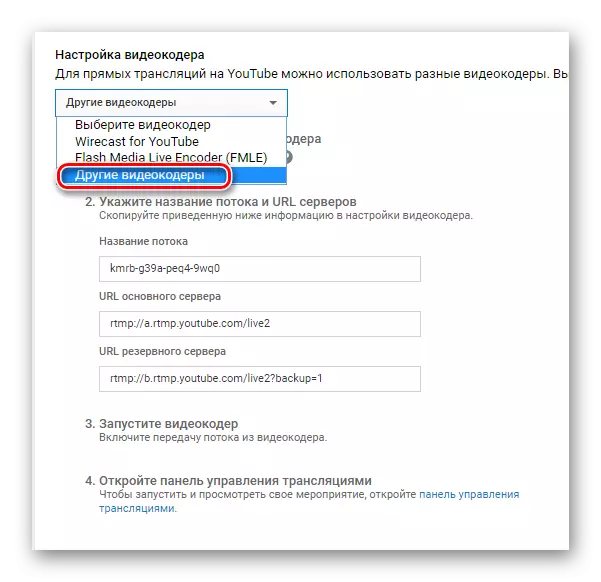
- Find the "Setup Video Codera" item, where you need to select "Other Video Codeners". Since the OSCE, which we will use, is absent in the list, you need to do as shown on the image below. If you use a video codec, which is present on this list, simply select it.
- Copy and save the name of the stream somewhere. This will be needed to enter into OBS Studio.
- Start Changes.
While you can postpone the site and run OK, where you also need to implement some settings.
Step 2: Setting up OBS Studio
This program will need to manage Stream. Here you can configure screen capture and add various broadcast elements.
Download Obs Studio.
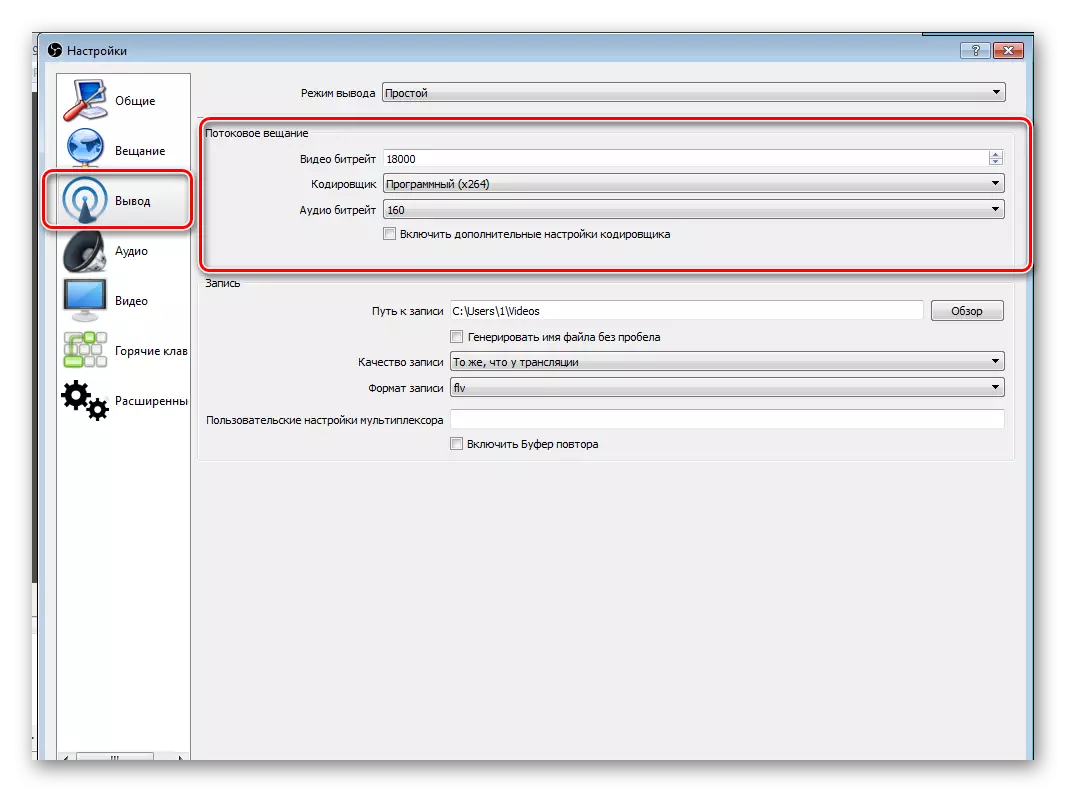
- Run the program and open the "Settings".
- Go to the "Display" section and select the encoder that matches the video card installed on your computer.
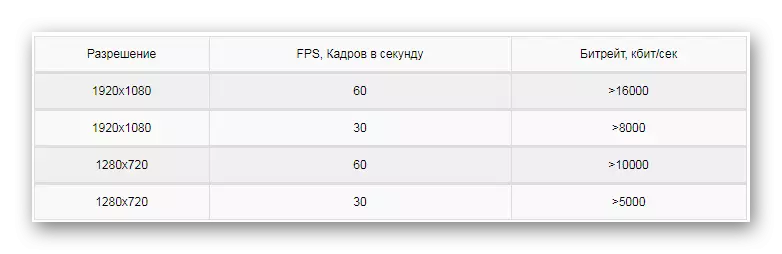
- Bitrate Choose according to your iron, because not every video card can pull high settings. It is better to use a special table.
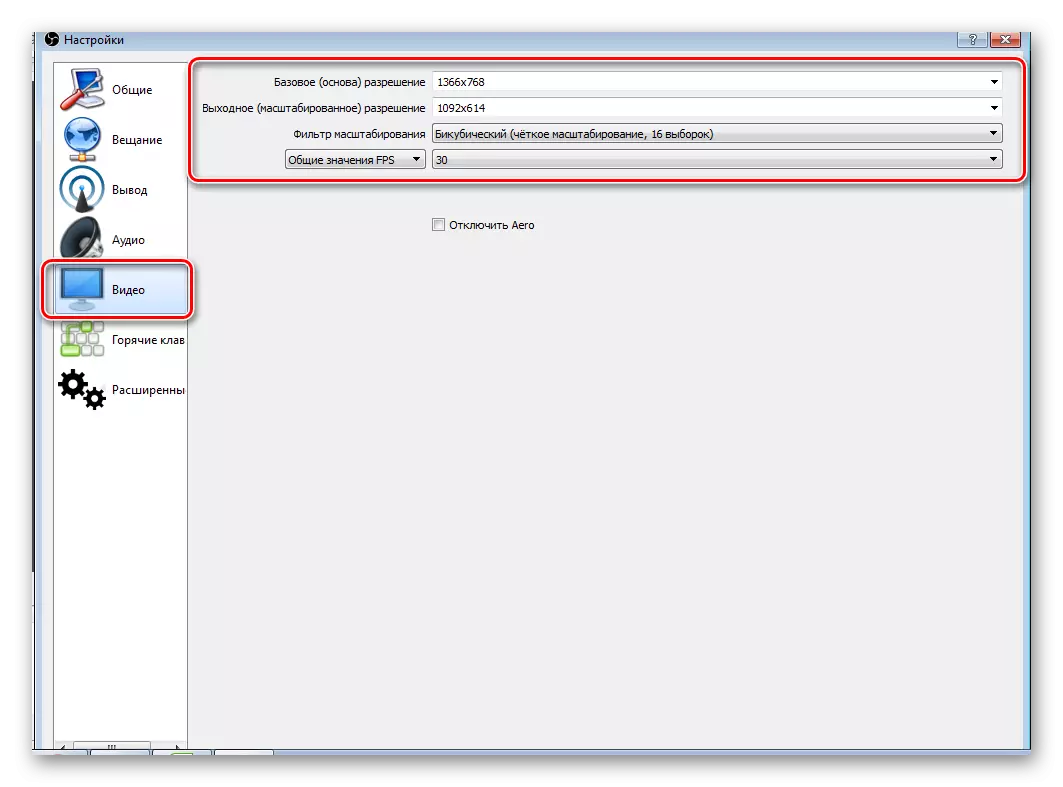
- Go to the "Video" tab and specify the same permission as you specified when creating a stream on the YouTube website so that there are no conflicts between the program and the server.
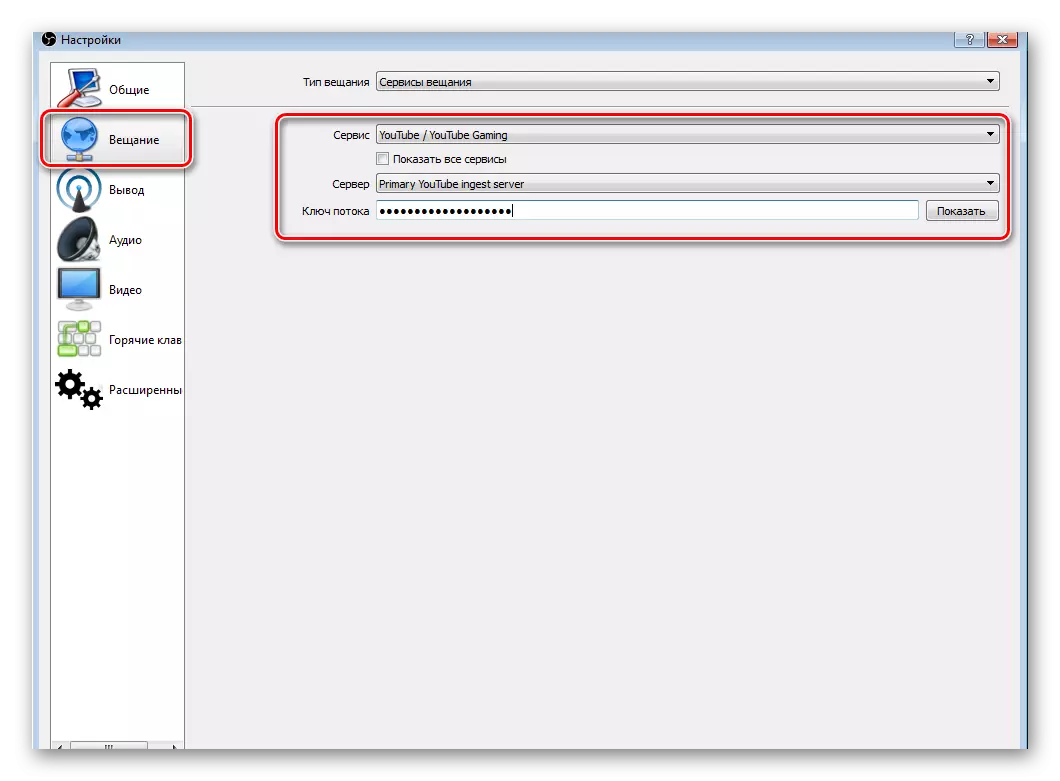
- Next, you need to open the "Broadcast" tab, where you need to select the "YouTube" and "Primary" service, and in the "flow key" line you need to insert the code that you have copied from the "Flow Name" string.
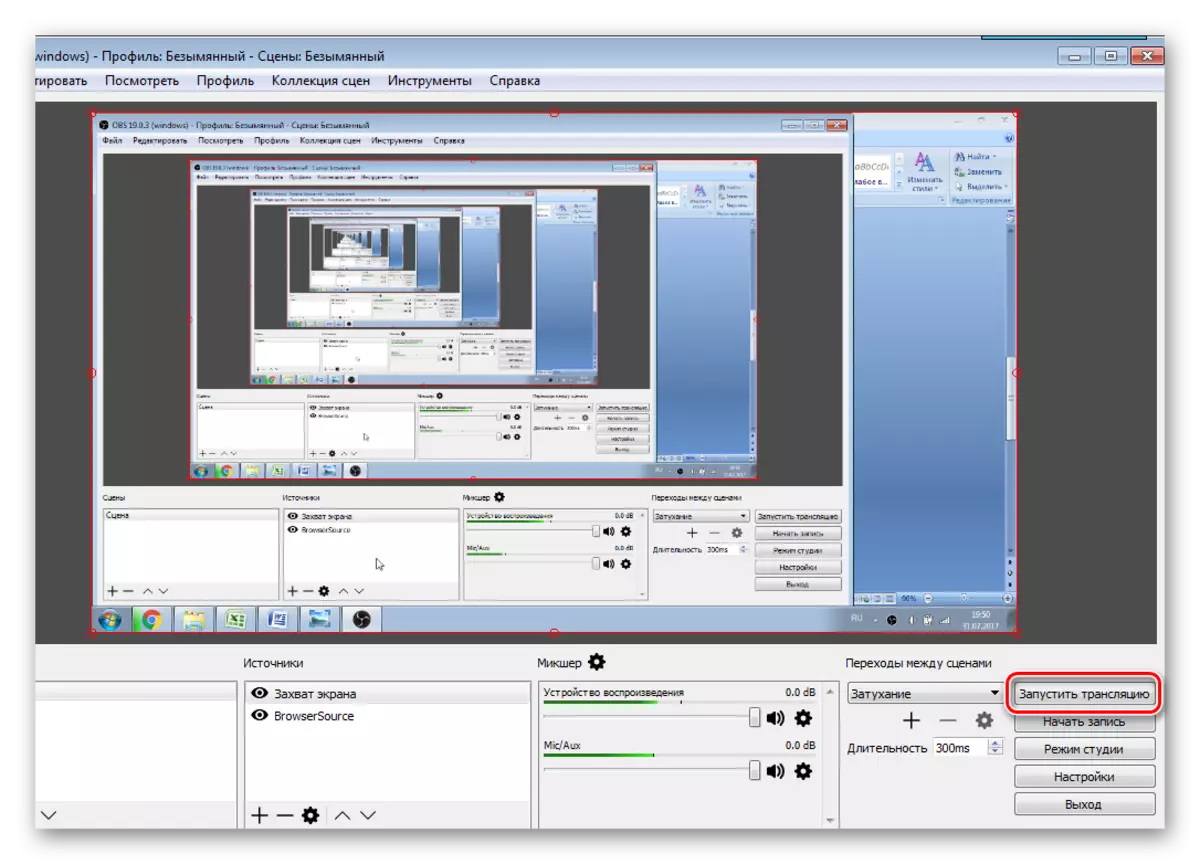
- Now exit from the settings and click "Run Broadcast".

Now you need to check the correctness of the settings so that there are no problems and failures on the stream.
Step 3: Verification of the broadcast operation, preview
The last moment remained before starting the stream - preview to make sure that the entire system is correct.
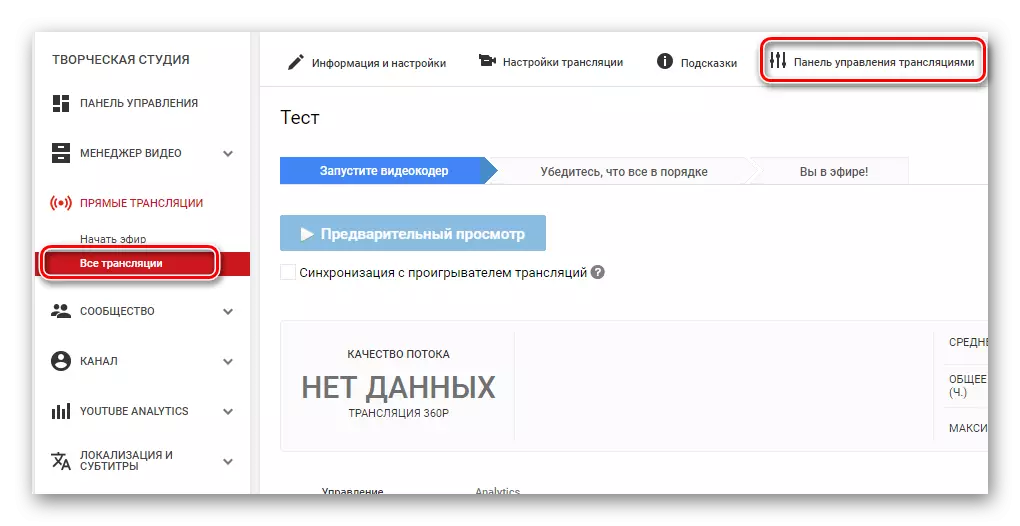
- Return to the creative studio again. In the "Live broadcasts" section, select "All broadcasts".
- On the top panel, select "Broadcast Control Panel".
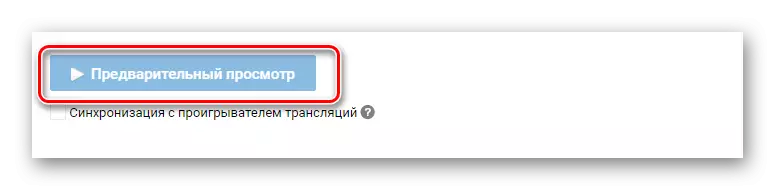
- Click "Preview" to make sure that all elements are working.
If something does not work, then make sure that the studio in OK is given the same parameters as when creating a new stream on YouTube. Also check if you inserted the correct flow key in the program, because without this nothing will work. If you are watching sagging, friezes or glitches of voice and pictures during the broadcast, then try to reduce the preset quality of striming. Perhaps your hardware does not pull so much.
If you are sure that the problem is not "iron", try updating the video card drivers.
Read more:
Update NVIDIA video card drivers
Installing Drivers via AMD Catalyst Control Center
Installing Drivers via AMD Radeon Software CRIMSON
Step 4: Additional OBS Studio Settings for Streaming
Of course, high-quality broadcast will not work without additional integrations. And, agree that by broading the game, you do not want other windows to fall into the frame. Therefore, you need to add additional items:
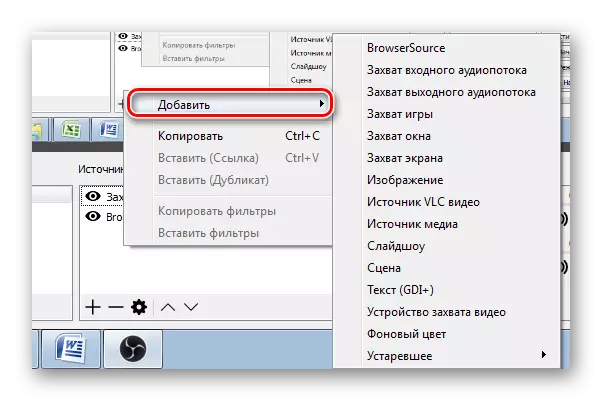
- Run OK and pay attention to the "Sources" window.
- Right-click and select "Add".
- Here you can configure screen capture, audio and video streams. For game striming, the "Capture Games" tool will also fit.
- To make donat, collecting funds or polls, you will need the BrowSerSource tool, which is already installed and can be found in the addition of sources.
That's all you need to know about Stregning on YouTube. Make this broadcast enough simply and does not take much time. You only need a little effort, normal, productive PC and good Internet.