

Virtualization may need to be needed to users who work with various emulators and / or virtual machines. And those and those may well work without turning on this parameter, however, if you need high performance while using the emulator, it will have to be turned on.
Important Warning
It is initially advisable to make sure whether your computer has virtualization support. If it is not, then you risks just in vain to spend time trying to activate via BIOS. Many popular emulators and virtual machines warn the user that its computer supports virtualization and if you connect this parameter, the system will work much faster.If you do not have such a message when you first start some emulator / virtual machine, then this may mean the following:
- The Intel Virtualization Technology technology in the bios is already connected by default (it happens rarely);
- The computer does not support this parameter;
- The emulator is not able to analyze and notify the user about the possibility of connecting virtualization.
Enable virtualization on the Intel processor
Using this step-by-step instruction, you can activate virtualization (relevant only for computers operating on Intel processor):
- Restart the computer and log in to the BIOS. Use the keys from F2 to F12 or Delete (the exact key depends on the version).
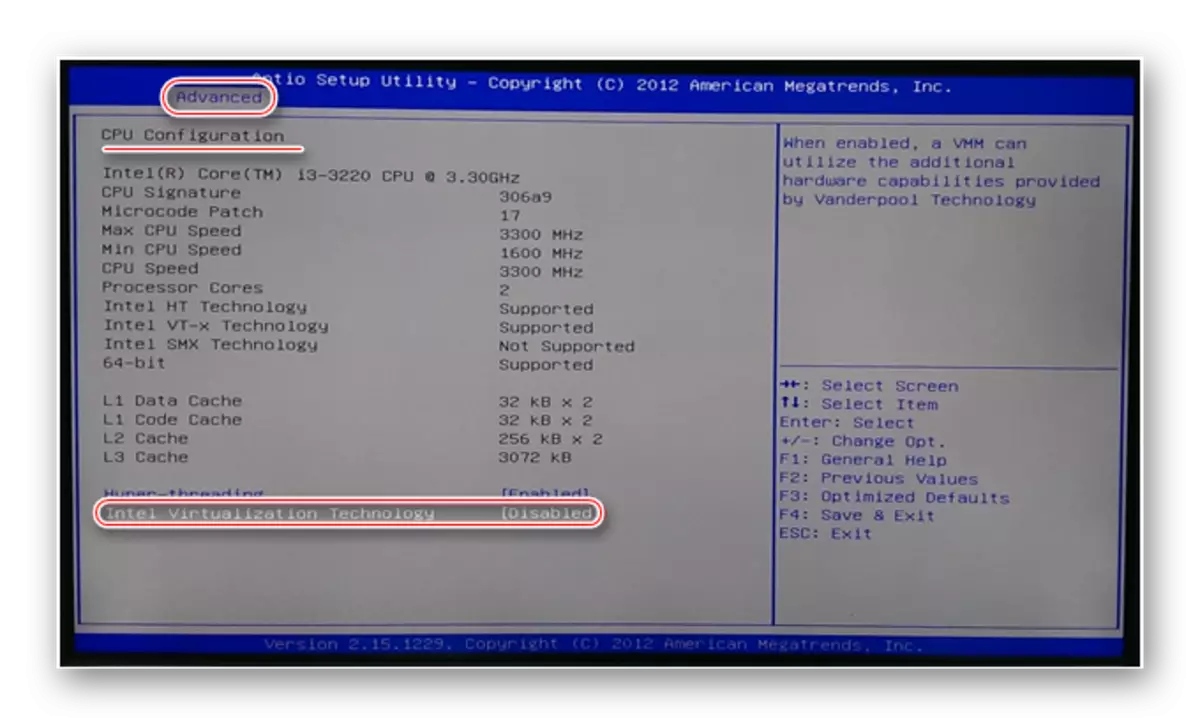
- Now you need to go to the "Advanced" item. He may also be called "Integrated Peripherals".
- You need to go to "CPU Configuration".
- It is necessary to find the item "Intel Virtualization Technology". If this item is not, this means that your computer does not support virtualization.
- If it is, then pay attention to the value that is opposite it. Must be "Enable". If there is another value, then select this item using the arrow keys and press ENTER. A menu will appear where you need to select the correct value.
- Now you can save the changes and exit the BIOS using the Save & Exit item or the F10 keys.
Enabling Virtualization on AMD processor
Step-by-step instruction looks like this way:
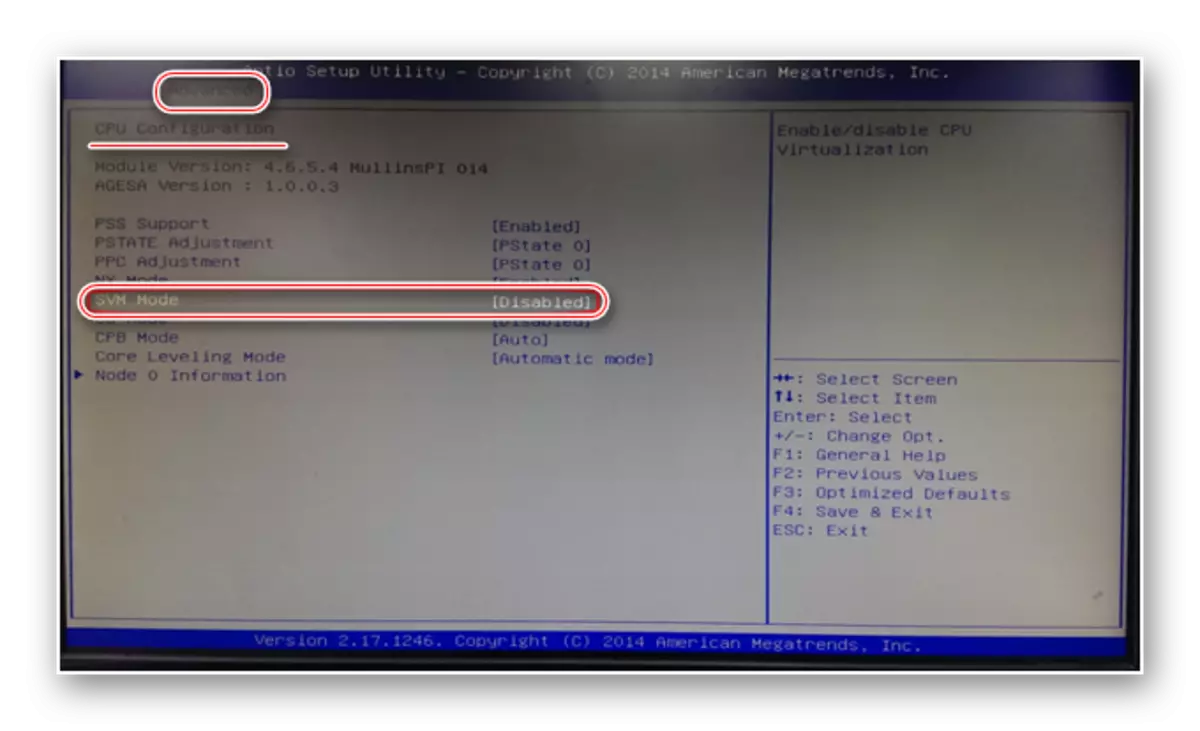
- Enter the BIOS.
- Go to "Advanced", and from there in "CPU Configuration".
- Take attention to the "SVM Mode" item. If there is a "disabled" opposite it, then you need to put "enable" or "auto". The value varies by analogy with the previous instruction.
- Save the changes and exit BIOS.
Enable virtualization on the computer is easy, for this you only need to follow step by step instructions. However, if there is no possibility to include this feature in BIOS, then you should not try to do this with third-party programs, as this will not give any result, but it may worsen the performance of the computer.