

Network card, most often, default in modern motherboards. This component is necessary to ensure that the computer can be connected to the Internet. Usually everything is on initially, but when configuring or changes in the configuration of the BIOS configuration device can be reset.
Tips before start
Depending on the BIOS version, the process of turning on / off network cards may vary. The article provides instructions on the example of the most common versions of the BIOS.It is also recommended to check the relevance of the drivers for the network card, and, if necessary, download and install the latest version. In most cases, updating drivers solves all the problems with the display of the network card. If it did not help, you will have to try to include it from the BIOS.
Lesson: how to install drivers on a network fee
Enabling network card on AMI BIOS
Step-by-step instructions for a computer running on the BIOS from this manufacturer, looks like this:
- Restart the computer. Without waiting for the appearance of the operating system logo, make an input to the BIOS using the keys from F2 to F12 or DELETE.
- Next, you need to find the "Advanced" item, which is usually located in the top menu.
- Go to "Onboard Device Configuration". To make a transition Select this item using the arrow keys and press ENTER.
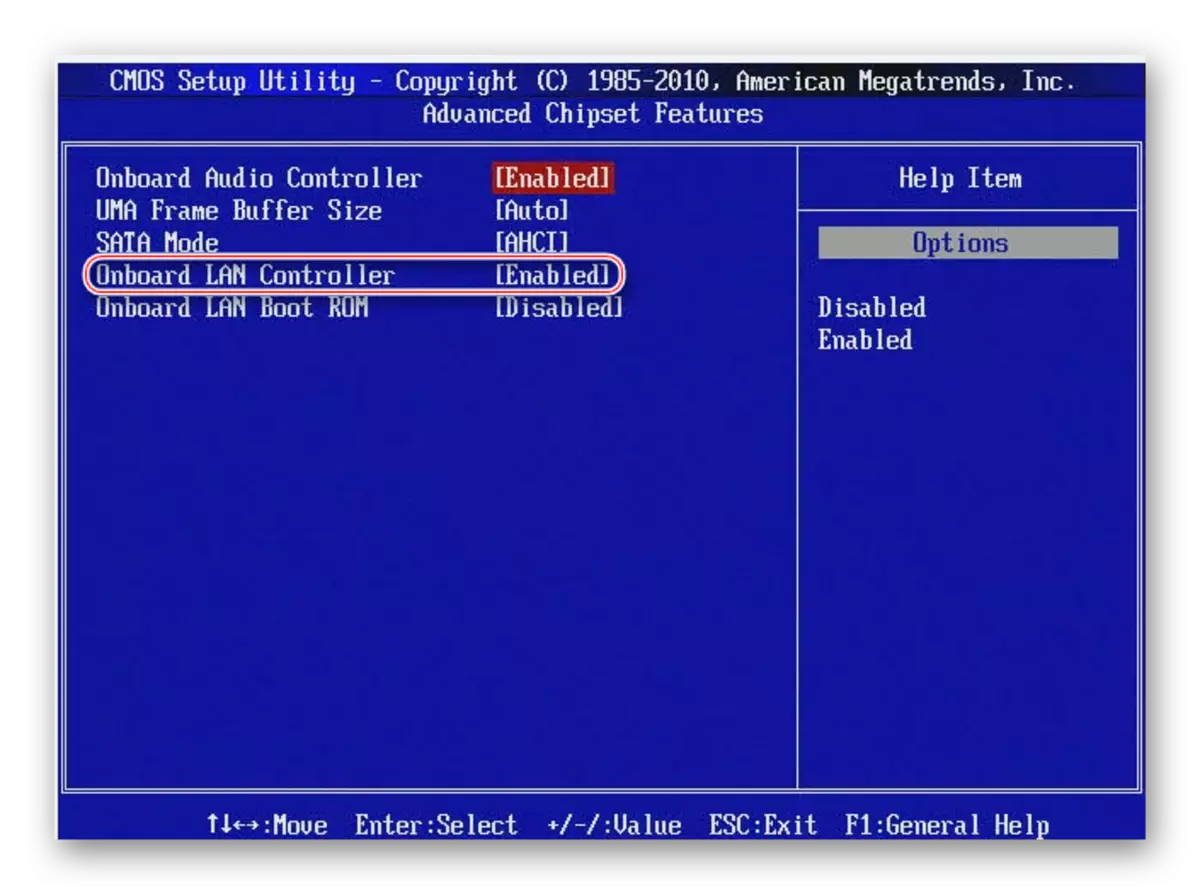
- Now you need to find the ONBOARD LAN Controller item. If in front of it is the value "Enable", then this means that the network card is enabled. If there is installed "Disable", then you need to select this parameter and press ENTER. In a special menu, select "Enable".
- Save the changes using the "EXIT" item in the top menu. After you select it and click Enter, BIOS will ask if you need to save changes. Confirm your actions consent.

Turn on the network card on Award BIOS
In this case, step-by-step instructions will look like this:
- Enter BIOS. For login, use the keys from F2 to F12 or Delete. The most popular options for this developer are F2, F8, Delete.
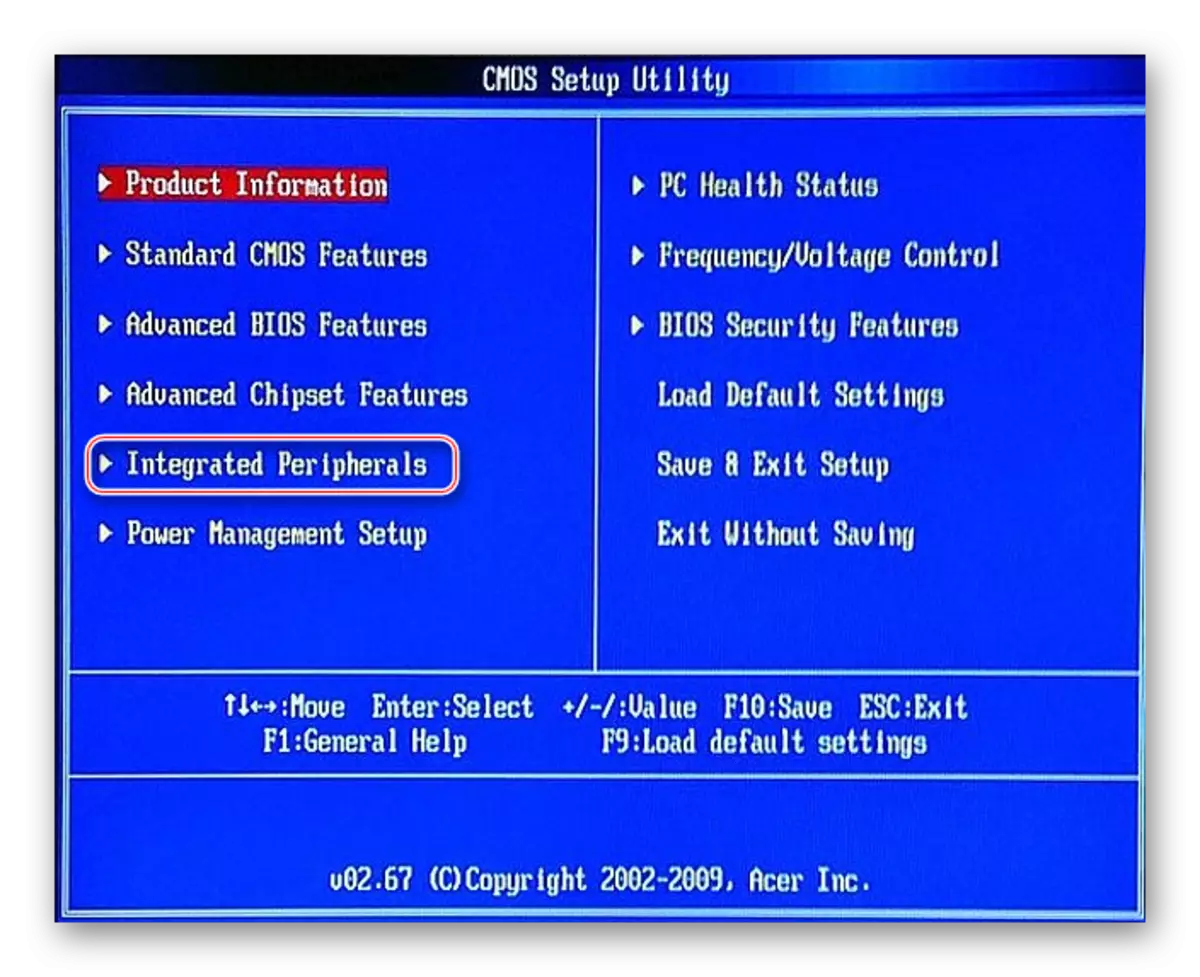
- Here in the main window you need to select the "Integrated Peripherals" section. Go to it using ENTER.
- Similarly, you need to go to "Onchip Device Function".
- Now find and select "Onboard Lan Device". If there is a "Disable" value opposite it, then press the Enter key on it and set the "AUTO" parameter, which will allow you to turn on the network card.
- Exit BIOS with settings. To do this, go back to the main screen and select "Save & Exit Setup" there.

Turning on the network card in the UEFI interface
The instruction looks like this:
- Enter UEFI. The entrance is made by analogy with the BIOS, but the F8 key is most often used.
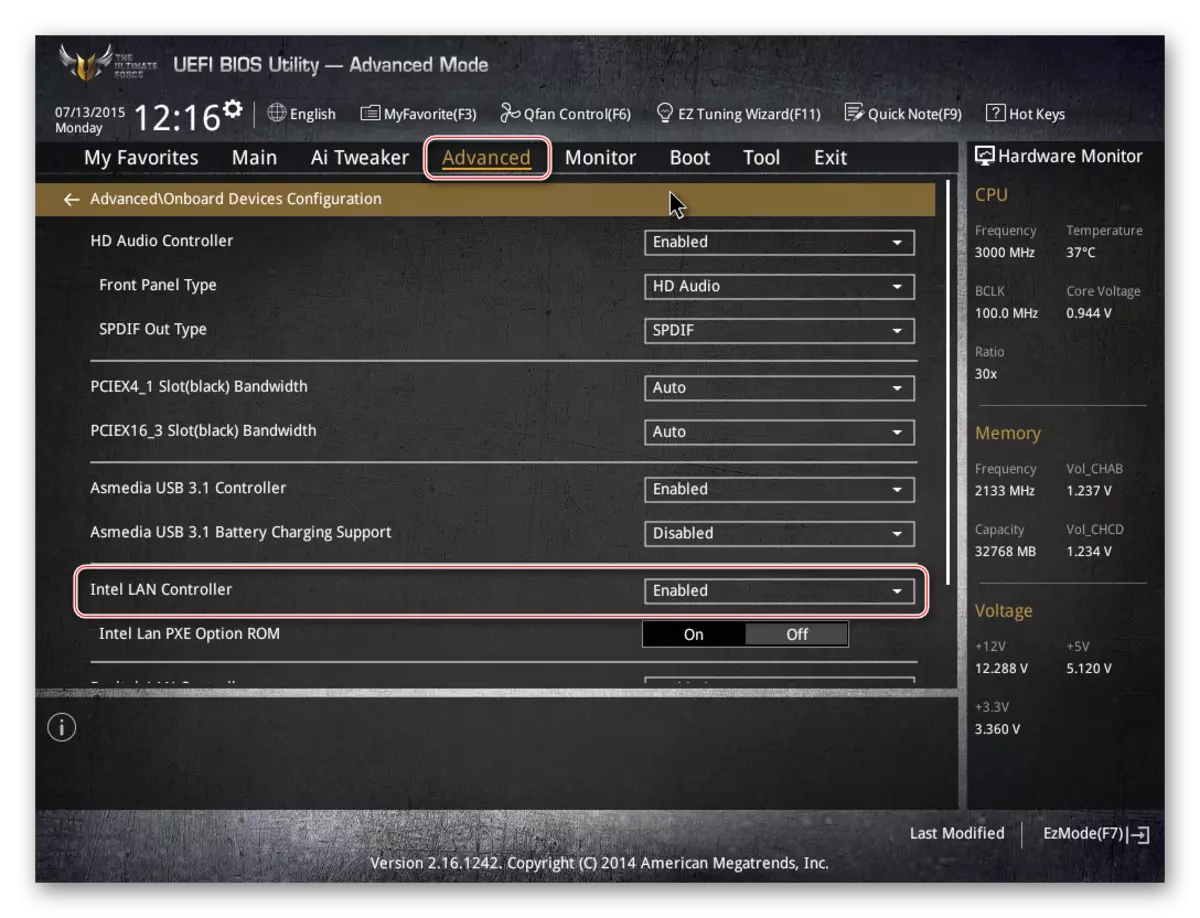
- In the top menu, find the "Advanced" or "Advance" item (the latter is relevant for users with a Russified UEFI). If there is no such item, it means that you need to enable "Extended Settings" using the F7 key.
- Look for the ONBOARD Device Configuration item. You can reveal it by simply pressing the mouse.
- Now you need to find "Lan Controller" and choose the "Enable" opposite it.
- After exit from UFFI while saving settings using the "EXIT" button in the upper right corner.
Connect the network card in the BIOS will not be difficult even to an inexperienced user. However, if the card is already connected, and the computer does not see it anyway, it means that the problem lies in something else.