

AHCI is the compatibility mode of modern hard drives and motherboards with SATA connector. Using this mode, the computer processes the data faster. Usually AHCI is enabled by default in modern PCs, but in the case of reinstalling OS or other problems, it may turn off.
Important information
To enable AHCI mode, you need to use not only bios, but also the operating system itself, for example, to enter special commands through the "command line". If you do not have the ability to load the operating system, it is recommended to create a bootable flash drive and use the installer to go to the "System Restore" item where you need to find the "Command Line" activation. To call, use this small instruction:
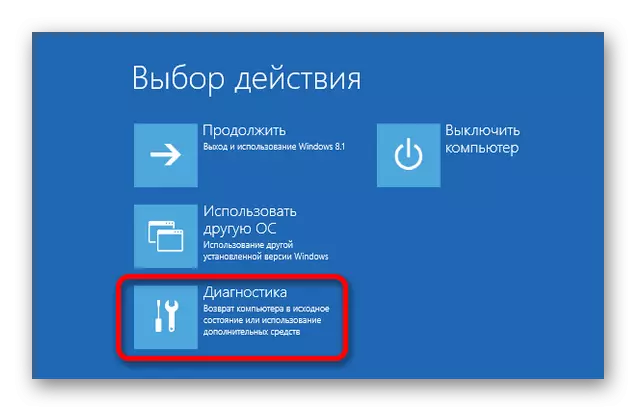
- As soon as you enter the "Restoration of the System", in the main window you need to go to "Diagnostics".
- Additional items will appear, of which you must select "Advanced Parameters".
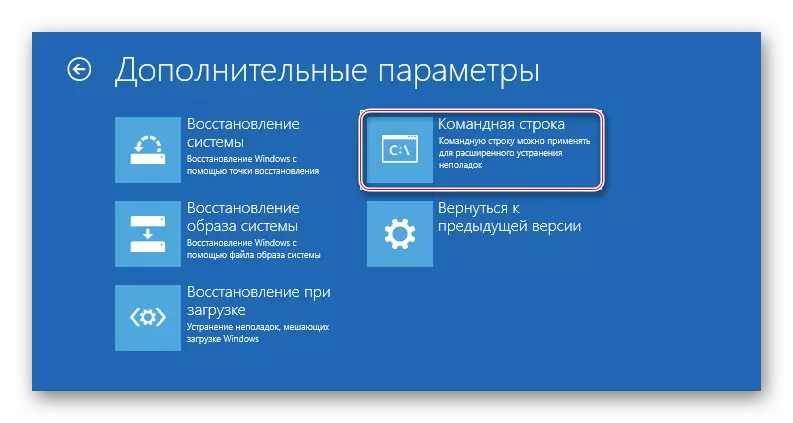
- Now find and click on the "Command Line".
If the flash drive is not started with the installer, then, most likely, you forgot to place the priorities of the download in the BIOS.
Read more: How to make download from a flash drive in BIOS
Enable AHCI in Windows 10
It is recommended to initially install the system load in "Safe Mode" using special commands. You can try to do everything without changing the type of loading of the operating system, but in this case you do this at your own risk. It is also worth noting that this method is suitable for Windows 8 / 8.1.
Read more: How to enter "Safe Mode" via BIOS
To make the right setting, you need:
- Open the "Command Line". Faster it will be done using the "Run" window (in OS is called the Win + R keys.). In the search bar, you need to register the CMD command. You can also open the "command line" using the "system restore" if you cannot download the OS.
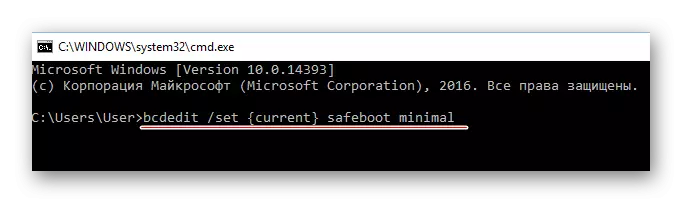
- Now enter the following in the "Command Line":
BCDEDIT / SET {CURRENT} SafeBoot Minimal
To apply the command, you need to press the ENTER key.

After the settings produced, you can proceed directly to turning on the AHCI mode in the BIOS. Use this instruction:
- Restart the computer. During reboot, you need to log in to the BIOS. To do this, press a definite key until the OS logo appears. Usually, these are keys from F2 to F12 or Delete.
- In BIOS, find the "Integrated Peripherals" item, which is located in the top menu. In some versions, it can also be found as a separate item in the main window.
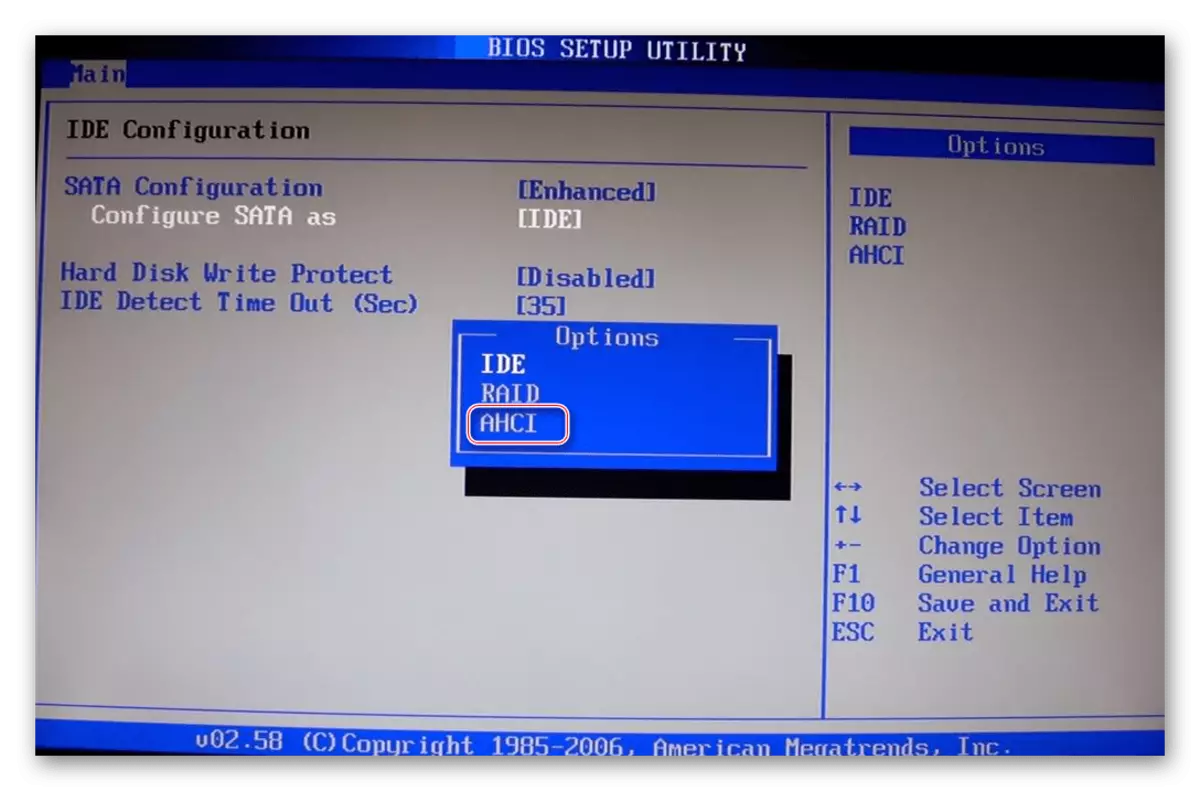
- Now you need to find an item that will wear one of the following names - "SATA CONFIG", "SATA TYPE" (depends on the version). He needs to set the value "Achi".
- To save the changes, go to "Save & Exit" (may be called a little different) and confirm the output. The computer will restart, but instead of downloading the operating system, you will be offered to select the options for its launch. Choose "Safe Mode with Command Line Support". Sometimes the computer itself is loaded in this mode without user participation.
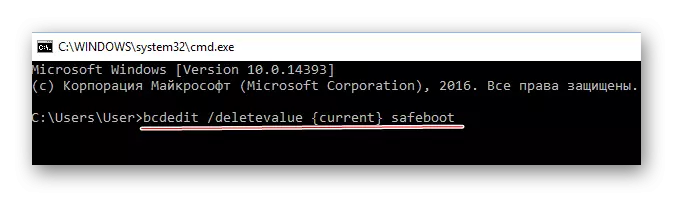
- In "Safe Mode" you do not need to make any changes, just open the "command line" and enter the following:
BCDEDIT / DELETEVALUE {CURRENT} SAFEBOOT
This command is needed to return the operating system to normal mode.
- Restart the computer.
Enabling AHCI in Windows 7
Here the power process will be somewhat more complicated, since in this version of the operating system you need to make changes to the registry.
Use this step-by-step instruction:
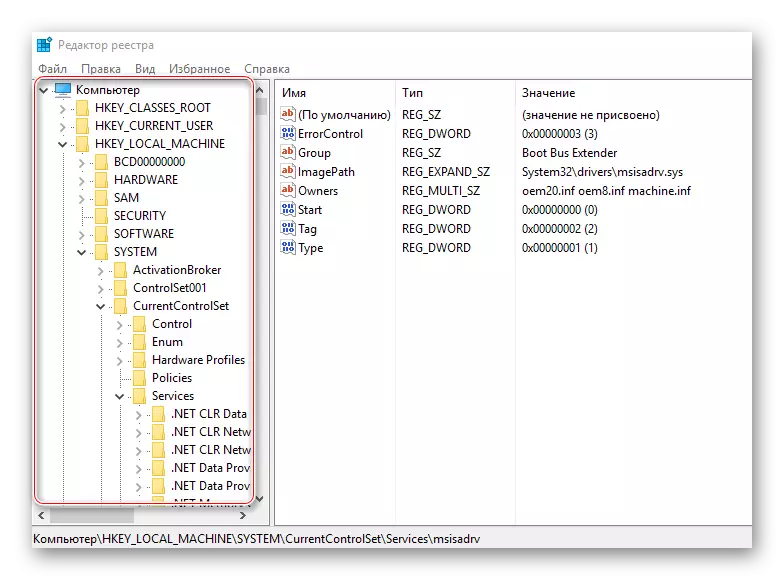
- Open the registry editor. To do this, call the "Run" string using the Win + R combination and enter the REGEDIT there, after press ENTER.
- Now you need to move on the next way:
HKEY_LOCAL_MACHINE \ SYSTEM \ CURRENTCONTROLSET \ SERVICES \ MSAHCI
All the necessary folders will be in the left corner of the window.
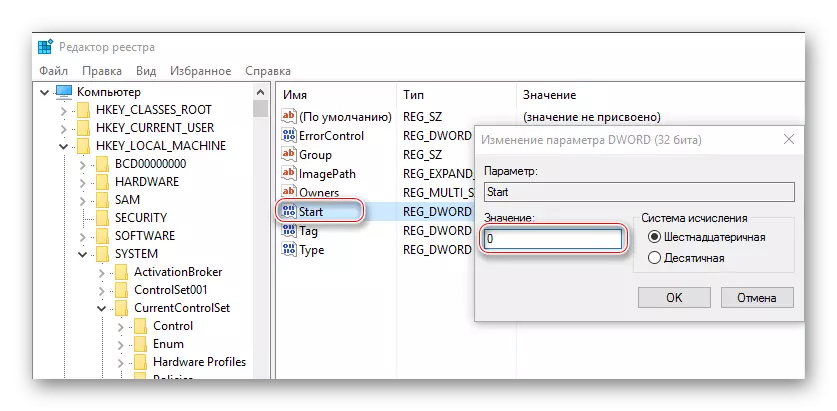
- In the destination folder, locate the "Start" file. Click on it twice so that the values input window appear. The initial value can be 1 or 3, you need to put 0. If 0 is already there by default, you do not need to change anything.
- Similarly, you need to do with the file that wears the same name, but is located at:
HKEY_LOCAL_MACHINE \ SYSTEM \ CURRENTCONTROLSET \ SERVICES \ IASTORV
- Now you can close the registry editor and restart the computer.
- Without waiting for the appearance of the OS logo, go to the BIOS. There you need to make the same changes as described in the previous instruction (paragraphs 2, 3 and 4).
- After exiting the BIOS, the computer will restart, Windows 7 will start and immediately starts the installation of the required software to turn on the AHCI mode.
- Wait for the installation and reboot the computer, after which the input in AHCI is fully manufactured.

Log in ACHI mode is not so difficult, but if you are an inexperienced PC user, then it is better not to do this job without a specialist, since there is a risk that you can knock down certain settings in the registry and / or BIOS, which may entail Computer problems.