

If you purchased a collected computer or laptop, then its BIOS is already configured properly, but you can always make any personal adjustments. When a computer is assembled independently, it is necessary to configure BIOS to properly work yourself. Also, this need may occur if a new component has been connected to the motherboard and all parameters have dropped by default.
On the interface and management in the BIOS
The interface of most BIOS versions, with the exception of the most modern, represents a primitive graphic shell, where there are several menu items from which you can go to another screen with already customizable parameters. For example, the "Boot" menu item opens the user to the distribution options for the priority of the computer loading, that is, you can select the device from which the PC boot will be performed.
Now it is necessary to make tuning the priority of hard drives and drives. Sometimes, if not to do it, the system simply will not be loaded. All the necessary parameters are in the "Main" or "Standard CMOS Features" section (depending on the BIOS version). Step-by-step instructions on the example of Award / PHOENIX BIOS looks like this:
- Note "IDE PRIMARY MASTER / SLAVE" and "Ide Secondary Master, Slave" items. There will have to make tuning hard drives if their capacity is more than 504 MB. Select one of these items using the arrow keys and press ENTER to go to the advanced settings.
- Opposite the "IDE HDD Auto-Detection" option, it is advisable to put "Enable", as it is responsible for the automatic arrangement of the extended disk settings. You yourself can ask them, but for this you will have to know the number of cylinders, revolutions, etc. In the event that something out of this is wrong, then the disk will not work at all, so the system is best to entrust the system.
- Similarly, it should be done with another point from the 1st step.

Similar settings You need to produce BIOS users from AMI, SATA parameters change here. Use this guide to work:
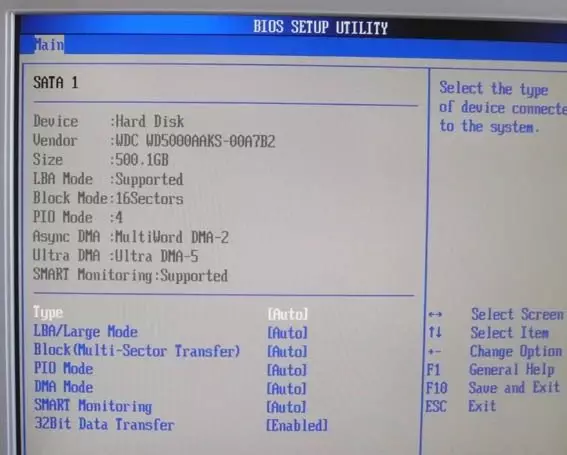
- In Main, pay attention to the items that are called "SATA". In total, there will be so many rigid disks to be supported by your computer. The entire instruction is considered on the example "SATA 1" - select this item and press ENTER. If you have a few "SATA" items, then all the steps that you need to do below with each of the items.
- The first parameter you want to configure is "Type". If you do not know the type of connection of your hard disk, then put the value "AUTO" opposite it and the system will determine it yourself.
- Go to LBA Large Mode. This parameter is responsible for the ability to work with a size of more than 500 MB, so opposite it be sure to install "AUTO".
- The remaining settings, up to the "32 bit Data Transfer" item, slide the value "Auto".
- Opposite "32 Bit Data Transfer" you need to set the "Enabled" value.

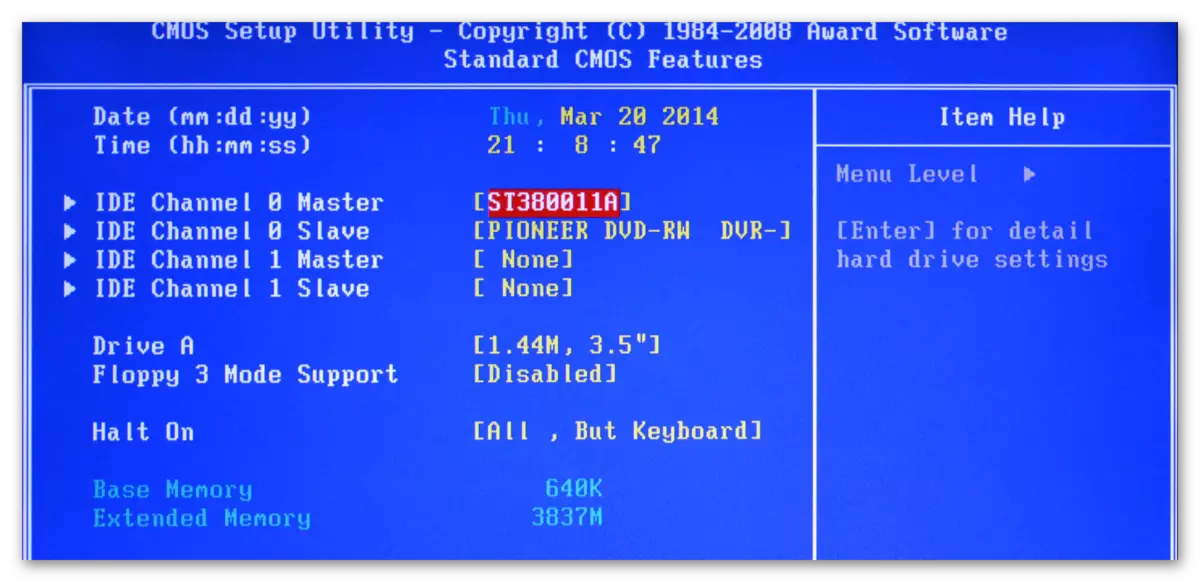
AMI BIOS users can finish standard settings on this, and the developers of Award and Phoenix have several additional items that need the user's participation. All of them are in the section "Standard Cmos Features". Here are their list:
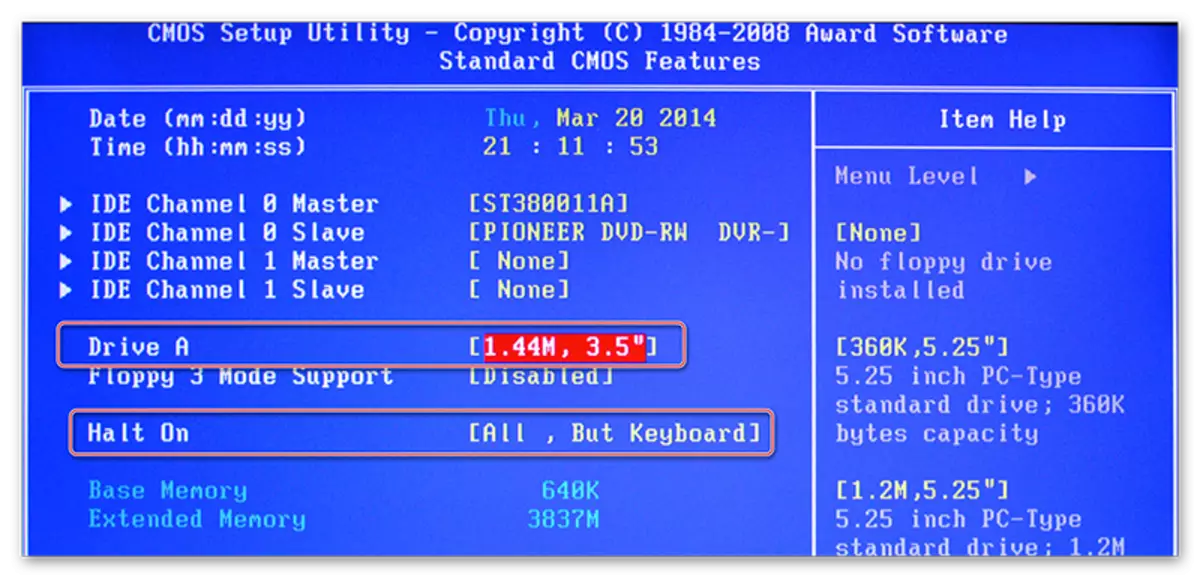
- DRIVE A and DRIVE B - these items are responsible for the work of the drives. If there are no in the design, then opposite both items you need to put the value "None". If there are drives, you will have to choose a drive type, so it is recommended to study all the characteristics of your computer in advance;
- "Halt Out" - is responsible for stopping the OS boot when any errors are detected. It is recommended to set the value "no errors" at which the computer load will not be interrupted if non-test errors will be detected. All information about the latter is displayed.
On this standard settings can be completed. Usually half of these items will already have what values need.
Advanced parameters
This time all settings will be made in the Advanced section. It is in the BIOS from any manufacturers, however, may be a little different name. Inside it can be a different number of items depending on the manufacturer.
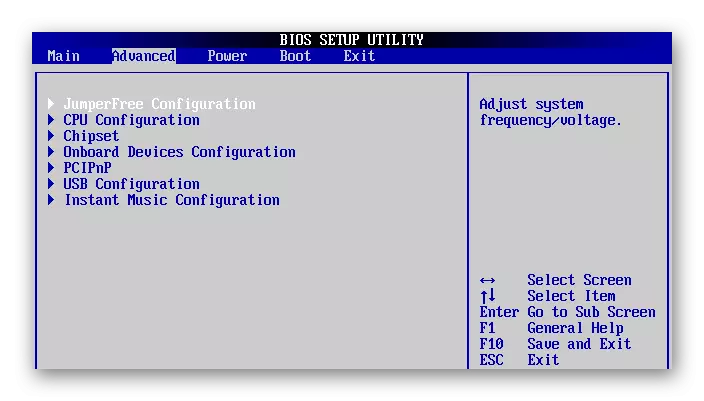
Consider the interface on the example of AMI BIOS:
- "JumperFree Configuration". Here is most of the settings that you need to make the user. This item responds immediately for setting up the voltage in the system, overclocking the hard drive and installing the working frequency for memory. Read more about setting - just below;
- "CPU Configuration". As follows from the name - there are various manipulations with the processor, but if you make standard settings after assembling the computer, you do not need to change anything at this point. Usually they appeal to it if you need to speed up the work of the CPU;
- "Chipset". Responsible for chipset and functioning of chipset and BIOS. It is not necessary to look at the usual user here;
- ONBOARD Device Configuration. Here configurations are configured to combine various elements on the motherboard. As a rule, all settings are made right already automatically;
- "PCIPNP" - setting the distribution of various handlers. You do not need to do anything at this point;
- "USB Configuration". Here you can configure the support of USB ports and USB devices for input (keyboard, mouse, etc.). Usually, all parameters are already active by default, but it is recommended to go and check - if some of them are not active, then connect it.
Read more: How to enable USB in BIOS
Now proceed directly to the settings of the parameters from the "JumperFree Configuration" item:
- Initially, instead of the necessary parameters there may be one or more subsections. If so, then go to the one called "Configure System Frequency / Voltage".
- Check for opposite all the parameters that will be there, the "AUTO" or "Standard" value was. Exceptions constitute only those parameters where any digital value is set, for example, "33.33 MHz". They don't need to change anything
- If, in front of some of them, "Manual" or any other, then select this item using the arrow keys and press ENTER to make changes.

At Award and Phoenix, you do not need to configure these parameters, as they default are correctly configured and are completely in another section. But in the Advanced section, you will find extended settings to set up load priorities. If the computer already has a hard disk with the operating system installed on it, then in the "First Boot Device", select "HDD-1" (sometimes you need to select "HDD-0").
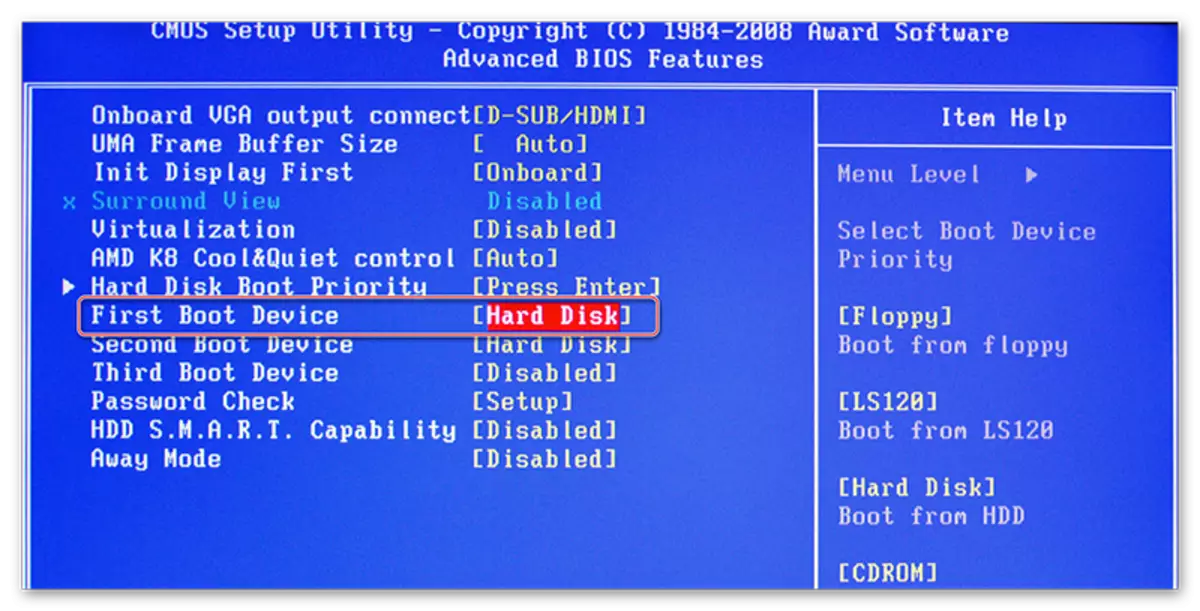
If the operating system on the hard disk is not yet installed, then instead it is recommended to deliver the value "USB-FDD".
Read also: How to install a computer load from a flash drive
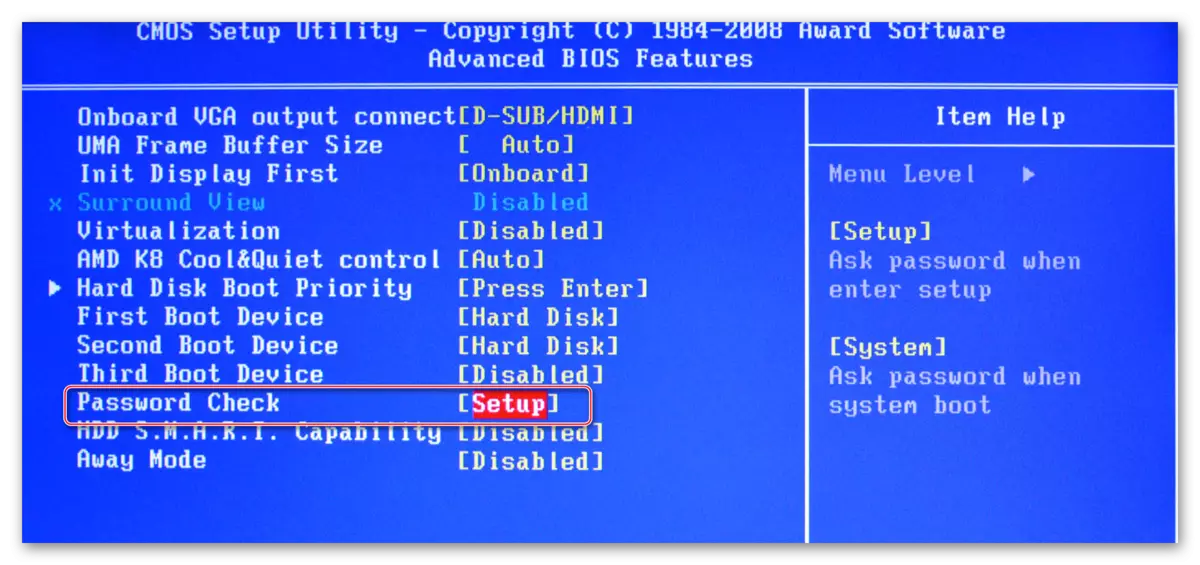
Also, Award and Phoenix in the Advanced section there is a point regarding the entry settings in the BIOS with a password - "Password Check". If you set a password, it is recommended to pay attention to this item and set an acceptable value for you, all of them are two:
- "SYSTEM". To gain access to the BIOS and its settings, you need to enter a faithful password. The system will request a password from the BIOS with each computer loading;
- "SETUP". If you chose this item, you can enter the BIOS without entering passwords, but to access its settings, you will have to enter the password specified earlier. The password is requested only when you are trying to enter the BIOS.
Safety and Stability Setup
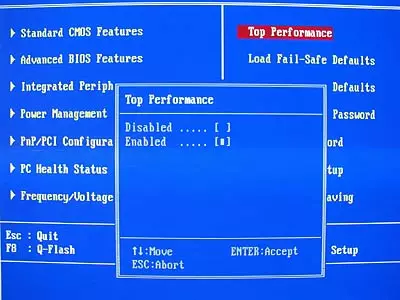
This feature is relevant only for machine owners with BIOS from Award or Phoenix. You can enable maximum performance or stability mode. In the first case, the system will work a little faster, but there is a risk of incompatibility with some operating systems. In the second case, everything works more stable, but slower (not always).
To enable high performance mode, select "Top Performance" in the main menu and set the "Enable" value. It is worth remembering that there is a risk of violating the stability of the operating system, so work in this mode for several days, and if there are no failures in the system, which were not previously observed, then disconnect it by setting the "Disable" value.
If the speed you prefer stability, it is recommended to download a secure settings protocol, and there are two types of them:
- "LOAD FAIL-SAFE DEFAULTS". In this case, BIOS downloads the safest protocols. However, productivity suffers greatly;
- "LOAD OPTIMIZED DEFAULTS". Protocols are loaded, based on the features of your system, thanks to this, the performance suffers is not as much as in the first case. Recommended for download.
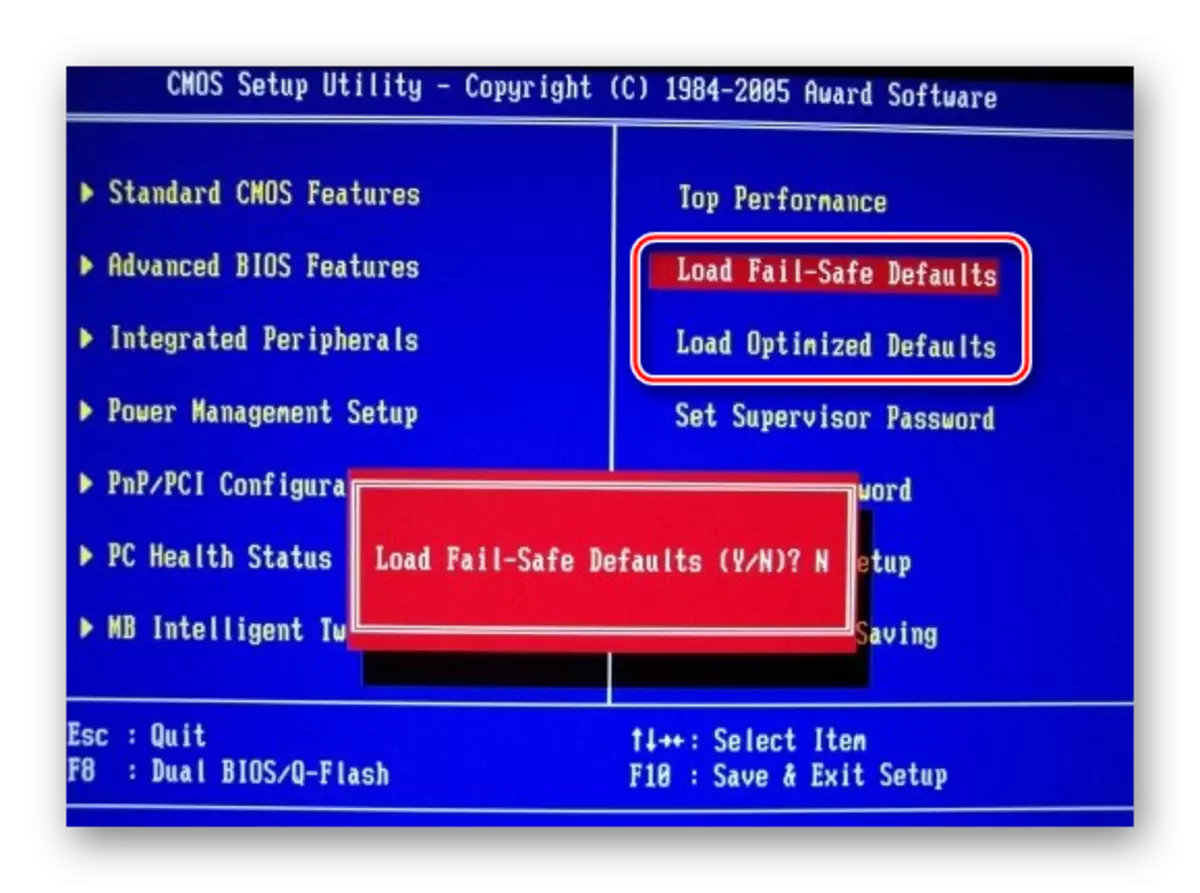
To download any of these protocols, select one of the items discussed above, on the right side of the screen, after which it is possible to confirm the load using ENTER or YE keys.
Installation of the password
After completing the main settings, you can set a password. In this case, no one except you can access the BIOS and / or the ability to change its parameters (depends on the settings that were described above).
In Award and Phoenix, in order to set a password, you need to select the "Set Supervisor Password" item on the main screen. A window will open where the password is entered up to 8 characters long, after entering the same window opens, where you need to register the same password to confirm. When typing, use only Latin characters and Arabic figures.
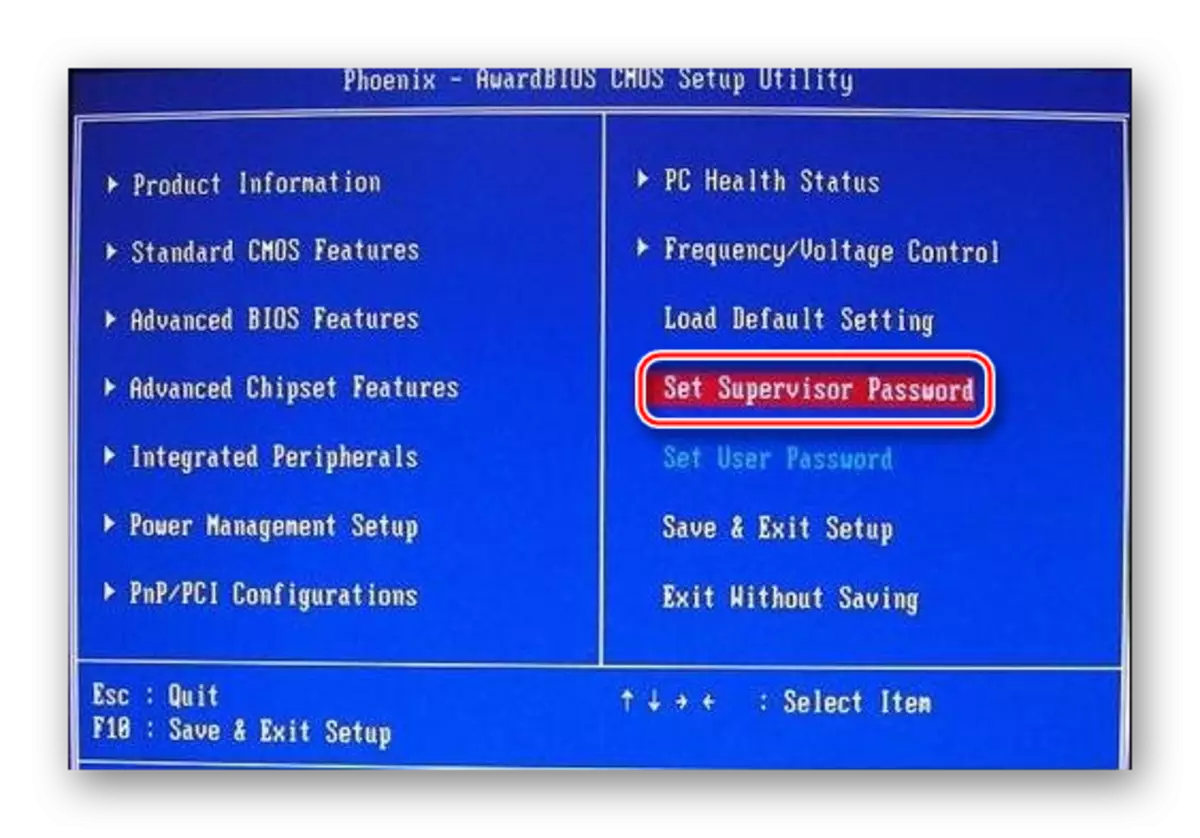
To remove the password, you need to select the "Set Supervisor Password" item again, but when the new password input window appears, just leave it empty and press ENTER.
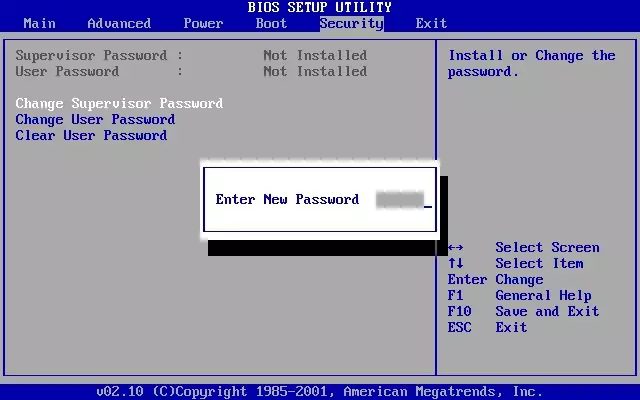
A AMI BIOS password will set a little different. To begin with, you need to go to the "Boot" section, which is in the top menu, and there already find "Supervisor Password". The password is set and removed in the same way with Award / Phoenix.
Upon completion of all manipulations in the BIOS you need to get out of it with the preservation of previously made settings. To do this, find the item "Save & Exit". In some cases, you can use the hot key F10.
Customize the BIOS is not as difficult as it may seem at first glance. In addition, most of the described settings are often exhibited by default as it is necessary for the normal operation of the computer.