
There is nothing surprising in that many users want the computer screen to display the highest quality and acceptable user-based picture in a specific lighting. You can achieve this, including, with the help of adjusting the brightness of the monitor. Let's find out how to cope with this task on the PC running Windows 7.
Ways adjustment
One of the easiest ways to change the brightness of the screen is to make settings using the monitor buttons. You can also solve the delivered problem through the BIOS settings. But in this article we will focus on the possibilities of solving the task of Windows 7 tools or using the software that is installed on the computer with this OS.All options can be divided into 3 groups:
- Adjustment using third-party developers;
- Adjustment using the video card control application;
- OS tools.
Now we will look at each group in more detail.
Method 1: Monitor Plus
First we learn how to solve the voiced task using a third-party program intended to control the Monitor Plus monitor.
Download Monitor Plus.
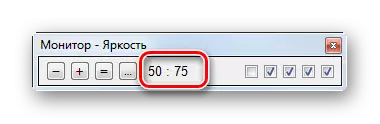
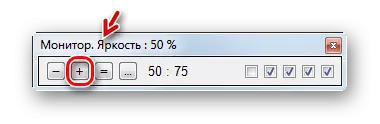
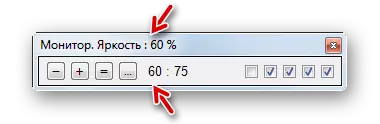
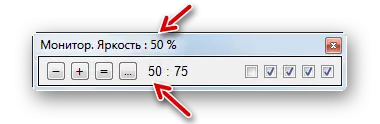
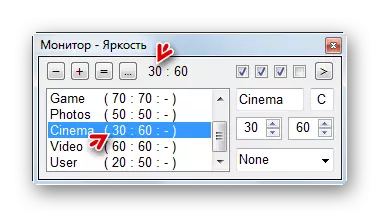
- This program does not require installation. Therefore, after downloading it, simply unpack the contents of the archive and activate the executable file of the monitor.exe application. A miniature program control panel will open. In it, the figures in the fraction indicate the current brightness (in the first place) and the contrast (in second place) of the monitor.
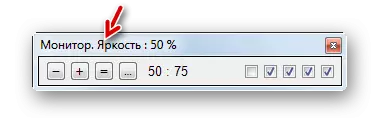
- In order to change the brightness, first of all, make sure the "Monitor - Brightness" value in the MONITOR PLUS header.
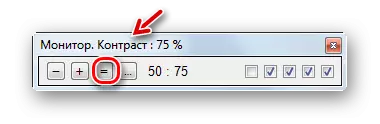
- If there is a "contrast" or "color" value, then in order to switch the mode, click the "Next" element, presented in the "=" icon form until the desired value is set. Or apply the combination of Ctrl + J.
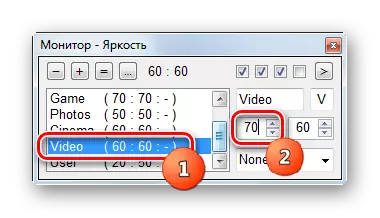
- After the desired value appeared on the program panel, to increase the brightness, press "Zoom" in the form of the "+" icon.
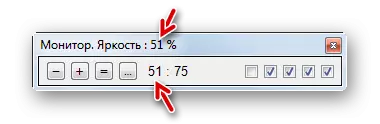
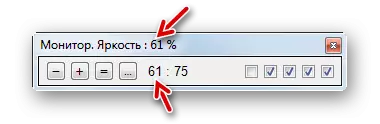
- With each click on this button, the brightness increases by 1%, which can be observed by changing the indicators in the window.
- If you use the combination of hot keys Ctrl + SHIFT + NUM +, then with each set of this combination, the value will increase by 10%.
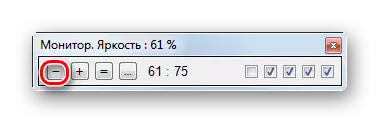
- In order to reduce the value, click on the "Reduce" button in the shape of the "-" sign.
- With each click, the indicator will be reduced by 1%.
- When using a CTRL + SHIFT + NUM value, the value will be reduced immediately by 10%.
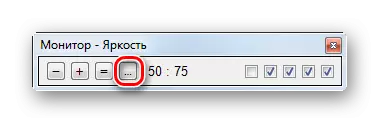
- You can control the screen in a miniature state, but if you wish to more accurately set the settings for viewing a different type of content, then click the "Show - hide" button in the form of a dot.
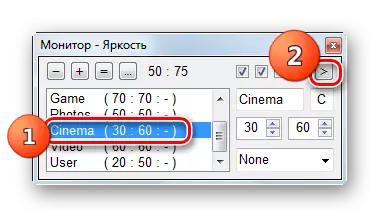
- A list of content and PC operation modes are open, for which the brightness level can be set separately. There are modes such:
- Photos (PHOTO);
- Cinema (cinema);
- VIDEO (video);
- Game (game);
- Text (text);
- Web (Internet);
- User.
The recommended parameter is already specified for each mode. To use it, select the mode name and click the Apply button as the ">" sign.
- After that, the monitor parameters will be changed to those that match the selected mode.
- But if for some reason you do not suit the values that are assigned to a certain default mode, they can easily be changed. To do this, highlight the name of the mode, and then in the first field to the right of the name, take the magnitude as a percentage you want to assign.
Method 2: F.Lux
Another program that can work with the settings of the monitor parameter we studied is F.Lux. Unlike the previous application, it is capable of adjusting automatically for specific lighting, according to the daily rhythm in your area.
Download F.Lux
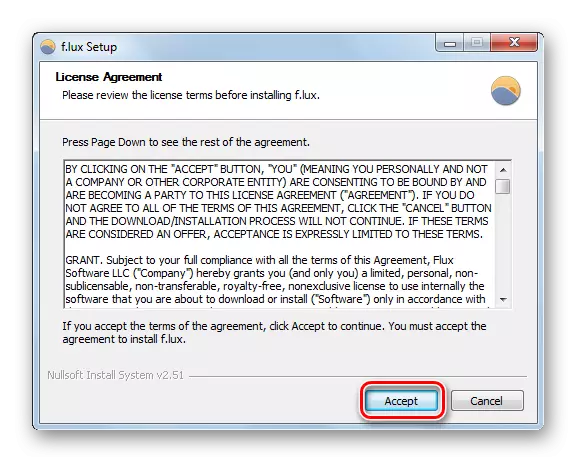
- After downloading the program, it should be installed. Run the installation file. The window opens with the license agreement. You need to confirm it by clicking "Accept".
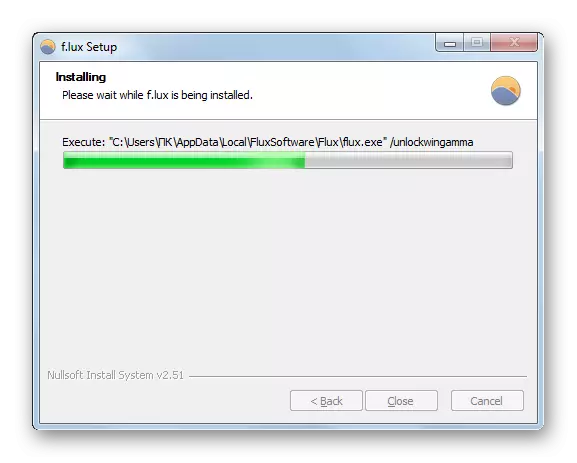
- Next, the program is installed.
- The window is activated, where to fully configure the system under F.Lux is invited to restart the PC. Save data in all active documents and complete your applications. Then press "RESTART NOW".
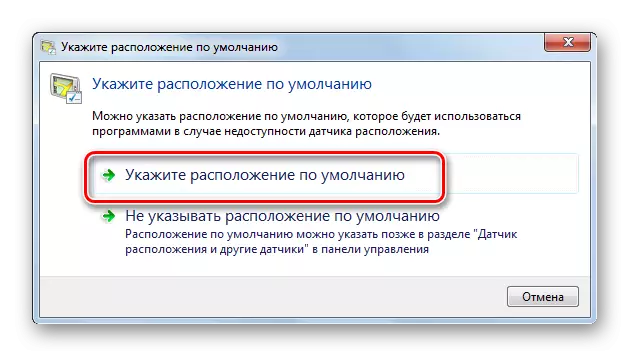
- After rebooting the program determines your location automatically via the Internet. But you can also specify your default position in the absence of the Internet. To do this in the window that opens, click on the "Specify the default location".
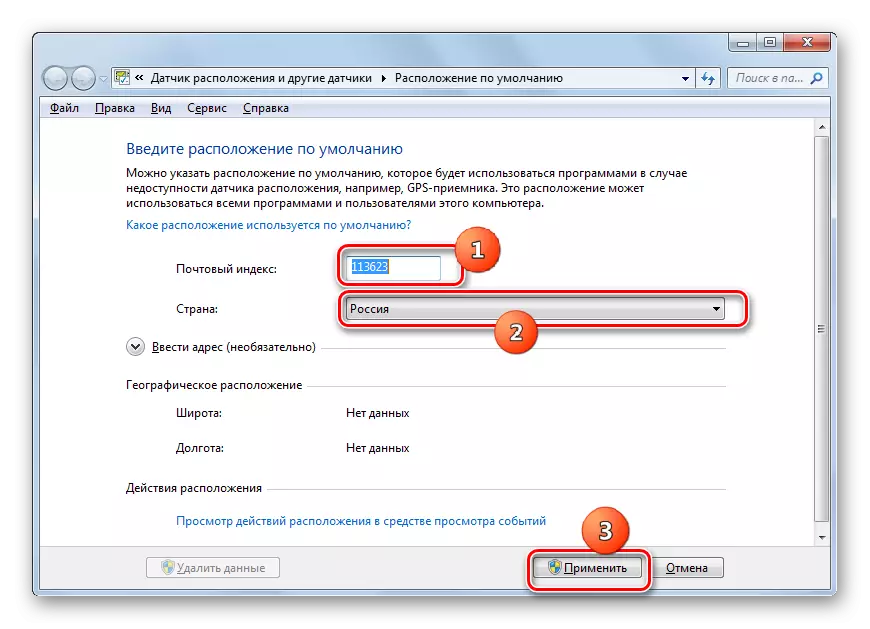
- The built-in operating system utility opens, in which you should specify in the "Postal Code" and "Country" fields. You do not have other information in this window. Click "Apply".
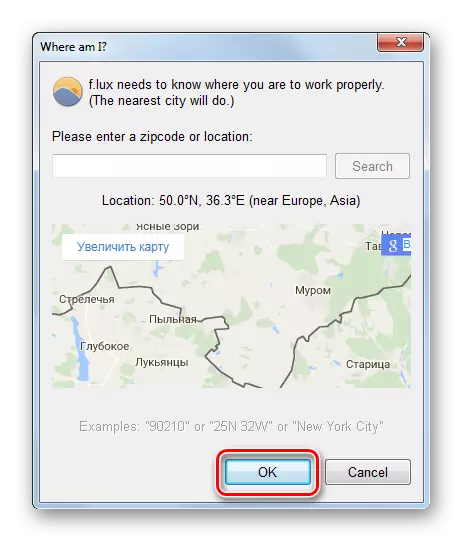
- In addition, simultaneously with previous system windows, the F.Lux program window will be opened, in which your location will be displayed according to information from the sensors. If it is true, just click "OK". If it does not match, then specify the point of real location on the map, and only then click "OK".
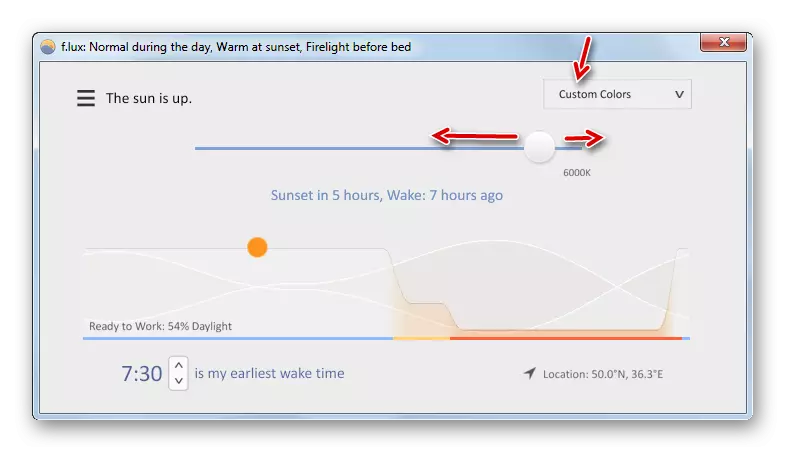
- After that, the program will regulate the most optimal brightness of the screen depending on the day or night, morning or evening in your area. Naturally, for this f.lux must constantly be launched on the computer in the background.
- But if you do not satisfy the current brightness, which the program recommends and installs it, you can adjust it manually, dragging the slider to the left or right in the main window F.Lux.


Method 3: Video Card Management Program
Now we learn how to solve the task using the program to control the video card. As a rule, this application is available on the installation disk attached to the video adapter, and installed with the drivers to the video card. Actions We consider on the example of the NVIDIA video adapter.
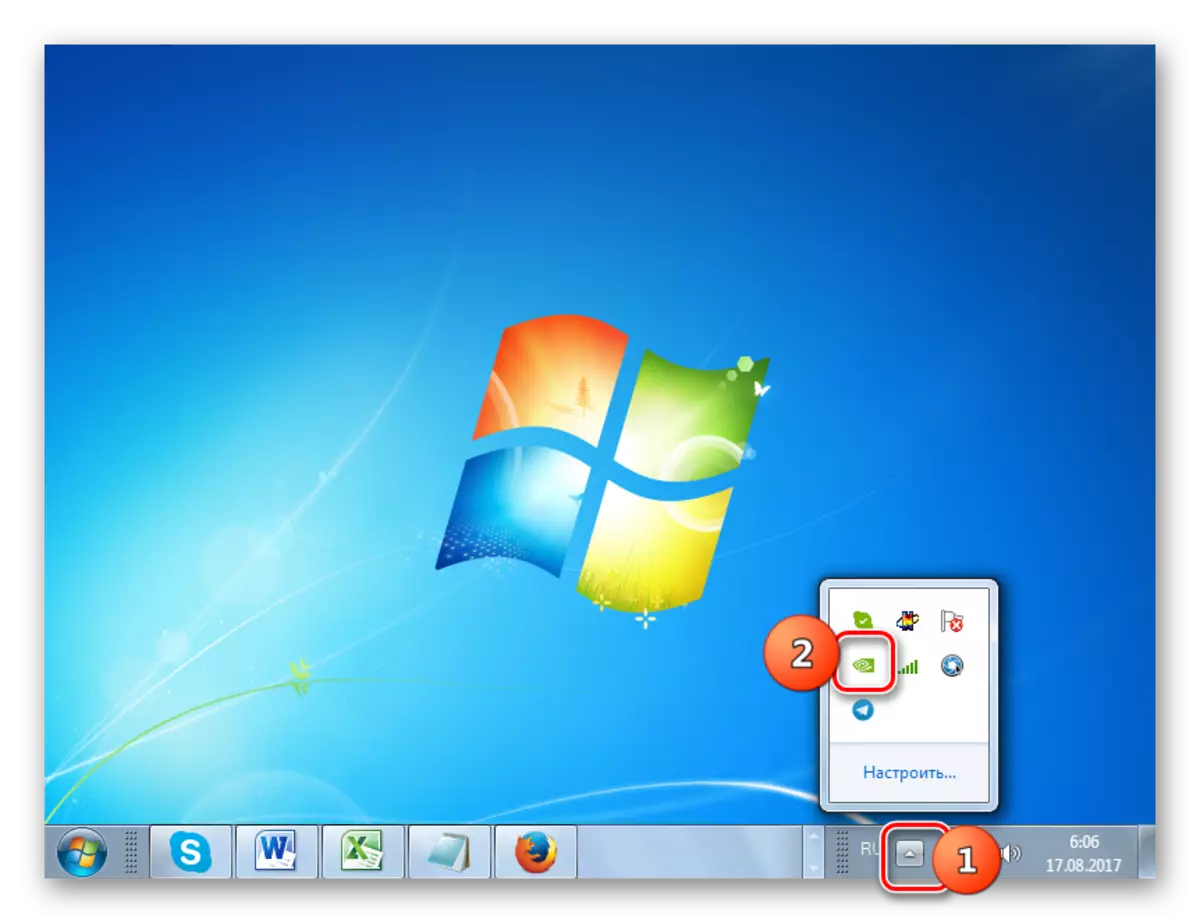
- The video adapter control program is prescribed in autorun and starts with the operating system, working in the background. To activate its graphic shell, move to the tray and find the NVIDIA settings icon there. Click on it.
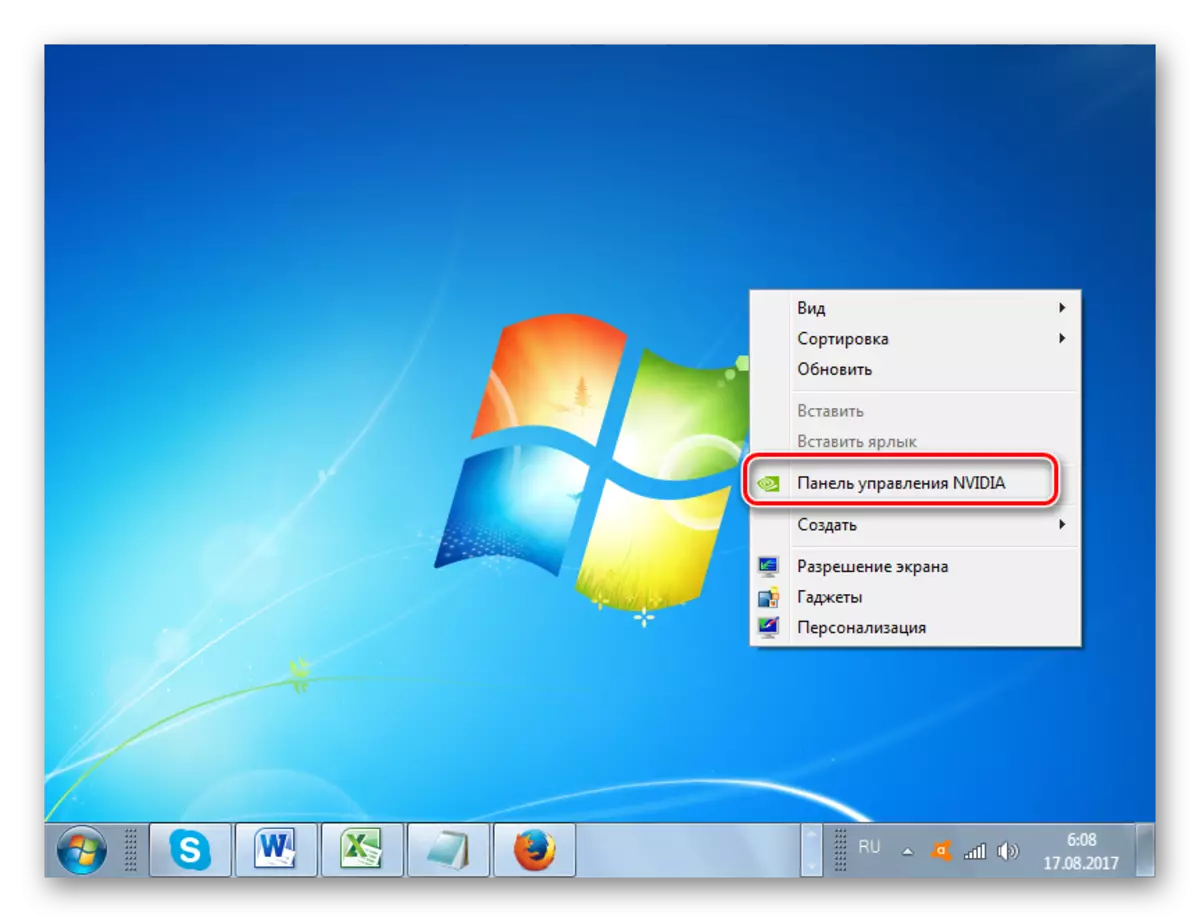
If for some reason the application is not added to the autorun or you have completed it, you can start manually. Go to the "Desktop" and click on the free space of the right mouse button (PKM). In the activated menu, press the "NVIDIA control panel".
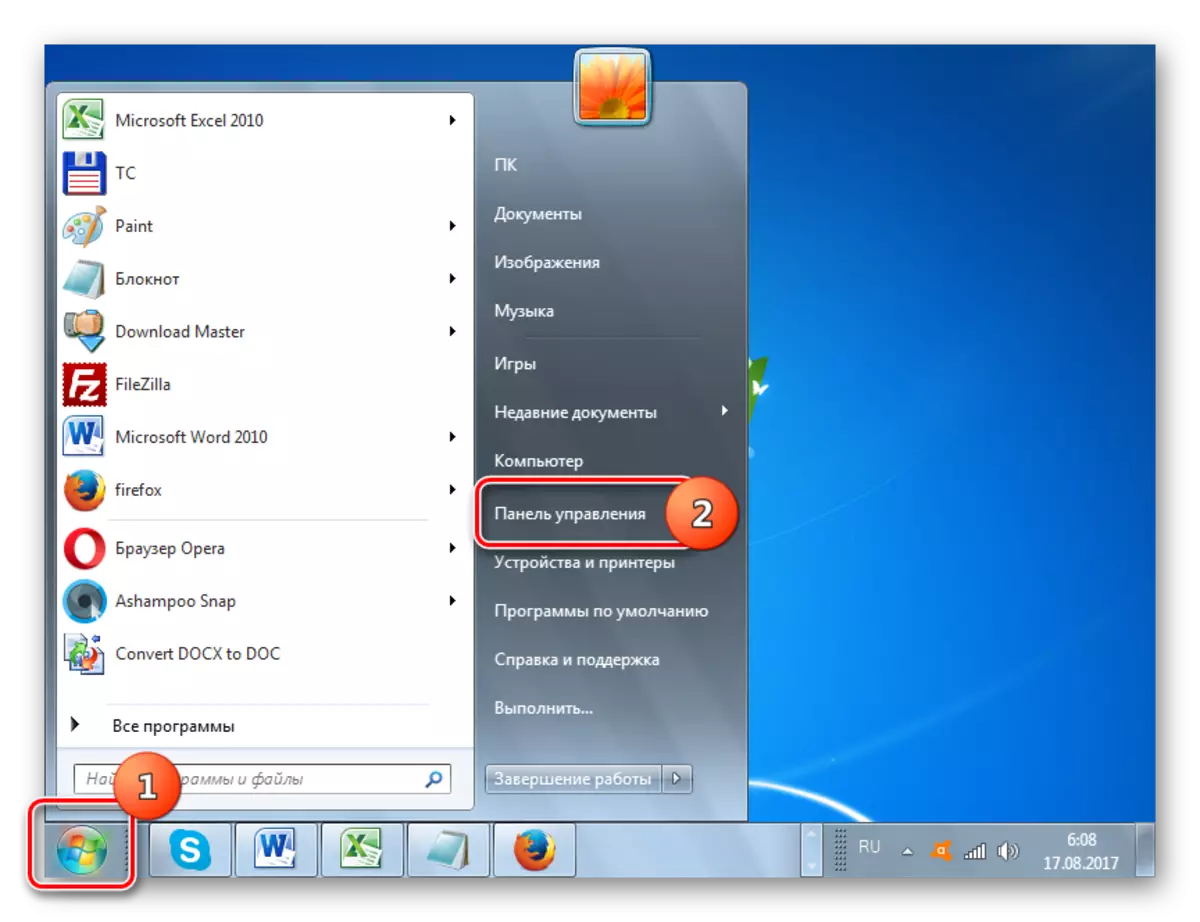
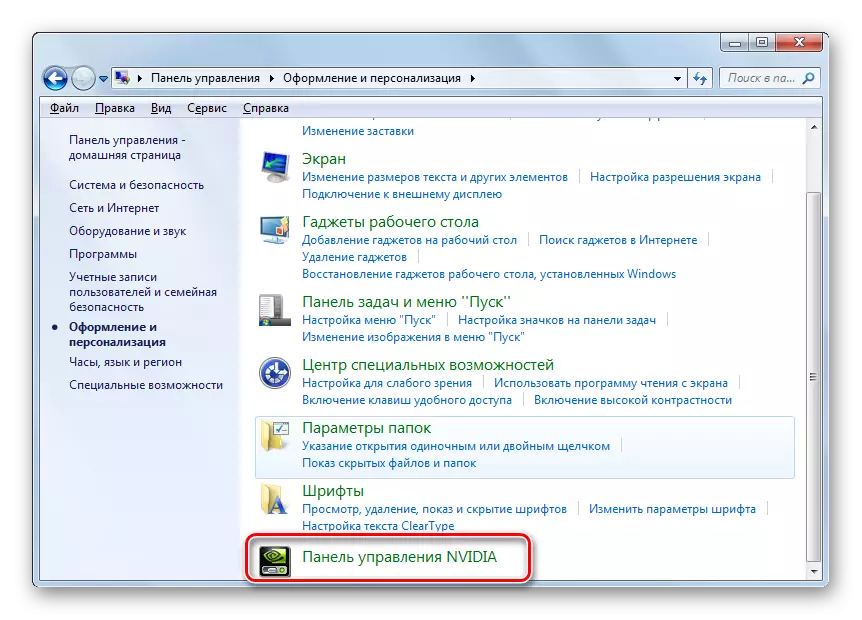
Another option to launch the tool you need assumes its activation through the Windows Control Panel. Click "Start" and then go to "Control Panel".
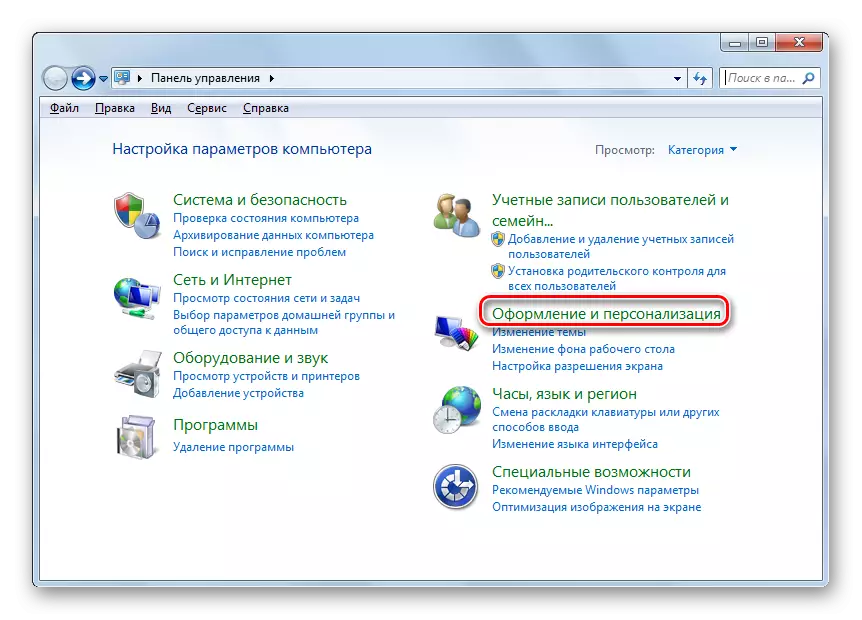
- In the window that opens, go to the "Registration and Personalization" section.
- Going to the section, click on the NVIDIA Control Panel.
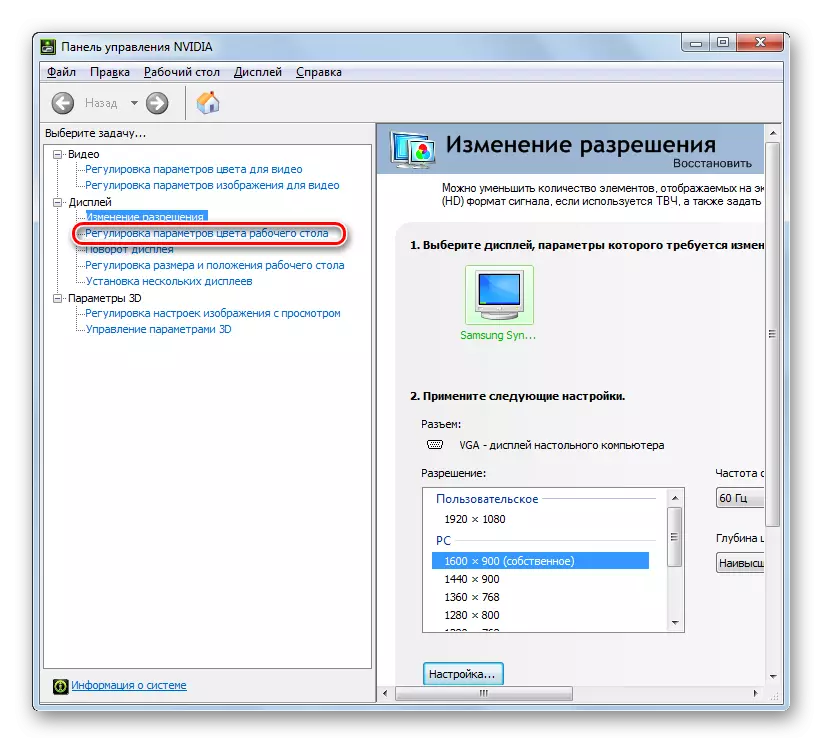
- The "NVIDIA control panel" starts. In the left area of the program shell in the "Display" block, move to the "Adjusting desktop color settings" section.
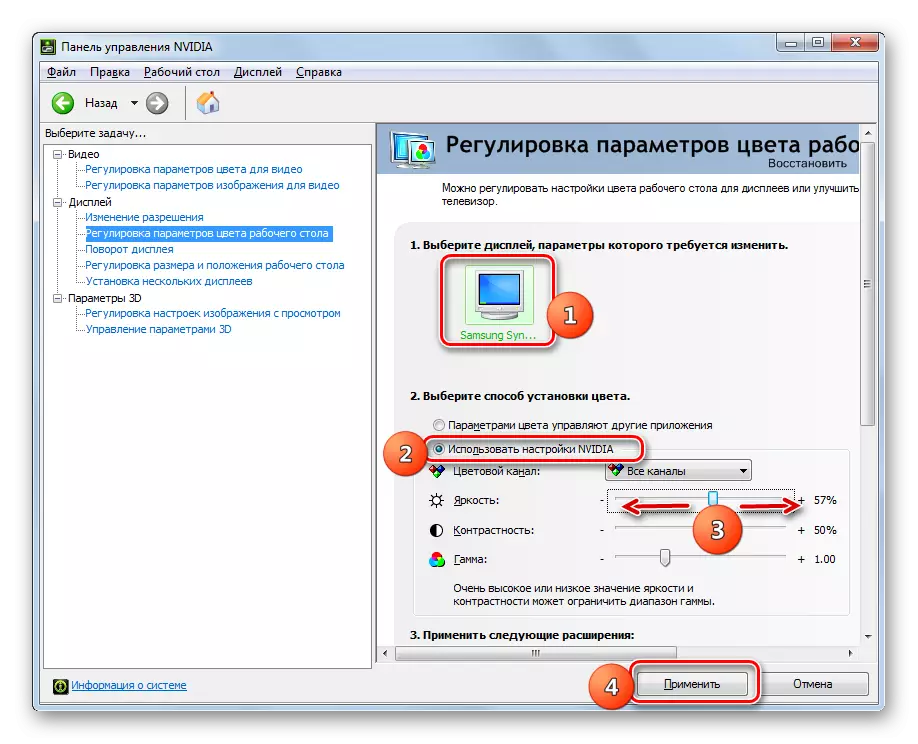
- The color adjustment window opens. If multiple monitors are connected to your computer, then in the "Select Display, whose parameters should be changed" to select the name of which of which you want to produce. Next, go to the "Select Color Method". In order to be able to change the parameters through the "NVIDIA control panel" shell, switch the radio button to "Use NVIDIA Settings". Then go to the "Brightness" parameter and by dragging the slider to the left or right, respectively reduce or increase the brightness. Then click "Apply", after which the changes will be saved.
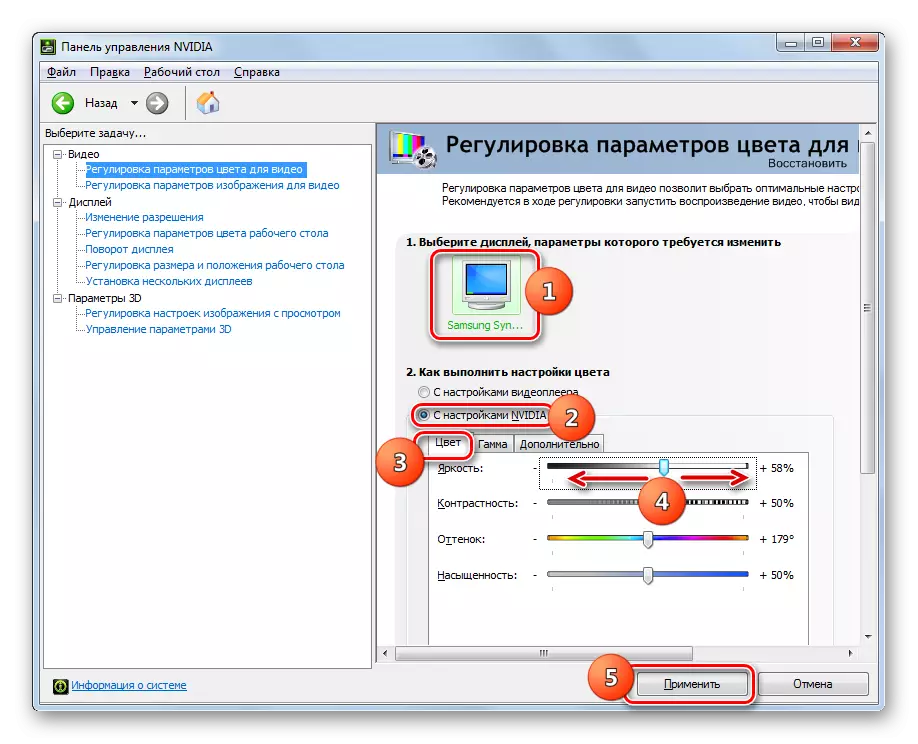
- You can separately set the settings for the video. Click on "Adjust Color Color Settings for Video" in the video "Video".
- In the window that opens in the "Select Display, whose options should be changed", select the target monitor. In the "How to perform color settings", stop the switch to the "Use NVIDIA settings" position. Open the Color tab if other is open. To increase the brightness of the video, drag the slider to the right, and to reduce the left. Click "Apply." The entered settings will be involved.

Method 4: Personalization
The settings you are interested in can be corrected using the OS tools exclusively, in particular, the "window color" tool in the "Personalization" section. But for this, one of the topics of Aero must be active on the PC. In addition, it should be noted that the settings of not all displayed on the screen will change, but only the windows of the windows, the "taskbar" and the "Start" menu.
Lesson: How to enable Aero mode in Windows 7
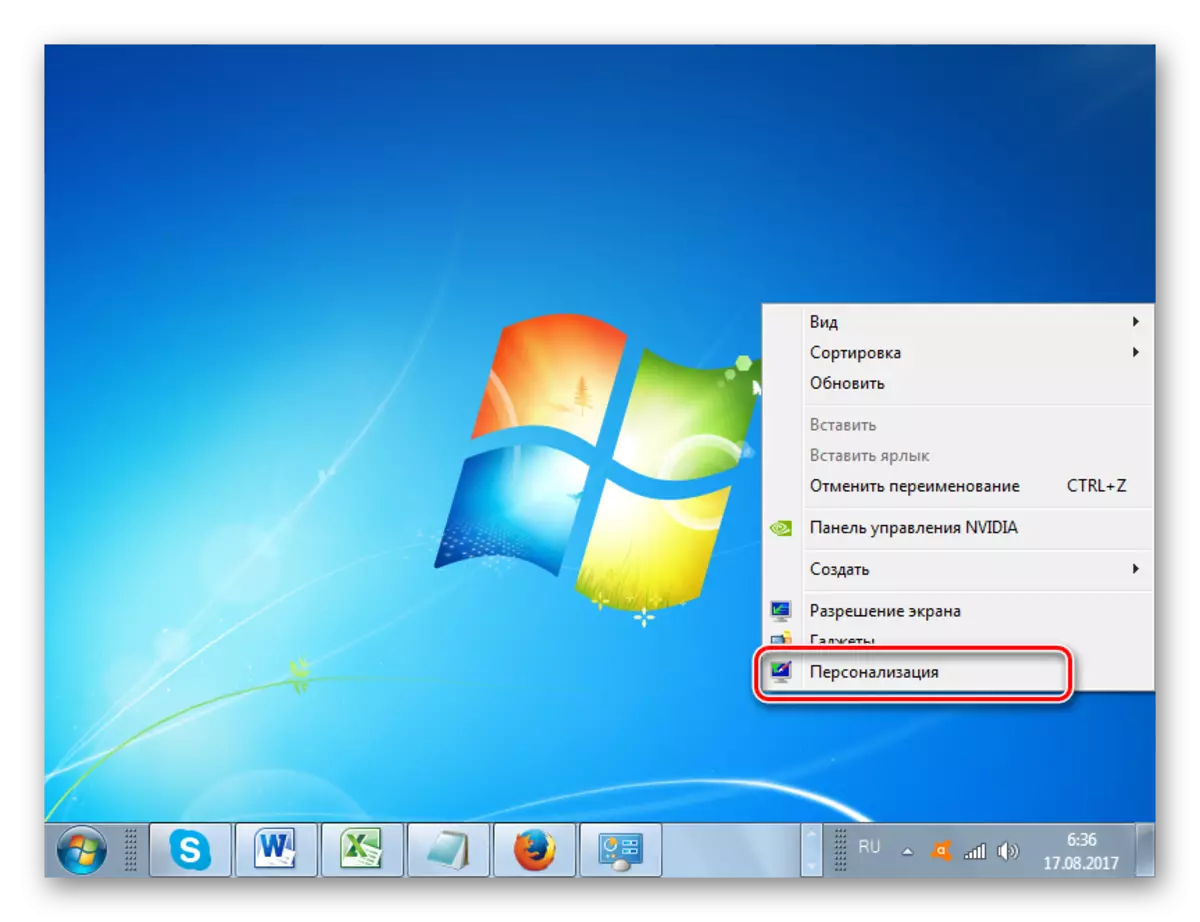
- Open the "Desktop" and click on the PCM on an empty place. In the menu, select "Personalization".
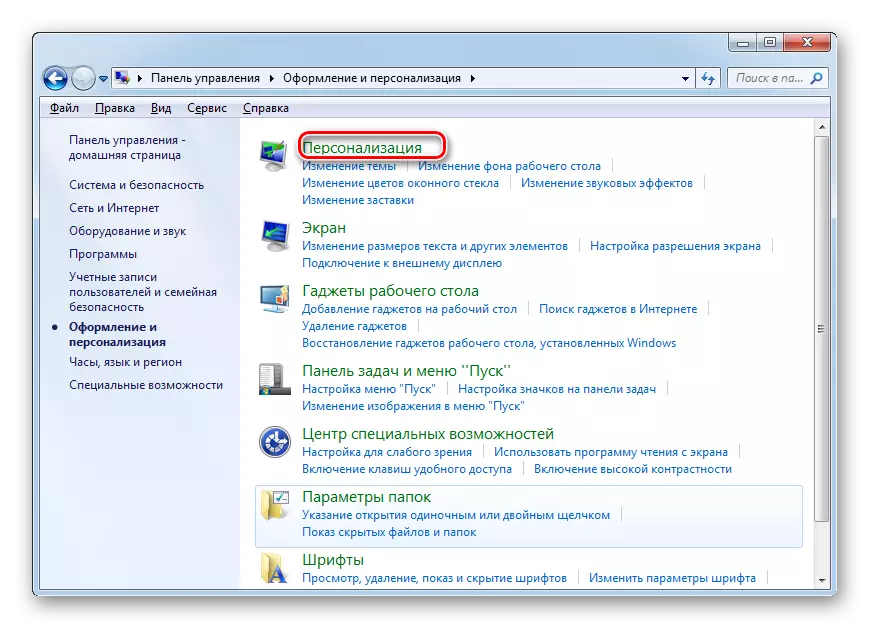
Also, the tool you are interested in can be launched through the "Control Panel". To do this, in the section "Registration and Personalization", click on the inscription "Personalization".
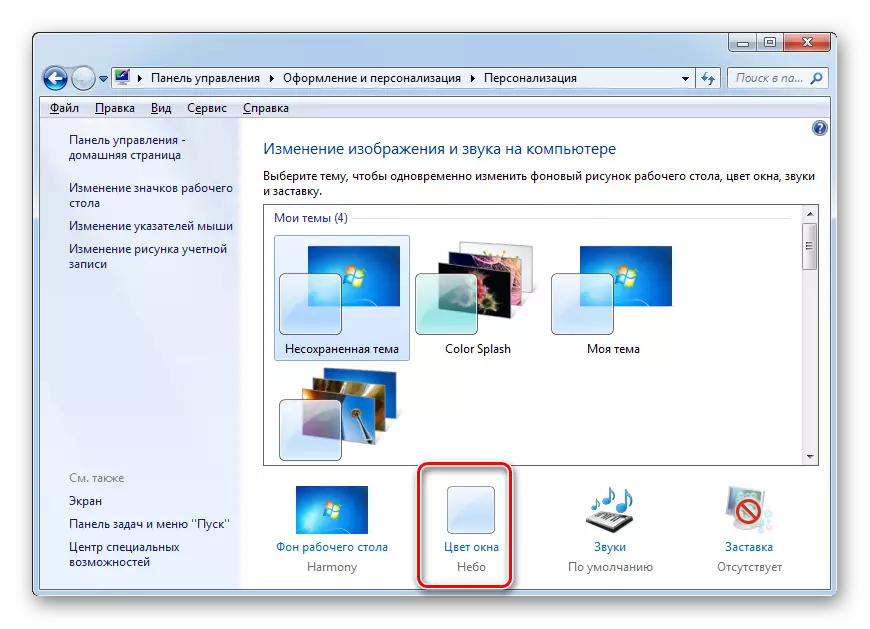
- The "Changing the Image and Sound on Computer" appears. Click on the name "Window color" at the very bottom.
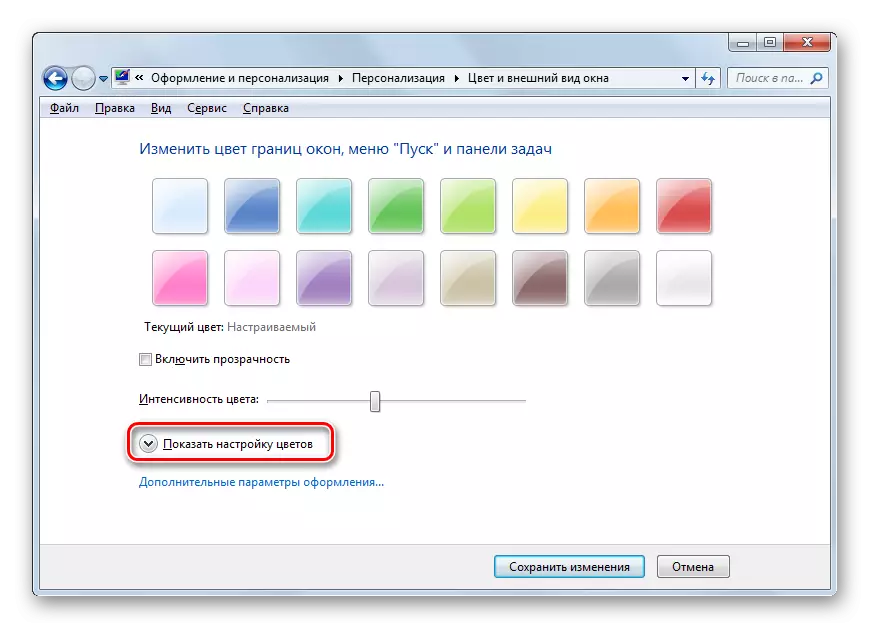
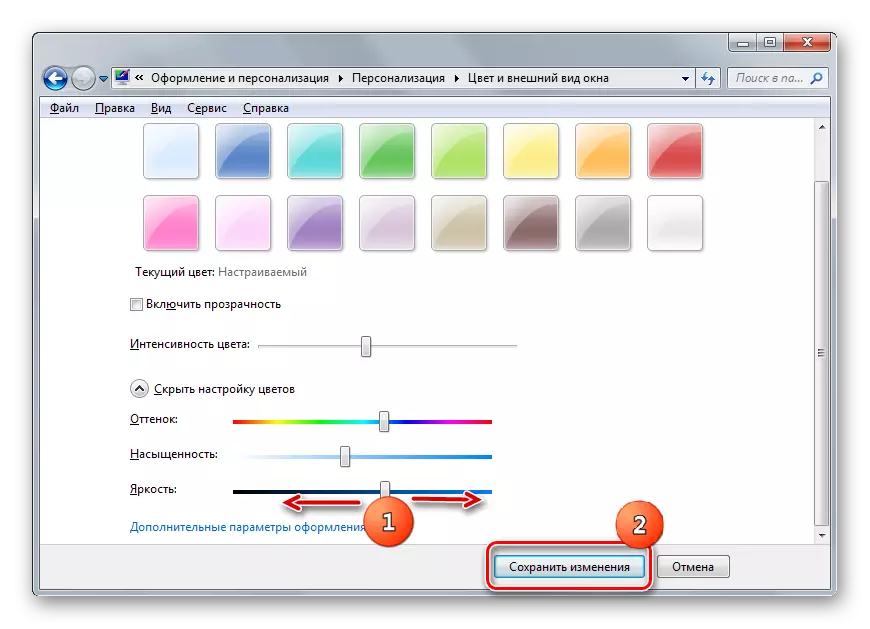
- The system of changing the color of the windows of the windows, the "Start" menu and "taskbar" menu is started. If you do not see in this window to adjust the parameter you need, then click "Show Color Settings".
- Additional setup tools appear, which consist of tint, brightness and saturation regulators. Depending on whether you want to reduce or increase the brightness of the above interface elements, pull the slider, respectively, to the left or right. After executing the settings for their application, click "Save Changes".
Method 5: Color Calibration
Modify the specified monitor parameter can also, using colors calibration. But it will have to use the buttons located on the monitor.
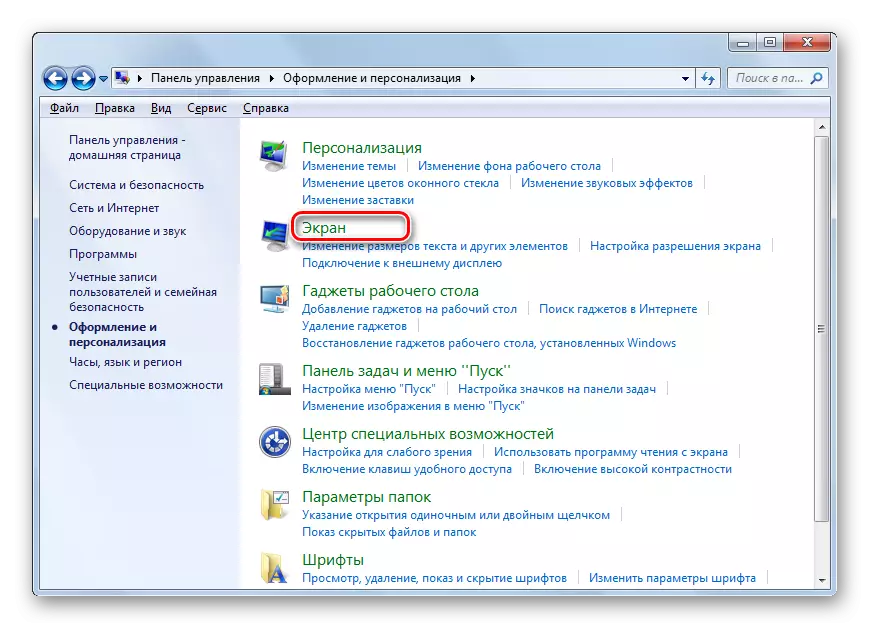
- Being in the section "Control Panels" "Design and Personalization", press "Screen".
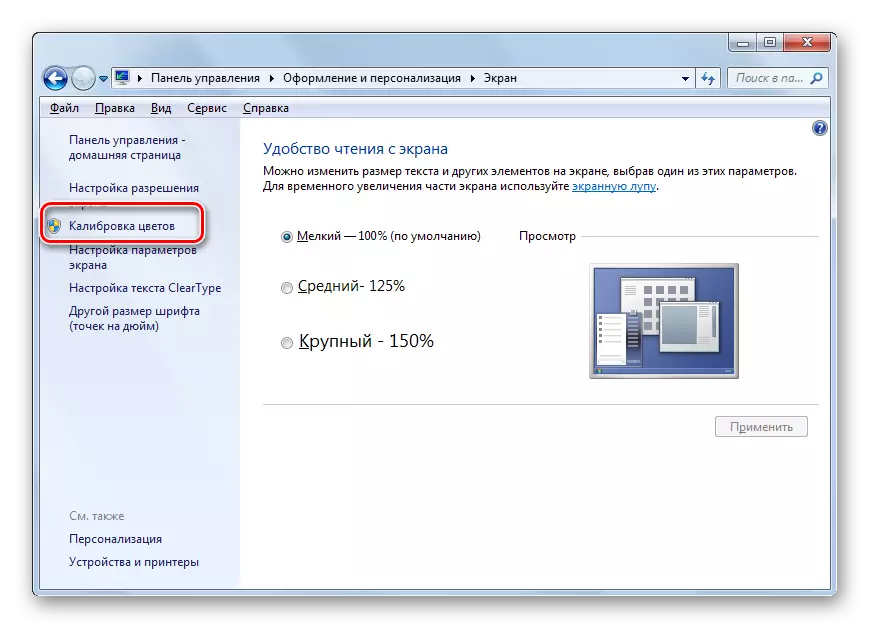
- In the left window that opened the window, click "Calibrate Flowers".
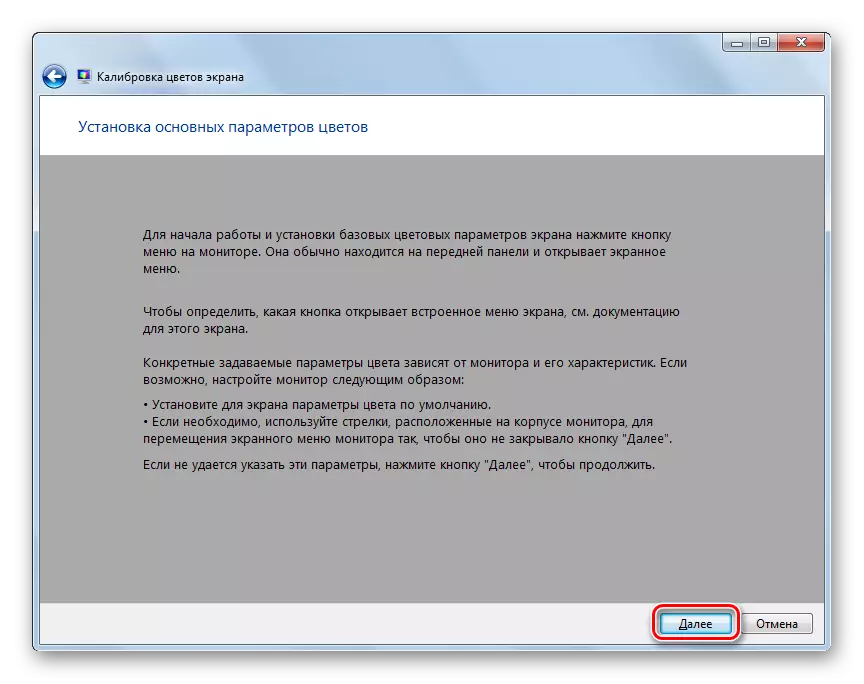
- The monitor colors calibration tool starts. In the first window, read the information presented in it and click "Next."
- Now you need to activate the menu button on the monitor, and in the window click on "Next".
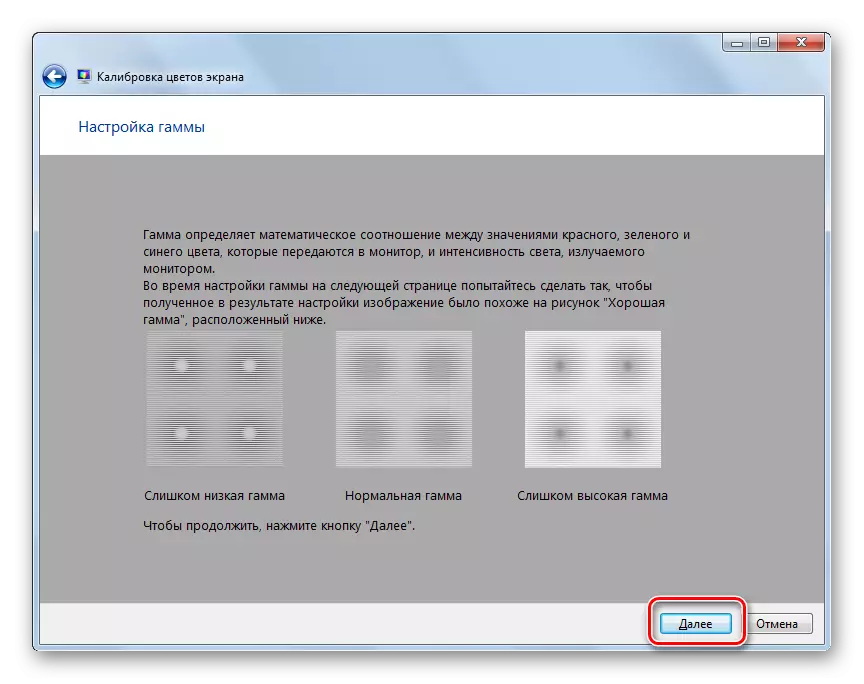
- The gamma adjustment window opens. But, since we have a narrow goal to change the specific parameter, and not to make a common screen setting, then we click on the "Next" button.
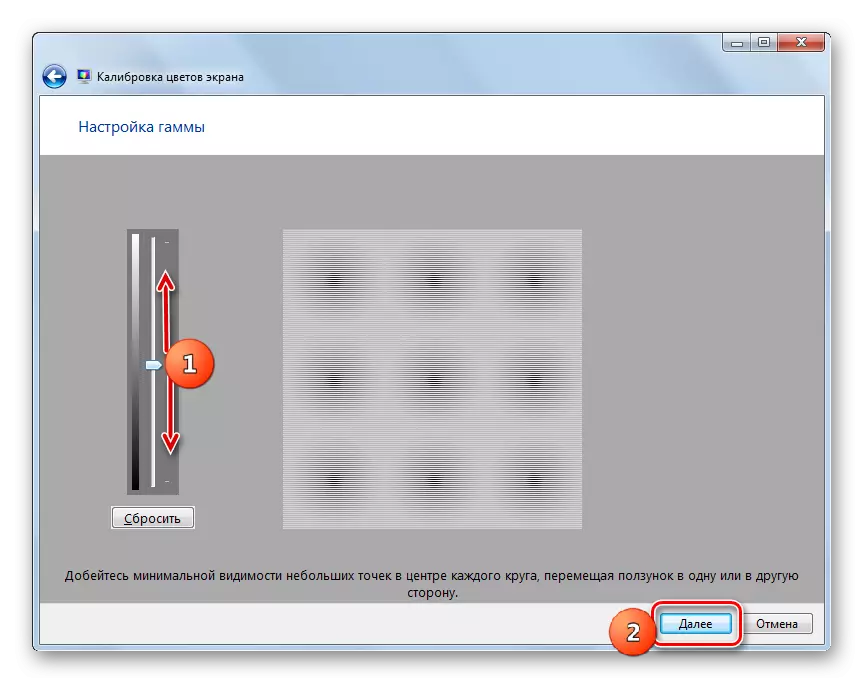
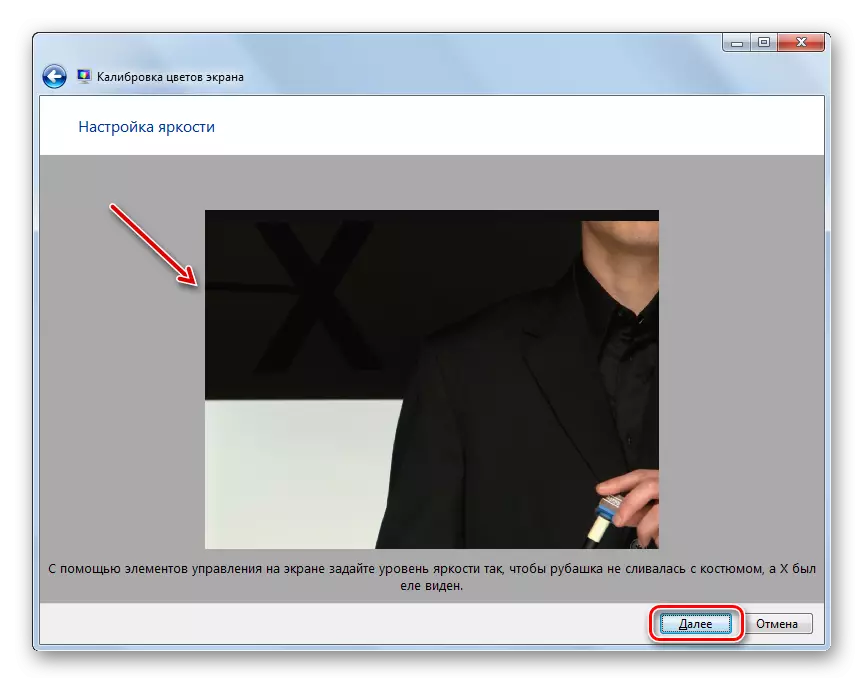
- In the next window by dragging the slider up or down, the monitor brightness can be installed. If you drag the slider down, the monitor will be darker, and up - lighter. After adjustment, press "Next".
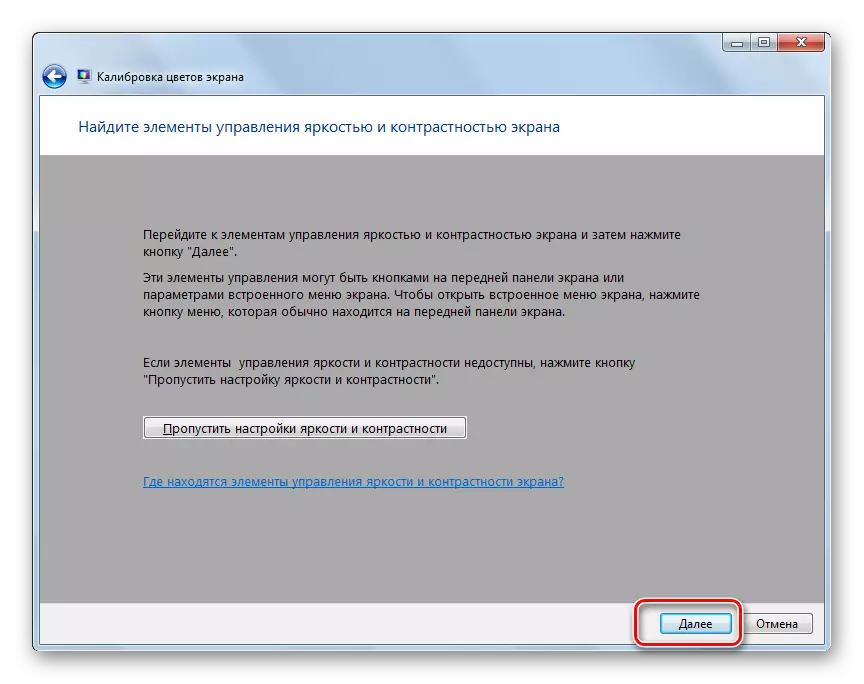
- After that, it is proposed to proceed to control the brightness adjustment on the monitor itself, by pressing the buttons on its housing. And in the Calibration window, press "Next".
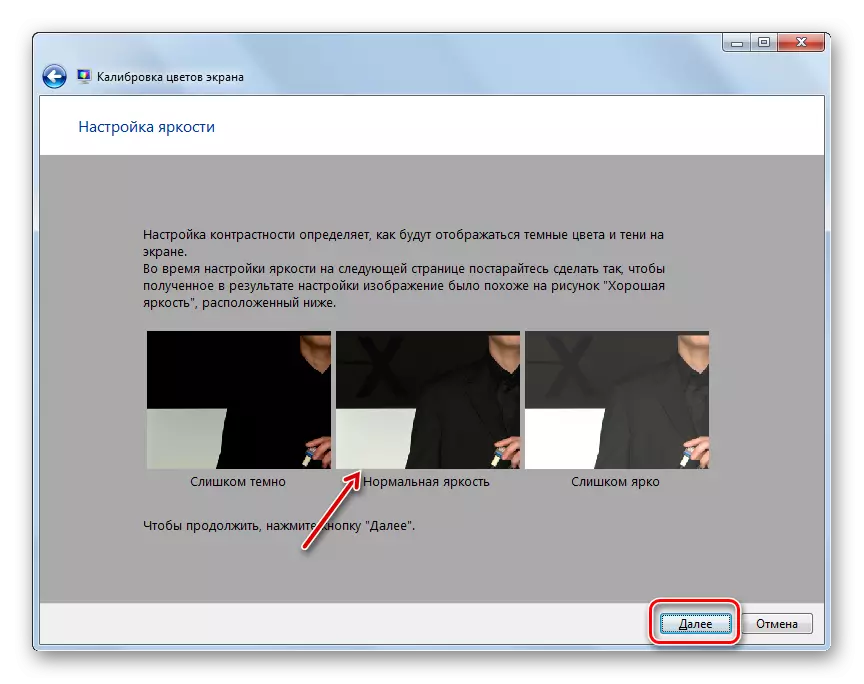
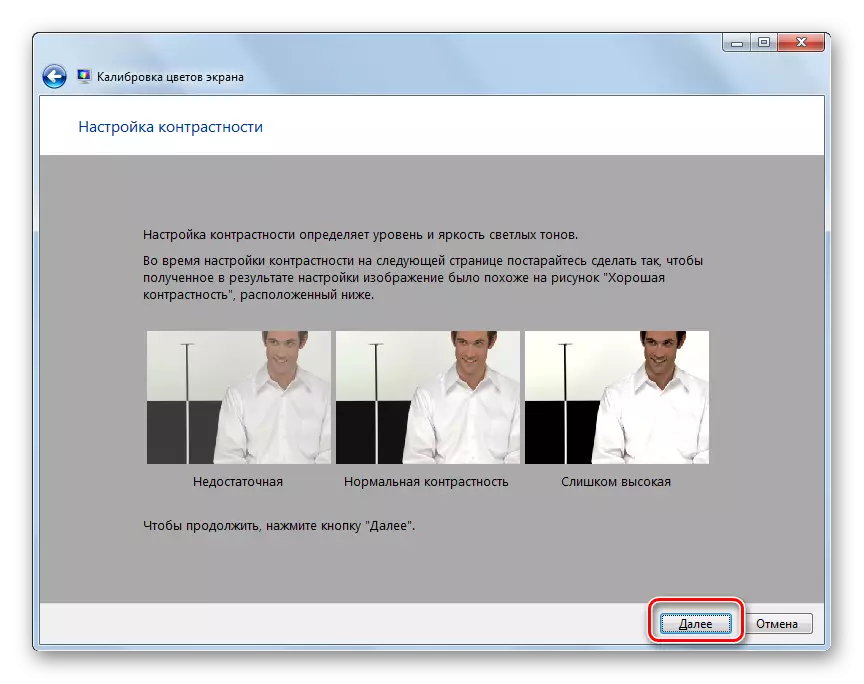
- On the next page, it is proposed to adjust the brightness, reaching such a result, as shown in the central picture. Press "Next".
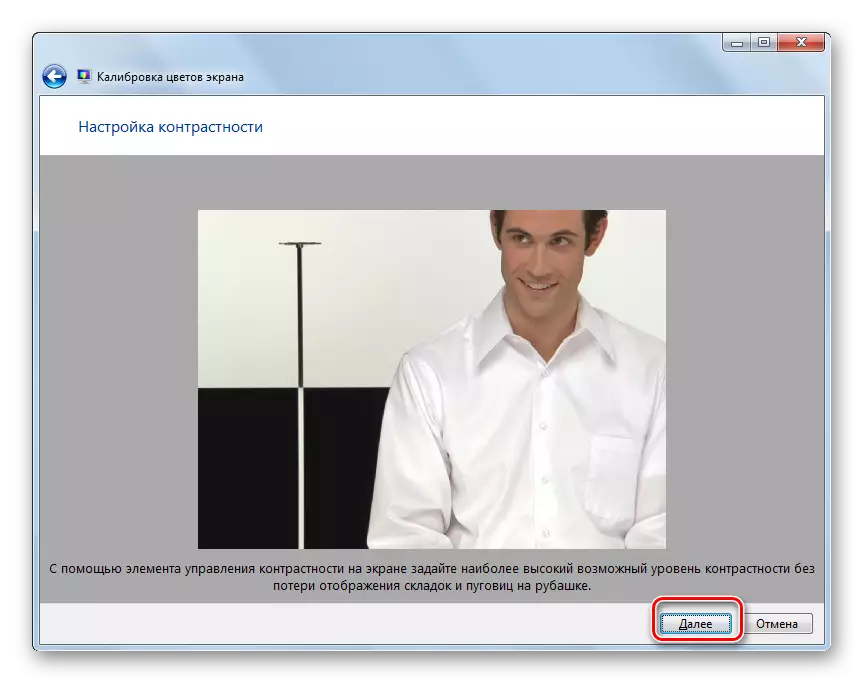
- Using the brightness controls on the monitor, achieve the image in the window that opens maximizes the central picture on the previous page. Click "Next".
- After that, the contrast adjustment window opens. Since we do not need to adjust it before us, just click "Next." The same users who still want to adjust the contrast can do this in the next window exactly by the same algorithm, as the brightness is adjusted before.
- In the window that opens, as mentioned above, or regulate the contrast, or simply click "Next".
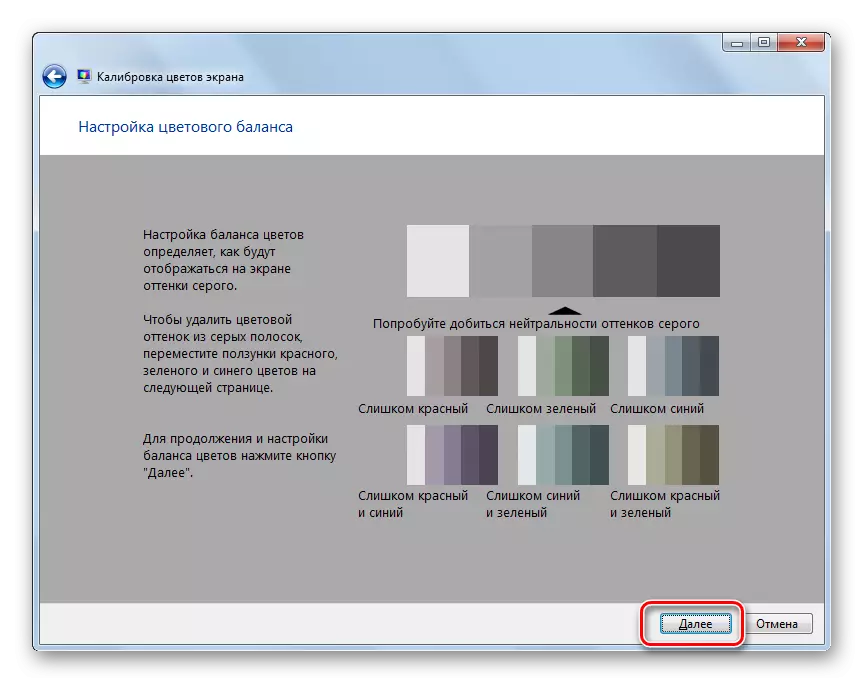
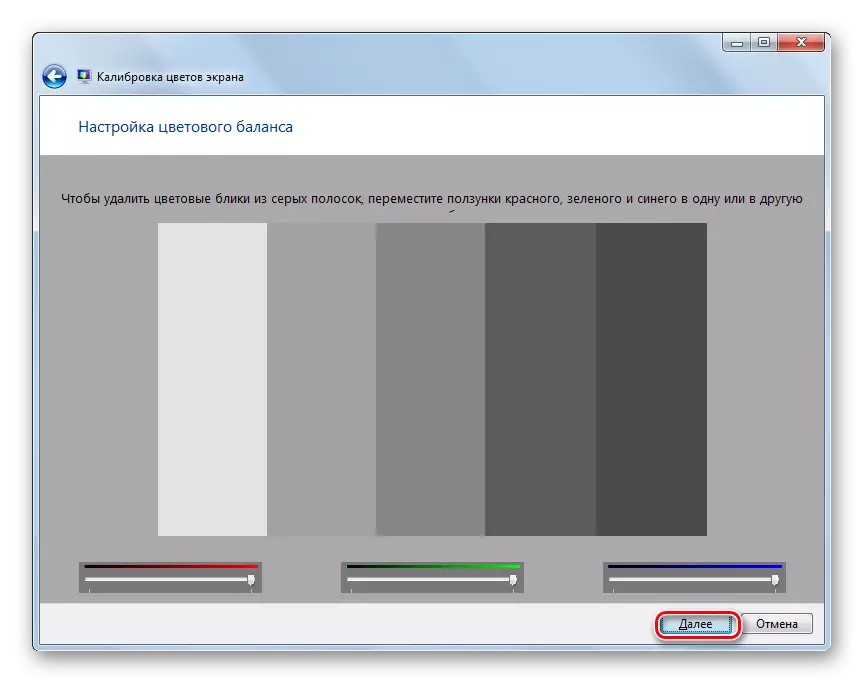
- A color balance setting window opens. This item in the framework of the topic under study does not interest us, and therefore we click "Next."
- In the next window, also click "Next".
- Then the window opens, which reports that the new calibration has been successfully created. Immediately it is proposed to compare the current calibration option with the fact that the adjustment was introduced. To do this, press the "Former Calibration" and "Current Calibration" buttons. In this case, the display on the screen will change according to these settings. If, when comparing a new version of the brightness level with the same, everything suits you, you can finish working with the screen calibration tool. You can remove the checkbox from the point "Run the Clearartype setting tool ..." because if you change only the brightness, you will not need this tool. Then click "Finish".


As you can see, the ability to adjust the brightness of the screen of computers exceptionally standard OS tools in Windows 7 is quite limited. So you can only adjust the parameters of the windows, "taskbar" and the Start menu. If you need to complete the monitor brightness adjustment, then you will have to use the buttons directly on it. Fortunately, it is possible to solve this problem by using third-party software or video card control program. These tools will allow you to fully configure the screen without using the buttons on the monitor.