

Service Pack 3 Update for Windows XP is a package containing many additions and corrections aimed at improving the safety and performance of the operating system.
Loading and installing Service Pack 3
As you know, Windows XP supported back in 2014, so finding and downloading a package from the official Microsoft website is not possible. There is a way out of this situation - download SP3 from our cloud.Download update SP3
After downloading, the package must be installed on the computer, this we will further.
System requirements
For the normal operation of the installer, we will need at least 2 GB of free space on the system section of the disk (the volume on which the Windows folder is located). The operating system may contain previous SP1 or SP2 updates. For Windows XP SP3, you do not need to install the package.
Another important point: SP3 package for 64-bit systems does not exist, so update, for example, Windows XP SP2 X64 to Service Pack 3 will not be possible.
Preparation for installation
- Installing a package will occur with an error if you previously set the following updates:
- Computer sharing setting.
- Multilingual user interface package for connecting to a remote desktop version 6.0.
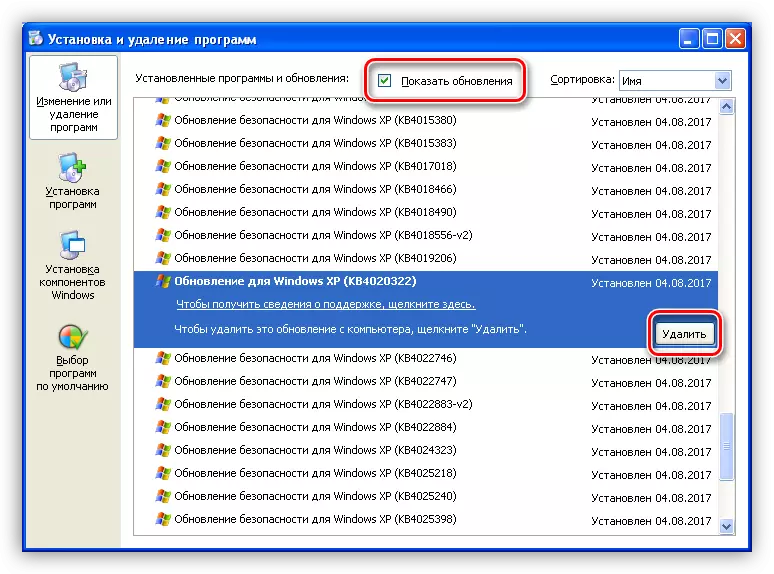
They will be displayed in the Standard section "Installing and Deleting Programs" in the "Control Panel".
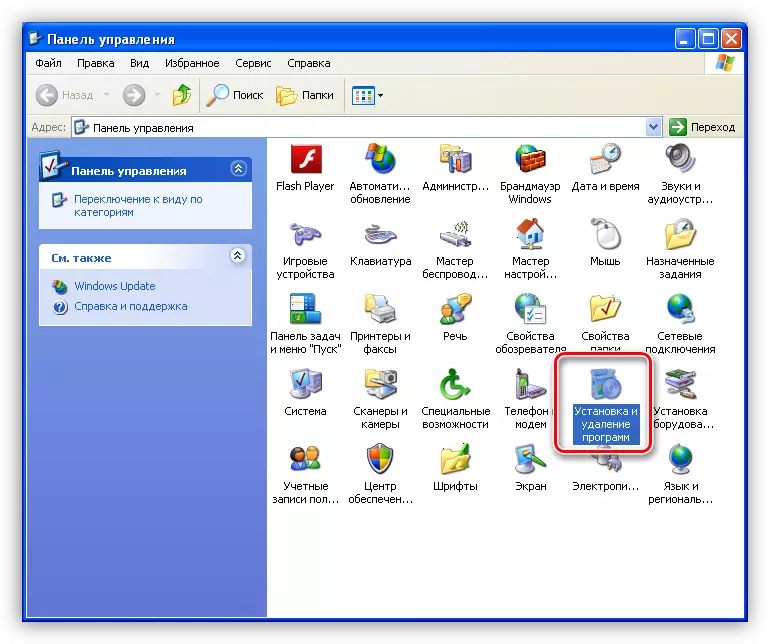
To view the installed updates, you must install the "Show updates" checkbox. If the above packages are present in the list, they must be removed.
- Next, it is necessary to disable all antivirus protection, as these programs may prevent changing and copying files in system folders.
Read more: How to turn off the antivirus
- Create a recovery point. This is done in order to be able to "roll back" in the event of errors and failures after installing SP3.
Read more: How to restore Windows XP system
After the preparatory work is made, you can start installing the package of updates. You can do this in two ways: from under running Windows or using a boot disk.
It's all, now we enter the system in the usual way and use Windows XP SP3.
Installation from the boot disk
This type of installation will avoid some errors, for example, if it is impossible to completely disable the antivirus program. To create a boot disk, we will need two programs - NLITE (to integrate the update package to the installation distribution), Ultraiso (to record the image on the disk or flash drive).
Download nLite

For normal operation of the program, Microsoft .NET Framework is also required not lower than version 2.0.
Download Microsoft .NET Framework
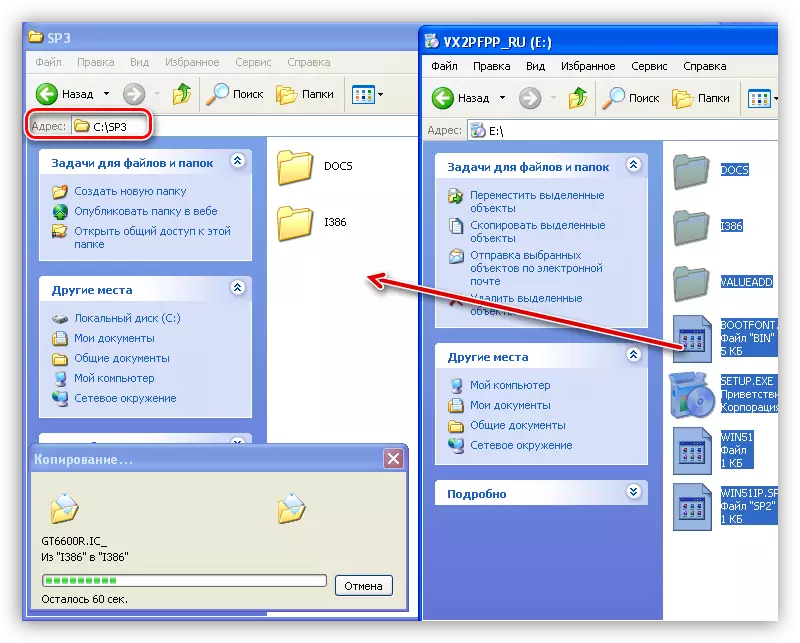
- Insert the disk with Windows XP SP1 or SP2 into the drive and copy all the files to the pre-created folder. Please note that the path to the folder, as well as its name, should not contain Cyrillic characters, so the most correct solution will be placed in the root of the system disk.
- Run the NLITE program and in the start window change the language.

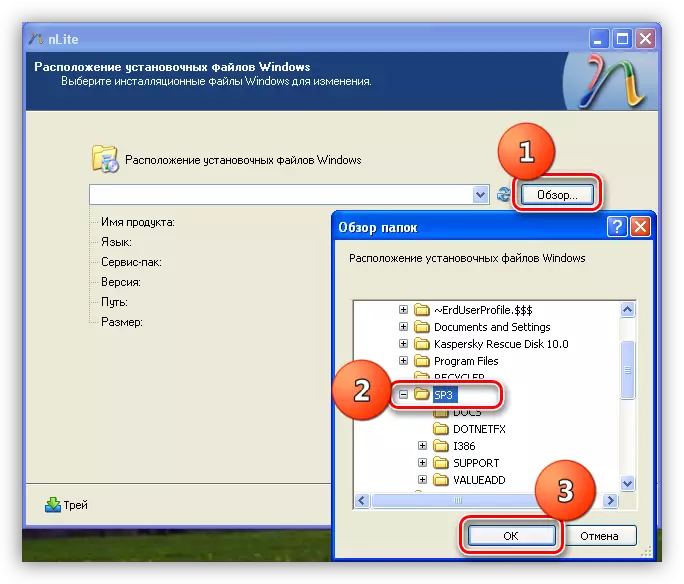
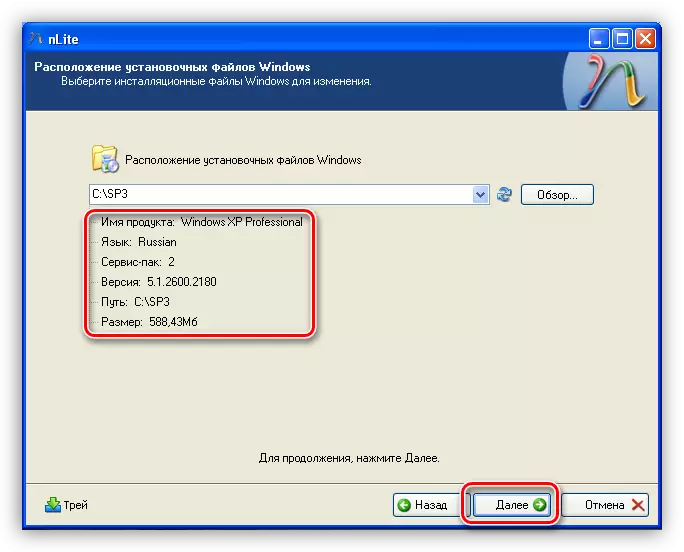
- Next, click on the "Overview" button and select our folder with files.
- The program will check the files in the folder and give information about the version and SP package.
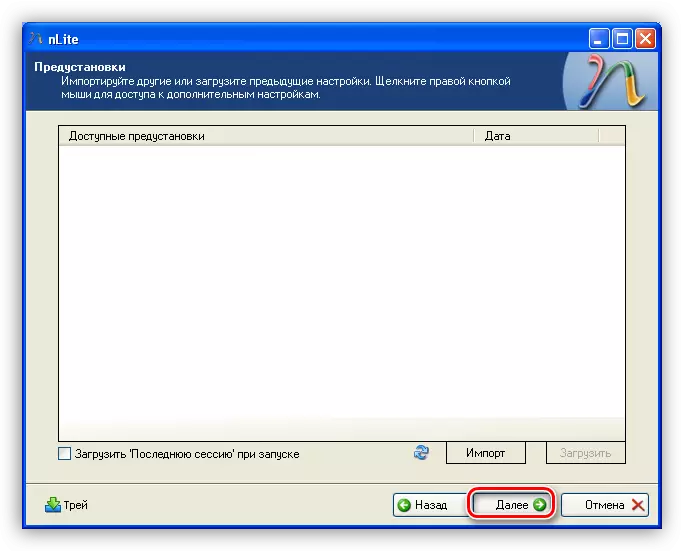
- We skip the window with presets by pressing "Next".
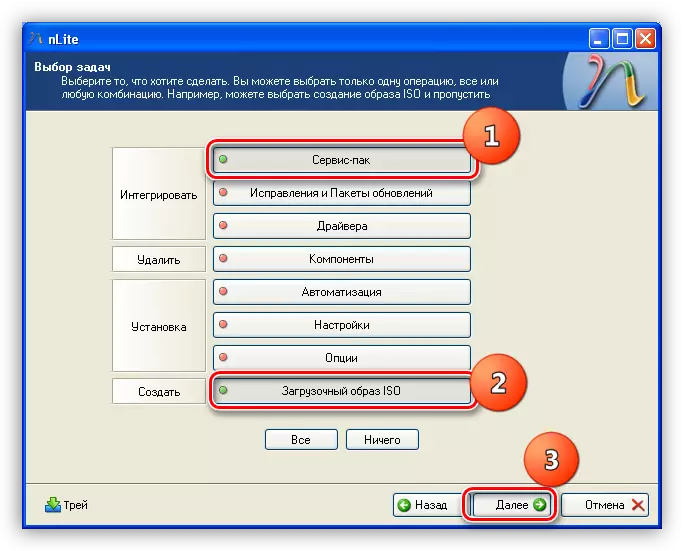
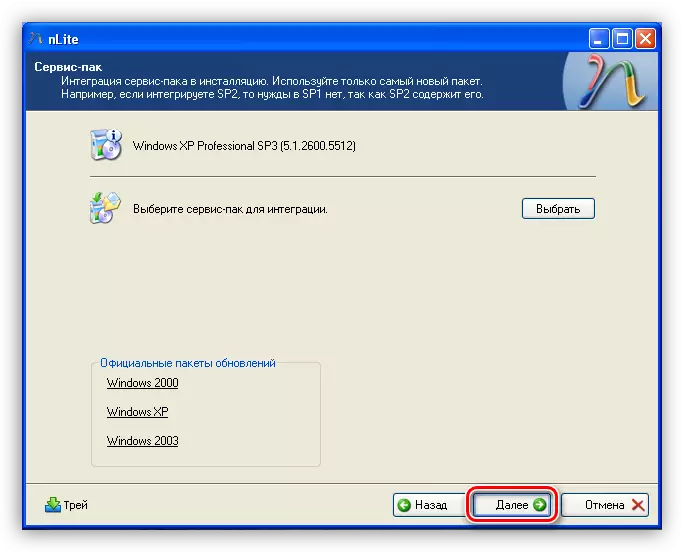
- Choose tasks. In our case, this is the integration of service pack and creating a boot image.
- In the next window, click the "Select" button and agree with the deletion of previous updates from the distribution.
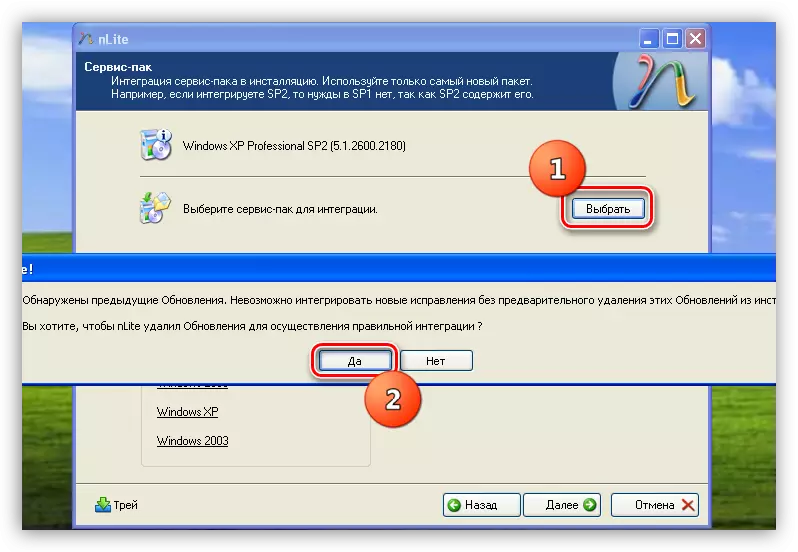
- Click OK.
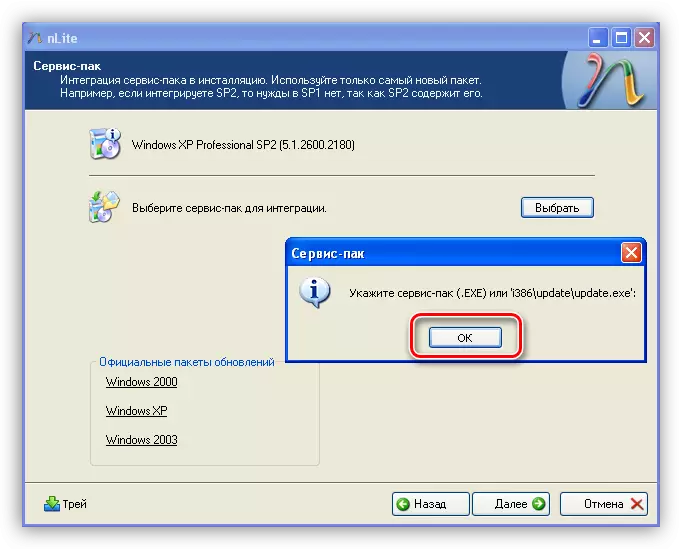
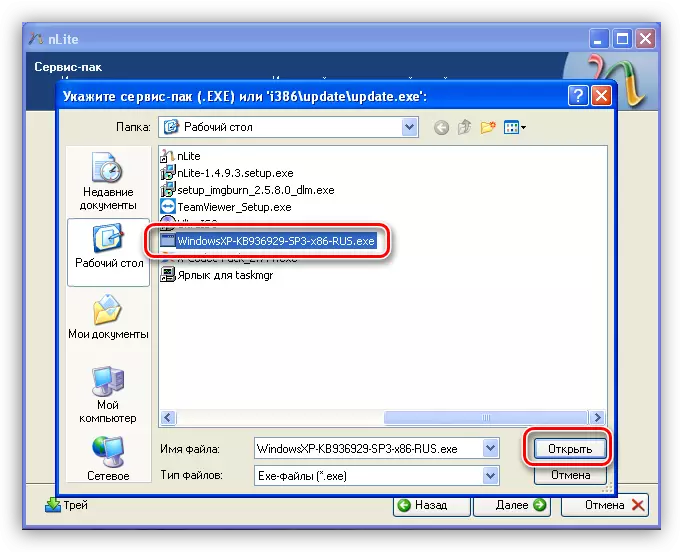
- We find the WindowsXP-KB936929-SP3-X86-RUS.EXE file on the hard disk and click "Open".
- Next, the files from the installer
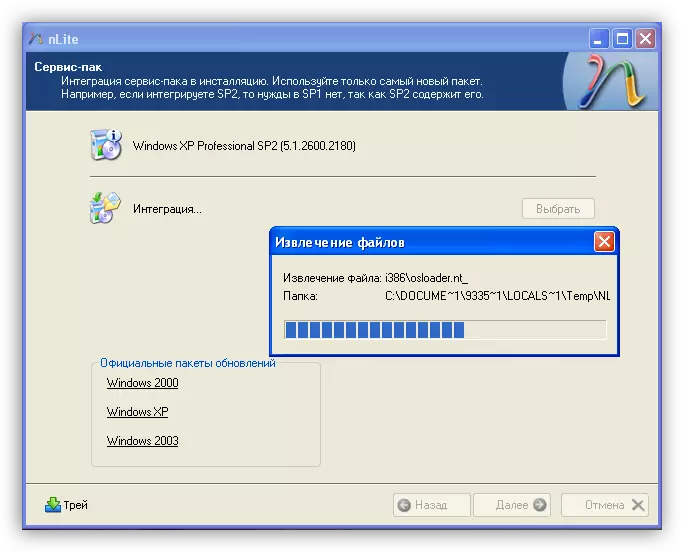
and integration.

- Upon completion of the process, click OK in the dialog box,
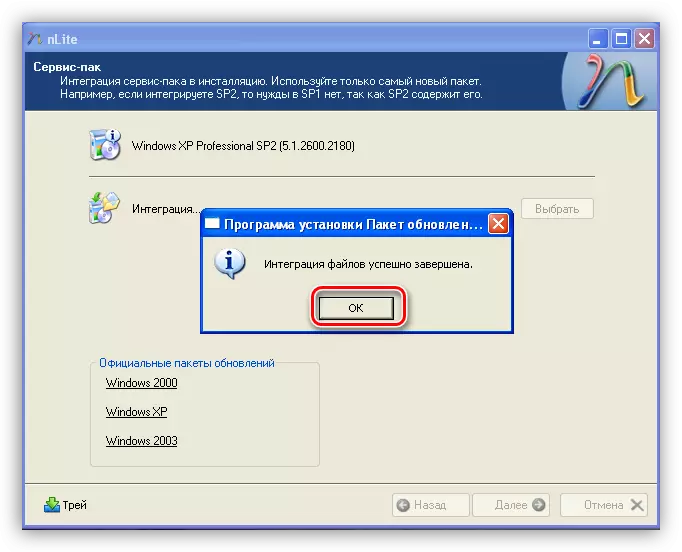
And then "Next".
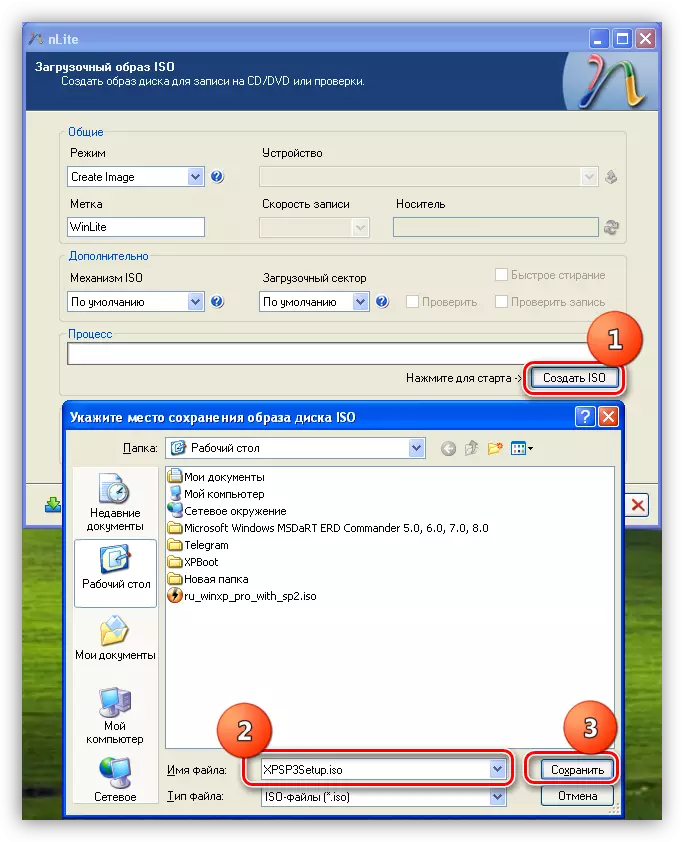
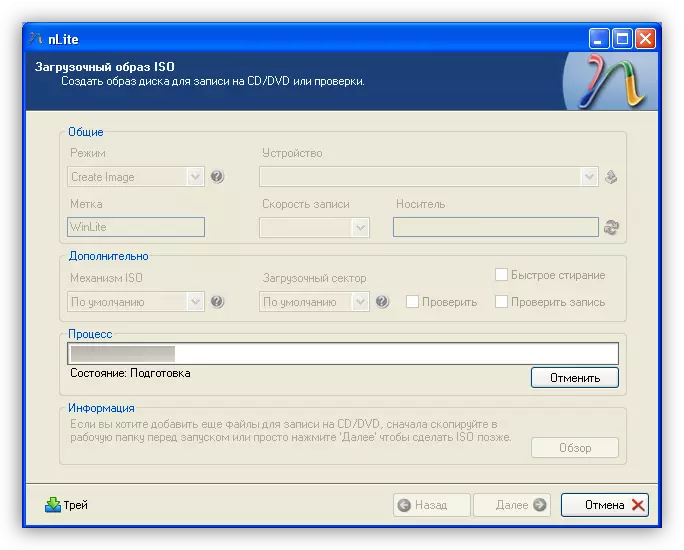
- We leave all the default values, click the "Create ISO" button and select the location and name for the image.
- When the process of creating an image is completed, you can simply close the program.
- To record the image on the CD, open Ultraiso and click on the icon with a burning disk in the top of the toolbar.
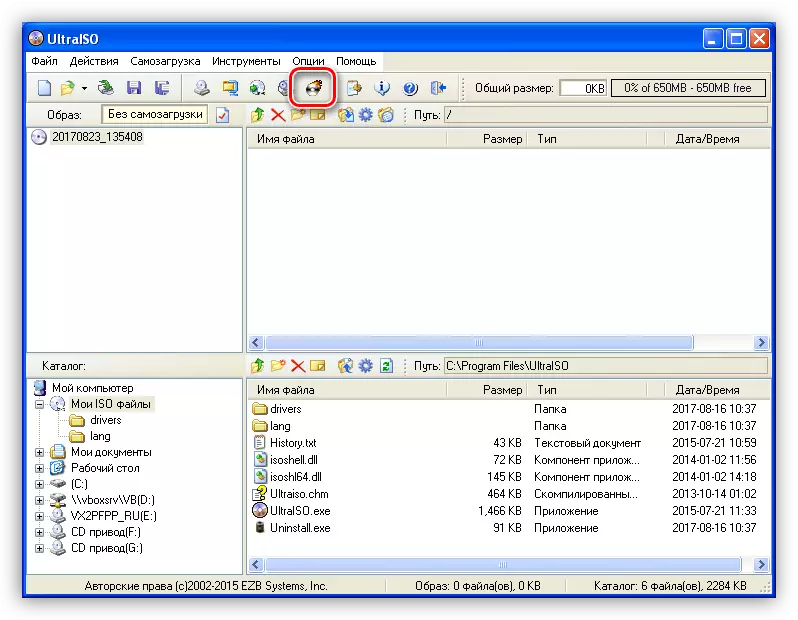
- Select the drive on which the "burning" will be made, set the minimum write speed, we find our created image and open it.
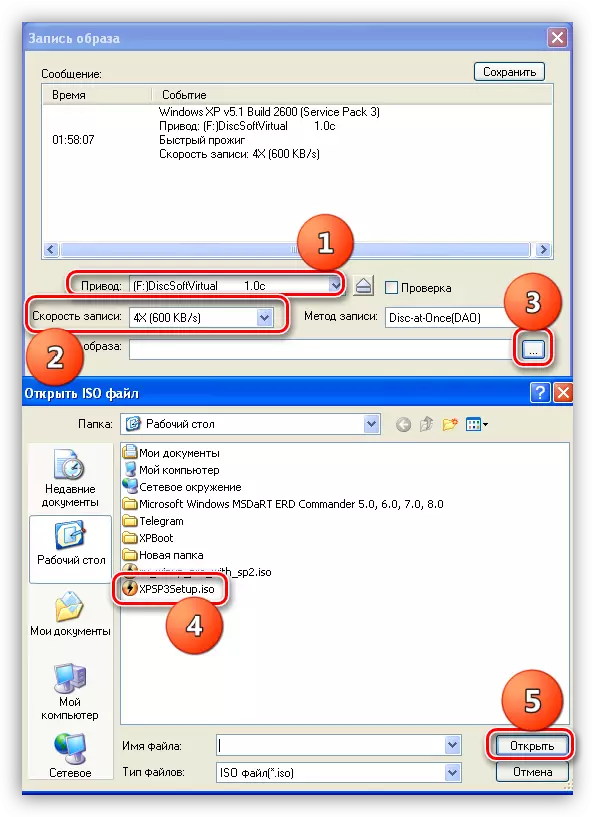
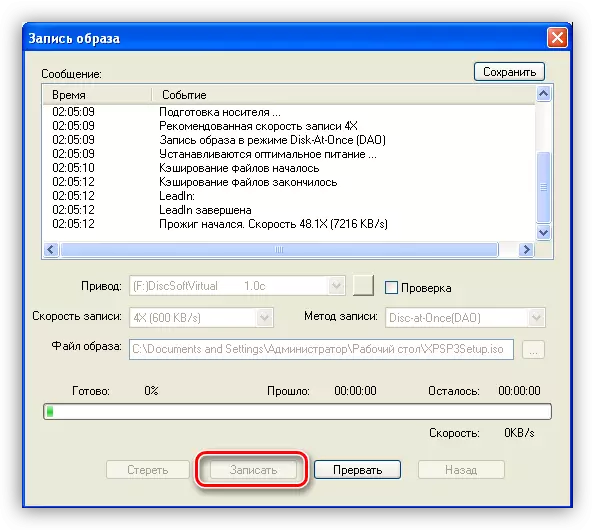
- Press the recording button and wait for it.
If you are convenient to use the flash drive, you can record and on such a carrier.
Read more: How to create a bootable flash drive
Now you need to boot from this disk and install the installation with custom data (read the system for restoring the system, the reference to which is presented above in the article).
Conclusion
Updating the Windows XP operating system using the Service Pack 3 package will allow you to improve computer security, and use system resources efficiently as possible. The recommendations given in this article will help to make it as quickly as possible and simple.