

The functionality and the BIOS interface is obtained at least some serious changes are quite rare, so it is not necessary to update it regularly. However, if you have gathered a modern computer, but the MSI motherboard has an outdated version, it is recommended to think about its update. The information that will be set out further is relevant only for MSI motherboards.
Technical features
Depending on how you decide to make an update, you will have to download or a special Windows utility, or the firmware files.If you decide to update from the Utilities built into the BIOS or DOS rows, then you will need an archive with installation files. In the case of a utility that goes under Windows, downloading installation files may not be needed in advance, since the utility functionality has the ability to download everything you need from MSI servers (depending on the selected installation type).
It is recommended to use standard BIOS update installation methods - built into it utilities or DOS string. Update via the operating system interface is dangerous in the event that in the event of any bug there is a risk of suspension of the process, which may entail serious consequences up to the failure of the PC.
Step 1: Preparatory
If you decide to use standard methods, you need to make appropriate training. First you need to find out information about the BIOS version, its developer and the model of your Matpal. All this is necessary that you can download the correct version of the BIOS for your PC and make a backup already existing.
To do this, you can use both the built-in Windows and third-party software. In this case, the second option will be more convenient, so the further step-by-step instruction is considered on the example of the AIDA64 program. It has a convenient interface in Russian and a large set of functions, but at the same time (although there is a demo period). The instruction looks like this:
- After opening the program, go to the "System Board" item. You can do it using icons in the main window or points in the left menu.
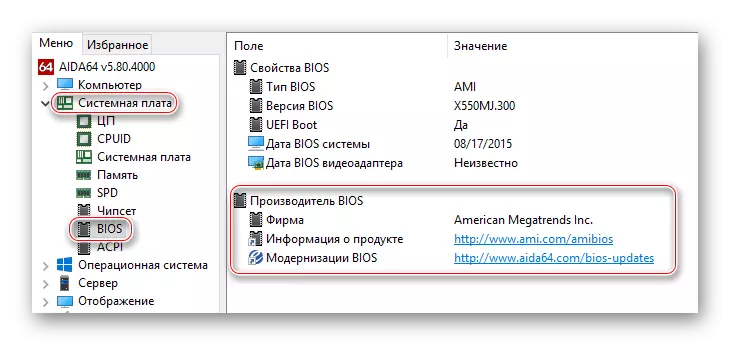
- By analogy with the previous step, you need to go to the BIOS item.
- Find there the "BIOS manufacturer" and "BIOS version" speakers. They will contain all the necessary information on the current version, which is desirable to save somewhere.
- From the program interface, you can also download the update for a direct link to the official resource, which is located opposite the "BIOS Update" item. However, it is recommended to make an independent search and downloading a fresh version on the website of the manufacturer of the motherboard, as the link from the program can lead to the download page irrelevant for you.
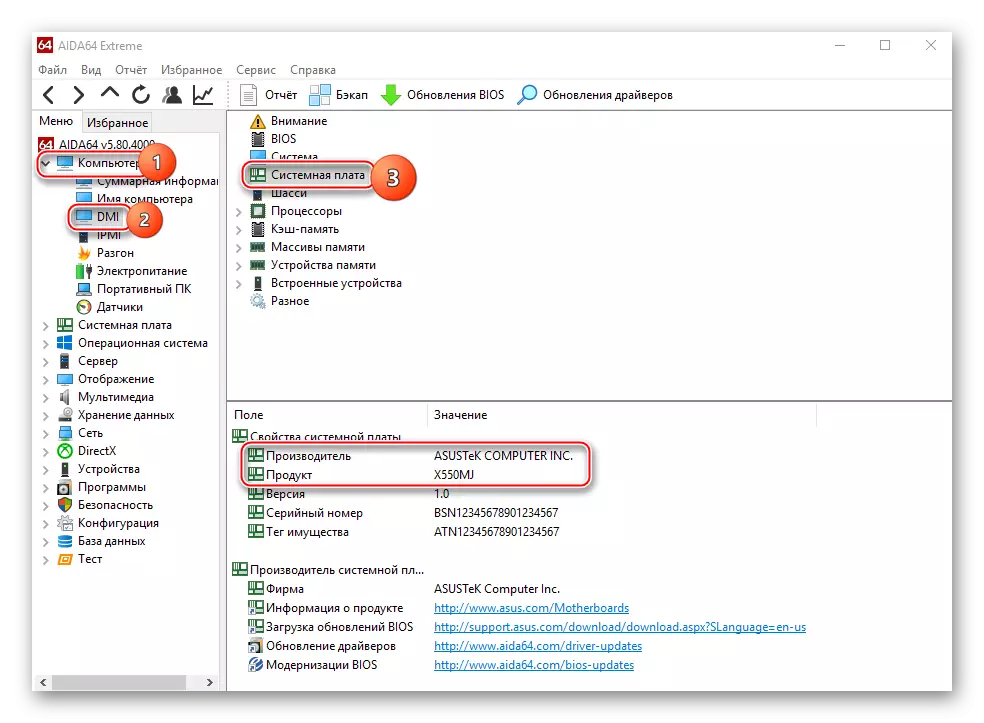
- As the last stage, you need to go to the "System Board" section (as well as in the 2nd point of Instructions) and find the "System Board Properties" field there. Opposite the line "System fee" should be its full name, which is useful to search for the latest version on the manufacturer's website.
Now download all files to update the BIOS from the MSI official website using this manual:
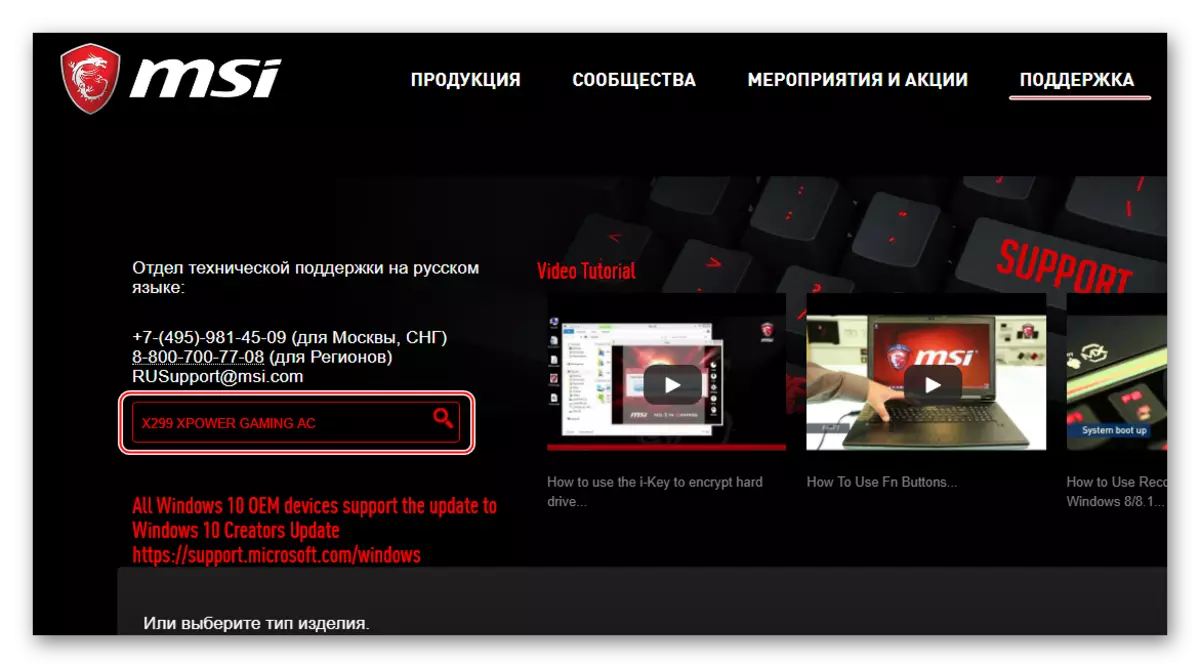
- On the site, use the search icon that on the upper right side of the screen. Enter the full name of your motherboard in the string.
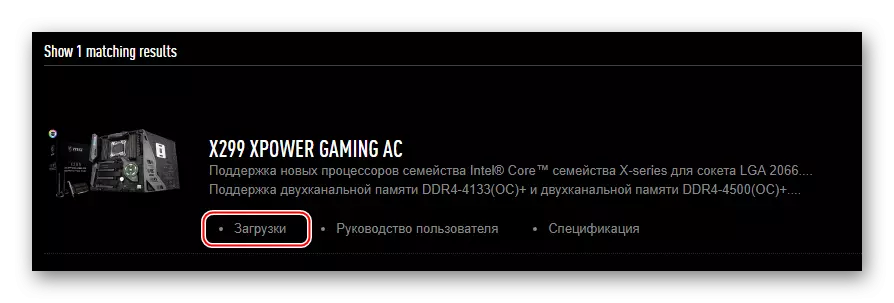
- Find it in the results and under a brief description to it, select "Downloads".
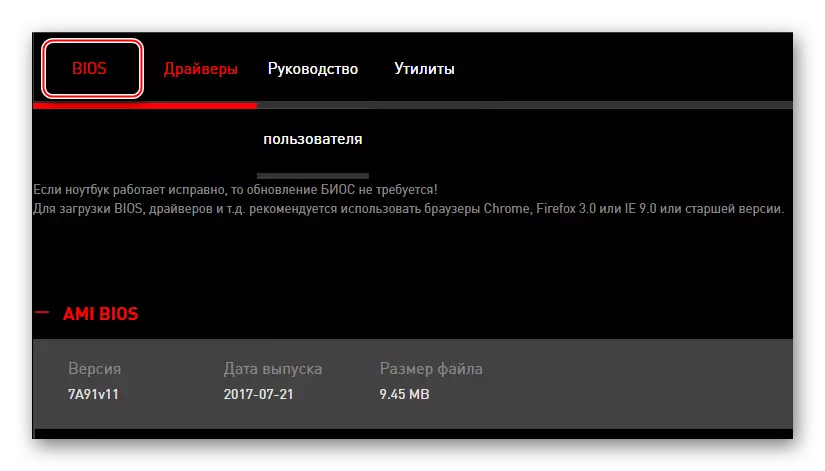
- You will transfer to the page, from where you can download different on your fee. In the upper column you need to select "BIOS".
- From the entire version of the version list, download the first in extradition, as it is the newest time for your computer.
- Also in the overall version of the versions, try to find your current. If you find, then download it too. If you do it, then you will have the opportunity at any time to roll back to the previous version.
To install the installation, the standard method must prepare a USB drive or CD / DVD. Make the media formatting into the FAT32 file system and cross the BIOS installation files from the downloaded archive. See that elements with BIO and ROM extensions are present among the files. Without them, the update will be impossible.
Stage 2: flashing
At this stage, consider the standard flashing method using the utility built into the BIOS. This method is good because it is suitable for all devices from MSI and does not require any additional work except those considered above. Immediately after you drop all files on the USB flash drive, you can proceed directly to the update:
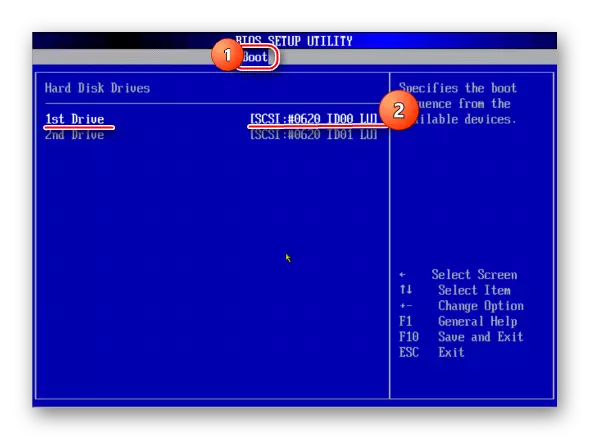
- To begin with, make the computer loaded from the USB media. Restart the PC and log in to the BIOS using the keys from F2 to F12 or Delete.
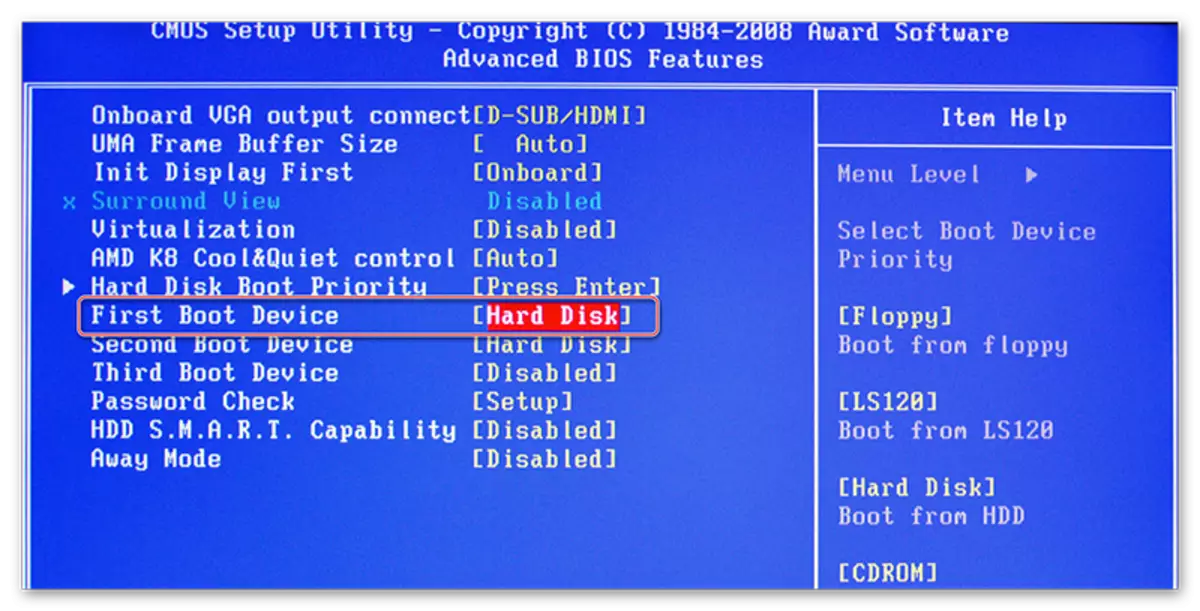
- There, install the faithful priority of the download so that it originally went from your media, not a hard disk.
- Save the changes and restart the computer. To do this, you can use the fast key F10 or the item in the "Save & Exit" menu. The latter is a more reliable option.
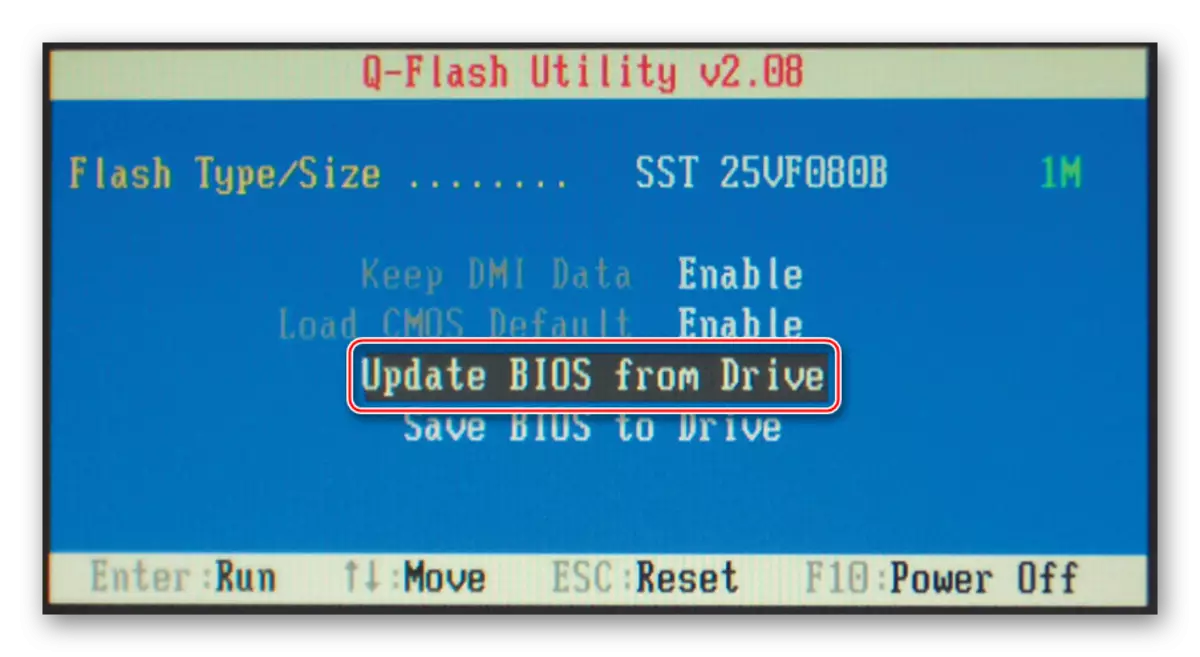
- After the manipulation in the interface of the basic output system, the computer will boot from the media. Since the BIOS installation files will be detected on it, you will be offered several options for the media. To update, select the option with the following name "BIOS UPDATE FROM DRIVE". The name of this point you may have a little different, but the point will be the same.
- Now select the version to which you need to upgrade. If you did not make a backup of the current BIOS version on the USB flash drive, then you will have only one version. If you did a copy and transferred it to the carrier, then be careful at this step. Do not set the old version by mistake.
Lesson: how to install a computer load from a flash drive
Method 2: Update from Windows
If you are not too an experienced PC user, you can try to update through a special utility for Windows. This method is suitable exclusively for users of stationary computers with MSI system boards. If you have a laptop, it is strongly recommended to refrain from this method, as it can cause failures in its work. It is noteworthy that the utility is also suitable for creating a bootable flash drive to upgrade through the DOS string. However, software is only suitable for updating via the Internet.
Instructions for working with the MSI Live Update utility looks like this:
- Turn on the utility and go to the "Live Update" section, if it is not open by default. It can be found in the top menu.
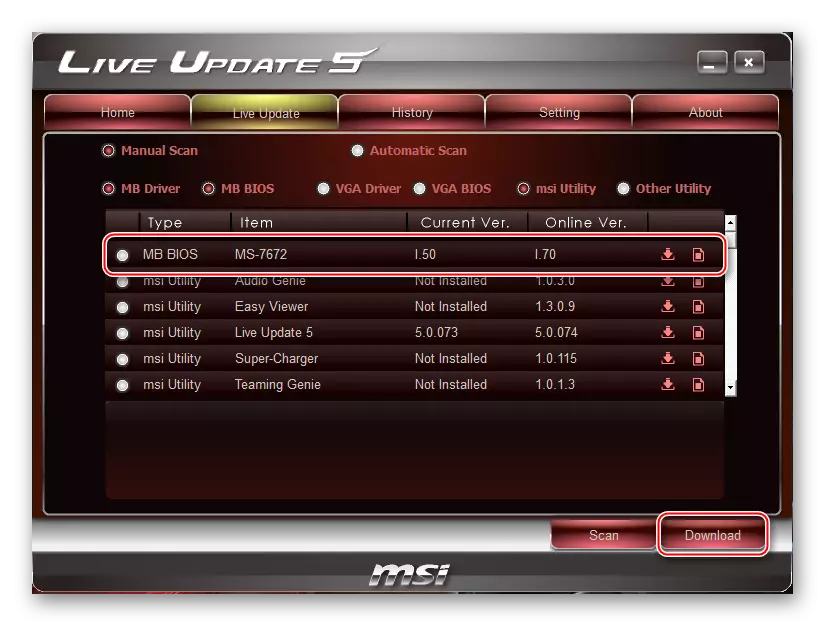
- Activate MANUAL SCAN and MB BIOS items.
- Now press the "SCAN" button at the bottom of the window. Wait for scanning.
- If the utility has detected a new version of the BIOS for your board, select this version and click on the "Download and Install" button that appears on the "DOWNLOAD AND INSTALL" button. In the old versions, the utility initially need to select the version of interest, then click on "download", and then select the downloaded version and click "Install" (should appear instead of "download"). Downloading and preparing for installation will take some time.
- Upon completion of the preparatory process, a window will open where the installation parameters will be refined. Mark "In Windows Mode", click "Next", check out the information in the next window and click on the Start button. In some versions, this step can be skipped, as the program immediately moves to the installation.
- The entire update procedure through Windows should not take more than 10-15 minutes. At this time, the OS can reboot one or twice. The utility must notify you about the completion of the installation.
Method 3: Through the DOS string
This method is somewhat confusing, as it implies the creation of a special bootable flash drive under DOS and work in this interface. Inexperienced users, the update on this method is categorically not recommended.
To create a flash drive, you will need the MSI Live Update utility from the previous method. In this case, the program also itself downloads all the necessary files from the official servers. Next actions are:
- Insert the flash drive and open the MSI Live Update on your computer. Go to the "Live Update" section, which is in the top menu, if it has not opened the default.
- Now dispel the checkboxes in front of MB Bios and Manual Scan items. Press the SCAN button.
- During the scan, the utility will determine if there are available updates. If so, the "Download and Install" button will appear at the bottom. Click on it.
- A separate window will open, where you need to check the box next to "in dos mode (USB)". After click "Next".
- Now in the top field "Target Drive", select your USB media and click "Next".
- Wait for the warning to successfully create a bootable flash drive and close the program.
Now you have to work in the DOS interface. To enter and make everything right, it is recommended to use this step-by-step instruction:
- Restart the computer and log in to the BIOS. There you only need to put the computer load from the flash drive.
- Now save the settings and exit BIOS. If you did everything correctly, then the DOS interface must appear after the exit (it looks almost as the "Command Line" in Windows).
- Now enter this command there:
C: \> AFUD4310 Version_number.H00
- The entire installation process will take no more than 2 minutes, after which you need to restart the computer.
The BIOS update on computers / MSI laptops is not so difficult, moreover, a variety of ways are presented here, thanks to which you can choose the most optimal option for yourself.