

When the user wants to increase the performance of its device, most likely, he will solve all the available processor kernels. There are several solutions that will help in this situation on Windows 10.
Turn on all processor kernels in Windows 10
All processor kernels work with different frequency (at the same time), and are used in full power when it is required. For example, for heavy games, video editing, etc. In everyday tasks, they work as usual. This makes it possible to achieve a balance of performance, which means that your device or its components will not be out of order.
It is worth considering that not all program manufacturers can decide on unlocking all cores and support for multithreading. This means that one core can take on all load, and the rest will work in normal mode. Since support for multiple cores with a specific program depends on its developers, the ability to enable all cores is available only to start the system.
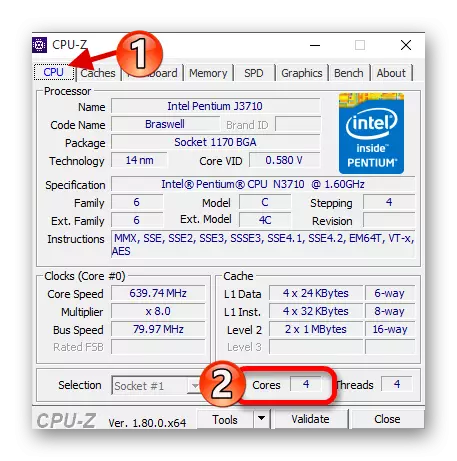
To use the kernel to launch the system, you must first find out their quantity. This can be done using special programs or in a standard way.
A free CPU-Z utility shows many information about the computer, including the one that is needed now.
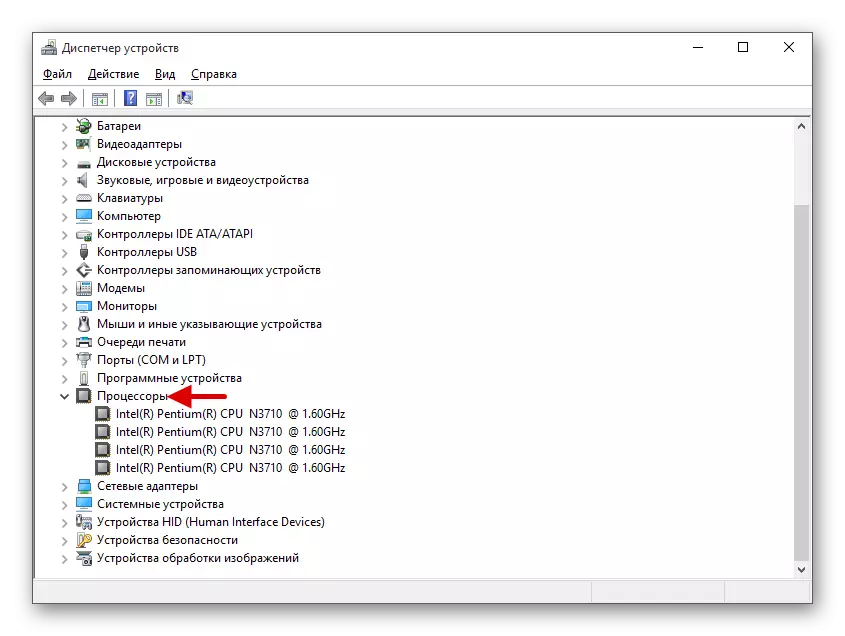
You can also apply the standard method.
- Find the magnifying glass icon on the taskbar and enter the Device Manager in the search field.
- Open the Processors tab.

Next, the options for switching on the nuclei at the launch of Windows 10 will be described.
Method 1: Standard System Tools
When the system starts, only one kernel is used. Therefore, a way to add a few more nuclei when the computer is turned on.
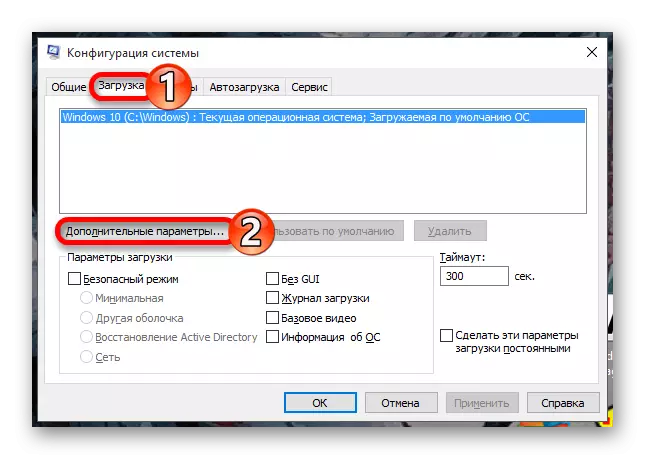
- Find the magnifying glass icon on the taskbar and enter "configuration". Click on the first found program.
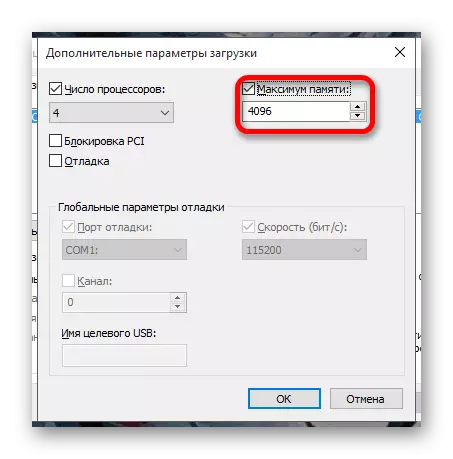
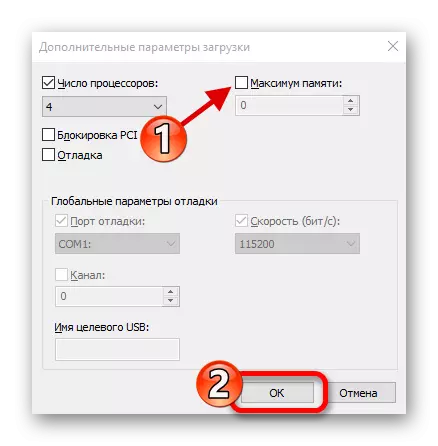
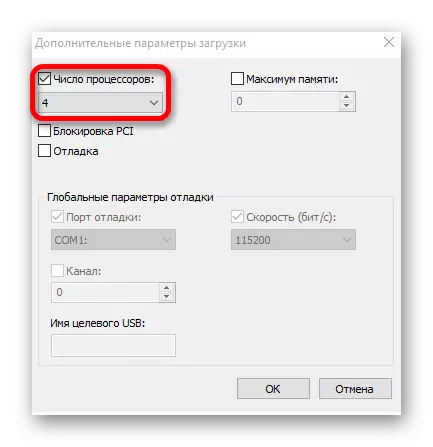
- In the "Load" section, find "Advanced Parameters".
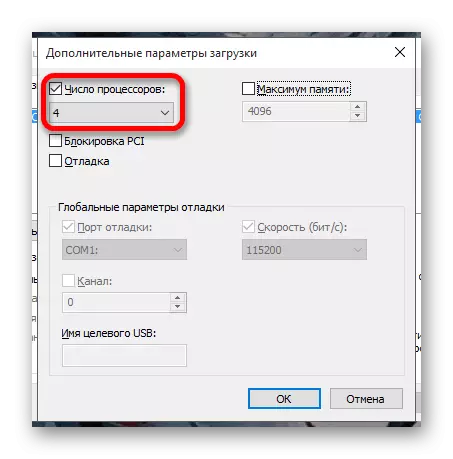
- Mark the "number of processors" and specify them all.
- Install the "Maximum Memory".

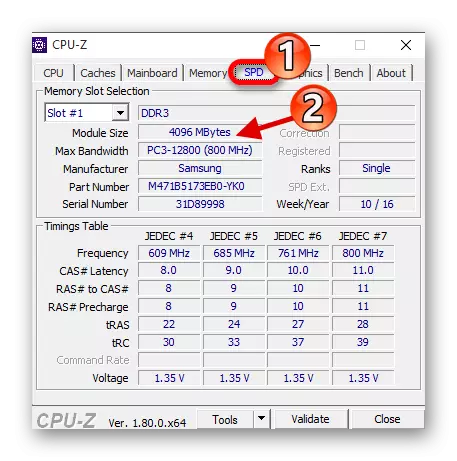
If you do not know how much memory you have, then this can be found through the CPU-Z utility.
- Run the program and go to the "SPD" tab.
- Opposite the "Module Size" there will be a precise number of RAM on one slot.
- The same information is listed in the Memory tab. Opposite the "Size" you will be shown all the available RAM.

Remember that one kernel should have 1024 MB of RAM. Otherwise, nothing will come. If you have a 32-bit system, then there is a possibility that the system will not use more than three gigabytes of RAM.
Read more: Safe mode in Windows 10
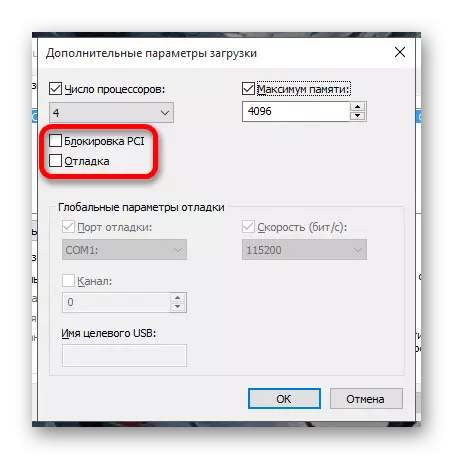
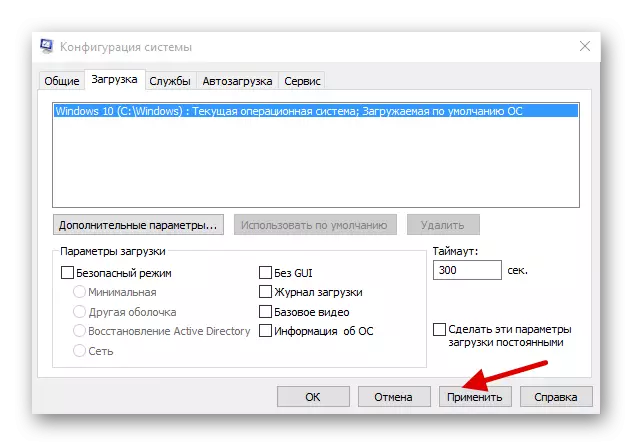
If you set faithful settings, but the number of memory is still knocked down, then:
- Remove the tick from the Maximum Memory item.
- You must have a tick opposite the "number of processors" and the maximum number is set.
- Click "OK", and in the next window - "Apply".
If nothing has changed, then you need to adjust the loading of several cores using the BIOS.
Method 2: Using BIOS
This method is used if certain settings have been reset due to the operating system failure. This method is relevant for those who unsuccessfully configured the system configuration and the OS does not want to run. In other cases, use the BIOS to enable all cores during the start of the system does not make sense.
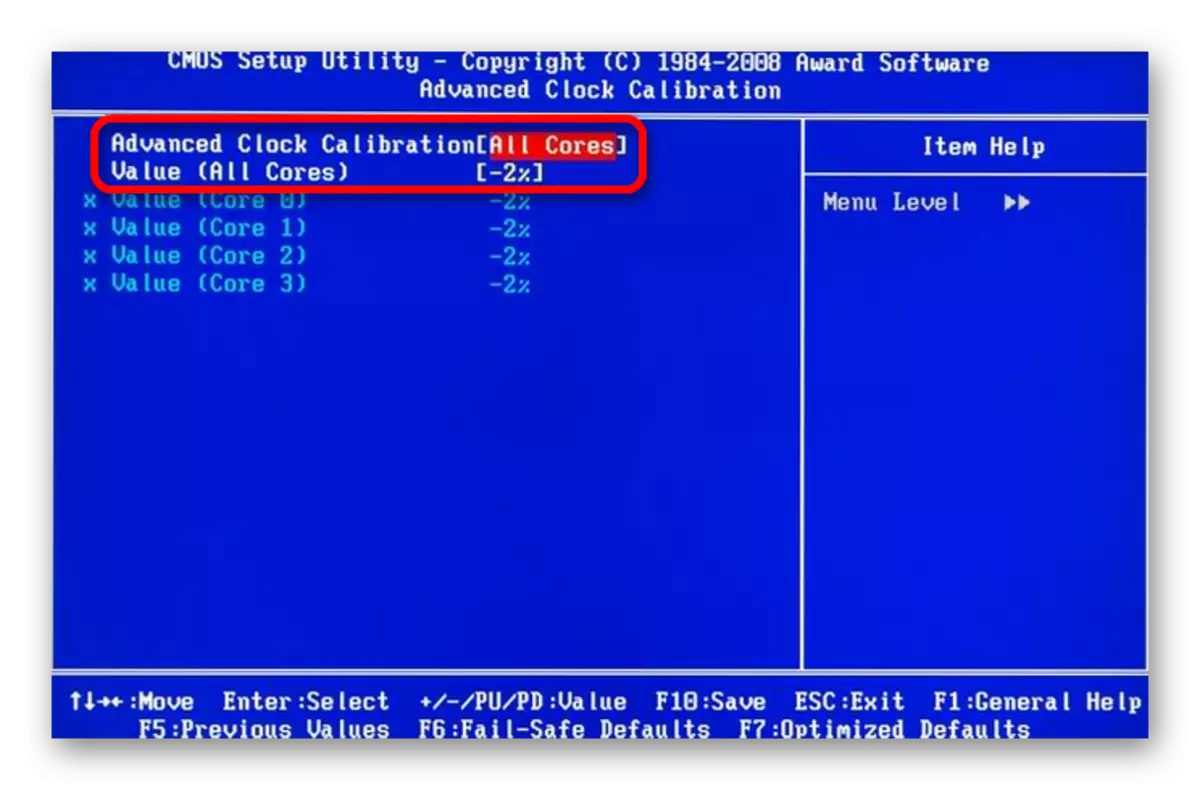
- Restart the device. When the first logo appears, clamp F2. Important: In different models, the BIOS is included in different ways. It can even be a separate button. Therefore, ask in advance how it is done on your device.
- Now you need to find the "Advanced Clock Calibration" item or something like that, since, depending on the BIOS manufacturer, this option may be called differently.
- Now find and set the "All Cores" or "Auto" values.
- Save and reboot.
In this way, you can turn on all kernels in Windows 10. These manipulations affect only starting. In general, they do not increase productivity, as it depends on other factors.