

Sometimes it is necessary to perform an AMR audio format conversion into a more popular MP3. Let's consider various ways to solve this problem.
Methods of transformation
Converting AMR in mp3 is able, first of all, program-converters. Let's consider the execution of this procedure in each of them separately.Method 1: Movavi Video Converter
First of all, consider the AMR conversion options in MP3 using Movavi video converter.
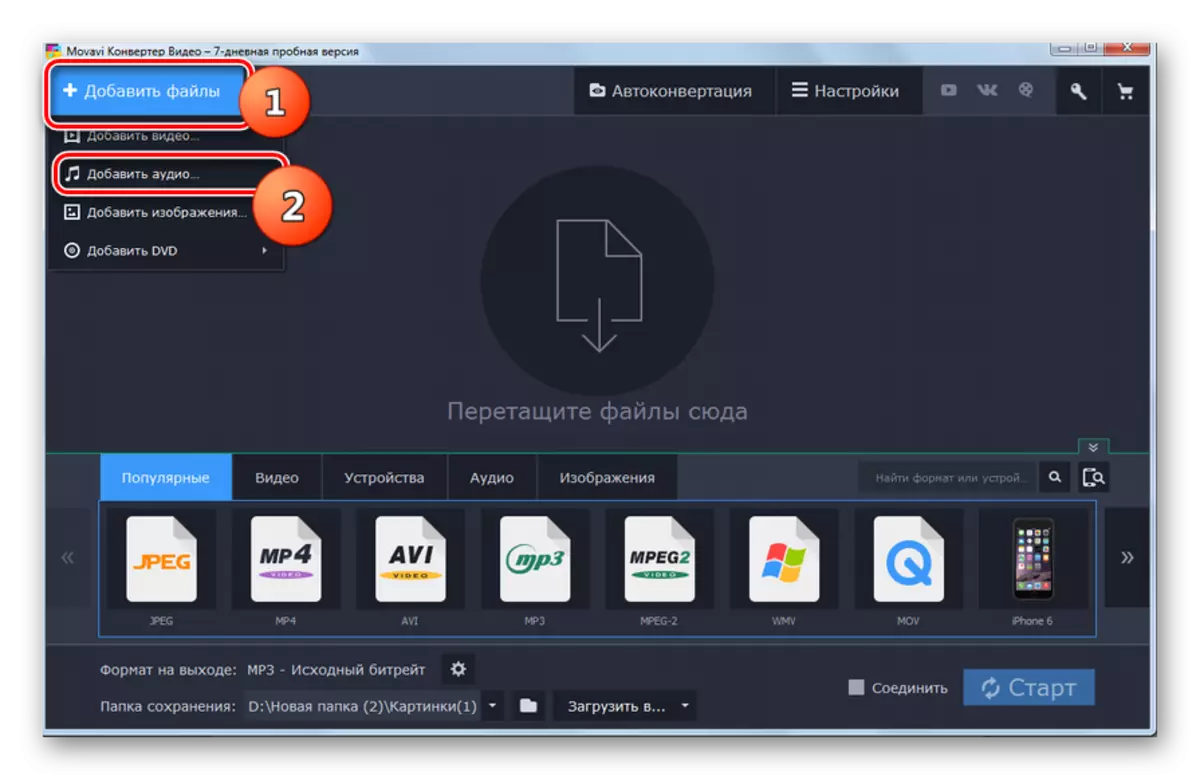
- Open Movavi video converter. Click "Add Files". Choose from the open list "Add Audio ...".
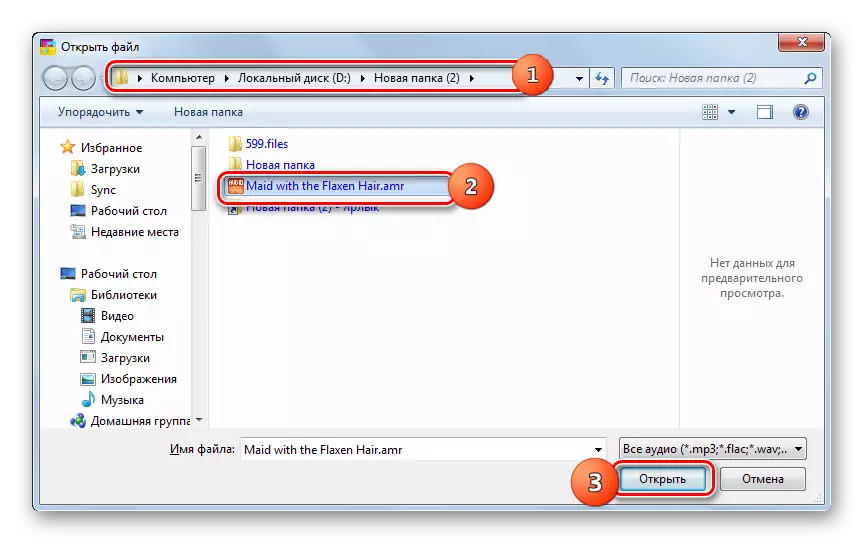
- The audio adding window opens. Find the location of the original AMR. Having highlight the file, click "Open".
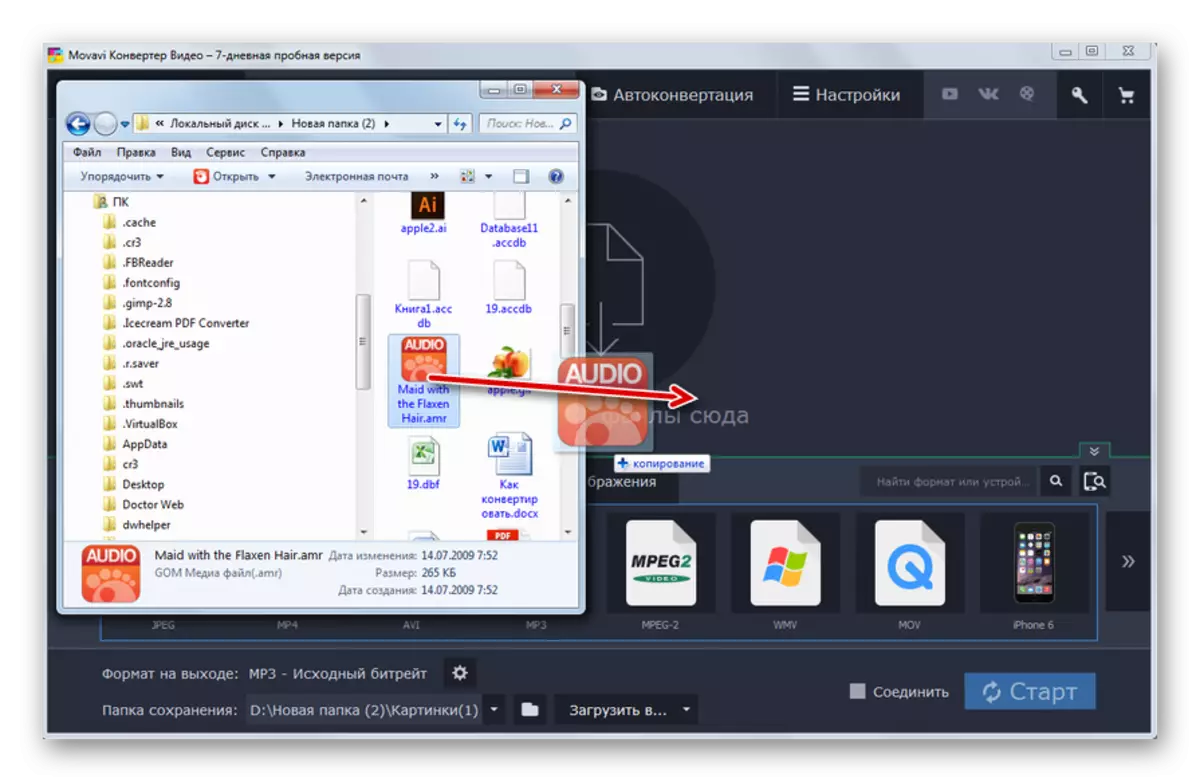
You can perform the discovery and bypass the above window. To do this, you need to drag AMR from the "Explorer" to the Movavi video converter area.
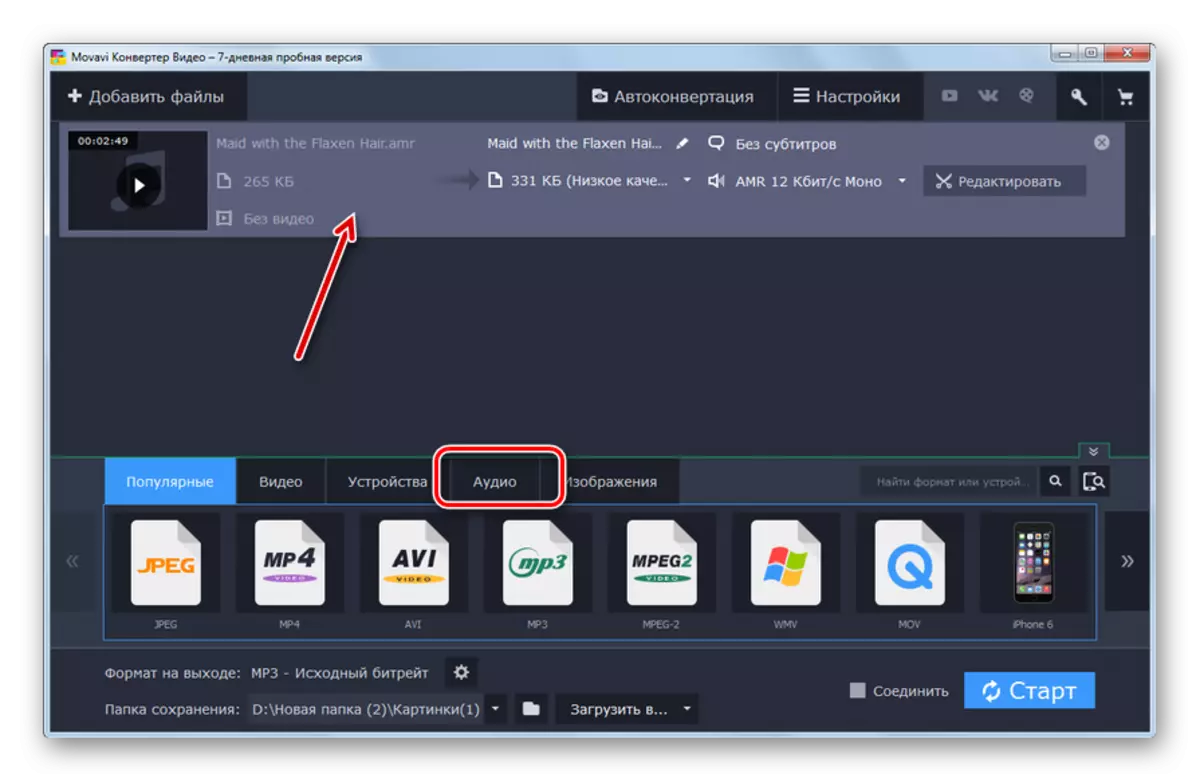
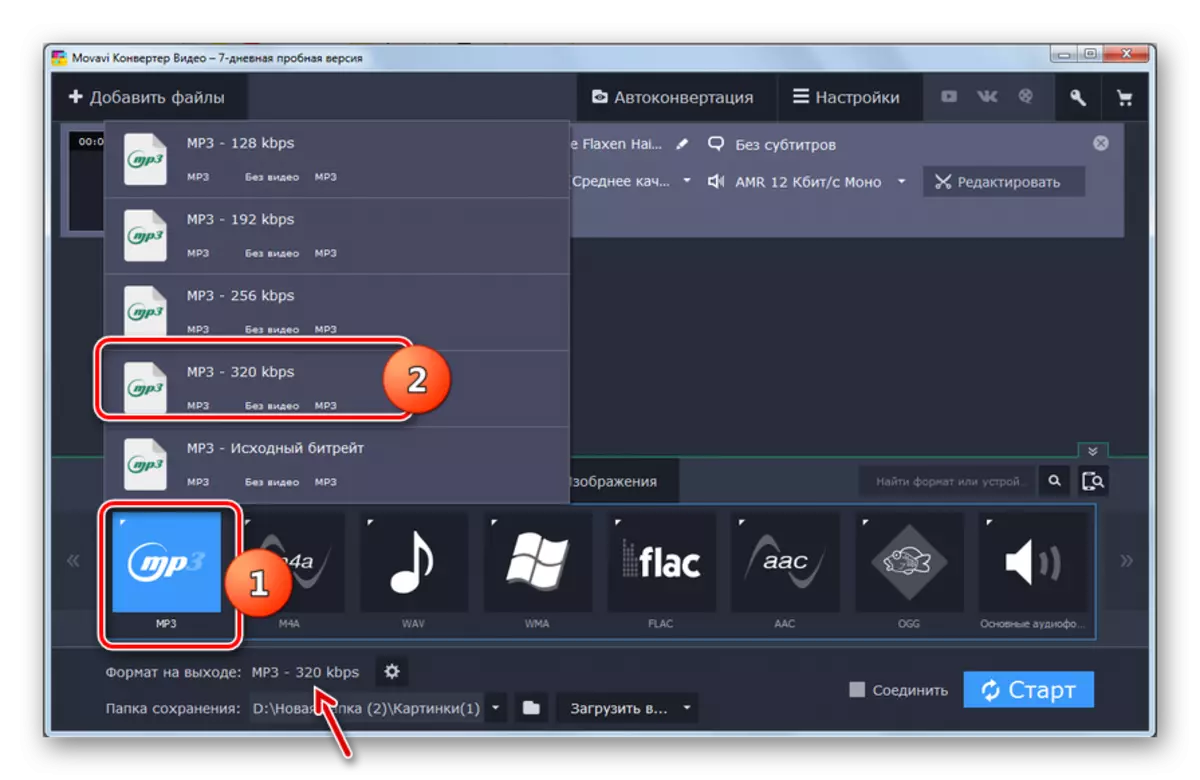
- The file will be added to the program, as evidenced by its display in the application interface. Now you need to select the output format. Go to the "Audio" section.
- Next click on the "MP3" icon. A list of different variants of the bitrate of this format from 28 to 320 KBS opens. You can also choose the source bitrate. Click on the preferred option. After that, the selected format and bitrate must be displayed in the "Output Format" field.
- In order to change the outgoing file settings if required, press "Edit".
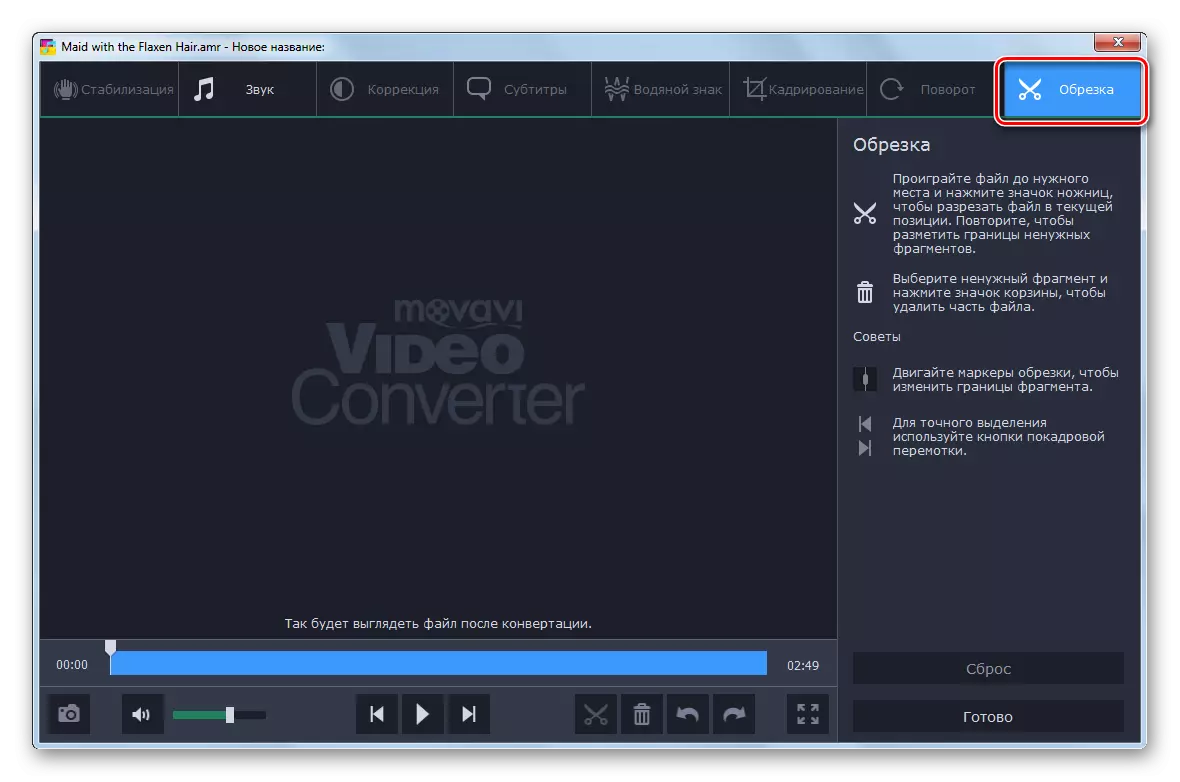
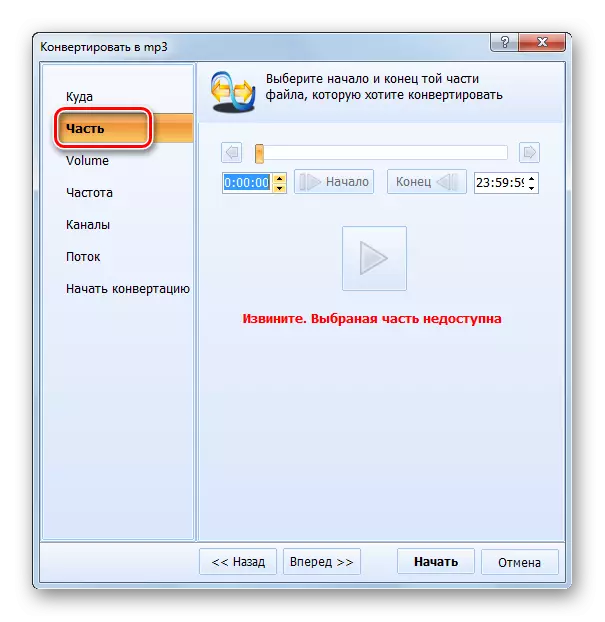
- A audio editing window opens. In the "Cutting" tab, you can cut the track before the size you need.
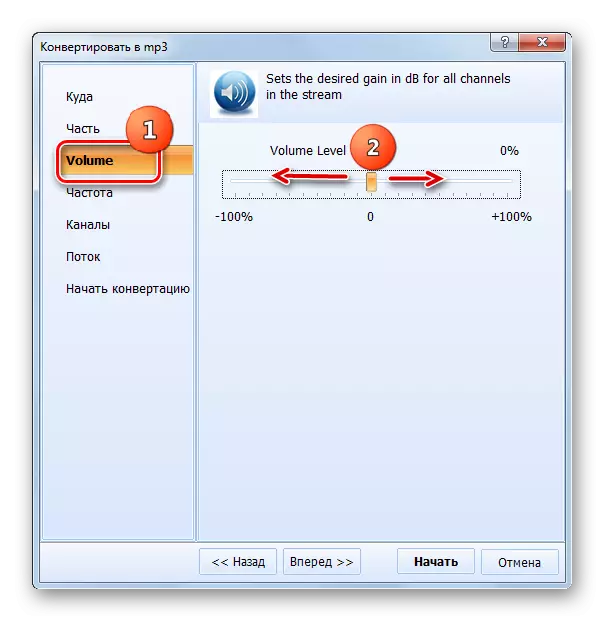
- In the "Sound" tab, you can adjust the volume and noise level. As additional options, you can use the normalization of sound and noise reduction by installing checkboxes near the respective parameters. After performing all the necessary actions in the edit window, click "Apply" and "Done."
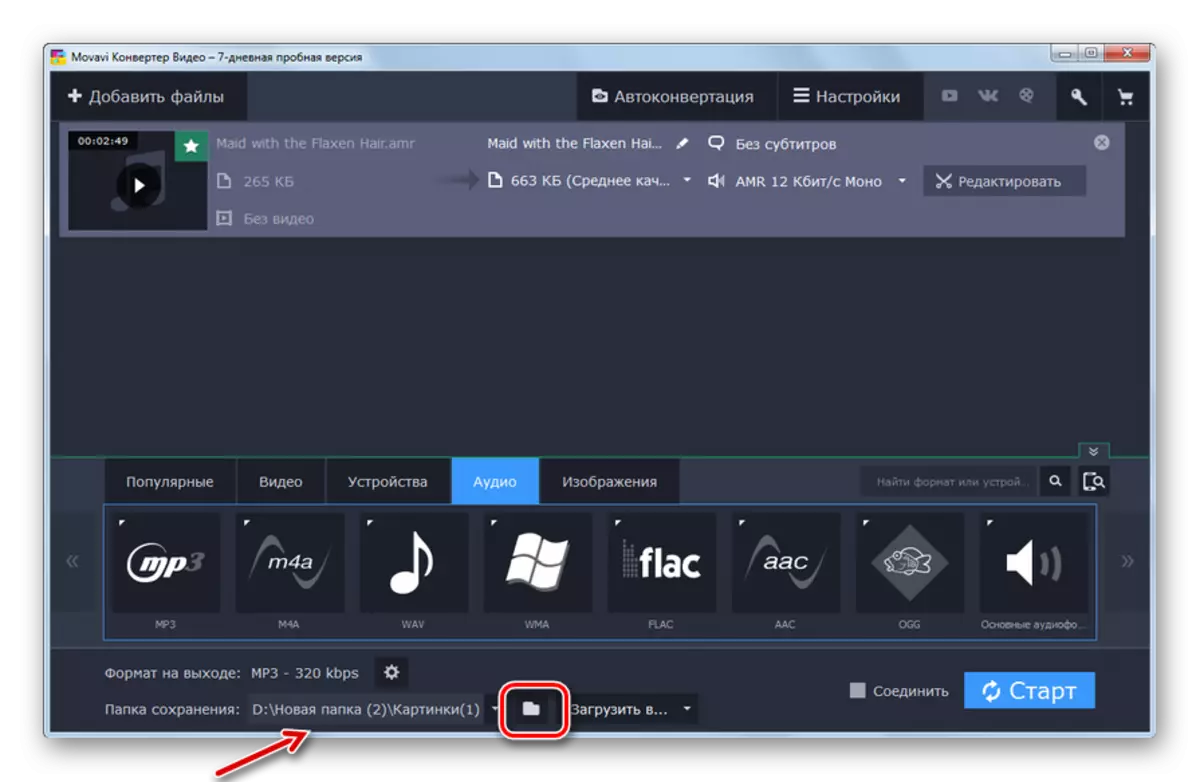
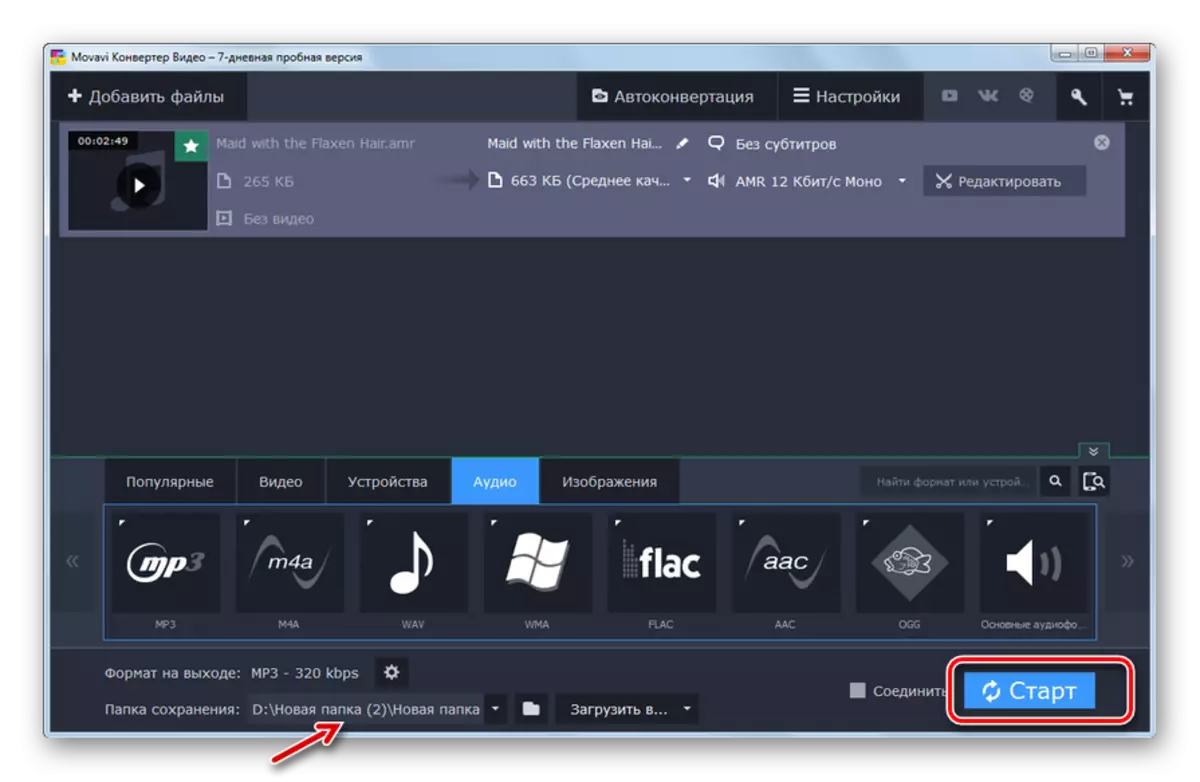
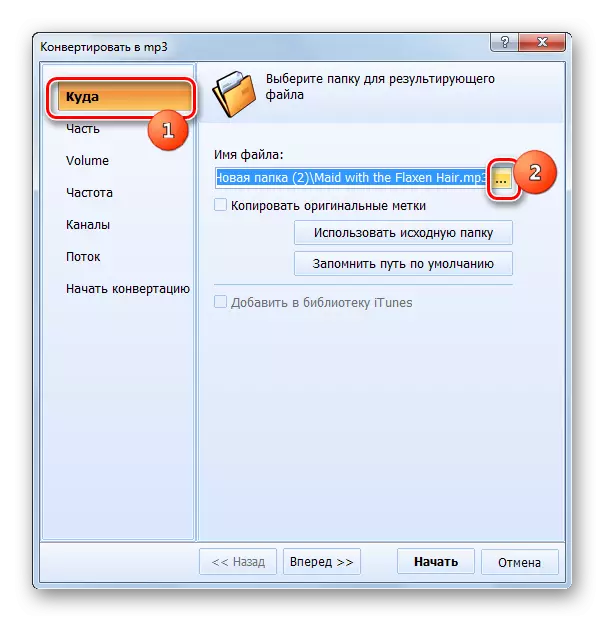
- To specify the outgoing file storage directory, if you are not satisfied with the one that is specified in the "Save Folder" area, click on the logo as a folder to the right of the named field.
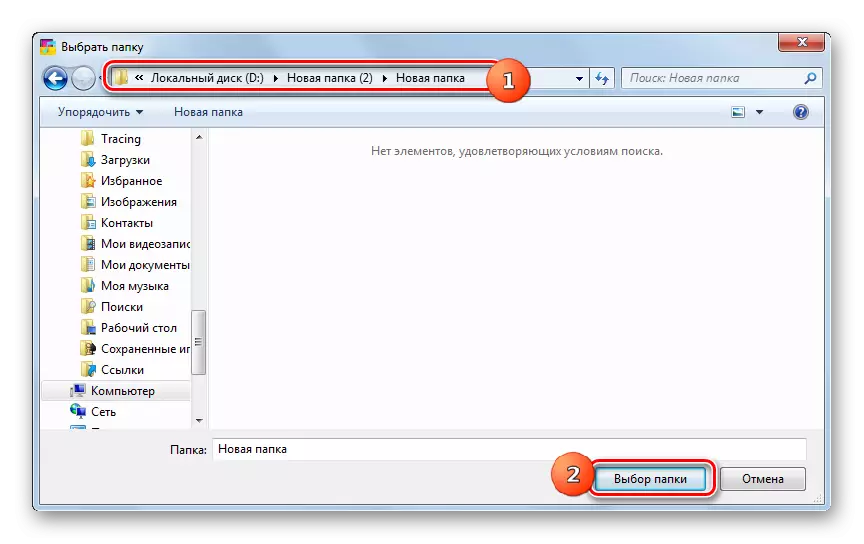
- The "Select folder" is started. Move to the destination directory and click Folder Select.
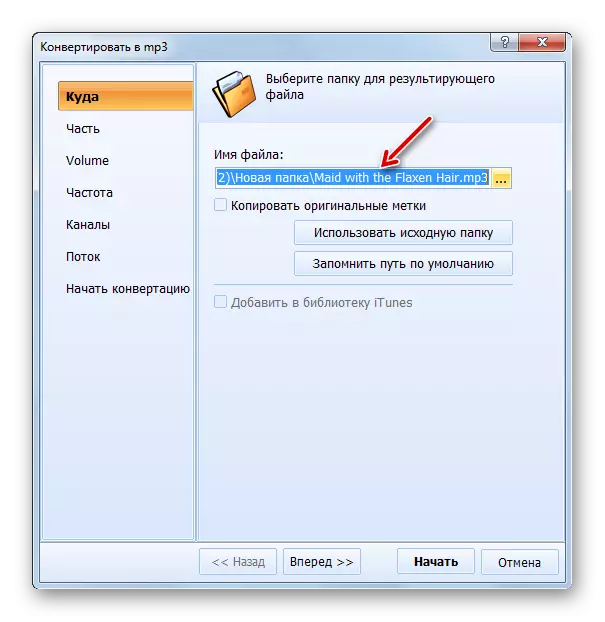
- The path to the selected directory is inserted in the "Conservation Folder" area. Start converting by pressing "Start".
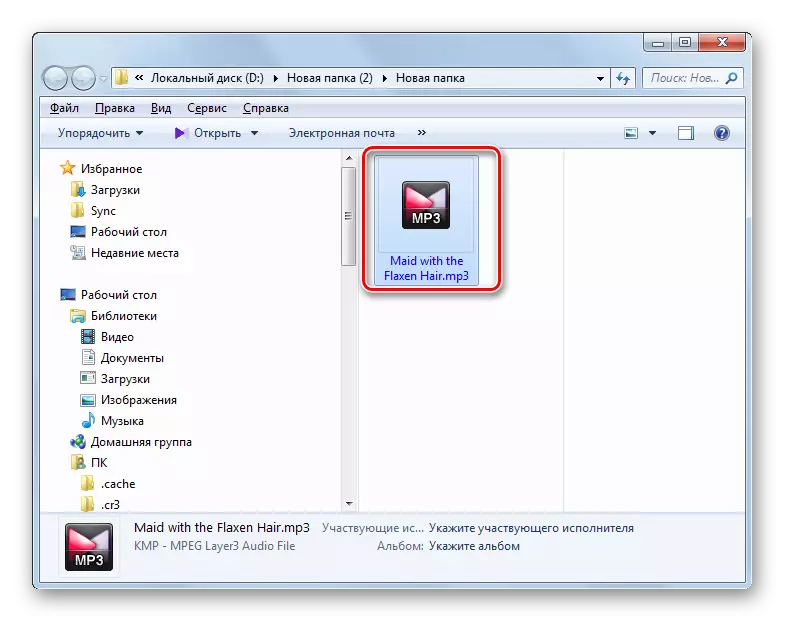
- The conversion procedure will be manufactured. Then the "Explorer" will be launched automatically in the folder in which the outgoing MP3 is stored.


It should be noted that the most unpleasant application of the Movavi Video Converter program is the most unpleasant application of this method. The trial version can be used only 7 days, but it allows you to convert only half of the original AMR audio file.
Method 2: Factory Formats
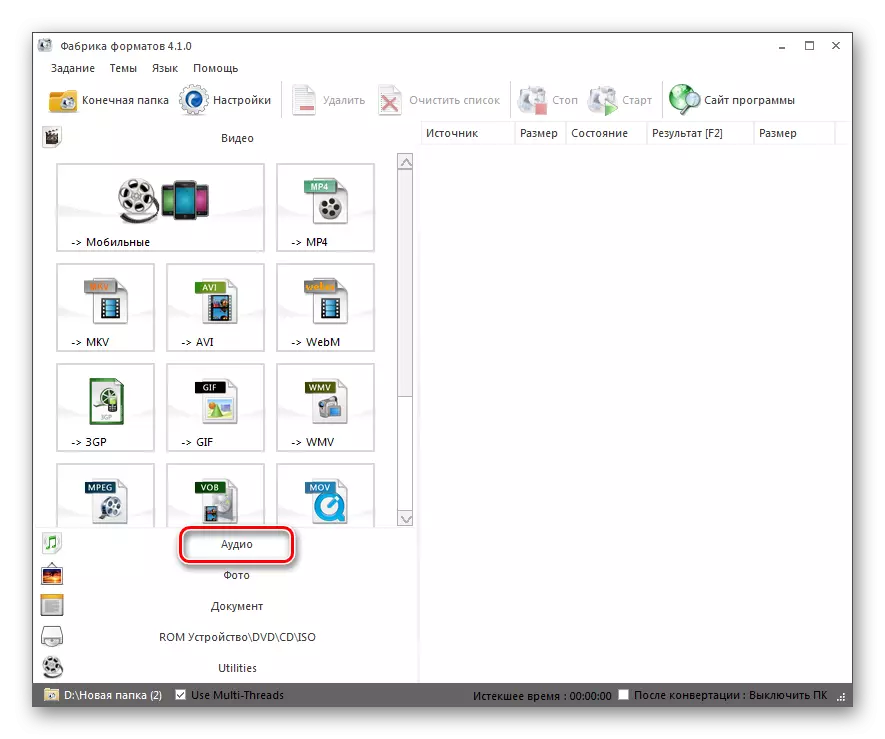
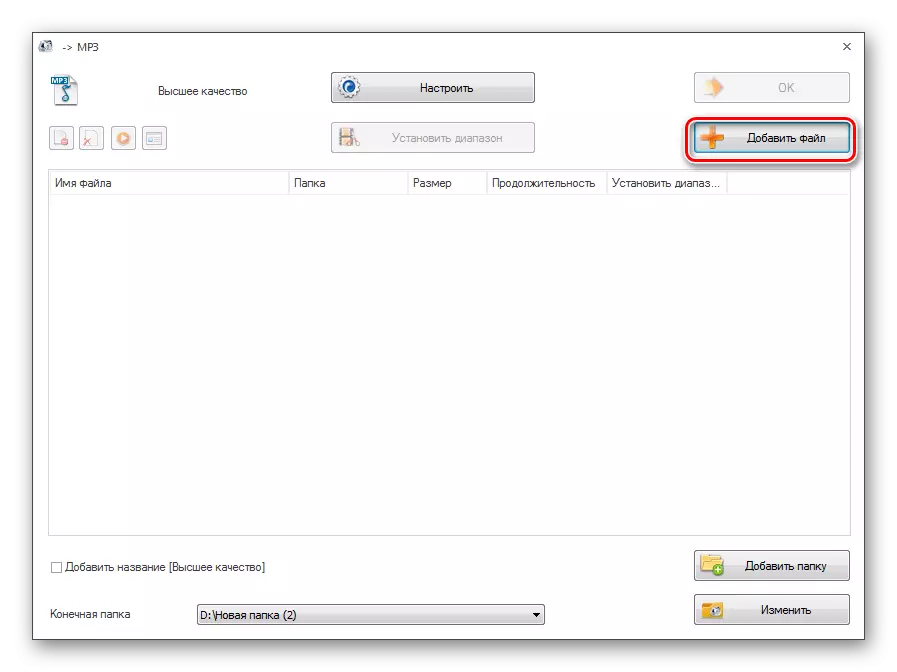
The next program that can convert an AMR to MP3 is the format factory converter (Format Factory).
- Activate the format factory. In the main window, move to the "Audio" section.
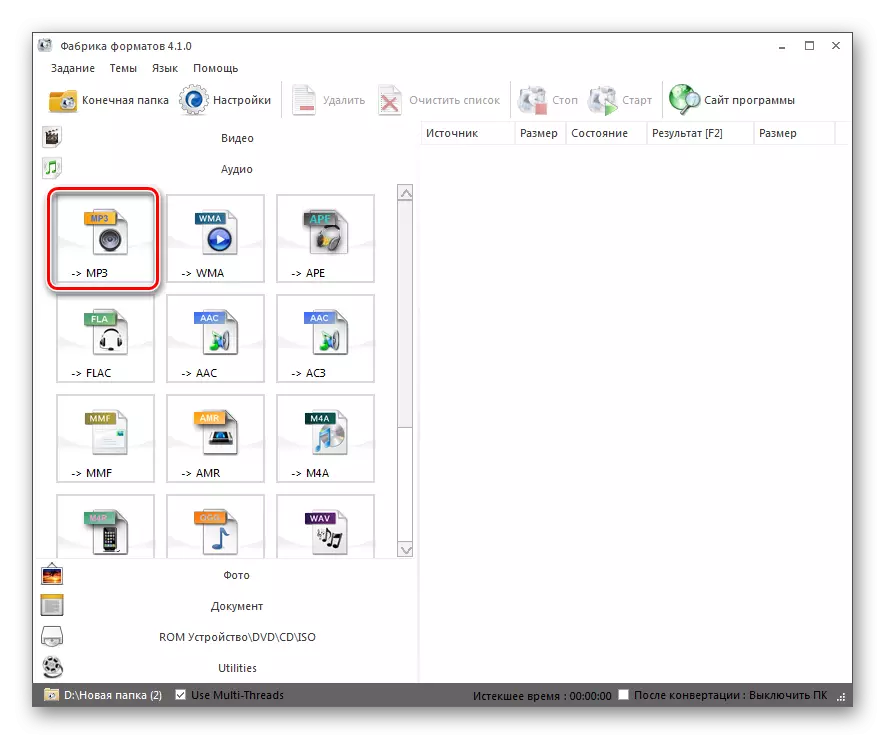
- From the list of presented audio formats, select the "MP3" icon.
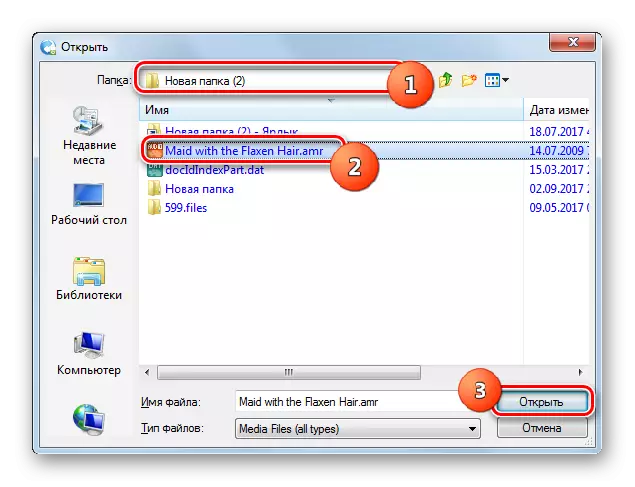
- A conversion settings window in MP3 opens. You need to select the source. Click "Add File".
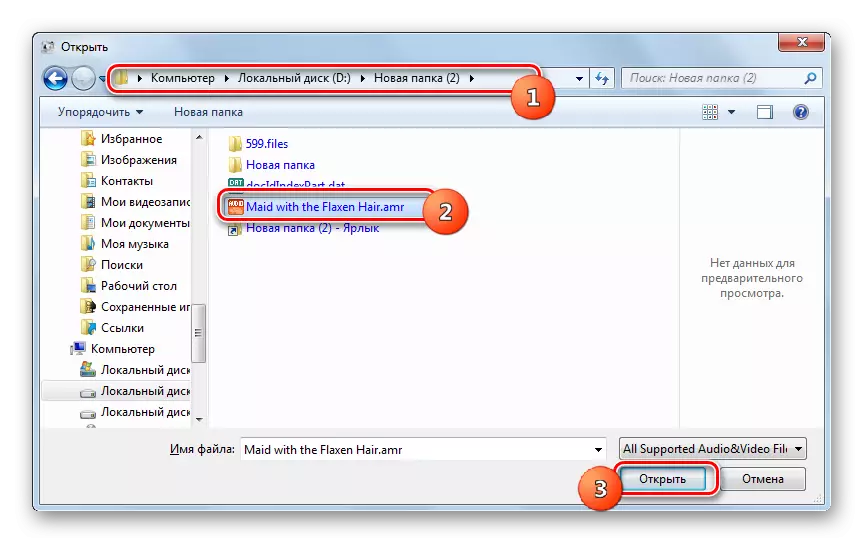
- In the opened shell, find the directory of location AMR. Noting audio file, click "Open".
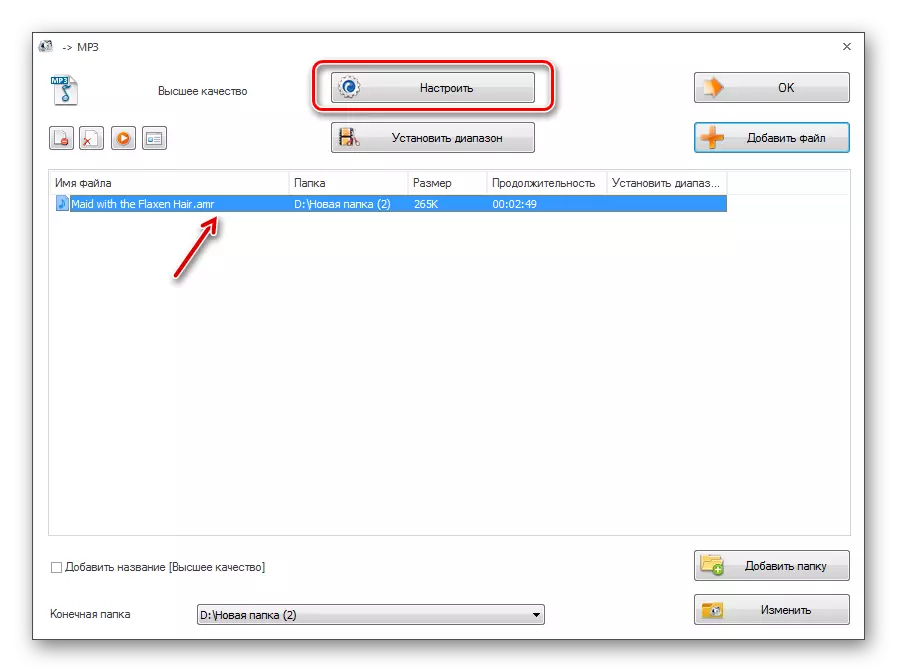
- The AMR audio file name and the path to it will appear in the central conversion settings window in MP3 format. If necessary, the user can make additional settings. To do this, click "Set up".
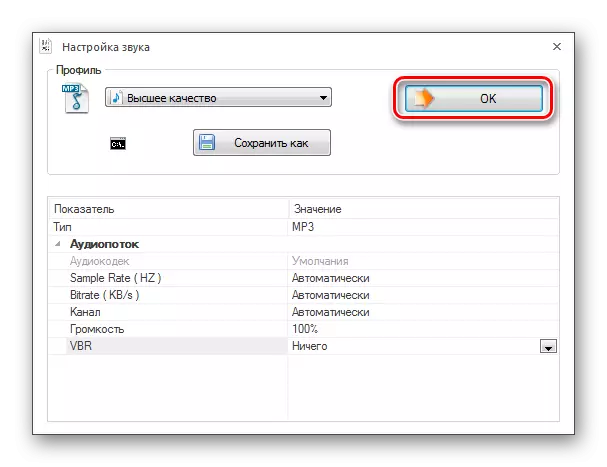
- Activates the "Sound Setup" tool. Here you can choose one of the quality options:
- Higher;
- The average;
- Low.
The higher the quality, the large sizes of the disk space will take an outgoing audio file, and the longer the conversion procedure will be performed.
In addition, in the same window you can change such settings:
- Frequency;
- Bitrate;
- Channel;
- Volume;
- VBR.
After making changes, click "OK".
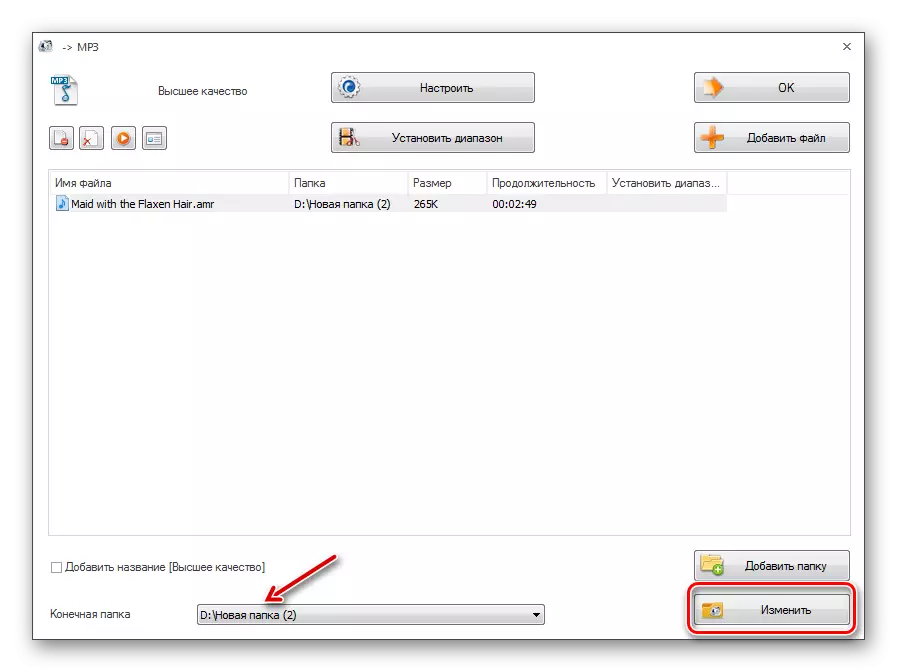
- According to the default settings, the outgoing audio file is sent to the same directory where the source is placed. His address can be seen in the "End Folder" area. If the user intends to change this directory, then he should click "change".
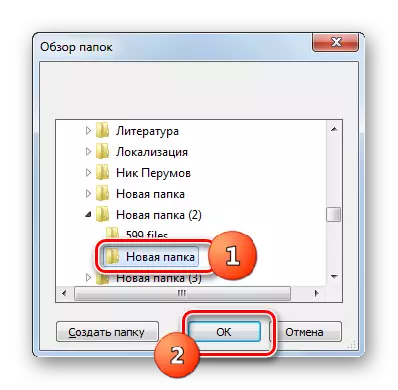
- The folder overview tool is launched. Mark the desired location directory and press "OK".
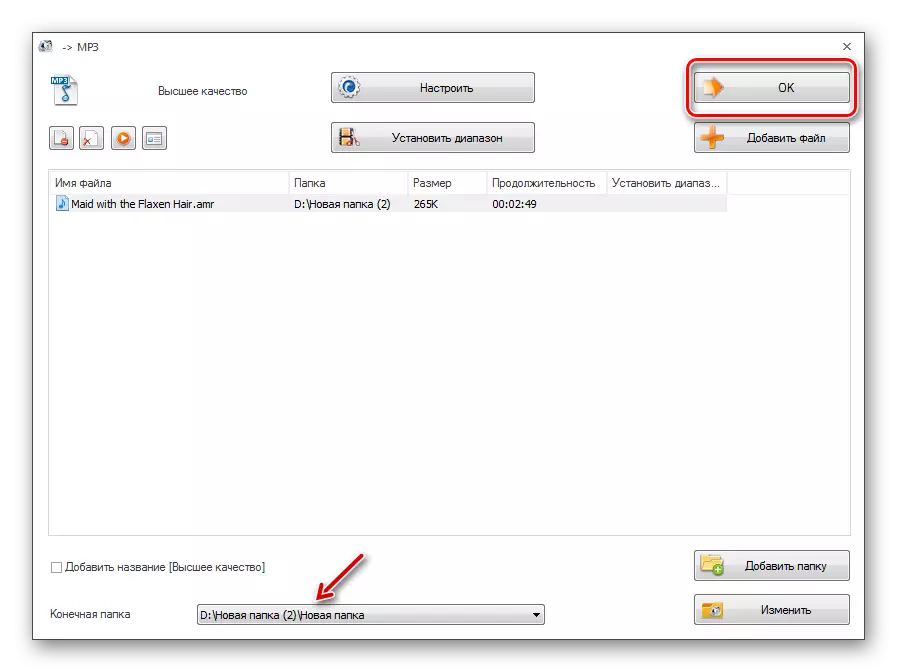
- The address of the new placement of the outgoing audio file will appear in the "End Folder" area. Click OK.
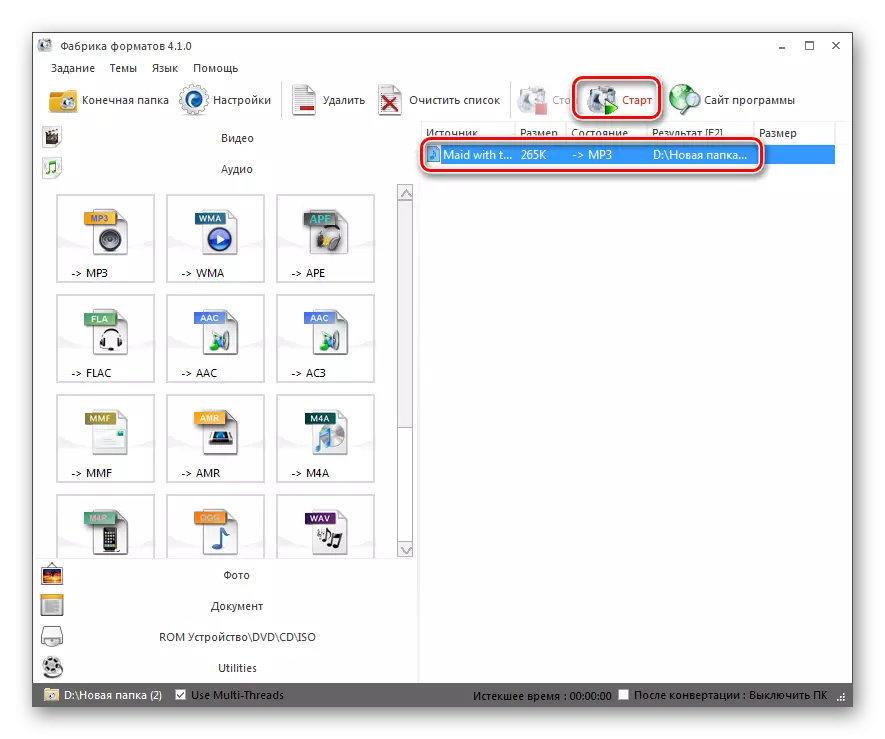
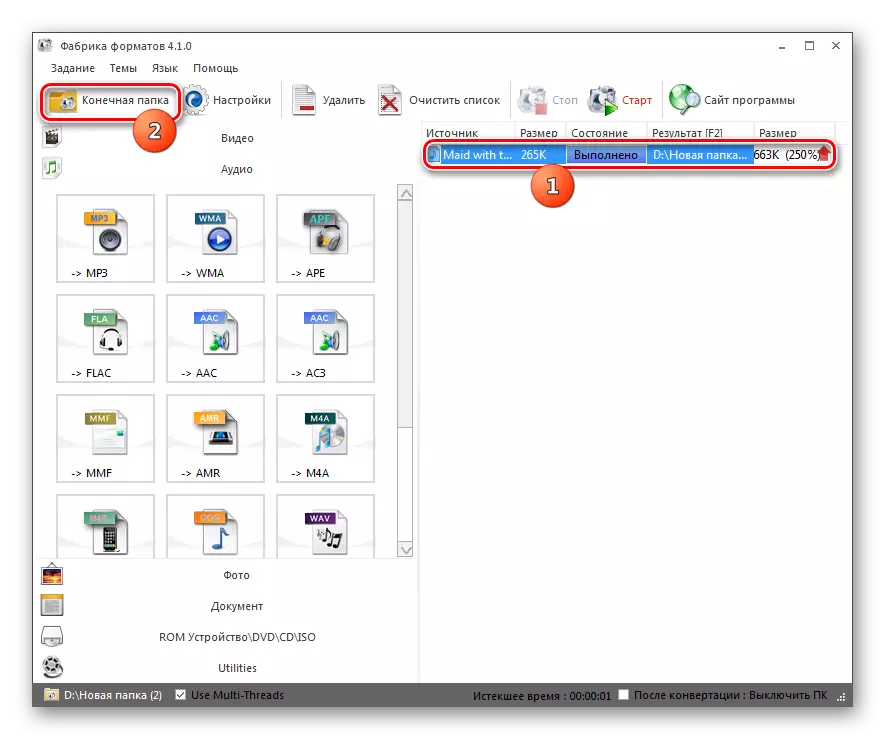
- We return to the central format factory window. There is already displayed the name of the Reformatting task of the AMR in MP3 with the specified user in the previous steps parameters. To start the process, select the task and press "Start".
- The AMR transformation procedure in MP3 is performed, the progress of which is indicated using a dynamic indicator in percentage.
- After the process is completed in the Status, the status is "executed".
- To go to the outgoing MP3 storage folder, highlight the task name and click on the "End Folder".
- The "Explorer" window will open in the directory where the transformed MP3 is posted.


This method is better than the previous one in performing the task in that the use of the format factory is completely free and does not require payment.
Method 3: Any Video Converter
Another free converter that can transform in the specified direction is Any Video Converter.
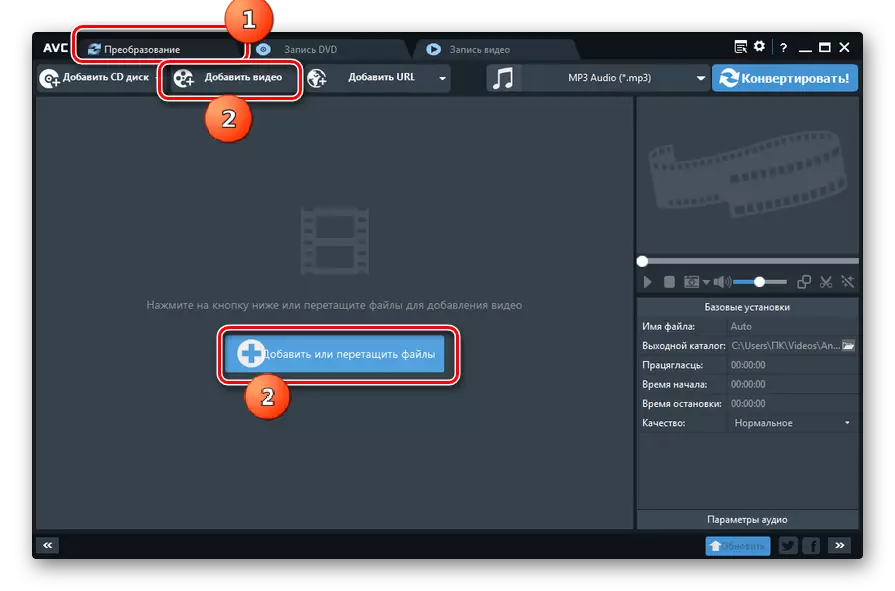
- Activate Eni video converter. Being in the "Conversion" tab, click "Add Video" or "Add or Drag Files".
- The add-on envelope is started. Lay the place of storage of the source. Mark it and press "Open".
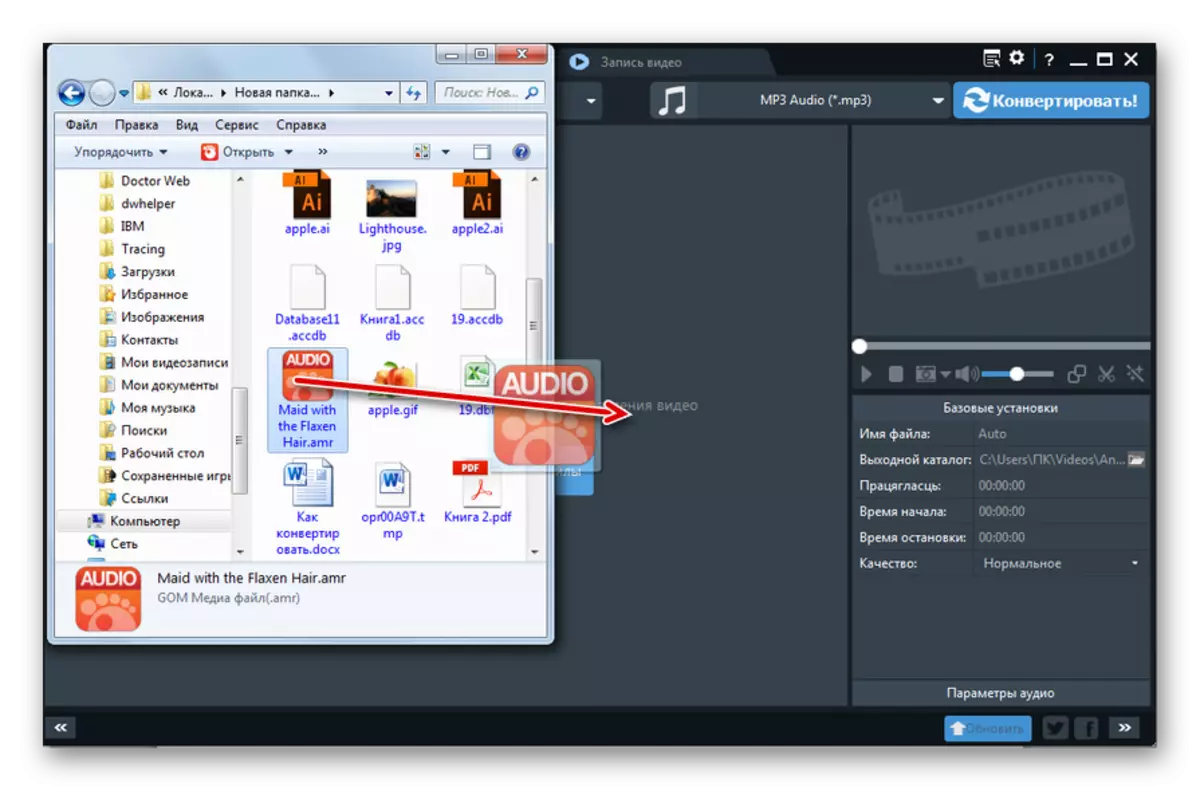
With the task of adding an audio file, you can cope without opening an additional window, for this it is enough to drag it from the "Explorer" at the Border of the Any Video Converter.
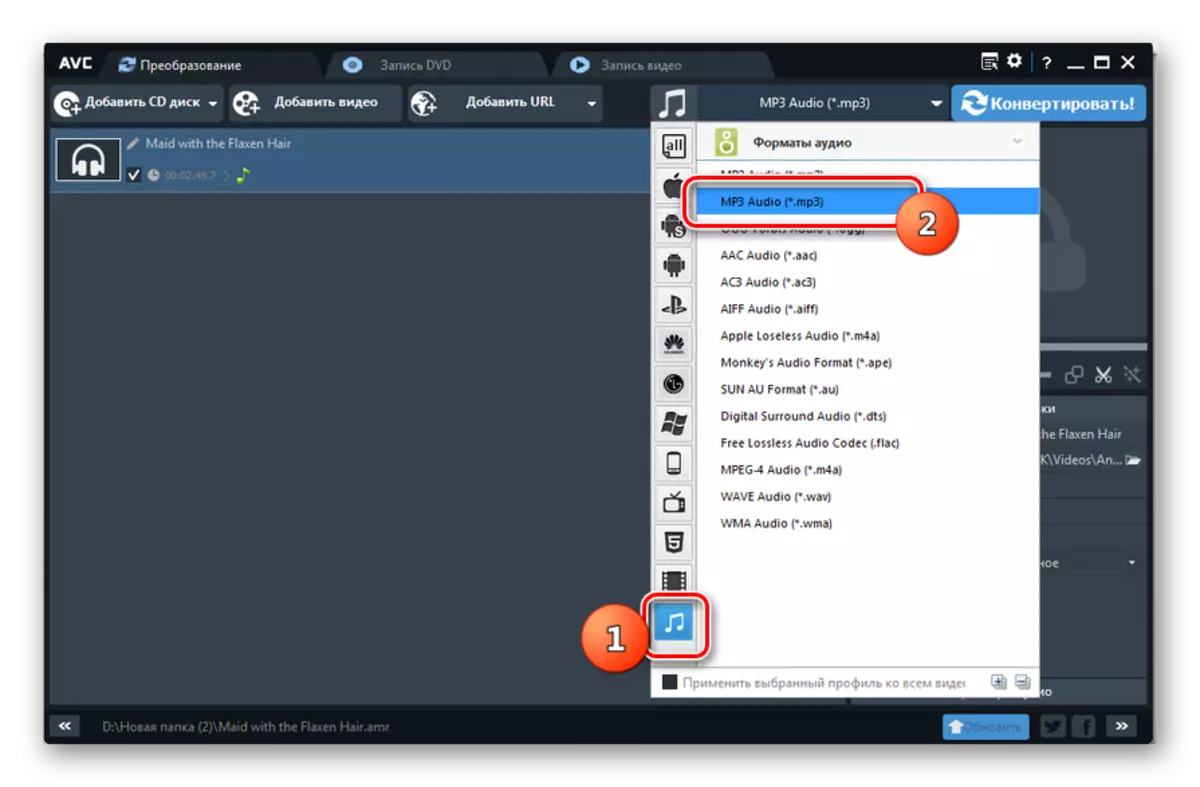
- The name of the audio file will appear in the central window of Eni video converter. You should assign an outgoing format. Click on the field to the left of the "Convert!" Item.
- A list of formats opens. Go to the "Audio Files" section, which is marked in the list on the left in the form of the icon in the form of notes. In the list that opens, click on MP3 Audio.
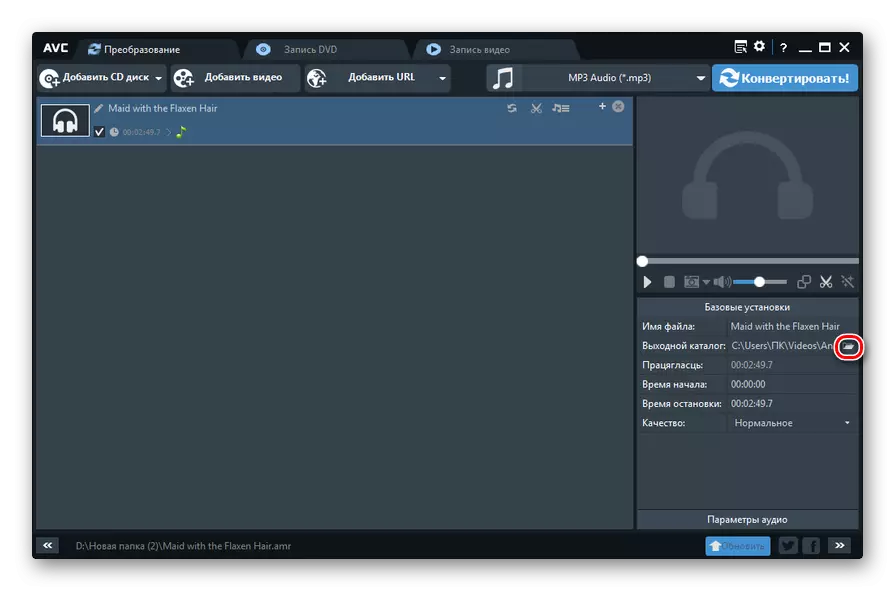
- Now in the "Basic Settings" area, you can specify the basic conversion settings. In order to set the directorization of the outgoing file, click the folder logo to the right of the "output directory" field.
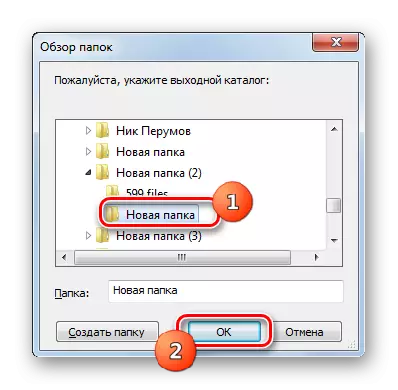
- The folder overview starts. Highlight the desired directory in the shell of this tool and click "OK".
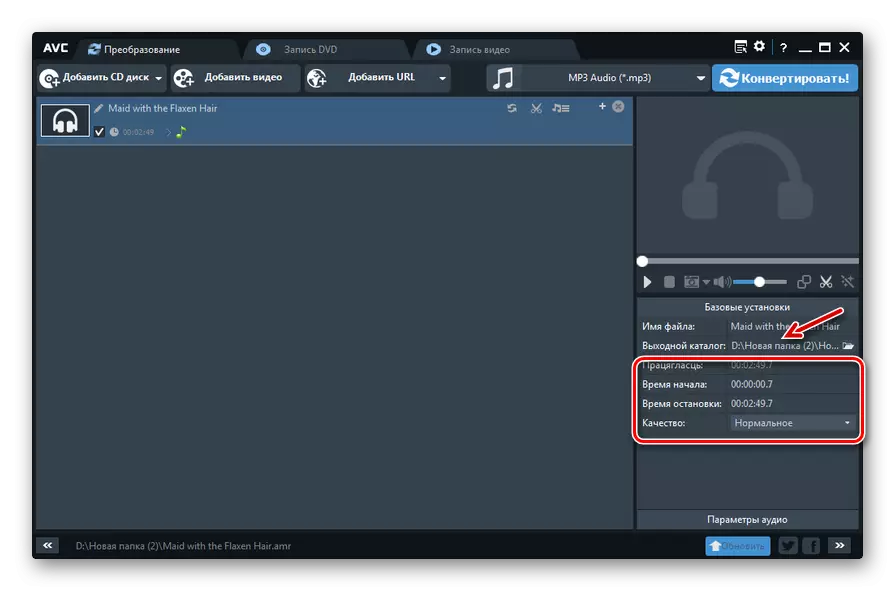
- Now the path to the location of the outgoing audio file will be displayed in the "Output Catalog" area. In the "Basic Settings" parameters, you can still set the sound quality:
- High;
- Low;
- Normal (default).
Immediately, if you wish, you can specify the start and end time of the transformed fragment if you are going to convert not the entire file.
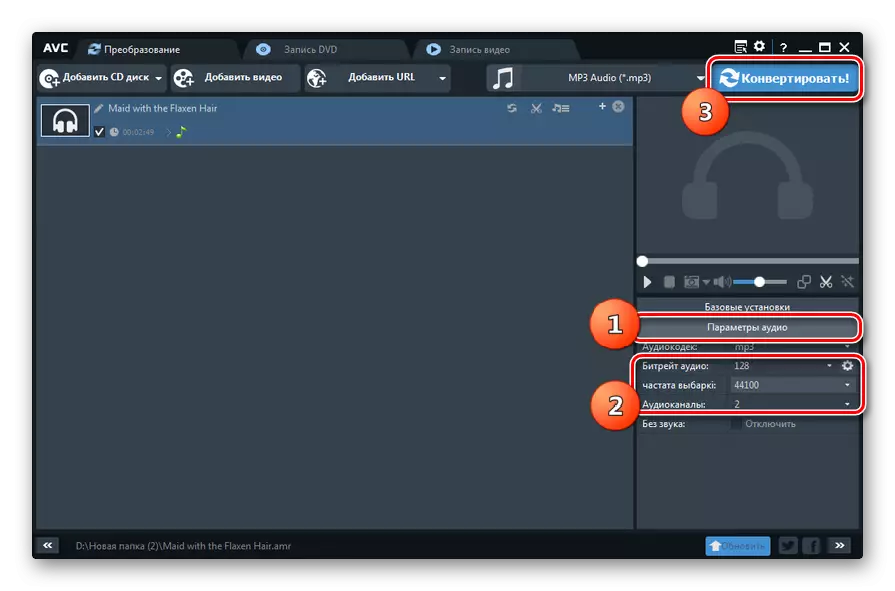
- If you click on the "Audio Settings" block name, then a number of additional options for changing parameters will be introduced:
- Audio channels (from 1 to 2);
- Bitrate (from 32 to 320);
- Sampling rate (from 11025 to 48000).
Now you can start reformatting. To do this, click the "Convert!" Button.
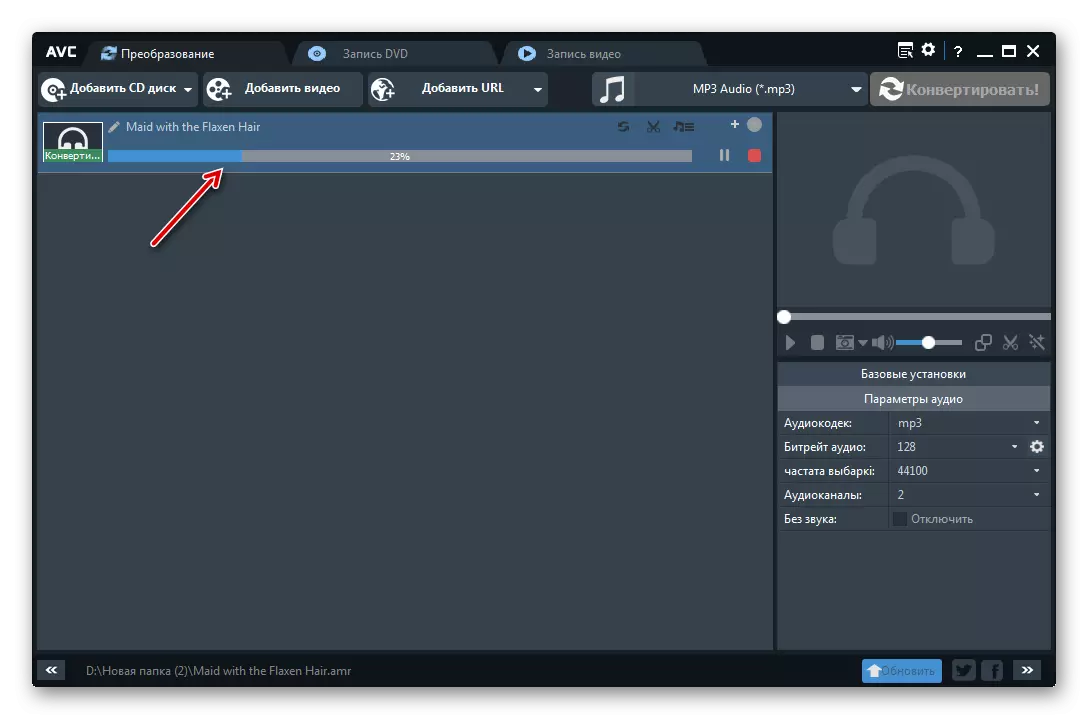
- Conversion is performed. Progress is displayed using an indicator issuing data in percentage.
- After the process is completed, the "conductor" will automatically be launched in the area of outgoing MP3.

Method 4: Total Audio Converter
Another free converter that solves the task is a specialized program for converting Total Audio Converter audio files.
- Run Total Audio Converter. Using the embedded file manager, check the folder in the left side of the window that opened the window where the AMR source is stored. In the right main part of the program interface, all files of this catalog will be displayed, which supports Total Audio Converter. Select the conversion object. Then click on the "MP3" button.
- If you use a trial version of the program, then a small window will start, in which you need to wait 5 seconds while the timer completes the countdown. Then press "Continue". In the paid version, this step is skipped.
- The conversion settings window starts. Go to the section "Where." Here you need to specify where the transformed audio file will go. According to the default settings, this is the same directory where the source is stored. If the user intends to set another directory, then you should click on the button with the image of the dots to the right of the "File Name" area.
- The "Save As ..." instrument is launched. Go to where you are going to put ready-made mp3. Click "Save".
- The selected address will appear in the "File Name" area.
- In the section "Part", you can specify the beginning of the time of the file that you want to convert if you do not intend to convert the entire object of the entire object. But this feature is available exclusively in paid versions of the program.
- In the "VOLUME" section by moving the slider, you can specify the volume balance.
- In the "Frequency" section by switching the radio pools, you can set the sound reproduction frequency in the range from 800 to 48000 Hz.
- In the "Channels" section by switching the radio button, one of three channels is selected:
- Stereo (default);
- Quasystero;
- Mono.
- In the "Stream" section of the drop-down list, you can choose a bit rate from 32 to 320 kbps.
- After all settings are specified, you can run the conversion. To do this, in the left vertical menu, click "Start Conversion".
- A window opens, which provides summary information on the conversion settings based on the data previously entered by the user or those that are set by default if the change has not been made. If you agree with everyone, you press "start" to start the process.
- The AMR transformation procedure is performed in MP3. Its progress is displayed using a dynamic indicator and percent.
- At the end of the process in the "Explorer", the folder will automatically open, in which the ready-made audio file MP3 is located.

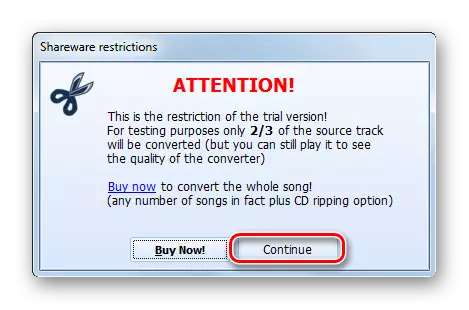


The disadvantage of this method is that the free version of the program allows you to convert only 2/3 of the part of the file.
Method 5: Convertilla
Another program that can convert AMR to MP3 is a converter with a simple interface - Convertilla.
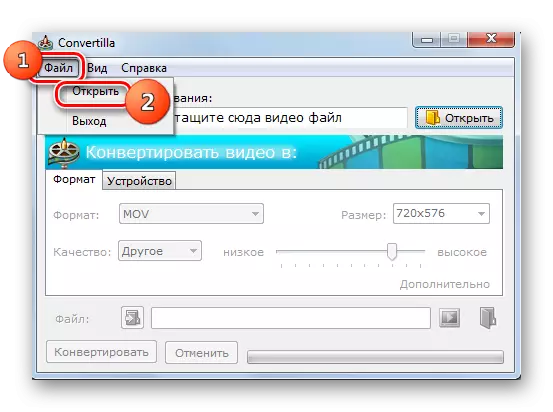
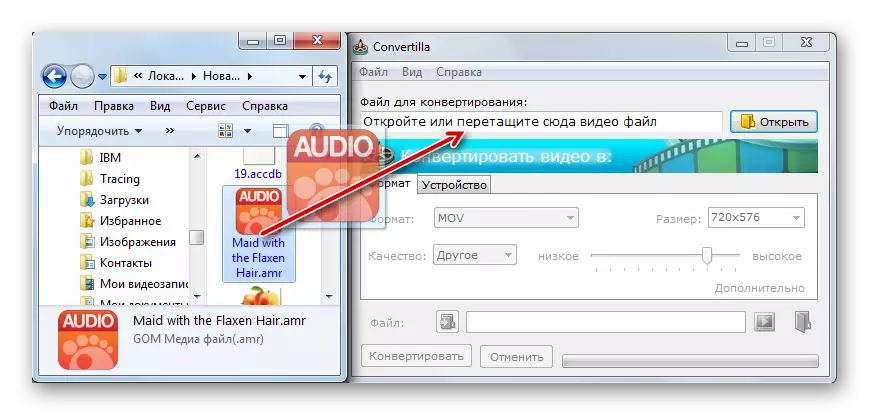
- Run Convertilla. Click "Open."
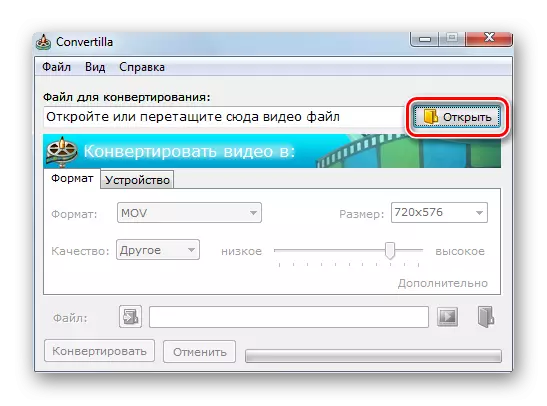
You can also use the menu by clicking "File" and "Open".
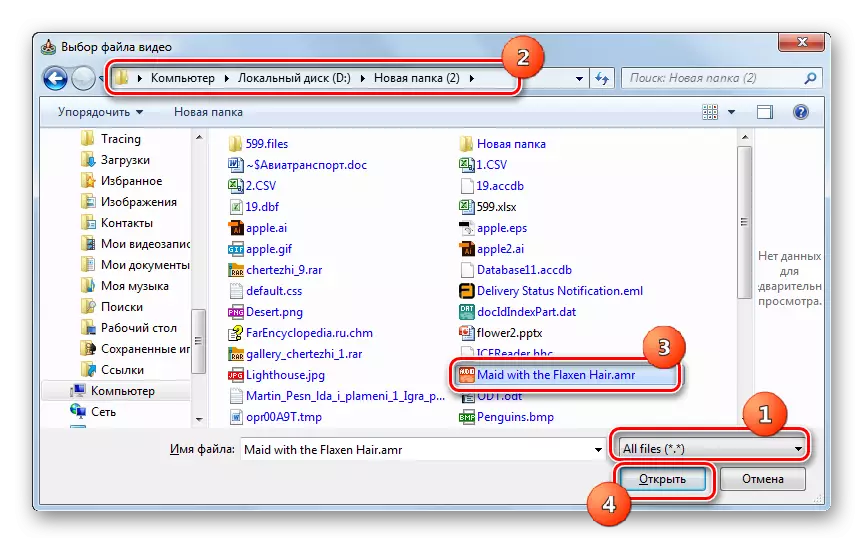
- The opening window will start. Be sure to select the "ALL FILES" item in the list of displayed formats, and otherwise the item will not appear. Find the directory where the audio file with the AMR extension is stored. Having element, press "Open".
- There is another option to add. It is performed, bypassing the opening window. To implement it, drag the file from the "Explorer" to the area in which the text "Open or drag a video file here" in Convertilla.
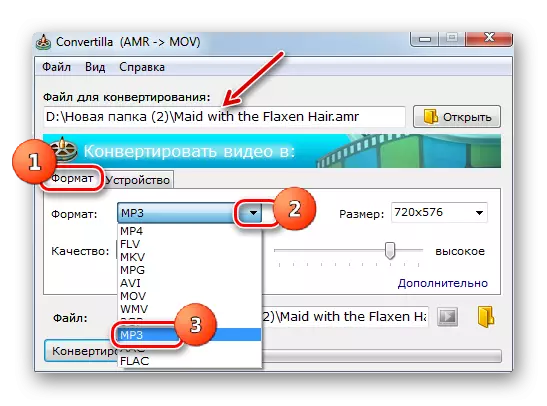
- When using any of the options for opening, the path to the specified audio file will appear in the "File for Conversion" area. Located in the "Format" section, click on the list of the same name. In the list of formats, select "MP3".
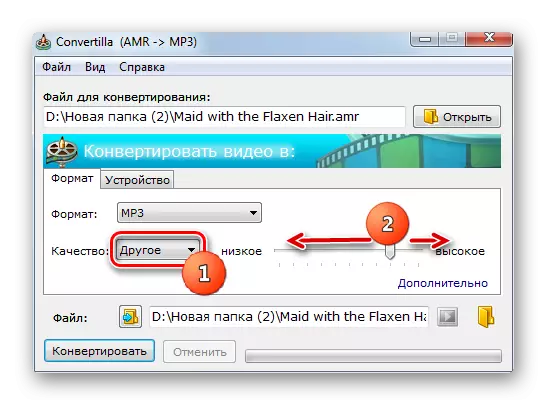
- If the user intends to change the quality of the outgoing MP3, then in the area "Quality" should be changed with the "original" to "Other". A slider will appear. By dragging it to the left or right, you can reduce or increase the quality of the audio file, which leads to a decrease or an increase in its final size.
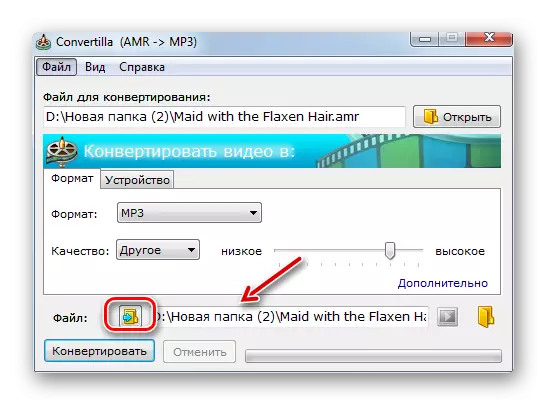
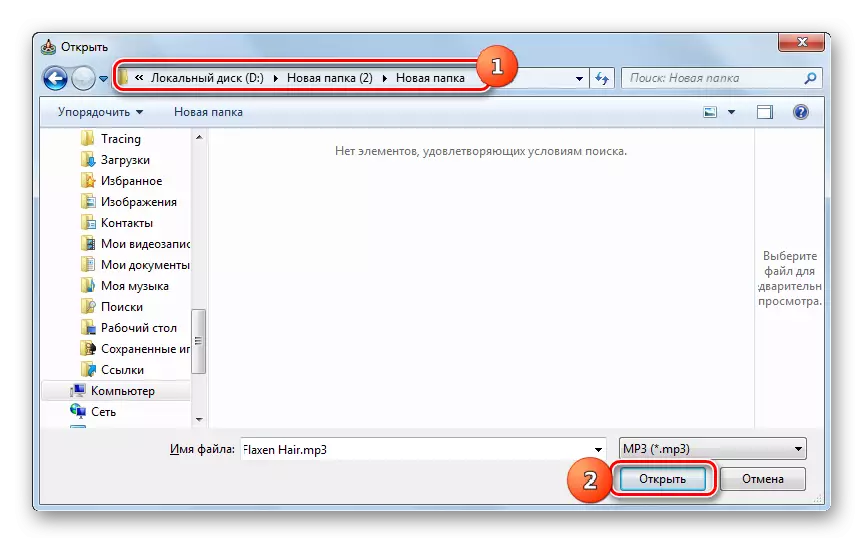
- By default, the final audio file will go to the same folder where the source is located. Its address will appear in the File field. If the user intends to change the destination folder, then click on the logo in the form of the directory with an arrow located on the left of the field.
- In the running window, go to the desired directory and click "Open".
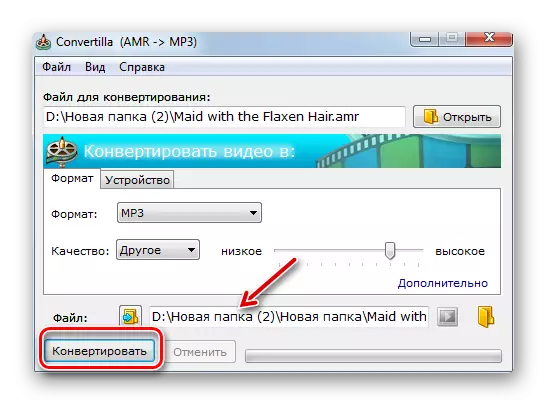
- Now the path in the "File" field will change to the one that the user himself chose. You can run reformatting. Click on the "Convert" button.
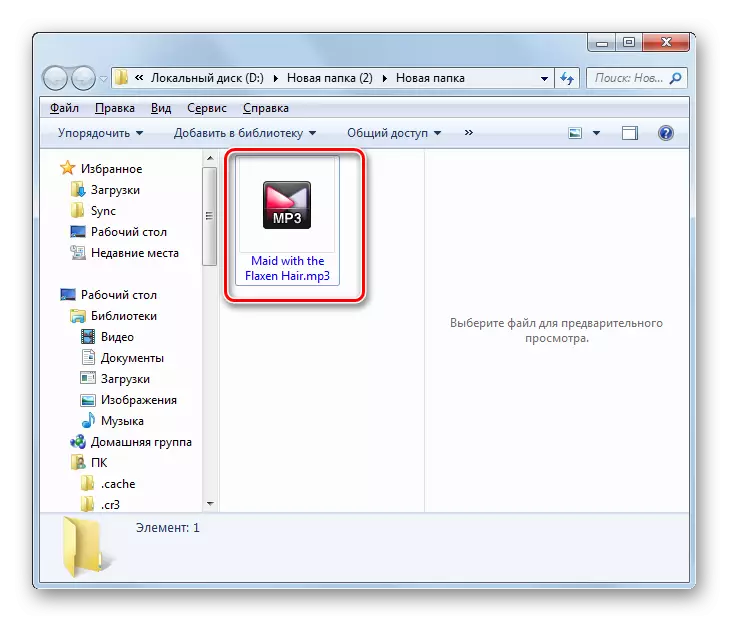
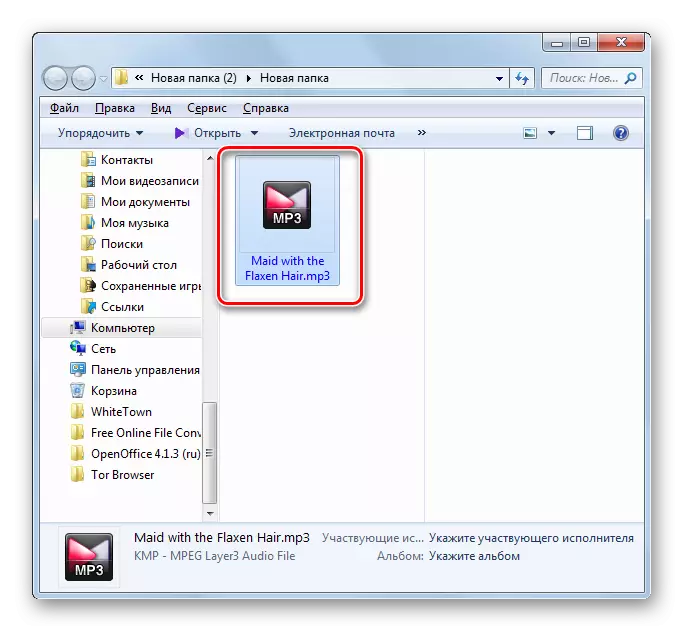
- Conversion is made. After completing it at the bottom of the CONVERTILLA shell, the status "Conversion is complete" will appear. The audio file will be in the folder that the user was previously asked. To visit it, click on the logo in the form of the directory to the right of the "File" area.
- "Explorer" will open in the folder where the outgoing audio file is stored.
The minus of the described method is that it allows you to convert only one file for one operation, and cannot carry out a group transformation, as the previously described programs are made. In addition, Convertilla has very few outgoing audio file settings.

There are quite a few converters who know how to convert AMR to MP3. If you want to make a simple conversion of a single file with a minimum number of additional settings, then in this case, the Convertilla program will be perfect. If you need to perform a mass conversion or set an outgoing audio file, a specific size, bitrate, sound frequency, or other accurate settings, then use more powerful converters - Movavi Video Converter, Format Factory, Any Video Converter or Total Audio Converter.