
The process of creating a poster may seem a sufficiently difficult task, especially if you would like to see it in modern styles. Special online services allow you to do it in just a few minutes, but it is worth understanding that something may need to register, and in some places there is a set of paid functions and rights.
Features of creating posters online
You can create posters in online mode for amateur printing and / or distribution in social networks, on different sites. Some services can help perform this high-level job, but you will have to use specially laid templates, therefore, there is not much space for creativity. Plus, work in such editors implies only amateur level, that is, you do not need to try to work professionally in them. To do this, it is better to download and install specialized software, for example, Adobe Photoshop, Gimp, Illustrator.Method 1: Canva
Excellent service with a wide functionality for both photo processing and to create high-level designer products. The site works very quickly even with a slow Internet. Users will delight extensive functionality and a large number of pre-harvested patterns. However, to work in the service you need to register, as well as consider that certain functions and templates are available only to the owners of a paid subscription.
Go to Canva.
Step-by-step instructions for working with poster templates in this case looks like this:
- On the site click on the button "Start work".
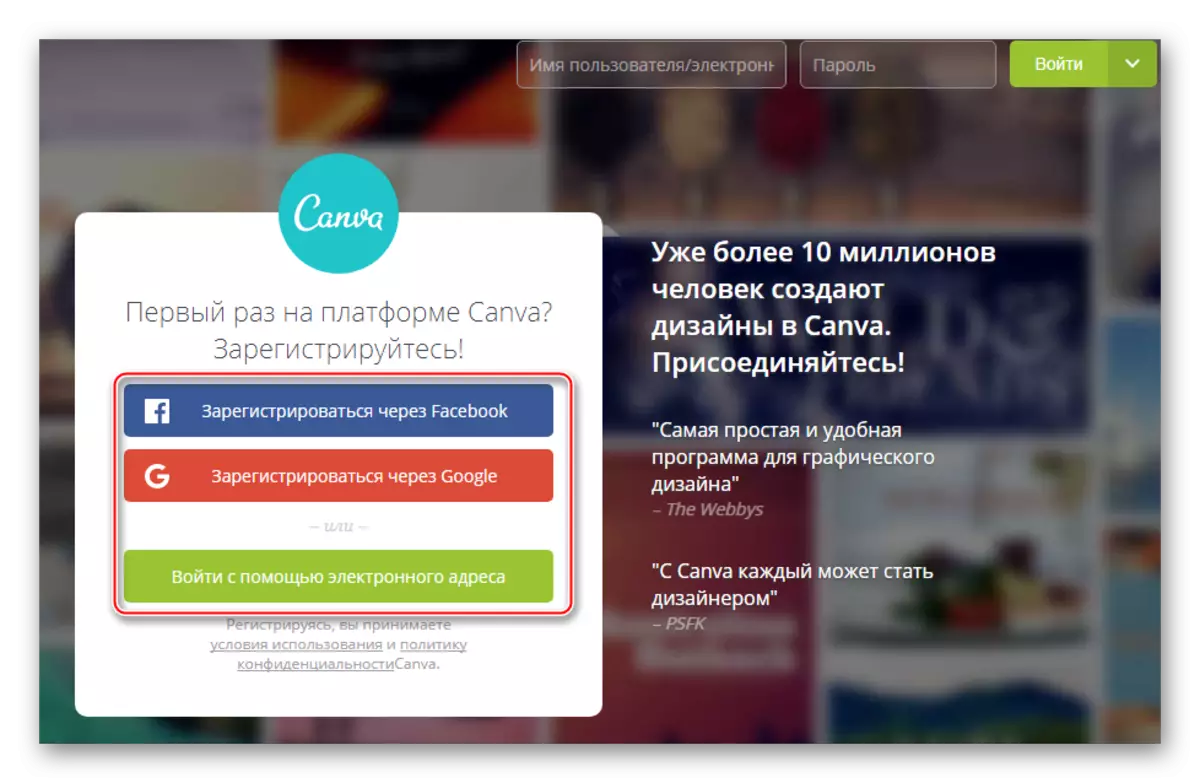
- Next, the service will propose to go through the registration procedure. Select the way - "Register through Facebook", "Register through Google +" or "Log in with the help of an email address". Authorization through social networks will take a little time and will be produced in just a couple of clicks.
- After registration, a questionnaire may appear with a small survey and / or fields for entering personal data (name, password for the Canva service). On the latter, it is recommended to always choose "for yourself" or "for training", since in other cases the service may begin to impose paid functionality.
- After the primary editor opens, where the site will propose to undergo training azam work in the reactor. Here you can skip learning, clicking into any part of the screen, so go through, by clicking on "Find out how to do it."
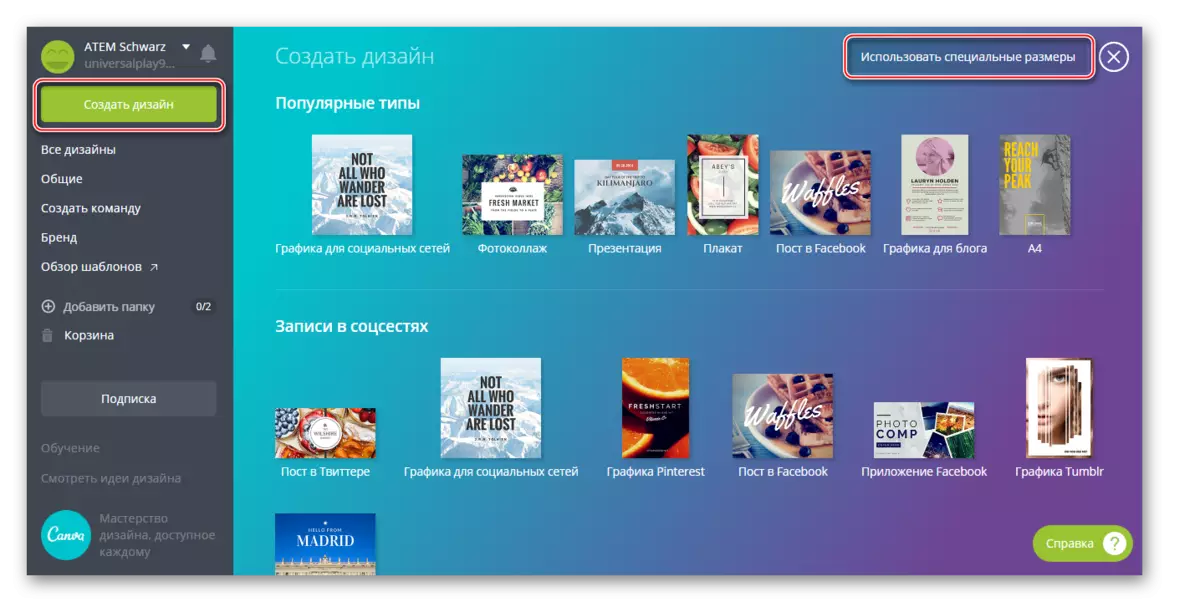
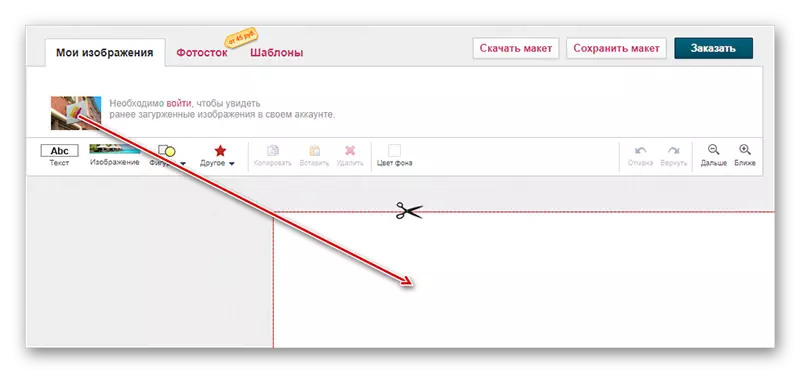
- In the editor that opens by default, the A4 sheet layout is originally opened. If you are not satisfied with the current template, then do this and follow-up two steps. Exit the editor by clicking on the right service in the upper left corner.
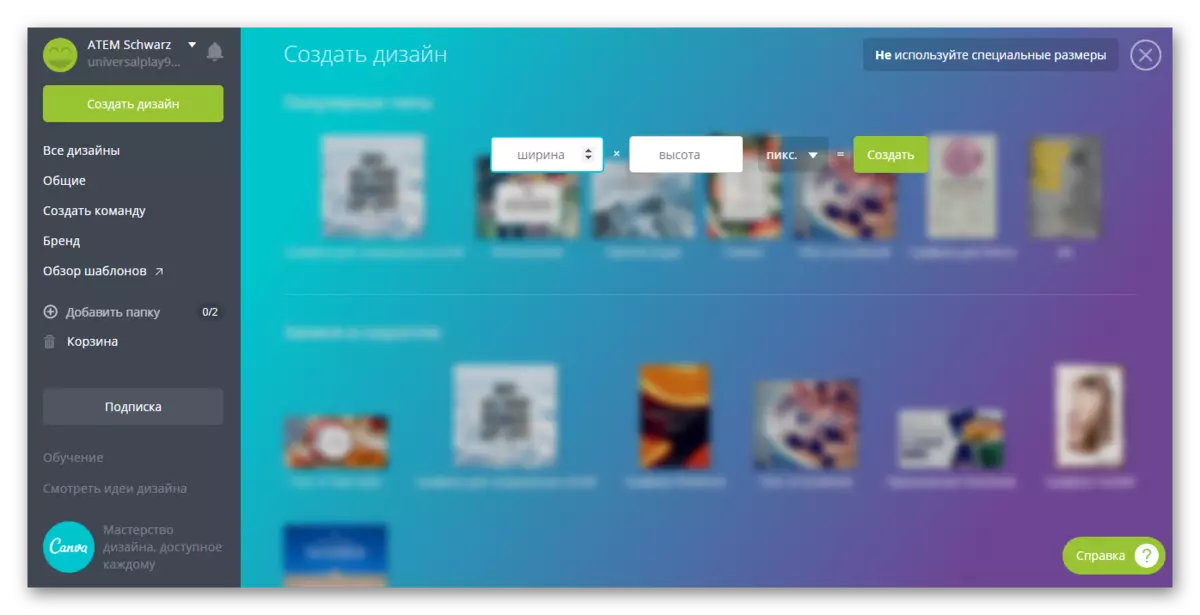
- Now click on the green button "Create Design". In the central part, all available sizes templates will appear, select one of them.
- If none of the proposed options arranged you, then click on "Use Special Sizes".
- Set the width and height for the future poster. Click "Create".
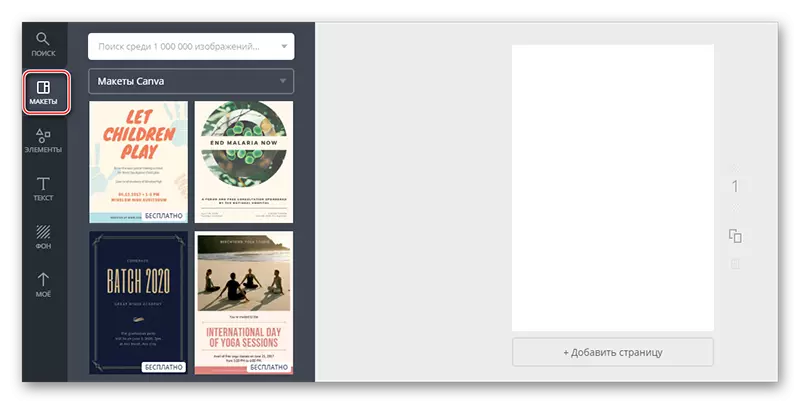
- Now you can start creating a poster itself. By default, you have the "Layouts" tab. You can choose a ready-made layout and change on it pictures, text, colors, fonts. Layouts are completely editable.
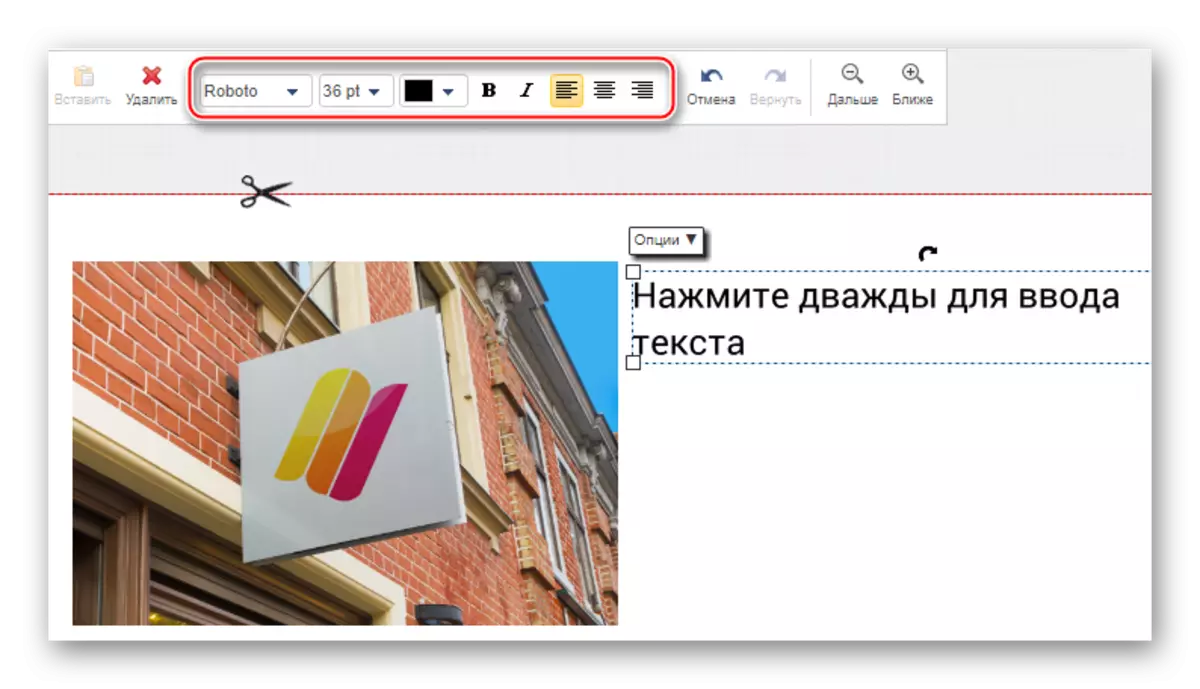
- To make changes to the text, click on it twice. The font is selected at the top, the alignment is specified, the font size is set, the text can be made bold and / or italics.
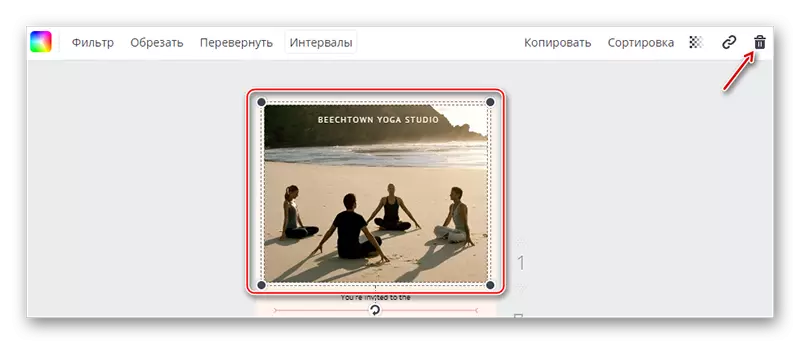
- If a photo is present on the layout, you can delete it and install some kind. To do this, click on the already available photos and click Delete to delete it.
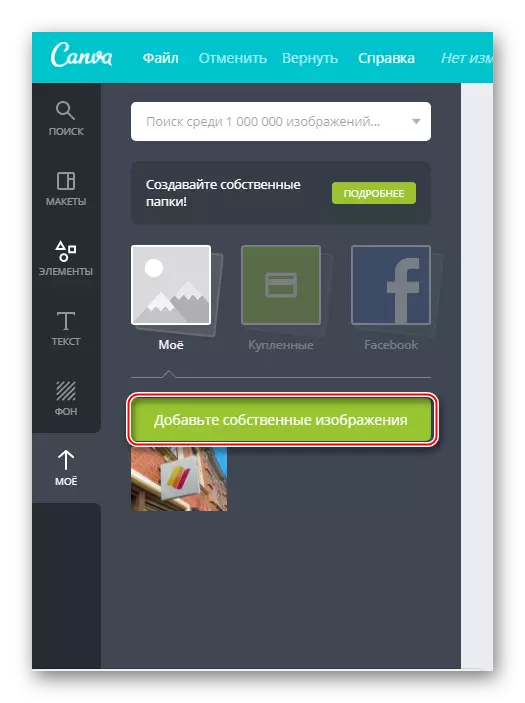
- Now go to "My", that in the left pane of the tool. Load the pictures from the computer, clicking on "Add your own images".
- A file selection window on the computer opens. Choose it.
- Drag the downloaded picture in place for photos on the poster.
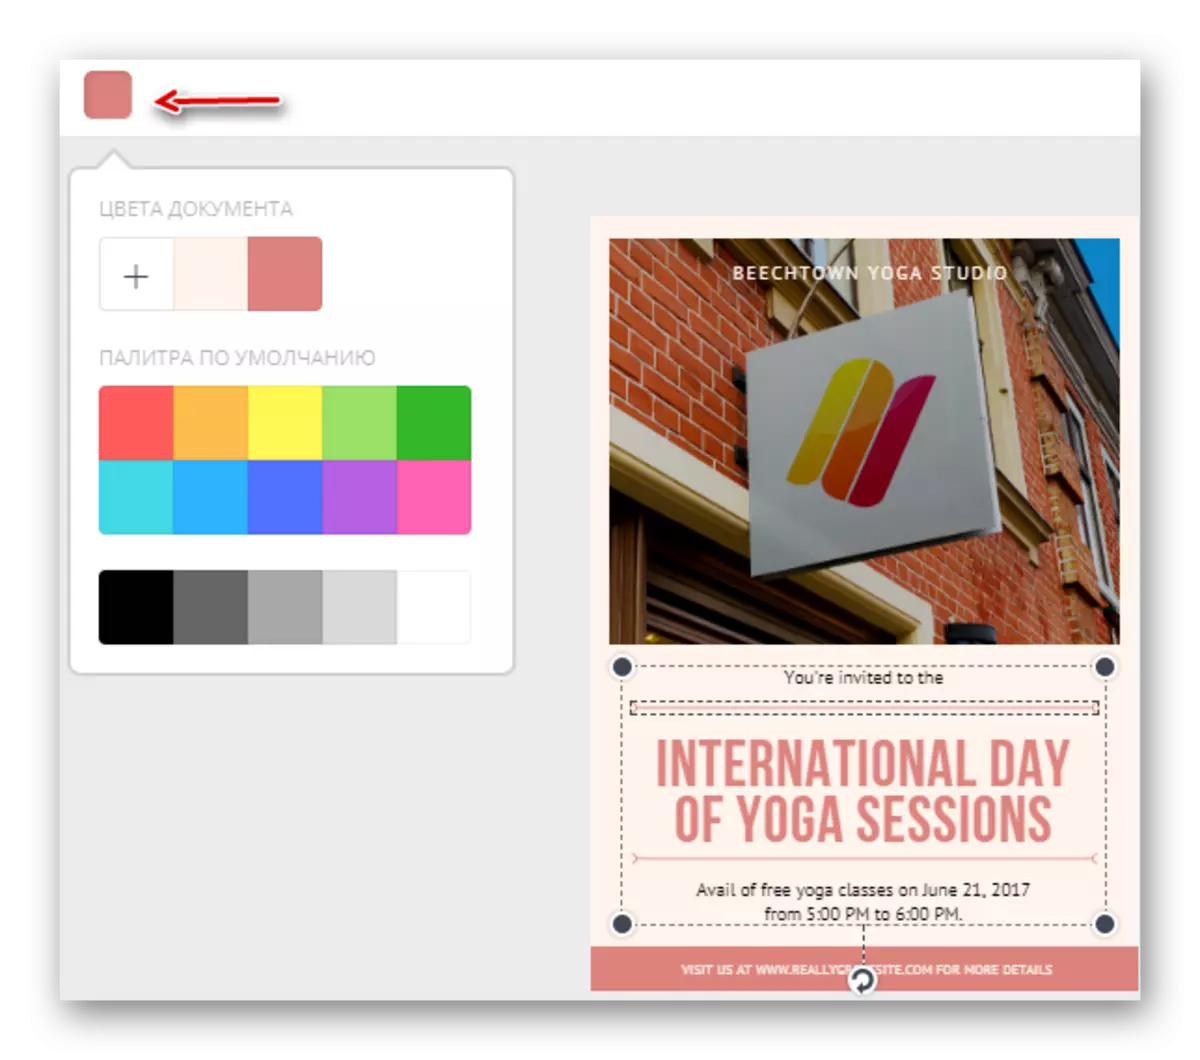
- To change the color of any element, just click on it a couple of times and find the color square in the upper left corner. Click on it to open the color palette, and select the color you like.
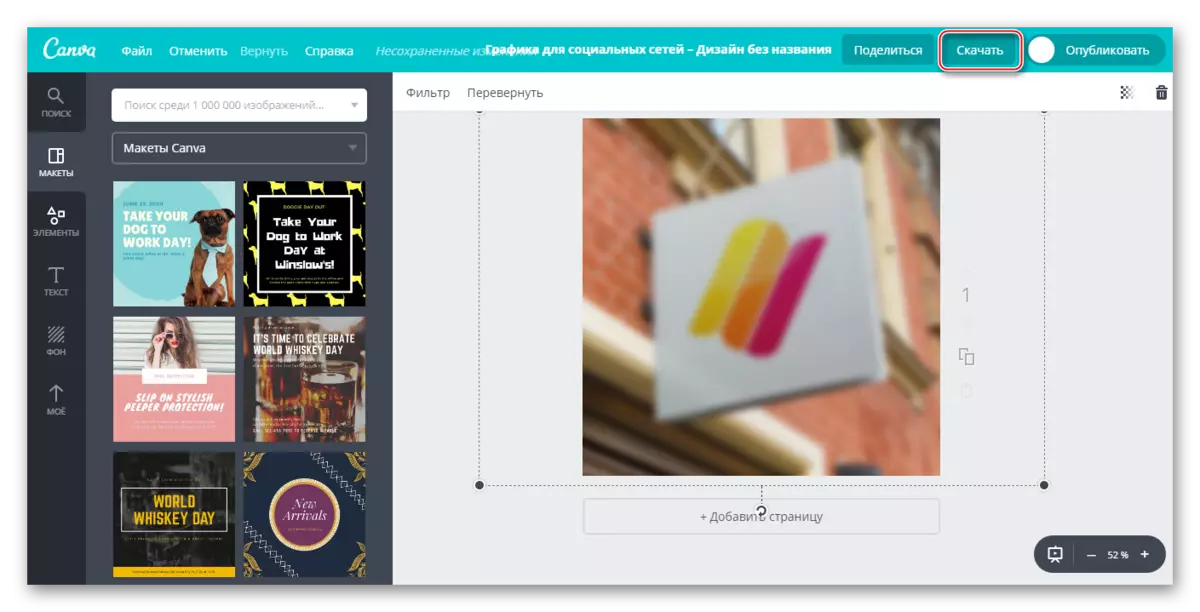
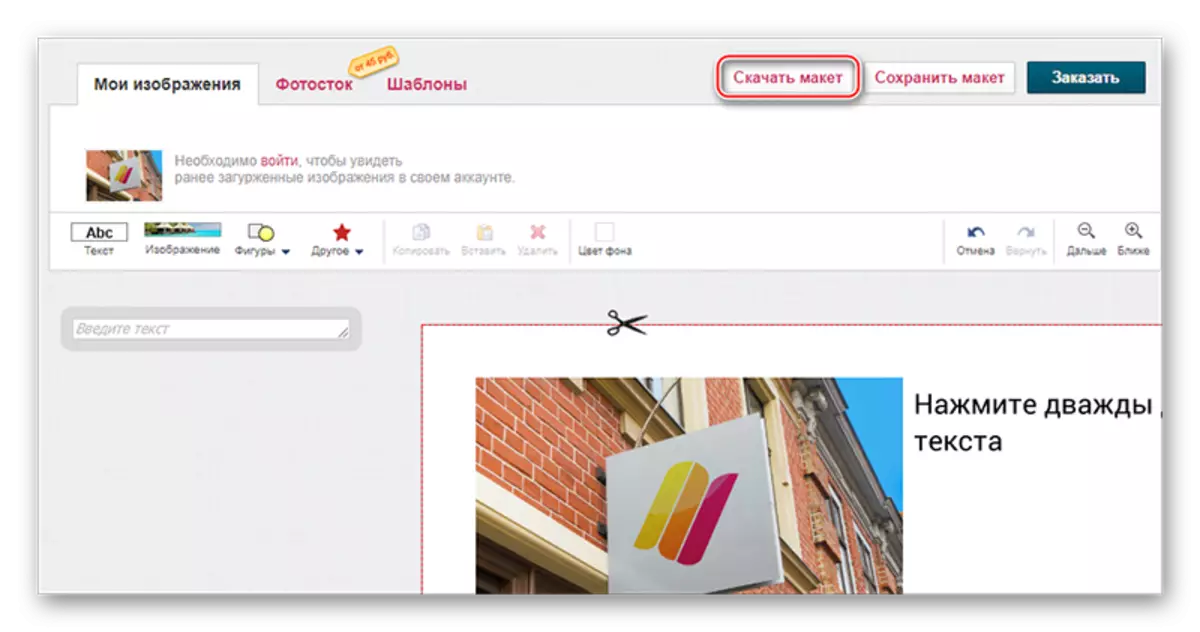
- Upon completion of work, you need to save everything. To do this, click on "Download".
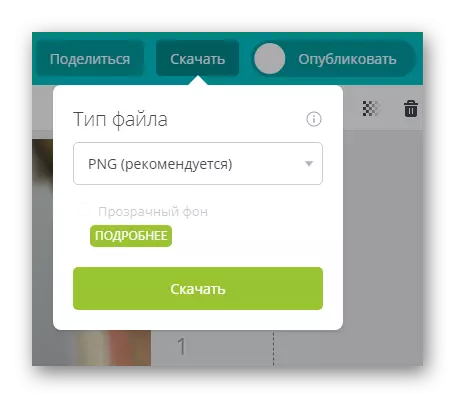
- A window will open where you want to select the type of file and confirm download.

The service also makes it possible to create your own, non-sabroval poster. So the instructions will look like in this case:
- In accordance with the first paragraphs of the previous instructions, open the CanVA editor and set the characteristics of the workspace.
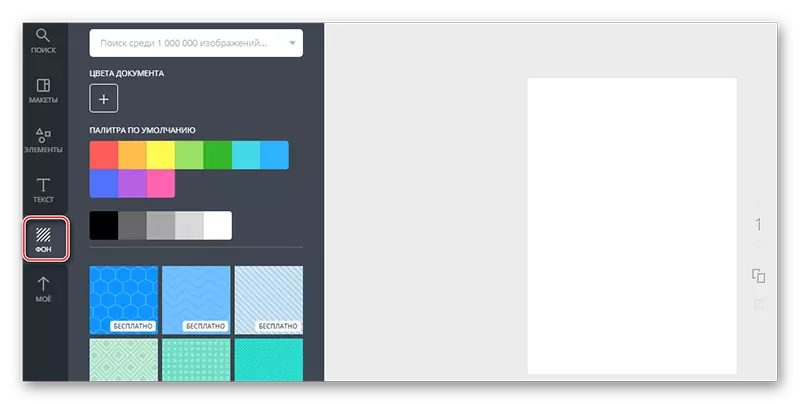
- Initially, you need to set the rear background. You can do this using a special button on the left toolbar. The button is called "background". When you click on it, you can choose some color or texture as a rear background. There are a lot of simple and free textures, but there are also paid options.
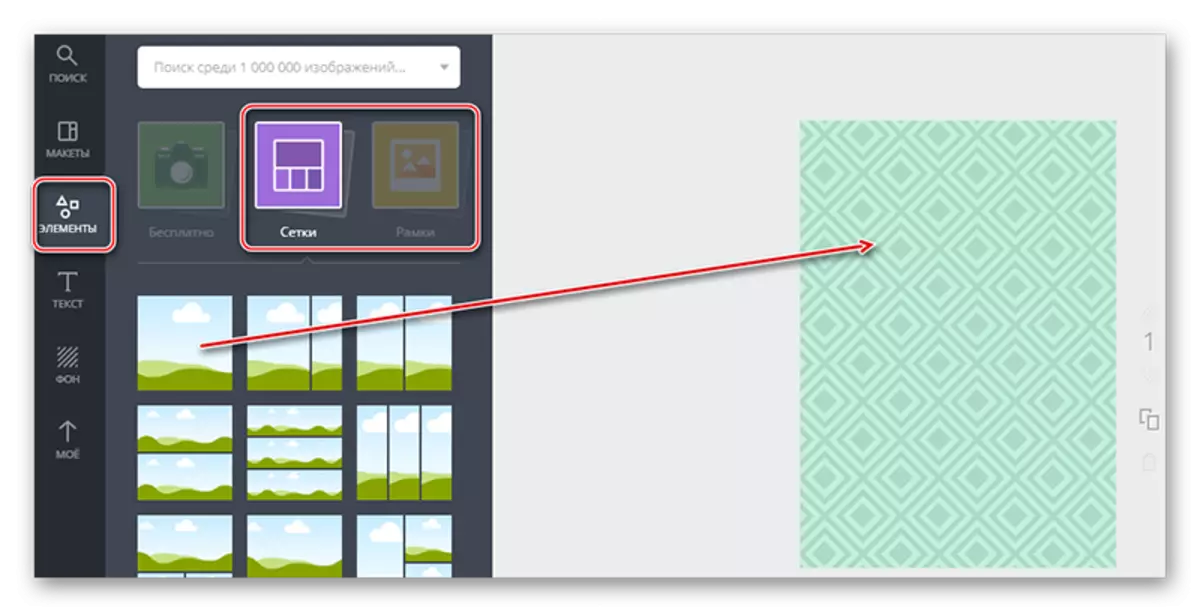
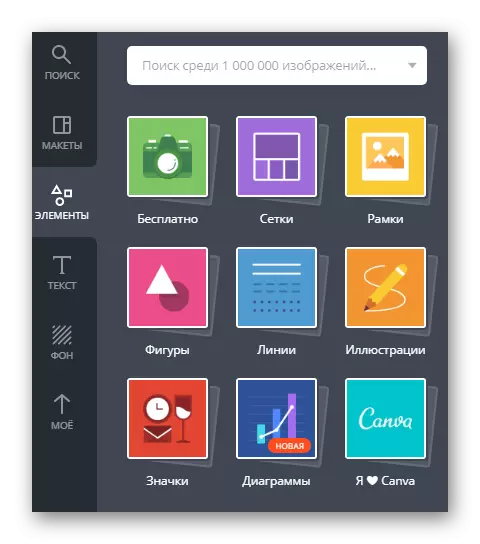
- Now you can attach any image to make it more interesting. To do this, use the "Elements" button on the left side. The menu will open, where the "Grid" or "Frames" subsection can be used to insert images. Select the insertion template for the photo that you like more and move it to the workspace.
- With the help of circles in the corners, you can adjust the image size.
- To download the picture in the photo field, go to "My" and click on the Add Image button or drag the photo added.
- On the poster must be a major header text and some text smaller. To add text items, use the Text tab. Here you can add headlines, subtitles and basic text for paragraphs. You can also use and template text design options. Transfer the element to the workspace.
- To change the content of the block with the text, click on it twice the LKM. In addition to changing the content, you can change the font, size, color, register, and highlight the text italics, bold and align in the center, to the left right edge.
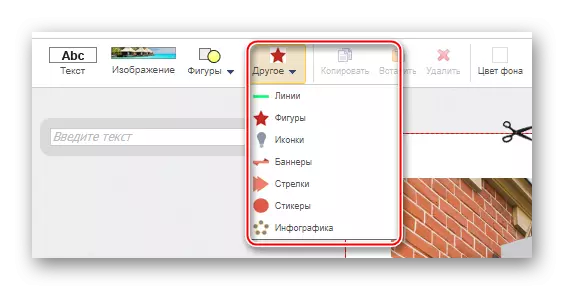
- After adding text, you can add any additional element for a variety, such as lines, figures, etc.
- Upon completion of the poster development, save it in accordance with the latest paragraphs of the previous instruction.


Creating a poster in this service is a creative thing, so learn the service interface, you may find any interesting features or decide to take advantage of the paid features.
Method 2: PrintDesign
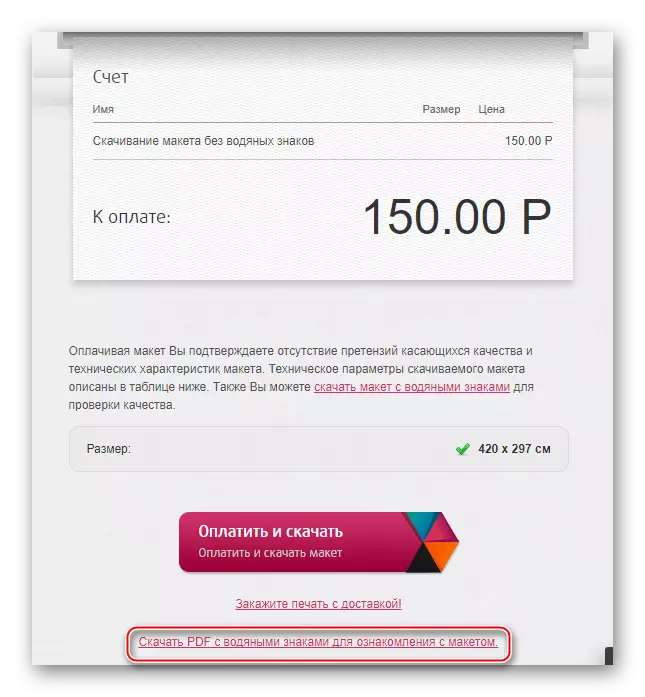
This is a simple editor to create printed production layouts. It does not need to register here, but you have to pay about 150 rubles for downloading the finished result on the computer. It is possible to download the created layout for free, but the water logo of the service will be displayed on it.
On this site, it is unlikely to create a very beautiful and modern poster, since the number of functions and layouts in the editor is strongly limited. Plus, everything here is for some reason the layout under the size A4 is not built.
Go to PrintDesign
When working in this editor, we will only consider the option of creating from scratch. The thing is that on this site from templates for posters there is only one sample. Step-by-step instruction looks like this:
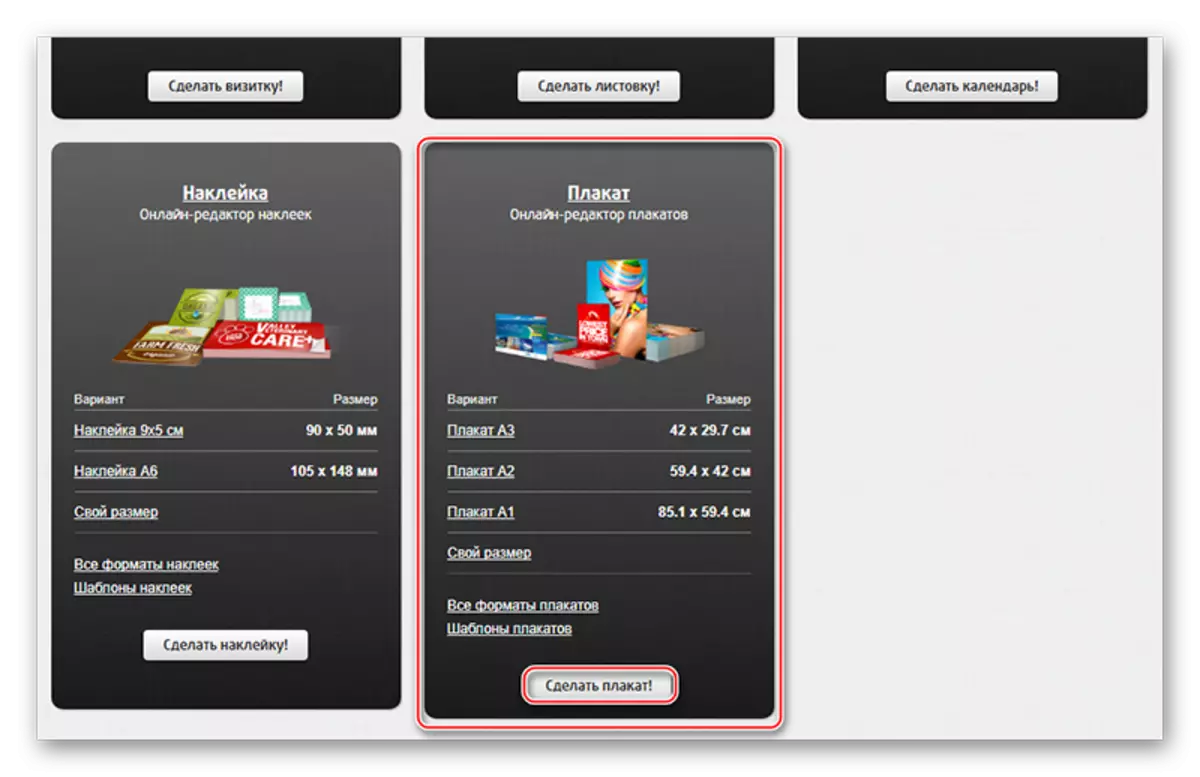
- Scroll through the main page just below, to see a complete list of options for creating printing products using this service. In this case, you need to select the Poster item. Click on "Make a Poster!"
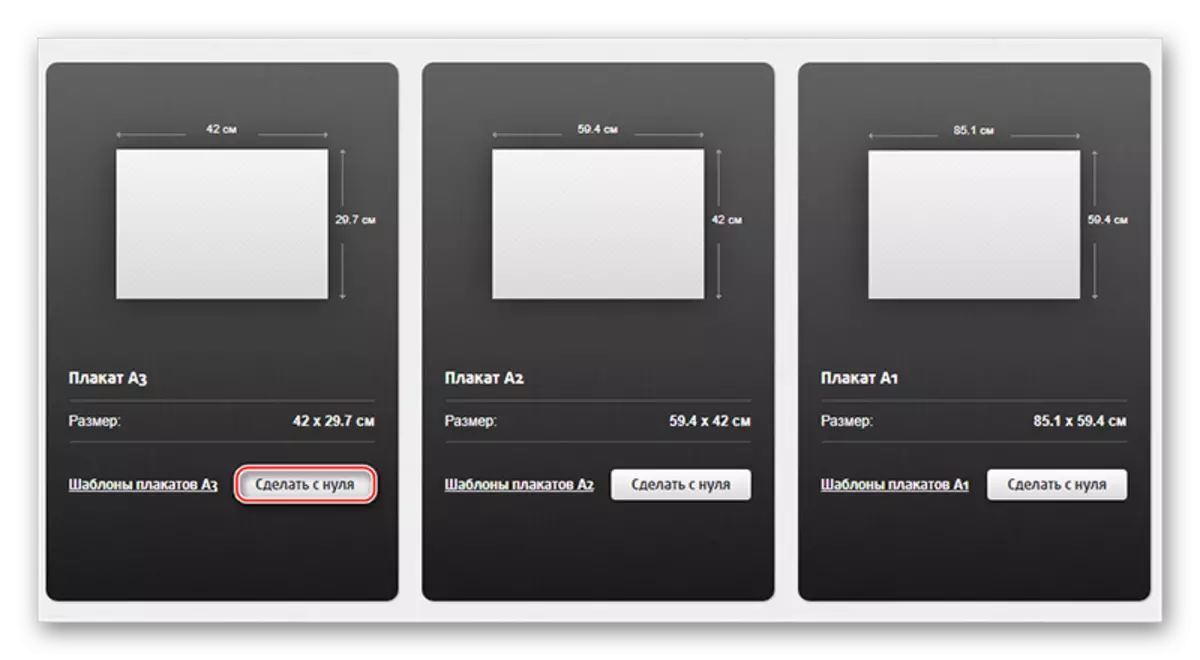
- Now select dimensions. You can use both template and set your own. In the latter case, you will not be able to use the template that is already laid in the editor. In this manual, consider the creation of a poster for a3 sizes (instead of AZ, any other size can be). Click on the "Make from scratch" button.
- After downloading editor starts. To begin with, you can insert any picture. Click on the "Image" that is in the top toolbar.
- Explorer will open, where you need to choose a picture for insertion.
- The downloaded image will appear in the "My Images" tab. To use it in your poster, simply drag to the workspace.
- Picture You can change the size using special nodes located on the corners, it is also possible to move freely throughout the work space.
- If necessary, set the background image by using the "Background color" parameter in the top toolbar.
- Now you can add text for a poster. Click on the tool at the same name, after which a tool will appear in a random place on the workspace.
- To set up text (font, size, color, highlighting, alignment), pay attention to the central part of the top panel with tools.
- For a variety, you can add several additional elements, such as figures or stickers. The latter can be seen when clicking on "Other".
- To see the set of available icons / stickers, etc., just click on the item you are interested in. After pressing the window opens with the full list of items.
- To save the finished layout to the computer, click on the "Download" button, which is at the top of the editor.
- You will transfer to the page, where the ready version of the poster will be shown and the check is provided in the amount of 150 rubles. Under the check, you can choose the following options - "Pay and download", "Order Printing with delivery" (the second option will cost quite expensive) and "Download PDF with watermarks to familiarize yourself with the layout."
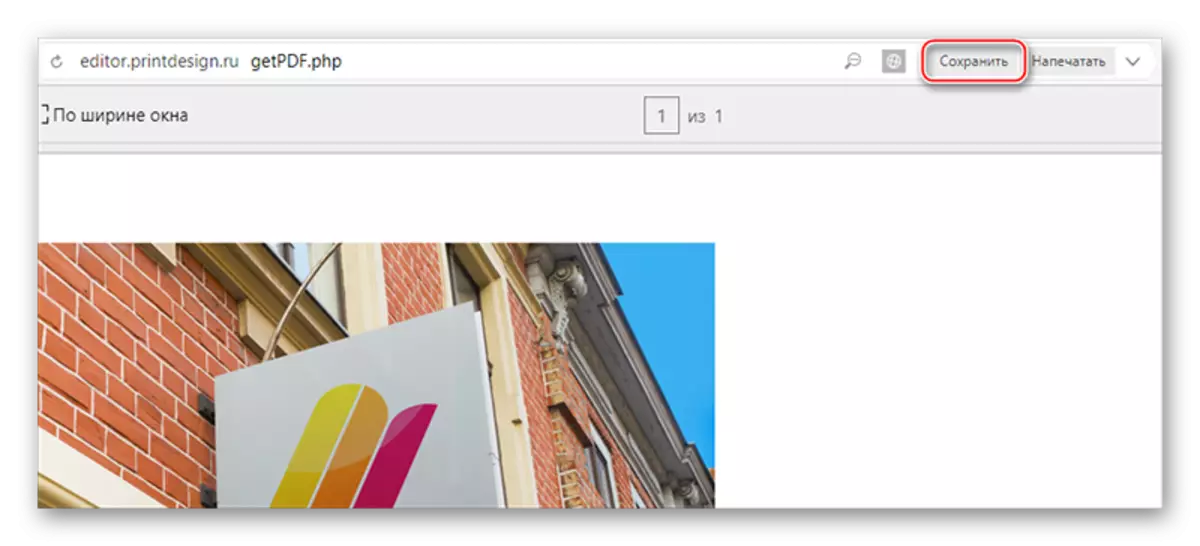
- If you have chosen the last option, a window will open where the full-sized layout will be presented. To download it to the computer, click on the Save button, which will be in the browser address bar. In some browsers, this step is skipped and the download starts automatically.


Method 3: Fotojet
This is also a specialized design service for creating posters and posters, similar over the interface and functionality on Canva. The only inconvenience for many users from the CIS is the lack of Russian. To somehow remove this disadvantage, it is recommended to use a browser with a tracking function (although it is not always correct).
One of the positive differences from Canva is the lack of mandatory registration. Additionally, you can use paid elements without buying an extended account, but the service logo will be displayed on such elements of the poster.
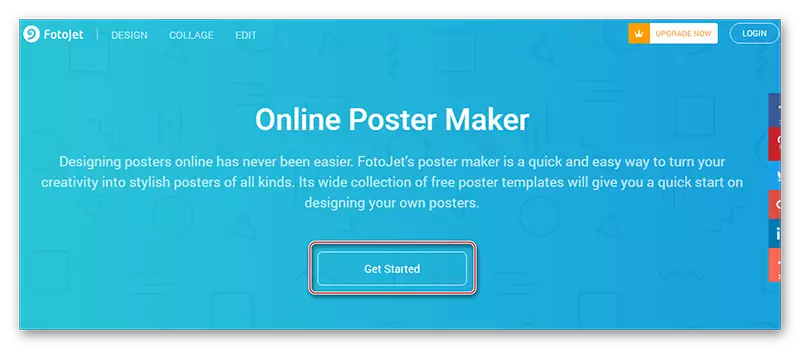
Go to fotojet.
Step-by-step instructions for creating a poster on the harvested layout looks like this:
- On the site, click "Get Started" to start work. Here you can additionally get acquainted with the main functionality and features of the service, however, in English.
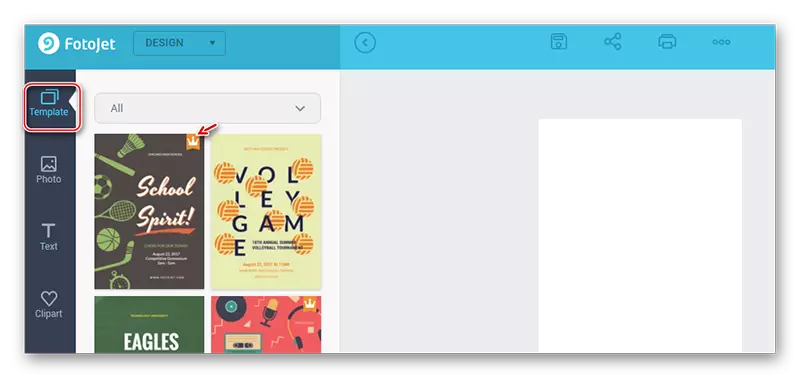
- By default, the TEMPLATE tab is open in the left pane, that is, layouts. Choose from them some suitable. Layouts marked in the upper right corner of an orange corona icon are available only to the owners of paid accounts. You can also use them on your poster, but a significant part of the space will occupy the logo that cannot be removed.
- You can change the text by clicking on it twice the left mouse button. Additionally, a special window will appear with a selection of fonts and adjustment of the alignment, font size, color and separation of oily / italics / undercut.
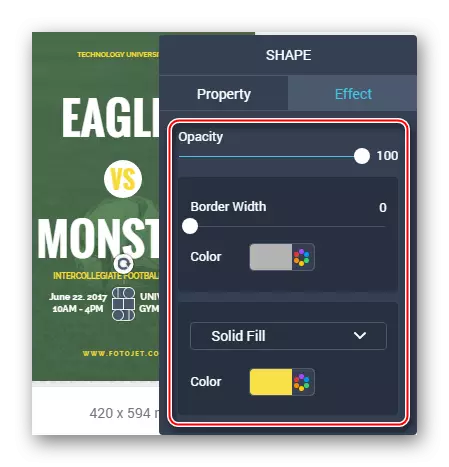
- You can configure various geometric objects. Just click on the left mouse object, after which the settings window opens. Go to the "Effect" tab. Here you can configure transparency (item "OPACITY"), borders (Border Width) and fill.
- The fill setting can be viewed in more detail, since you can completely disable it by selecting the "No Fill" item. This option is suitable if you need to select some kind of stroke object.
- You can make the fill standard, that is, one color covering the entire figure. To do this, select from the drop-down menu "Solid Fill", and in "Color" set the color.
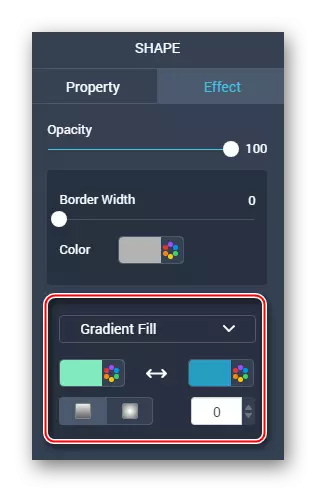
- You can also set the gradient fill. To do this, select "GRADIENT FILL" in the drop-down menu. Under the drop-down menu, specify two colors. Plus, you can specify the type of gradient - radial (running out of the center) or linear (comes from top to bottom).
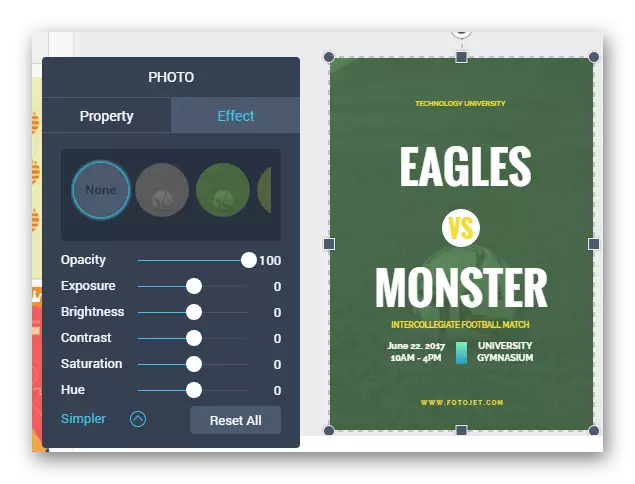
- Unfortunately, the rear background you cannot replace in layouts. You can only ask any additional effects. To do this, go to "Effect". There you can choose the ready-made effect from a special menu or make settings manually. For independent settings, click on the label at the bottom of Advanced Options. Here you can move the sluts and achieve interesting effects.
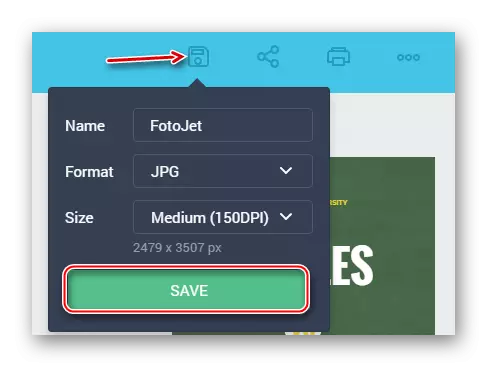
- To save your job, use the floppy icon that in the top panel. A small window will open, where you need to set the file name, its format, and also choose the size. For users who use the service for free, only two sizes are available - "Small" and "Medium". It is noteworthy that here the size is measured by pixel density. What it is higher, the better the print quality will be. For commercial printing, it is recommended to use a density of at least 150 DPI. When the settings are completed, click on "Save".


Create a poster from scratch will be more difficult. In this instruction other maintenance features will be considered:
- The first item is similar to what is shown in the previous instruction. You have to open a workspace with an empty layout.
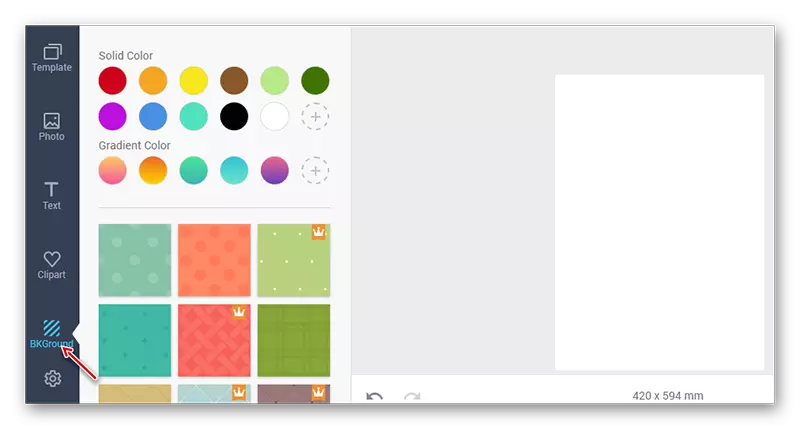
- Set the background for the poster. In the left pane, go to the tab "bkground". Here you can set a monophonic background, gradient fill or texture. The only minus is the already specified background to customize it is impossible.
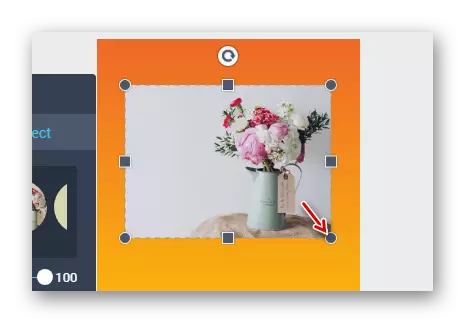
- As a background, you can also use photos. If you decide to do this, then instead of "bkground" open "photo". Here you can upload your photo from a computer by clicking on "Add Photo" or use already built-in photos. Drag your photo or picture that is already in the service, to the workspace.
- Stretch a photo on the entire workspace using points in the corners.
- It can be used to apply various effects by analogy with the 8th point from the previous instruction.
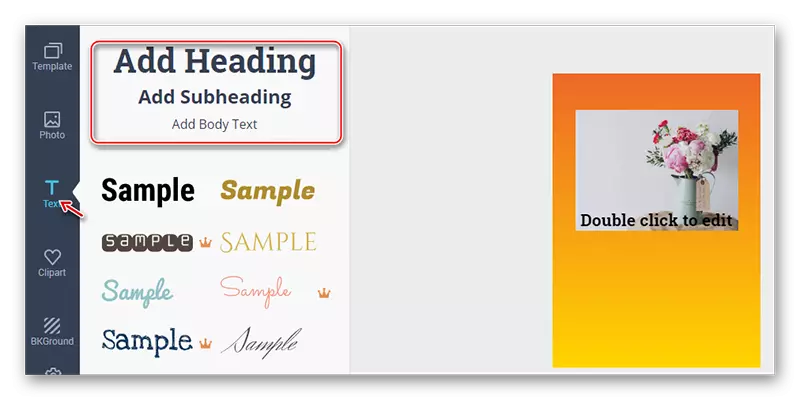
- Add text using the "Text" item. In it you can choose font options. Drag like the workspace, replace the standard text to your and configure the various additional parameters.
- In order to diversify the composition, you can choose some vector object from the "Clipart" tab. Each of them settings can vary greatly, so familiarize yourself with them yourself.
- You can continue to get acquainted with the functions of the service independently. When finished, do not forget to keep the result. It is done in the same way as in the previous instruction.


See also:
How to make a poster in photoshop
How to make a poster in photoshop
Create a high-quality poster using online resources, quite real. Unfortunately, there are enough good online editors in RuNet with free and necessary functionality.