
When connecting a new printer to a PC, the latter requires drivers for successful work with a new device. You can find them in several ways, each of which will be described in detail below.
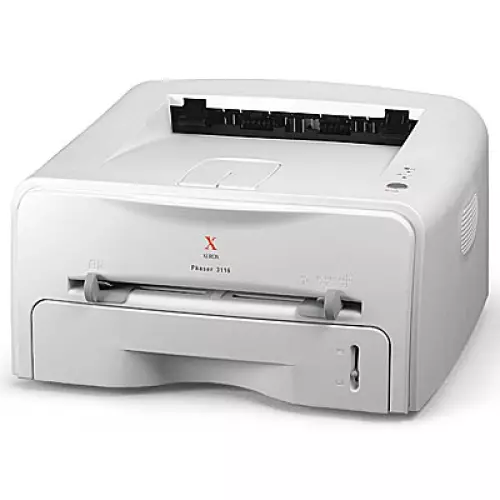
Installing Drivers for Xerox Phaser 3116
After purchasing the printer, the search for drivers can cause difficulties. To deal with this question, you can use the official website or third-party software, which will also help you download drivers.Method 1: device manufacturer site
You can get the required software for the device by opening the official website of the company. To search and further download drivers, you will need to do the following:
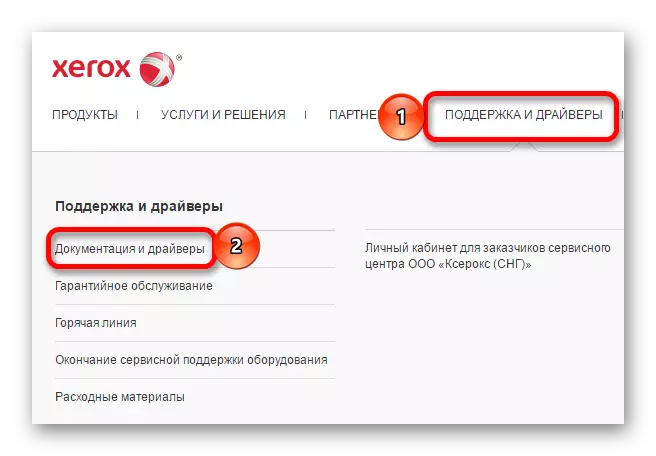
- Go to Xerox.
- In his header, find the section "Support and Driver" and hover over it. In the list that opens, select "Documentation and Drivers".
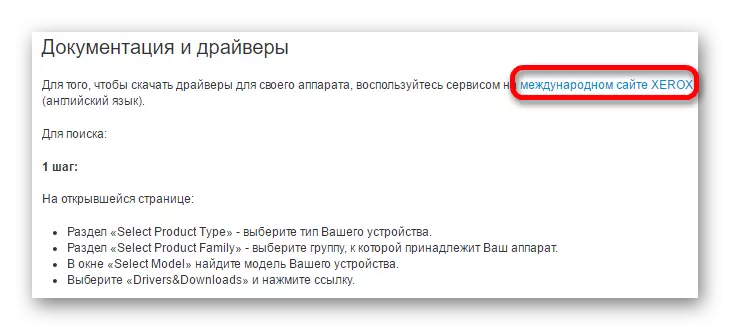
- The new page will contain information about the need to switch to the international version of the site to further search for drivers. Click on the existing link.
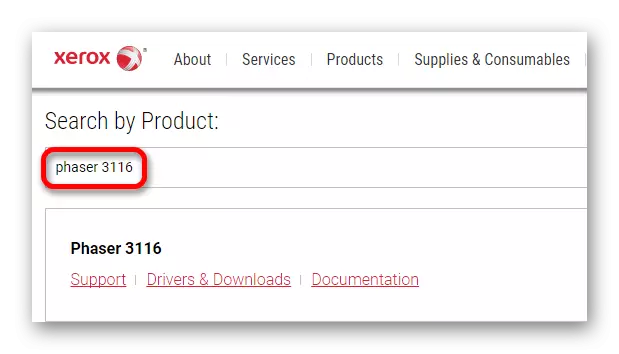
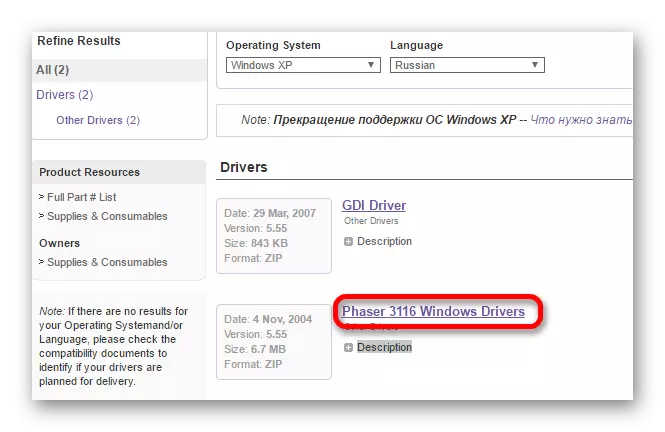
- Find the "Search by Product" section and enter the Phaser 3116 in the search window. Wait for the desired device you find, and click on the exiled link with its name.
- After that, you will need to choose the version of the operating system and language. In the case of the last, it is desirable to leave English, because it is more likely to get the required driver.
- In the list of available programs, click on "Phaser 3116 Windows Drivers" to start downloading.
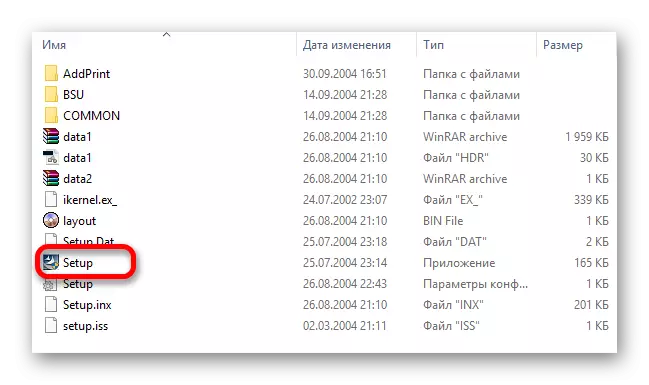
- After the archive is injected, unpack it. In the folder received, you will need to run the setup.exe file.
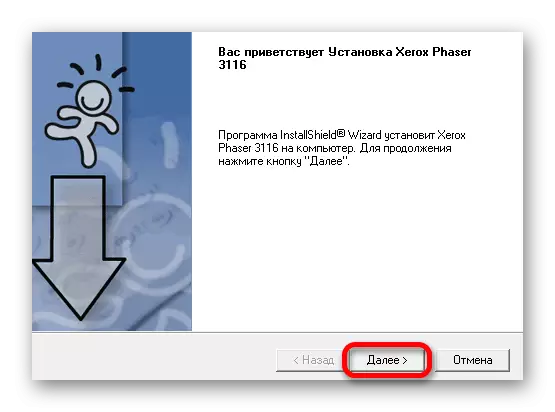
- In the setup window that appears, click "Next".
- Further installation will be automatically passed, the user will be shown the course of this process.
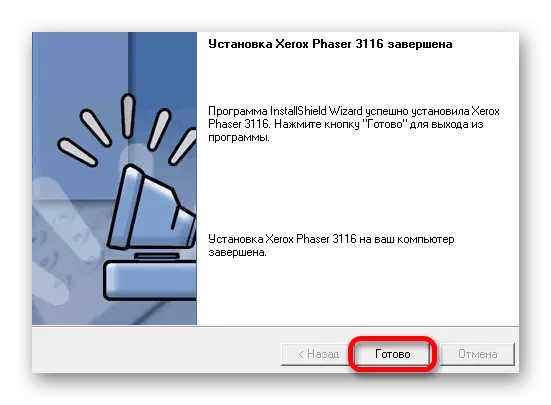
- After completing it, it will remain click on the "Finish" button to close the installer.


Method 2: Special programs
The second installation method is the use of special software. In contrast to the previous method, such programs are not intended strictly for one device and can download the necessary programs for any equipment available (subject to connection to the PC).
Read more: Software for installation of drivers

One of the most well-known options for such software is Drivermax, which is distinguished by a simple interface, understandable for inexperienced users. Before starting the installation, as in many other programs of this type, the recovery point will be created, so that when problems occurs, the computer can be returned to the initial state. However, this software is not free, and some possibilities can only be obtained when buying a license. The program also provides the user with full computer information and has four recovery methods.
Read more: How to use DRIVERMAX
Method 3: Device ID
This option is suitable for those who do not want to install additional programs. The user needs to find the required driver on its own. To do this, you should learn the equipment ID with the help of the Device Manager. Found information must be copied and enter on one of the resources that follow the search for the identifier software. In the case of Xerox Phaser 3116, these values can be used:
USBPRINT \ Xeroxphaser_3117872c.
USBPRINT \ Xerox_Phaser_3100mFP7DCA.

Lesson: How to download Drivers using ID
Method 4: System Features
If the methods described above are not the most suitable, you can resort to system tools. This option is distinguished by the fact that the user does not need to download software from third-party sites, but it is not always effective.
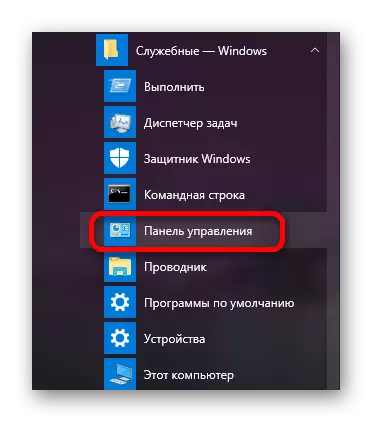
- Run the control panel. It is located in the "Start" menu.
- Select "View devices and printers" item. It is in the "Equipment and Sound" section.
- Adding a new printer is performed by pressing the button in the header of the window having the name "Adding Printer".
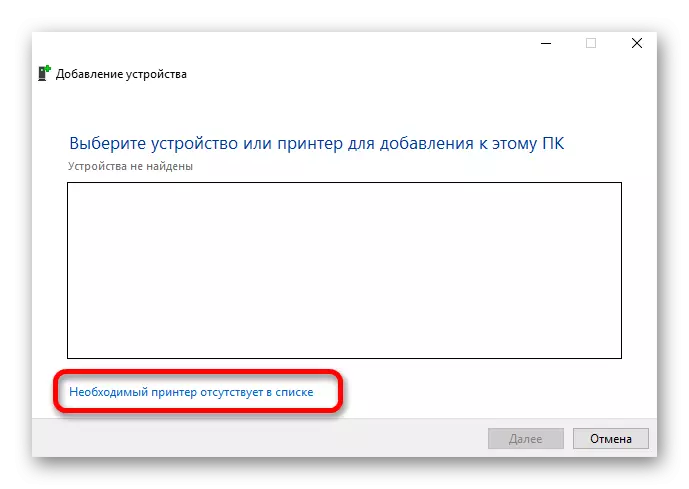
- First scan for the presence of connected equipment. If the printer is detected, then click on it and click Install. In the reverse situation, click the "The required printer is missing" button.
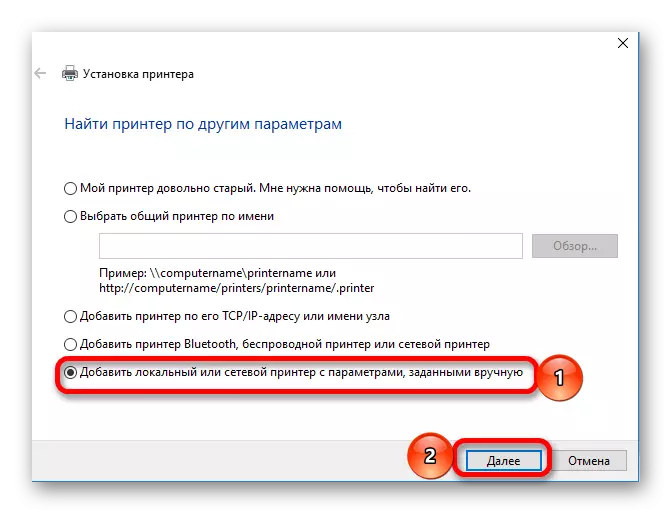
- The subsequent installation process is performed manually. In the first window, select the last line "Add Local Printer" and click Next.
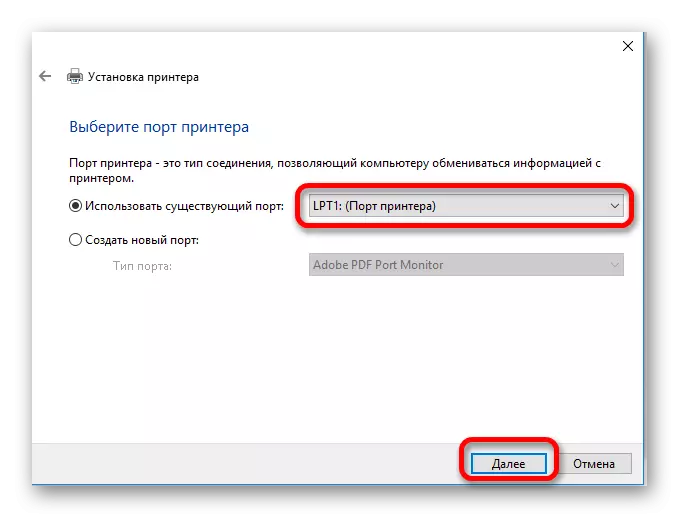
- Then define the connection port. If you wish, leave the installed automatically and click Next.
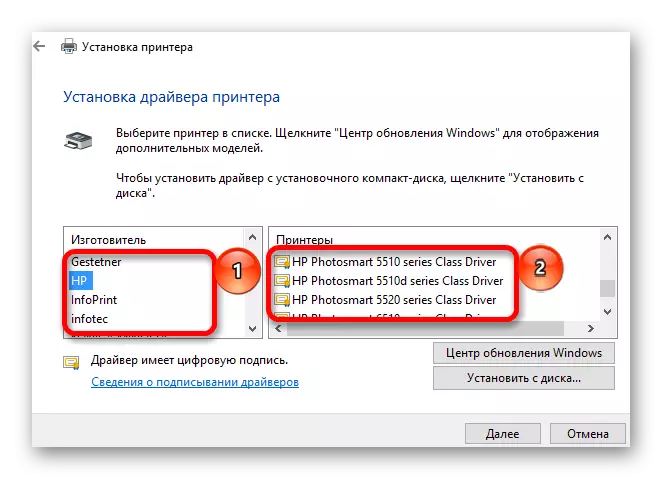
- Lay the name of the connected printer. To do this, select the device manufacturer, and then the model itself.
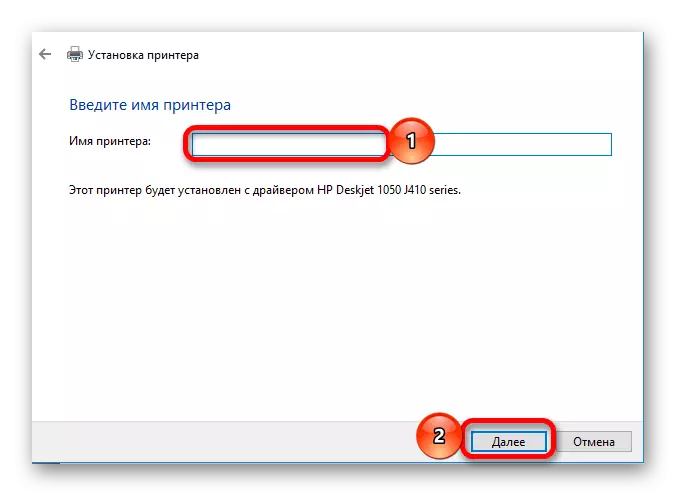
- Print a new name for the printer or leave the available data.
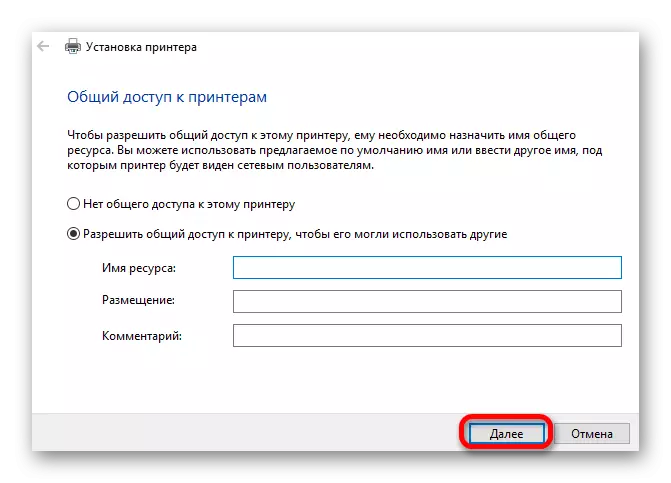
- In the last window, complete access is set. Depending on the further method of using the device, decide whether it is required to provide a common access. Then click "Next" and expect the installation completion.


Installing the printer drivers does not require special skills and is available to each user. Given the number of ways available, everyone can choose for itself the most suitable.