
Collages from photographs are used everywhere and often look quite attractive, if, of course, they are made professionally and creatively.
Compilation of collages - an interesting and fascinating occupation. Selection of photos, their location on canvas, design ...
This can be engaged in almost any editor and Photoshop no exception.
Today's lesson will consist of two parts. In the first we will make a classic collage from the snapshot set, and in the second we will master the reception of creating a collage from one photo.
Before making photo collage in Photoshop, you need to pick up pictures that will comply with the criteria. In our case, it will be the subject of the landscapes of St. Petersburg. The photo should be similar by lighting (day-night), the time of year and theme (buildings-monuments-people-landscape).
For the background, choose a picture that also corresponds to the subject.
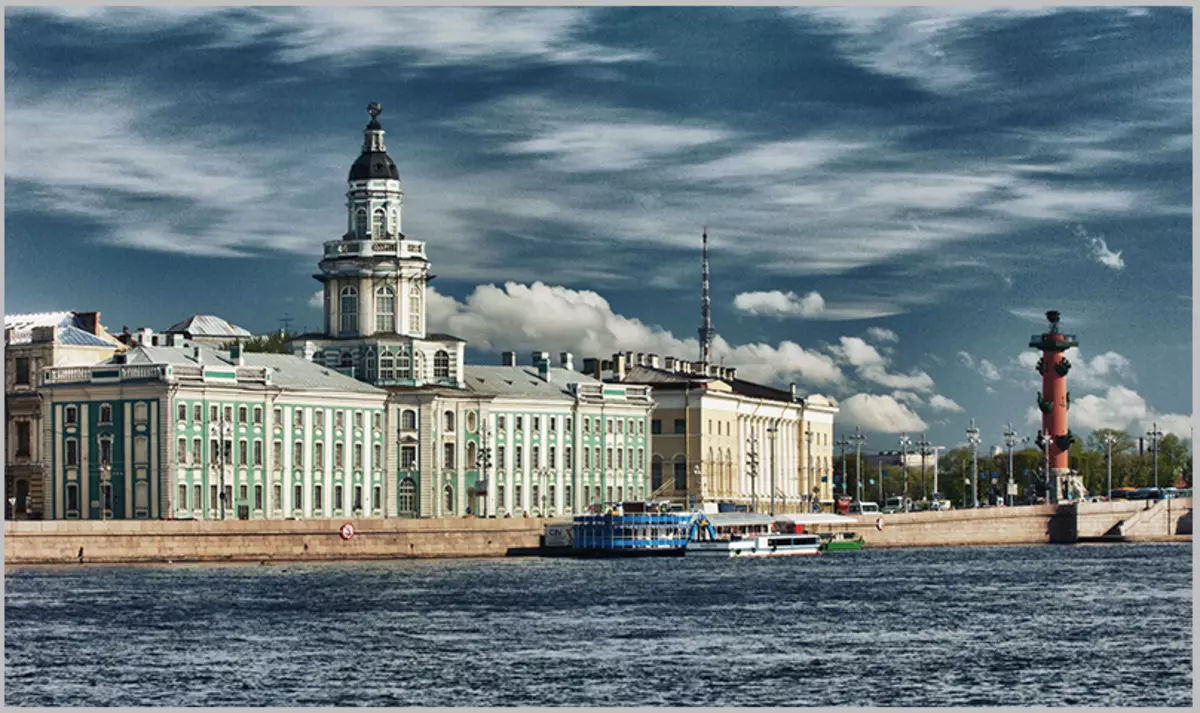
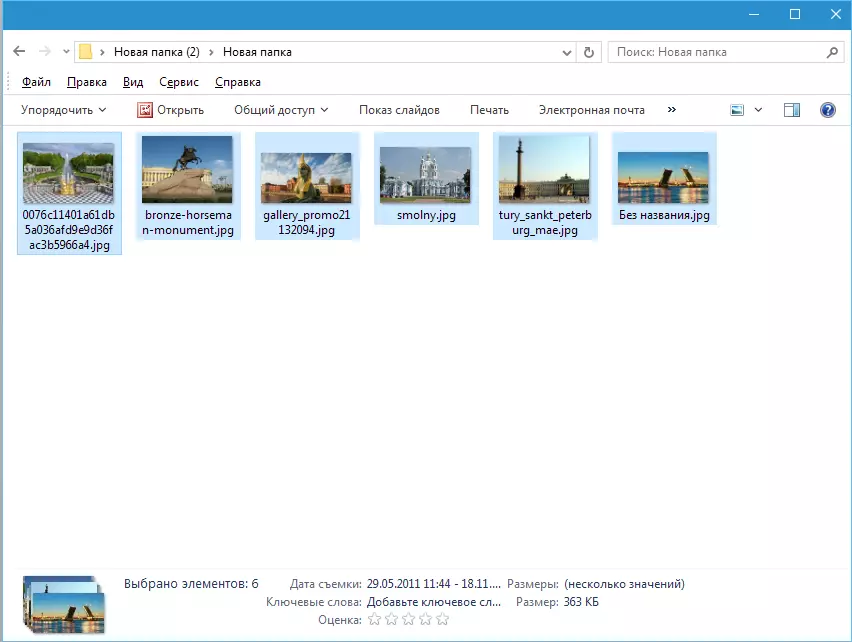
To draw up a collage, take some pictures with scenery of St. Petersburg. For personal convenience considerations, it is better to put them in a separate folder.
Let's start creating a collage.
Open the background image in Photoshop.
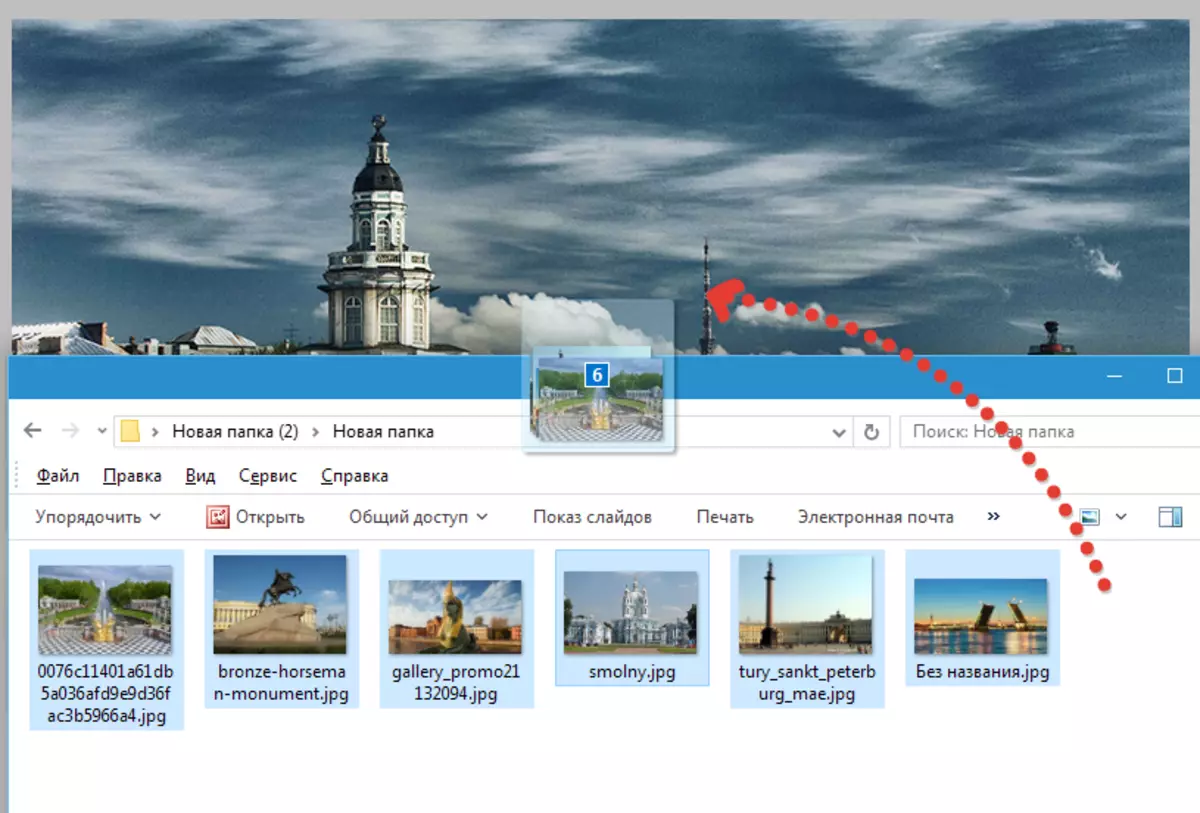
Then we open the folder with the pictures, we allocate everything and drag them to the workspace.
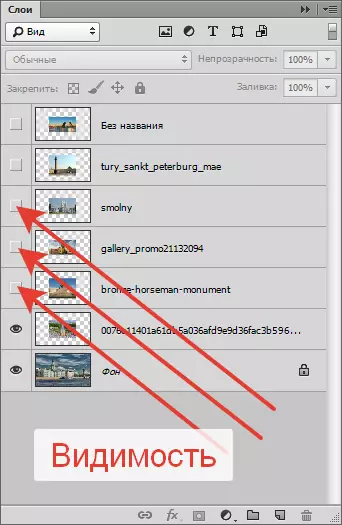
Next, we remove the visibility from all layers, except the lowest. This concerns only the photo that have been added, but not a background image.
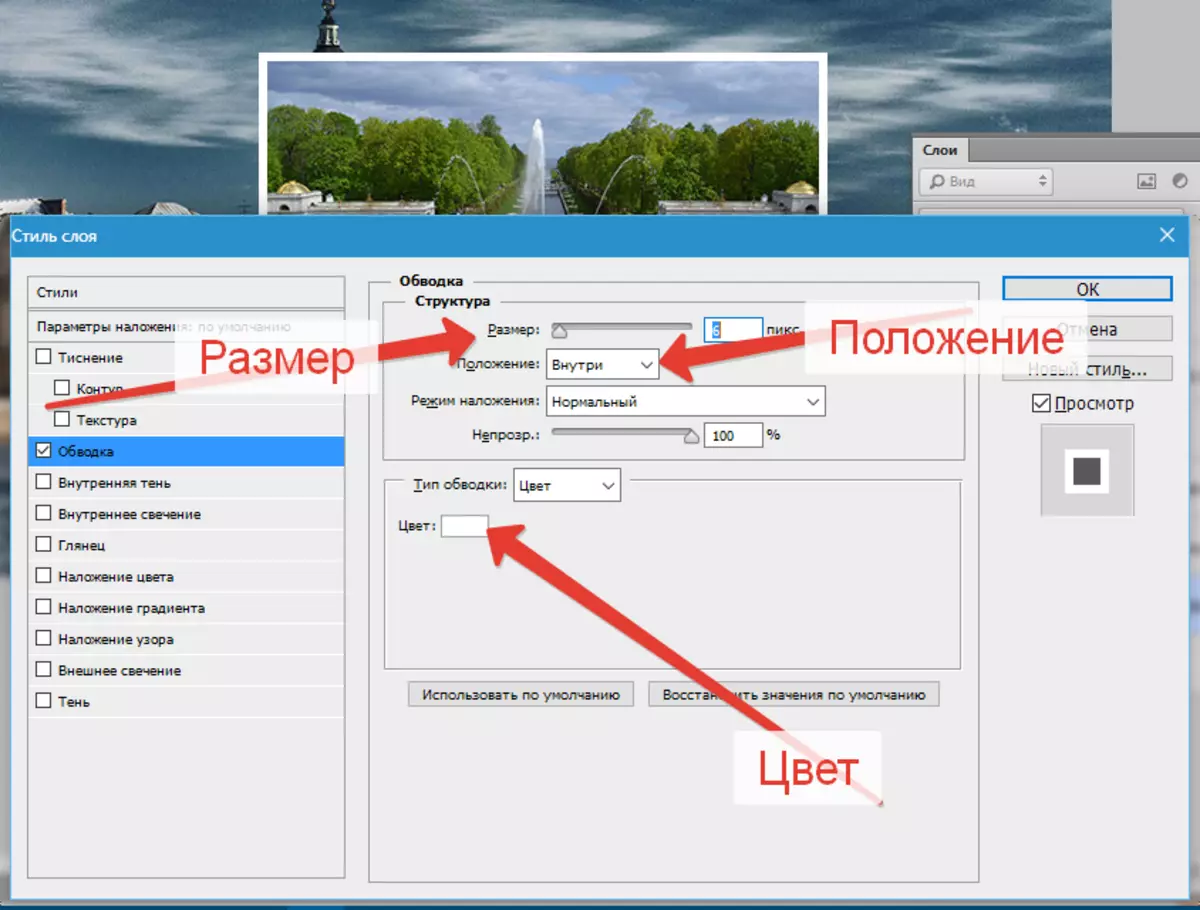
Go to the bottom layer with a photo, and twice click on it. The Style Settings window opens.
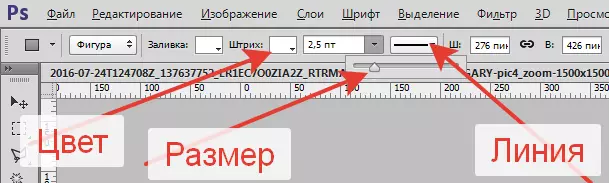
Here we need to customize the stroke and shadow. The stroke will become a frame for our photos, and the shadow will allow separating the pictures one from the other.
Stroke settings: White color, size - "on the eye", position - inside.
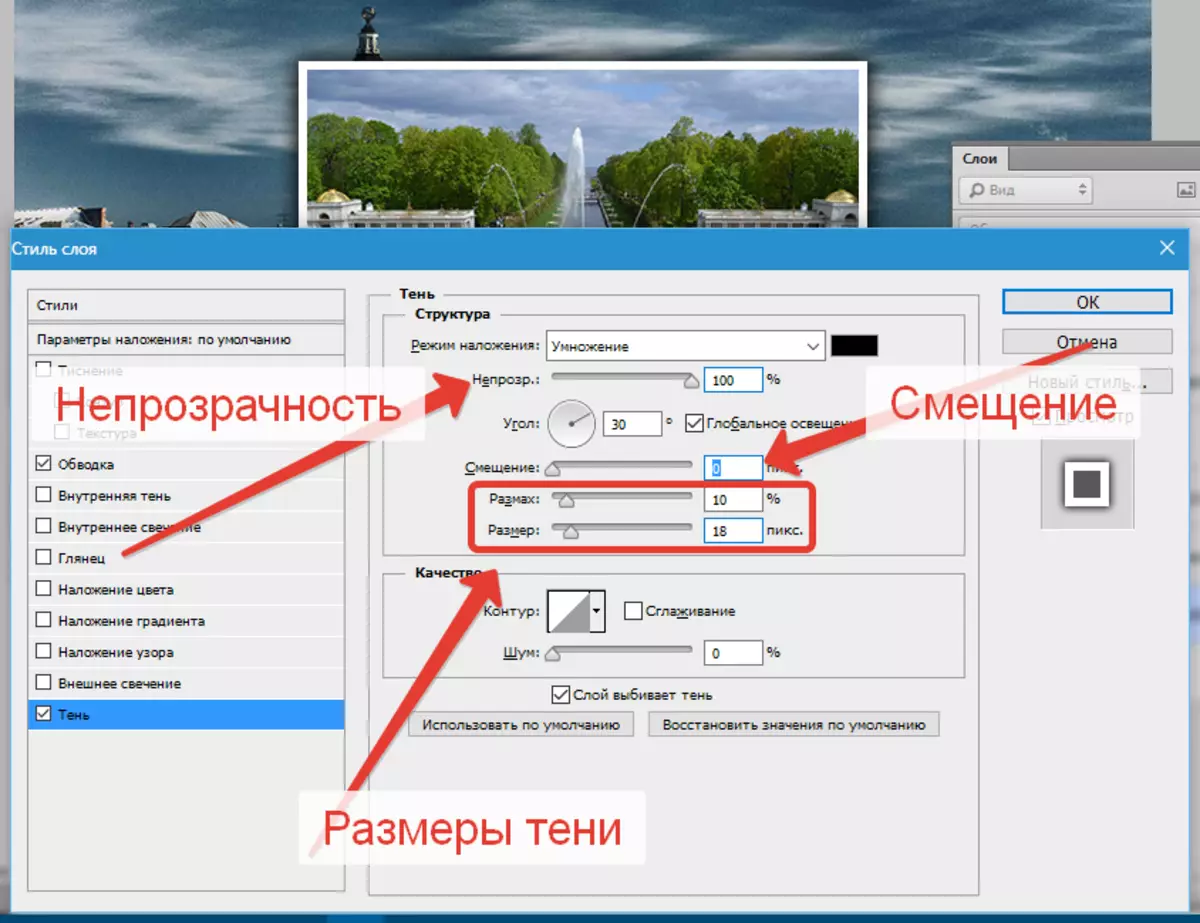
Shadow settings are not constant. We only need to set this style, and subsequently the parameters can be adjusted. The main point is opacity. This value is set 100%. Offset - 0.
Press OK.
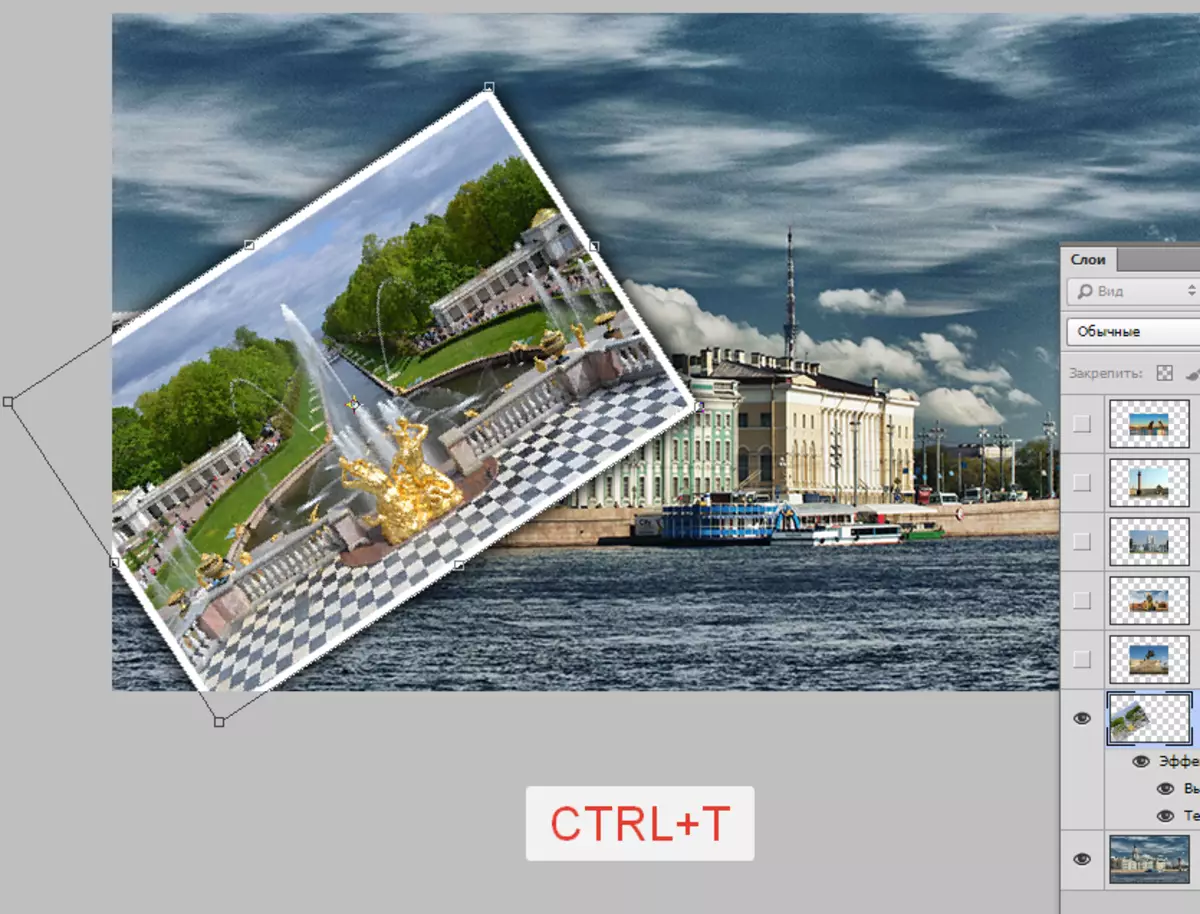
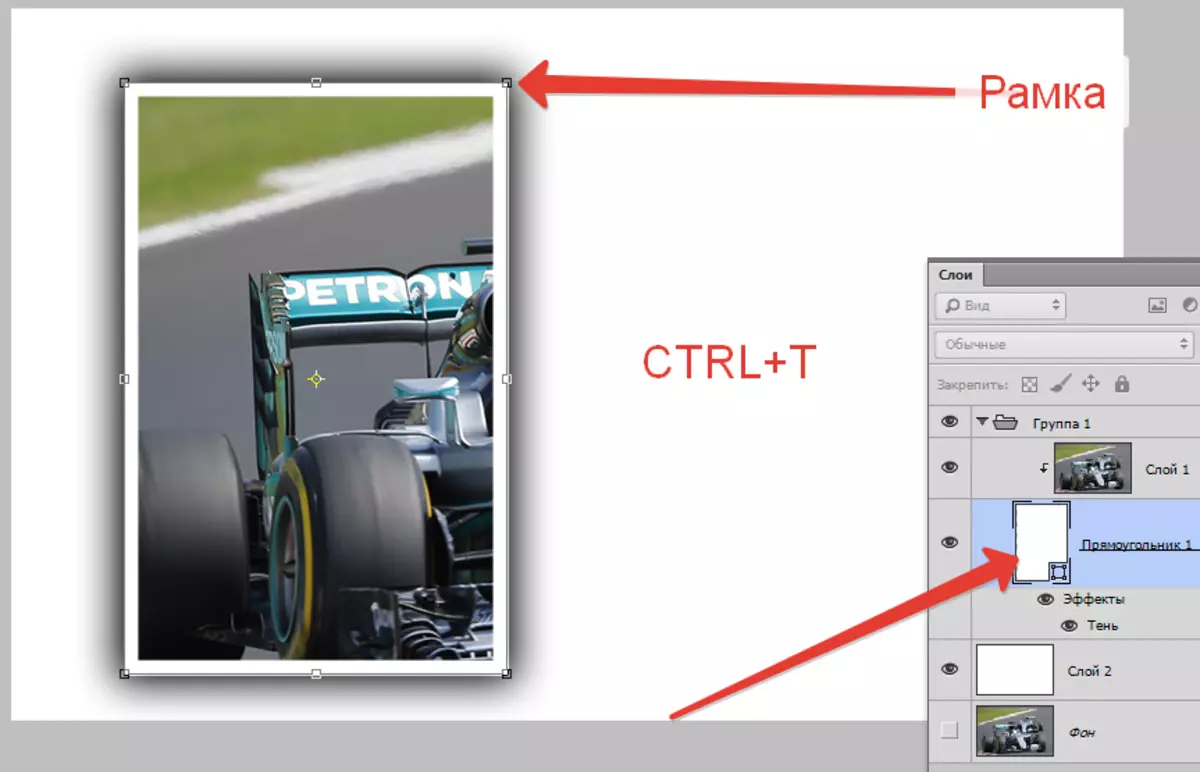
Move the snapshot. To do this, press the key combination Ctrl + T. And drag the photo and, if necessary, turn.
The first shot is decorated. Now you need to transfer styles to the next.
Clamp Alt. , sum up the cursor to the word "Effects" , Press the LKM and drag on the next (upper) layer.

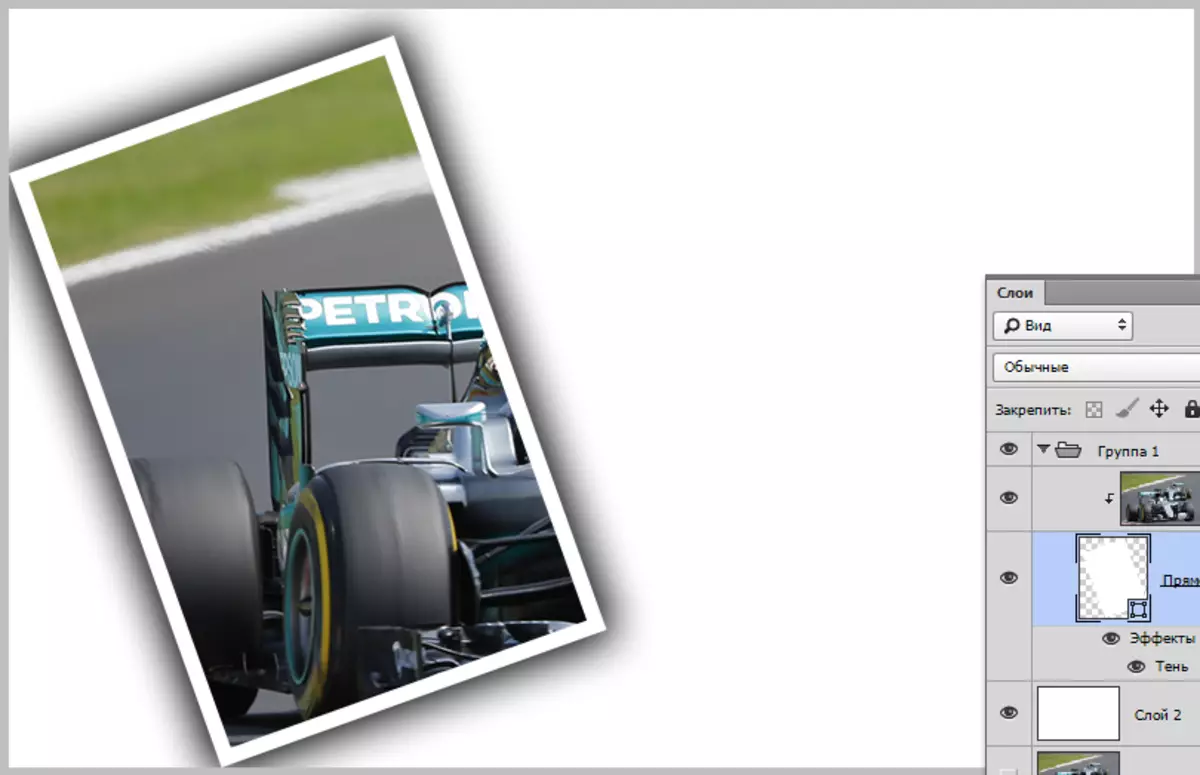
We include visibility for the next snapshot and place it in the right place with free transformation ( Ctrl + T.).
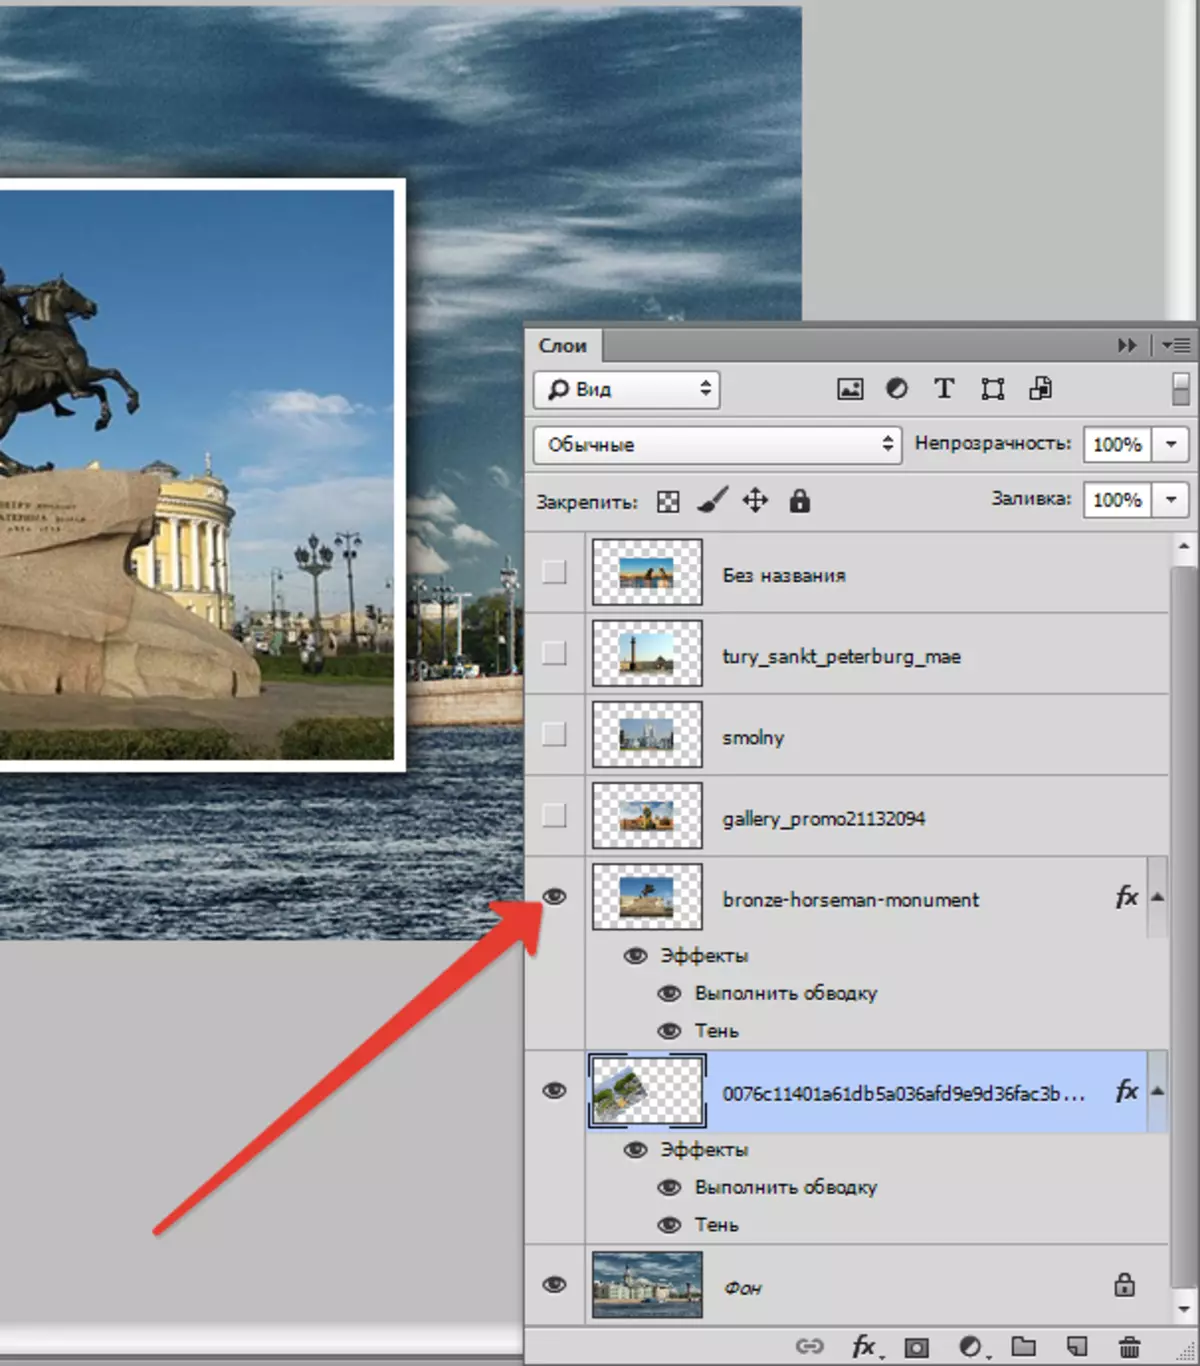
Next by the algorithm. Thinking styles with a pinch key Alt. , turn on visibility, move. Upon completion, see.
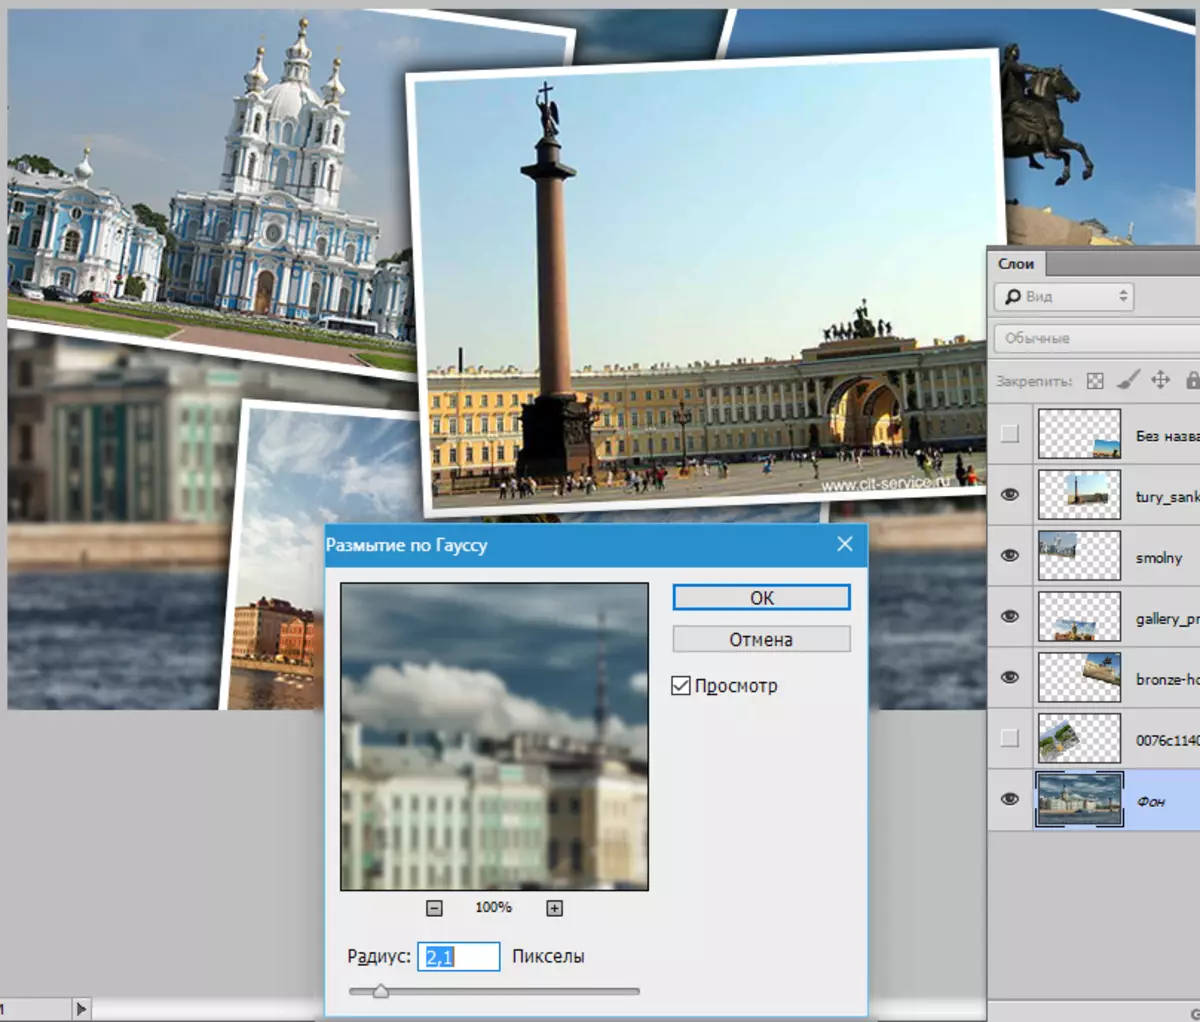
On this compilation of the collage could be considered to be finished, but if you decide to arrange fewer snapshots on the canvas, and the background image is open on a large area, then its (background) needs to be blurred.
Go to the layer with the background, go to the menu "Filter - Blur - Blur in Gauss" . We swallow.
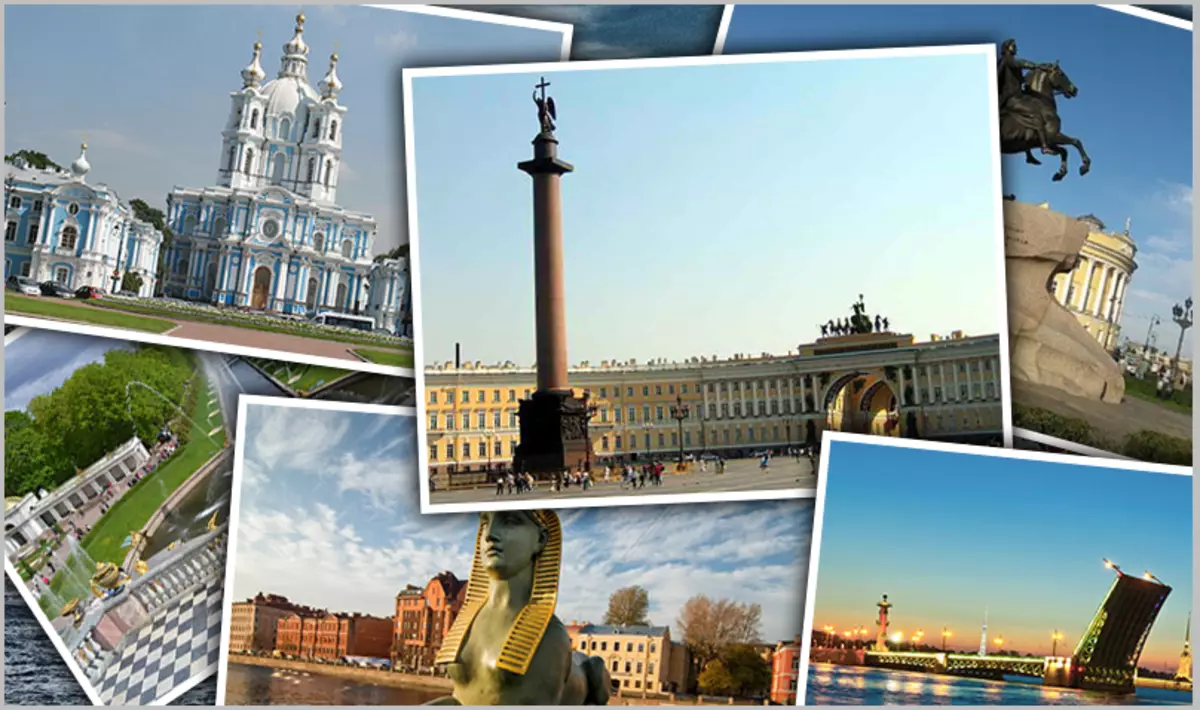
Collage ready.
The second part of the lesson will be a little more interesting. Now let's create a collage of one (!) Snapshot.
First, we will select the right photo. It is desirable that it was as small as possible non-informative sites (a large area of grass or sand, for example, that is, without people, machines, tasks, etc.). The more fragments you plan to place, the more there should be small objects.
This will quite fit.

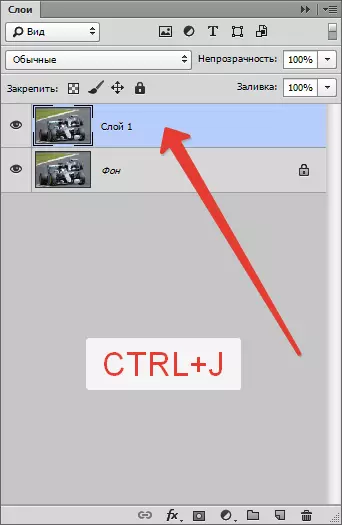
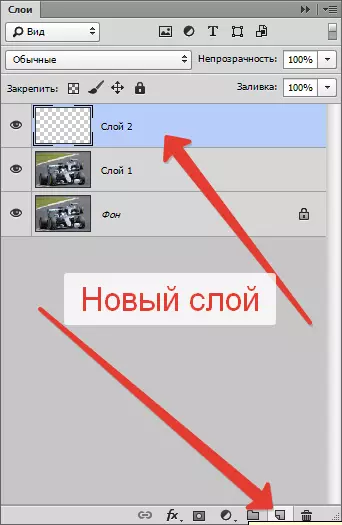
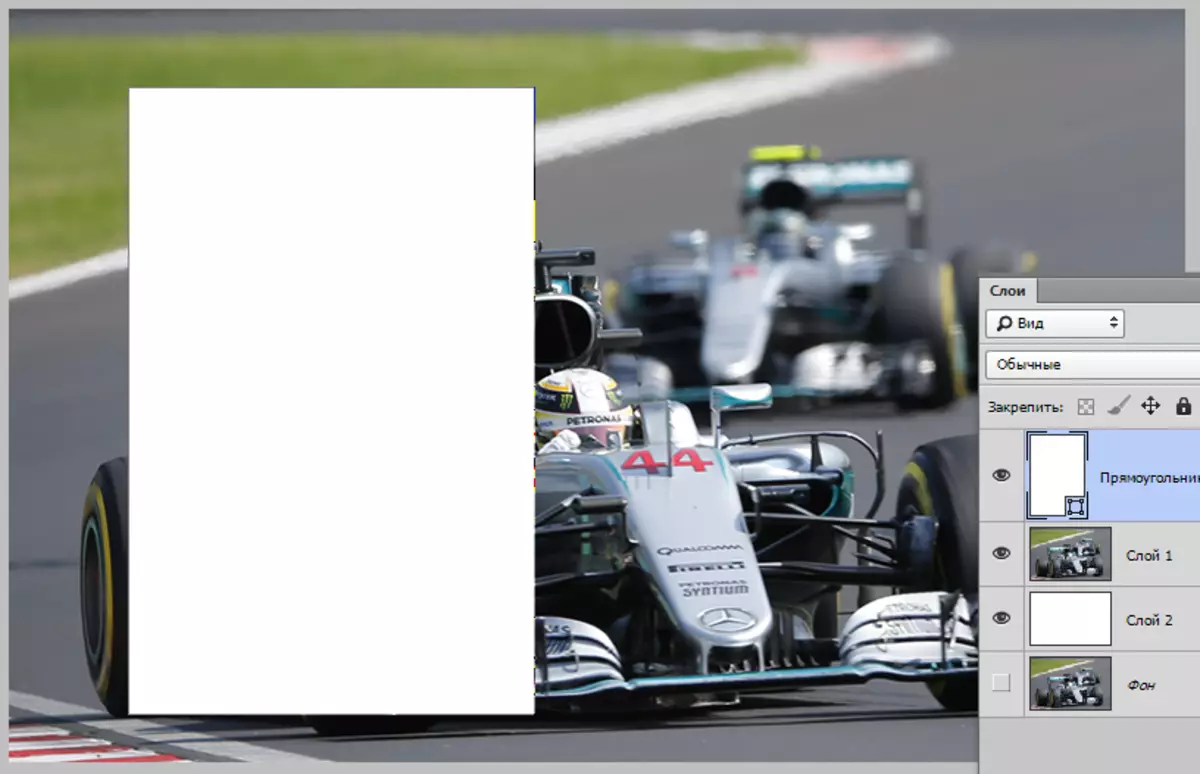
First you need to create a copy of the background layer by pressing the keyboard key Ctrl + J..
Then create another empty layer,
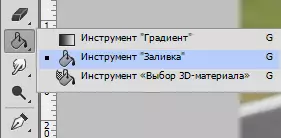
Select tool "Fill"
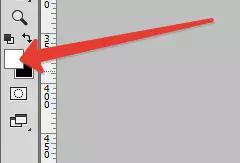
And pour it with white.
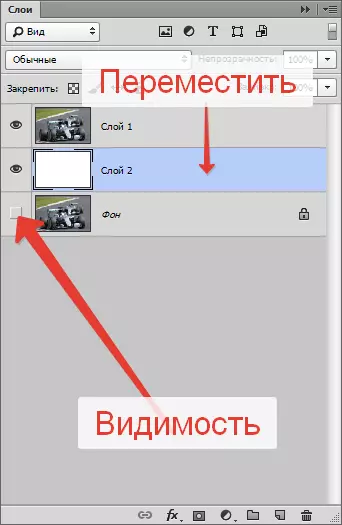
The resulting layer is placed between layers with the image. With the background to take visibility.
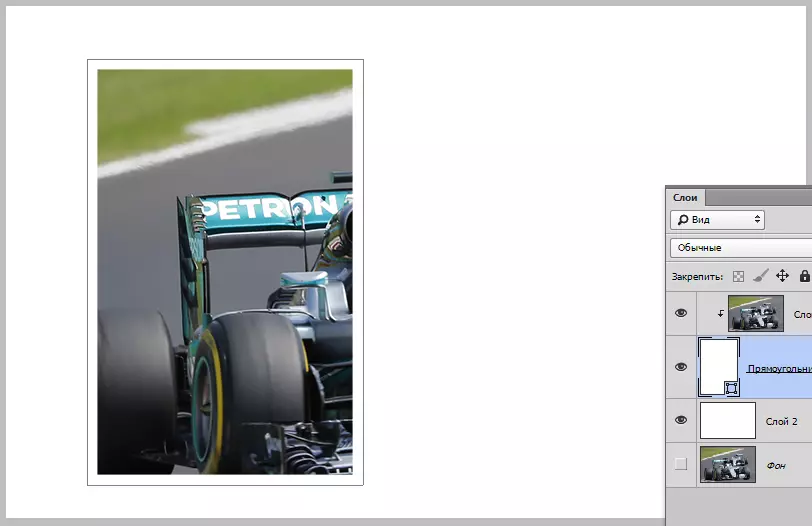
Now create the first fragment.
Go to the top layer and choose the tool "Rectangle".
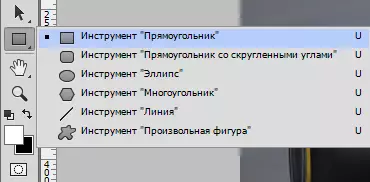
Draw a fragment.
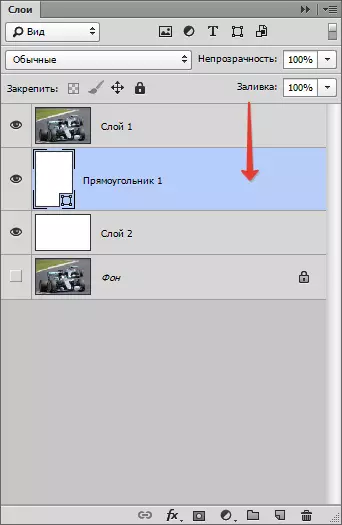
Next, move the layer with a rectangle under the layer with the image.
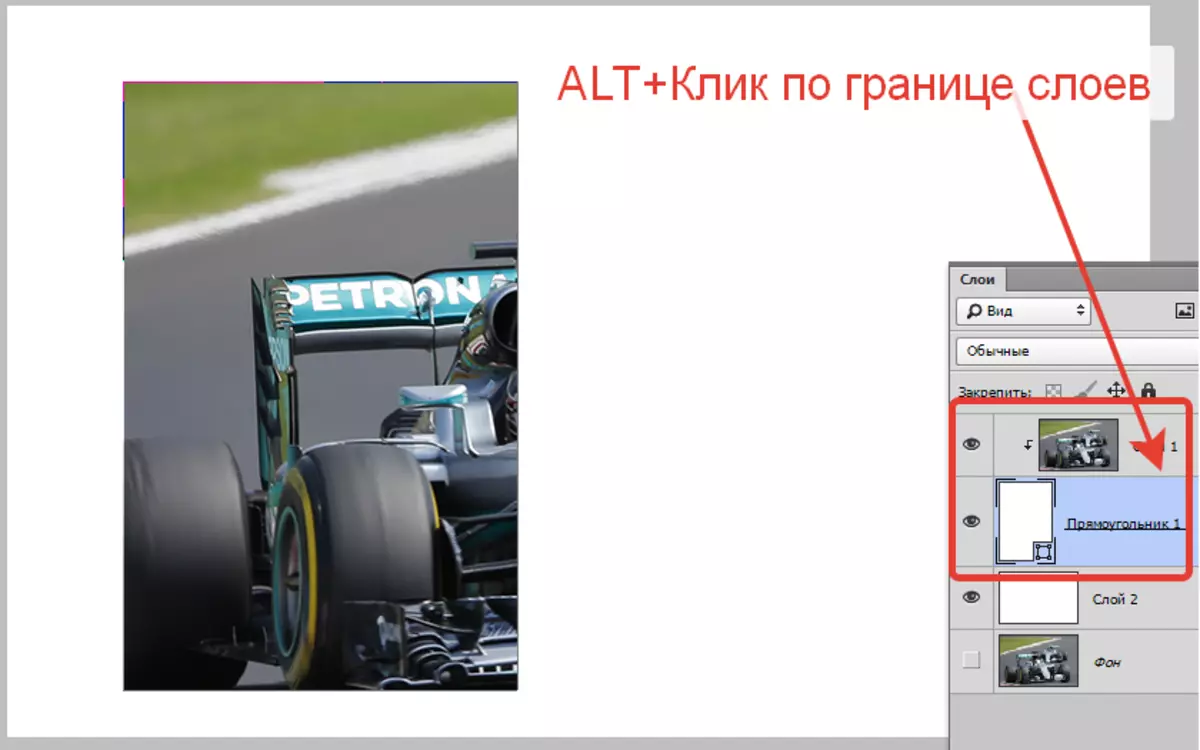
Click key Alt. And click on the border between the upper layer and a layer with a rectangle (the cursor during the hovering should be swapped). Create a clipping mask.
Then, being on a rectangle (tool "Rectangle" It should be activated) We go to the top panel of the settings and adjust the barcode.
Color white, solid line. Size select the slider. This will be a photo frame.
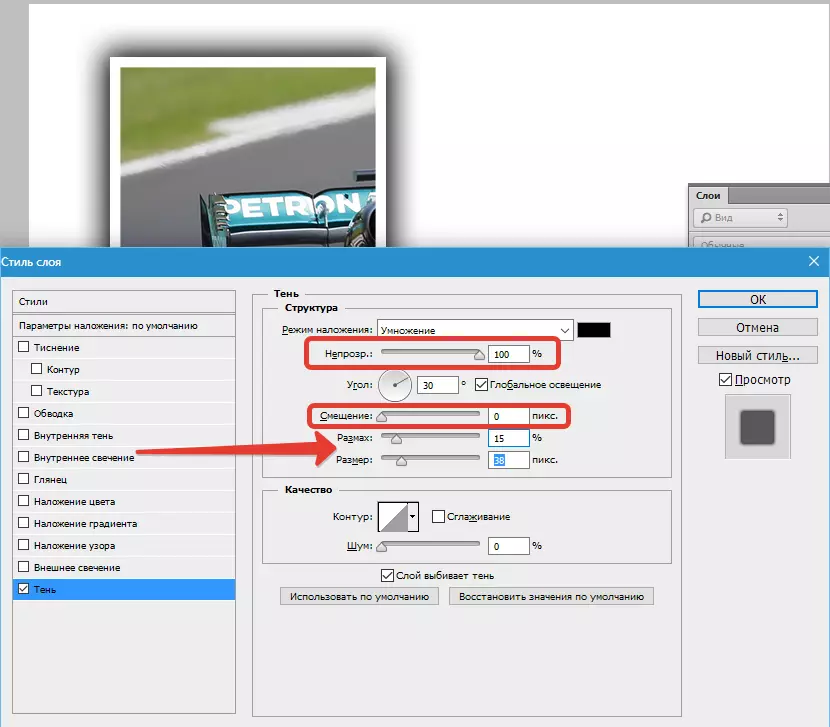
Next twice click on a layer with a rectangle. In the window that opens, choose the "Shadow" settings window and configure it.
Opacity exhibit 100%, Bias - 0. The remaining parameters ( Size and scope ) - "approximately". The shadow must be a bit hypertrophored.
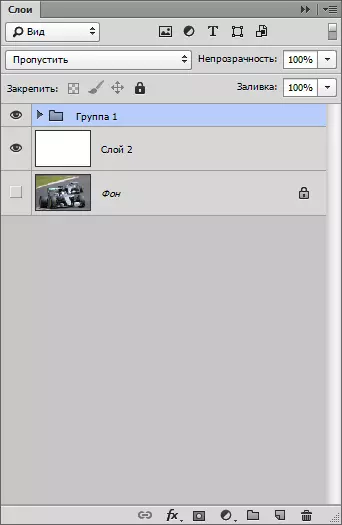
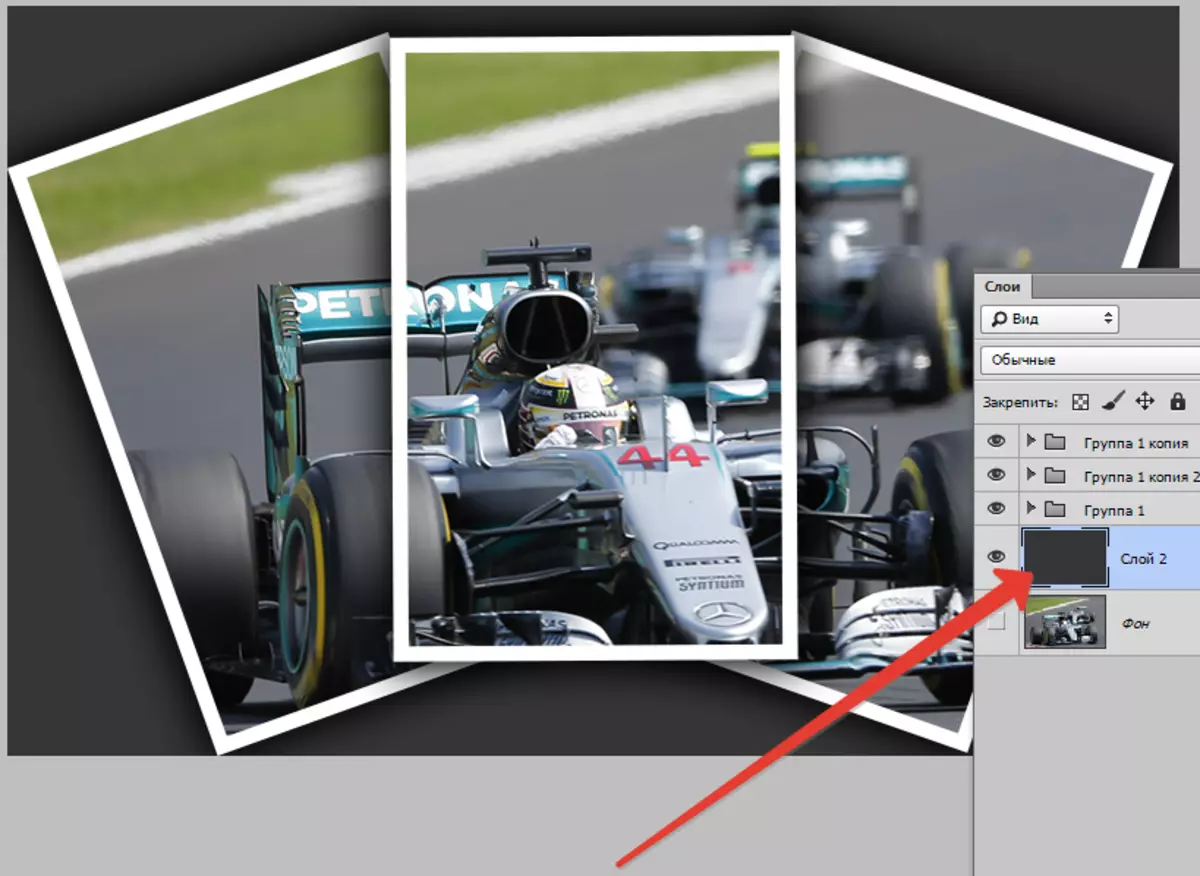
After the style is configured, click OK . Then clamp Ctrl and click on the upper layer, thereby highlighting it (two layers are now highlighted), and click Ctrl + G. , combining them into the group.
The first basic fragment is ready.
Let's do it in its move.
To move the fragment, it is enough to move the rectangle.
Open the created group, go to the layer with a rectangle and click Ctrl + T..
With this frame, you can not only move the fragment on the canvas, but also rotate. Dimensions are not recommended. If you do this, you will have to reinstate the shadow and frame.
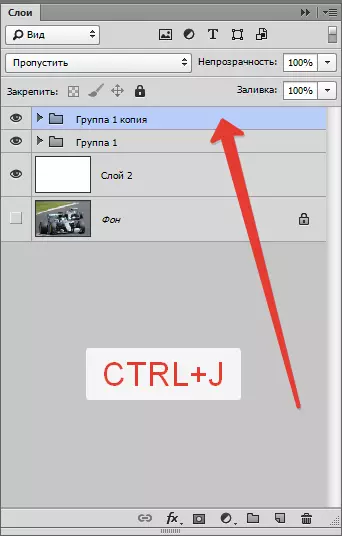
The following fragments are created very simply. Close the group (so as not to be interfered) and create it a copy of the key combination Ctrl + J..
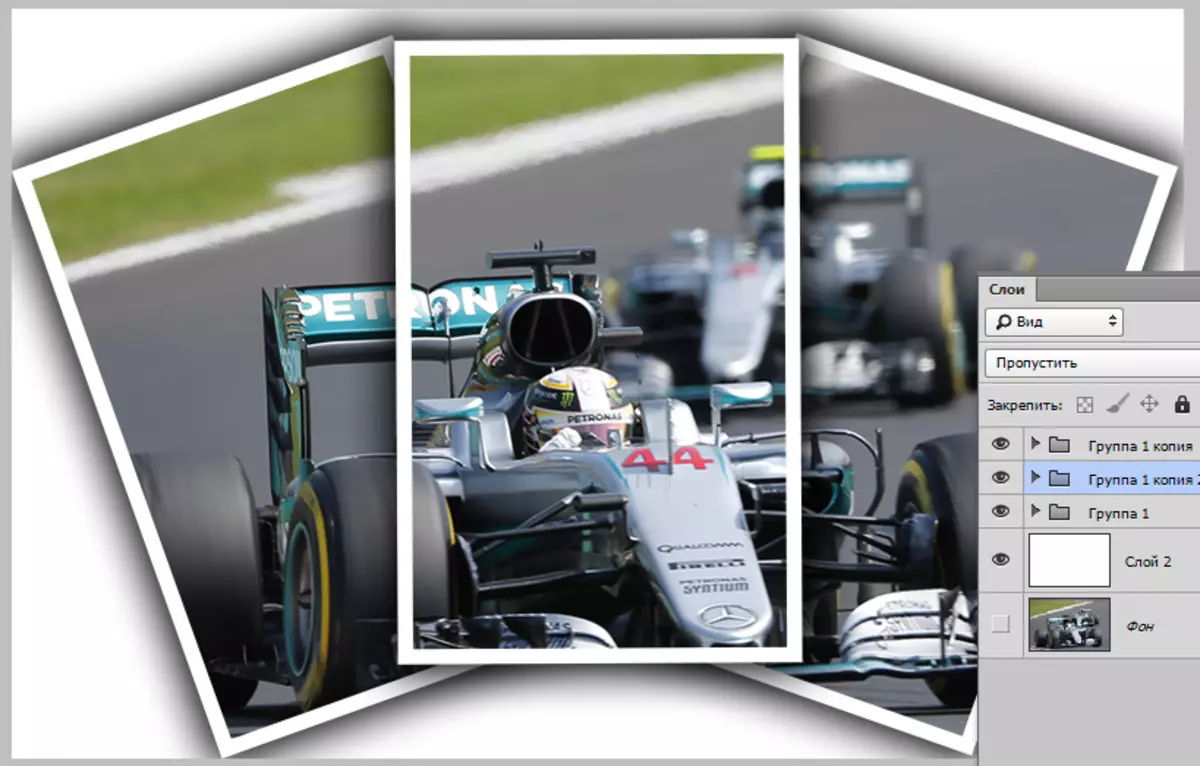
Next, everything is on the template. Open a group, go on a layer with a rectangle, click Ctrl + T. and move (turn).
All obtained groups in the layers palette can be "mixed".
Such collages are better looking at a dark background. Such a background can be created, bay (see above) White background layer Dark color, or place a picture with another background.
To achieve a more acceptable result, you can slightly reduce the size or scope of the shadow in the styles of each rectangle separately.
A small addition. Let us give our collage some realism.
Create a new layer on top of all, click SHIFT + F5. and hill it 50% gray.
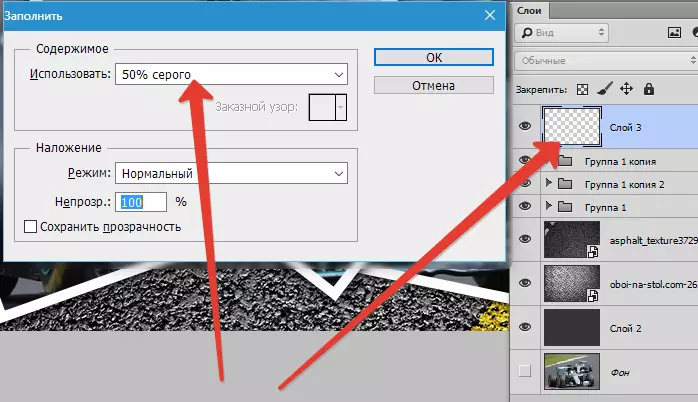
Then go to the menu "Filter - noise - add noise" . Customize the filter on the same grain:

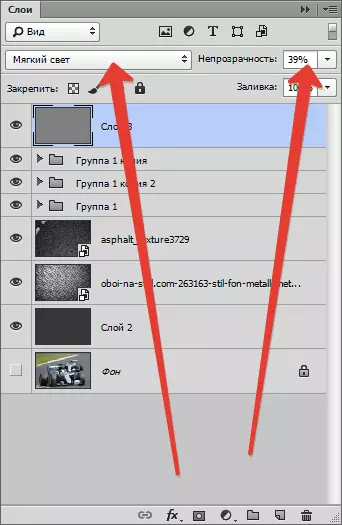
Then change the overlay mode for this layer on "Soft light" And play with opacity.
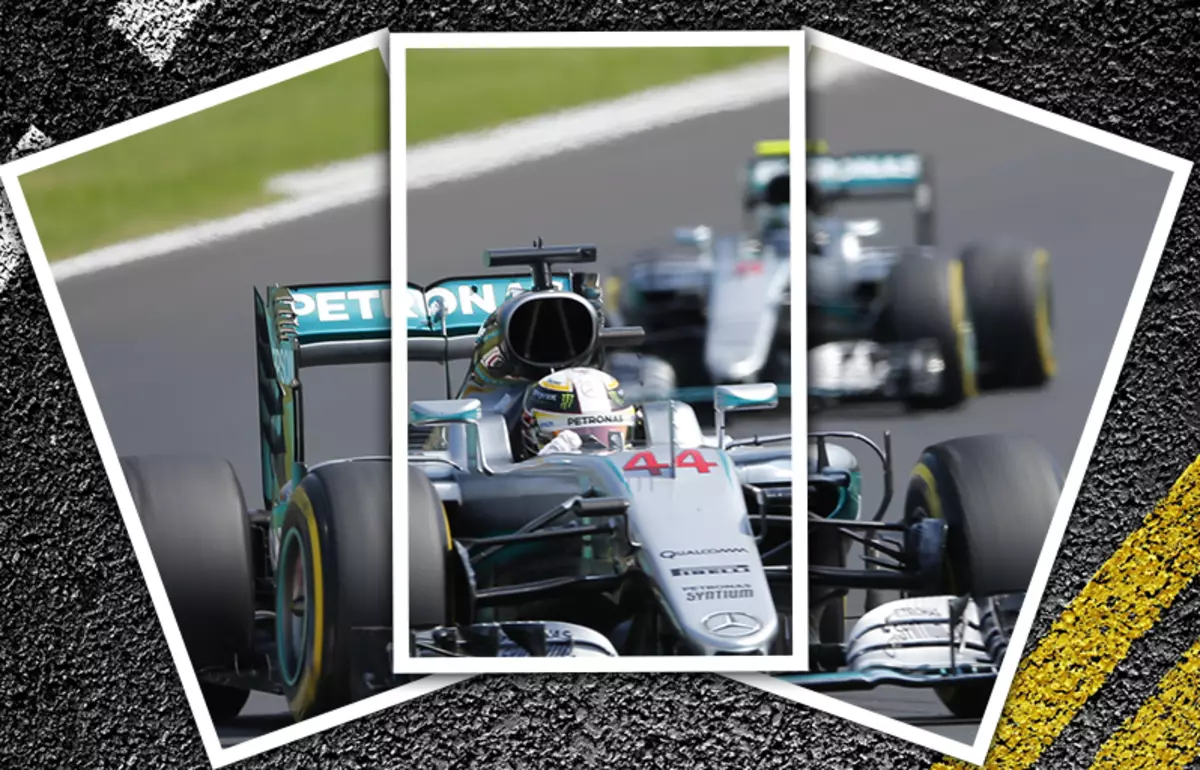
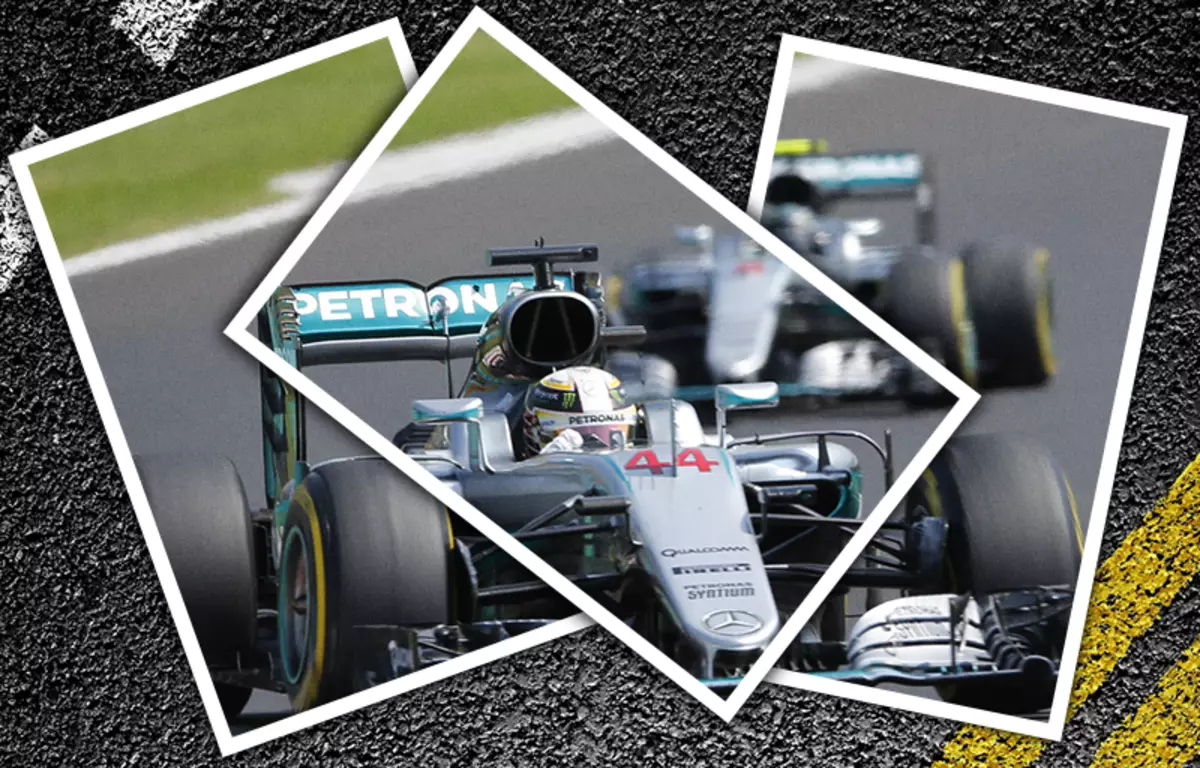
The result of our lesson:
Interesting reception, isn't it? With it, you can create collages in photoshop, which will look very interesting and unusual.
The lesson is over. Create, create collages, good luck in your work!