

Windows Movie Maker is a pretty popular free video editor that can be downloaded in Russian. But because of its not completely understandable interface, the program often makes users think: what and how to do. We decided to assemble the most popular questions in this article and give answers on them.
Windows Movie Maker is a video editor of the video from Microsoft, which was included in the standard "Supplies" of the Windows operating system up to Vista version. Despite the fact that the application has not been supported for a long time, it does not rush to lose popularity among users.
Let's look at how to use the video editor Movie Meker.
How to add files to the program
Before you proceed to editing the video, you will need to add files with which further work will be carried out.
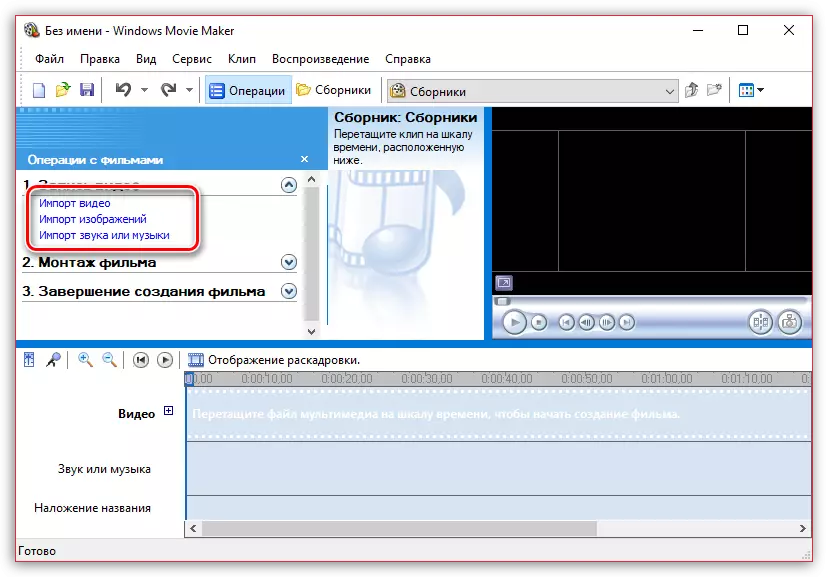
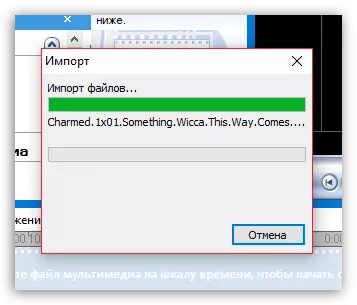
- To do this, run the Windows Movie Maker program. Click on the "Operation" button to open an additional menu, and then press the button according to the type of file you want to download: If this is a video recording, click on "Import video" if music, respectively, "import of sound or music" and etc.
- The import process will begin, the duration of which will depend on the size of the loaded file. As soon as the procedure is completed, this window will automatically hide.
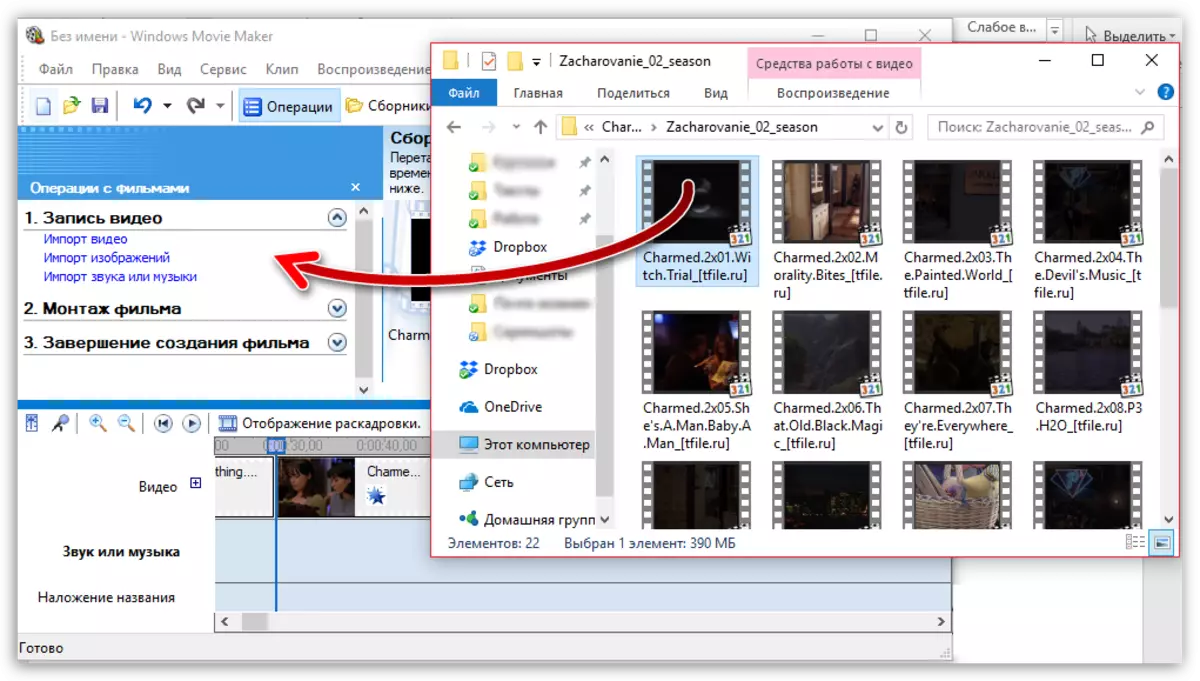
- Video can be added to the program and much easier: just move it into the program window. But you should do this only when the "Operations" tab is open.
How to trim video in Windows Movie Maker
To trim the video, download it into the editor and switch in the "Display of the time scale" mode. Now you need to carefully view the video and determine which area you need to cut. Using the "Divide into two parts" button, make a video by moving the slider to the necessary places. Then remove all unnecessary fragments.
If you just need to trim the video first or from the end, then move the mouse to the beginning or end of the time scale and when the trim icon appears, drag the slider for a while to trim.
See this article in more detail in this article:
How to trim the video in Windows Movie Maker
How to cut a fragment from video
Often, users are required not easy to trim the video, and cut out an extra fragment that can be located, for example, in the center. But it is very simple to do it.
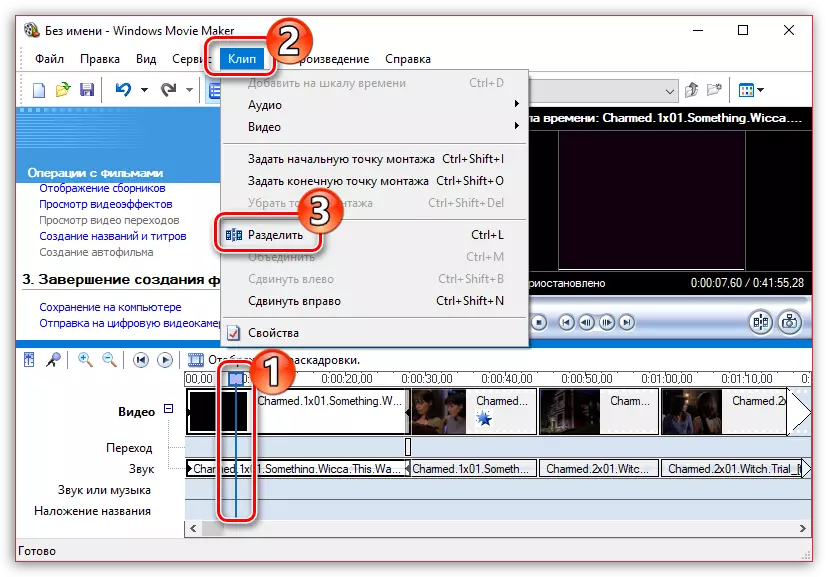
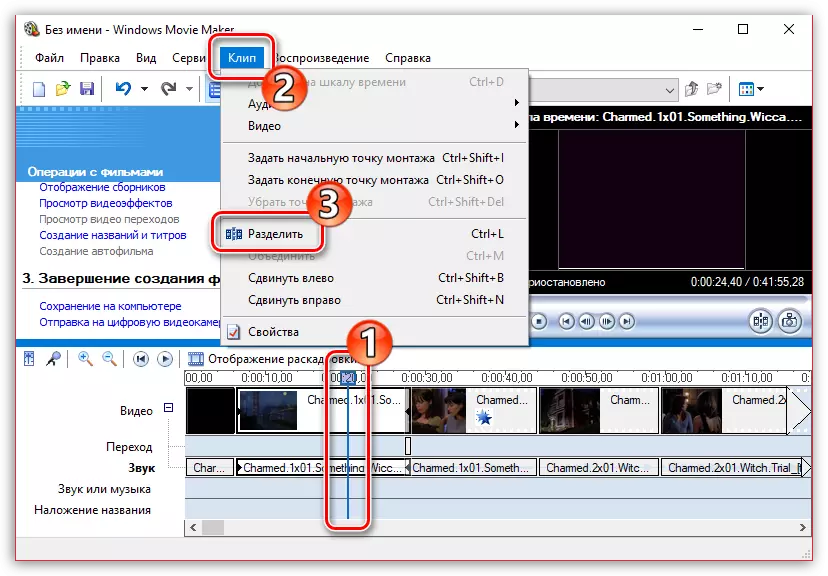
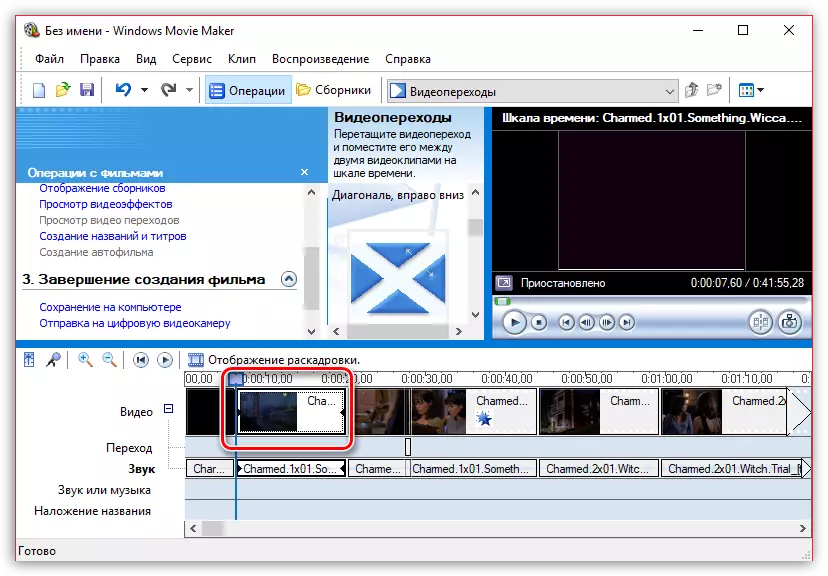
- To do this, move the slider on the timeline in the video in the area where the start of the fragment that needs to be cut is indicated. In the top of the window, open the Clip tab at the top of the window and select "Divide".
- As a result, instead of one roller you will have two separate. After moving the slider on the timeline, now in the area where the end of the cut cut will be located. Perform a separation again.
- At the end, select the separated segment with one mouse click and remove it with the DEL key on the keyboard. Ready.
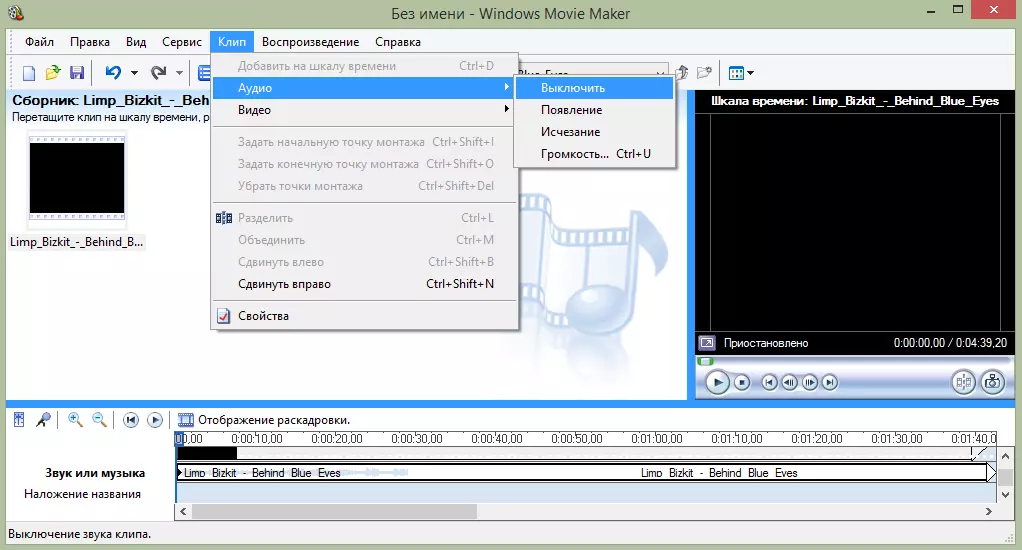
How to remove with video sound
To remove the video from the video, you must open it in Windows Movie Maker and at the top to find the menu "Clips". Find the "Audio" tab and select "Disable". As a result, you will receive a video without sound to which you can apply any audio recording.
How to apply an effect on a video
To make the video brighter and more interesting, you can impose effects on it. You can also do it using Windows Movie Maker.
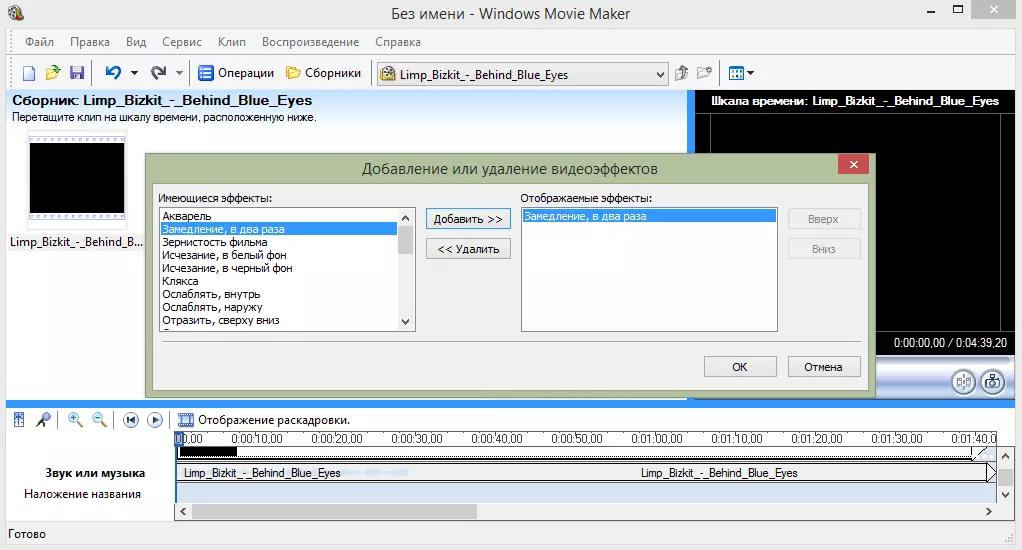
To do this, download the video and locate the "Clip" menu. There, click on the "Video" tab and select "Video Effects". In the window that opens, you can both impose effects and delete them. Unfortunately, the preview function in the editor is not provided.
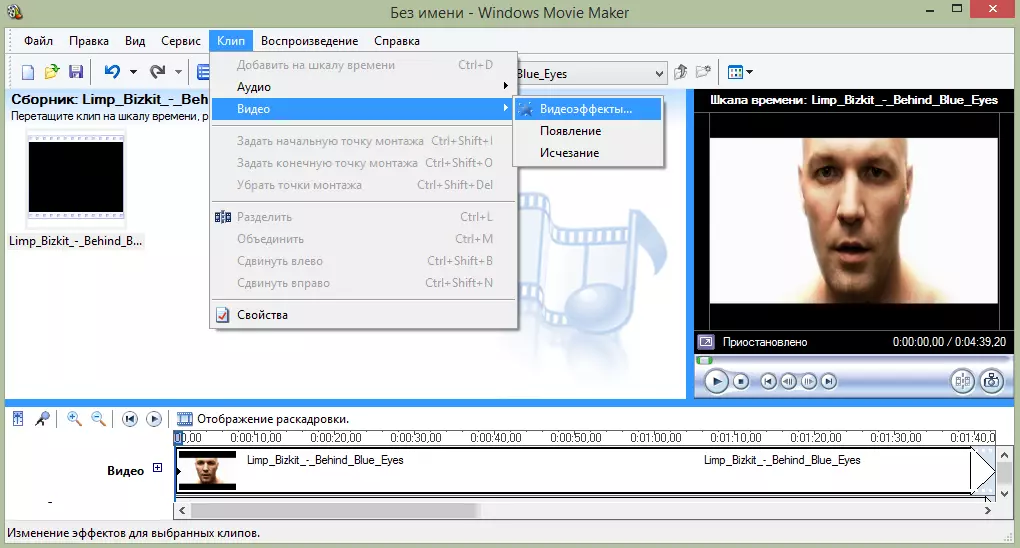
How to speed up video playback
If you want to speed up or slow down video playback, then you need to download a video, highlight it and find it in the menu item "Clip". Turn over the "Video" tab and select "Video Effects". Here you can find such effects as "deceleration, twice" and "acceleration, twice."
How to video to impose music
Also in Windows Movie Maker, you can simply and easily apply audio recording on video. To do this, you need the same as the video, open music and drag it to the video for the right time with the mouse.
By the way, just like a video, you can crop and impose effects to music.
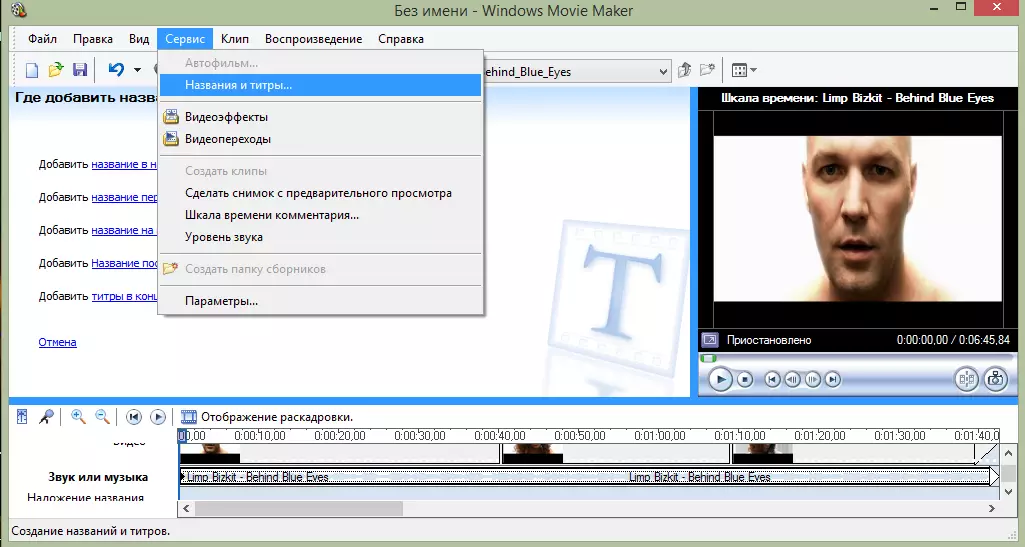
How to add titers in Windows Movie Maker
You can add credits to your video clip. To do this, find the "Service" menu, and then select "Title and Titres". Now you need to choose what and where exactly you want to post. For example, titers at the end of the film. A small sign appears that you can fill out and add to the clip.
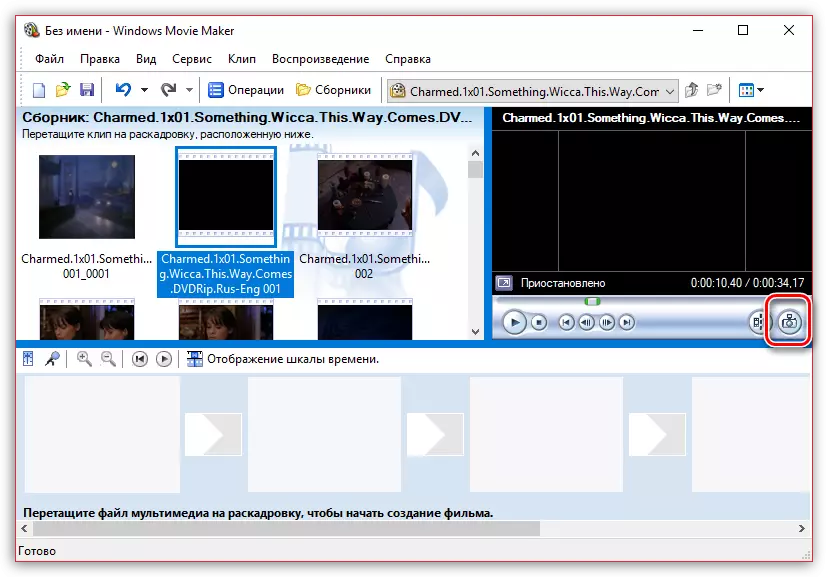
How to keep footage from video
Quite often, users need to "pull out" the frame from the video, saving it as an image on the computer. Make it in Movie Maker can be literally in a couple of moments.
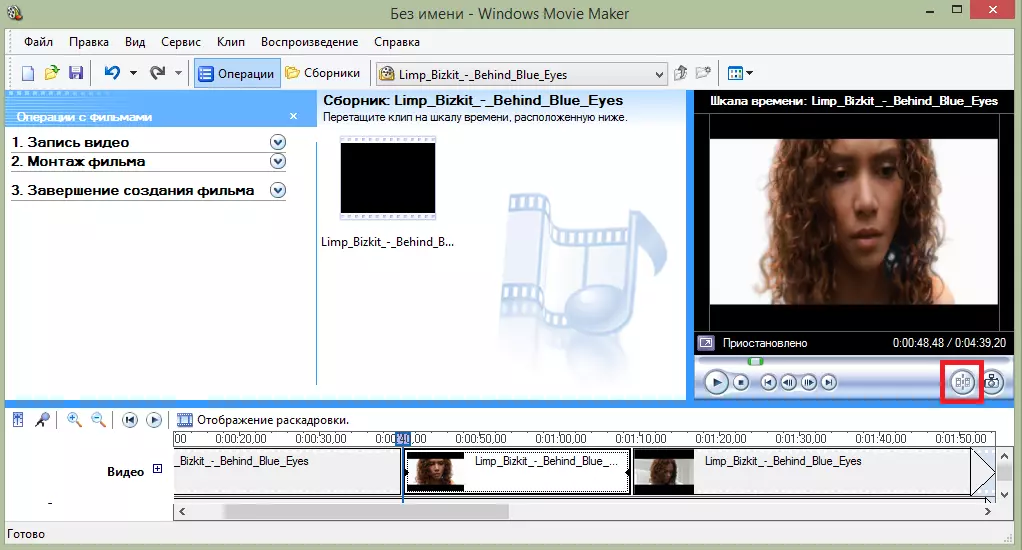
- Having opening the video in Movie Maker, using a slider on a timeline, move it to that part of the video so that exactly the frame that you want to save on the screen.
- To illuminate the frame, in the right area of the program window on the button below.
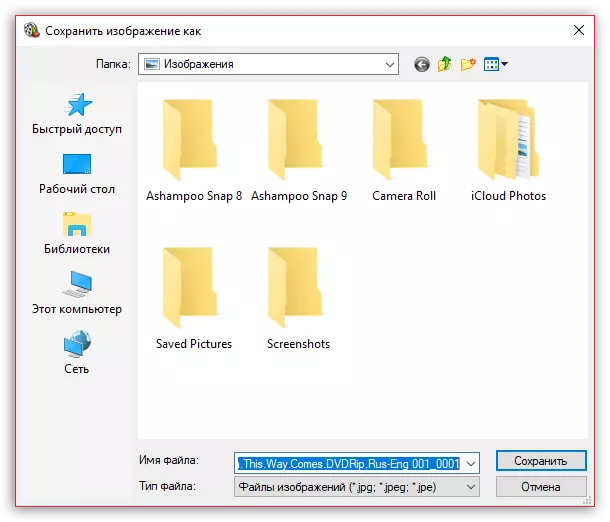
- The Windows Explorer will appear on the screen in which you only remains to specify the final folder for the stored image.
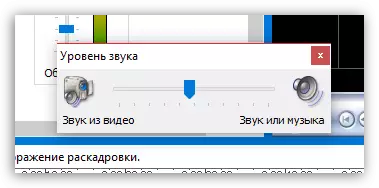
How to set the sound volume
If, for example, you mount the video with comments, the volume of the output audio track with background music should be so that it does not block his voice.
- To do this, in the bottom left area, click on the "Sound Level" button.
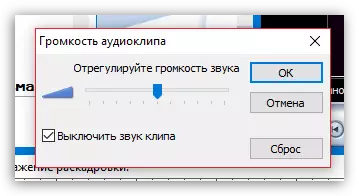
- A scale will be displayed on the screen by moving the slider on which you can or make the predominance of sound from the video (in this case, move the left slider), or the predominance of separately loaded sound or music (the slider should be right).
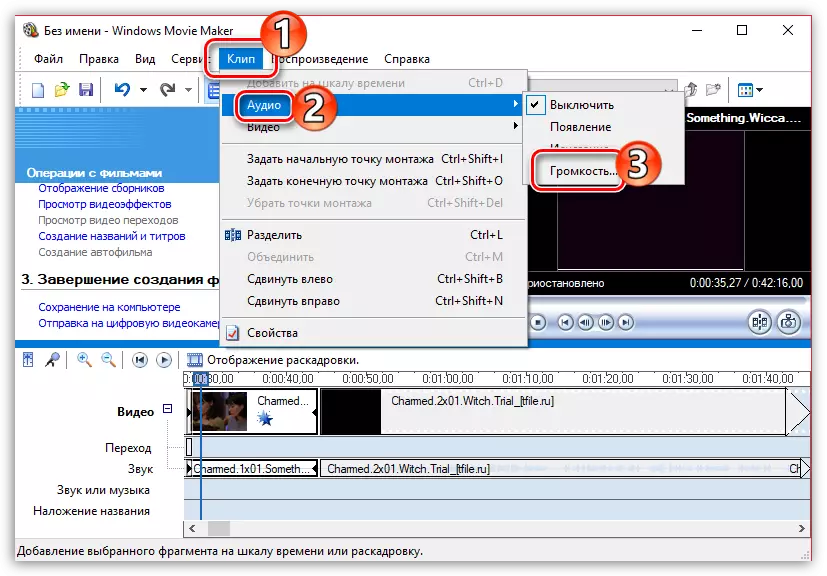
- You can go to a few other way: highlight the video or sound on the timeline or sound, the volume for which you want to configure, and then at the top of the window, click on the "Clip" tab, and follow the "Audio" menu - "Volume".
- A scale will be displayed on the screen, with which you can adjust the volume of the sound.

How to glue several separate rollers
Suppose you have a few separate videos on your computer, which must be connected to one song.
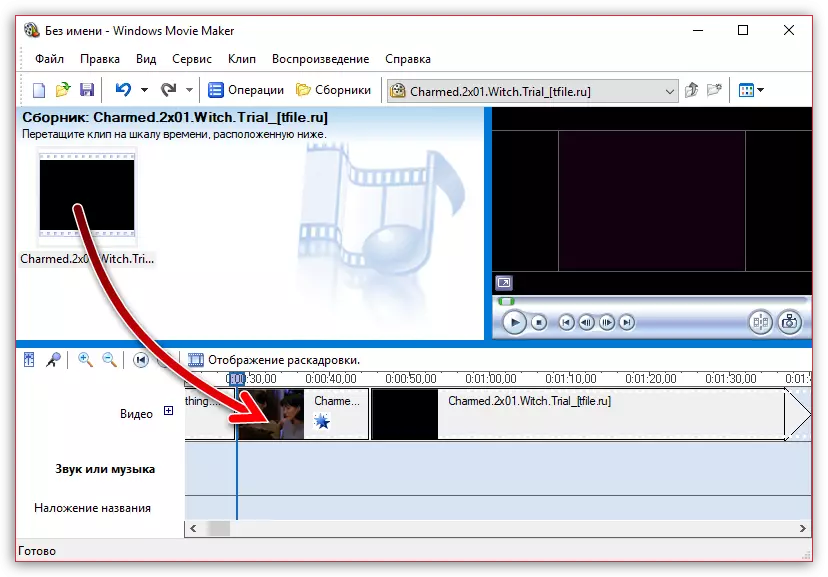
- Load a video that will be the first to go with a gluing video, and then drag it with the mouse in the timeline. Video will consolidate.
- If necessary, again opening the "Operations" tab, drag the video to the movie Maker video, which will follow the first. By adding it to the program, drag it to the timeline exactly in the same way. Similarly, do with all the rollers that you need to glue.
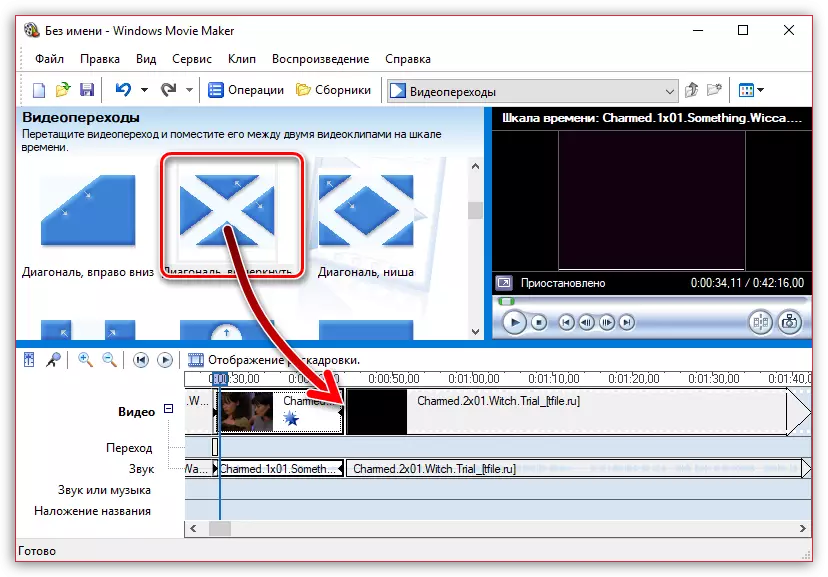
How to add transitions
If you do not apply transitions to glued videos, then one roller will be replaced by others sharply, which, you see, it will look crawled. You can solve the problem by adding before the start of each video transition.
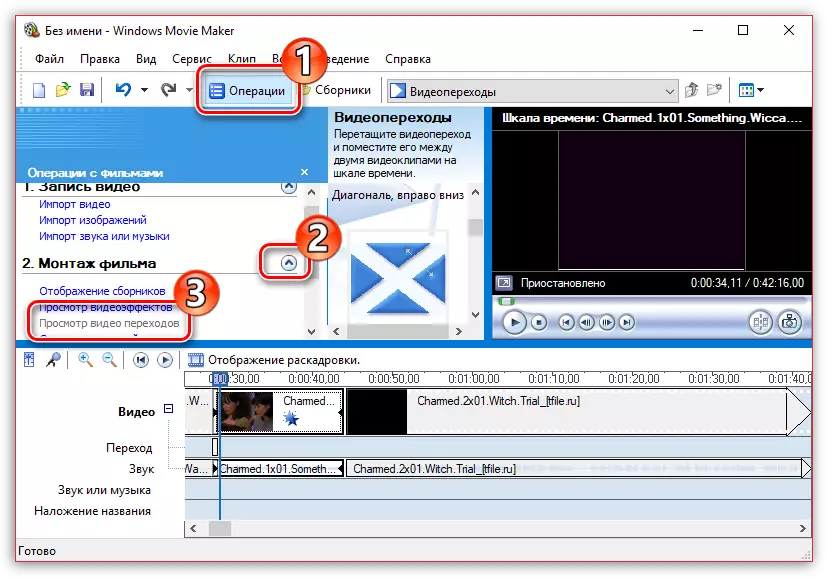
- Open the "Operations" section and deploy the Mounting Video tab. Select "View video transitions".
- The screen displays the list of available transitions. Finding suitable, drag it with the mouse at the junction between the two rollers, and it will fix it there.
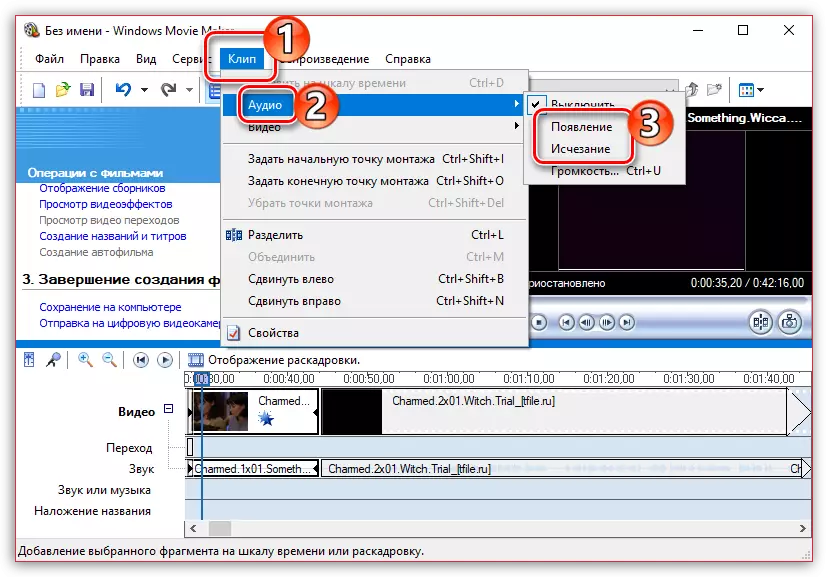
How to set up smooth transitions between sound
In the same way as in the video, the sound after gluing the default is replaced by another. So that there is no such, for sound you can apply smooth entry and attenuation.
To do this, highlight the roller or sound track by one mouse click on the time scale, then open the "Clip" tab at the top of the program window, go to the "Audio" section and tick one or immediately two items: "appearance" and "disappearance".
How to save video to computer
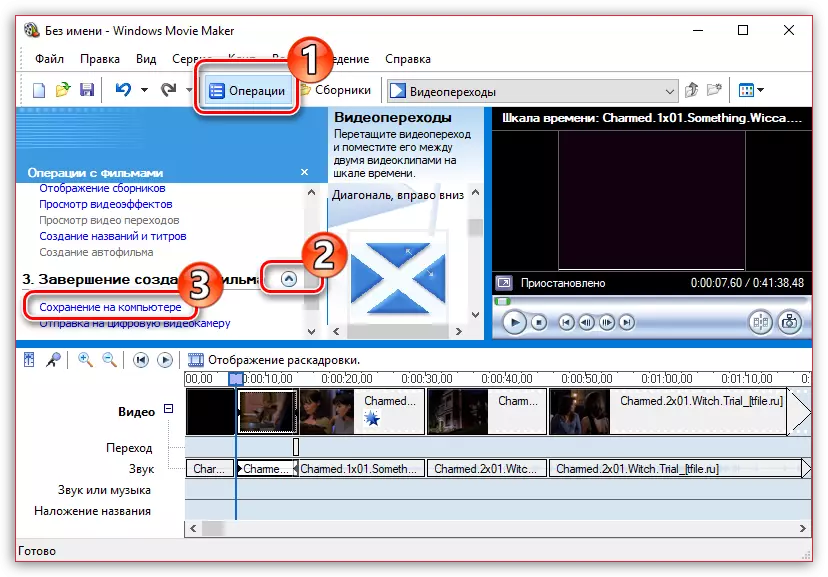
Finally, finally, the installation process in Movie Maker, you remain the final stage - save the resulting result to the computer.
- To do this, open the "Operations" section, deploy the Full Creation tab and select "Saving on your computer".
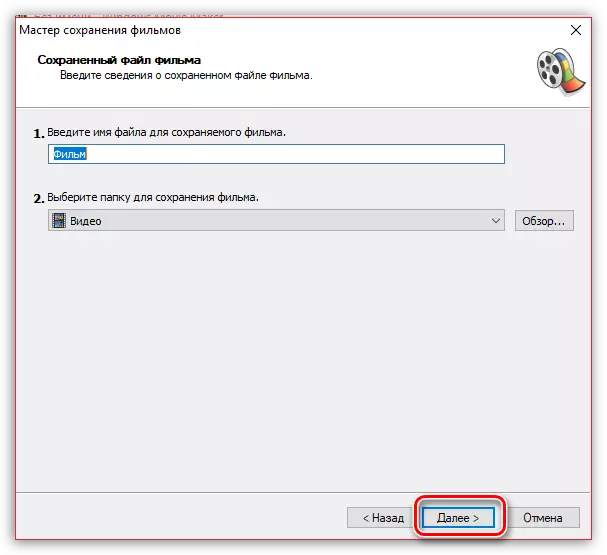
- The screen will disappear the movie wizard in which you need to specify a name for your roller and specify the folder on the computer where it will be saved. Click on the "Next" button.
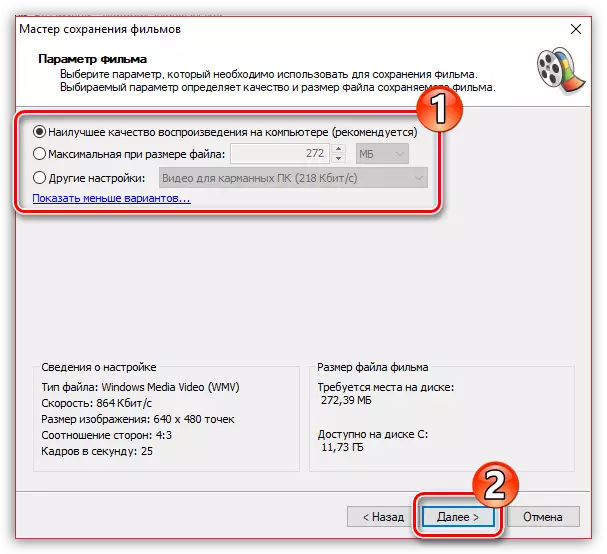
- If necessary, install quality for video. At the bottom of the window you will see its final size. Select the Next button.
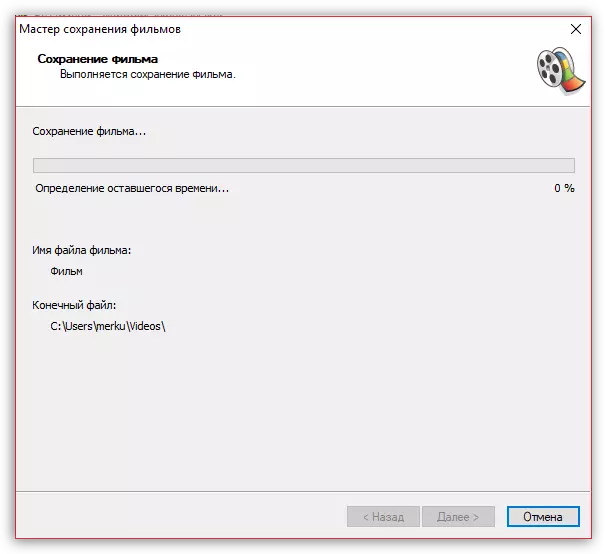
- The export process will begin, the duration of which will depend on the size of the roller - you just have to wait for its end.
We reviewed the basic features of the program that you are enough to edit the video. But you can continue to learn the program and meets new features so that your video has become really high-quality and interesting.