

Our realities are such that most domestic users have to work with two languages (Russian and English), and some more with a lot of quantities. Focusing what is now in the system active language panel helps the language panel. In addition, those users who are not accustomed to switching between hot-keys modes do it using exactly the icon. But it happens when he just disappears. Let's figure out what to do if the panel disappeared, and how to produce it to restore in Windows 7.
Recovery procedure
The switching panel may abill both due to the failures in the OS and intentional actions of users. In addition, there are even such situations that the user is inadvertently disables the tool, and then does not know how to restore it. The choice of the recovery variant largely depends on the reasons for which the language switch disappeared from the taskbar.Method 1: Collapse language panel
One of the reasons why the language panel is not displayed in the usual place, it may be that the user inadvertently clicked on it and pressed to "restore the lingu panel".
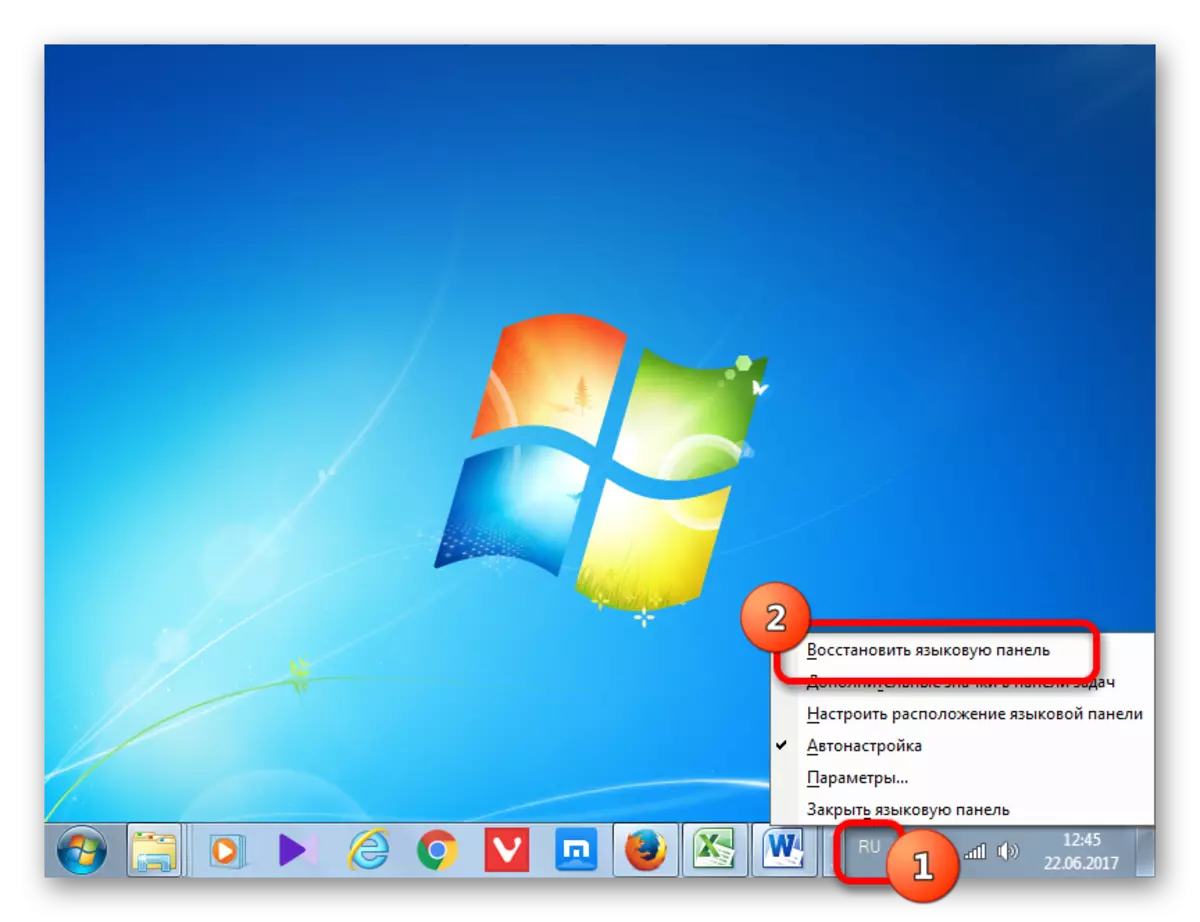
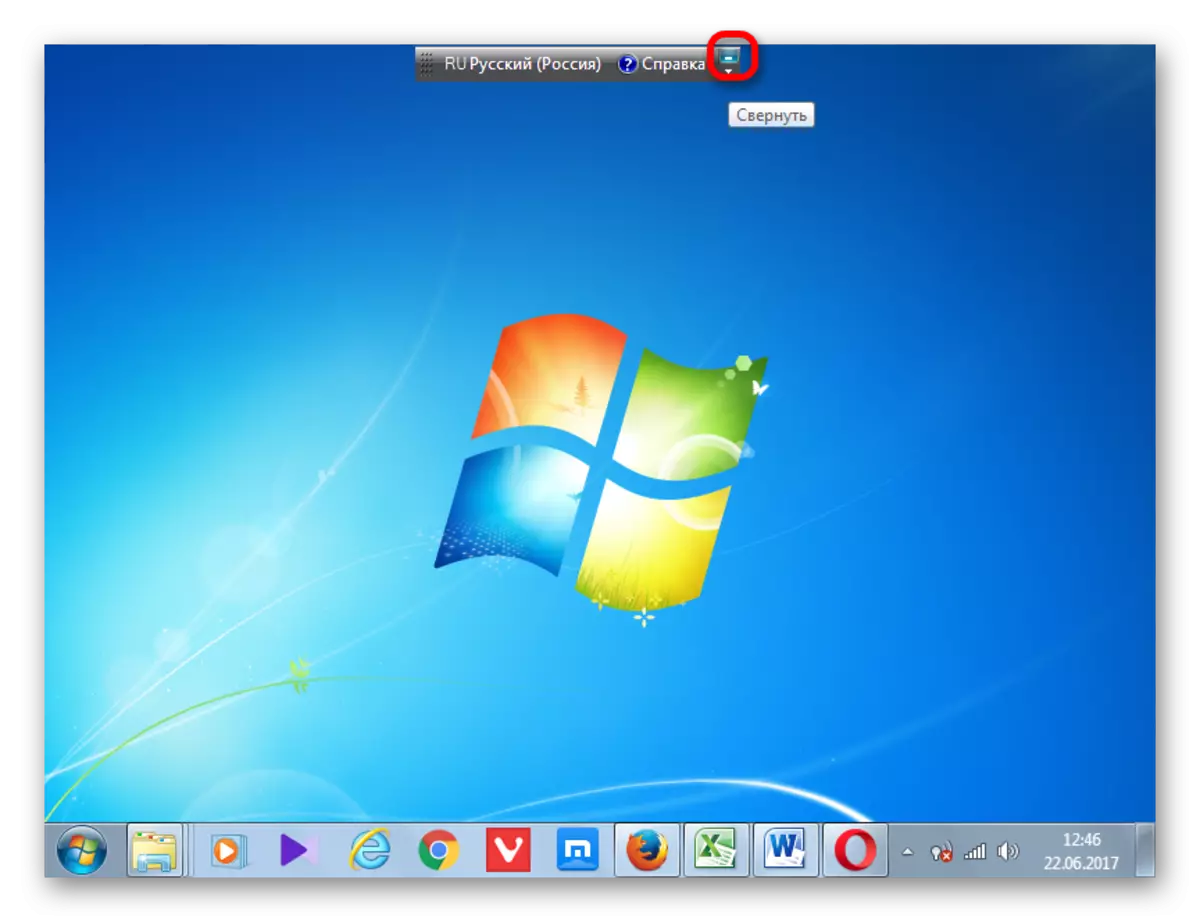
- But you should not be very upset. If you look at the top of the screen, the object is most likely there will be there. Although it may also be in the other place of the monitor plane. Therefore, before proceeding to further actions, you just carefully examine the screen. If you detected the panel, then simply click on the standard "Collapse" icon in its upper right corner.
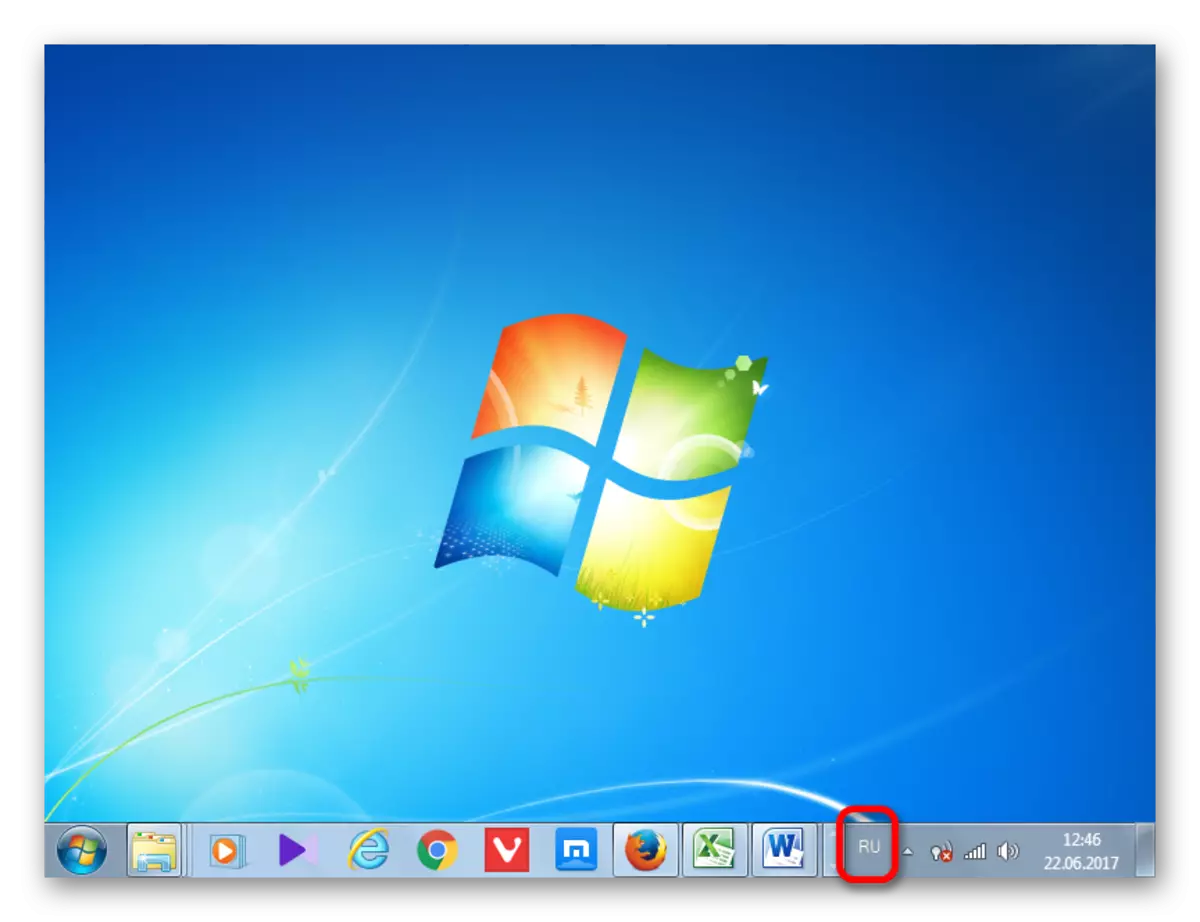
- After this action, it will be at its usual place.
Method 2: Control Panel
There is a simple, but rather effective way to enable the display of the language panel through the control panel.
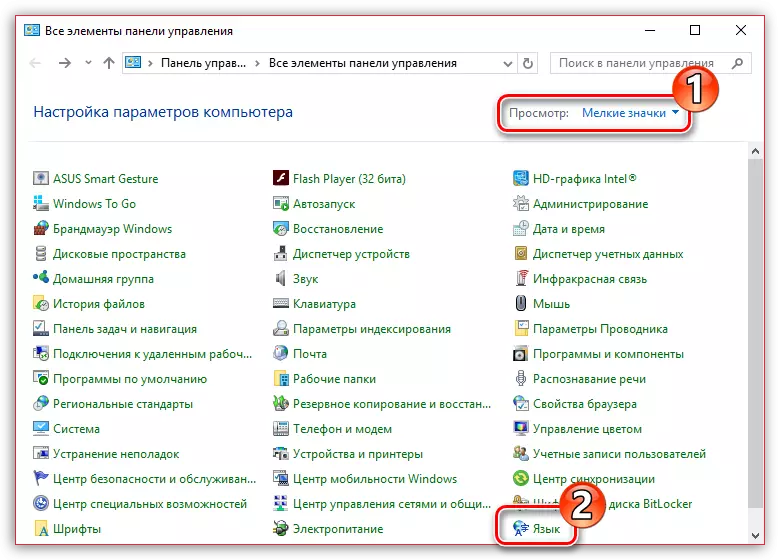
- Open the Control Panel menu. Install the "Minor Icons" viewer in the upper right corner, and then go to the "Language" section.
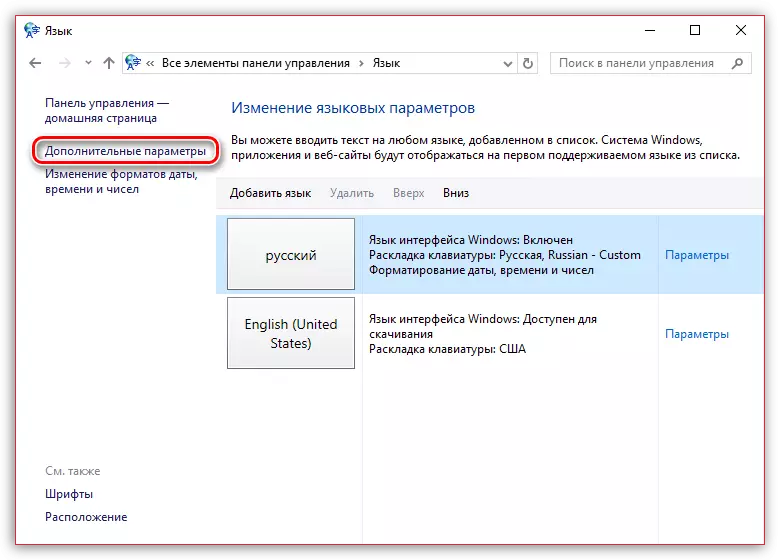
- In the left section of the window, open the "Advanced Parameters" section.
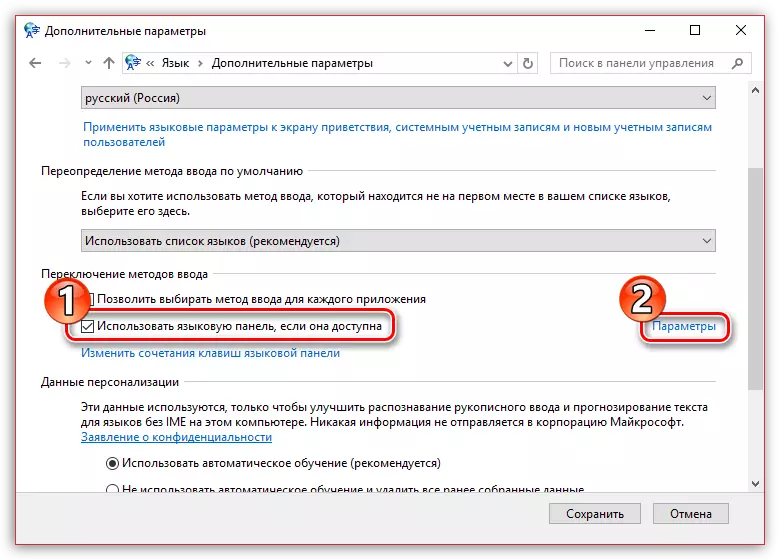
- In the "Switching Input Methods" block, check the box near the "Use the Language Panel if it is available", and the right to click on the "Parameters" button.
- A new window will appear on the screen, in which, on the Language panel tab, you will need to make sure that the item is "fixed on the taskbar", and the check mark is set near the item "Display text marks in the language panel". Save the changes.
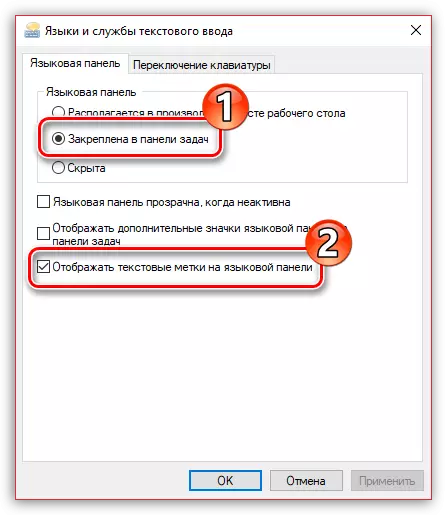
After making these adjustments, the language panel should be displayed in its previous place.
Method 3: Enable service
Sometimes there is no language panel for the reason that the service is disabled, which is responsible for the launch. In this case, the relevant service is required to include through a system planner. In Windows 7, this service can be stopped manually by making changes to the registry, since it systemically significantly and developers removed the possibility of its stop in standard mode. However, due to various failures, it can be disconnected even without user intervention, which will cause various negative phenomena, including the absence of the language panel. Let's see how you can run the specified service.
- To make the transition to the Service Manager, press "Start". Next, go to the already familiar lettering "Control Panel".
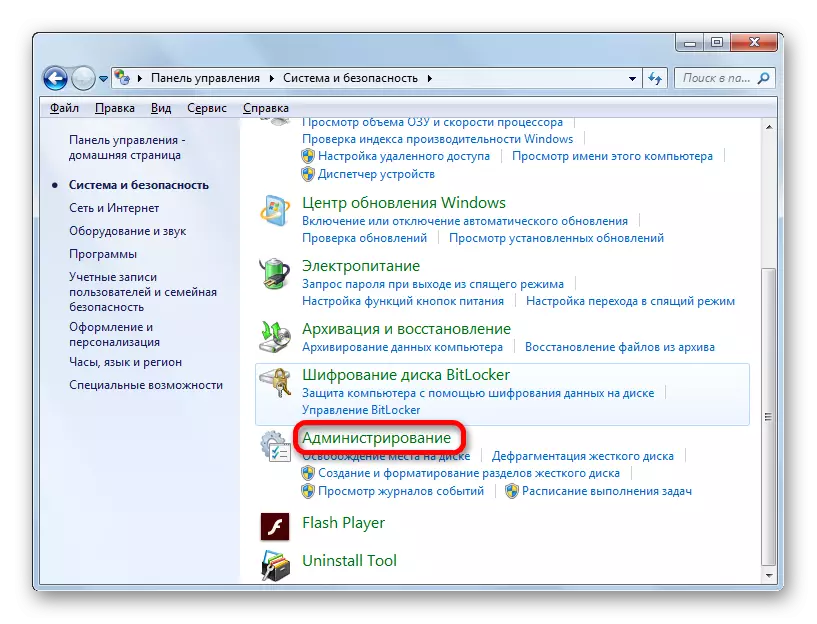
- Then click on "System and Security".
- Next, move to "Administration".
- A list of a variety of systemic utilities opens. Select "Services".
- In the opened list of services, look for the name "job scheduler". Double-click on the specified name.
- The properties window opens. In the General tab, the "Startup Type" field requires the "automatically" value drop-down list. Then repeat to click "Run", "Apply", "OK".


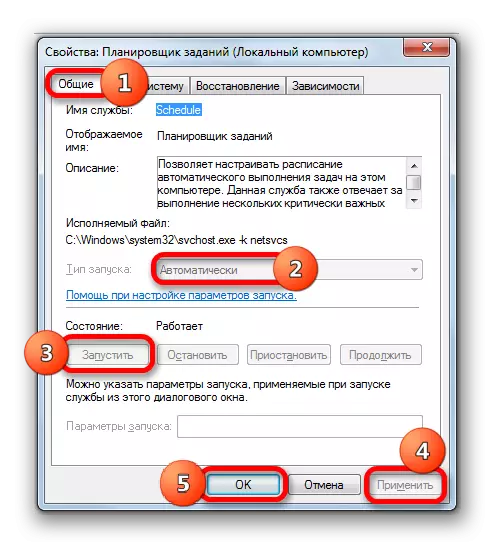
After restarting the PC, the panel of the languages is displayed again at normal location.
Method 4: manual start loader
If, due to any reasons, it was not possible to start the service, then, in this case, as a temporary measure, you can apply the manual launch of the language panel bootloader. Measure is temporary because with the launch of the service scheduler, you will still need to decide something, as it is responsible for activating many processes in the system.
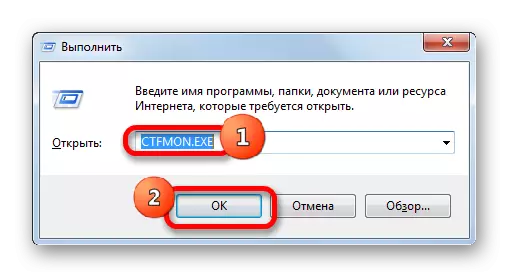
- Type Win + R, which will cause the "Run" tool. Enter:
Ctfmon.exe.
Click OK.
- After this action, the CTFMON.exe bootloader will start, which in turn activates the graphical language switching tool.
There is also another opportunity.
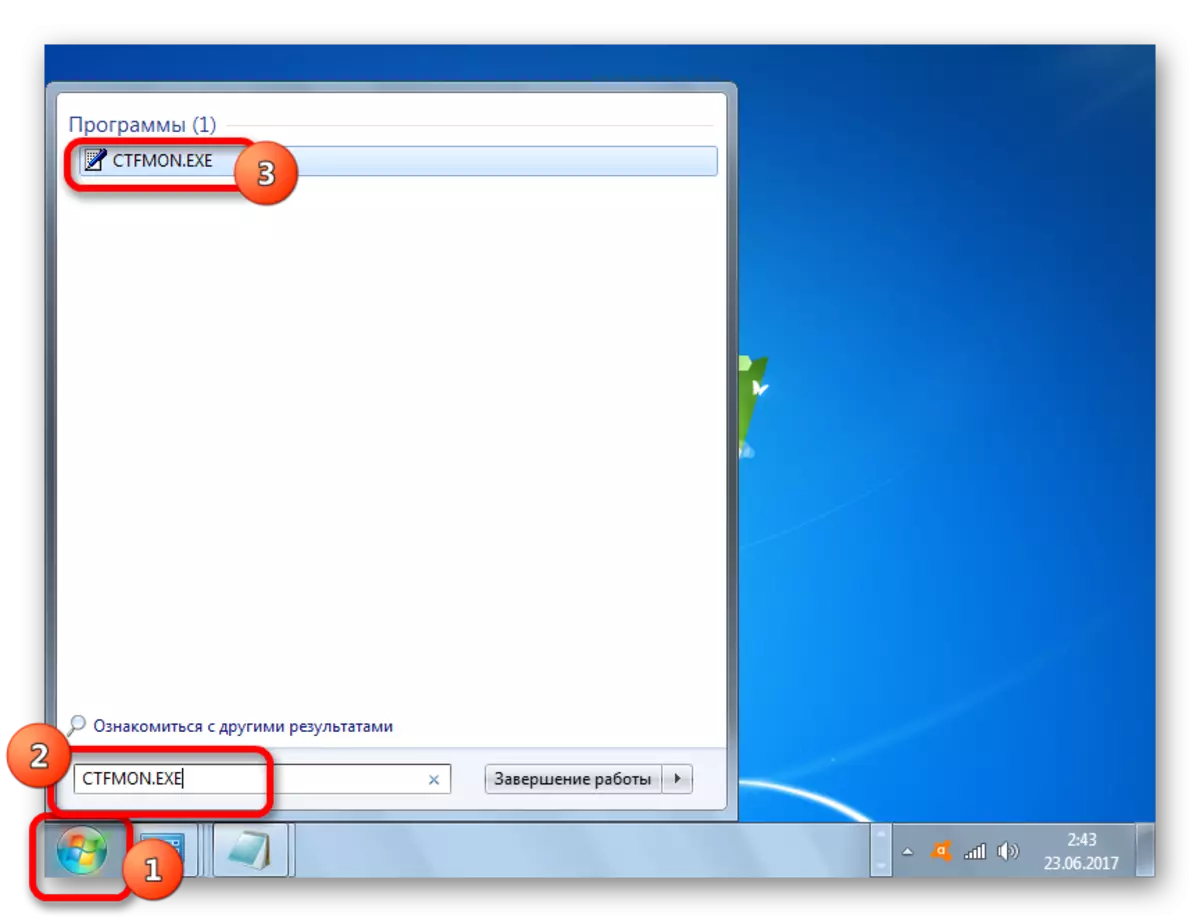
- Click "Start". In the "Find Programs and Files" field, enter:
Ctfmon.exe.
The search result will be displayed automatically. Make a double click on it with the left mouse button.
- This will lead to the launch of the bootloader and the language panel.
The operation will have to spend each time after starting the computer.
It should be noted that this method affects only if the object has disappeared due to a deactivation of the service. If it was turned off manually through the context menu, then in this case you need to apply the actions described in the method 2.
Method 5: add to autoload
But still, it is possible to make the language panel automatically started when the system starts, even with a deactivated task scheduler. To do this, the object is CTFMON.EXE Add to autorun in the registry editor.
- Before starting manipulations in the registry editor, create a system recovery point.
- Run the "Run" window (Win + R). We introduce:
regedit.exe
Click "OK".
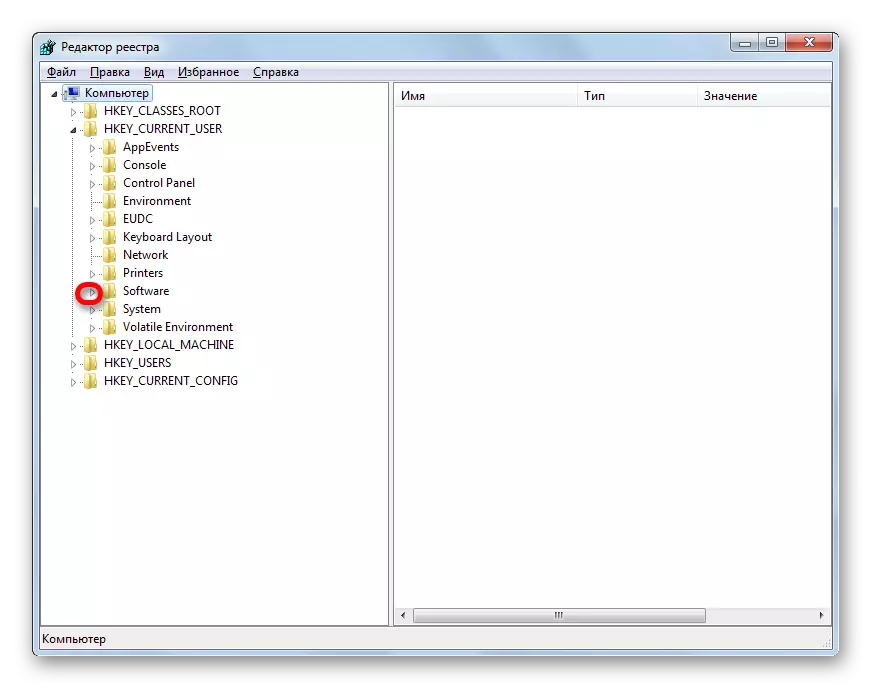
- The registry editor is launched. In the left area of the window there is a navigation tool with a tree location of directories. Click on "HKEY_CURRENT_USER".
- Next, go to the Software section.
- After that, click on the Microsoft folder.
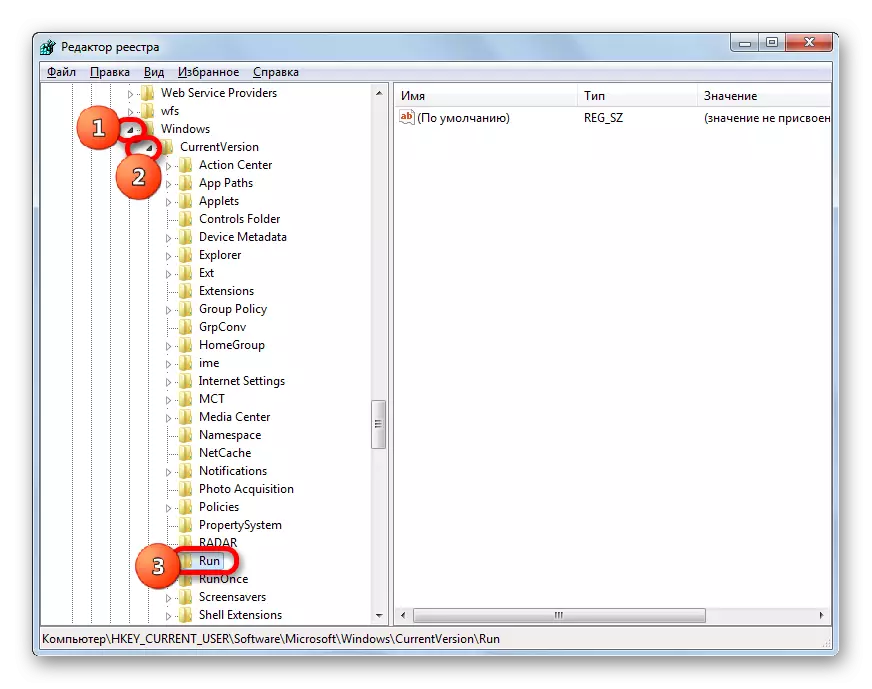
- Next, we follow the sections of "Windows", "CurrentVersion" and "Run".
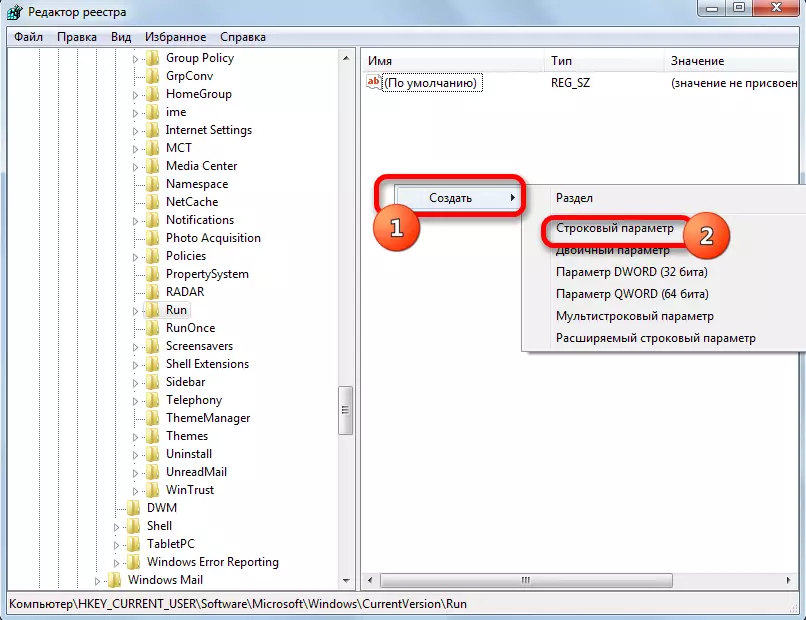
- In the right area we make a click anywhere right-click. Go on the inscription "Create". In the list, select "String Parameter".
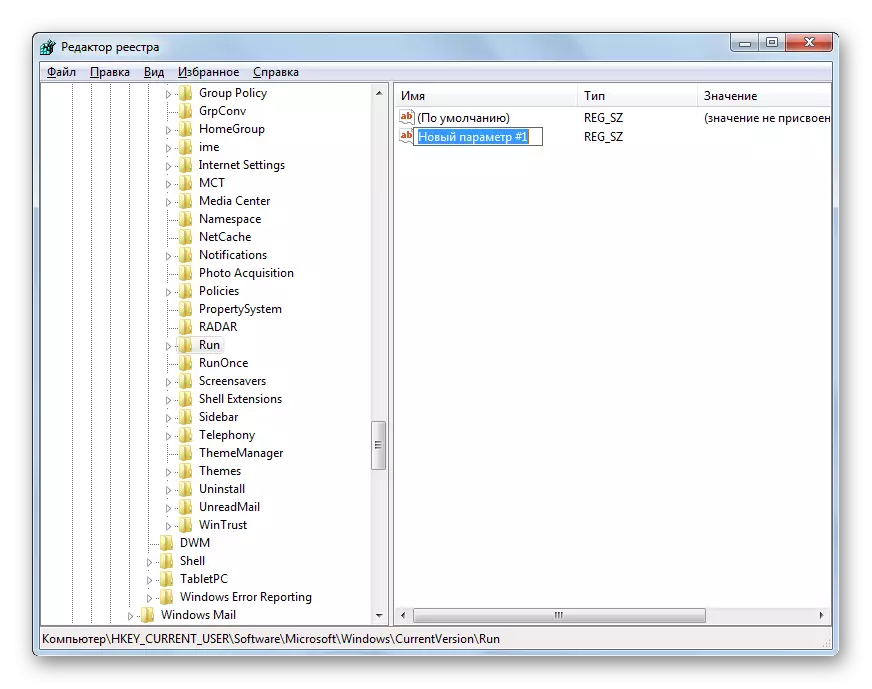
- A new string parameter appeared.
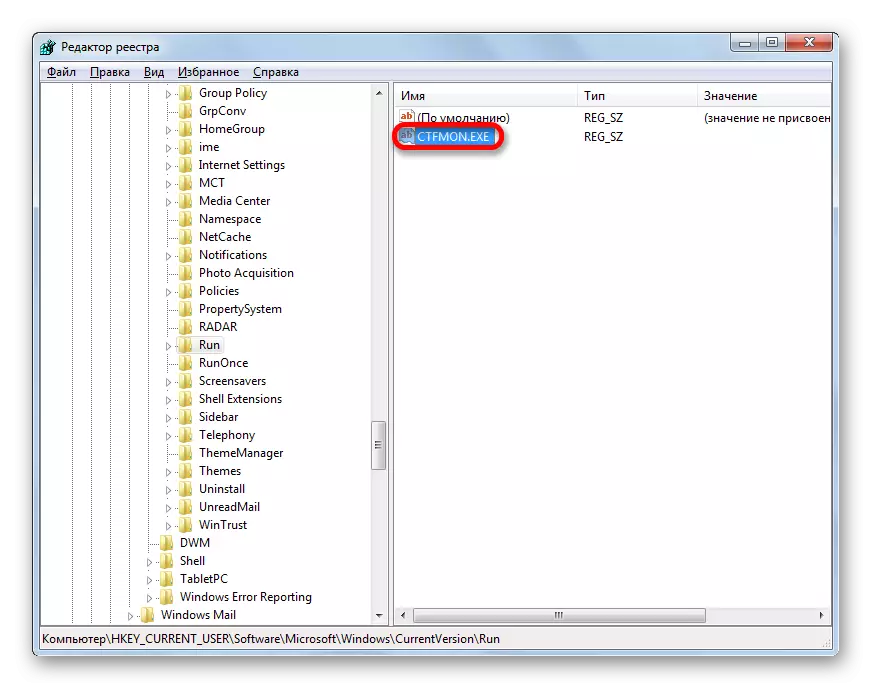
- Instead of the name "New Parameter", drive "ctfmon.exe". Click Enter. Twice click on this parameter with the left mouse button.
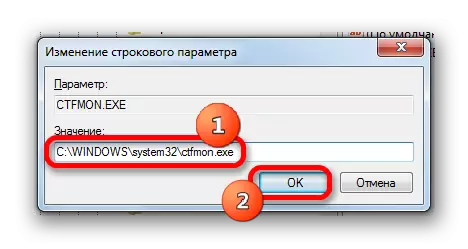
- The window of changing the string parameter opens. In the "Value" area, we enter the full path to ctfmon.exe, namely:
C: \ Windows \ System32 \ Ctfmon.exe
Click "OK".
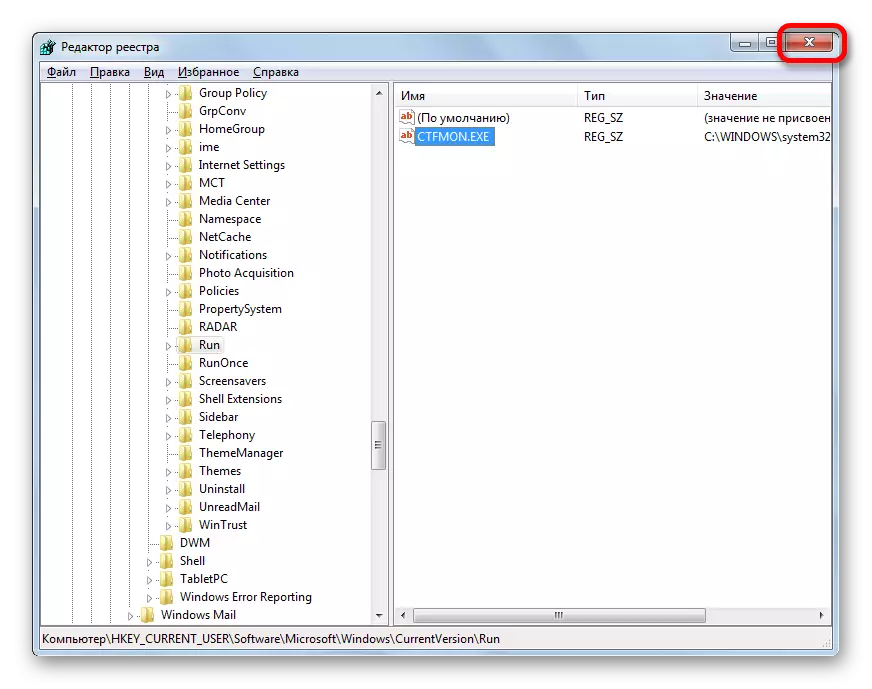
- After the string parameter is formed, you can assign the registry editor closing pictogram.
- It remains only to restart the computer so that the tongue panel is in its place. Now it will automatically start always even when the scheduler is turned off.
Attention! If you are not ready before the trifles follow the instructions, which is spelled out in this method, or not confident in your abilities, it is better not to even try to make changes in the registry editor. After all, if an error is made, it may be extremely negatively affected by the system's performance as a whole.
It should also be noted that there are other options for adding a Ctfmon.exe file to the Windows 7 autoload. But it is the described method that the registry entry is the most optimal, since the autoload will occur regardless of which account is logged in to the system.
Lesson: How to add a program in WINDOVS 7


Method 6: System Restore
If none of the above methods have helped you return the language panel, although it was previously present, we invite you to use the way that allows you to solve a variety of problems that have arisen in the operation of the operating system - to perform the recovery procedure.
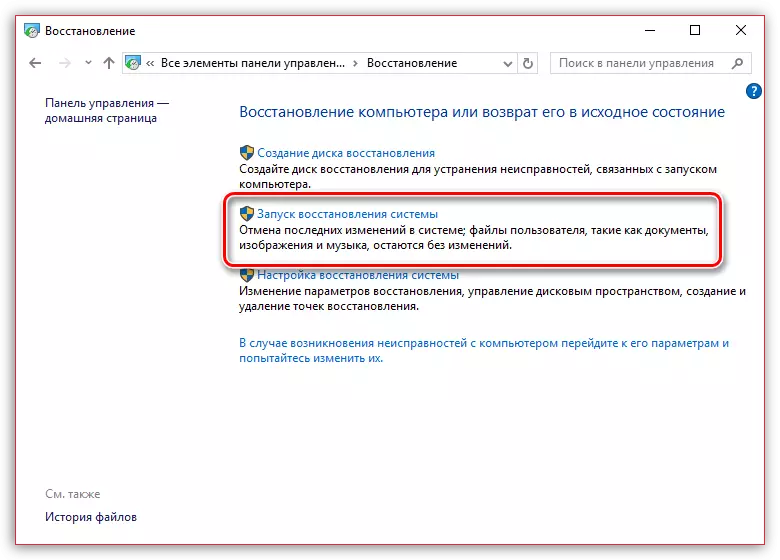
The essence of the method is that the operating system is just for such cases, automatically creates recovery points to which you can completely return the operation of the computer. You only need to choose the point of kickback, when the language panel was still present, and it was not observed in it.
The recovery function will completely return to Windows to the selected period of time, but there are still exceptions: the user files will not be affected in the process - music, videos, documents, etc.
Earlier on our site, it was already described in detail about the restoration of the system, so we recommend that you explore the article on this topic.
Lesson: how to restore the operating system
As you can see, there are various reasons why the language panel has disappeared from the usual location: disassembling, closing, stopping service. Accordingly, the choice of a method for solving the problem depends on its causes.