
Debian does not boast of their performance immediately after installation. This is the operating system that you must first set up, and in this article will be told how to do it.
After the computer starts again, the system will have already been updated, so you can go to the next setting step.
After that, the program will prompt you to update all available repositories information - click the "Update" button, after which you will wait for the process end and proceed to perform the next step.
Terminal
If for some reason you could not configure using the Software & Updates program, the same task can be performed in the Terminal. Here is what to do:
- Open the file in which the list of all repositories is located. To do this, the article will use the Geedit text editor, you can enter the command in the appropriate place.
Sudo gedit /etc/apt/sources.list.
- In the editor that opens, add "Main", "Contrib" and "Non-Free" variables to all lines.
- Click the Save button.
- Close the editor.
After the actions done, close the program window by giving permission to update the data.
Terminal
In the "Terminal" to add the backports repository, you must enter the data to the file "Sources.list". For this:
- Open the desired file:
Sudo gedit /etc/apt/sources.list.
- In it, set the cursor at the end of the last line and pressing the Enter key twice, make an indent, then enter the following lines:
DEB http://mirror.yandex.ru/Debian Stretch-Backports Main Contrib Non-Free
DEB-SRC http://mirror.yandex.ru/debian Stretch-Backports Main Contrib Non-Free (for Debian 9)
or
DEB http://mirror.yandex.ru/Debian Jessie-Backports Main Contrib Non-Free
DEB-SRC http://mirror.yandex.ru/Debian Jessie-Backports Main Contrib Non-Free (for Debian 8)
- Click the Save button.
- Close text editor.
To apply all the settings, update the list of packages:
Sudo Apt-Get Update
Now, to install the software system from this repository, use the following command:
Sudo APT-Get Install -T Stretch-Backports [Package Name] (for Debian 9)
or
Sudo Apt-Get Install -T Jessie-Backports [Package Name] (for Debian 8)
Where instead of "[Package Name]" enter the name of the package you want to install.
Step 5: Installation of Fonts
An important element of the system is fonts. In Debian, they are pre-installed very little, so users who often work in text editors or images in the GIMP program must be replenished with the list of already existing fonts. Among other things, the Wine program will not be able to work correctly without them.To install fonts used in Windows, you need to execute the following command:
Sudo Apt-Get Install TTF-FreeFont TTF-MSCorefonts-Installer
You can also add fonts from NOTO set:
Sudo Apt-Get Install Fonts-Noto
You can install other fonts, just looking for them on the Internet and moving to the ".fonts" folder, which is in the root of the system. If you do not have this folder, then create it yourself.
Step 6: Setting the font smoothing
By installing Debian, the user can observe a bad smoothing of system fonts. This problem is solved quite simply - you need to create a special configuration file. This is how it is done:
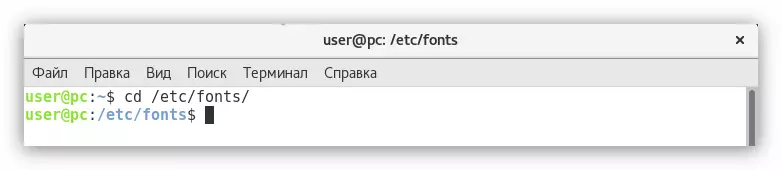
- In the Terminal, go to the "/ etc / fonts /" directory. To do this, follow:
CD / etc / fonts /
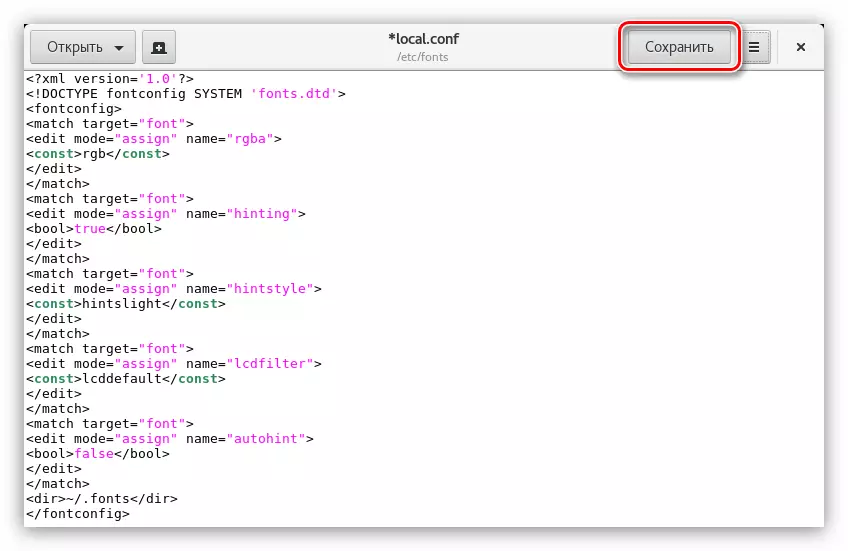
- Create a new file named "Local.conf":
Sudo Gedit Local.conf.
- In the opened editor, enter the following text:
RGB.
True.
hintslight
LCDDEFAULT.
false
~ / .fonts.
- Click the Save button and close the editor.
After that, in the entire system, the fonts will have normal smoothing.
Step 7: Sound Sound Dynamics
This setting must be carried out not to all users, but only to those who hear the characteristic sound from their system unit. The fact is that in some builds this parameter is not disabled. To fix this shortcoming, you need:- Open the configuration file "FBDEV-BlackList.conf":
Sudo gedit /etc/modprobe.d/fbdev-blacklist.conf.
- At the very end to register the following line:
BlackList PcSpkr.
- Save changes and close the editor.
We just brought the "PCSPKR" module, which is responsible for the sound of the system speaker, blacklisted, respectively, the problem is eliminated.
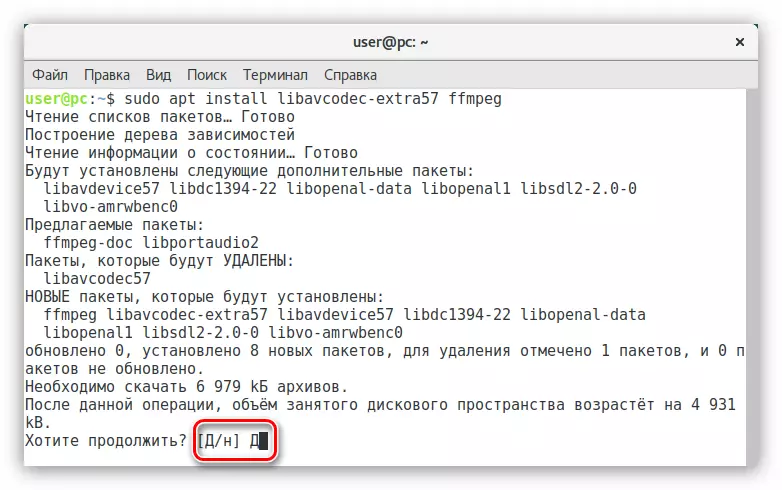
Step 8: Setting codecs
In only the Debian installed system, there are no multimedia codecs, this is associated with their proprietary. Because of this, the user will not be able to interact with many formats of audio and video. To correct the situation, you need to install them. For this:
- Run the command:
Sudo Apt-Get Install Libavcodec-Extra57 FFmpeg
During the installation process, you will need to confirm the action by typing the "d" symbol on the keyboard and pressing ENTER.
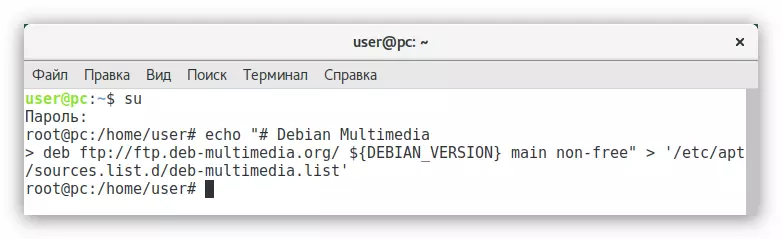
- Now you need to install additional codecs, but they are in another repository, so it must be added to the system. To do this, follow three commands alternately:
SU.
echo "# Debian Multimedia
Deb ftp://ftp.deb-multimedia.org Stretch Main non-Free "> '/etc/apt/sources.list.d/deb-multimedia.list' (for Debian 9)
or
SU.
echo "# Debian Multimedia
Deb ftp://ftp.deb-multimedia.org jessie main non-free "> '/etc/apt/sources.list.d/deb-multimedia.list' (for Debian 8)
- Update repositories:
APT UPDATE
In extradition, it can be noted that an error has occurred - the system cannot access the GPG key repository.
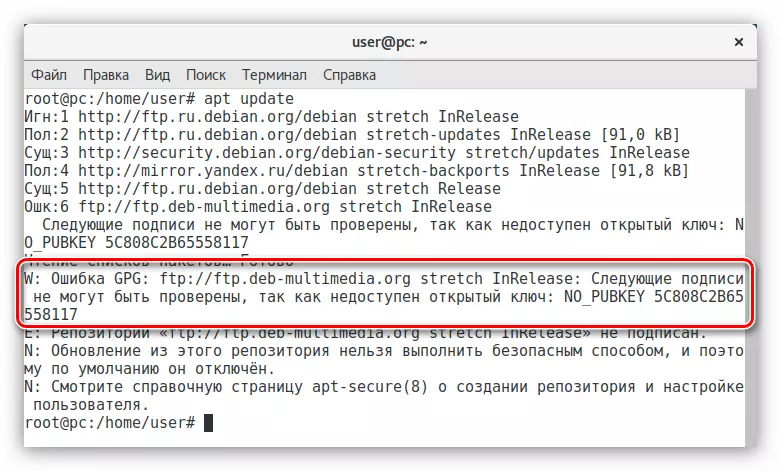
To fix this, execute this command:
APT-KEY ADV --RECV-KEY --KEYSERVER pgpkeys.mit.edu 5c808c2b655558117
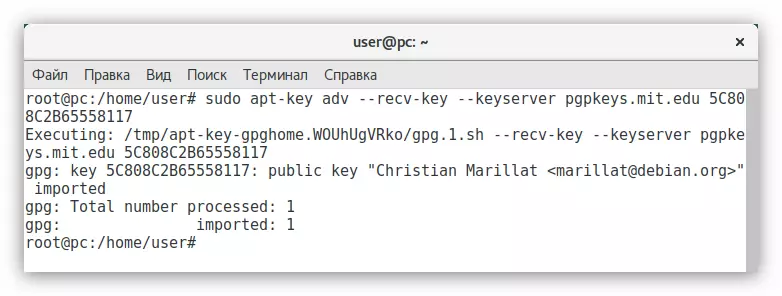
Note: In some Debian builds, the DirmNGR utility is missing, due to this, the command is not performed. It must be installed by executing the command "Sudo Apt-Get Install DirmnGr".
- Check if the error has been eliminated:
APT UPDATE
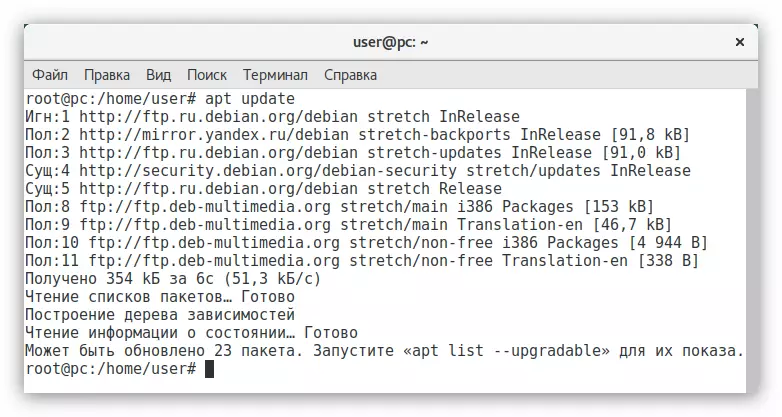
We see that there is no error, then the repository is added successfully.
- Install the necessary codecs by running the command:
APT Install Libfaad2 LIBMP4V2-2 LIBFAAC0 ALSAMIXERGUI TWOLAME LIBMP3LAME0 LIBDVDNAV4 LIBDVDREAD4 LIBDVDCSS2 W64CODECS (for 64-bit system)
or
APT Install Libfaad2 LIBMP4V2-2 LIBFAAC0 ALSAMIXERGUI TWOLAME LIBMP3LAME0 LIBDVDNAV4 LIBDVDREAD4 LIBDVDCSS2 (for 32-bit system)
After all items are fulfilled, you install all the necessary codecs to the system. But this is not the end of the Debian setting.
Step 9: Install Flash Player
Those who are familiar with Linux know that the Flash Player developers have long been not updated their product on this platform. Therefore, and also because this application is proprietary, it is not in many distributions. But there is an easy way to install it in Debian.To install Adobe Flash Player you need to perform:
Sudo Apt-Get Install FlashPlugin-Nonfree
After that it will be installed. But if you are going to use the Chromium browser, then perform another command:
Sudo Apt-Get Install PepperflashPlugin-Nonfree
For Mozilla Firefox Team Other:
Sudo Apt-Get Install Flashplayer-Mozilla
Now all elements of sites that are designed using Flash will be available to you.
Step 10: Installing Java
If you want your system to correctly display items made in the Java programming language, you must install this package to itself in the OS. To do this, you need to perform only one command:
Sudo APT-Get Install Default-Jre
After executing you get the version of Java Runtime Environment. But unfortunately, it is not suitable for creating programs on Java. If you need this option, you install Java Development Kit:
Sudo Apt-Get Install Default-JDK
Step 11: Installing Applications
It is not necessary in the desktop version of the operating system to use only the "Terminal" when it is possible to use software with a graphical interface. We offer you a set of software recommended for installation.- Evince. - works with PDF files;
- VLC. - Popular video player;
- File-Roller - archiver;
- Bleachbit. - cleans the system;
- Gimp. - graphic editor (Analog PhotoShop);
- Clementine. - music player;
- Qalculate. - calculator;
- Shotwell. - program for viewing a photo;
- gparted. - editor of disk partitions;
- diodon - Exchange buffer manager;
- LibreOffice-Writer. - text processor;
- LibreOffice-Calc. - Tabular processor.
Some programs from this list can already be installed in your operating system, it all depends on the assembly.
To install a single application from the list, use the command:
Sudo Apt-Get Install Programname
Where instead of "ProgramName" substitute the program name.
To install all applications at once, simply list their names through the space:
Sudo Apt-Get Install File-Roller Evince Diodon Qalculate Clementine VLC GIMP Shotwell Gparted Libreoffice-Writer Libreoffice-Calc
After executing the command, a fairly long-lasting load will start, after which, all of the specified software will be installed.
Step 12: Installing drivers on a video card
Installing the proprietary video card driver in Debian is a process, the success of which depends on the set of factors, especially if you have AMD. Fortunately, instead of a detailed analysis of all the subtleties and perform a variety of commands in the "Terminal", you can use a special script that all downloads and installs and installs. It is about him now and will be discussed.
Important: When installing drivers, the script closes all the processes of window managers, so before executing the instruction, save all the necessary components.
- Open the "Terminal" and go to the "BIN" directory, which is located in the root section:
CD / USR / Local / Bin
- Download SGFXI script from the official site:
Sudo Wget -Nc SMXI.ORG/SGFXI
- Give him the right to execute:
Sudo Chmod + x SGFXI
- Now you need to go to the virtual console. To do this, press the CTRL + ALT + F3 key combination.
- Enter your username and password.
- Get the right of superuser:
SU.
- Run the script by running the command:
SGFXI.
- At this stage, the script scatters your equipment and suggests the latest version driver on it. You can refuse and choose a version yourself, using the command:
SGFXI -O [driver version]
Note: All available versions for installation You can find out using the SGFXI -H command.

After all the actions done, the script will start loading and installing the selected driver. You can only wait for the end of the process.
If for some reason you decide to delete the installed driver, then you can make it using the command:
SGFXI -N.
Possible problems
Like any other software, the SGFXI script has shortcomings. With its execution, some errors may happen. Now we will analyze the most popular of them and give instructions to eliminate.
- Failed to remove the nouveau module . Solve the problem is pretty easy - you need to restart the computer and start the script again.
- Virtual consoles will switch automatically . If during the installation process on the screen you will see a new virtual console, then for the resumption of the process, simply return to the previous one by pressing the Ctrl + Alt + F3 keys.
- Scripping at the very beginning of work gives an error . In most cases, this is due to the missing "Build-Essential" package. The script when installing it downloads it automatically, but come and there are protesters. To solve the problem, install the package independently by entering the command:
APT-Get Install Build-Essential
These were the most frequent problems when working as a script, if among them you did not find our own, you can get acquainted with the full version of the leadership, which is located on the official developer website.
Step 13: Adjusting the automatic switching on Numlock
All the main components of the system are already configured, but finally it is worth telling how to configure the automatic switching on the numlock digital panel. The fact is that in the default Debian distribution, this parameter is not configured, and the panel must be turned on each time on your own when the system is started.
So to set up, you need:
- Download the Numlockx package. To do this, enter this command to the Terminal:
Sudo Apt-Get Install Numlockx
- Open the Default configuration file. This file is responsible for automatic execution of commands when the computer starts.
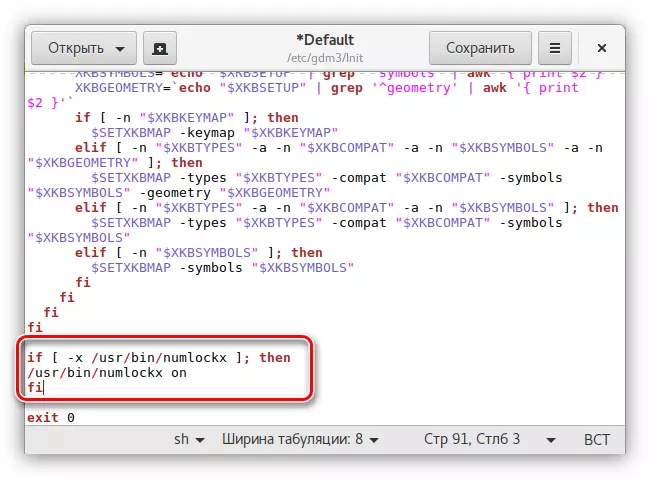
Sudo GEDIT / ETC / GDM3 / Init / Default
- Insert the following text in the string before the "EXIT 0" parameter:
if [-x / usr / bin / numlockx]; Then.
USR / BIN / NUMLOCKX ON
fi
- Save changes and close a text editor.
Now when you start the computer, the digital panel will be turned on automatically.
Conclusion
After performing all the Debian setup items, you will receive a distribution, which is great not only for solving the everyday tasks of an ordinary user, but also to work at the computer. It is necessary to clarify that the above settings are basic, and provide the normal operation of only the most used components of the system.