
Some users working on computers with Windows 7 are encountered with an error 0x80070005. It may occur when attempting to download updates, start the OS license activation process or during the system recovery procedure. Let's deal with what is the direct cause of the specified problem, as well as find out the way to eliminate it.
Causes of errors and ways to eliminate it
Error 0x80070005 is an expression of refusal to file access to a specific operation, most often associated with downloading or installing the update. Direct reasons for this problem there may be many factors:- Interrupted or incomplete loading of the previous update;
- Failure to access Microsoft sites (often occurs due to improper configuration of antiviruses or firewalls);
- System infection with virus;
- TCP / IP failure;
- Damage to system files;
- Hard disk malfunctions.
Each of the above reasons for the occurrence of the problem has its ways to solve that the conversation will go below.
Method 1: Suppinacl utility
First, consider the problem solving algorithm using the SuBinacl utility from Microsoft. This method is perfect, if the error 0x80070005 originated during the update or activation of the license of the operating system, but it is unlikely to help if it appeared in the OS recovery process.
Download subinacl
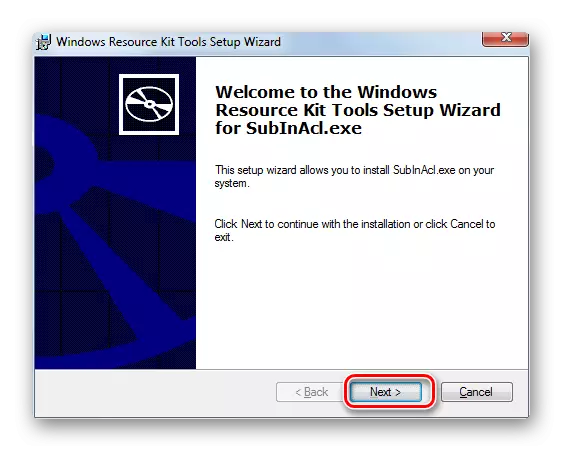
- After you downloaded the subinacl.msi file, run it. The "Installation Wizard" opens. Click "Next".
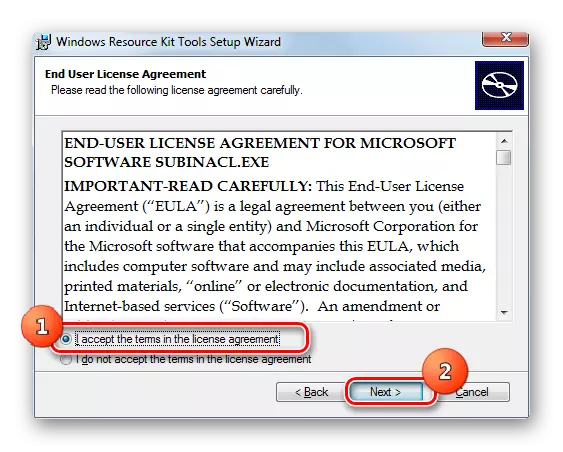
- Then the license agreement will then appear. Rearrange the radio button in the upper position, and then press "Next". Thus, you confirm your consent with Microsoft licensed policies.
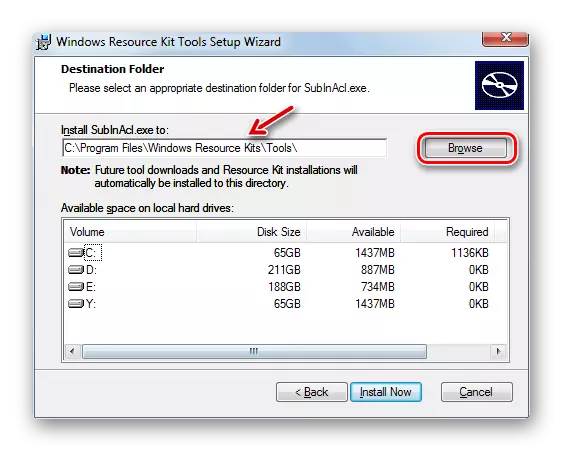
- After that, the window will open, where you should specify the folder in which the utility will be installed. By default, this is the "Tools" directory, which is invested in the Windows Resource Kits folder located in the Program Files directory on the C drive. You can leave this default setting, but we still advise to better work the utility to specify the directory more Close to the root directory of the disk C. To do this, click "Browse".
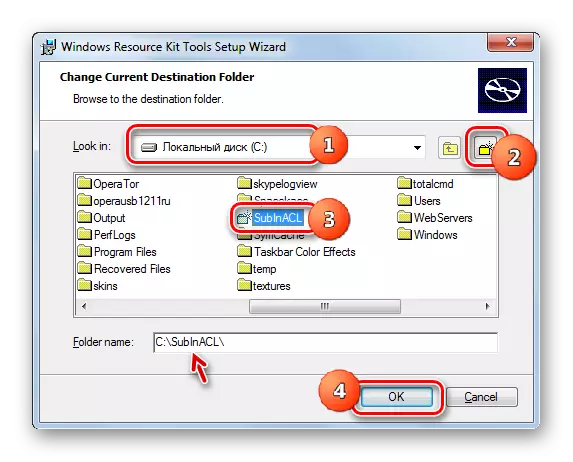
- In the window that opens, move to the root of the C disk and by clicking on the "CREATE A NEW FOLDER" icon, create a new folder. The name can give any, but we assign the name "subinacl" to it and will continue to operate it. Allowed the directory you just created, press OK.
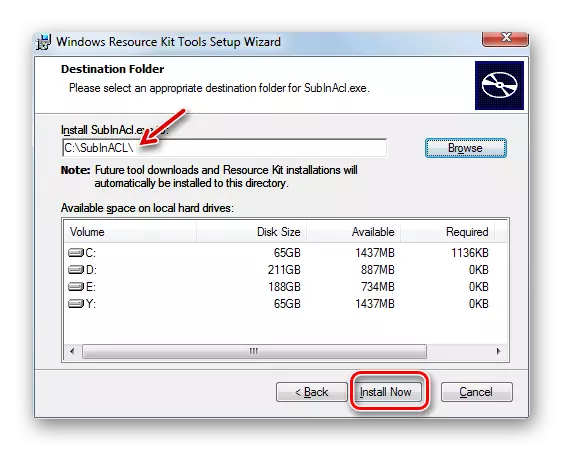
- It will be automatically refund to the previous window. To start the installation process of the utility, click "Install NOW".
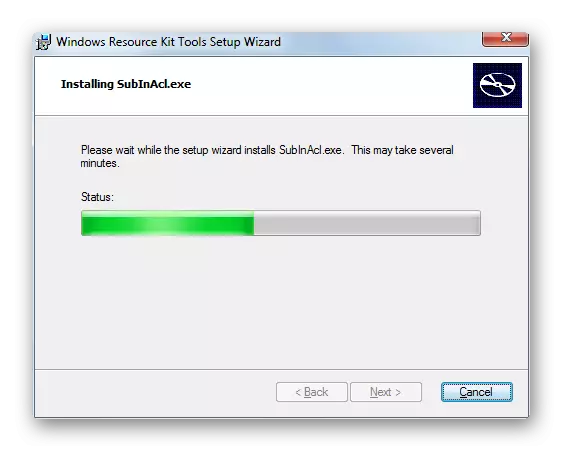
- The utility installation procedure will be performed.
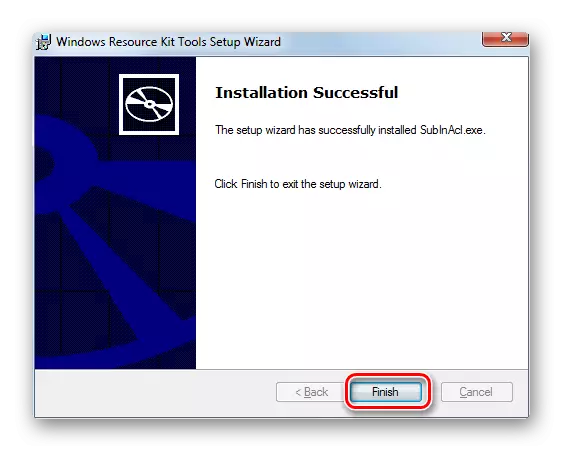
- The "Installation Wizard" window will appear about the successful end. Click "FINISH".
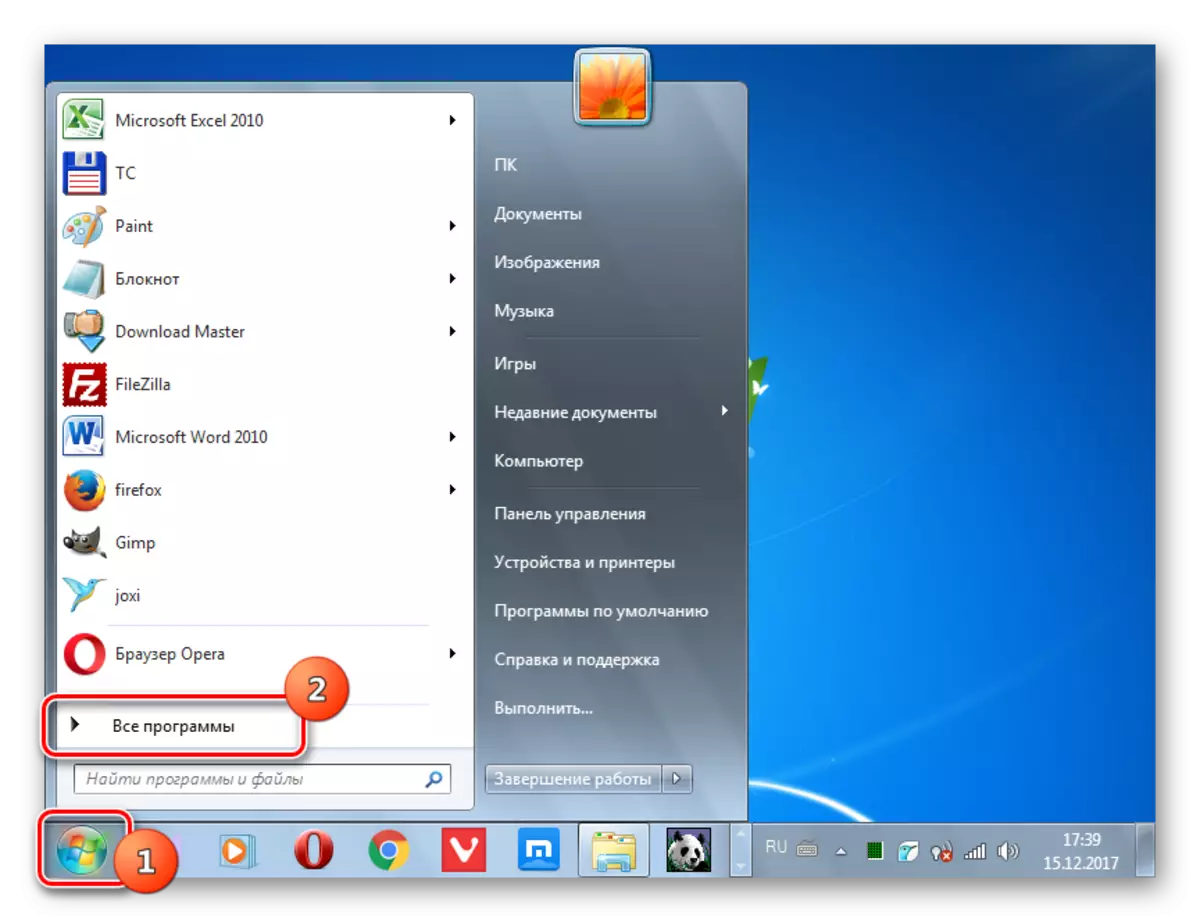
- After that, click the Start button. Select All Programs.
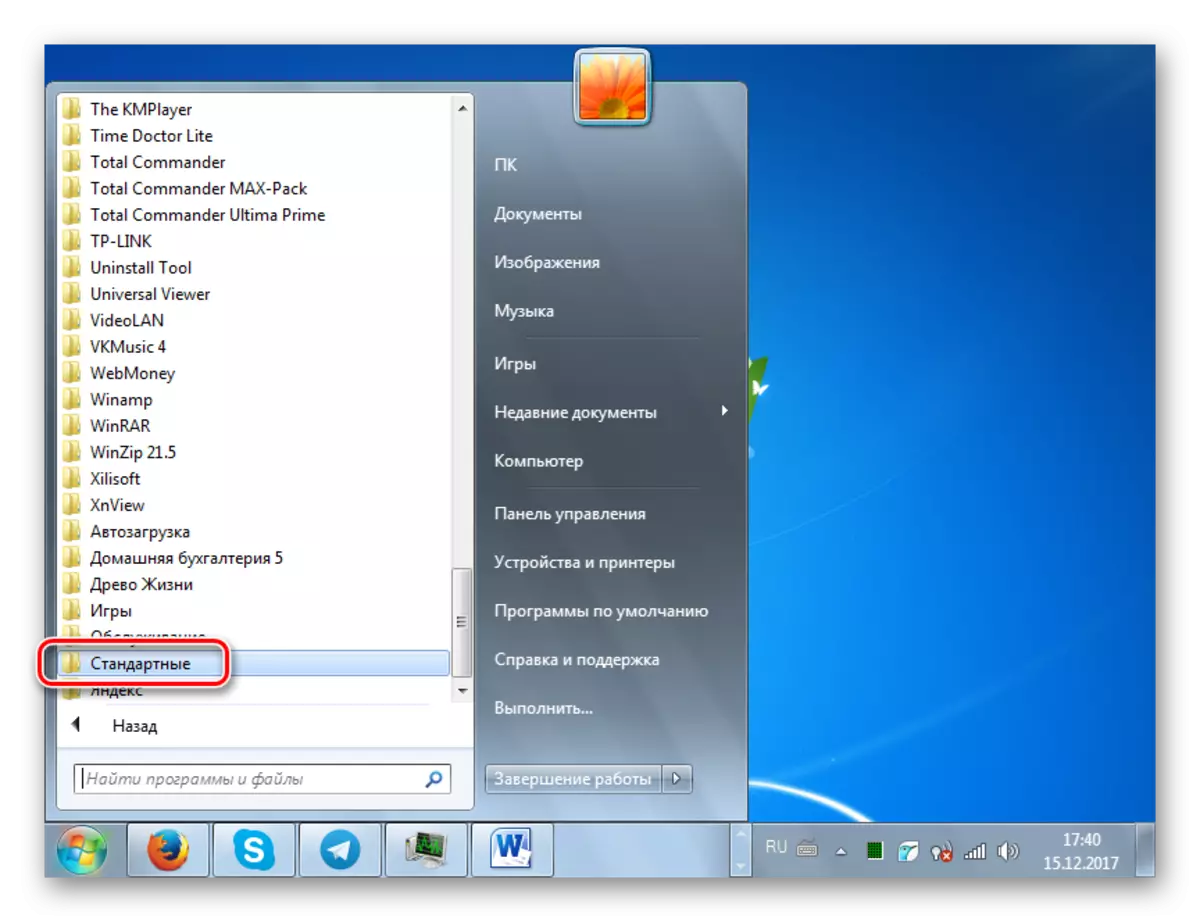
- Go to the folder "Standard".
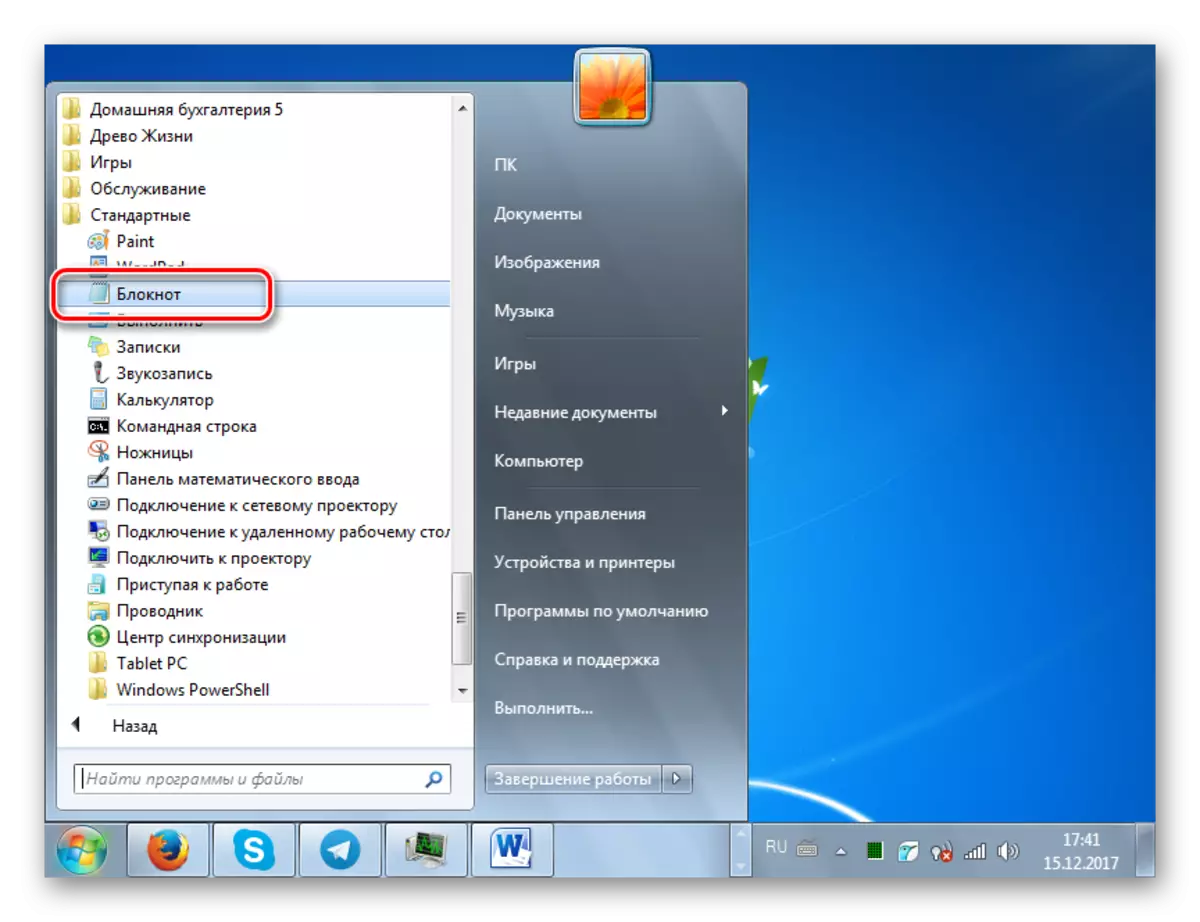
- In the list of programs, select "Notepad".
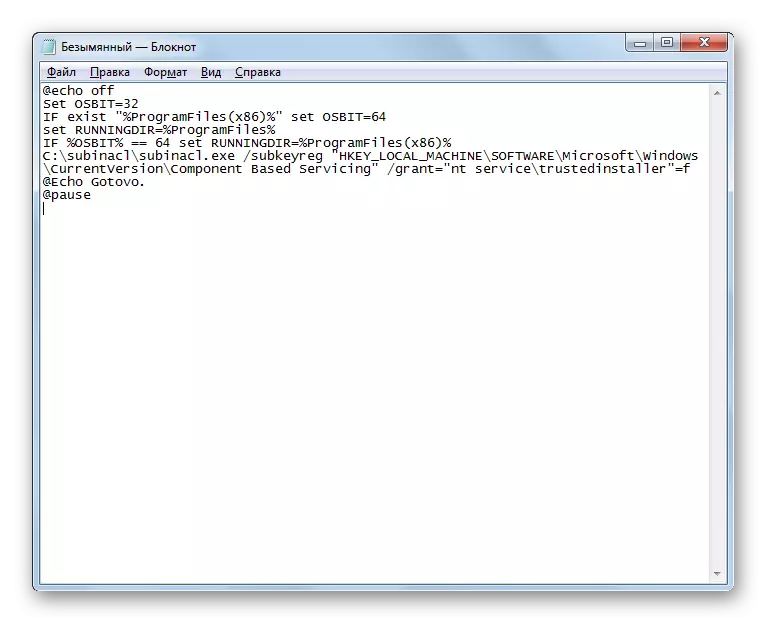
- In the "Notepad" window that opens, enter such a code:
@echo off
SET OSBIT = 32
IF EXIST "% ProgramFiles (x86)%" SET OSBIT = 64
Set Runningdir =% ProgramFiles%
IF% Osbit% == 64 set RunningDir =% ProgramFiles (x86)%
C: \ subinacl \ subinacl.exe / subkeyreg "HKEY_LOCAL_MACHINE \ Software \ Microsoft \ Windows \ CurrentVersion \ Component Based Servicing" / GRANT = "NT Service \ TrustedInstaller" = F
@Echo Gotovo.
@pause
If during the installation you have been prescribed another path to install the SubinACL utility, then instead of the value "C: \ subinacl \ subinacl.exe", specify the current installation address for your case.
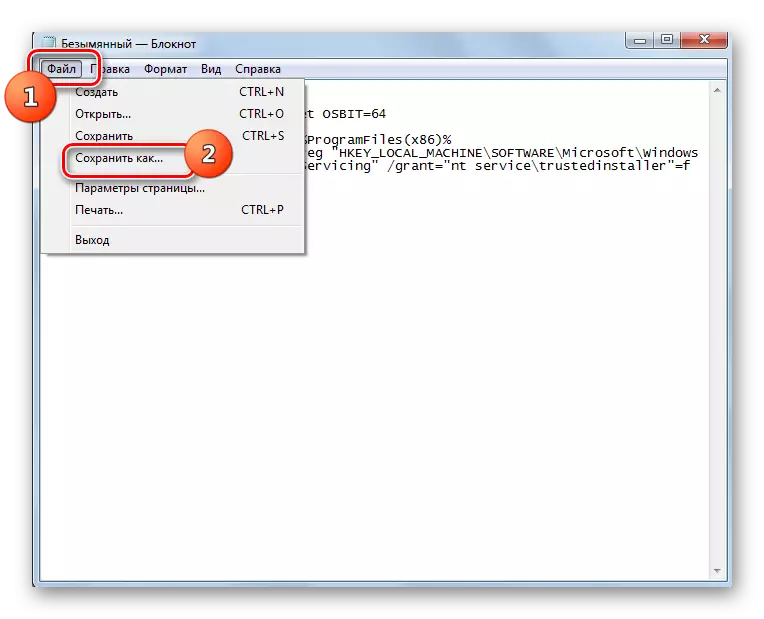
- Then click "File" and choose "Save As ...".
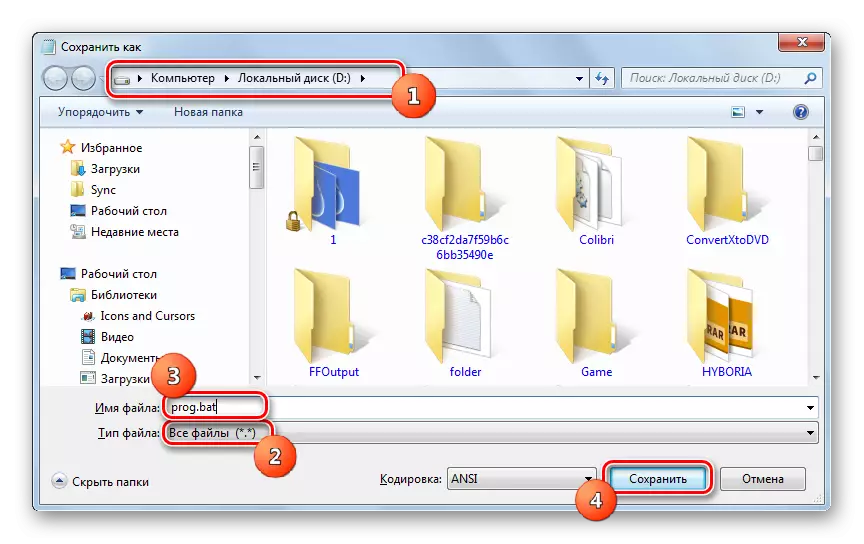
- The File Saving window opens. Move at any convenient place on the hard drive. In the "File Type" drop-down list, select "All Files". In the "File Name" area, assign any name created by the object, but be sure to enter the extension ".bat". Click "Save".
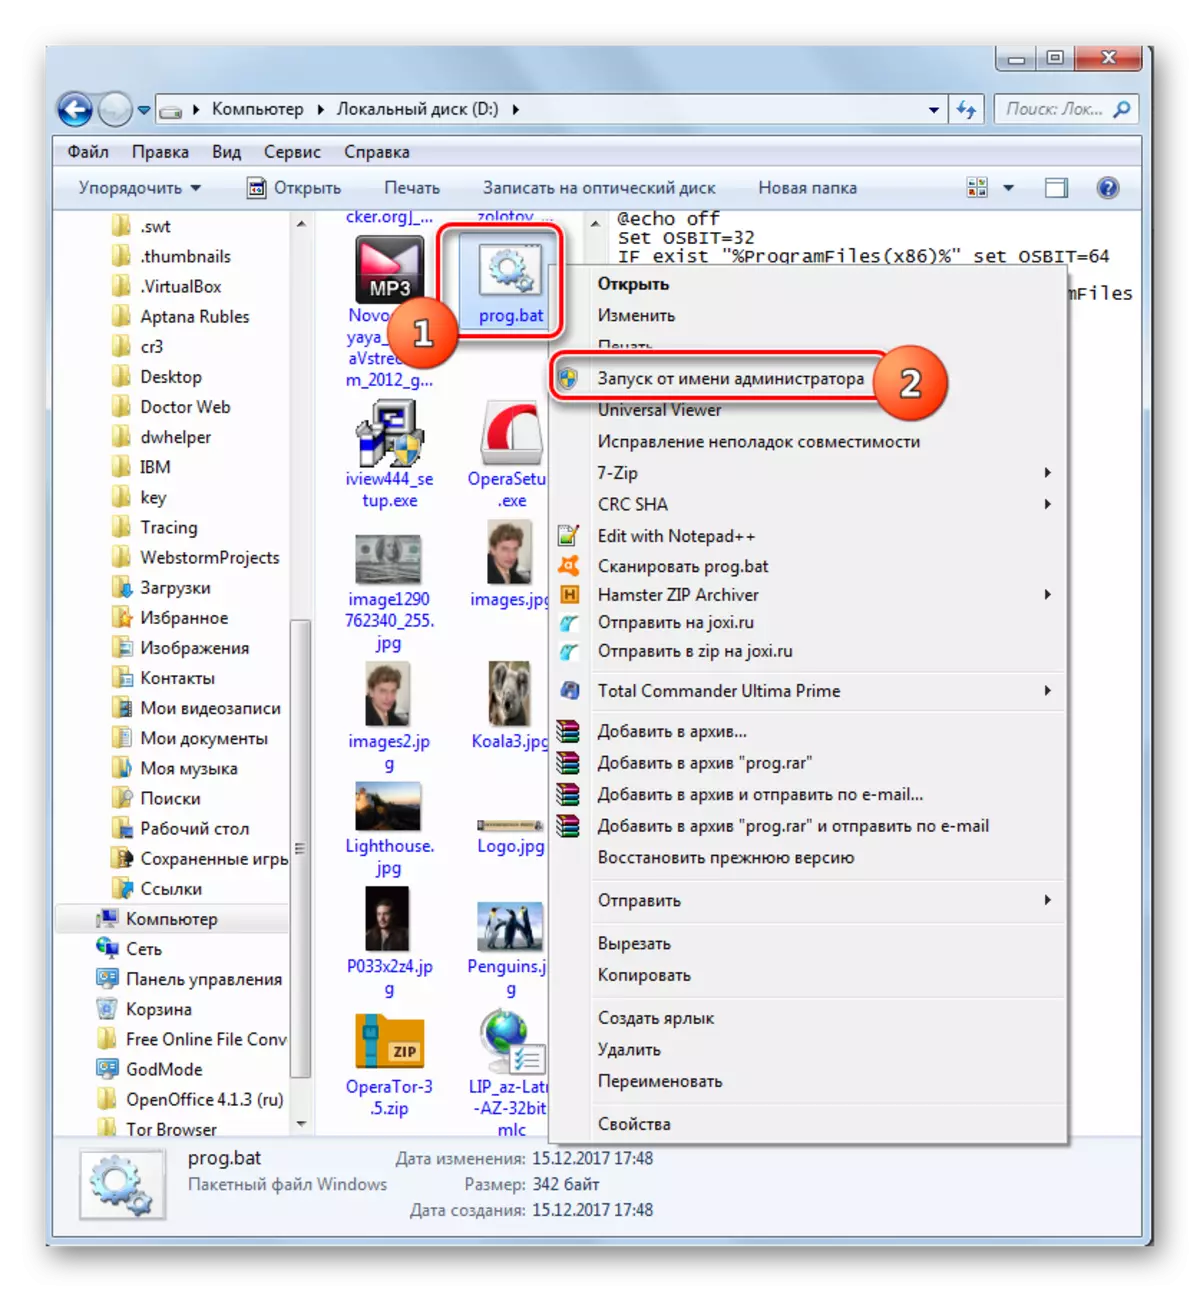
- Close the "Notepad" and run the "Explorer". Move to the directory where the file has been saved with the BAT extension. Click on it right mouse button (PCM). In the list of actions, stop the selection to "Run from the administrator".
- The script will be launched and performing the necessary system settings, interacting with the SubinCL utility. Next, make a reboot of the computer, after which the error 0x80070005 should disappear.
If this option does not work, you can simultaneously create a file with the extension ".bat", but with another code.
Attention! This action can lead to the inoperability of the system, so use it only as a last resort at your own risk. Before it uses it is recommended to create a system recovery point or its backup.
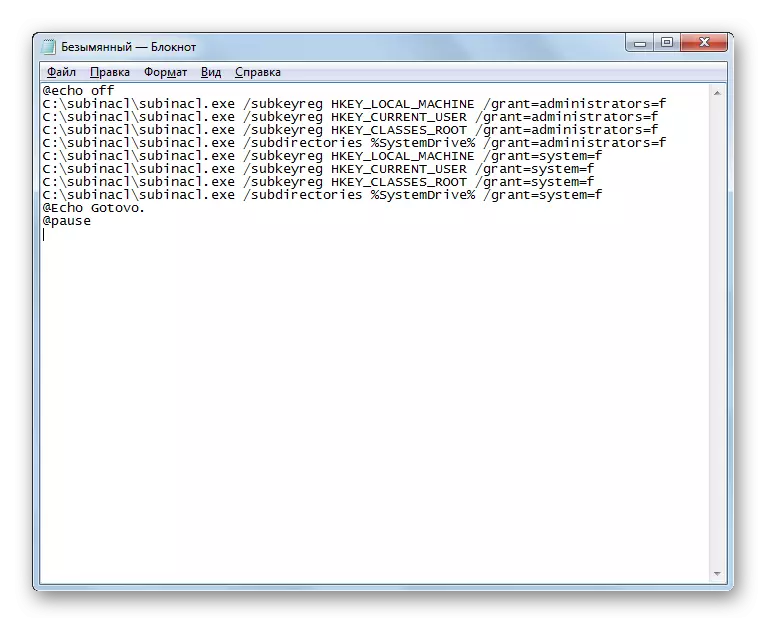
- By producing all the above-described steps to install the SubinACL utility, open the "Notepad" and drive this code there:
@echo off
C: \ subinacl \ subinacl.exe / subkeyreg HKEY_LOCAL_MACHINE / GRANT = administrators = f
C: \ subinacl \ subinacl.exe / SubkeyReg HKEY_CURRENT_USER / GRANT = administrators = f
C: \ subinacl \ subinacl.exe / subkeyreg HKEY_CLASSES_ROOTRA / GRANT = administrators = f
C: \ subinacl \ subinacl.exe / subdirectories% SystemDrive% / GRANT = administrators = f
C: \ subinacl \ subinacl.exe / subkeyreg HKEY_LOCAL_MACHINE / GRANT = SYSTEM = F
C: \ subinacl \ subinacl.exe / subkeyreg HKEY_CURRENT_USER / GRANT = SYSTEM = F
C: \ subinacl \ subinacl.exe / subkeyreg HKEY_CLASSES_ROOT / GRANT = SYSTEM = F
C: \ subinacl \ subinacl.exe / subdirectories% SystemDrive% / GRANT = SYSTEM = F
@Echo Gotovo.
@pause
If you installed the SubinCL utility to another directory, then instead of expressing "C: \ subinacl \ subinacl.exe", specify the current path to it.
- Save the specified code to a file with the ".bat" extension with the same method that was described above, and activate it from the person of the administrator. The "Command String" will open, where the procedure for changing the access rights will be performed. After the process is completed, press any key and restart the PC.
Method 2: Rename or delete the contents of the SoftWaredistRibution folder
As it was already mentioned above, the cause of the error 0x80070005 may be a break when loading the previous update. Thus, the underfloor object prevents the correct passage of the next update. This problem can be solved by renaming or deleting the contents of the folder that contains downloads updates, namely the SoftwaredRIBUTION directory.
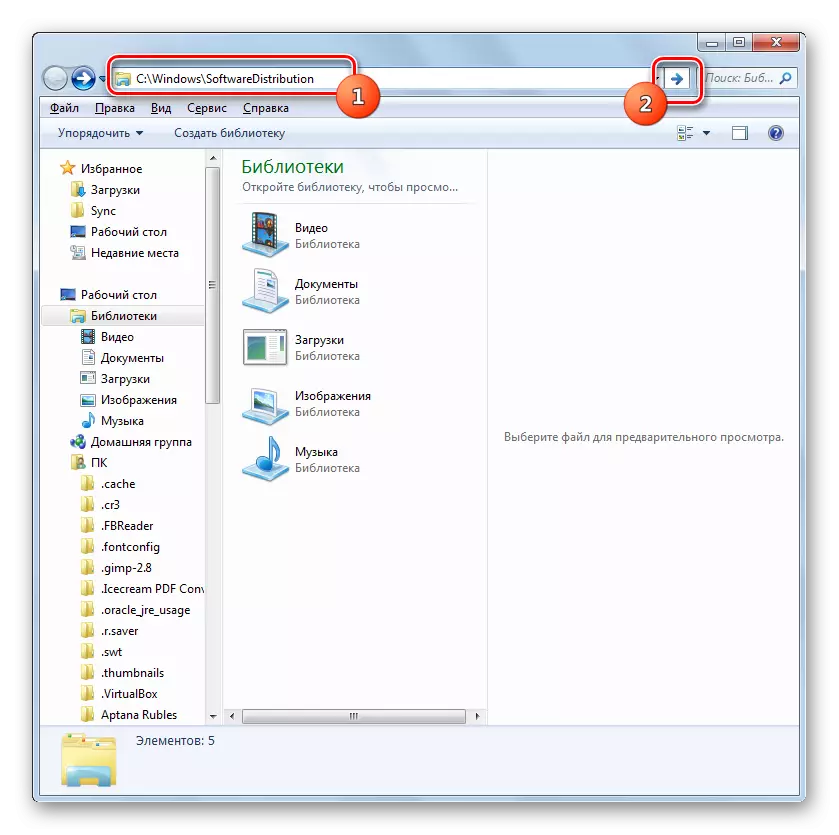
- Open the "Explorer". Enter such an address in its address bar:
C: \ Windows \ SoftWaredistribution
Click on the elder to the right of the address string or press ENTER.
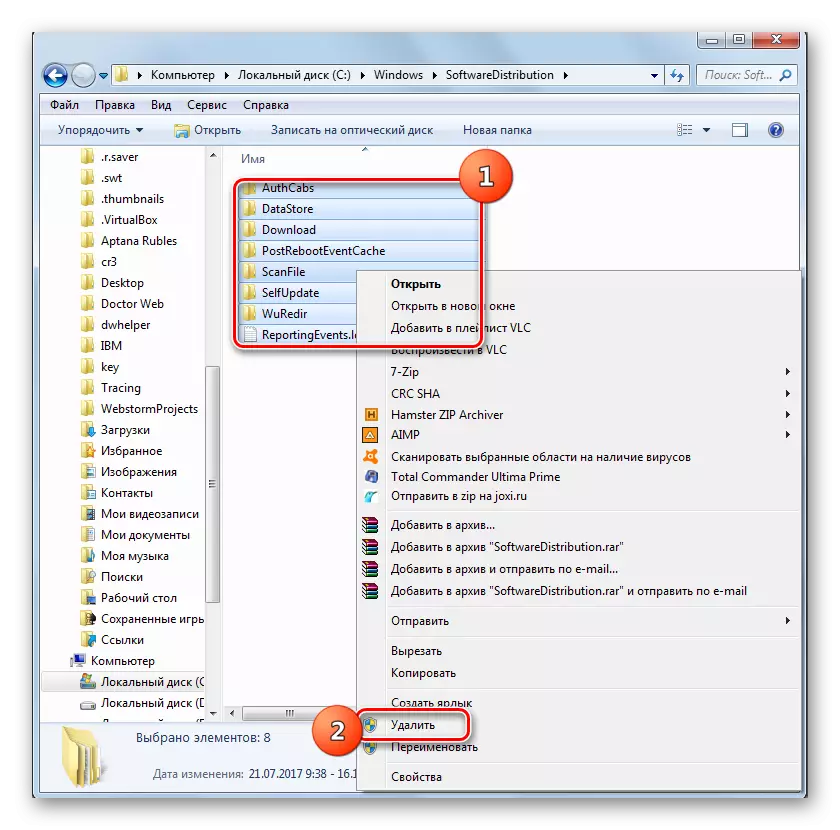
- You fall into the "SoftWaredistribution" folder located in the Windows directory. It is here that the downloaded system updates are stored before they are installed. To get rid of the 0x80070005 error, you need to clean this directory. To highlight all its contents, use Ctrl + a. Click the PCM on the selection. In the displayed menu, select "Delete".
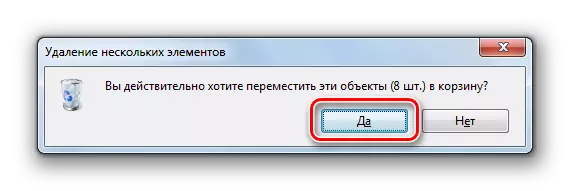
- A dialog box opens where the question is asked if the user really wants to move all selected objects in the "Basket". Agree by clicking "Yes."
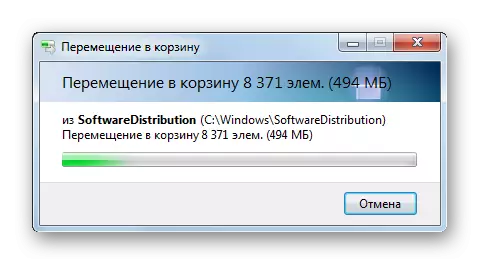
- The procedure for deleting the contents of the "SoftWarDistribution" folder will be launched. If someone cannot be removed, since it is currently engaged in the process, then press the "Skip" button in the displayed window that informs about this situation.
- After deleting the contents, you can try to perform an action during which the error 0x80070005 was displayed. If the reason was in incorrectly loaded previous updates, this time fails should not be.
At the same time, not all users risk deleting the contents of the "SoftWarDistribution" folder, as they are afraid to destroy not yet installed updates or some other way to damage the system. Situations occur when the above option cannot remove exactly the broken or short-meed object, which will fail, since it is he who is busy process. In both of these cases, another method can be used. It consists in renaming the "Softwaredistribution" folder. This option is more complicated than the above, but if necessary, all changes can be returned.
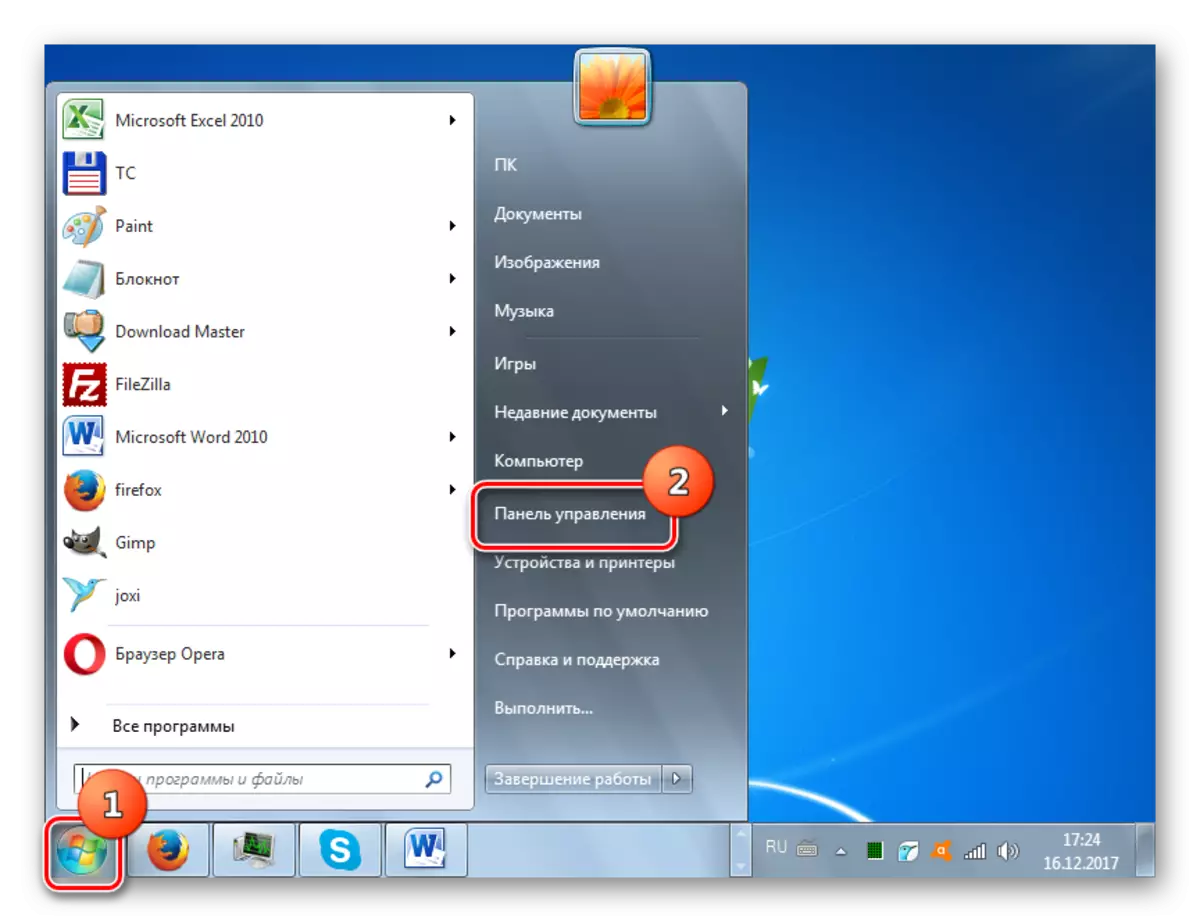
- Click "Start". Come in the "Control Panel".
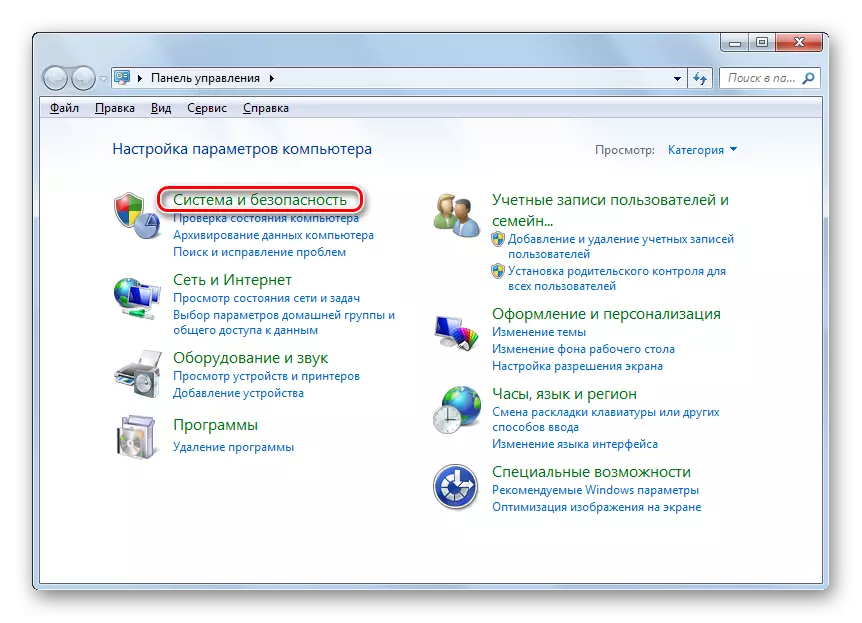
- Come in the "System and Security" section.
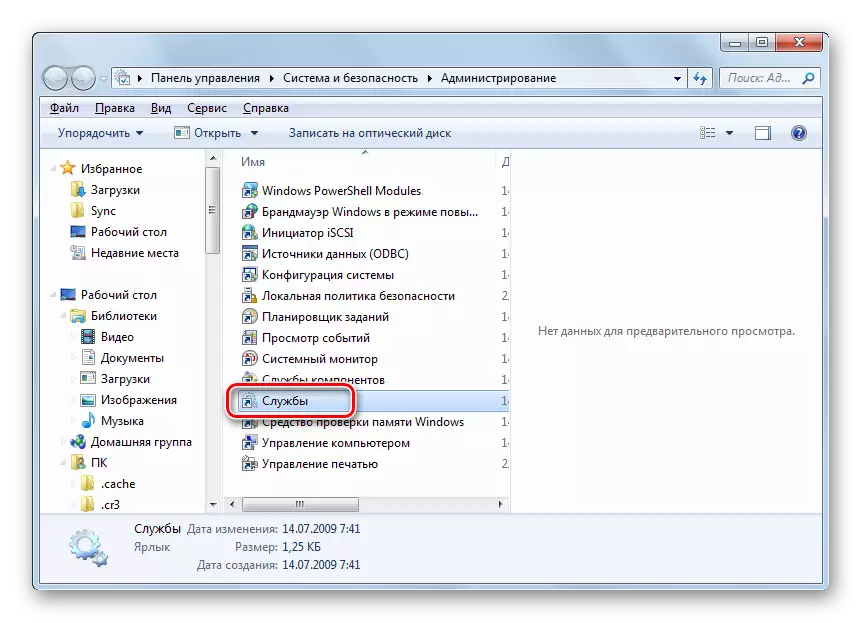
- Click "Administration".
- In the "Service" clicking on the list.
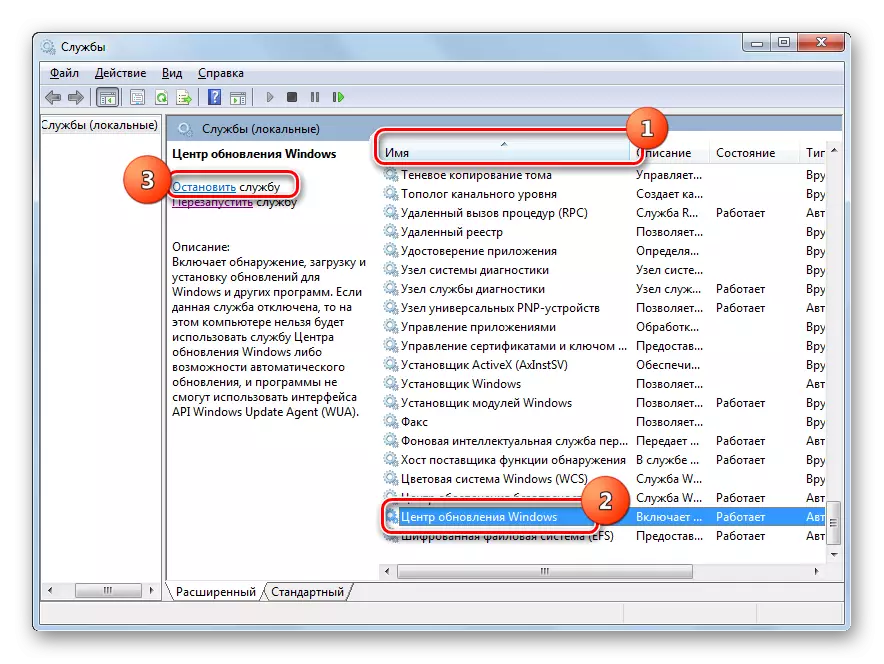
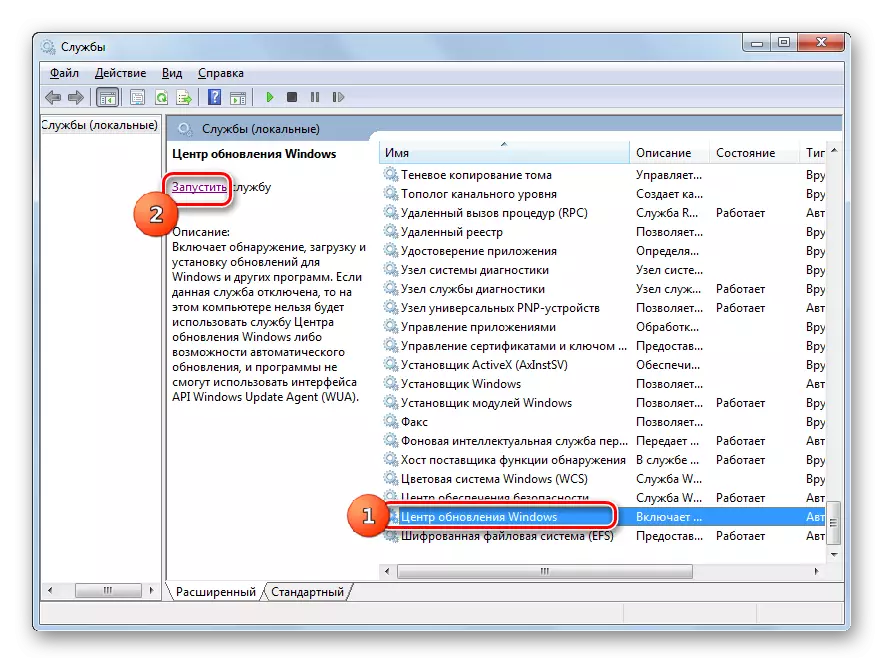
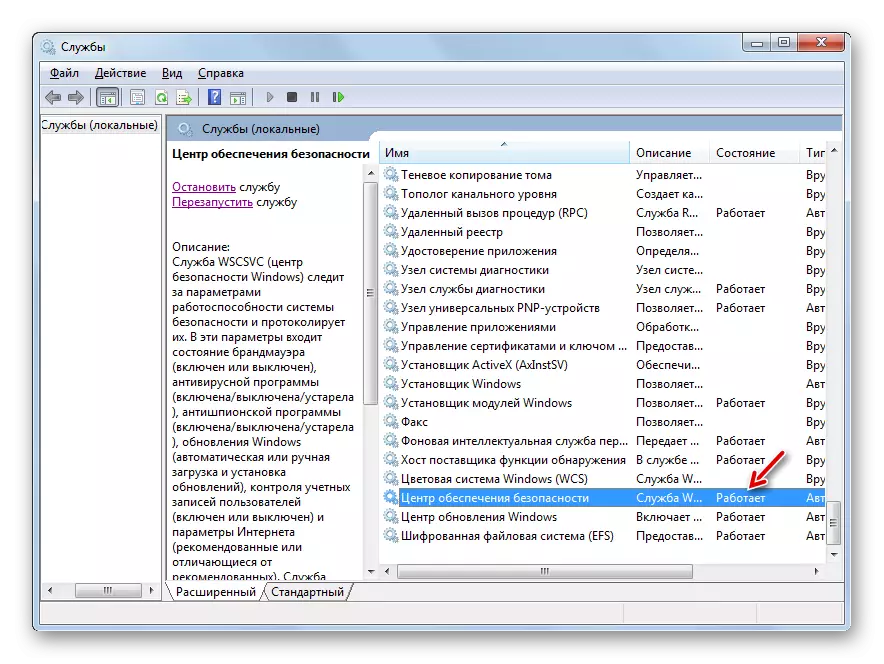
- The "Service Manager" is activated. Lay out the Windows Update Object. To simplify the search, you can build names according to the alphabet, clicking on the title of the "Name" column. After you find the desired element, designate it and click "Stop".
- The process of stopping the selected service is initiated.
- After stopping the service when you allocate its name in the left area, the inscription "Run" will be displayed. The "Services Manager" window does not close, but simply roll it on the taskbar.
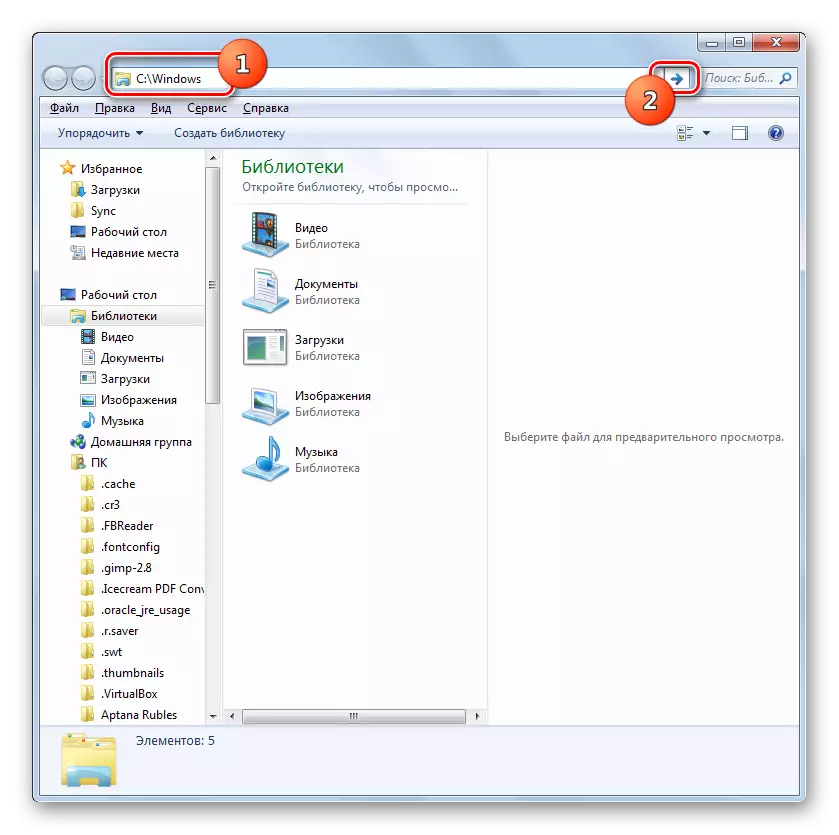
- Now open the "Explorer" and enter the following path to its address field:
C: \ Windows
Click on the elder to the right of the specified string.
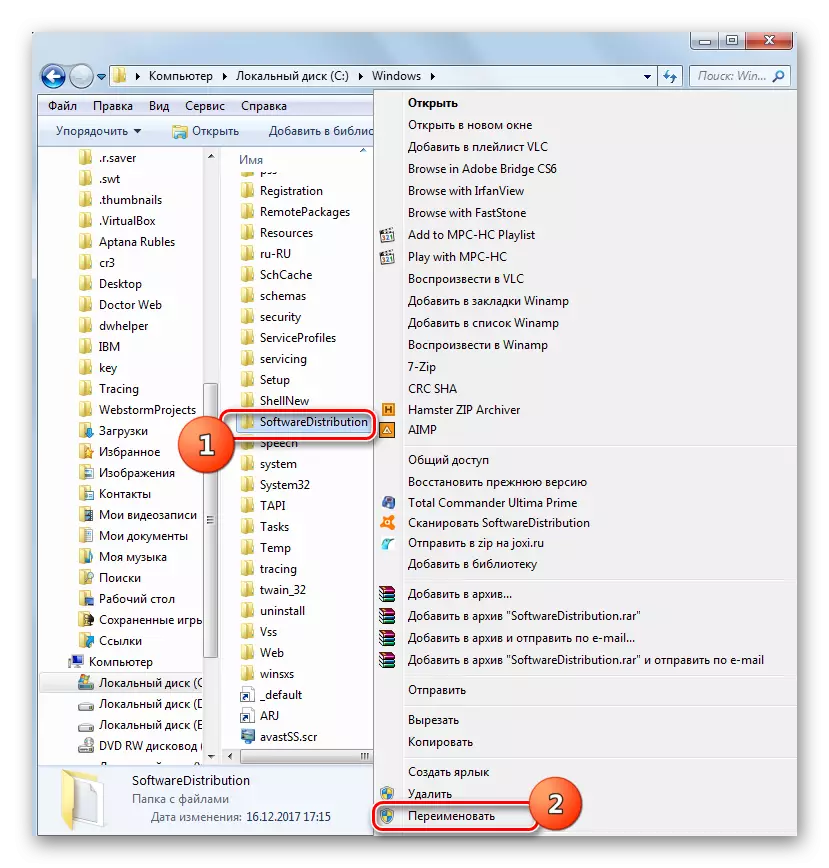
- A transition to the "Windows" folder is made localized in the root directory of the C drive C. Here we look for the already familiar folder of the "SoftWarDistribution" folder. Click on it PKM and in the list of actions select "Rename".
- Change the name of the folder to any name that you think. The main condition so that this name does not have other directories located in the same directory.
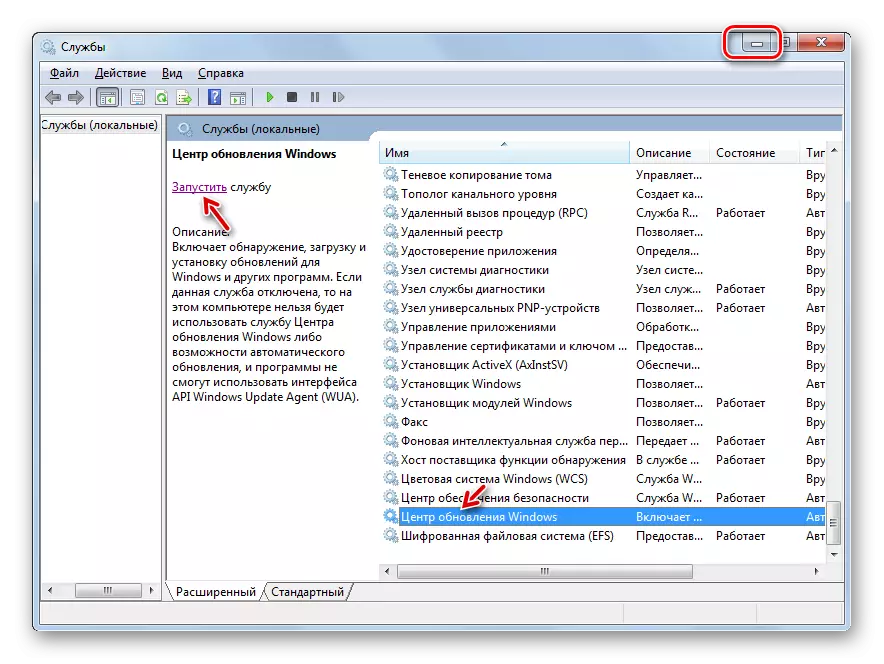
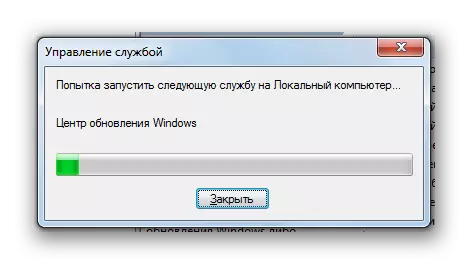
- Now return to the "service dispatcher". Highlight the name "Windows Update Center" and click "Run".
- The procedure for starting the specified service will be performed.
- The successful end of the above task will indicate the appearance of the status "Works" in the Status column opposite the name of the service.
- Now after restarting the computer, the error 0x80070005 should disappear.


Method 3: Disable Anti-Virus or Fireavy
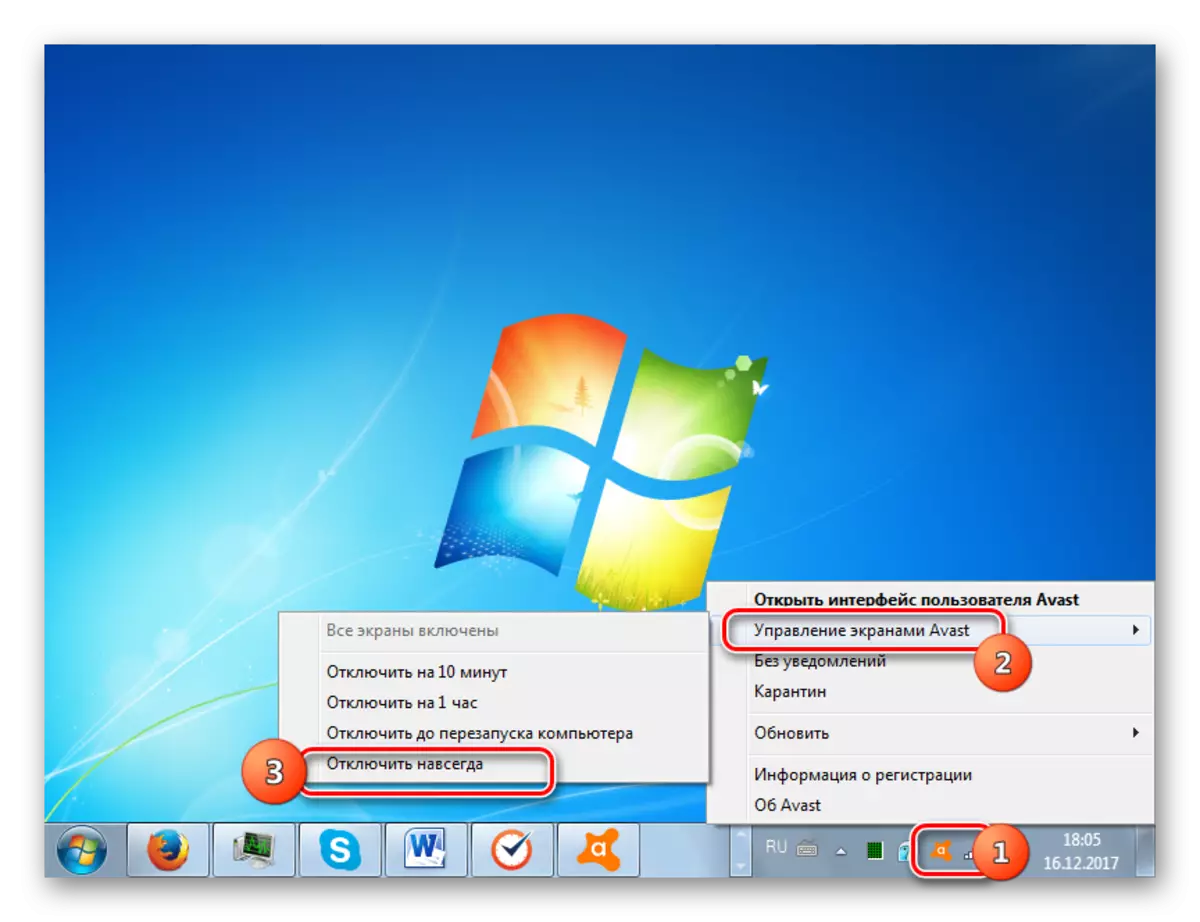
The next reason that may cause an error 0x80070005 are incorrect settings or failures in the operation of the standard antivirus or firewall. Especially often it causes problems during system recovery. To check if it is, it is necessary to temporarily disable protection and trace if the error does not appear again. The anti-virus and firewall deactivation procedure can differ significantly depending on the manufacturer and the version of the specified software.
If the problem appears again, you can include protection and continue searching for troubleshooting. If after turning off the antivirus or firewall, the error disappeared, try to correct the settings of the specified types of antivirus programs. If you cannot configure software, we advise you to uninstall it and replace it with analog.
Attention! The above actions must be made to the highest possible period, as it is dangerous to leave a computer without anti-virus protection for a long time.
Lesson: how to turn off the antivirus
Method 4: Disk Check for Errors
Failure 0x80070005 can cause physical damage or logical errors on the hard disk of the PC on which the system is installed. The easiest way to check the hard drive for the above problems and, if possible, eliminate the faults is carried out using the Check Disk system utility.
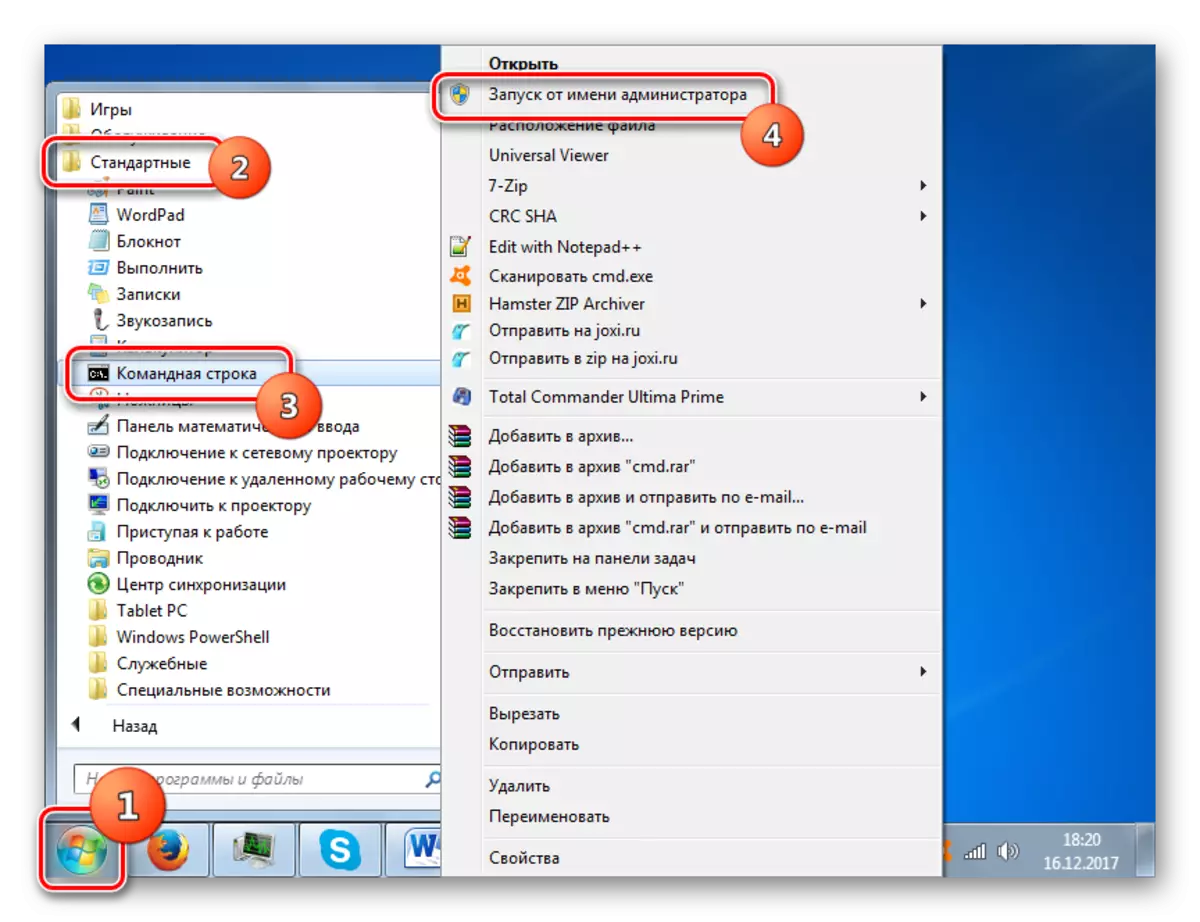
- Using the Start menu, move to the "Standard" directory. In the List of Objects, find the "Command Line" item and click PCM. Select "Run on behalf of the administrator".
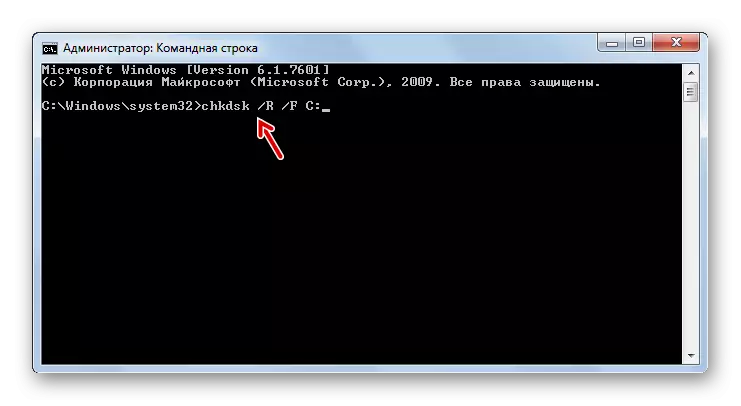
- The "Command Line" opens. Put the record there:
CHKDSK / R / F C:
Click ENTER.
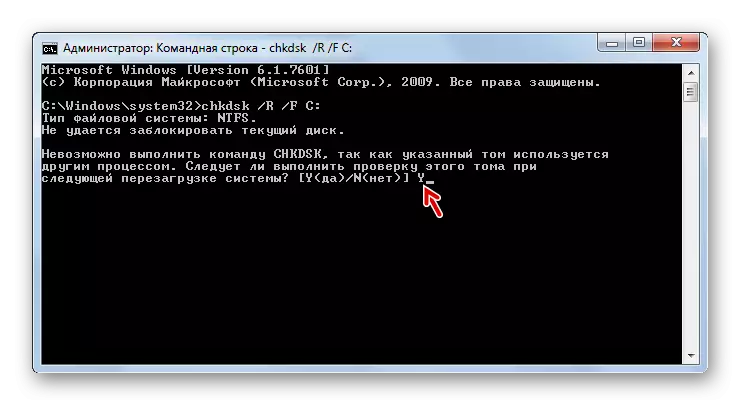
- Information will appear that reports that it is impossible to check the disk, as it is occupied by another process. Therefore, it will be prompted to scan when the system is restarted. Enter "Y" and press ENTER. After that restart the PC.
- During the reboot, the Check Disk utility will check the C disc check. If possible, all logical errors will be corrected. If the problems are caused by physical malfunctions of the hard drive, then it is best to replace it with a normally functioning analog.
Lesson: Checking disk on errors in windows 7
Method 5: Restore system files
Another reason for the problem we studied may be damage to windows system files. If the specified malfunction, the OS should be scanned for integrity and, if necessary, restore damaged items using the SFC system tool.
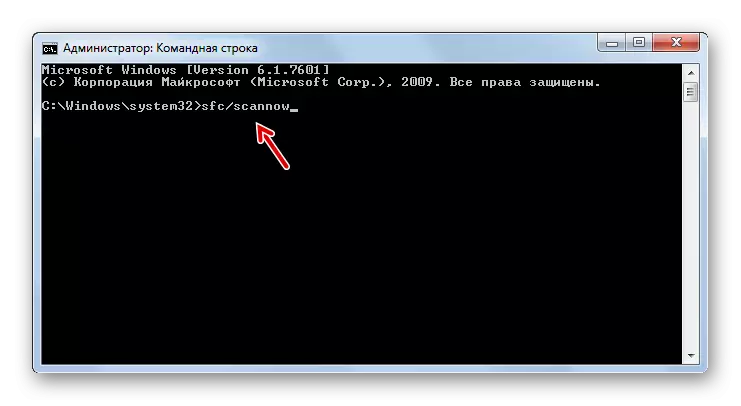
- Call a "command line" by acting on the recommendations described in the method 4. Enter such an entry in it:
SFC / SCANNOW.
Click ENTER.
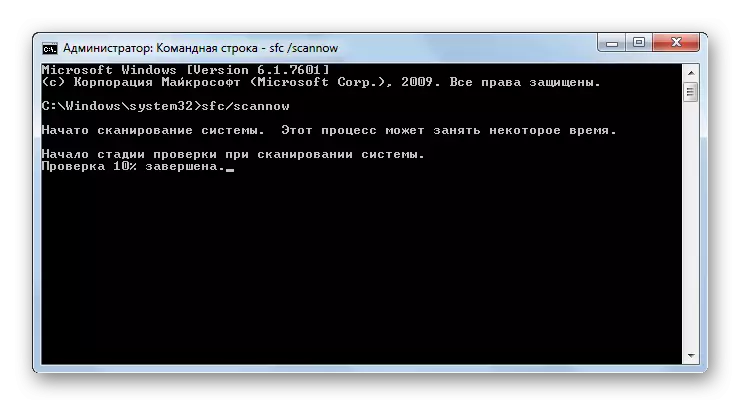
- The SFC utility will be launched and performing an OS scan for the lack of integrity of the system elements. In case of troubleshooting, damaged elements will be restored.
Lesson: Check on the integrity of OS files in Windows 7
Method 6: Reset TCP / IP Parameters
Another reason for the problem we studied can be a failure of TCP / IP. In this case, you need to reset the parameters of this stack.
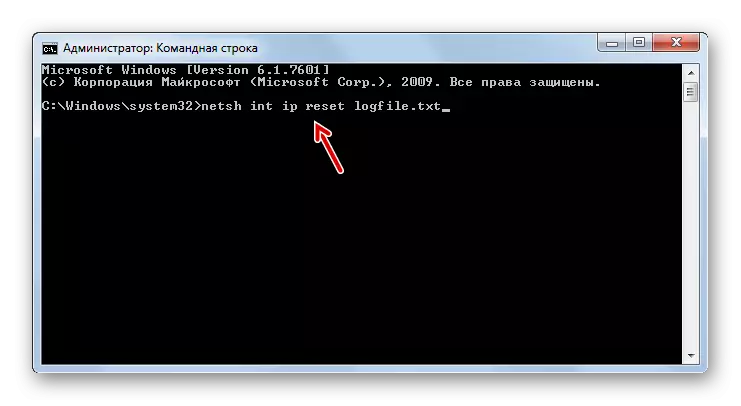
- Activate the "Command Line". Enter such entry:
Netsh int ip reset logfile.txt
Click ENTER.
- Using the execution of the above command, the TCP / IP stack parameters will be discarded, and all changes are recorded in the logfile.txt file. If the cause of the error was covered in the failures of the component specified above, now the problems must disappear.
Method 7: Change the attributes of the "System Volume Information" directory
The next cause of the error 0x80070005 may be setting the read-only attribute for the System Volume Information directory. In this case, we will need to change the above parameter.
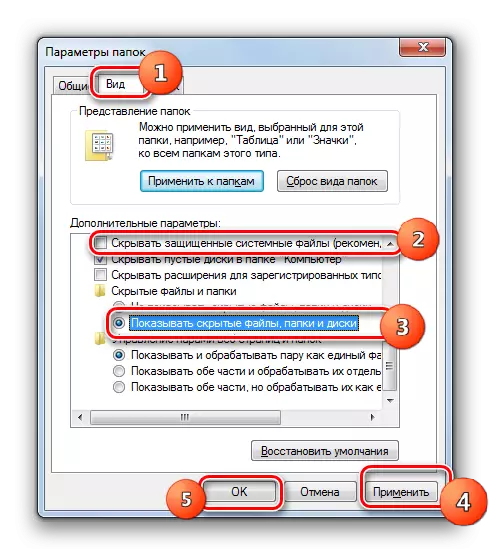
- Given the fact that the "System Volume Information" directory is hidden, we should enable the display of system objects in Windows 7.
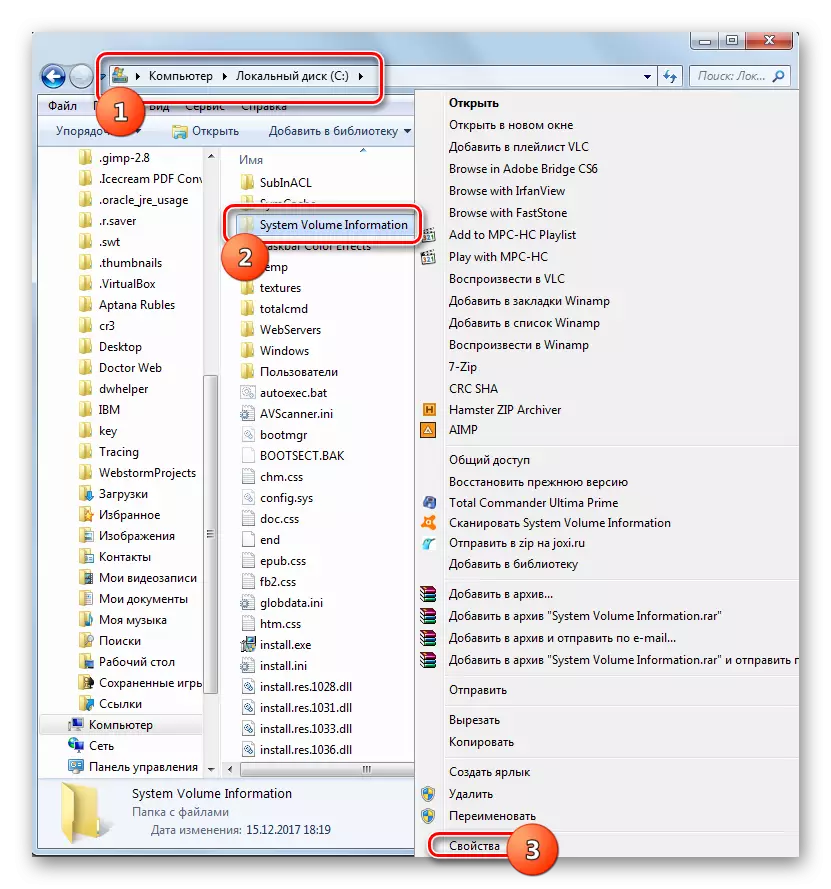
- Next, activate the "Explorer" and go to the root directory of the disk C. Find the System Volume Information directory. Click on the PCM. In the list that appears, select "Properties".
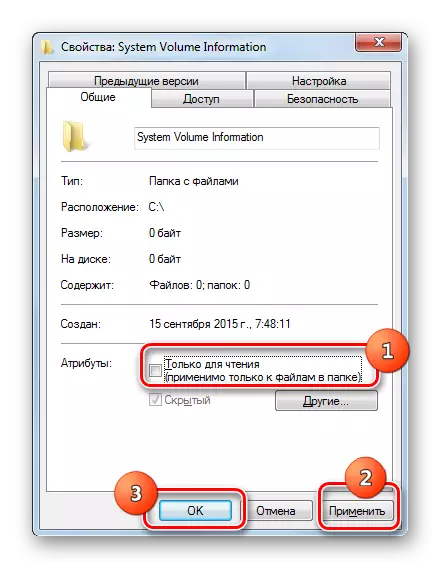
- The window of the properties of the above directory opens. Check that in the "Attributes" block near the read-only parameter, the checkbox was not selected. If it is worth it, then definitely remove it, and then press "apply" and "OK". After that, you can test the PC for the error we studied by us by applying the actual action.
Method 8: Enabling "Shadow Copying Tom"
Another reason for the problem may be a disabled service "Shadow Copying Tom".
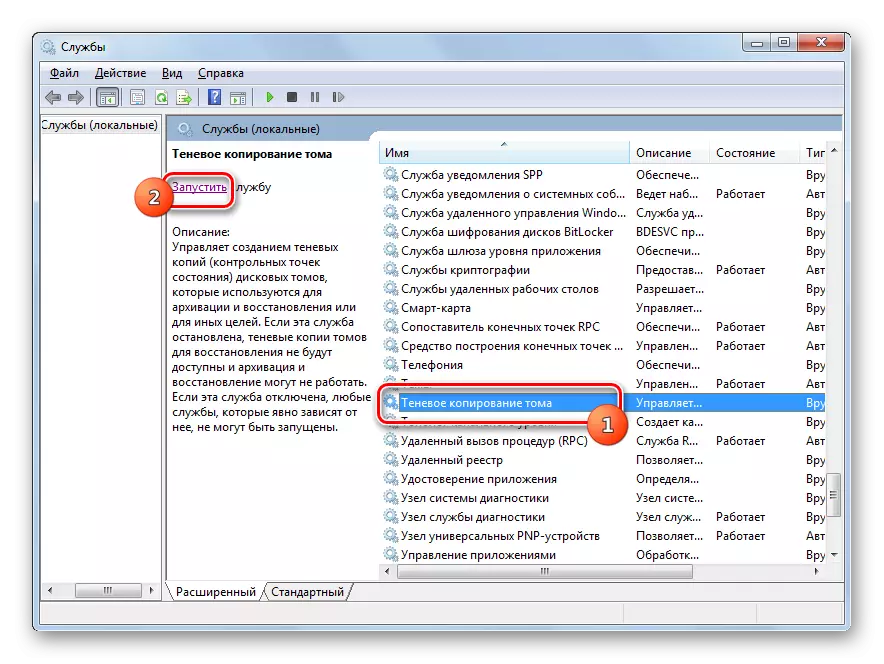
- Go to "Service Manager" using the algorithm described in the method 2. Find the "Shadow Copying Tom" item. If the service is disabled, then click Run.
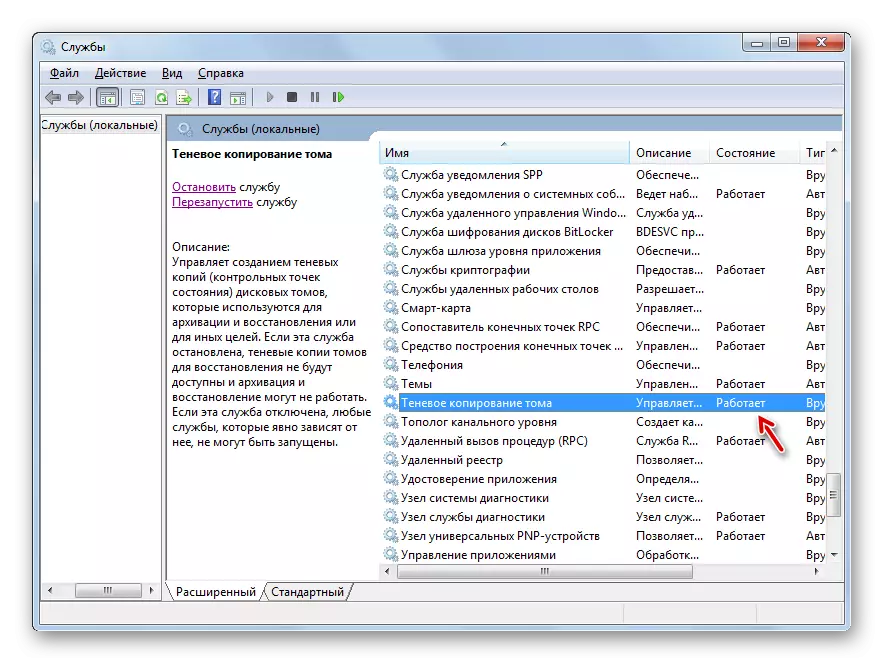
- After that, opposite the name of the service should be displayed the status "Works".
Method 9: Elimination of a viral threat
Sometimes an error 0x80070005 may cause a computer infection with certain types of viruses. Then it is necessary to check the PC with a special anti-virus utility, but not a regular antivirus. It is best to scan from under another device or via LiveCD (USB).
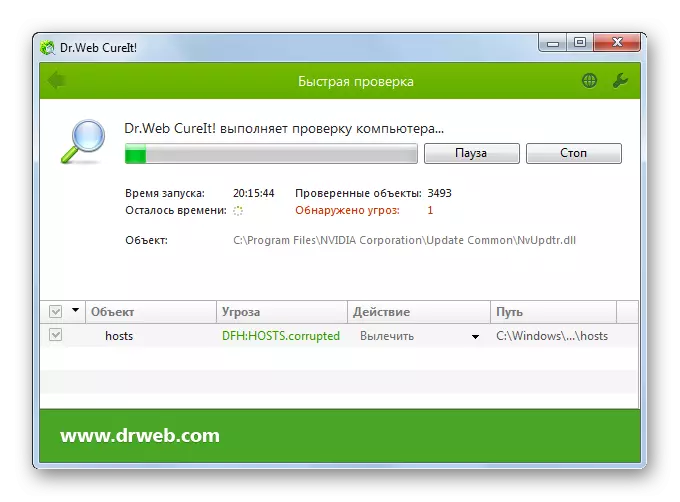
During the check, when a malicious code is detected, you must perform the recommendations that the utility gives through your interface. But even if the virus is found and neutralized, this does not give a complete guarantee of the disappearance of the errors we study, since the malicious code could produce certain changes in the system. Therefore, after removing it, most likely, it will be necessary to additionally apply one of those methods of eliminating the problem of 0x80070005, which we described above, in particular, restoring system files.
As you can see, there is a fairly wide list of causes of error 0x80070005. The elimination algorithm depends on the essence of this cause. But even if you failed to install it, you can simply use all the methods specified in this article and the exclusion method achieve the desired result.