

Many owners of their own domains wondered, or at least would like their personal mail and letters from the users of the site to different electronic boxes depending on requests. You can do it in almost all known postal services, but only if you have already acquired a full-fledged site and know how to manage it.
Make mail with your domain
Before proceeding with the analysis of the main task, it is important to make a reservation to the fact that this article is intended only for those people who can easily understand what it is about and, that is important, to do everything right. If you have no experience in working with various domains on the Internet, then you will most likely come across many difficulties.To connect the unique name of the site to the mailbox, it is desirable to have a domain of the first level with a maximum number of features. However, there are exceptions.
Please note that the most promising postal service when using the site name today is the post from Yandex. This is due to the overall demand, the ease of connection of domains, and also due to completely free, but at the same time quality services.
Yandex Mail
The postal service from Yandex is the perfect solution for you as for the owner of the personal name of the site. In particular, this is due to the fact that the company itself relates positively to the overwhelming majority of hosting and without any extra problems allows you to attach names for electronic boxes.
Yandex works only with those domains over which you as owner have complete control.
Read more: How to connect a domain using Yandex.Wef
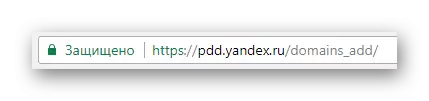
- The first step you will need to go to the Special Page of Yandex, using the link provided by us.
- Referring to the advantages of the postal service under consideration, carefully read the text block "Why Yandex.mount for Domain" at the bottom of the open page.
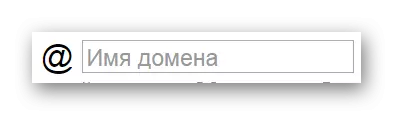
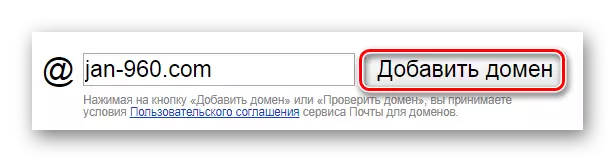
- In the center of the page, find the Count "Domain Name" and fill out in accordance with the data of your personal site.
- Use the "Add Domain" button next to the specified text field.
- Note that for registration you must be authorized on the Yandex Mail website.
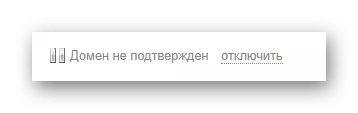
- After authorization, the first thing you see is notifying the absence of confirmation.
- To attach the mailbox to your site, you will need to fulfill the prescriptions specified in the "Step 1" block.
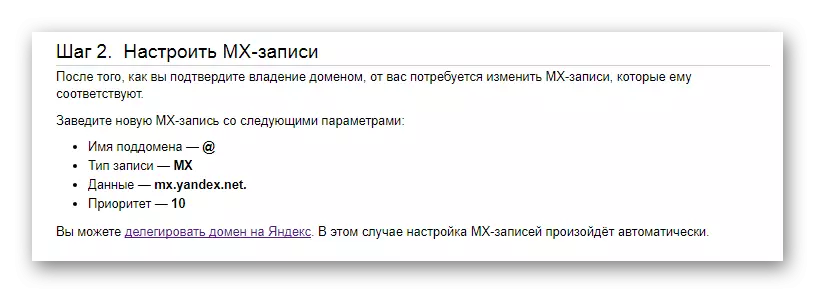
- You will need to configure MX records or delegate a domain to Yandex.
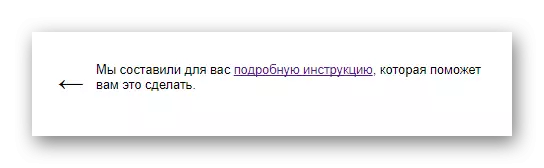
- For a better understanding of the requirements, we recommend using the built-in instructions from the Yandex postal service.
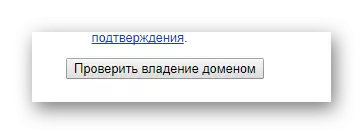
- Upon execution of the written recommendations, use the "Check domain" button.
Go to Domain Connectivity page via Yandex


Before registering it is recommended to perform the procedure for creating a new mailbox with the login that will be appropriate for your site. Otherwise, the domain will be tied to your basic login.
Read more: How to register on Yandex.We

What makes it easier to do, solve only you.
If you have errors, check all the domain settings for compliance with the requirements of the service from Yandex.
In completing all the actions done, you will get a full-fledged mail on Yandex with your domain. The new address to which emails will be able to send, as well as used when authorized on the resource under consideration, will have the following structure:
Login @ domain
This instruction can be completed on this instruction, since all further actions are directly related to your personal domain and e-mailbox settings from Yandex.
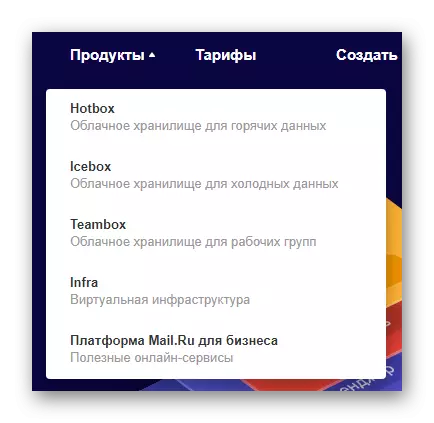
Mail.ru.
In Russia, the postal service from Mail.Ru is the second, and for some people and the first, in popularity. As a result, it is easy to guess, the administration has developed a functionality of mailing mail using your personal domains.
Mail.ru is significantly inferior to Yandex, as not all possibilities are provided free of charge.
Despite the presence of some paid elements, most of them can be refused.
- The first thing you need to do is go to the special page of Mail.Ru using the appropriate link.
- Carefully read the main sections of this project, which in particular concerns the "Tariffs" section.
- In addition to the domain connection functionality, you can take advantage of some additional features.
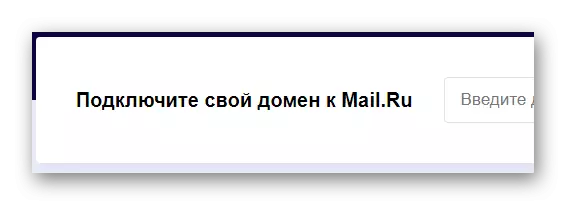
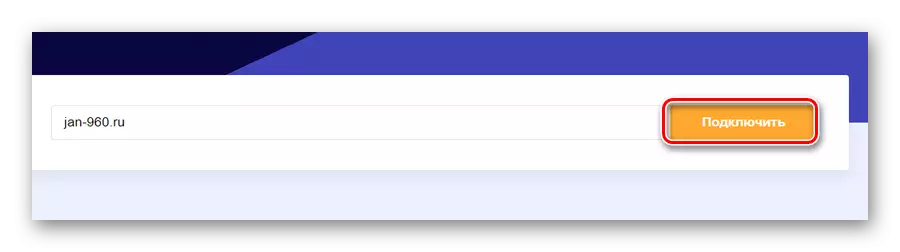
- Scroll through the open page to the "Connect your domain to Mail.ru" block.
- In a nearby text box, enter the unique name of your site and use the "Connect" button.
- Next, you will need to confirm the rights to possession of the specified domain name.
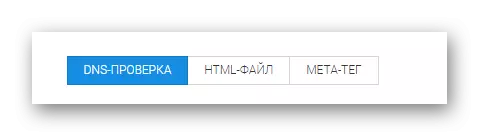
- Guided by personal preferences and knowledge in the field of possession of the site, select the type of confirmation of the rights to the specified name:
Go to Domain Connectivity page via Mail.Ru

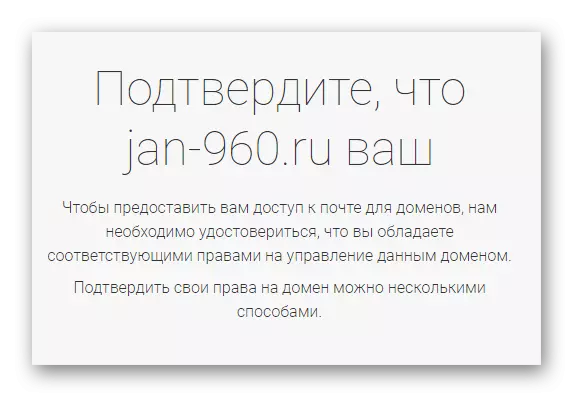
- DNS check - if you still do not have a site on hosting;
- HTML file - if the site is already placed on hosting and is in active condition;
- Meta tag - also used for real-time sites.

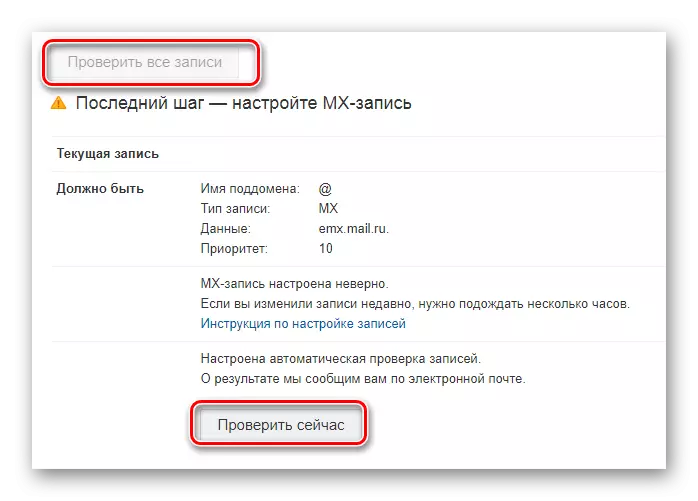
After completing the attachment of the domain name of your site to the postal service, you must apply settings for the MX record.
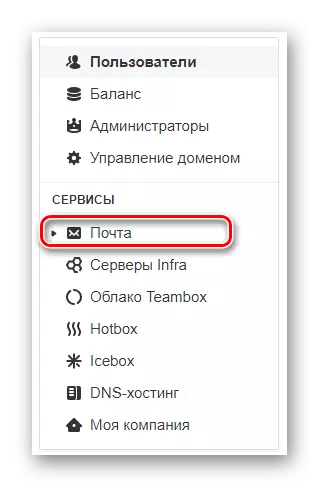
- Go to the Mail Domain Control Panel on Mail.Ru.
- In the left part of the active web browser window, find the navigation menu and in the "Services" block, expand the "Mail" section.
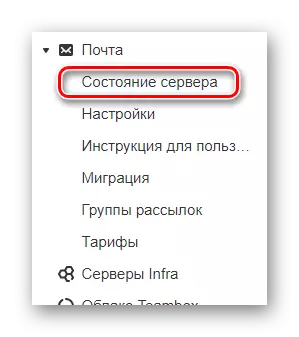
- Now you need to open the Server Status page.
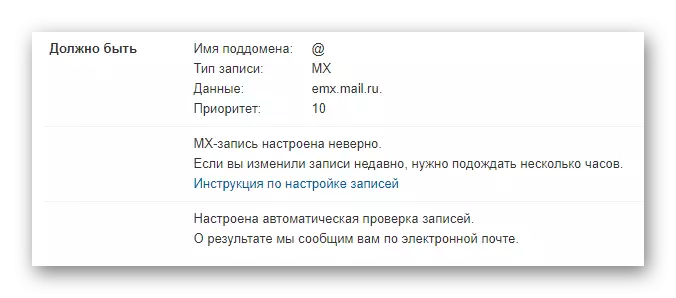
- Return to your domain and configure the MX record in accordance with the prescriptions of this project.
- After performing all the written recommendations, click the "Check all records" button at the top of the page or "Check now" in the block with a specific MX recording.

Due to the successful connection, you can use mail with the domain name that you have indicated. At the same time, the business project from Mail.Ru does not limit you in terms of connecting additional sites.
Gmail.
Unlike the two above viewed postal services, the Gmail site is more focused on active users of the Google system. This is due to the fact that all subsidiaries of this company are closely related to each other.
Mail is the basis of the account on the Google domain sites. Be careful by performing your site binding!
As with other projects from Google, connecting your domain to mail, you can use some paid features.
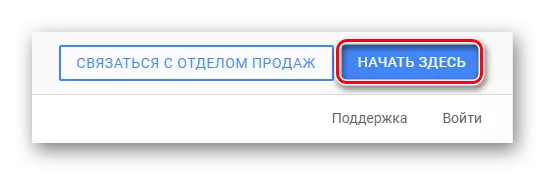
- Go to Google's Guest Project Start page.
- Click on the "Start here" button located on the right side of the top panel of this page.
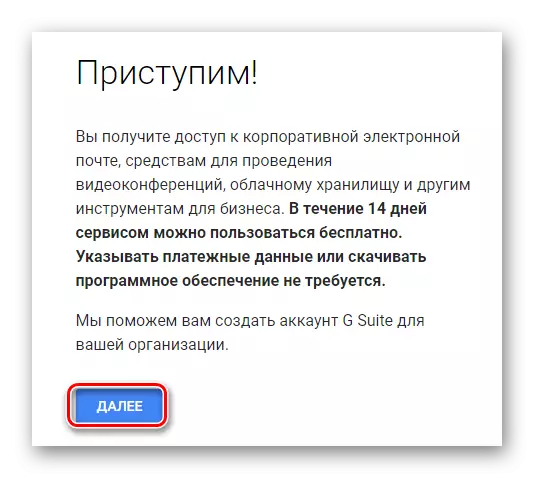
- In general, the use of these capabilities is paid, but with a test period of 14 calendar days. Click the "Next" key to this kind of notification.
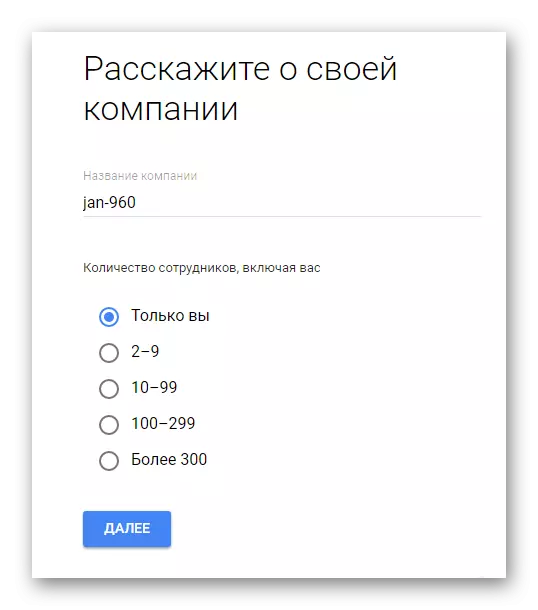
- Fill in the field the main information about the company registered.
- Each subsequent action will require you to enter certain data as if standard registration.
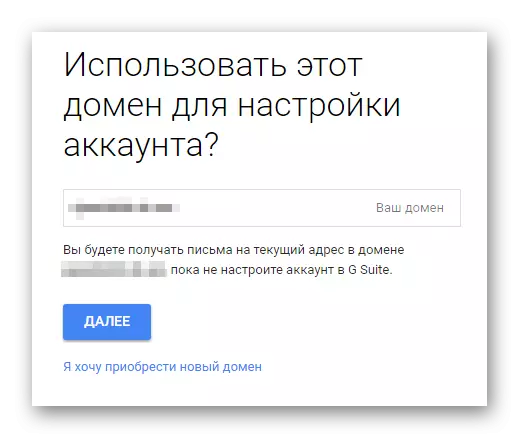
- At a certain point, you will need to enter the domain of your site.
- Confirm the use of a domain to configure your mailbox.
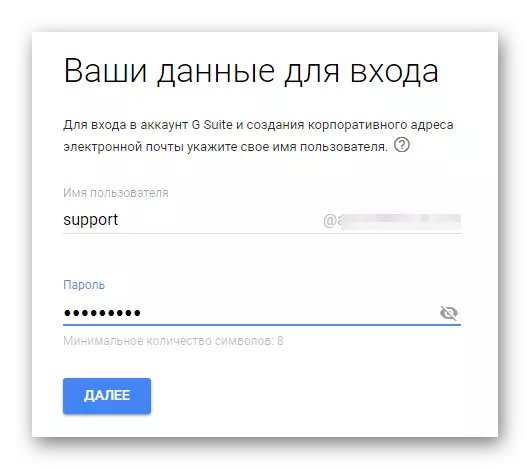
- Fill in the fields with data for the future to enter the account on the G Suite project.
- In the final stage, pass the antibot check and click the "Accept and Create Account" button.
Go to domain connection page via Google


Although the actions you are fulfilled and are basic, nevertheless you need to perform more in-depth service setting.
- After completing the registration, click on the "Go to Setup" key.
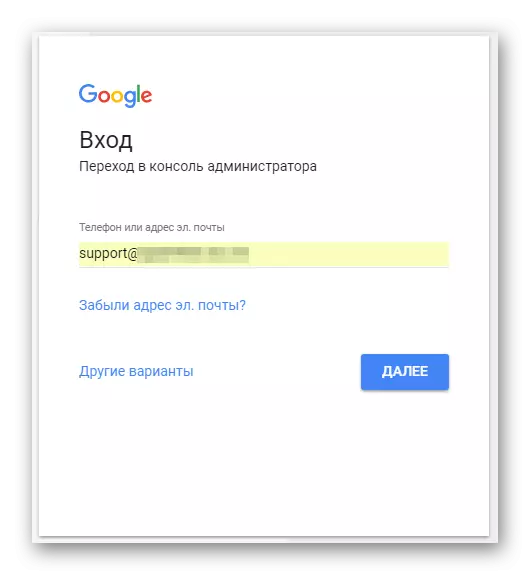
- Enter the domain administrator console using the previously specified account data.
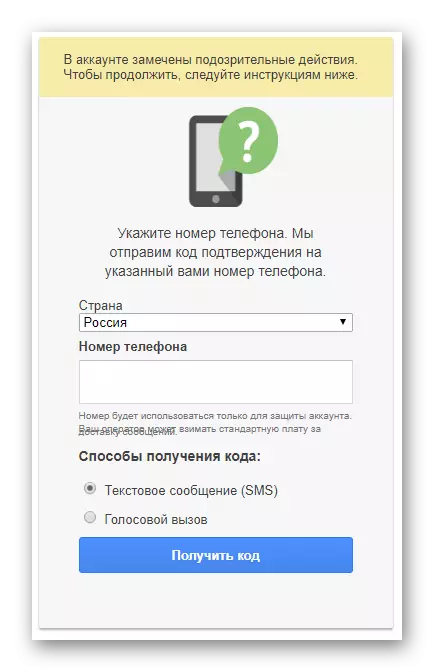
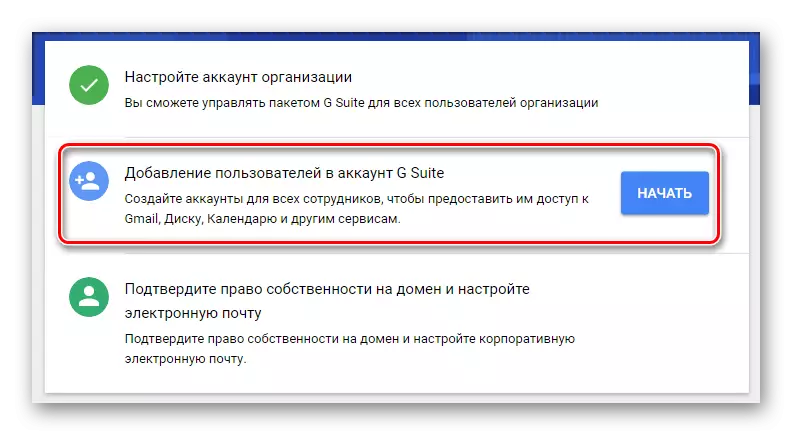
- If necessary, specify the phone number and follow the appropriate confirmation.
- Adding users to the account.
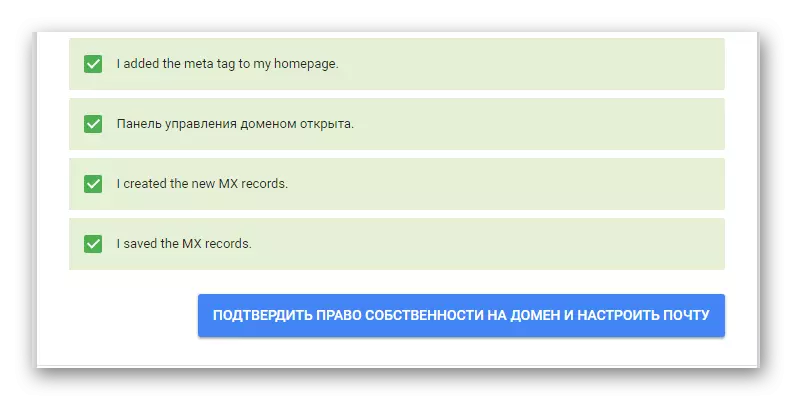
- To complete the basic configuration, you will need to confirm the ownership of the ownership of the domain name. Make it you can according to the instructions attached to the settings.
- Having finished with all items, use the "Confirm the ownership of the domain and set up the mail".


Next steps come from your personal preferences, and not instructions, as a result of which this section can be completed.
Rambler.
Unfortunately, to date, the Rambler postal service does not provide open opportunities for how to create corporate mail. At the same time, the service itself has an extensive list of settings and is likely to be implemented in the future in the future.
As you notice, make mail with a domain in many ways, depending on your preferences and material opportunities. At the same time, remember that the created or attached domain is only available once within the same project.
Deleting a domain from the account, as a rule, is performed on request in technical support.
We hope you were able to deal with the task of the task without any problems.